
ZDSKV3 - Uncategorized PHOENIX GOLD - Free user manual and instructions
Find the device manual for free ZDSKV3 PHOENIX GOLD in PDF.


| Brand | Phoenix Gold |
| Model | ZDSKV3 |
| Product Type | Car Speaker Upgrade Kit (Component Speaker System) |
| Compatible Vehicles | Volvo S80 (2006-2011) with Premium Sound System |
| Kit Components | 2x Woofers, 2x Tweeters, 2x Crossovers (filters), necessary hardware |
| Woofer Size | Approximately 6.5 inches (OEM replacement) |
| Tweeter Size | Approximately 1 inch (custom fit in OEM pod) |
| Installation Tools Required | T25 screwdriver, 10mm wrench/socket, plastic pry tool, 5mm drill, PH2 screwdriver |
| Installation Difficulty | Moderate (requires door panel removal and drilling) |
| Tweeter Attenuation | -2 dB (by separating specific cables) |
| Frequency Response | Not specified in manual; typical car component: 60-20,000 Hz (estimate) |
| Impedance | 4 ohms (typical for car speakers) |
| Power Handling (RMS) | Not specified; estimate 50-100W RMS |
| Weight (per speaker) | Approximately 1-2 kg (estimate) |
| Material | Injection-molded basket, paper/composite cone, silk dome tweeter (typical) |
| Mounting Depth | Not specified; must fit OEM location (approx. 2.5 inches) |
| Warranty | Standard Phoenix Gold warranty (typically 1-2 years) |
| Manual Language | English (installation guide with images) |
Frequently Asked Questions - ZDSKV3 PHOENIX GOLD
User questions about ZDSKV3 PHOENIX GOLD
0 question about this device. Answer the ones you know or ask your own.
Ask a new question about this device
Download the instructions for your Uncategorized in PDF format for free! Find your manual ZDSKV3 - PHOENIX GOLD and take your electronic device back in hand. On this page are published all the documents necessary for the use of your device. ZDSKV3 by PHOENIX GOLD.
USER MANUAL ZDSKV3 PHOENIX GOLD
ZDSKV3

natural_image
Two black speaker amplifiers with attached earphones and connectors, shown from top and side views (no text or symbols visible)Installation Tools Required
Vehicle used for installation:\*
Volvo S80 2006 - 2011
Performance Sound System
*Some differences may occur between different car and year models.
T25 Screwdriver

natural_image
Simple line drawing of a screwdriver with a star emblem on the handle (no text or symbols)10mm Wrench

natural_image
Simple line drawing of a wrench (no text or symbols)Plastic Pry Tool

natural_image
Abstract geometric shape with a black vertical line and gray curved bands (no text or symbols)5mm Drill

natural_image
Line drawing of a handheld electric drill (no text or symbols)ZDSKV3 Installation 1
Tools required:

1x Plastic Pry Tool
1. Front door panel removal

natural_image
Interior view of a car showing the dashboard and side panel (no text or symbols visible)3. Disconnect the tweeter connector

natural_image
Close-up of a car engine component with a highlighted red circle and 'Q410A' label, showing internal wiring and mounting brackets (no readable text beyond labels)2. Remove the tweeter pod
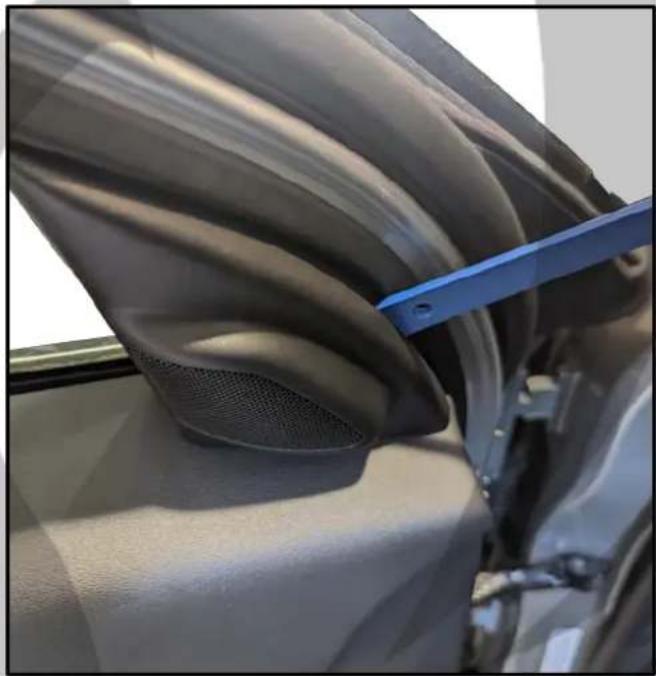
natural_image
Close-up of a car's side panel with a blue tool inserted, showing internal components and airflow (no text or symbols visible)4. Remove the screw cover

natural_image
Close-up of a car's side panel showing the blue plastic clip attached to the seat (no text or symbols visible)ZDSKV3 Installation 2
Tools required:

1x T25 Screwdriver

1x Plastic Pry Tool
5. Unscrew the two screws

natural_image
Close-up of a car's front panel showing two red-circled components, no visible text or symbols7. Lift the door panel up
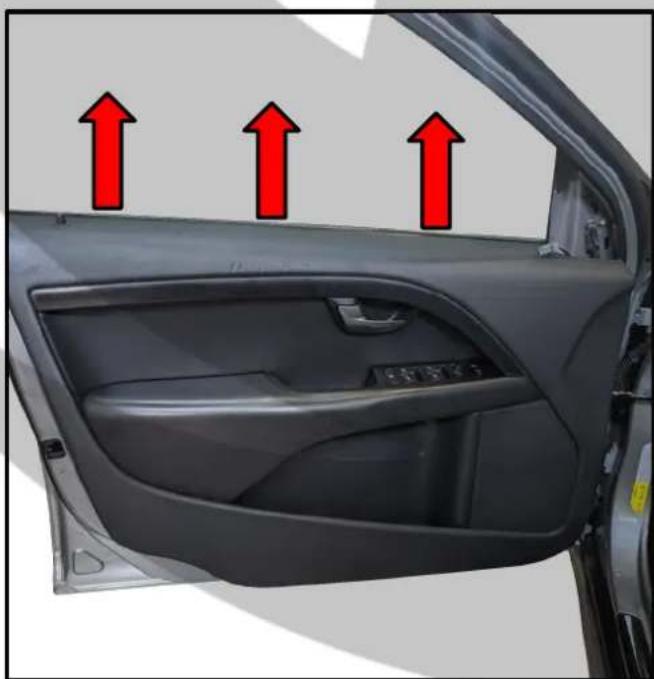
natural_image
Interior view of a car showing the dashboard and side panel with three red arrows pointing upward (no text or symbols)natural_image
Interior view of a car showing the dashboard and side panel with red arrows pointing to the door (no text or symbols visible)8. Remove the door connectors

ZDSKV3 Installation 3
Tools required:

1x Drill 5mm
9. OEM Speaker

natural_image
Close-up of a car's front panel showing a speaker grille and wiring (no text or symbols visible)11. Drill out the OEM speaker

natural_image
Close-up of a car's rear suspension system with visible speaker and mechanical components (no text or symbols)10. Disconnect the speaker connector

natural_image
Close-up of a car's front panel showing a speaker and internal components, with a red circle highlighting a small electronic component (no text or symbols visible)12. Take out the nuts and bolts
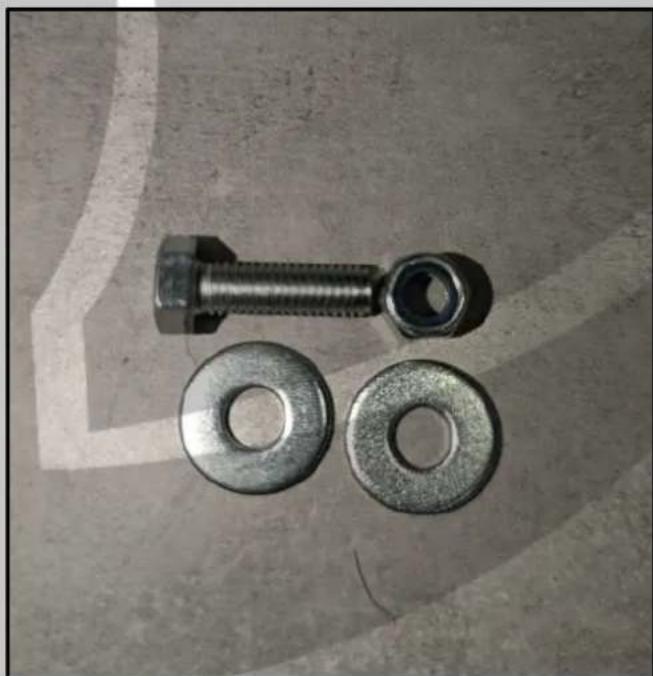
natural_image
Close-up of metal fasteners including a bolt, nut, and washer on a textured surface (no text or symbols visible)ZDSKV3 Installation 4
Tools required:

2x 10mm Wrenches / Sockets
13. Insert the bolt

natural_image
Close-up of a car wheel assembly with a metallic screw and black plastic housing (no visible text or symbols)15. Connect the speaker harness

natural_image
Close-up of a car's electrical connector with wires, no visible text or symbols14. Screw on the nuts from the back

natural_image
Close-up of a mechanical component with a metal tool inserted, showing internal components and a circular opening (no visible text or symbols)16. Route the cable into the adapter

natural_image
Close-up of a car wheel with red and blue wires attached, no visible text or symbolsZDSKV3 Installation 5
Tools required:

1x PH2 Screwdriver
- Connect the Phoenix Gold speaker

natural_image
Close-up of a mechanical component with a red cable and electronic circuit board attached to a black aircraft fuselage (no visible text or symbols)- Fasten the filter and cables

natural_image
Close-up of a car's seatbelt with black plastic components and visible wiring, no text or symbols present.- Screw the speaker in place
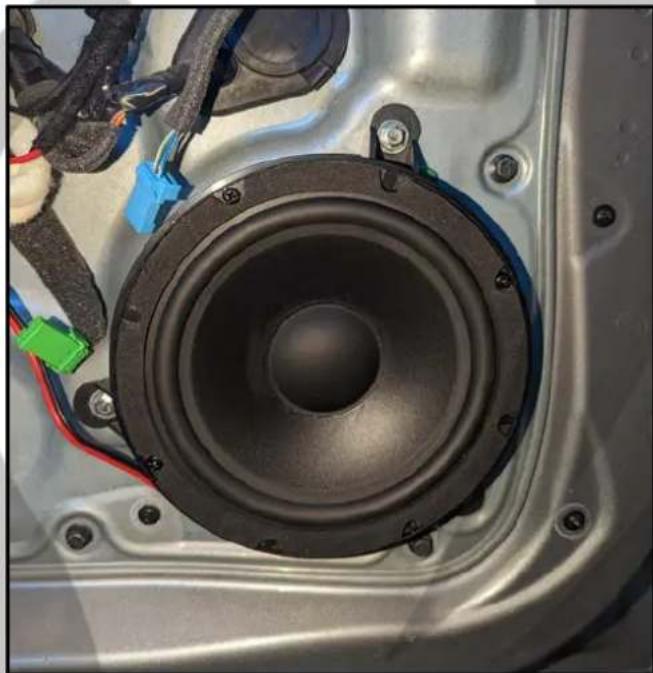
natural_image
Close-up of a car's front panel showing a speaker cone and wiring (no text or symbols visible)- Take out the tweeter and foam ring

natural_image
Two circular electronic components with mesh surfaces, one black perforated and one gold-colored ring, placed on a white surface (no text or symbols visible)ZDSKV3 Installation 6
Tools required:

1x Drill 5mm
- Put the tweeter in the foam ring
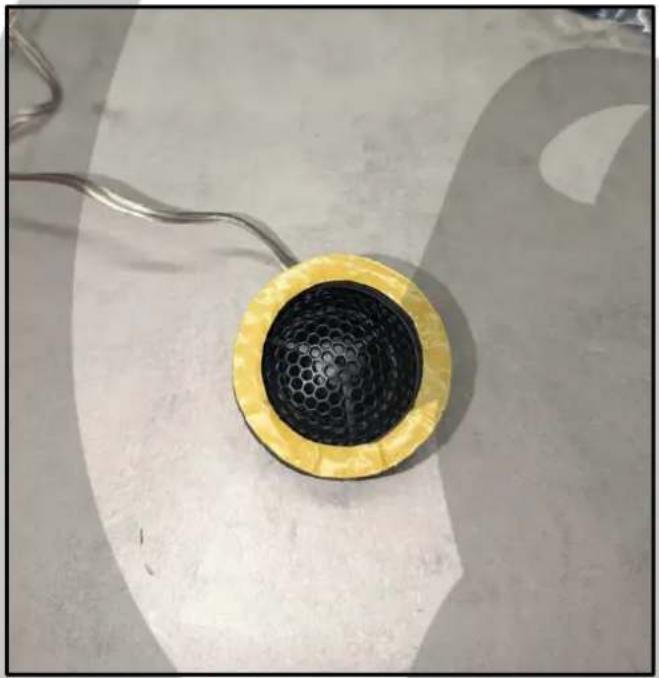
natural_image
Close-up of a circular mechanical component with a honeycomb and mesh pattern, placed on a white surface with a coiled cable (no text or symbols visible)- Tweeter removed

natural_image
Damaged black plastic fan component with blue connectors, next to a Volvo 207A1065 motor (no visible text or symbols on the fan itself)- Drill out the OEM tweeter

natural_image
Close-up of a black plastic bag with blue connectors and a circular label showing 'ZM400' and 'SST1000', no readable text or symbols beyond the label.Make a little cut and peel off the
- protective film

natural_image
Close-up of a black honeycomb component being cut with a metal tool, no visible text or symbolsZDSKV3 Installation 7
Tools required:
- Press the tweeter into place
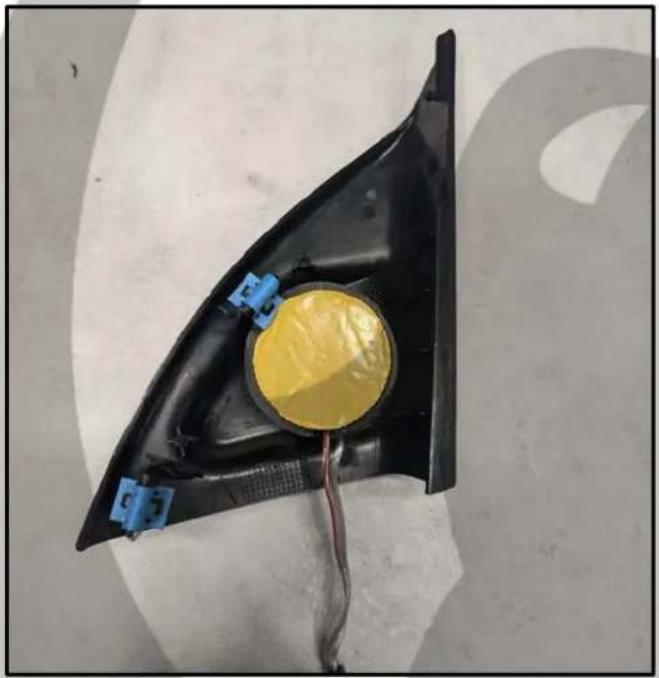
natural_image
Top-down view of a black plastic component with a yellow circular body and blue connectors, placed on a plain surface (no text or symbols visible)- Separate these cables (-2dB TW)
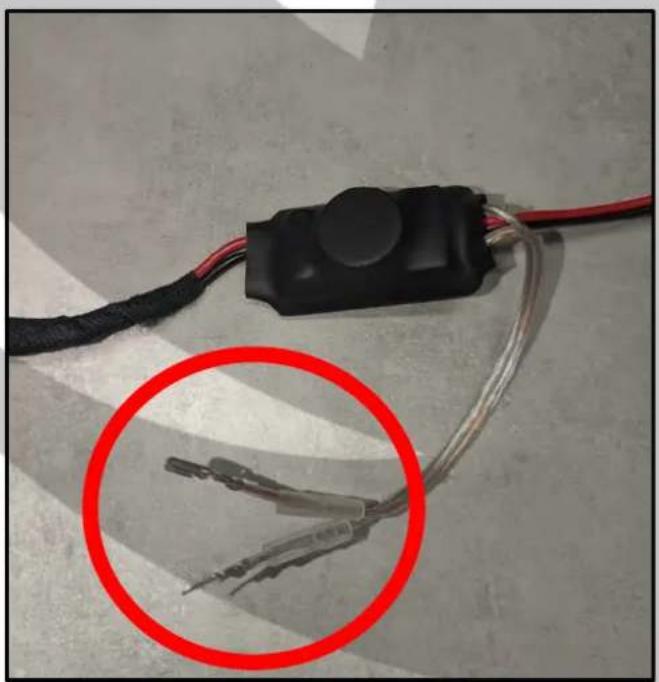
natural_image
Close-up of a black electrical connector with red wires and a magnified close-up of its wires (no text or symbols visible)- Add the foam plate

natural_image
Close-up of a yellow circular object mounted on a black base with blue clips and wires, no visible text or symbols.- Connect the speaker harness

natural_image
Close-up of a car's electrical connector with blue cable and wiring, no visible text or symbolsZDSKV3 Installation 8
Tools required:
- Fasten the filter and cables

natural_image
Close-up of a car's engine compartment with wiring and sensors (no visible text or symbols)- Mount the tweeter pod

natural_image
Interior view of a car showing the dashboard and side panel (no text or symbols visible)- Reassemble the door in reverse

natural_image
Interior view of a car showing the dashboard and steering wheel (no text or symbols visible)- Installation is now complete

natural_image
Stylized orange phoenix logo with curved wings and a beak silhouette (no text or symbols)On Behalf of the Phoenix Gold team, Thank you for choosing us!
Your installation is complete and we hope that your new upgraded system will bring you joy and happiness for many years to come when listening to your favorite music. As always, our goal is bringing you The Gold Standard in Sound.
- ZDSKV3
- Installation Tools Required
- Vehicle used for installation:\*
- ZDSKV3 Installation 1
- Tools required:
- Front door panel removal
- Disconnect the tweeter connector
- Remove the tweeter pod
- Remove the screw cover
- ZDSKV3 Installation 2
- Unscrew the two screws
- Lift the door panel up
- Remove the door connectors
- ZDSKV3 Installation 3
- OEM Speaker
- Drill out the OEM speaker
- Disconnect the speaker connector
- Take out the nuts and bolts
- ZDSKV3 Installation 4
- Insert the bolt
- Connect the speaker harness
- Screw on the nuts from the back
- Route the cable into the adapter
- ZDSKV3 Installation 5
- ZDSKV3 Installation 6
- ZDSKV3 Installation 7
- ZDSKV3 Installation 8
- On Behalf of the Phoenix Gold team, Thank you for choosing us!
Brand : PHOENIX GOLD
Model : ZDSKV3
Category : Uncategorized