
ZGW-LORA-W1 - Router Zurn - Free user manual and instructions
Find the device manual for free ZGW-LORA-W1 Zurn in PDF.


| Product Type | LoRaWAN Gateway / Router |
| Brand | Zurn |
| Model | ZGW-LORA-W1 |
| Power Supply | 5V DC (included) |
| Ethernet | RJ45, 10/100 Mbps |
| Wireless Protocol | LoRaWAN |
| Cellular Option | LTE (model ZGW-LORA-W1-LTE, AT&T only) |
| LED Indicators | Status, LoRa, Cell, Ethernet Link, Ethernet Speed |
| Reset Button | Reboots or restores factory defaults (caution: may render device unfunctional) |
| Mounting | Wall-mountable with included bracket and screws |
| Antenna | Omnidirectional LoRa antenna, 31.2 mm length |
| Package Contents | Gateway, power supply, RJ45 cable, mounting plate, installation guide |
| Default Network Setting | DHCP |
| Operating Temperature | Not specified in manual (typical indoor use) |
| Warranty | See manufacturer documentation |
Frequently Asked Questions - ZGW-LORA-W1 Zurn
User questions about ZGW-LORA-W1 Zurn
0 question about this device. Answer the ones you know or ask your own.
Ask a new question about this device
Download the instructions for your Router in PDF format for free! Find your manual ZGW-LORA-W1 - Zurn and take your electronic device back in hand. On this page are published all the documents necessary for the use of your device. ZGW-LORA-W1 by Zurn.
USER MANUAL ZGW-LORA-W1 Zurn
ZGW-LORA-W1
Zurn Gateway
Connected Products Gateway Installation Guide
The Zurn Gateway connects your Zurn Connected Products to the Zurn Cloud using the LoRaWAN ® protocol.
Package Contents
Your device ships with the following:
1 - Zurn Gateway (ZGW-LORA-W1)
1 - Power supply
1 - RJ45 Ethernet cable
1 - Mounting plate
1 - Installation Guide
Important: Contact Zurn if a replacement power supply is needed. Using a different power supply may damage the device and voids the warranty.
Connectors and LEDs
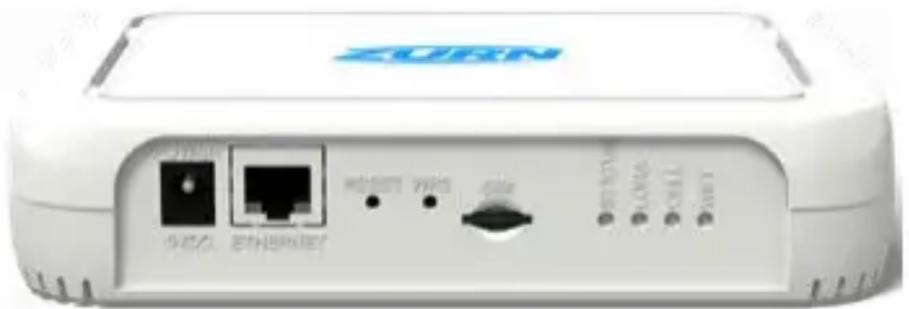
Note: Some features are available only on select models. The above image shows the model with all features.
| ITEMDESCRIPTION | |
| CONNECTORS | |
| Power | 5 volt power jack |
| Ethernet | RJ45 Ethernet jack |
| WPS | Reserved for future use |
| SIM | Cellular models only – SIM slot |
| RECESSED BUTTON | |
| Reset | Reset button reboots device or restores factory defaults. CAUTION: Reset should never be pressed/ used as it will render the gateway unfunctional. |
ITEMDESCRIPTION
| LEDS | |
| Status | Blinks when operating system is fully loaded. |
| LoRa | LoRa service active LED displays ON when actively connected and OFF when not connected. |
| Cell | Cellular models only.Lights when there is power to the radio.Blinks when the SIM is registered with the carrier. |
| WiFi | Reserved for future use. Always OFF. |
| Ethernet Link (Green) | Left LED on the Ethernet connector. Blinks when data is sent or received on the Ethernet link. Steady light when there is a valid Ethernet connection. |
| Ethernet Speed (Orange) | Right LED on the Ethernet connector.Lit when the Ethernet is linked at 100 Mbps.If not lit, the Ethernet is linked at 10 Mbps. |
LTE Cellular Connection
If your gateway is configured for LTE cellular capability (Model ZGW-LORA-W1-LTE), it will have shipped to you with an active SIM card already installed.
Note: The ZGW-LORA-W1-LTE works only on the AT&T network, and connects automatically once the gateway is powered and in range of the AT&T network signal.
Cabling, Powering and Connecting Your Device
- Connect one end of the RJ45 Ethernet cable (supplied) to the gateway's Ethernet port and plug the cable's other end into the nearest wall port of the building's Ethernet network.
- Connect the power supply to the power jack.
-
Wait for status LED to go from ON to double flash every second, the LoRa LED to turn ON solid, and the cell LED (if LTE enabled) to flash once every 3 seconds. Should take around 1-2 minutes depending on location. Your gateway is now ready to transmit data from your Zurn connected product.
-
Zurn Gateways have been set to DHCP by default. Please consult local IT support for possible additional access requirements for your network.
Mounting the Zurn Gateway
The device ships with a mounting bracket. You will also need:
- Four #6 screws with anchors - Screwdriver - Drill
Determining Location for the Zurn Gateway
- Select a location central to all devices to be connected to this gateway. Place the gateway as high as possible, such as near the top of a wall.
- Avoid obstructions. Thick walls and reflective surfaces, such as metal, weaken the signal between the gateway and other devices.
- Note the LoRa antenna location. The signal will be strongest radiating from that side of the device. The LoRa antenna is 31.2 mm long.
- The LoRa antenna is an omni-directional antenna, but for best results, mount the device so the LoRa antenna is in a vertical position near the top of a wall. We recommend conducting a site survey to test the signal strength in different locations before you mount the device.
Mounting the Zurn Gateway
- Determine where you want to mount the device.
- Mark where you want the screws to go.
- Drill holes for the screws and insert anchors.
- Place the mounting bracket and secure it with screws.
- Attach the device to the bracket and rotate to lock into place.
LoRa
antenna
location

![graph TD A["Start"] --> B{Transformation} B --> C["ZURN"] C --> D["End"]](/content/2026/05/1094094/images/e12996c6c39a1106deb23698cdc4cedd112e3a96bac64ef9c2ae5b80d5708786.jpg)


Brand : Zurn
Model : ZGW-LORA-W1
Category : Router