
VS0202 - Router ATEN - Free user manual and instructions
Find the device manual for free VS0202 ATEN in PDF.


| Product Type | Router |
| Brand | ATEN |
| Model | VS0202 |
| Dimensions (W x D x H) | 200 x 75 x 25 mm |
| Weight | 0.3 kg |
| Power Supply | 5V DC, 1A |
| Power Consumption | 5 W (max) |
| Network Interfaces | 2 x 10/100 Mbps Ethernet ports |
| Wireless Standards | IEEE 802.11 b/g/n |
| Frequency Band | 2.4 GHz |
| Antenna Type | 2 x external 5 dBi |
| Maximum Data Rate | 300 Mbps |
| Firewall | SPI, NAT, VPN pass-through |
| VPN Support | PPTP, L2TP, IPSec |
| Number of Antennas | 2 |
| Operating Temperature | 0°C to 40°C |
| Storage Temperature | -20°C to 70°C |
| Humidity | 10% to 90% (non-condensing) |
| LED Indicators | Power, LAN, WAN, WLAN |
| Mounting Type | Desktop, wall-mountable |
| Security Features | WEP, WPA, WPA2, WPS |
| Management | Web-based GUI, Telnet, SNMP |
| Spare Parts Available | Power adapter, antennas, screws |
| Repair Information | Refer to authorized service center |
| Cleaning Instructions | Wipe with dry cloth, no liquids |
Frequently Asked Questions - VS0202 ATEN
User questions about VS0202 ATEN
0 question about this device. Answer the ones you know or ask your own.
Ask a new question about this device
Download the instructions for your Router in PDF format for free! Find your manual VS0202 - ATEN and take your electronic device back in hand. On this page are published all the documents necessary for the use of your device. VS0202 by ATEN.
USER MANUAL VS0202 ATEN
Compliance Statements
FEDERAL COMMUNICATIONS COMMISSION INTERFERENCE STATEMENT
This equipment has been tested and found to comply with the limits for a Class B digital service, pursuant to Part 15 of the FCC rules. These limits are designed to provide reasonable protection against harmful interference in a residential installation. Any changes or modifications made to this equipment may void the user's authority to operate this equipment. This equipment generates, uses, and can radiate radio frequency energy. If not installed and used in accordance with the instructions, may cause harmful interference to radio communications. However, there is no guarantee that interference will not occur in a particular installation. If this equipment does cause harmful interference to radio or television reception, which can be determined by turning the equipment off and on, the user is encouraged to try to correct the interference by one or more of the following measures:
♦ Reorient or relocate the receiving antenna.
- Increase the separation between the equipment and receiver.
- Connect the equipment into an outlet on a circuit different from that to which the receiver is connected.
- Consult the dealer or an experienced radio/TV technician for help.
The device complies with Part 15 of the FCC Rules. Operation is subject to the following two conditions: (1) this device may not cause harmful interference, and (2) this device must accept any interference received, including interference that may cause undesired operation.
Frequency band(s) in which the radio equipment operates & maximum radio-frequency power
2412MHz\~2472MHz:17.93dBm
This equipment should be installed and operated with a minimum distance of 20 cm between the radiator and your body.
The device is restricted to indoor use only when operating in the 5150 to 5350 MHz frequency range in AT, BE, BG, CY, CZ, DE, DK, EE, EL, ES, FI, FR, HR, HU, IE, IT, LT, LU, LV, MT, NL, PL, PT, RO, SE, SI, SK, UK(NI), CH, IS, LI, NO, TR.
You are cautioned that changes or modifications not expressly approved by the part responsible for compliance could void the user's authority to operate the equipment.
FCC RF Radiation Exposure Statement:
- This Transmitter must not be co-located or operating in conjunction with any other antenna or transmitter.
- This equipment complies with FCC RF radiation exposure limits set forth for an uncontrolled environment. This equipment should be installed and operated with a minimum distance of 20 centimeters between the radiator and your body.
FCC Caution
Any changes or modifications not expressly approved by the party responsible for compliance could void the user's authority to operate this equipment.
Suggestion
Shielded twisted pair (STP) cables must be used with the unit to ensure compliance with FCC & CE standards.

KCC Statement
Industry Canada Statement
This Class B digital apparatus complies with Canadian ICES-003.
CAN ICES-003 (B) / NMB-003 (B)
HDMI Trademark Statement
The terms HDMI, HDMI High-Definition Multimedia Interface, and the HDMI Logo are trademarks or registered trademarks of HDMI Licensing Administrator, Inc.

RoHS
This product is RoHS compliant.
User Information
Online Registration
Be sure to register your product at our online support center:
International http://eservice.aten.com
Telephone Support
For telephone support, call this number:
| International 886-2-8692-6959 | |
| China 86-400-810-0-810 | |
| Japan 81-3-5615-5811 | |
| Korea 82-2-467-6789 | |
| North America 1-888-999-ATEN ext 4988 | |
| 1-949-428-1111 | |
User Notice
All information, documentation, and specifications contained in this manual are subject to change without prior notification by the manufacturer. The manufacturer makes no representations or warranties, either expressed or implied, with respect to the contents hereof and specifically disclaims any warranties as to merchantability or fitness for any particular purpose. Any of the manufacturer's software described in this manual is sold or licensed as is. Should the programs prove defective following their purchase, the buyer (and not the manufacturer, its distributor, or its dealer), assumes the entire cost of all necessary servicing, repair and any incidental or consequential damages resulting from any defect in the software.
The manufacturer of this system is not responsible for any radio and/or TV interference caused by unauthorized modifications to this device. It is the responsibility of the user to correct such interference.
The manufacturer is not responsible for any damage incurred in the operation of this system if the correct operational voltage setting was not selected prior to operation. PLEASE VERIFY THAT THE VOLTAGE SETTING IS CORRECT BEFORE USE.
Product Information
For information about all ATEN products and how they can help you connect without limits, visit ATEN on the Web or contact an ATEN Authorized Reseller. Visit ATEN on the Web for a list of locations and telephone numbers:
| International http://www.aten.com |
| North America http://www.aten-usa.com |
Package Contents
Check to make sure that all the components are in working order. If you encounter any problem, please contact your dealer.
◆ 1 VP2020 4K Wireless Presentation Switch / VP2021 4K Wireless Presentation Switch with Quad View
◆ 1 power adapter and power cord
◆ 2 WiFi antennas
◆ 1 user instructions
Table of Contents
Compliance Statements ...... ii
User Information .....iv
Online Registration .....iv
Telephone Support....iv
User Notice ....iv
Product Information v
Package Contents ......vi
Table of Contents ...... vii
About this Manual x
Conventions . . . . . . . . . . . . . . . . . . . . . . . . . . . . . . . . . . . . . . . . . . . . . . . . . . . . . . . . . . . . . . . . . . . . . . . . . . . . . . . . . . . . . . . . . . . .
1. Introduction
Overview....1
Features 2
Planning the Installation 4
Required Equipment 4
Optional Equipment. 4
2. Hardware Setup
Hardware Overview 5
VP2020 / VP2021 Front View 5
VP2020 / VP2021 Rear View .... 5
Installation 7
3. Local Operation
Overview....9
Power LED Indication 9
Resetting the Unit 10
Displaying the Room Info 11
More Settings 12
Display Settings and Behavior 14
Auto Display Layout 14
The OSD 16
OSD Tool Menu 17
Getting Screen Captures / Crops 18
Screen Capturing 18
Cropping 19
Whiteboard 21
Pencil Options 23
Highlighter Options 23
Eraser Options 23
Save As 24
Whiteboard Layouts 24
Removing a Whiteboard Layer 24
Background Pad 25
Pencil Options 26
Highlighter Options 26
Eraser Options 27
Save As 27
4. Remote Operation
Overview 29
Default Network and Login Settings 29
Supported Web Browsers 30
Operation Consideration 30
Browser Sharing 31
Joining a Meeting as Participant via Web Console 31
Logging In the Web Console 34
The Web Console Main Screen 37
General Settings 38
Basic Settings 38
Resolution Settings 40
Date & Time Settings ....41
Network Settings 42
Wi-Fi Settings 42
Ethernet Settings....44
Administration Settings 45
Update Settings....45
Password & Configuration Settings 46
Power Settings 48
Windows & macOS App Sharing 49
Joining a Meeting as Participant via App .....49
The App Main Screen 51
Selecting Screen or Tab 53
Remote View 53
More App Settings 54
Joining a Meeting as Participant via Quick Join 56
Joining a Meeting as Participant via Install-Free Version . . . . . . . . . 57
iOS Screen Sharing via AirPlay 59
5. Wireless Presentation App
Overview 61
Operation Consideration 61
Installing and Configuring the App....61
Android Version 64
Main Page 64
Selecting Screen or Tab 66
Remote View 66
More App Settings 67
Appendix
Safety Instructions 69
General 69
Rack Mounting 71
Technical Support 72
International 72
North America 72
Specifications 73
VP2020 73
VP2021 74
ATEN Standard Warranty Policy 76
About this Manual
This user manual is provided to help you get the most from the 4K Wireless Presentation Switch and Remote Pad. It covers all aspects of installation, configuration, and operation for the VP2020 / VP2021.
Chapter 1, Introduction introduces you to the VP2020 / VP2021. Its purpose, features, benefits, and installation considerations are described.
Chapter 2, Hardware Setup introduces the panel components of the 4K Wireless Presentation Switch and the IR Remote Control, and details the steps to quickly and safely install the VP2020 / VP2021.
Chapter 3, Local Operation provides information on how to locally operate and access the system settings via the panel pushbuttons and IR remote control.
Chapter 4, Remote Operation provides details on remote management and control tasks via the system web interface.
Chapter 5, Wireless Presentation App provides details on remotely configuring system settings via the ATEN Video Presentation Control App.
Appendix provides a list of safety instructions and precautions, contact information for ATEN technical support, product specifications, and other technical information.
Note:
- Read this manual thoroughly and follow the installation and operation procedures carefully to prevent any damage to the unit or any connected devices.
- The product may be updated, with features and functions added, improved, or removed since the release of this manual. For an up-to-date user manual, visit http://www.aten.com/global/en/
Conventions
This manual uses the following conventions:
Monospaced Indicates text that you should key in.
[] Indicates keys you should press. For example, [Enter] means to press the Enter key. If keys need to be chorded, they appear together in the same bracket with a plus sign between them: [Ctrl+Alt].
- Numbered lists represent procedures with sequential steps.
◆ Bullet lists provide information, but do not involve sequential steps.
Indicates selecting the option (on a menu or dialog box, for example), that comes next. For example, Start > Run means to open the Start menu, and then select Run.
Indicates critical information.

This Page Intentionally Left Blank
Overview
As a wireless BYOD solution, the VP2020 / VP2021 is a 4K presentation switch featuring a Wi-Fi module and multiple access approaches for the essential connectivity that a successful meeting requires. It enables users to cast up to 4K content to 1 HDMI-enabled display and 1 VGA-enabled display at the same time via Wi-Fi from their laptops or mobile devices. Such wireless connectivity supports all major operating platforms, including Windows, macOS, and Android, through the dedicated ATEN Wireless Presentation Switch App. Moreover, the VP2020 / VP2021 is compatible with AirPlay and Google Cast ^1 , and Chrome.
The VP2020 / VP2021 contains various features that make it a perfect collaboration terminal. The VP2020 allows up to 8 attendees to quickly enter a meeting either wirelessly or via Ethernet connection to the local network; the VP2021, on the other hand, while enabling up to 8 attendees to join the meeting remotely, it also enables up to 20 to attend via Ethernet connection. With the capability of displaying multiple sources simultaneously, content can be presented in full screen / side-by-side / quad view (VP2021 only) screen layouts. When auto layout projection is enabled, the layout can be switched automatically whenever a new signal is detected. The USB-C and USB Type-A ports feature touch back functionality, delivering seamless operation of a presentation directly from a connected touchscreen or mouse. Moderation Mode gives the moderator access to manage and control attendees' connection status as well as the AV content being displayed. Moreover, the VP2021 supports collaboration tools, such as annotation, whiteboard on screen, and screen capturing, to take video conferencing and digital learning experiences to the next level.
Additional highlights include the all-metal enclosure that gives the presentation switch a sleek look while guaranteeing durability. VP2020 / VP2021's support for Power over Ethernet (PoE) connectivity makes installation easier without the need for an extra power adapter. Integration with audio amplifiers or mixing systems is made easier thanks to the audio de-embedding functionality. The VP2020 / VP2021 is a perfect fit for achieving seamless teamwork in any wireless meeting.
Features
- A BYOD presentation switch with wireless presentation capability
- Up to 4K content can be output to 1 HDMI-enabled display and 1 VGA-enabled display at the same time
- Allows native content sharing from users’ laptop screens though the ATEN Wireless Presentation Switch App available on Windows, macOS, and Android
- Compatible with popular operating systems, including AirPlay ^1 , Google Cast ^1 , and Chrome, for wireless content sharing
-
Multi-view presentation:
-
VP2020 — up to two sources can be shared wirelessly in full screen / side-by-side layout
- VP2021 — up to four sources can be shared wirelessly in full screen / side-by-side / quad view layout
- Auto layout projection — presentation layout can be switched automatically whenever a new signal is detected
◆ Multiple simultaneous connections:
◆ VP2020 allows for up to 8 attendees to join a meeting
- VP2021 allows for up to 8 attendees to join a meeting wirelessly and up to 20 through Ethernet connection to the local network
- Moderation Mode — the moderator can manage and control attendees' connection status and the AV content being displayed
- Multiple collaboration tools ^2 — annotation, whiteboard on screen, and screen capturing
- USB touch back — allows for seamless operation of a presentation directly from a connected touchscreen or mouse
- Web GUI for control and configuration of the presentation switch
- Supports Power over Ethernet (PoE) connectivity for easier installation, eliminating the need for an additional power adapter
- HDMI audio de-embedding — enables easy integration with audio amplifiers or mixing systems
- A perfect collaboration terminal that suits any wireless video conference and digital learning application
Note: 1. The information contained is the property of ATEN International Co. LTD or their respective owners. All rights reserved. AirPlay® is a trademark of Apple Inc., registered in the U.S. and other countries and regions. Google Cast™ is a trademark of Google LLC. Any other
brand names or marks are used for compatibility description only and are trademarks or registered trademarks of their respective owners.
- These collaboration tools are supported by VP2021 only.
Planning the Installation
Required Equipment
Prepare the following equipment before installing the VP2020 / VP2021.
- Up to 2 display devices, one equipped with an HDMI port and the other equipped with a VGA port
Optional Equipment
Prepare the following equipment as required.
◆ 1 active speaker
◆ 1 USB mouse
- 1 Ethernet cable to connect the VP2020 / VP2021 to a PoE-supported network switch for remote management via the web console, Wifi coverage, and power supply
- Mounting kits:
- Rack mount kit
Chapter 2
Hardware Setup

-
Please review the safety information regarding the placement of this device in Safety Instructions, page 69.
-
Do not power on the VP2020 / VP2021 until all the necessary hardware is connected.
Hardware Overview
VP2020 / VP2021 Front View

VP2020 / VP2021 Rear View
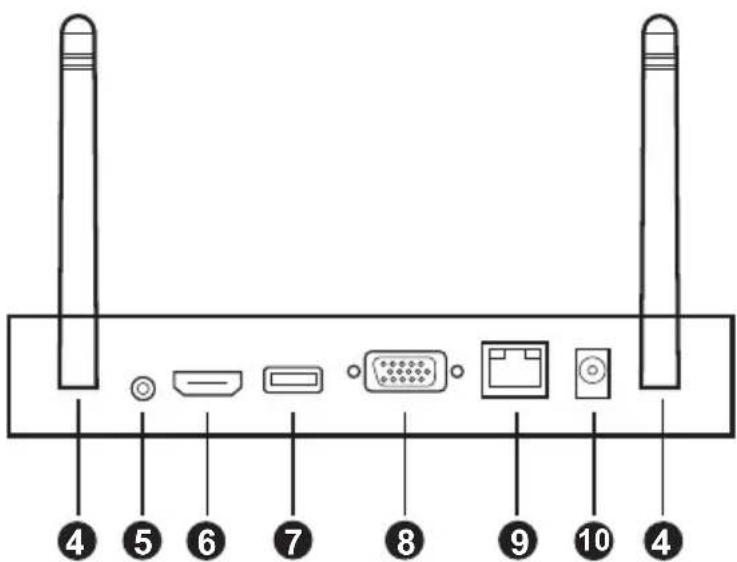
| No. | Component Description | |
| 1 | power pushbutton / LED Used | to power on / off the VP2020 / VP2021, or enable/disable the standby mode. For details, see Power LED Indication, page 9. |
| 2 | USB-C port Connects to a USB | mouse or a USB-enabled touchscreen. |
| 3 | USB 3.0 Type-A port Connects to a USB mouse or a USB-enabled touchscreen. | |
| 4 | WiFi antenna ports Connects to the supplied WiFi antennas. | |
| 5 | audio output port Connects to a set of active speakers. | |
| 6 | HDMI output port Connects to an HDMI-enabled display device. | |
| 7 | USB 2.0 Type-A port Connects to a USB mouse or a USB-enabled touchscreen. | |
| 8 | VGA output port Connects to a VGA display device. | |
| 9 | Ethernet port | Connects to a network switch via an Ethernet cable to allow remote operation via the web console and to provide WiFi coverage.Connects to a PoE-supported network switch via an Ethernet cable to allow remote operation via the web console, provide WiFi coverage, and power supply. |
| 10 | power jack Receives a power adapter to supply power to the VP2020 / VP2021. |
Installation
Follow the steps below to safely install sources, displays, and other equipment to the VP2020 / VP2021.

-
Connect an HDMI-enabled display to the unit's HDMI output port.
-
Connect a VGA projector to the unit's VGA output port.
-
(Optional) Connect a set of speakers to the unit's audio output port.
Note: If the VGA output port is used, connect a set of speakers for audio output.
4. (Optional)
- To operate the unit via OSD (on-screen display), connect a USB mouse to the unit's USB 2.0 Type-A, USB 3.0 Type-A, or USB-C ports.
- To use a USB-enabled touchscreen, connect the USB-enabled touchscreen to the unit's USB 2.0 Type-A, USB 3.0 Type-A, or USB-C and HDMI output ports.
-
To use a USB flash drive for storage purposes, connect the USB flash drive to the unit’s USB 2.0 Type-A, USB 3.0 Type-A, or USB-C ports.
-
To allow access to the web interface and to provide WiFi coverage for the meeting members, connect an Ethernet cable to the unit's Ethernet port. Optionally, connect the unit to a PoE-supported network switch for web interface accessibility, WiFi coverage, and power supply.
Note: If this Ethernet port is not connected with an Internet-enabled network switch via an Ethernet cable, then the unit does not provide Internet accessibility wirelessly. For mobile devices that can still use their cellular data while connected to the unit (without Internet accessibility) wirelessly, it is a benefit feature that the mobile operating system company provides. Please refer to its official website and related user manual for more information.
- (Optional) Connect the power adapter to the unit's power jack.
- Install the WiFi antennas to the unit's WiFi antenna ports.
- Power on the unit by pressing the power pushbutton, and the power LED lights blue.
- Download the ATEN Wireless Presentation App to join a meeting, share contents, switch displays, and configure system settings to the unit.
a) For Android device, please refer to Wireless Presentation App, page 61.
b) For Windows and Mac PCs, please refer to Remote Operation, page 29.
Overview
This chapter provides detailed information on the features of the VP2020 / VP2021's OSD (on-screen display), and how the power LED indicates the power status of the VP2020 / VP2021. You can perform the following tasks through the OSD (on-screen display):
◆ Make screen captures (VP2021 only)
- Use whiteboard to communicate with meeting participants in real-time (VP2021 only)
◆ Make notes on the video content (VP2021 only)
Power LED Indication
The power pushbutton is equipped with an LED that indicates the power status of the VP2020 / VP2021. Refer to the table below for the status and supported tasks for each LED indication.
| LED Indication (Power Pushbutton) | VP2020 / VP2021 Status | Tasks |
| Flashes red The VP2020 / | VP2021 is loading system information. | Wait for the unit to finish loading information. |
| Red The VP2020 / | VP2021 is in standby mode. | The standby mode is a power-saving mode that shuts parts of the system down to allow the user to quickly resume operation when needed.To awake the VP2020 / VP2021, press the power pushbutton (VP2020 / VP2021 front panel) once. |
| Flashes blue The VP2020 / | VP2021 is busy running remote control processes. | Wait for the unit to finish running remote control processes. |
| Blue The VP2020 / | VP2021 is awaken. | ◆ To enable the standby mode to conserve power, press thepower pushbutton(VP2020 / VP2021 front panel) once.◆ To power off the unit:(1) Press and hold thepower pushbuttonfor 3 seconds. A confirmation message appears in the OSD.(2) Press thepower pushbuttononce. The VP2020 / VP2021 powers off. |
Resetting the Unit
To perform a hardware reset on the VP2020 / VP2021, follow the steps below.
- Power on the VP2020 / VP2021 by connecting the unit to a power supply.
- Press the power pushbutton for 10 seconds.
- Wait for the VP2020 / VP2021 to restart, the power LED lights blue to indicate the VP2020 / VP2021 is ready to operate.
Displaying the Room Info
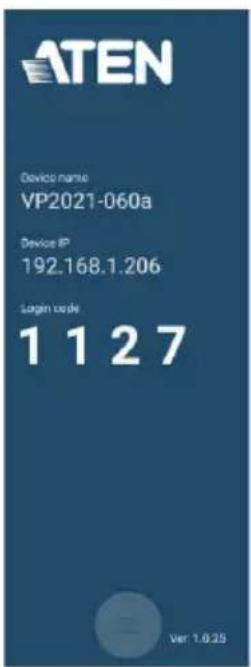
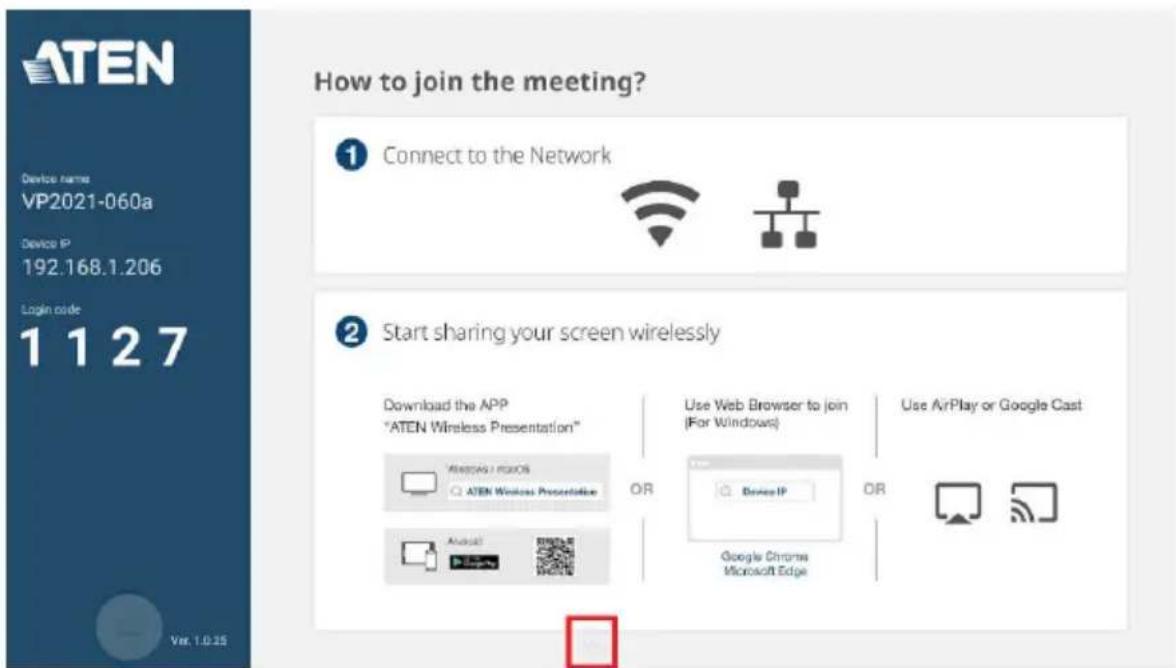
To display meeting information such as login code, IP address for the web console, and QR code for the ATEN Wireless Presentation App to join the meeting, connect a HDMI-enabled and/or a VGA monitor to the VP2020 / VP2021's HDMI and VGA output port(s). The room info is automatically displayed on the OSD.
Note:
For more information on how to connect the VP2020 / VP2021 to your Android device or PC, see the cross references below.
- For Android device, please refer to Wireless Presentation App, page 61.
- For Windows and Mac PCs, please refer to Remote Operation, page 29.
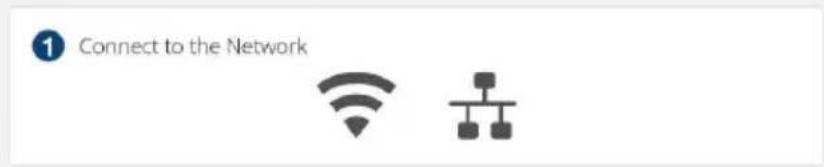
How to join the meeting?
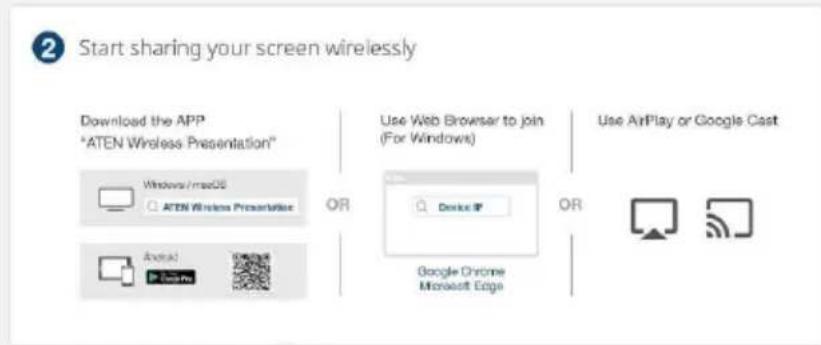
flowchart
graph LR
    A["Download the APP "ATEN Wireless Presentation""] --> B["Windows / macOS ATEN Wireless Presentation"]
    B --> C["Application icon: Google Chrome Microsoft Edge"]
    D["Use Web Browser to join (For Windows)"] --> E["Device IP"]
    F["Use AirPlay or Google Cast"] --> G["Mobile device icon"]
More Settings
In the advanced settings you can enable / disable Touch Back, Remote View (VP2021 only), and Moderation Mode. For this settings to become available, connect a USB mouse or a touch screen to the VP2020 / VP2021's USB 2.0 Type-A, USB 3.0 Type-A, or USB-C ports.
- From the OSD main page, click the More Settings icon.
- The More Settings menu appears.

- Please refer to the table below for the functions and its description.
| Tool Task | |
| Touch Back Click to | enable / disable the remote control on a streamed-in source. For example, if you wish to control a PPT from another person's sharing content, enable the Touch Back function.Note:When the Touch Back function is enabled, users are only allowed to remote control the PC's sharing screen that is shared through app, see Windows & macOS App Sharing, page 49. |
| Remote View Click | to enable / disable the Remote View. To bring the sharing content onto your mobile and laptop / PC screen for a clear view if you are far away from the main monitor, enable the Remote View function.Note:This function is only supported by VP2021. |
| Moderation Mode | Click to enable / disable the Moderation Mode. To allow the administrator to manage the participant's video and audio sharing request, enable the Moderation Mode. |
Display Settings and Behavior
The VP2020 / VP2021 supports multiple display layout from single, PbP, triple (VP2021 only), and quad (VP2021 only) for the streamed-in sources.
Auto Display Layout
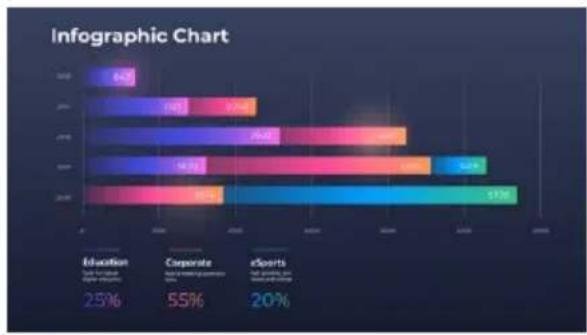
The VP2020 / VP2021 supports auto display layout, the shared sources are displayed in predefined locations based on the order in which the source is shared. As sources are received by the VP2020 / VP2021, they appear on the display from left to right, top to bottom.
Single Display Layout

other
| Year | Education (funds for hybrid digital education) | Corporate hybrid meeting space solution (%) | eSports (full growing, few teams and college) | |------|--------------------------------------------------|---------------------------------------------|-----------------------------------------------| | 2016 | B42 | - | - | | 2017 | 1321 | 2240 | - | | 2018 | 2603 | 4201 | - | | 2019 | 1620 | 4560 | 5219 | | 2020 | 1894 | - | 5728 |PbP Display Layout
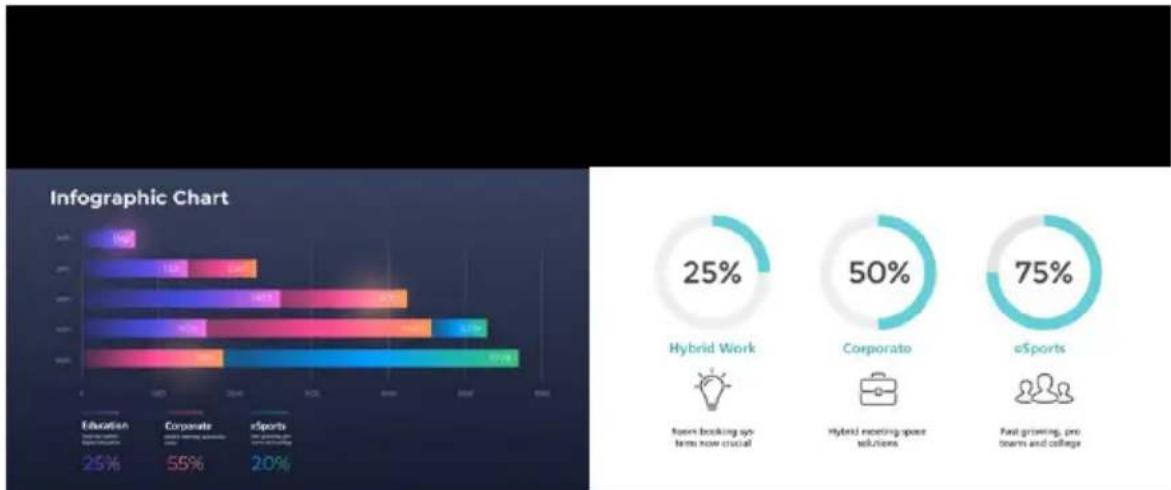
other
| Category | Value | |---|---| | Education | 25% | | Corporate | 55% | | eSports | 20% | | Hybrid Work | 25% | | Corporate | 50% | | eSports | 75% |Triple Display Layout (VP2021 only)
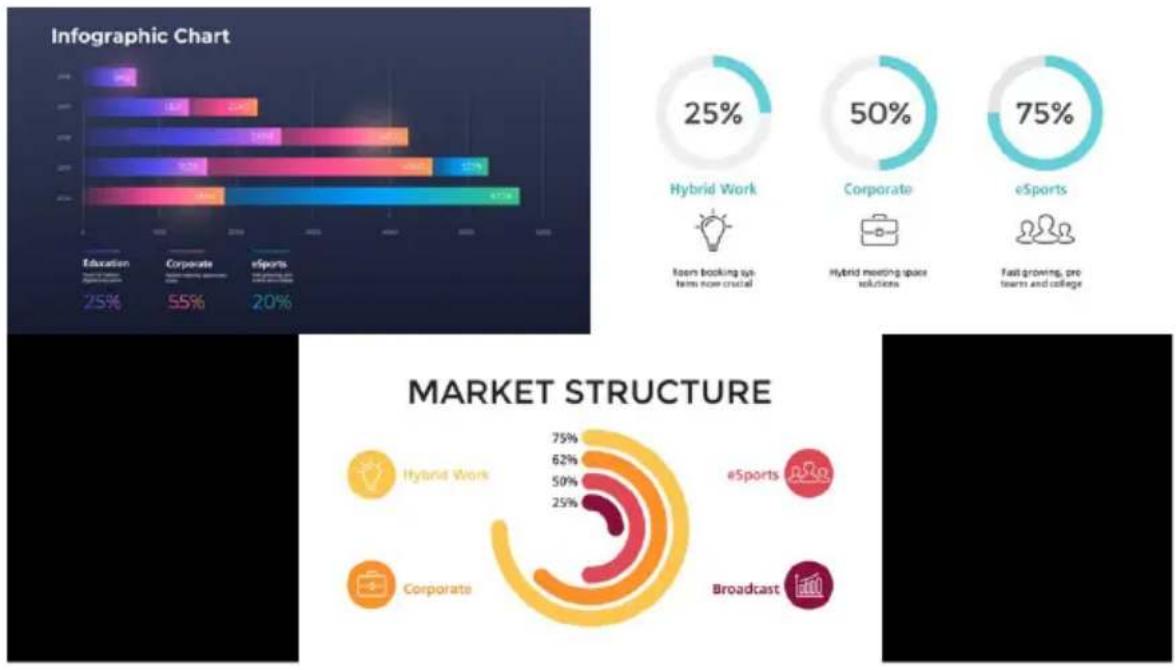
Quad Display Layout (VP2021 only)
bar
| Year | Education (%) | Corporate (%) | eSports (%) | |------|---------------|---------------|-------------| | 2010 | 25 | - | - | | 2011 | - | - | - | | 2012 | - | - | - | | 2013 | - | - | - | | 2014 | - | - | - | | 2015 | - | - | - | | 2016 | - | - | - | | 2017 | - | - | - | | 2018 | - | - | - | | 2019 | - | - | - | | 2020 | 34 | 55 | 20 |
Hybrid Work

Corporate

e5ports

Room booking system now crucial

Hybrid meeting space solutions

fast growing, protanics and college
MARKET STRUCTURE

pie
| Category | Percentage (%) | | :--- | :--- | | Hybrid Work | 75 | | Corporate | 62 | | eSports | 50 | | Broadcast | 25 |
geo
GLOBAL MARKET RESEARCH | Category | Value (%) | |---|---| | 1 | 30 | | 2 | 51 | | 3 | 26 | | 4 | 48 | | 5 | 25 |The OSD
To make a screen capture, use whiteboard, or make notes on a video content, connect a USB mouse or a touch screen to the VP2021's USB 2.0 Type-A, USB 3.0 Type-A, or USB-C ports for OSD operation.
Note: These functions are only supported by VP2021.
- From the OSD main page, click on the Tool icon.

- The Tool menu appears.

OSD Tool Menu
The following controls are available in the tool menu. For the OSD tool menu to become available, connect a USB mouse or a touch screen to the VP2021's USB 2.0 Type-A, USB 3.0 Type-A, or USB-C ports.
Note: These functions are only supported by VP2021.

flowchart
graph TD
    A["1"] --> B["Center"]
    C["2"] --> B
    D["3"] --> B
    B --> E["4.1.0"]
| No. Tool Task | |
| 1 Screen Capture Click this icon to capture / crop the video content and save it to your device or a USB storage device connected to the VP2021. Make sure you have a storage device inserted to the VP2021 for this function to be available. For more information, see Getting Screen Captures / Crops, page 18. | |
| 2 Whiteboard Click this icon to bring up the whiteboard. For more information, see Whiteboard, page 21. | |
| 2 Background Pad Click this icon to make notes on the video content. For more information, see Background Pad, page 25. | |
Getting Screen Captures / Crops
You can capture or crop and save important screens during a meeting using the Screen Capture and Crop functions. To make a capture or crop the video content and save it to your device or a USB storage device connected to the VP2021, click from the OSD tool menu. The screen below appears, please refer to the screen and table below for the supported functions and its description.
Note: This function is only supported by VP2021.

| No. Tool Task | |
| 1 Screen Capture Click this icon to screen capture the video content. | |
| 2 Crop Click this icon to crop an area of the video content your wish to capture. | |
| 2 Go Back Click this icon to go back to the previous page. | |
Screen Capturing
To make a screen capture, follow the steps below.
- From the screen capture and crop page, click
- You are asked for a Save Option. You can save the captured content to image or PDF format, USB flash drive or your own device, or you can paste it into whiteboard for discussion.
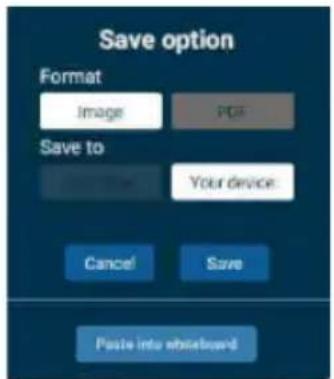
- If you choose to save the screen capture to Your device, the VP2021 will automatically generate a QR code on the bottom right of the screen. Scan the QR code to open the saved file.
Cropping
To make a crop, follow the steps below.
Note: This function is only supported by VP2021.
- From the screen capture and crop page, click .
- From the screen, click, hold, and drag the arrow to locate the area of the video content you wish to crop.


- You are asked for a Save Option after the cropping is done. You can save the cropped content to image or PDF format, USB flash drive or your own device, or you can paste it into whiteboard for discussion.
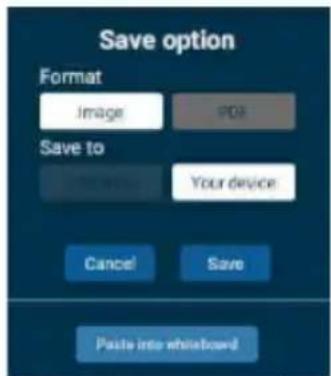
- If you choose to save the cropped content to Your device, the VP2021 will automatically generate a QR code on the bottom right of the screen. Scan the QR code to open the saved file.
Whiteboard
The whiteboard allows you to draw, paste captured or cropped images, and share to all the participants. You can also save the whiteboard locally for future use. To use the whiteboard, click from the OSD tool menu. The screen below appears, please refer to the screen and table below for the supported functions and its description.
Note: This function is only supported by VP2021.

| No. Tool Task | |
| 1 Pencil Click this icon to select a color and size for the pencil to write or draw on the whiteboard. See Pencil Options, page 23. | |
| 2 Undo Click this icon to undo your current move. | |
| 3 Highlighter Click this icon to select a color and size for the pencil to highlight on the whiteboard. See Highlighter Options, page 23. | |
| 4 Color Options The color options are available when you select pencil or highlighter and the options vary depending on which tool is selected. | |
| 5 Size Options The sizing options are available when you select pencil, highlighter, or eraser and the options vary depending on which tool is selected. | |
| 6 Eraser Click this icon to select a size for the eraser to remove any pixels on the whiteboard, or select the broom icon to remove all pixels on the whiteboard. See Eraser Options, page 23. | |
| 7 Minimize Color and Sizing Option | Click this icon to minimize the color and sizing options. |
| 8 Save Click this icon to save your current whiteboard to your device or a USB flash drive. | |
| 9 Delete a Layer Click this icon to delete a whiteboard layer. | |
| 10 Add a Layer Click this icon to add a whiteboard layer. | |
| 11 Whiteboard Layout Options | Click this icon to select a whiteboard layout. See Whiteboard Layouts, page 24. |
| 12 Previous Layer Click this icon to go to a previous whiteboard layer. | |
| 13 Next Layer Click this icon to go to a next whiteboard layer. | |
| 14 Bin Click to remove the current whiteboard to the bin. See Removing a Whiteboard Layer, page 24. | |
| 15 Go Back Click this icon to go back to the previous page. | |
Pencil Options

flowchart
graph TD
    A["Camera Icon"] --> B["Category 1"]
    C["Image Icon"] --> D["Category 2"]
    E["Document Icon"] --> F["Category 3"]
    G["Balance Icon"] --> H["Category 4"]
    I["Balance Box Icon"] --> J["Category 5"]
    K["Balance Ring Icon"] --> L["Category 6"]
    M["Balance Circle Icon"] --> N["Category 7"]
    O["Balance Arrow Icon"] --> P["Category 8"]
Highlighter Options

flowchart
graph TD
    A["Start"] --> B{Decision}
    B -->|Yes| C["Action"]
    B -->|No| D["End"]
    C --> E["Image Edit"]
    C --> F["Image Annotation"]
    D --> G["Action Recognition"]
    D --> H["Action Recognition"]
    E --> I["Final Output"]
    F --> I
    G --> I
    H --> I
Eraser Options

flowchart
graph TD
    A["数据输入"] --> B["处理"]
    B --> C["输出"]
    C --> D["图像生成"]
    D --> E["反馈"]
    E --> F["生成报告"]
    F --> G["结束"]
Save As
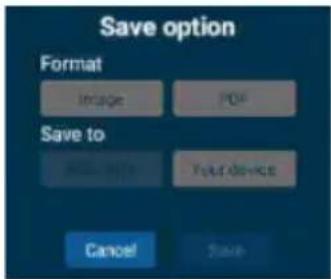
To save your current whiteboard to your device or a USB flash drive, click and the screen below appears. You can save the whiteboard to image or PDF format, USB flash drive or your own device. If you choose to save the whiteboard to Your device, the VP2021 will automatically generate a QR code on the bottom right of the screen. Scan the QR code to open the saved file.
Whiteboard Layouts
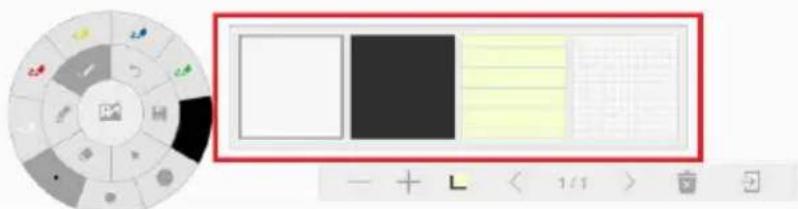
To select a whiteboard layout, click L and the screen below appears. Click to select a desire whiteboard layout.
Note: This function is only supported by VP2021.
Removing a Whiteboard Layer
To remove the current whiteboard, click and the screen below appears. Click OK to remove the whiteboard without saving.
Note: This function is only supported by VP2021.

Background Pad
The background pad allows you to draw, make notes, and share to all the participants. You can also save the background pad locally for future use. To use the background pad, click from the OSD tool menu. The screen below appears, please refer to the screen and table below for the supported functions and its description.
Note: This function is only supported by VP2021.

| No. Tool Task | |
| 1 Pencil Click this icon to select a color and size for the pencil to write or draw on the whiteboard. SeePencil Options, page 23. | |
| 2 Undo Click this icon to undo your current move. | |
| 3 Highlighter Click this icon to select a color and size for the pencil to highlight on the whiteboard. SeeHighlighter Options, page 23. | |
| 4 Color Options The color options are available when you select pencil or highlighter and the options vary depending on which tool is selected. | |
| 5 Size Options The sizing options are available when you select pencil, highlighter, or eraser and the options vary depending on which tool is selected. | |
| 6 Eraser Click this icon to select a size for the eraser to remove any pixels on the whiteboard, or select the broom icon to remove all pixels on the whiteboard. See Eraser Options, page 23. | |
| 7 Go Back Click this icon to go back to the previous page. | |
| 8 Save Click this icon to save your current whiteboard to your device or a USB flash drive. | |
Pencil Options

flowchart
graph TD
    A["Start"] --> B["Process 1"]
    B --> C["Process 2"]
    C --> D["End"]
    style A fill:#f9f,stroke:#333
    style B fill:#ccf,stroke:#333
    style C fill:#cfc,stroke:#333
    style D fill:#fcc,stroke:#333
Highlighter Options

flowchart
graph TD
    A["Input"] --> B["Process Step 1"]
    B --> C["Output"]
    C --> D["Feedback Loop"]
    D --> E["Final Output"]
    style A fill:#f9f,stroke:#333
    style B fill:#ccf,stroke:#333
    style C fill:#cfc,stroke:#333
    style D fill:#fcc,stroke:#333
    style E fill:#ffc,stroke:#333
Eraser Options

flowchart
graph TD
    A["Data Input"] --> B["Processing"]
    B --> C["Output"]
    C --> D["Feedback"]
    D --> E["Image Generation"]
    E --> F["Final Output"]
Save As
To save your current whiteboard to your device or a USB flash drive, click and the screen below appears. You can save the whiteboard to image or PDF format, USB flash drive or your own device, or you can paste it into whiteboard for discussion. If you choose to save the whiteboard to Your device, the VP2021 will automatically generate a QR code on the bottom right of the screen. Scan the QR code to open the saved file.

This page is intentionally left blank.
Chapter 4
Remote Operation
Overview
This chapter provides information on how to remotely operate and configure the VP2020 / VP2021 via the web console.
Default Network and Login Settings
The VP2020 / VP2021 uses the following network settings and login credentials as its default settings.
Note: For wired connection users, please configure the IP settings in the Ethernet Settings, page 44 via wireless connection. You can either choose DHCP for dynamic IP address or Static to assign an IP address.
◆ Default network settings
| Network Parameter Default Setting | |
| IP Address 192.168.0.60 | |
| Subnet Mask 255.255.255.0 | |
| Gateway 192.168.0.1 | |
| HTTP Port 80 | |
Note: If the VP2020 / VP2021 is connected to a router that supports DHCP, a dynamic IP address will be assigned to the VP2020 / VP2021 as soon as it connects to the network. Simply connect an HDMI-enabled or VGA monitor to look up the IP address via the OSD.
◆ Default login credentials
| Login Credential | Default Setting Limitations |
| Username administrator 5 to 30 characters in length without special characters, not case-sensitive | |
| Password password | |
Supported Web Browsers
The VP2020 / VP2021 supports access to its web console through the following web browsers and operating systems:
| Operating System Web Browser Supported Version | |
| Windows 10 x64 Edge 85.0.564.67 x64 | |
| Windows 10 x64 Firefox 88.0 x64 | |
| Windows 10 x 64 Chrome 90.0.4430.93 x64 | |
| Ubuntu 20.04 x64 Chrome 90.0.4430.93 x64 | |
| Solaris 11.4 x64 Firefox 52.9.0_x32 | |
| Windows 10 x64_1703_Enterprise QQ 10.8 | |
| Windows 10 x64_1703_Enterprise 360 13.1.1302.0 | |
Operation Consideration
When using the web console or ATEN Wireless Presentation App, make sure your mobile and laptop / PC is/are connected to the same network environment where the VP2020 / VP2021 is installed.
Browser Sharing
When you log into the VP2020 / VP2021's web console as participant, you are remotely connected to an online meeting where you can share your screen to meeting participants.
Joining a Meeting as Participant via Web Console
When you log into the VP2020 / VP2021's web console as participant, you are allowed to share your laptop / PC, or an application window / Chrome tab from your laptop / PC to the meeting participants.
Note:
- This feature is only available using Chrome.
-
The VP2020 / VP2021 can receive up to 20 (VP2020: 8; VP2021: 20) concurrent streamed-in channels via LAN and wireless connection and up to 2 concurrent streaming channels via LAN and wireless connection.
-
Make sure you have the screen, application window, or the Chrome tab you wish to share opened on your laptop / PC.
-
In a web browser, type the IP address of the VP2020 / VP2021. This screen appears.

-
Click to share your screen to the meeting participants and the screen below appears.
-
Enter a display name and click
Start Sharing

- The screen below appears. Select a screen to share, to combine and share both the system and your microphone audios, check the Share system audio checkbox, and click Share.

- The screen below appears when you have successfully shared your screen.
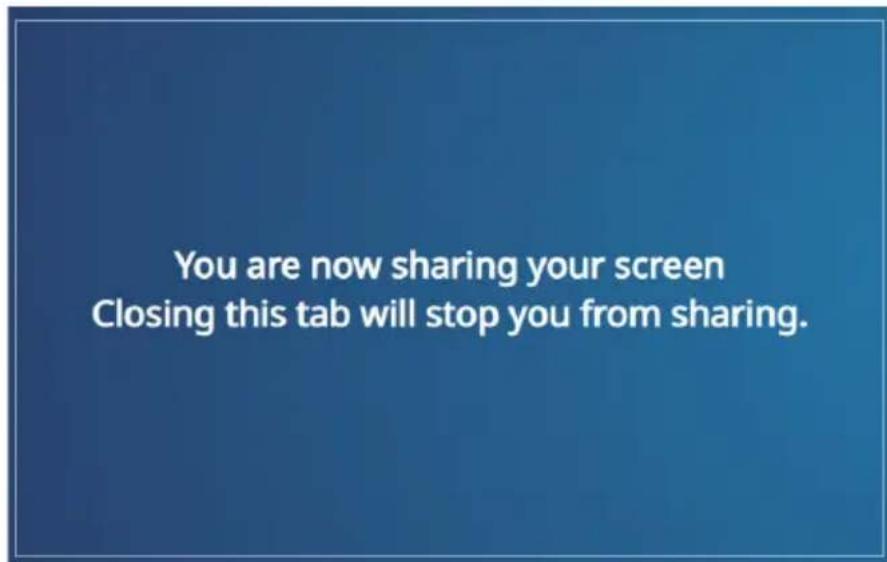
- To stop the screen sharing, simply close the tab.
Note:
If your Chrome does not have an appropriate extension installed for this feature, a prompt appears for installing an extension when you try to enable the function. In this case, follow the steps below to download and install the extension.
a. Click download in the pop-up prompt.
b. Open a new tab in your Chrome and type chrome://extensions in the address bar to open the extensions page.
c. Enable Developer mode at the top-right corner and reload the page.
d. Drag-and-drop the downloaded extension file to this page to install the file.
e. Close and reopen the tab to refresh your browser.
Logging In the Web Console
When you log into the VP2020 / VP2021's web console as administrator, you are allowed to access and make configuration to the VP2020 / VP2021's settings.
- In a web browser, type the IP address of the VP2020 / VP2021. This screen appears.

- Click to log in as an administrator for system configuration and the screen below appears.

-
Type the password and check the I have read and accepted the Privacy Policy and EULA checkbox, then click Login.
-
If this is the first time you log in as an administrator, you will be asked to change the password for security purpose.

- Click OK to change for a new password and the screen below appears.

- Fill in the required fields and click Apply. The screen below appears and you have successfully changed your password.

- You will be brought back to the login page, Click and enter your new password. Check the I have read and accepted the Privacy Policy and EULA checkbox, then click Login. The main screen appears.

The Web Console Main Screen
The VP2020 / VP2021 defaults to the main screen after logging in. Refer to the illustration and table below for an overview of the web console.

| No. | Element Description | |
| 1 | DISATEN logo. | |
| 2 | Device Information Indicates the device model and name. | |
| 3 | Sub Settings Tab Click on the tabs to switch between different sets of settings. | |
| 4 | Click this icon to reboot the VP2020 / VP2021. Rebooting[82x4]Rebootthe device will disconnect all connected participants. | |
| 5 | Click the icon to log out of the web console.[2557]Log out | |
| 6 | Main Settings Tab Click on the tabs to switch between different sets of settings. | |
| 7 |  | ◆ The Apply icon greys out if no configuration is made to the VP2020 / VP2021.◆ Click the icon to apply all the configuration made to the VP2020 / VP2021. |
General Settings
The General page includes settings such as device name, login code, background image, language, resolution settings, and date & time settings. To access the general settings, log in the web console and the screen defaults to the page.

Basic Settings

Device Name: Type a name for the VP2020 / VP2021 WiFi SSID. A valid name should be within 16 characters in length and contains no special characters. This name appears on the Wifi network list on the mobile device and laptop / PC. Changing the device name will disconnect all connected participants.
- Login Code: A login code is a 4-digit combination that is required for participants to join an online meeting.
- Random: The system generates random login code and displays on the OSD (on-screen display).
- No Code: No login code is required for the participants to join an online meeting. This is the default setting.
- Fixed: You can type your combination and the login code is displayed on the OSD (on-screen display)
- Background Image: Selects a background image for the OSD (on-screen display). You can create up to 4 background images by clicking
+ , and then follow the on-screen instructions. The accepted image format and size are as follows, JPEG or PNG formats with a resolution up to 3840 x 2160, and an aspect ration of 16 : 9.

- Allow Remote View: Use the toggle to enable / disable the remote view function. When enabled, the remote view allows users to bring the sharing content onto their mobile and laptop / PC screen for a clear view if they are far away from the main monitors.
- Allow Google Cast: Use the toggle to enable / disable the Google Cast function.
Language: Use the drop-down list to select a language for your web console and OSD (on-screen display).
- Apply: Click to apply the changes you make to the VP2020 / VP2021.
Resolution Settings

- Video Output: Selects an output option between HDMI or HDMI and VGA (up to FHD) for the content and OSD (on-screen display) to be displayed on the display device.
- Resolution: Click the drop-down list to select a resolution for the display device. Changing the resolution will reboot the device. This field is only available when the display is connected to the VP2020 / VP2021. Make sure to select a correct display resolution for the connected display, otherwise the display will not display any content.
- Output Resolution: Indicates the output resolution you set from the above resolution field.
- Apply: Click to apply the changes you make to the VP2020 / VP2021.
Date & Time Settings
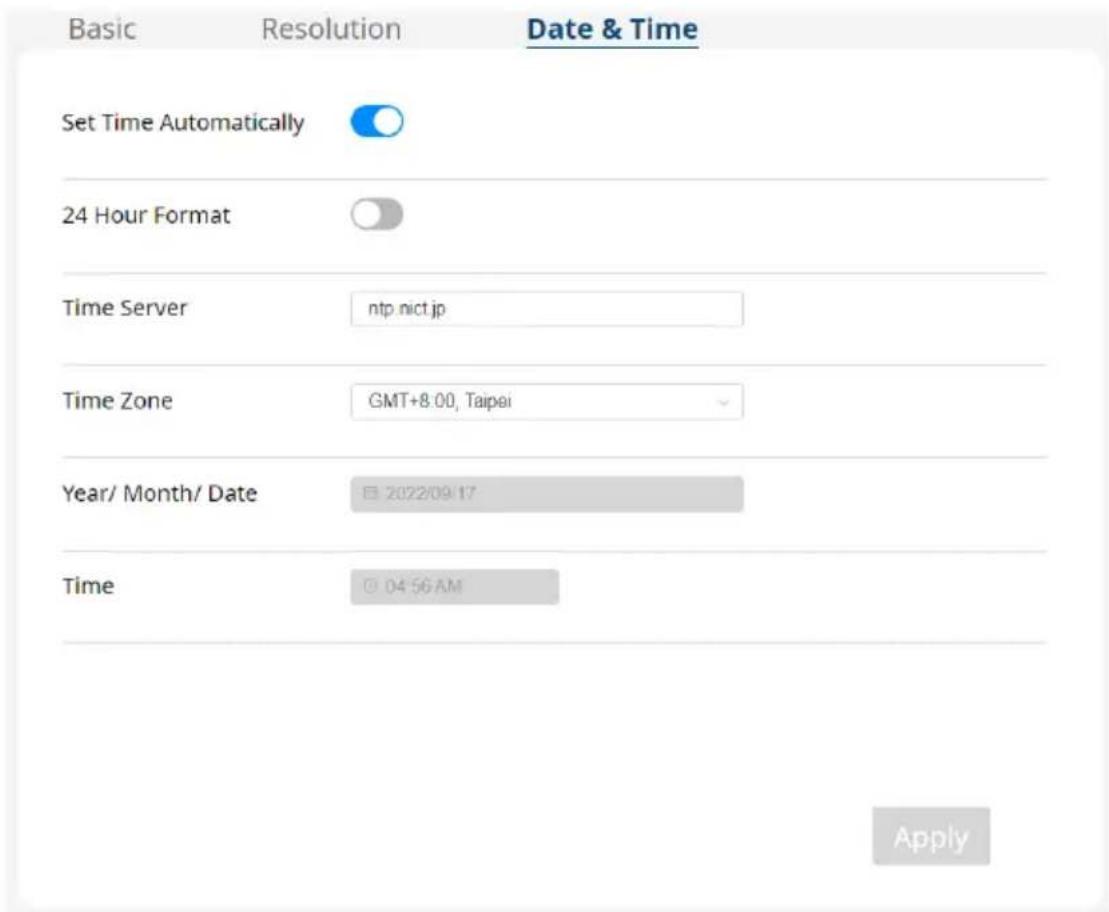
- Set Time Automatically: Use the toggle to enable / disable the set time automatically function. When enabled, the VP2020 / VP2021 sets time automatically. This is the default setting.
- 24 Hour Format: Use the toggle to enable / disable the 24 hour format function. When enabled, the VP2020 / VP2021 sets time in a 24 hour format (e.g., 20:30).
- Time Server: Synchronized the VP2020 / VP2021's date and time with a specified NTP server.
- Time Zone: Use the drop-down list to select a time zone.
- Year / Month / Date: Indicates the year, month, and date.
◆ Time: Indicates the time. - Apply: Click to apply the changes you make to the VP2020 / VP2021.
Network Settings
The Network page includes settings such as WiFi functionality and its settings, and Ethernet settings such as IP address, subnet mask, and gateway. To access the network settings, log in the web console and then click Network from the main setting tab.

Wi-Fi Settings

- Sets the ATEN Wireless Presentation as AP: Check this checkbox to set the VP2020 / VP2021 as an access point. This makes the VP2020 / VP2021 able to provide Wi-Fi coverage for participants to connect wirelessly. This is the default setting.
- Pairs the ATEN Wireless Presentation to another AP: Check this checkbox to set the VP2020 / VP2021 as an extender to another access point. This allows users to extend their Wi-Fi coverage.
- Turns off the ATEN Wireless Presentation Wi-Fi capability: Check this checkbox to disable the Wi-Fi function on the VP2020 / VP2021.
- SSID: The Wi-Fi name you see when you scan for an available wireless network. This SSID can be changed via Device Name, see Device Name, page 39.
- Hide SSID: Use the toggle to hide / unhide the SSID.
- Security: Sets the password required for the participants to connect to the VP2020 / VP2021 wirelessly.
- None: No password is required for the participants to connect to the VP2020 / VP2021 wirelessly. This is the default setting.
- WPA2: Check this checkbox to set a password for the participants to connect to the VP2020 / VP2021 wirelessly. To see the password you enter, click , click again to hide to password.
- Band: Sets the Wi-Fi bandwidth for the VP2020 / VP2021.
- 5G: Sets the VP2020 / VP2021 to broadcast 5G Wi-Fi bandwidth signals. This bandwidth has higher data rate and smaller Wi-fi coverage. This is the default setting.
◆ 2.4G: Sets the VP2020 / VP2021 to broadcast 2.4G Wi-Fi bandwidth signals. This bandwidth has lower data rate and larger Wi-Fi coverage.
♦ Network Mode: Sets the VP2020 / VP2021's network mode.
- NAT: Sets the VP2020 / VP2021 to NAT network mode. In this mode, the VP2020 / VP2021 allows mapping multiple devices with local private IP addresses to a single public IP address before transferring information. This is the default setting.
- Bridge: Sets the VP2020 / VP2021 to bridge mode. In this mode, the VP2020 / VP2021 disables the NAT function, which means the VP2020 / VP2021 will not give out any private IP address. The VP2020 / VP2021 itself and the connected participant's IP addresses are given out by a DHCP server-enabled device through an Ethernet connection.
◆ Gatekeeper: Selects a gatekeeper option for the VP2020 / VP2021.
- Allow All: Check this checkbox to allow all access.
- Internet Only: Check this checkbox to allow Internet access only.
- Block All: Check this checkbox to block all access.
- Apply: Click to apply the changes you make to the VP2020 / VP2021.
Ethernet Settings

- Obtain IP address: Selects an IP address option for the VP2020 / VP2021.
- DHCP: Sets the VP2020 / VP2021 to DHCP. In this mode, the connected network switch dynamically assigns an IP address, subnet mask, gateway, and DNS to the VP2020 / VP2021.
- Static: Sets the VP2020 / VP2021 to static. In this mode, the VP2020 / VP2021 uses a fixed IP address. Specify the IP address, subnet mask, default gateway, and DNS.
♦ IP Address: Indicates the IP address of the VP2020 / VP2021.
♦ Subnet Mask: Indicates the subnet mask of the VP2020 / VP2021.
◆ Gateway: Indicates the gateway of the VP2020 / VP2021.
◆ DNS 1: Indicates the DNS 1 of the VP2020 / VP2021.
- DNS 2: Indicates the DNS 2 of the VP2020 / VP2021.
- Apply: Click to apply the changes you make to the VP2020 / VP2021.
Administration Settings
The Administration page includes settings such as admin password, device information, firmware upgrades, import / export configuration file, and system reset settings. To access the administration settings, log in the web console and then click Administration from the main setting tab.
Update Settings

◆ Model Name: Indicates the model name.
♦ ATEN Wireless Presentation Information: Indicates the ATEN Wireless Presentation App version.
Update Manually: Upgrades the system firmware to the VP2020 / VP2021.
- Browse: Click Browse to locate an available firmware file.
Update: Once a firmware file is selected, click Update to upgrade the system firmware to the VP2020 / VP2021.
Password & Configuration Settings

- Admin Password: Changes the admin password here for security purposes. A valid password is not case-sensitive and should be 1 to 16 characters in length, without space or special characters.
- Current Password: Enters the current password here.
- New Password: Enters a new password here.
- Confirm Password: Enters a new password for confirmation here.
♦ RESTFUL API Key
◆ Generate: Click Generate to generate a RESTFUL API key.
- Configuration File: Allows users to import / export configuration files.
- Browse: Click Browse to locate an available configuration file.
- Import: Once a previously exported configuration file is selected, click Import to import the selected configuration file to the VP2020 / VP2021.
- Export: Click Export to export the current configurations of the VP2020 / VP2021 for future use. This export will not include the username and password settings.
- System Reset: Resets the VP2020 / VP2021 to its default settings.
- Reset: Click Reset to reset the VP2020 / VP2021.
- System Log Recording: Use to toggle to enable / disable the system log recording function. When enabled, the VP2020 / VP2021 records any changes made or activities into system log.
- Download System Log: Click Download System Log to download the system log history.
Power Settings
The Power Settings page includes settings such as sleep mode and suspend mode. To access the power settings, log in the web console and then click Power Settings from the main setting tab.
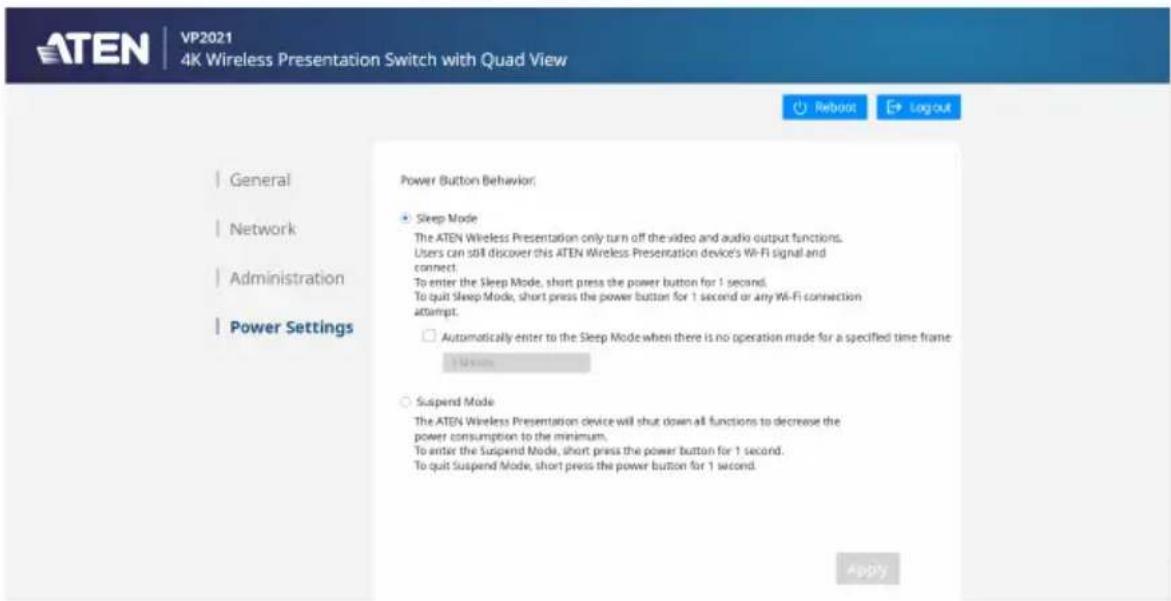
- Power Button Behavior: Selects a power button behavior option for the VP2020 / VP2021.
- Sleep Mode: Check this checkbox to enable sleep mode.
To set a specified time frame for the VP2020 / VP2021 to automatically enter to the sleep mode when there is no operation made, check the Automatically enter to the Sleep Mode when there is no operation made for a specified time frame and use the drop-down list to select a time frame option from 5 Minutes / 15 Minutes / 30 Minutes / 60 Minutes.
♦ Suspend Mode: Check this checkbox to enable suspend mode.
Windows & macOS App Sharing
When you log into the VP2020 / VP2021's web console as participant, you can download the app for Windows or macOS to remotely join an online meeting and share your screen to the meeting participants.
Joining a Meeting as Participant via App
To join an online meeting as participant using the app, follow the steps below.
- In a web browser, type the IP address of the VP2020 / VP2021. This screen appears.

-
Click the app that corresponds to your Laptop / PC's operation system.
-
Click if you are using a Windows laptop / PC.
-
Click if you are using a macOS laptop / PC.
-
Double-click the downloaded file and follow the on-screen instructions to install the ATEN Wireless Presentation App.
-
When the app in installed on your laptop / PC, click to open the app and the screen below appears.

- Wait for a few seconds for the app to scan for an available VP2020 / VP2021 device in the network environment.

- To connect an available VP2020 / VP2021 device, click beside the available VP2020 / VP2021 device, and the screen below appears.

The App Main Screen
The VP2020 / VP2021 defaults to the main screen after connecting to an available VP2020 / VP2021 device. Refer to the illustration and table below for an overview of the ATEN Wireless Presentation App.
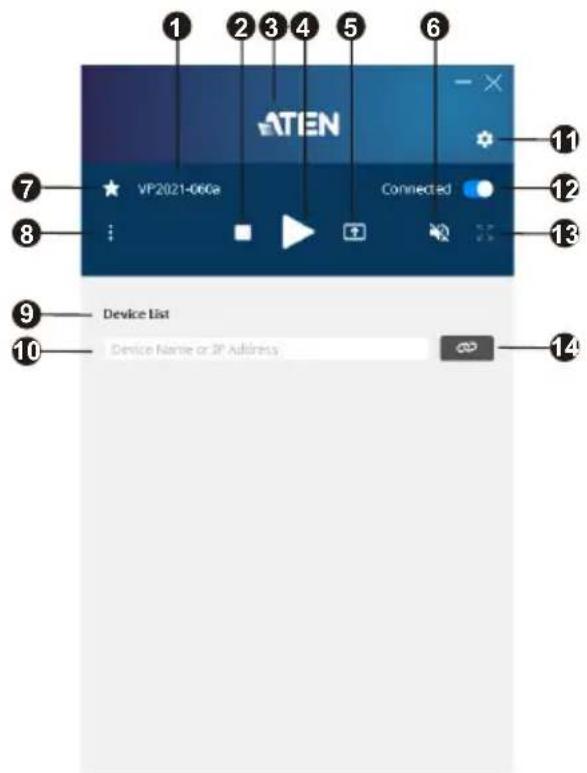
| No. | Element Description | |
| 1 | Device Information Indicates the device model and name (SSID). | |
| 2 | Click this icon to stop the screen sharing. | |
| 3 | Click ATEN logo. | |
| 4 | Click this icon to start / pause the screen sharing. | |
| 5 | Click is icon to select a screen or app window to be shared to the participants. See , page 58. | |
| 6 | Click is icon to mute / unmute the audio. | |
| 7 | Click is icon to make the connected VP2020 / VP2021device as your favorite, and the icon lights orange. | |
| 8 | Click is icon to use the remote view function (page 39).  | |
| 9 | Device List The available  | |
| 10 | Device Name or IP press | |
| 11 | Click this icon for more app settings. See More App Settings, page 54. | |
| 12 | Click this icon to disconnect with the VP2020 / VP2021 connected | |
| 13 | Click this icon to display multiple shared content on your screen or monitors.   | |
| 14 | Click this icon to connect with a specified device name or IP address. This icon lights blue when the Device Name or IP Address field is filled. | |
Selecting Screen or Tab
To select a screen or app window from your laptop / PC to be shared to the participants, click and the screen below appears. Choose the content you wish to share and click Select, the selected content is automatically shared to the participants.

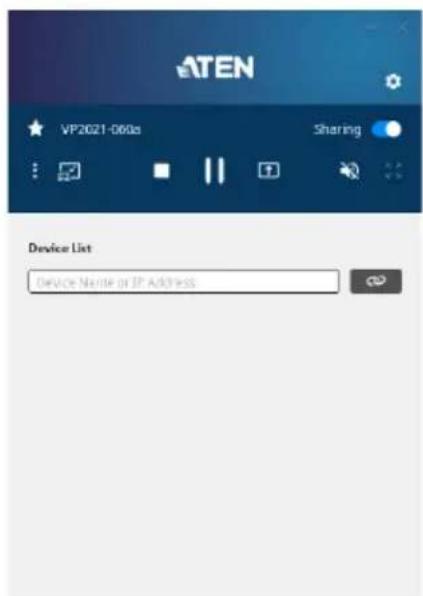
Remote View
To bring the sharing content onto your mobile and laptop / PC screen for a clear view if you are far away from the main monitors. Click 📄, the screen below appears and then click 📋. Make sure the remote view function is enabled for this icon to become available. See Allow Remote View, page 39.
Note: This function is only supported by VP2021.
More App Settings
For more ATEN Wireless Presentation App settings, click 📄 and the screen below appears.
ATEN
General
About
Display Name
iansun
☐ Automatically start screen projection once the connection to an ATEN Wireless Presentation Device is successful.
√ Automatically mute PC audio once the ATEN Wireless Presentation App is launched.
General
ATEN
General
About
Display Name
iansun
□ Automatically start screen projection once the connection to an ATEN Wireless Presentation Device is successful.
√ Automatically mute PC audio once the ATEN Wireless Presentation App is launched.
◆ Display Name:
- Automatically start screen projection once the connection to an ATEN Wireless Presentation Device is successful:
- Automatically mute PC audio once the ATEN Wireless Presentation App is launched:
About

- About: Shows app information and version.
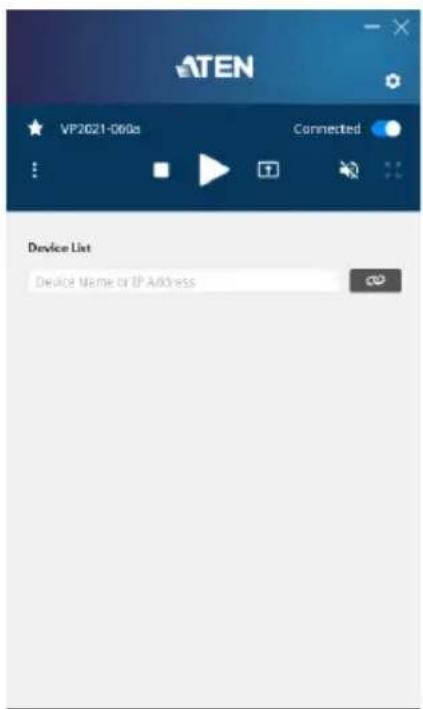
Joining a Meeting as Participant via Quick Join
To quickly join an online meeting, follow the steps below.
- Click from the VP2020 / VP2021 web console login page.

- Double-click the download file and the ATEN Wireless Presentation App pops up. You are automatically joined to an online meeting.
Joining a Meeting as Participant via Install-Free Version
To use an install-free version ATEN Wireless Presentation App, follow the steps below.
- Click from the VP2020 / VP2021 web console login page.

- Double-click the download file and the ATEN Wireless Presentation App pops up.
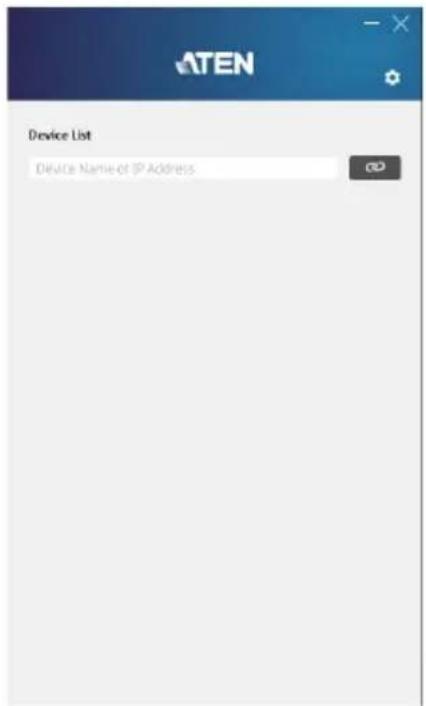
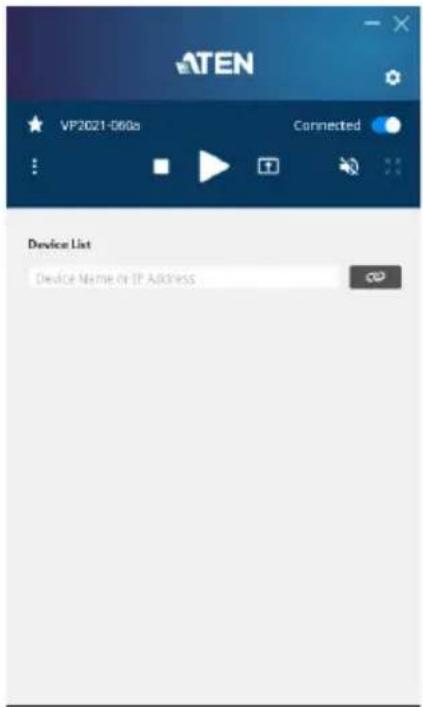
- Wait for a few seconds for the app the scan for an available VP2020 / VP2021 device in the network environment.

- To connect an available VP2020 / VP2021 device, click beside the available VP2020 / VP2021 device, and the screen below appears.
iOS Screen Sharing via AirPlay
For iOS devices such as iPhone and iPad, you can share your screen to the meeting participants via AirPlay. To share your screen, follow the steps below.
- Go to Settings > Wi-Fi > and select an available network (SSID) that is broadcasted from the VP2020 / VP2021. See Wi-Fi Settings, page 42.
- Enter the password to connect to the network.
- From your iOS devices, enable AirPlay to share your screen to the meeting participants.
This Page Intentionally Left Blank
Chapter 5
Wireless Presentation App
Overview
The ATEN Wireless Presentation App is designed to help you conveniently joining a meeting and share contents on your VP2020 / VP2021 device.
Operation Consideration
When using the web console or ATEN Wireless Presentation App, make sure your mobile and laptop / PC is/are connected to the same network environment where the VP2020 / VP2021 is installed.
Supported Systems
The ATEN Wireless Presentation App supports the following mobile operating systems:
| Mobile Operating System Supported Versions | |
| Android version 8.0 or later | |
Installing and Configuring the App
- Install the ATEN Wireless Presentation App on a mobile device.
a) From the mobile device, tap the Google Play icon.
b) In the search box, type "ATEN Wireless Presentation App".
c) Tap ATEN Wireless Presentation App and install the app. Or,
d) Scan the QR Code below to install the app.


- From the mobile device, tap the ATEN Wireless Presentation App icon

to open the app and the screen below appears.
Note: Make sure to connect the mobile device to the network where the VP2020 / VP2021 is installed.

- Wait for a few seconds for the app the scan for an available VP2020 / VP2021 device in the network environment.

- To connect an available VP2020 / VP2021 device, click beside the available VP2020 / VP2021 device, and the screen below appears.

Android Version
Main Page
The VP2020 / VP2021 defaults to the main screen after connecting to an available VP2020 / VP2021 device. Refer to the illustration and table below for an overview of the ATEN Wireless Presentation App.

| No. | Element Description | |
| 1 | Device Information Indicates the device model and name (SSID). | |
| 2 | Click this icon to stop the screen sharing. | |
| 3 | Displays the ATEN logo. | |
| 4 | Click this icon to start / pause the screen sharing. | |
| 5 C | Click this icon to select a  | screen or app window to be shared to the participants. See Selecting Screen or T ab, page 66. |
| 6 C | Click this icon to mute /  | unmute the audio. |
| 7 C | Click this icon to make the  | connected VP2020 / VP2021 device as your favorite, and the icon lights orange. |
| 8 C | Click this icon to use the  | remote view function (page 66).See Remote View, page 66.This function is only supported by VP2021. |
| 9 D |  List The available List The available | VP2020 / VP2021 device shows here. |
| 10 | Device Name or IP  press press | Manually type in the VP2020 / VP2021 device name or its IP address here. |
| 11 | Click this icon for more app settings. See More App  | Settings, page 67. |
| 12 | Click this icon to disconnect with the VP2020 / VP2021 device. The status changes to indicate the current status of your app from Connected, Sharing, and Paused. | |
| 13 C |  this icon to display this icon to display | multiple shared content on your screen or monitors. |
| 14 C |  this icon to connect with a specified device name or IP address. This icon lights blue when the Device Name or IP Address field is filled. this icon to connect with a specified device name or IP address. This icon lights blue when the Device Name or IP Address field is filled. | |
Note: Unless otherwise specified, all the screens shown in this manual are for smartphone only. The layout of the actual screens for tablet may vary slightly from these examples.
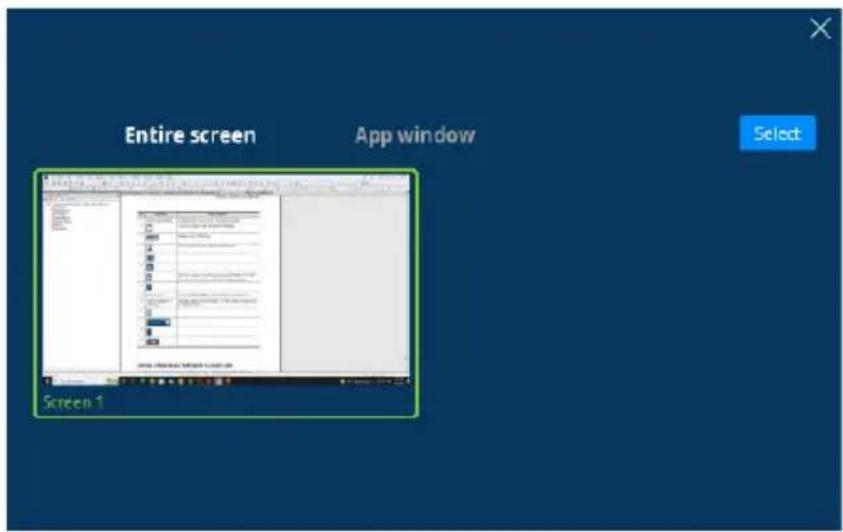
Selecting Screen or Tab
To select a screen or app window from your laptop / PC to be shared to the participants, click ↑ and the screen below appears. Choose the content you wish to share and click Select, the selected content is automatically shared to the participants.
Remote View
To bring the sharing content onto your mobile and laptop / PC screen for a clear view if you are far away from the main monitors. Click ☐, the screen below appears and then click 📋. Make sure the remote view function is enabled for this icon to become available. See Allow Remote View, page 39.
Note: This function is only supported by VP2021.

More App Settings
For more ATEN Wireless Presentation App settings, click 📄 and the screen below appears.
ATEN
General
About
Display Name
iansun
□ Automatically start screen projection once the connection to an ATEN Wireless Presentation Device is successful.
√ Automatically mute PC audio once the ATEN Wireless Presentation App is launched.
General
ATEN
General
About
Display Name
iansun
□ Automatically start screen projection once the connection to an ATEN Wireless Presentation Device is successful.
√ Automatically mute PC audio once the ATEN Wireless Presentation App is launched.
◆ Display Name:
- Automatically start screen projection once the connection to an ATEN Wireless Presentation Device is successful:
- Automatically mute PC audio once the ATEN Wireless Presentation App is launched:
About

- About: Shows app information and version.
General
- This product is for indoor use only.
- Read all of these instructions. Save them for future reference.
◆ Follow all warnings and instructions marked on the device. - Do not place the device on any unstable surface (cart, stand, table, etc.). If the device falls, serious damage will result.
♦ Do not use the device near water. - Do not place the device near, or over, radiators or heat registers.
- The device cabinet is provided with slots and openings to allow for adequate ventilation. To ensure reliable operation, and to protect against overheating, these openings must never be blocked or covered.
- The device should never be placed on a soft surface (bed, sofa, rug, etc.) as this will block its ventilation openings. Likewise, the device should not be placed in a built-in enclosure unless adequate ventilation has been provided.
- Never spill liquid of any kind on the device.
- Unplug the device from the wall outlet before cleaning. Do not use liquid or aerosol cleaners. Use a damp cloth for cleaning.
- The device should be operated from the type of power source indicated on the marking label. If you are not sure of the type of power available, consult your dealer or local power company.
- To prevent damage to your installation it is important that all devices are properly grounded.
- Do not allow anything to rest on the power cord or cables. Route the power cord and cables so that they cannot be stepped on or tripped over.
- Position system cables and power cables carefully; Be sure that nothing rests on any cables.
- Never push objects of any kind into or through cabinet slots. They may touch dangerous voltage points or short out parts resulting in a risk of fire or electrical shock.
Appendix
- Do not attempt to service the device yourself. Refer all servicing to qualified service personnel.
-
If the following conditions occur, unplug the device from the wall outlet and bring it to qualified service personnel for repair.
-
The power cord or plug has become damaged or frayed.
♦ Liquid has been spilled into the device. - The device has been exposed to rain or water.
- The device has been dropped, or the cabinet has been damaged.
- The device exhibits a distinct change in performance, indicating a need for service.
- The device does not operate normally when the operating instructions are followed.
- Only adjust those controls that are covered in the operating instructions. Improper adjustment of other controls may result in damage that will require extensive work by a qualified technician to repair.
Rack Mounting
Before working on the rack, make sure that the stabilizers are secured to the rack, extended to the floor, and that the full weight of the rack rests on the floor. Install front and side stabilizers on a single rack or front stabilizers for joined multiple racks before working on the rack.
- Always load the rack from the bottom up, and load the heaviest item in the rack first.
- Make sure that the rack is level and stable before extending a device from the rack.
- Use caution when pressing the device rail release latches and sliding a device into or out of a rack; the slide rails can pinch your fingers.
- Do not overload the AC supply branch circuit that provides power to the rack. The total rack load should not exceed 80 percent of the branch circuit rating.
- Make sure that all equipment used on the rack – including power strips and other electrical connectors – is properly grounded.
- Ensure that proper airflow is provided to devices in the rack.
- Ensure that the operating ambient temperature of the rack environment does not exceed the maximum ambient temperature specified for the equipment by the manufacturer.
- Do not step on or stand on any device when servicing other devices in a rack.
Technical Support
International
- For online technical support – including troubleshooting, documentation, and software updates: http://support.aten.com
◆ For telephone support, call this number:
| International 886-2-86 | 92-6959 |
| China 86-400-810-0-8 | 10 |
| Japan 81-3-5615-5811 | |
| Korea 82-2-467-6789 | |
| North America 1-888-999-ATEN ext 4988 | |
| 1-949-428-1111 |
North America
| Email Support support@aten-usa.com | ||
| Online Technical Support | Troubleshooting Documentation Software Updates | http://www.aten-usa.com/support |
| Telephone Support 1-888-999-ATEN ext 4988 | ||
When you contact us, please have the following information ready beforehand:
- Product model number, serial number, and date of purchase
- Your computer configuration, including operating system, revision level, expansion cards, and software
◆ Any error messages displayed at the time the error occurred
- The sequence of operations that led up to the error
◆ Any other information you feel may be of help
Specifications
VP2020
| Video Output | |
| Interfaces 1 x HDMI | Type-A Female (Black)1 x VGA (HDB-15) Female |
| Max. Distance HDMI | Up to 5 mVGA: Up to 15 m |
| Video | |
| Max. Resolution | HDMI: Up to 4K @ 30 HzVGA: Up to 1080p |
| Audio | |
| Output | Stereo Audio: 1 x Mini Stereo Jack Female (Black) |
| Wireless | |
| Authentication Protocol | AP Mode: WPA2-PSKStation Mode: WEP, WPA, WPA2, 802.1x EAP |
| Wireless Transmission Protocol | IEEE 802.11ac |
| Frequency Band | Switchable dual band 2.4GHz and 5GHz(DFS channels not supported) |
| Reach | 20 m Transmission in 5 GHz30 m Transmission in 2.4 GHz |
| Connectors | |
| Console Ports | USB 3.0: 1 x USB Type-A Female (Blue)USB 2.0: 1 x USB Type-A FemaleUSB-C: 1 x USB-C Female |
| Power | 1 x DC Jack (Black) |
| Switches | |
| Power | 1 x Pushbutton (LED: Blue) |
| Control | |
| Ethernet 1 x RJ-45 | Female (Silver) |
| Power Consumption | |
| Power DC12V:12W | BTU |
| Environmental | |
| Operating Temperature | 0 - 40°C |
| Storage Temperature | -20 - 60°C |
| Humidity 0 - 80% RH, Non-Condensing | |
| Physical Properties | |
| Housing Metal | |
| Weight 0.47 kg (1.04 lb) | |
| Dimensions (L x W x H) | 17.00 x 10.40 x 2.83 cm (6.69 x 4.09 x 1.11 in) |
VP2021
| Video Output | |
| Interfaces 1 x HDMI | Type-A Female (Black)1 x VGA (HDB-15) Female |
| Max. Distance HDMI | Up to 5 mVGA: Up to 15 m |
| Video | |
| Max. Resolution | HDMI: Up to 4K @ 30 HzVGA: Up to 1080p |
| Audio | |
| Output | Stereo Audio: 1 x Mini Stereo Jack Female (Black) |
| Wireless | |
| Authentication Protocol | AP Mode: WPA2-PSKStation Mode: WEP, WPA, WPA2, 802.1x EAP |
| Wireless Transmission Protocol | IEEE 802.11ac |
| Frequency Band | Switchable dual band 2.4GHz and 5GHz(DFS channels not supported) |
| Reach | 20m Transmission in 5GHz30 m Transmission in 2.4 GHz |
| Connectors | |
| Console Ports | USB 3.0: 1 x USB Type-A Female (Blue)USB 2.0: 1 x USB Type-A FemaleUSB-C: 1 x USB-C Female |
| Power | 1 x DC Jack (Black) |
| Switches | |
| Power | 1 x Pushbutton (LED: Blue) |
| Control | |
| Ethernet 1 x RJ-45 | Female (Silver) |
| Power Consumption | |
| Power DC12V:12W | BTU |
| Environmental | |
| Operating Temperature | 0 - 40°C |
| Storage Temperature | -20 - 60°C |
| Humidity 0 - 80% RH, Non-Condensing | |
| Physical Properties | |
| Housing Metal | |
| Weight 0.47 kg (1.04 lb) | |
| Dimensions (L x W x H) | 17.00 x 10.40 x 2.83 cm (6.69 x 4.09 x 1.11 in) |
ATEN Standard Warranty Policy
Limited Hardware Warranty
ATEN warrants its hardware in the country of purchase against flaws in materials and workmanship for a Warranty Period of two [2] years (warranty period may vary in certain regions/countries) commencing on the date of original purchase. This warranty period includes the LCD panel of ATEN LCD KVM switches. For UPS products, the device warranty is two [2] years but battery is one [year]. Select products are warranted for an additional year (see A+ Warranty for further details). Cables and accessories are not covered by the Standard Warranty.
What is covered by the Limited Hardware Warranty
ATEN will provide a repair service, without charge, during the Warranty Period. If a product is detective, ATEN will, at its discretion, have the option to (1) repair said product with new or repaired components, or (2) replace the entire product with an identical product or with a similar product which fulfills the same function as the defective product. Replaced products assume the warranty of the original product for the remaining period or a period of 90 days, whichever is longer. When the products or components are replaced, the replacing articles shall become customer property and the replaced articles shall become the property of ATEN.
To learn more about our warranty policies, please visit our website: http://www.aten.com/global/en/legal/policies/warranty-policy/
© Copyright 2023 ATEN® International Co., Ltd.
Released: 2023-06-14
ATEN and the ATEN logo are registered trademarks of ATEN International Co., Ltd. All rights reserved. All other brand names and trademarks are the registered property of their respective owners.


- Compliance Statements
- FEDERAL COMMUNICATIONS COMMISSION INTERFERENCE STATEMENT
- FCC RF Radiation Exposure Statement:
- FCC Caution
- Suggestion
- KCC Statement
- Industry Canada Statement
- CAN ICES-003 (B) / NMB-003 (B)
- HDMI Trademark Statement
- RoHS
- User Information
- Online Registration
- Telephone Support
- User Notice
- Product Information
- Package Contents
- Table of Contents
- Introduction
- Hardware Setup
- Local Operation
- Remote Operation
- Wireless Presentation App
- Appendix
- About this Manual
- Note:
- Conventions
- Overview
- Features
- Planning the Installation
- Required Equipment
- Optional Equipment
- Chapter 2
- Hardware Setup
- Hardware Overview
- Installation
- (Optional)
- Power LED Indication
- Resetting the Unit
- Displaying the Room Info
- More Settings
- Display Settings and Behavior
- Auto Display Layout
- The OSD
- OSD Tool Menu
- Getting Screen Captures / Crops
- Screen Capturing
- Cropping
- Whiteboard
- Pencil Options
- Highlighter Options
- Eraser Options
- Save As
- Whiteboard Layouts
- Removing a Whiteboard Layer
- Background Pad
- Chapter 4
- Remote Operation
- Default Network and Login Settings
- Supported Web Browsers
- Operation Consideration
- Browser Sharing
- Joining a Meeting as Participant via Web Console
- Logging In the Web Console
- The Web Console Main Screen
- General Settings
- Resolution Settings
- Date & Time Settings
- Network Settings
- Wi-Fi Settings
- Ethernet Settings
- Administration Settings
- Update Settings
- Password & Configuration Settings
- Power Settings
- Windows & macOS App Sharing
- Joining a Meeting as Participant via App
- The App Main Screen
- Selecting Screen or Tab
- Remote View
- More App Settings
- ATEN
- Display Name
- General
- About
- Joining a Meeting as Participant via Quick Join
- Joining a Meeting as Participant via Install-Free Version
- iOS Screen Sharing via AirPlay
- Chapter 5
- Wireless Presentation App
- Supported Systems
- Installing and Configuring the App
- Android Version
- Main Page
- Rack Mounting
- Technical Support
- International
- North America
- Specifications
- ATEN Standard Warranty Policy
- Limited Hardware Warranty
- What is covered by the Limited Hardware Warranty
Brand : ATEN
Model : VS0202
Category : Router