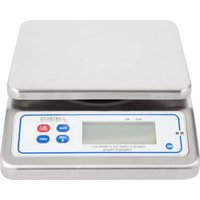
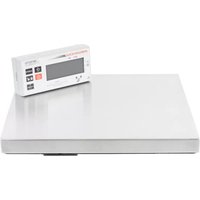
PS30 - Kitchen scale Cardinal Detecto - Free user manual and instructions
Find the device manual for free PS30 Cardinal Detecto in PDF.


| Brand | Cardinal Detecto |
| Model | PS30 |
| Product Type | Kitchen Scale |
| Capacity | 30 lb (13.6 kg) |
| Readability | 0.1 oz / 1 g |
| Units of Measurement | lb, kg, oz, g |
| Platform Material | Stainless Steel |
| Display Type | LCD |
| Power Source | 2 x AAA batteries (not included) |
| Auto-Off | After 2 minutes of inactivity |
| Tare Function | Yes |
| Low Battery Indicator | Yes |
| Overload Indicator | Yes |
| Dimensions (L x W x H) | 8.5 x 6 x 2 inches |
| Weight | 1.2 lb |
| Color | White |
| Cleaning Instructions | Wipe with a damp cloth; do not immerse in water |
| Certifications | NSF, CE |
Frequently Asked Questions - PS30 Cardinal Detecto
User questions about PS30 Cardinal Detecto
0 question about this device. Answer the ones you know or ask your own.
Ask a new question about this device
Download the instructions for your Kitchen scale in PDF format for free! Find your manual PS30 - Cardinal Detecto and take your electronic device back in hand. On this page are published all the documents necessary for the use of your device. PS30 by Cardinal Detecto.
USER MANUAL PS30 Cardinal Detecto
Thank you for purchasing our Detecto Model PS30 Digital Portion Scale. This manual will guide you through installation, and operation of your scale. Please read it thoroughly before attempting to operate this scale and keep it handy for future reference.
FCC COMPLIANCE STATEMENT
This equipment generates uses and can radiate radio frequency and if not installed and used in accordance with the instruction manual, may cause interference to radio communications. It has been tested and found to comply with the limits for a Class A computing device pursuant to Subpart J of Part 15 of FCC rules, which are designed to provide reasonable protection against such interference when operated in a commercial environment. Operation of this equipment in a residential area may cause interference in which case the user will be responsible to take whatever measures necessary to correct the interference.
You may find the booklet "How to Identify and Resolve Radio TV Interference Problems" prepared by the Federal Communications Commission helpful. It is available from the U.S. Government Printing Office, Washington, D.C. 20402. Stock No. 001-000-00315-4.
All rights reserved. Reproduction or use, without expressed written permission, of editorial or pictorial content, in any manner, is prohibited. No patent liability is assumed with respect to the use of the information contained herein. While every precaution has been taken in the preparation of this manual, the Seller assumes no responsibility for errors or omissions. Neither is any liability assumed for damages resulting from use of the information contained herein. All instructions and diagrams have been checked for accuracy and ease of application; however, success and safety in working with tools depend to a great extent upon the individual accuracy, skill and caution. For this reason the Seller is not able to guarantee the result of any procedure contained herein. Nor can they assume responsibility for any damage to property or injury to persons occasioned from the procedures. Persons engaging the procedures do so entirely at their own risk.
TABLE OF CONTENTS
Installation 1
Display Annunciators 2
Key Functions 3
Operation 3
Configuration 4
Display Messages ...... 7
Care and Maintenance 7
SPECIFICATIONS
| Weight Display: | 1.0 inch backlit LCD, 5 Digit with fraction |
| Dimensions: | 11.22" W x 10.03" D x 3.54" H (285mm x 255mm x 90mm) |
| Platform Size: | 9.44" W x 7.28" D (240mm x 185mm) |
| Zero: Established on power up routine and maintained by auto-zero circuitry. | |
| Power: 4 AA Alkaline cells OR 9-15VDC,100mA wall plug-in UL/CSA listed power supply | |
| Tare: | 100% of full scale capacity |
| Temperature: | 40° to 95°F (5°to 35°C) |
| Humidity: | 15% ~85% RH |
| Capacity: | 0-15 lb x 0.1 oz 5-30 lb x 0.2oz 0-6 kg x 2 g 6-15 kg x 5 g |
| Keys: | ON/OFF, HOLD, UNIT, TARE/BACKLIGHT |
| Features: | Low battery indicator, Power saving selectable timing auto shut-off |
Serial Number
Date of Purchase
Purchased Form
RETAIN THIS INFORMATION FOR FUTURE USE
PRECAUTIONS
Before using this instrument, read this manual and pay special attention to all "NOTIFICATION" symbols:

IMPORTANT

RICAL
WARNING
This page intentionally left blank.
INSTALLATION
UNPACKING
Before beginning installation of your scale, make certain the instrument has been received in good condition. When removing the scale from its packing, inspect it for signs of damage, such as exterior dents and scratches. Keep the carton and packing material for return shipment if it should become necessary. It is the responsibility of the purchaser to file all claims for any damages or loss incurred during transit.
- Remove the scale from the shipping carton and inspect it for any signs of damage.
- Plug-in the 9-15VDC adapter or insert four (4) AA Alkaline batteries to use the scale.
- Place the scale on a flat level surface, such as a table or bench.
- The scale is now ready for use.
POWER SUPPLY
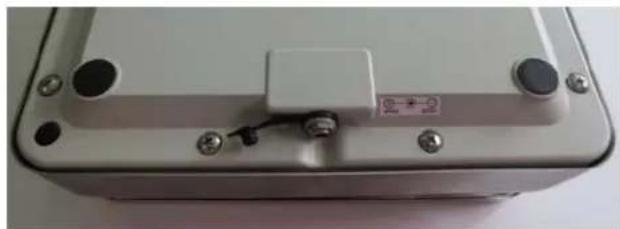
To apply power to the scale using the supplied 9-15VDC, 100 mA power supply, insert the plug from the power supply cable into the power jack on the back of the scale and then plug power supply into the proper electrical outlet. The scale is now ready for operation.
natural_image
Exterior view of a gray electronic device casing with buttons and a central display (no visible text or symbols)BATTERY
The scale can use four (4) AA size batteries (not included). If you wish to operate the scale from batteries, you must first obtain and install the batteries. Access is via a removable cover on the bottom of the scale.
Battery Installation/Replacement
- Turn scale over so that display is facing down and place it upside down on a flat level surface, such as a table or bench.
- Locate battery cover on bottom of scale and loosen two plastic captive screws.

natural_image
Close-up of a white electronic component with two circular buttons and mounting screws, no visible text or symbols.
natural_image
Close-up of a metallic electronic device with two small white components and mounting holes (no visible text or symbols)
- Remove battery cover (lift straight up and slide it out) exposing battery holder.
- If installing new batteries, proceed to step 5. If replacing batteries, remove all 4 batteries from battery holder and then proceed to step 5.
- Install 4 new "AA" size batteries in battery holder, noting polarity markings as shown above.
-
After placing all 4 batteries in holder, replace battery cover on scale. Slide tabs on battery cover into cover slots, press down on cover and tighten two plastic captive screws loosen in step 2.
-
Turn scale over (display facing up) and press ON/OFF key.
-
If display turns on, batteries have been installed correctly. If not, remove battery cover and check for one or more improperly positioned batteries.
DISPLAY ANNUNCIATORS
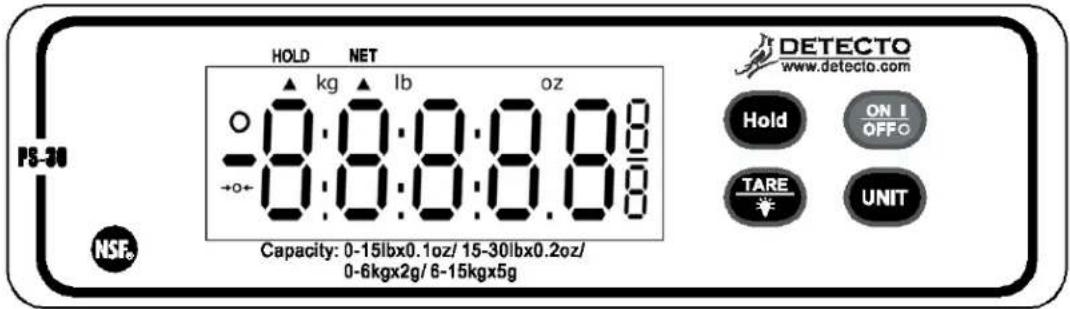
The annunciators are turned on to indicate that the scale display is in the mode corresponding to the annunciator label or that the status indicated by the label is active.
O
The ○ annunciator is turned on when the weight display is stable.

Indicates scale is at center of zero.
lb
The lb annunciator is turned on to indicate that the displayed weight is in pounds.
oz
The oz annunciator is turned on to indicate that the displayed weight is in ounces.
lb/oz
Both the lb and oz annunciators are turned on to indicate that the displayed weight is in pounds and ounces.
lb/oz 1/8
The lb/oz 1/8 annunciator is turned on to indicate that the displayed weight is in 1/8 ounce.
kg
The kg annunciator is turned on to indicate that the displayed weight is in kilograms.
HOLD
The HOLD annunciator indicates the weight display hold function is activated.
NET
Activated with the TARE function, the NET annunciator indicates that the displayed weight is the net weight on the scale.
LobRt (LOW BATTERY)
When the batteries are near the point they need to be replaced, a low battery indicator on the display will turn on. If the battery voltage drops too low for accurate weighing, the scale will automatically shut off and you will be unable to turn it back on. When the low battery indicator is displayed, the operator should replace the batteries or remove the batteries and plug-in the 9-15VDC adapter.
KEY FUNCTIONS
HOLD
- Press once to hold the displayed weight.
- Press again to return display to normal weighing mode.
ON/OFF
- Press and release to turn on scale.
- Press and release to turn the scale off.
TARE
- Press to reset the display to zero up to 100% of the scale capacity.
- Press to confirm the setting for each menu.
- Setting backlight function ON or OFF.
UNIT
- Press to change the weighing units to the alternate units of measurement (if selected during configuration of the scale).
- Press 6 times while holding ON/OFF key to enter Configuration mode.
- Press to select menu in the Configuration mode.
OPERATION
TURN THE SCALE ON
Press the ON/OFF key to turn the scale on.
The scale will display
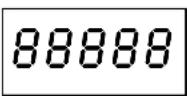
then change to the selected weighing units.
SELECT THE WEIGHING UNIT
Press the UNIT key to alternate between weighing units.
WEIGH
Place the item to be weighed on the scale tray. Wait a moment for the scale display to stabilize and then read the weight.
To re-ZERO (tare) the weight display, press the TARE key and continue. The scale will re-ZERO (tare) until the full capacity is reached.

The membrane keyboard is not to be operated with pointed objects (pencils, pens, fingernails, etc). Damage to keyboard resulting from this practice will NOT be covered under warranty.
CONFIGURATION
The Scale has been pre-configured at the factory and should not require configuration for use in most applications. In the event that the factory settings do not meet the requirements of your application, the following describes the steps to configure the scale.
TO BEGIN CONFIGURATION:
- While holding the ON/OFF key, press the TARE key 3 times and then release the ON/OFF key.
- The display will change to show SET, the software revision level and then change to Un IT.
Unit (WEIGHING UNITS)
To select "kg" (kilogram only) weighing units
- With the display showing Un it, press the TARE key. The display will change to show "kg".
- Press the TARE key to display kg status.
- Press the UNIT key to toggle between: Enable (display will change to 0n) or Disable (display will change to OFF).
- Press the TARE key and then the UNIT key 5 times. The display will change to Unit.
- Proceed to ROFF (AUTOMATIC SHUTOFF).
To select "lb" (pounds only) weighing units:
- With the display showing Unit, press the TARE key and then UNIT key. The display will change to show "lb".
- Press TARE key to display lb status.
- Press the UNIT key to toggle between: Enable (display will change to ) or Disable (display will change to ).
- Press the TARE key and then the UNIT key 4 times. The display will change to Unit.
- Proceed to ROFF (AUTOMATIC SHUTOFF).
To select "OZ" (ounce only) weighing units
- With the display showing Unit, press the TARE key and then the UNIT key 2 times. The display will change to show "OZ".
- Press the TARE key to display OZ status.
-
Press the UNIT key to toggle between: Enable (display will change to 0n) or Disable (display will change to OFF).
-
Press the TARE key and then the UNIT key 3 times. The display will change to Unit.
-
Proceed to ROFF (AUTOMATIC SHUTOFF).
CONFIGURATION, CONT.
To select "lb/OZ" (pounds/ounce) weighing units:
-
With the display showing Un, t, press the TARE key and then the UNIT key 3 times. The display will change to show both "lb" and "OZ".
-
Press TARE key to display lb/OZ status.
-
Press the UNIT key to toggle between: Enable (display will change to ) or Disable (display will change to ).
-
Press the TARE key and then the UNIT key 2 times. The display will change to Unit.
- Proceed to ROFF (AUTOMATIC SHUTOFF).
To select "lb/OZ 1/8" (pounds/ounce 1/8) weighing units:
-
With the display showing Un, t, press the TARE key and then the UNIT key 4 times. The display will change to show both "lb", "OZ" and "1/8".
-
Press TARE key to display lb/OZ 1/8 status.
-
Press the UNIT key to toggle between: Enable (display will change to ) or Disable (display will change to ).
-
Press the TARE key and then the UNIT key. The display will change to Unit.
-
Proceed to ROFF (AUTOMATIC SHUTOFF).
ROFF (AUTOMATIC SHUTOFF)
-
With the display showing Unit, press the UNIT key. The display will change to show ROFF.
-
Press the TARE key to begin selection of the automatic shut-off time (in seconds). The display will change to show 120 5.
-
Press the UNIT key to toggle through the selections; 120 5, 180 5, 240 5, 300 5, or OFF.
-
When the desired time is displayed, press the TARE key. The display will change to show ROFF.
-
Proceed to CAP (CAPACITY).
CAP (CAPACITY)
-
With the display showing , press the UNIT key. The display will change to show .
-
Press the TARE key to begin selection of the scale capacity. The display will change to show 15_0059.
-
Press the UNIT key to toggle through the selections;
10.02g, 3001g, 5005g, 5001g, 10.005kg, 15.005kg, 30.01kg, 60.1kg, 120.1kg, 150.1kg, 180.1kg.
-
When the desired capacity is displayed, press the TARE key. The display will change to show CRP.
-
Proceed to bUrr (BUZZER).
CONFIGURATION, CONT.
bUcr 9.bU00E-r0.
-
With the display showing , press the UNIT key. The display will change to show .
-
Press TARE key to display the ON
-
Press the UNIT key to toggle between: Enable (display will change to ) or Disable (display will change to ).
-
When the desired setting is displayed, press TARE key. The display will change to show bUcc.
-
Proceed to 8r-8nG 9.MUILT-RANGE0
R_rR_nG (MUILT-RANGE)
-
With the display showing , press the UNIT key. The display will change to show .
-
Press TARE key to display the ON status.
-
Press the UNIT key to toggle between: Enable (display will change to ) or Disable (display will change to ).
-
Press the TARE key. The display will change to ArAnG.
-
Proceed to HrRnG (HOLD RANGE).
HrRnG (HOLD RANGE)
-
With the display showing , press the UNIT key. The display will change to show .
-
Press TARE key to display the 1d status.
-
Press the UNIT key to toggle through the selections; Id, 5d, 10d, 15d.
-
When the desired setting is displayed, press the TARE key. The display will change to show _rR_nG .
-
Proceed to End (END).
End (CONFIGURATION COMPLETE)
-
With the display showing , press the UNIT key. The display will change to show .
-
Press TARE key to save the settings.
-
The scale will reset and return to the normal operating mode.
-
Configuration is complete.
DISPLAY MESSAGES
| DISPLAY | MEANING |
| L_obRt | Low battery indication. Replace batteries or use AC adapter |
| E_rr | Total load exceeds maximum scale capacity. |
| E_rrL | Load cell signal too low. |
CARE AND MAINTENANCE
The heart of the PS30 Digital Portion Scale is a precision load cell located in the center of the scale base. It will provide accurate operation indefinitely if protected against overload of scale capacity, dropping items on scale, or other extreme shock.
- DO NOT submerge the scale in water, pour or spray water directly on it.
• DO NOT use acetone, thinner or other volatile solvents for cleaning.
• DO NOT expose scale to direct sunlight or temperature extremes.
• DO NOT place scale in front of heating/cooling vents.
• DO clean the scale with a damp soft cloth and mild non-abrasive detergent. - DO remove power before cleaning with a damp cloth.
• DO provide clean AC power and adequate protection against lightning damage. - DO keep the surroundings clear to provide clean and adequate air circulation.

- FCC COMPLIANCE STATEMENT
- TABLE OF CONTENTS
- PRECAUTIONS
- INSTALLATION
- UNPACKING
- POWER SUPPLY
- BATTERY
- Battery Installation/Replacement
- DISPLAY ANNUNCIATORS
- KEY FUNCTIONS
- HOLD
- ON/OFF
- TARE
- UNIT
- OPERATION
- TURN THE SCALE ON
- SELECT THE WEIGHING UNIT
- WEIGH
- CONFIGURATION
- TO BEGIN CONFIGURATION:
- Unit (WEIGHING UNITS)
- CONFIGURATION, CONT.
- ROFF (AUTOMATIC SHUTOFF)
- CAP (CAPACITY)
- bUcr 9.bU00E-r0.
- R_rR_nG (MUILT-RANGE)
- HrRnG (HOLD RANGE)
- End (CONFIGURATION COMPLETE)
- CARE AND MAINTENANCE
Brand : Cardinal Detecto
Model : PS30
Category : Kitchen scale