
Baby BW-10PK - Baby product CUISINART - Free user manual and instructions
Find the device manual for free Baby BW-10PK CUISINART in PDF.


| Brand | Cuisinart |
| Model | Baby BW-10PK |
| Product Type | Bottle Warmer |
| Category | Baby Product |
| Dimensions (approx.) | 7.5 x 6.5 x 5.5 inches |
| Weight (approx.) | 1.5 lbs |
| Power Source | 120V AC, 60Hz |
| Power Consumption (approx.) | 200W |
| Warming Chamber Capacity | Up to 8.9 oz bottles, baby food jars up to 6 oz |
| Bottle Materials Supported | Plastic and Glass |
| Key Functions | Bottle warming, food warming, nightlight |
| Controls | Dial (ON/OFF), button for nightlight |
| Indicators | Blue LED for warming, built-in nightlight |
| Automatic Shut-Off | Yes, after warming cycle completes |
| Safety Features | Auto shut-off, do not overfill water, test temperature before feeding |
| Included Accessories | Measuring cup, bottle basket, adapter ring, food warming basket |
| Maintenance | Empty water after each use, wipe clean with damp cloth |
| Repair and Spare Parts | Contact Cuisinart customer service for replacement parts |
| Manual Availability | Free downloadable PDF on notice-facile.com |
Frequently Asked Questions - Baby BW-10PK CUISINART
User questions about Baby BW-10PK CUISINART
0 question about this device. Answer the ones you know or ask your own.
Ask a new question about this device
Download the instructions for your Baby product in PDF format for free! Find your manual Baby BW-10PK - CUISINART and take your electronic device back in hand. On this page are published all the documents necessary for the use of your device. Baby BW-10PK by CUISINART.
USER MANUAL Baby BW-10PK CUISINART
NOTE: These instructions are to be used as a guide only. Please note that there are many variables, such as size of the bottle and starting temperature of the food, that can affect the speed at which this unit warms the bottle or jar as well as the final temperature. Adjustments to the instructions below may be necessary. Always test the temperature of food before feeding baby.
- Remove the measuring cup from the front of the housing and fill it with water to the appropriate fill line, according to the chart.

| Bottle Warming Guide | ||
| Bottle Capacity 5 | °C/40°F 20°C/70°F | |
| 4 oz. plastic 10ml 8ml | ||
| 8.9 oz. plastic 10ml 8ml | ||
| 4 oz. glass 14ml 8ml | ||
| 8.9 oz. glass 14ml 8ml | ||
| Baby food 4 oz. | 12ml 8ml | |
| Baby food 6 oz. | 12ml 8ml | |
- Four the pre-measured amount of water from the measuring cup directly into the warming chamber.

Do not overfill. If too much water is used, the bottle or jar may be heated for too long a period and reach too high a temperature.
Note: Always make sure there is no water in chamber from previous use. To empty the unit of leftover water, tilt the unit onto its side over the sink. Any extra water will come out.
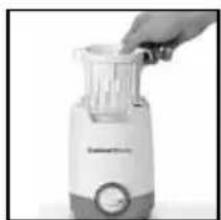
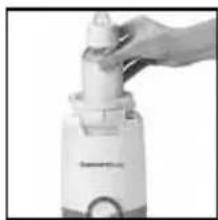
- FOR PLASTIC BOTTLES Put the bottle basket in the bottle-warming chamber. Line up the bottle basket arms with the insets on the bottle warmer housing. In this position the basket will be even/flush with the housing.


- FOR GLASS BOTTLES Put the bottle basket in the bottle warming chamber and turn the bottle basket to a 45-degree angle (basket will slide into place). In this position the bottle basket will sit about 1 inch above the housing.
BOTTLE WARMING CONTINUED
6.
- In the dial to ON position, Blue LED indicator will turn on. The unit will shut off automatically once bottle warming is complete. Turn the dial to the OFF position.
Let the bottle sit for 15 to 30 seconds. Remove extremely carefully. Shake the bottle to distribute the heated contents before checking the temperature.
When warming a narrow bottle, we suggest that you use the adapter ring. Position the adapter ring over the bottle* sitting in the bottle warming chamber and turn the dial to the ON position. Blue LED indicator will turn on. The unit will shut
off automatically once bottle warming is complete. Turn the dial to the OFF position.

*NOTE: IF THE ADAPTER RING DOES NOT FIT LOOSELY AROUND THE BOTTLE, DO NOT USE THE RING.
FOOD WARMING
1.
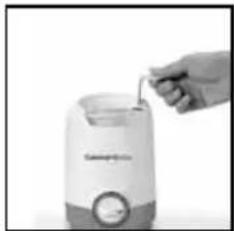
Remove the lid of the food jar and then put the jar in the food warming basket. Use the handle to lower it into the bottle warming chamber. Turn the dial to the ON position. Blue LED indicator light will turn on. The unit will shut off automatically once food warming is complete. Turn the dial to the OFF position.

Let the jar sit for 15 to 30 seconds before removing. Use the handle of the food-warming basket to lift the jar out of the warming chamber. When you remove the jar from the unit, the contents of the jar will not be evenly heated. Stir the food to distribute the heated contents before checking the temperature.
NIGHTLIGHT
1.
To turn the nightlight on, press the gray button with the word LIGHT above it located on the top of the unit.
Light will illuminate from the measuring cup area and from around the dial. The nightlight will stay on until the button is pressed again.


IMPORTANT
Do not throw away. Read before operating your new Bottle Warmer. Keep for future reference.
These helpful hints are intended to be a supplement to the Instruction Booklet. In order to ensure safe operation and optimum performance, please read the entire Instruction Booklet.


Brand : CUISINART
Model : Baby BW-10PK
Category : Baby product