
SI5020N - Griddle SWAN - Free user manual and instructions
Find the device manual for free SI5020N SWAN in PDF.


| Product Type | Steam Iron |
| Brand | Swan |
| Model | SI5020N |
| Power Supply | 220-240 V ~ 50 Hz |
| Power Consumption | 2200 Watts |
| Auto Shut-Off | Yes (upright: 8-15 min, flat: 25-30 sec) |
| Steam Output | Adjustable via steam control lever |
| Shot of Steam Function | Yes (max 5 seconds) |
| Vertical Steam Function | Yes (hold 15-30 cm from fabric) |
| Spray Function | Yes (tank must be more than 1/4 full) |
| Self-Cleaning System | Yes (weekly or more frequently in hard water areas) |
| Anti-Drip Feature | Yes (automatic water cut-off when temperature too low) |
| Temperature Control | Adjustable knob with neon light indicator |
| Water Tank Capacity | Approximately 300 ml (estimated) |
| Soleplate Material | Standard metal (not specified) |
| Power Cord Length | Approximately 2 m (estimated) |
| Weight | Approximately 1.2 kg (estimated) |
| Dimensions (L x W x H) | Approximately 30 x 12 x 15 cm (estimated) |
| Safety Features | Auto shut-off, earthed plug, thermal fuse |
| Maintenance | Self-cleaning, wipe soleplate with damp cloth |
| Warranty | 2 years (UK and Eire only) |
| Package Contents | Iron, measuring cup, user manual |
Frequently Asked Questions - SI5020N SWAN
User questions about SI5020N SWAN
0 question about this device. Answer the ones you know or ask your own.
Ask a new question about this device
Download the instructions for your Griddle in PDF format for free! Find your manual SI5020N - SWAN and take your electronic device back in hand. On this page are published all the documents necessary for the use of your device. SI5020N by SWAN.
USER MANUAL SI5020N SWAN
Swan Electronic Steam Iron

INSTRUCTION GUIDE

MODEL NO.: SI5020
WASTE ELECTRICAL RECYCLING
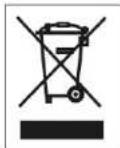
This symbol indicates that this product is classed as Electrical or Electronic Equipment and should not be disposed of with other household waste.
The Waste Electrical and Electronic Equipment (WEEE) Directive has been introduced across the European Union:
- to recycle waste electrical products using the best available recovery and recycling techniques in order to minimise the impact on the environment
• to treat any hazardous substances and
• to avoid increasing landfill.
WEEE product should be disposed of by handing it over at a designated collection point.
For more information about where you can drop off your waste product for recycling please contact your local authority.
GUARANTEE
This product is guaranteed for 2 years from the date of original purchase. If any defect arises due to faulty materials or workmanship, the unit will either be repaired, replaced or refunded at our discretion.
The following conditions apply:
- The product must be returned to the retailer with original proof of purchase.
- The product must be installed and used in accordance with the instructions contained in this instruction guide.
• It must be used only for domestic purposes. - It does not cover wear and tear, damage, misuse or consumable parts.
- SWAN has no responsibility for incidental or consequential loss or damage.
• Valid in the UK and Eire only.
TECHNICAL SPECIFICATION
Power source SI5020 220-240 V\~ 50Hz Power consumption SI5020 2200 Watts with Auto shut off.
CE
LRL UK
L70 1AB
Box MPRC8
IMPORTANT SAFEGUARDS
- Please read these instructions in conjunction with the illustrations before using the appliance.
- Before using for the first time, check if the voltage rating on the rating plate corresponds to the mains voltage in your home.
- Never use the appliance if it is damaged in any way.
• Take care that children cannot touch the iron when hot and that they cannot pull the mains cord. - Remove the plug from the socket before filling the iron with water or pouring out the remaining water after use. Always use the provided filling cup to fill water.
- Never immerse the iron in water.
- When you have finished ironing, and also when leaving the iron even for a short while
- set the variable steam knob to position of no steam;
- stand the iron upright;
- remove the mains plug from the wall socket.
Note: the soleplate may become damaged if the iron is stored with the soleplate facing downwards. - Some parts of the iron have been slightly greased and as a result the iron may smoke slightly when switched on for the first time. After a short while, however, this will cease.
- Before using for the first time remove any sticker or protective foil from the soleplate. Clean the soleplate with a soft cloth.
- Do not put vinegar or other descaling agents into the water reservoir.
- Do not use chemically descaled water.
- The cordset should not be allowed to touch the hot soleplate.
- Do not try to repair the iron, plug or power cord on your own.
• This is an attended appliance. Never leave it unattended. - If supply cord is damaged, it must be replaced by the manufacturer or its service agent or a similarly qualified person, in order to avoid a hazard.
- Press the 'Shot of Steam button', the steam will penetrate the fabric to remove the creases.
Self-cleaning
In order to remove lime and dust particles, the self-cleaning system should be used weekly or more frequently in hard water areas..
- Fill the measuring beaker provided half-full and then pour into the water reservoir.
- Set the steam control lever to the Off position.
- Insert the mains plug into the wall socket.
- Set the temperature control knob to MAX.
- Wait unit the neon light goes out.
- Remove the plug from the wall socket.
- Hold the steam iron horizontally over a sink.
- Move the steam control lever to 1 (on). Hot water and steam will be emitted from the soleplate. Swing the steam iron lightly to and fro to allow lime and dust particles to come out.
- When the water reservoir is empty, release the self-cleaning button and let it cool down completely.
- Stand the steam iron upright and insert the plug into the wall socket to let the steam iron heat up again.
- Move the steam iron over a clean cotton cloth to clean the soleplate.
Cleaning
- Before cleaning remove the mains plug from the wall socket and allow the iron to cool down sufficiently.
- Scale and other residue can be wiped off the soleplate with a damp cloth and some non-scratching proprietary cleaner.
Storage
- Remove the mains plug from the wall socket.
- Pour any remaining water out of the water reservoir, taking care to avoid splashing as the water may still hot.
- Set the steam lever to no steam position.
- Stand the iron upright and let it cools down sufficiently before storage.
Wool / Silk
... Cotton / Linen
Dry ironing
Either empty the water reservoir or move the steam control to Off position.
- Set the temperature control knob F to the desired setting. The neon light serves as the setting reference point. Stand the iron on its heel.
- Wait until the red neon light goes to a non flashing (steady) state then flashing again before using.
Spray
At any temperature, by pressing the spray button a couple of times, the laundry can be damped down. Tank must be more than 1/4 full.
Steam Ironing
ALWAYS start by ironing items which require the lowest temperature setting.
- Ensure that there is enough water in the tank.
- Insert the mains plug into the wall socket.
- Set the temperature control knob F to the desired setting. The neon light serves as the setting reference point. Stand the iron on its heel.
- Wait until the red neon light goes out then comes on again.
- Ironing in horizontal position and the iron will automatically begin to steam.
• The steam output can be adjusted using the steam control lever. - This iron has a built-in anti-drip feature. The supply of water is cut off automatically to avoid any drips from the soleplate when the temperature of the iron is too low to produce steam.
Shot of Steam
By pressing 'Shot of Steam' button, an intense shot of steam is emitted from the soleplate. To prevent water leaking from the soleplate, do not keep the button depressed for more than 5 seconds. Tank must be more than 1/4 full.
Vertical Steam Ironing
Your iron can be used for vertical steam ironing. This process can be applied to curtains, dresses on hangers etc.
- Set the steam Control lever to position 1.
• Hold the iron 15-30cm from the fabric.
ELECTRICAL SAFETY
Before switching on, make sure that the voltage of your electricity supply is the same as that indicated on the rating plate. This product is designed to operate on AC 220V-240V, 50Hz. Connecting it to any other power source may damage the unit. This product may be fitted with a non-rewireable plug. If it is necessary to change the fuse in the plug, the fuse cover must be refitted. If the fuse cover becomes lost or damaged, the plug must not be used until a suitable replacement is obtained. If the plug has to be changed because it is not suitable for your socket, or due to damaged, it should be cut off and an appropriate plug fitted following the wiring instructions below. This should be carried out by a qualified electrician. The plug removed must be disposed of safety, as insertion into a 13Amp socket is likely to cause an electrical hazard.
IMPORTANT - THIS APPLIANCE MUST BE EARTHED.
Wiring Instructions
The wires in this mains lead are coloured in accordance with the following code:
Blue = Neutral
Brown = Live
Green + Yellow = Earth
As the colours of the wires in the mains lead of this appliance may not correspond with the coloured markings identifying the terminals in your plug, proceed as follows (refer to the plug wiring diagram).

- The wire which is coloured Blue must be connected to the terminal which is marked with the letter N or coloured Black.
- The wire which is coloured Brown must be connected to the terminal which is marked with the letter L or coloured Red.
- The wire which is coloured Green & Yellow must be connected to the terminal which is marked with the letter E or ⊕, or coloured Green.
If a 13Amp (BS1363) plug is used, a 13Amp (BS1362) fuse must be fitted, or if any other type of plug is used, a 13Amp fuse must be fitted, either in the plug or adaptor, or on the Distribution Board.
KNOWING YOUR IRON

KNOW YOUR STEAM/SPRAY/DRY IRON
A. Spray Button
B Shot of Steam Button
C Steam Control Lever
D Water tank filler cover
E Water tank
F Temperature control knob
G Self clean button
Safety auto shut-off ( Model SI5020 only).
For safety reasons, your iron will automatically stop heating if it's left :
- upright for 8-15 minutes, or
- flat for 25-30 seconds.
The red neon light will flash to show that the iron is not heating. To re start heating simply move or gently shake the iron.
USING YOUR IRON
Getting started
Remove your iron carefully from the box. You may wish to store the packaging for future use. Remove any packing or labels on the sole plate.
Filling with water (for steam-ironing and spraying)
• Fill with normal tap water for first use.
- Subsequently, you can also use tap water. However, if the water is very hard (hardness higher than 17° dH), it is advisable to use distilled water.
- Remove the mains plug from the wall socket before filling the iron. Set the steam control to position Off.
- Open water inlet cover and use the measuring beaker provided for pouring water into the filling aperture. DO NOT exceed MAX level.
Before Using the Iron
Before using for the first time it is important to purge the inside of the iron by allowing it to steam freely for a minute. This allows removal of any impurities left by the manufacturing process.
• Fill the water tank.
- Set the steam control to Off.
- Insert the mains plug into the wall socket.
- Set the temperature control knob F to MAX. Stand the iron on its heel.
• Wait until the red neon light goes out.
- Place a clean piece of cotton on the ironing board.
- Set the steam control to 1 (on), place the iron on the cotton and press the steam shot button several times to clean out the steam chamber.
NOTE: It is normal for a strong smell of hot oil at this stage. This will soon disappear.
Setting the temperature
Always follow the ironing instructions attached to the garment. Sort your ironing into groups and start with the coolest setting, then increase the setting as required.
• Polyamide / Nylon
- SWAN ELECTRONIC STEAM IRON
- INSTRUCTION GUIDE
- WASTE ELECTRICAL RECYCLING
- GUARANTEE
- TECHNICAL SPECIFICATION
- IMPORTANT SAFEGUARDS
- SELF-CLEANING
- CLEANING
- STORAGE
- DRY IRONING
- SPRAY
- STEAM IRONING
- SHOT OF STEAM
- VERTICAL STEAM IRONING
- ELECTRICAL SAFETY
- IMPORTANT - THIS APPLIANCE MUST BE EARTHED
- WIRING INSTRUCTIONS
- KNOWING YOUR IRON
- KNOW YOUR STEAM/SPRAY/DRY IRON
- SAFETY AUTO SHUT-OFF ( MODEL SI5020 ONLY)
- USING YOUR IRON
- GETTING STARTED
- FILLING WITH WATER (FOR STEAM-IRONING AND SPRAYING)
- BEFORE USING THE IRON
- SETTING THE TEMPERATURE
Brand : SWAN
Model : SI5020N
Category : Griddle