
EFG9H60X - Frying Pan EAS Electric - Free user manual and instructions
Find the device manual for free EFG9H60X EAS Electric in PDF.


| Product Type | Freestanding Gas & Electric Cooker |
| Brand | EAS Electric |
| Model | EFG9H60X |
| Color | Stainless Steel |
| Dimensions (W x D x H) | 900 x 600 x 900 mm (approx.) |
| Weight | 70 kg (approx.) |
| Energy Type | Gas (Natural/LPG) and Electric |
| Power Supply | 220-240 V ~ 50/60 Hz |
| Gas Types | Natural Gas (G20 20 mbar) and LPG (G30 30 mbar) |
| Number of Gas Burners | 4 (Auxiliary 0.85 kW, Semi-rapid 1.50 kW, Rapid 2.30 kW, Triple Crown 3.60 kW) |
| Oven Type | Gas oven with electric grill and rotisserie |
| Oven Capacity | 90 L (approx.) |
| Heating Elements (Electric) | Bottom 1800W, Top 1500W, Ventilated 2000W x2, Grill 2000W, Hot plates 1500W and 1000W |
| Functions | Static, Grill, Rotisserie, Fan-assisted static, Fan-assisted grill, Fan-assisted bottom, Circular, Turbo, Defrosting, ECO |
| Controls | Front panel knobs for gas burners, oven thermostat, grill/rotisserie selector, electronic programmer (optional) |
| Safety Features | Thermocouple on gas burners, electronic spark ignition, glass lid safety, oven door safety switch |
| Cleaning | Stainless steel surfaces, removable burner caps and flame-spreader crowns, oven door glazing |
| Spare Parts | Oven bulb 25W T300°C, gas nozzle set for LPG/Natural conversion |
| Accessories Included | Oven rack, deep tray, chromium-plated gripper, rotisserie rod |
| Repairability | Removable oven door, burner nozzle replacement, thermostat and tap adjustments |
Frequently Asked Questions - EFG9H60X EAS Electric
• Auxiliary burner: 12-14 cm
• Semi-rapid burner: 16-24 cm
• Rapid burner: 18-26 cm
• Triple crown burner: 18-26 cm
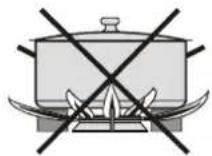
Use flat and smooth-bottomed pans that do not extend beyond the hob edge.
User questions about EFG9H60X EAS Electric
0 question about this device. Answer the ones you know or ask your own.
Ask a new question about this device
Download the instructions for your Frying Pan in PDF format for free! Find your manual EFG9H60X - EAS Electric and take your electronic device back in hand. On this page are published all the documents necessary for the use of your device. EFG9H60X by EAS Electric.
USER MANUAL EFG9H60X EAS Electric
natural_image
Line drawing of a simple kitchen appliance with a front panel and six burners (no text or symbols)EFG9B60X
EFG9B60W
EFG9H60X
EFG9H60C
EFG9H60N
natural_image
Isometric line drawing of a square frame with internal geometric lines and mounting holes (no text or symbols)Bandeja de Horno de 90 X60

natural_image
Isometric line drawing of a rectangular tray or container with internal compartments (no text or symbols)natural_image
Isometric view of a rectangular metal grate with parallel slats (no text or symbols)Bandeja de horno de 90 X60
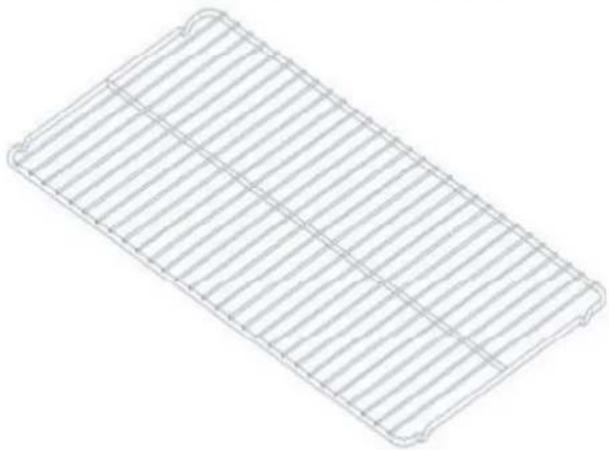
natural_image
Line drawing of a rectangular grid pattern with vertical lines, no text or symbols present
natural_image
Technical line drawing of a mechanical assembly with gears and shafts (no text or symbols)OPCIÓN
Asador de pollos
V. 3

natural_image
Pure technical line drawing of a rectangular frame with internal oval and connected components (no text or symbols)OPCIÓN
natural_image
Two black-and-white illustrations showing a person pushing a large block with an arrow, and another person falling on a ramp (no text or symbols)natural_image
Technical line drawing of a mechanical assembly with no visible text or symbols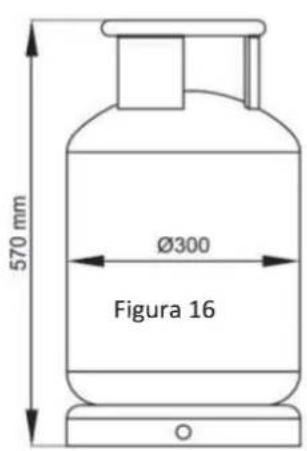
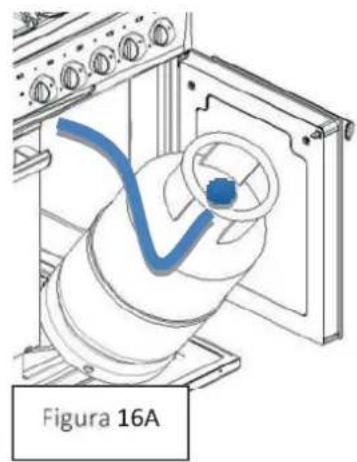
natural_image
Technical line drawing of a mechanical component with a blue winding line, labeled Figura 16A (no readable text or symbols)
natural_image
Technical line drawing of a mechanical assembly with no visible text or symbols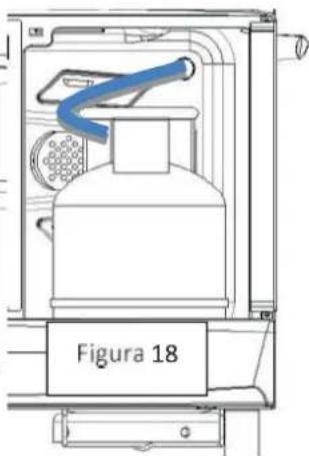
natural_image
Diagram of a mechanical component with a magnified inset showing a pin and adjustment (no text or symbols)Figura 19.1

Figura 19.2
natural_image
Technical line drawing of a mechanical component with three views: top view, front view, and side view (no text or symbols)Figura 19.3
natural_image
Simple line drawing of a mechanical component with a handle and circular base, labeled '19.4' (no text or symbols on the diagram itself)flowchart
graph TD
    A["Grid with filled squares"] --> B["Step 1: Circle with dots"]
    B --> C["Step 2: Square with filled squares"]
    C --> D["Step 3: Square with filled squares"]
    D --> E["Step 4: Square with filled squares"]
    E --> F["Step 5: Square with filled squares"]
    F --> G["Arrow Right"]
    H["Circle with star"] --> I["Step 6: Circle with dots"]
    I --> J["Step 7: Circle with dots"]
    J --> K["Step 8: Circle with dots"]
natural_image
Simple line drawing of a cooking pot with crossed black lines indicating prohibition (no text or symbols)
natural_image
Cross-sectional technical drawing of a mechanical assembly (no visible text or labels)
natural_image
Simple line drawing of a fire extinguisher with flames and smoke (no text or symbols)natural_image
Technical illustration of a mechanical tool with multiple clamps and a handle, labeled V. 3 (no text or symbols on the tool itself)ES
natural_image
Simple line drawing of a circle with internal diagonal lines and an arrow, no text or symbols present.natural_image
Simple black L-shaped arrow pointing right on white background (no text or symbols)
natural_image
Technical line drawing of a mechanical device interior with no visible text or symbols
natural_image
Simple line drawing of a cooking pot with arrows indicating flow or pressure direction (no text or symbols)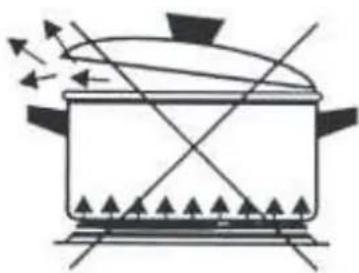
natural_image
Simple line drawing of a cooking pot with steam rising and cooling (no text or symbols)
natural_image
Diagram of a cooking pot with directional arrows indicating flow or movement (no text or symbols)natural_image
Simple line drawing of a cooking pot with arrows indicating heating direction (no text or symbols)natural_image
Simple line drawing of a disc with a lid and base, no text or symbols presentnatural_image
Illustration of hands pressing down on a circular object (no text or symbols)

natural_image
Diagram of a mechanical lever system with labeled parts (C, D) and directional arrows, no readable text or symbols present.
natural_image
Mechanical device with rotating arm and labeled point A, no visible text or symbolsnatural_image
Three mechanical components with arrows indicating motion, no text or symbols presentnatural_image
Line drawing of a simple kitchen appliance with a double boiler and four side fans (no text or symbols)Contents
1 INSTRUCTIONS FOR SAFETY AND USE 4
2 RECYCLING INSTRUCTIONS - OUR ENVIRONMENT POLICY 6
3 INSTALLING THE APPLIANCE 7
4 ADAPTATION TO DIFFERENT TYPES OF GAS 11
5 FINAL OPERATIONS 14
6 DESCRIPTION OF THE CONTROLS ON THE FRONT PANEL 16
7 USING THE HOB 18
8 USING THE OVEN 20
9 ELECTRONIC PROGRAMMER (ON CERTAIN MODELS ONLY) 24
10 DIGITAL TIMER (ON CERTAIN MODELS ONLY) 26
11 ANALOGUE CLOCK (ON CERTAIN MODELS ONLY) 26
12 CLEANING AND MAINTENANCE 27
13 EXTRAORDINARY MAINTENANCE 29
14 AVAILABLE ACCESSORIES 30

INSTRUCTIONS FOR THE INSTALLER: these are intended for the qualified technician who must carry out an adequate inspection of the gas system, install the appliance, set it functioning and test it.

INSTRUCTIONS FOR THE USER: these contain user advice, the description of the controls and the correct procedures for cleaning and maintenance of the appliance.
Presentation
1 INSTRUCTIONS FOR SAFETY AND USE

THIS MANUAL IS AN INTEGRAL PART OF THE APPLIANCE. THEREFORE IT MUST BE KEPT IN ITS ENTIRETY AND IN AN ACCESSIBLE PLACE FOR THE WHOLE WORKING LIFE OF THE COOKER. WE ADVISE YOU TO READ THIS MANUAL AND ALL THE INFORMATION IT CONTAINS CAREFULLY BEFORE USING THE COOKER. ALSO KEEP THE SERIES OF NOZZLES PROVIDED. INSTALLATION MUST BE CARRIED OUT BY QUALIFIED PERSONNEL IN ACCORDANCE WITH THE REGULATIONS IN FORCE. THIS APPLIANCE IS INTENDED FOR DOMESTIC USE AND CONFORMS TO THE EEC DIRECTIVES CURRENTLY IN FORCE. THE APPLIANCE HAS BEEN BUILT TO CARRY OUT THE FOLLOWING FUNCTION: COOKING AND HEATING UP FOOD; ALL OTHER USES SHOULD BE CONSIDERED UNSUITABLE. THE MANUFACTURER CANNOT BE HELD LIABLE FOR USES OTHER THAN THOSE INDICATED.

NEVER LEAVE DISCARDED PACKAGING UNATTENDED IN THE HOME. SEPARATE WASTE PACKAGING MATERIALS BY TYPE AND CONSIGN THEM TO THE NEAREST SELECTIVE WASTE COLLECTION CENTRE.

IT IS OBLIGATORY FOR ALL ELECTRICAL EQUIPMENT TO BE EARTHED ACCORDING TO THE METHODS LAID DOWN BY SAFETY REGULATIONS.
THE PLUG TO BE CONNECTED TO THE POWER SUPPLY CABLE AND ITS SOCKET MUST BE OF THE SAME TYPE AND CONFORM TO THE REGULATIONS IN FORCE. THE SOCKET MUST BE ACCESSIBLE AFTER THE APPLIANCE HAS BEEN BUILT IN. NEVER UNPLUG BY PULLING ON THE CABLE.
IMMEDIATELY AFTER INSTALLATION, CARRY OUT A QUICK TEST ON THE APPLIANCE FOLLOWING THE INSTRUCTIONS PROVIDED LATER IN THIS MANUAL. SHOULD THE APPLIANCE NOT FUNCTION, DISCONNECT IT FROM THE POWER SUPPLY AND CALL THE NEAREST TECHNICAL ASSISTANCE CENTRE. NEVER ATTEMPT TO REPAIR THE APPLIANCE.

ALWAYS CHECK THAT THE CONTROL KNOBS ARE IN THE Ⓞ (OFF) POSITION WHEN YOU FINISH USING THE APPLIANCE.

NEVER PLACE FLAMMABLE OBJECTS IN THE OVEN: IF IT SHOULD ACCIDENTALLY BE SWITCHED ON, THIS MIGHT CAUSE A FIRE.

THE IDENTIFICATION PLATE WITH THE TECHNICAL DATA, SERIAL NUMBER AND BRAND NAME IS IN A VISIBLE POSITION ON THE BACKSIDE OF THE OVEN. DO NOT REMOVE THIS PLATE FOR ANY REASON.
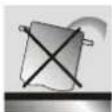
NEVER PLACE PANS WITH BOTTOMS WHICH ARE NOT PERFECTLY FLAT AND SMOOTH ON THE HOB RACKS.
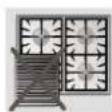
NEVER USE PANS OR GRIDDLES WHICH PROJECT BEYOND THE OUTSIDE EDGE OF THE HOB.

HOLD THE GLASS LID WITH YOUR HAND WHILE LOWERING IT.
WARNING: THE GLASS LID CAN SPLINTER IF OVERHEATED.
TURN OFF ALL THE BURNERS AND WAIT FOR THEM TO COOL DOWN BEFORE CLOSING IT.
DURING USE THE APPLIANCE BECOMES VERY HOT.TAK E CARE NEVER TO TOUCH THE HEATING ELEMENTS INSIDE THE OVEN.
Presentation

THE USE OF THIS APPLIANCE IS NOT PERMITTED TO PEOPLE (INCLUDING CHILDREN) OF REDUCED PHYSICAL AND MENTAL ABILITY, ORLACKING IN EXPERIENCE IN THE USE OF ELECTRICAL APPLIANCES, UNLESS THEY ARE SUPERVISED OR INSTRUCTED BY ADULTS OR PEOPLE RESPONSIBLE FOR THEIR SAFETY.

INSTALL THE APPLIANCE SO THAT WHEN OPENING DRAWERS AND DOORS OF UNITS POSITIONED AT THE LEVEL OF THE HOB THERE IS NO POSSIBILITY OF MAKING CONTACT WITH PANS POSITIONED ON TOP OF IT.

THIS APPLIANCE IS MARKED ACCORDING TO EUROPEAN DIRECTIVE 2012/19 /UE WASTE ELECTRICAL AND ELECTRONIC EQUIPMENT (WEEE).
THIS DIRECTIVE DETERMINES THE STANDARDS FOR THE COLLECTION AND RECYCLING OF WASTE ELECTRICAL AND ELECTRONIC EQUIPMENT APPLICABLE THROUGHOUT THE EUROPEAN UNION.
BEFORE THE APPLIANCE IS PUT INTO OPERATION, ALL LABELS AND PROTECTIVE FILMS APPLIED INSIDE OR OUTSIDE MUST BE REMOVED.
The manufacturer cannot be held liable for damage to persons or things caused by failure to comply with the above requirements or by tampering with any part of the appliance or by the use of non-original spare parts.
The environment – Instructions for recycling
2 RECYCLING INSTRUCTIONS - OUR ENVIRONMENT POLICY
Our household appliances are only packaged using non-pollutant, environment-friendly, recyclable materials. Please help by disposing of the packaging correctly. You can obtain the addresses of collection, recycling and disposal centres from your retailer or from the competent local organisations.
Never leave all or part of the packaging lying around.
Your old appliance also needs to be disposed of correctly.
Important: deliver the appliance to the local agency authorised for the collection of household appliances no longer in use.
Correct disposal enables intelligent recovery of valuable materials. Refrigeration appliances contain gases which may damage the environment; it is therefore important to ensure that the refrigeration circuit pipelines are not damaged until the competent service has accepted delivery of the appliance.
Before disposing of your appliance it is important to remove doors and leave shelves in position as for use, to ensure that children cannot accidentally become trapped inside during play. It is also necessary to cut the connecting cable to the power supply network, removing it along with the plug.
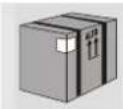
NEVER LEAVE DISCARDED PACKAGING UNATTENDED IN THE HOME. SEPARATE THE VARIOUS WASTE PACKAGING MATERIALS BY TYPE AND CONSIGN THEM TO THE NEAREST SELECTIVE WASTE COLLECTION CENTRE.

INFORMATION FOR USERS:
The european directive 2012/19 /UE on wasted electrical and electronic equipments (WEEE), requires that household electrical appliances must not be disposed of in the normal unsorted municipal waste stream. appliances must be collected separately in order to optimize the recovery and recycling of the materials they contain, and reduce the impact on human health and the environment. The crossed out "wheeled bin" symbol on the product reminds you of your obligation, that when you disposed of the appliances, it must be separately collected. Consumers should contact their local authority or retailer for information concerning the correct disposal of their old appliance.
Instructions for the installer
3 INSTALLING THE APPLIANCE

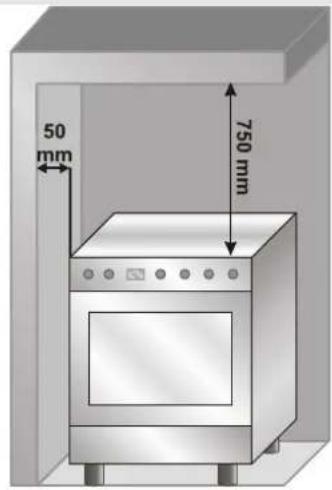
The appliance must be installed by a qualified technician and according to the standards in force. Depending on the type of installation, it belongs to class 1 (Fig.A) or to class 2, subclass 1 (Fig.B-C). This appliance may be installed next to walls, one of which must be higher than the appliance, at a minimum distance of 50 mm from the side of the appliance, as shown in drawings A and B relative to the installation classes. Any wall cupboards or ventilation hoods must be at a distance of at least 750 mm above the work surface.

Built-in
Free-standing installation
B

natural_image
Illustration of a kitchen appliance with oven, cabinets, and drawer (no text or symbols)Instructions for the installer
3.1 Electrical connection
Make sure the voltage and the cross-section of the power supply line match the specifications indicated on the identification plate positioned on the backside of the oven.
Do not remove this plate for any reason.
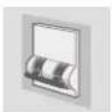
If the appliance is connected to the power supply network by means of a fixed connection, install a multipolar cut-out device on the power supply line, in compliance with installation regulations, located near the appliance and in an easily reachable position.

Connection to the power supply network may be fixed or with a plug and socket. In the latter case the plug and socket must be suitable for the cable employed and conform to the regulations in force. Regardless of the type of connection, the appliance must be earthed. Before connection, make sure that the power supply line is suitably earthed. Avoid use of adapters and shunts.

1 - For operation on 220-240V \~: use a H05V2V2-F type three-core cable (3 x 1.5 mm²).
The end to be connected to the appliance must have an earth wire (yellow-green) at least 20 mm longer than the others.
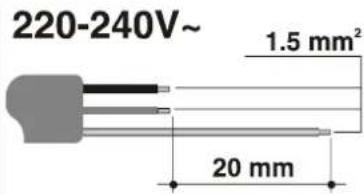

WARNING: THE VALUES INDICATED ABOVE REFER TO THE CROSS-SECTION OF THE INTERNAL CONDUCTOR.
3.2 Room ventilation

The room containing the appliance should have an air supply in accordance with the standards in force. The room where the appliance is installed must have enough air flow as required for the regular combustion of gas and by the necessary air exchange of the same room. The air vents, protected by grills, must be suitably dimensioned in compliance with the current regulations and positioned so that no part of them is obstructed.
The cooker must be kept adequately ventilated in order to eliminate the heat and humidity produced by cooking: in particular, after prolonged use, you are recommended to open a window or to increase the speed of any fans.

Instructions for the installer
3.3 Extraction of the combustion products

The combustion products may be extracted by means of hoods connected to a natural draught chimney whose efficiency is certain or via forced extraction. An efficient extraction system requires precision planning by a specialist qualified in this area and must comply with the positions and distances indicated by the regulations. When the job is complete, the installer must issue a certificate of conformity.
3.4 Connection to gas
3.4.1 Connection with a rubber hose

Installation with a standards-compliant rubber hose must be carried out so that the length of the piping does not exceed 1.5 metres; make sure that the hose does not come into contact with moving parts and that it is not crushed in any way. The inside diameter of the hose must be 8 mm for LPG GAS and 13 mm for NATURAL GAS.
Verify that all the following conditions are met:
• the hose is fixed to the hose connection with safety clamps;
• no part of the hose is in contact with hot walls (max. 50 °C);
• the hose is not under traction or tension and has no tight curves or twists;
• the hose is not in contact with sharp objects or sharp corners;
- if the hose is not perfectly airtight and leaks gas, do not try to repair it: replace it with a new hose;
• verify that the hose is not past its expiry date (serigraphed on the hose itself).

CONNECTION USING RUBBER HOSES COMPLYING WITH THE CURRENT REGULATIONS IS ONLY PERMITTED IF THE HOSE CAN BE INSPECTED ALONG ITS ENTIRE LENGTH.

THE TIGHTENING TORQUE BETWEEN CONNECTIONS THAT INCORPORATE A GASKET MUST NOT EXCEED 10Nm.
3.4.2 Connection to natural and city gas
Make the connection to the gas mains using a rubber hose whose specifications comply with the current regulations (verify that the reference standard is stamped on the hose).
Carefully screw the hose connector A to the gas connector B of the appliance, placing the seal C between them. Push the rubber hose D onto the hose connector A and secure it with the clamp E that is compliant with the applicable standard.

For the connection between the cooker and the gas cylinder use a piece of standards-compliant hose no less than 1.4 m in length.
Instructions for the installer

3.4.3 Connection to LPG gas
Use a standards-compliant pressure regulator and carry out the connection to the gas cylinder in accordance with the regulations in force.
Make sure that the supply pressure complies with the values indicated in the paragraph "3.2/3.3 Burner and nozzle characteristics table".

3.4.4 Connection with a flexible steel hose (for all types of gas)
This type of connection can be made on both built-in and free-standing appliances. Only use standards-compliant steel hoses whose length is no greater than 2 metres. Screw the end of the flexible hose F onto the threaded 12 " external gas connector B with the seal C positioned in between them.
At the end of the installation, check for any leaks with a soapy solution, never with a flame.

4. ADAPTATION TO DIFFERENT TYPES OF GAS
Before performing any operations requiring access to powered parts, switch off the power supply to the appliance.

In the case of operation with other types of gas the burner nozzles must be changed and the minimum flame adjusted on the gas taps.
To change the nozzles, proceed as described below.
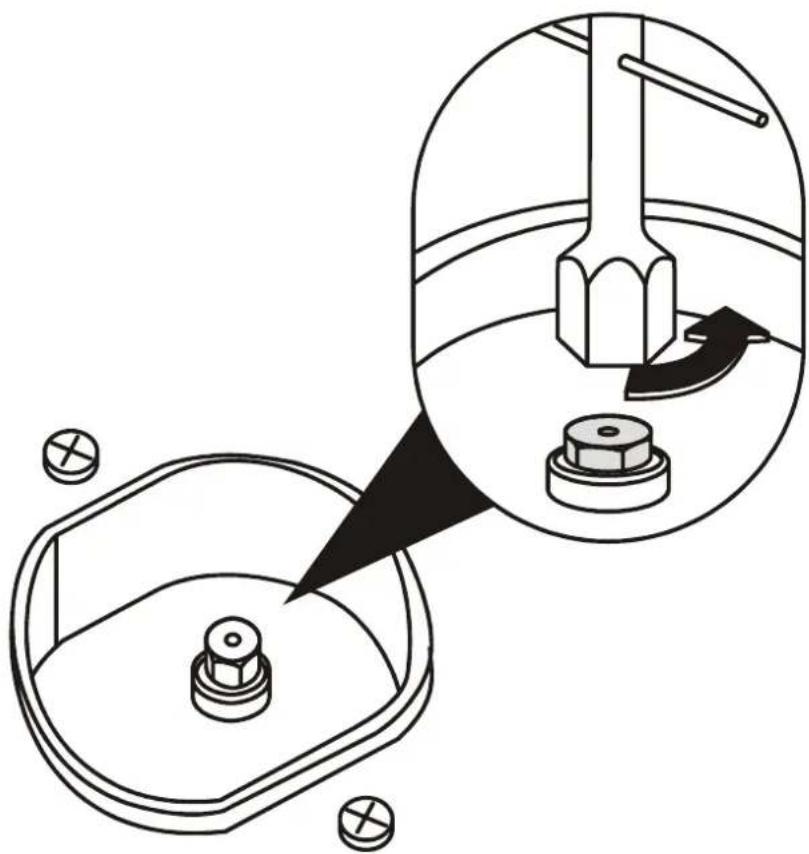
4.1 Replacement of nozzles on the hob
This operation does not require the primary air to be adjusted.
Extract the grids and remove all the caps and flame-spreader crowns;
Unscrew the burner nozzles with a 7 mm socket wrench;
Replace the nozzles according to t he type of gas to be used and the description in paragraph "4.2
Burner and nozzle characteristics table";
Replace the burners in the correct position.
natural_image
Technical diagram showing a mechanical assembly with a component inside a housing and a magnified view of the internal structure (no text or labels)Instructions for the installer
4.2 Burner and nozzle characteristics table
| Burner | Rated capacity (KW/H) | LPG GAS – G30 mbar | |
| Nozzle diameter 1/100 mm | Capacity g/h G30 | ||
| Auxiliary | 0.85 | 50 | 67 |
| Semi-rapid | 1.50 | 65 | 118 |
| Rapid | 2.30 | 80 | 181 |
| Triple crown | 3.60 | 98 | 284 |
| Maxi oven | 4.5 | 110 | 354 |
| Large grill | 3.00 | 92 | 236 |
| Burner | Rated heating capacity (KW/H) | NATURAL GAS – G20 20 mbar | |
| Nozzle diameter1/100 mm | CapacityM3/h G20 | ||
| Auxiliary | 0.85 | 0.70 | 82 |
| Semi-rapid | 1.40 | 0.92 | 142 |
| Rapid | 2.55 | 1.20 | 238 |
| Triple crown | 3.40 | 1.45 | 350 |
| Maxi oven | 3.70 | 1.50 | 394 |
| Large grill | 2.80 | 1.20 | 300 |
| BOTTON HEATING ELEMENT | 1800W |
| TOP HEATING ELEMENT | 1500W |
| VENTILATED HEATING ELEMENT | 2000W X 2 |
| GRILL HEATING ELEMENT | 2000W |
| HOT PLATE | 1500W |
| HOT PLATE | 1000W |
4.3 Arrangement of the burners on the hob

natural_image
Technical line drawing of a three-panel air vent system with circular components and mounting holes (no text or symbols)
natural_image
Line drawing of a double-door electric stove fan with four fans and three speakers (no text or symbols)HOB
- Auxiliary
- Semi-rapid
- Rapid
- Triple
4.4 Oven burner adjustment (only for models with a gas oven)
To adjust the oven burner you need to open the oven door and carry out the following operations:
- Remove the oven basic and its rack.
- Lift up the oven surface and pull it outwards.

natural_image
Interior view of a large industrial or laboratory facility with illuminated metal structures and structural beams (no visible text or symbols)4.4.1 Replacing the oven burner nozzle
• Loosen the oven burner fixing screw A.
- Push the burner B towards the right until the nozzle is accessible.
- Using a socket wrench replace the nozzle, inserting a new nozzle suitable for the type of gas to be used (see paragraph "4.2 Burner and nozzle characteristics table").

natural_image
Diagram of a heat exchanger or cooling unit with labeled components A and B (no text or symbols beyond labels)4.4.2 Primary air adjustment for the oven burner
- Loosen the adjustment screw A" of the air regulation sleeve.
- Turn the adjustment sleeve "B" to the position that corresponds to the type of gas to be used according to the table below.
- Tighten the adjustment screw and restore the seals.
- When the operation is completed, reassemble the burner correctly.
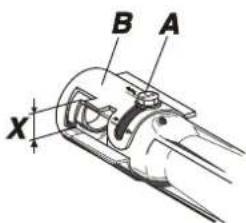
| NATURAL GAS (N) | G30/G31 (LPG) | |
| X = | 5 mm | 10 mm |
Instructions for the installer
5 FINAL OPERATIONS
After replacing the nozzles, reposition the flame-spreader crowns, the burner caps and the racks.

Following adjustment to a gas other than the preset one, replace the gas setting label fixed to the appliance with the one corresponding to the new gas.
5.1 Regulation of the hob burner minimum for natural gas
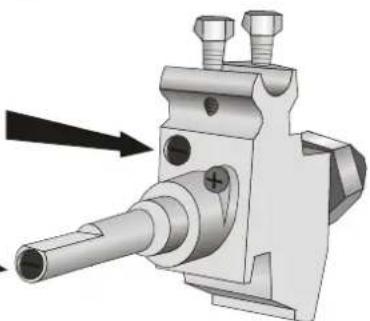
Light the burner and turn it to the minimum position △. Extract the gas tap knob and turn the adjustment screw to the top left of the tap rod until the correct minimum flame is achieved.
Refit the knob and verify that the burner flame is stable (when turning the knob rapidly from the maximum to the minimum position the flame must not go out). Repeat the operation on all the gas taps.
(can be here for some models)
natural_image
Mechanical component diagram showing a shaft and housing assembly with bolts (no text or symbols)
For valved models, keep the knob pressed in at the minimum level for a few seconds to keep the flame lit and to activate the safety device.
5.2 Adjusting the hob burner minimum for LPG gas
In order to adjust the minimum setting with LPG gas, the screw at the side of the tap rod must be tightened clockwise all the way.
When the adjustment is completed, restore the sealing of the by-passes with paint or another material.
5.3 Adjustment of the oven burner minimum
The oven valve is equipped with a screw for regulating the minimum, which can be seen by removing the thermostat knob.
When changing the type of supplied gas, the minimum must be adjusted as follows:
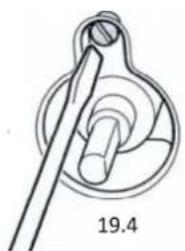
- Light the oven burner and keep it at the maximum for 10/15 minutes with the door closed and without the shelf; after this period, move the knob to the minimum temperature, slide off the knob and insert a straight edge screwdriver to make the adjustment.
- If using LPG gas the adjustment screw must be tightened clockwise to the very end.
- If using city gas or natural gas, adjust the screw so that when the oven knob is turned from the maximum to the minimum position, the flame remains steady and constant. When the adjustment is completed, restore the seal on the screws using paint or equivalent materials. When closing the oven door, make sure the burner remains lit at the minimum.

Instructions for the installer
5.4 Positioning and levelling the appliance
After making the electrical and gas connections, level the appliance on the floor by means of its four adjustable feet. For good cooking results, the appliance must be properly levelled. the feet height adjustment may vary from 90 to 120 mm. These heights refer to the distance between the highest point of the foot (fixed part) and the lowest point (movable part which rests on the floor).
7. DESCRIPTION OF FRONT PANEL CONTROLS
All the control and monitoring devices are clearly in view on the front panel. The symbols used are described in the table below.


FRONT RIGHT-HAND BURNER

HOT PLATE

REAR RIGHT-HAND BURNER
HOT PLATE

REAR LEFT-HAND BURNER

THERMOSTAT

FRONT LEFT-HAND BURNER

OVEN LIGHT / ROTISSERIE / GRILL

FUNCTION SELECTOR KNOB

Before using the oven/main oven, check that the display is showing the symbol 🎨 (see paragraph "11. ELECTRONIC PROGRAMMER".
HOB BURNER CONTROL KNOB
To light the flame, press the knob and turn it anti-clockwise to the minimum flame symbol .
To adjust the flame, turn the knob to the zone between the maximum ( ) and the minimum ( ) settings.
To turn off the burner, turn the knob to the ●position.
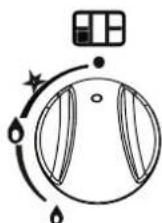
FUNCTION SELECTOR KNOB
The electric oven's various functions are suitable for different cooking modes. After selecting the function required, set the cooking temperature using the thermostat knob.

DEFROSTING

VENTILATED HEATING ELEMENT

BOTTOM HEATING ELEMENTS

TOP AND BOTTOM HEATING ELEMEN

TOP + BOTTOM HEATING ELEMENTS + VENTILATED HEATING ELEMENT

TOP HEATING ELEMEN

GRILL ELEMENT

natural_image
Diagram of a camera aperture with surrounding icons (no text or labels)Instructions for the user
6 DESCRIPTION OF THE CONTROLS ON THE FRONT PANEL
All the cooker controls are grouped together on the front panel.
The symbols used are described in the table below.

FRONT RIGHT-HAND BURNER
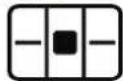
CENTRAL BURNER
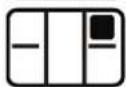
REAR RIGHT-HAND BURNER
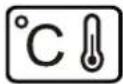
GAS OVEN THERMOSTAT

REAR LEFT-HAND BURNER
OVEN LIGHT / ROTISSERIE / GRILL

FRONT LEFT-HAND BURNER

BURNER IGNITION KNOB

LIGHT SWITCH-ON

If the cooker is equipped with an electronic programmer, before using the oven make sure that 📄 appears on the display; see “9.1 Setting the time”.
HOB BURNERS CONTROL KNOB (ON SOME MODELS ONLY)
To light the flame, press the knob and turn it anticlockwise to the minimum flame symbol / . To adjust the flame, turn the knob to the zone between the maximum ( / ) and minimum ( / ) settings. To turn off the burner, turn the knob to the position.

BURNER IGNITION BUTTON (ON SOME MODELS ONLY)
In the models fitted with this button, the flame is ignited by turning the knob anticlockwise to the minimum flame setting / while simultaneously pressing this button. To adjust the flame, turn the knob to the zone between the maximum ( / ) and minimum ( / ) settings. To turn off the burner, turn the knob to the position.

natural_image
Simple line drawing of a moon with a star and a circular symbol, no text or symbols present.Instructions for the user
GAS OVEN THERMOSTAT KNOB (ON SOME MODELS ONLY)
This knob allows the gas burner inside the oven to be lit. The cooking temperature is selected by turning the knob anticlockwise to the desired setting, between Min. and 275°C.
To learn how to light the gas oven, see paragraph "7.3 Using the gas oven".
OVEN LIGHT / ROTISSERIE / GRILL SWITCH KNOB
(ON SOME MODELS ONLY)
This knob enables the Grill / Rotisserie function to be activated or the light inside the oven to be lit to check the cooking progress of the food.
WARNING: IT IS NOT POSSIBLE TO OPERATE THE GAS OVEN AND THE GRILL / ROTISSERIE AT THE SAME TIME.
TIMER KNOB
(ON SOME MODELS ONLY)
To set the cooking time and the buzzer, turn the knob clockwise.
The numbers correspond to minutes (maximum 90 minutes).
Adjustment is progressive so that the time can also be set to any intermediate value between these numbers. The end of cooking buzzer does not interrupt operation of the oven.
OVEN LIGHT KEY
(ON SOME MODELS ONLY)
This key allows you to switch on the oven light at any moment.
This key allows you also to start the rotisserie motor.




THERMOSTAT KNOB
The cooking temperature is selected by turning the knob clockwise to the required setting, between 50^ and 300^ C.
The light comes on to indicate that the oven is heating up.
This light goes out when the set temperature is reached. It flashes at regular intervals to indicate that the temperature inside the oven is being kept constantly at the set level.

Instructions for the user

7 USING THE HOB
7.1 Lighting the hob burners

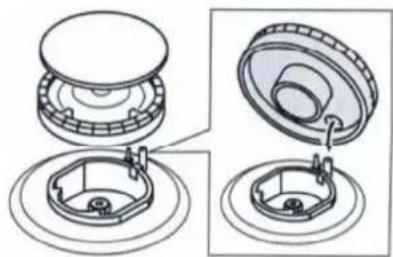
Before lighting the hob burners, check that the flame-spreader crowns are correctly in place with their respective burner caps, making sure that the holes A in the flame-spreaders are aligned with the igniters and thermocouples.
Before lighting the burners, lift the glass lid; before closing it again, turn off all the burners and wait for them to cool.
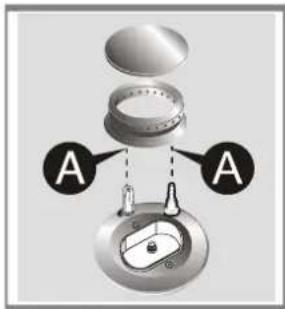
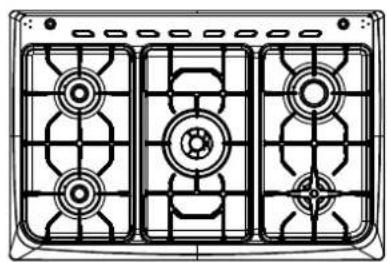
The burner controlled by each knob is shown next to the knob.
The appliance is equipped with an electronic ignition device. Simply press the knob and turn it anticlockwise to the minimum flame symbol ▲, until it lights. If it does not light in the first 15 seconds, position the knob on 0 and wait at least 60 seconds before trying to light it again.
On valved models, once the burner is lit, keep the knob pressed for a few seconds to give the thermocouple time to heat up. The burner may go out when the knob is released: in this case, the thermocouple has not heated up sufficiently.
Wait a few moments and repeat the operation keeping the knob pressed for longer. This is not necessary on burners that are not equipped with a thermocouple.

natural_image
Simple line drawing of a circular object with internal divisions and directional arrows, no text or symbols present.
On models with a thermocouple, if the burners should go out accidentally, a safety device will be tripped, cutting off the gas supply even if the gas tap is open. In this case, turn the knob to the OFF position and wait at least 60 seconds before trying to light the burner again.
7.2 Practical hints for using the hob burners

For better burner efficiency and to minimise gas consumption: use pans with lids and of suitable size for the burner, so that flames do not reach up the sides of the pan (see paragraph "6.3 Pan Diameters"). Once the contents come to the boil, turn down the flame far enough to ensure that the liquid does not boil over. To prevent burns or damage to the hob during cooking, all pans or griddles must be placed inside the perimeter of the hob. All pans must have smooth, flat bottoms. Take the greatest care when using fats or oils since they may catch fire if overheated. If the flame accidentally goes out, turn off the control knob and wait at least 1 minute before trying to re-light the burner.
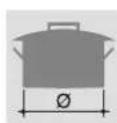
7.3 Pan diameters (60X90 cm model)
natural_image
Technical line drawing of a three-panel air vent system with circular components (no text or symbols)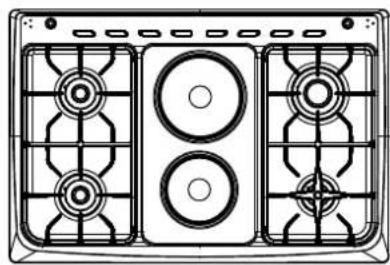
natural_image
Technical line drawing of a three-side fan or vent system with circular and square cutouts (no text or symbols)HOB
- Auxiliary
- Semi-rapid
- Rapid
- Triple
min. and max. ∅ (in cm)
12 - 14
16 - 24
18-26
18-26

WARNING
When switching on the hob for the first time, or if the hob has not been used for a long time, to remove any humidity from the insulating material it should be dried out by placing the hob on position 1 for 30 minutes.

To use correctly remember to:
- Switch the hob only after having placed the pan on it.
• Use flat and thick bottomed pans.
• Never use pans which are smaller than the hob.
• Dry the bottom of the pan before placing it on the hob. - After use, to make sure that the surfaces are clean and long lasting, the electric hob must be treated with specific cleaning products which are available on the market. This necessary operation prevents oxidisation (rust formation).
- When cooking with flammable oils and fats, never leave the appliance.
- The hobs will stay hot for a long time after use: do not touch them or place any objects on them.
- Before switching on the electric hobs, lift up the glass cover on the cooker; before closing it, switch off the hobs and wait for them to cool down.
- If any dents appear in the hob surface, switch it off immediately and contact the nearest authorised servicing centre.
Instructions for the user
8 USING THE OVEN

In models with an electronic programmer, before using the oven make sure that 📄 appears on the display.
In models with an analogue clock and a timer knob, it should be set to 📁.
8.1 General warnings and advice
Before using the oven and the grill for the first time, pre-heat to their maximum temperature (260°C for electric ovens and 275°C for gas ovens) long enough to burn away any manufacturing oily residues which could give the food unpleasant odours. After a power outage, the oven will show the display flashing and the symbol 000. To adjust it, see paragraph "9 ELECTRONIC PROGRAMMER ON CERTAIN MODELS ONLY").

During cooking, do not cover the bottom of the oven with aluminium or tin foil and do not place pans or oven trays on it as this may damage the enamel coating. If you wish to use greaseproof paper, place it so that it will not interfere with the hot air circulation inside the oven.

The oven accessories intended to come into contact with food are made of materials that comply with the provisions of the directives in force.

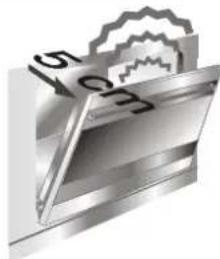
To prevent any steam in the oven from causing problems, open the door in two stages: half open (5 cm approx.) for 4-5 seconds and then fully open. To access food, always leave the door open as short a time as possible to prevent the temperature in the oven from falling and ruining the food.
natural_image
Illustration of a metallic mechanical component with engraved numbers (15, 20, 33) and a gear-like structure above it (no readable text or symbols)8.2 Using the gas oven
8.2.1 Electronic spark ignition (on some models only)
Open the oven door fully, press the gas oven knob and turn it anticlockwise to the maximum temperature; the electric spark ignition is activated automatically. When the oven is lit, keep the knob pressed down for a few seconds to allow the thermocouple to heat up.
If the burner does not ignite after 15 seconds, stop attempting to light it, open the oven door completely and do not try to light it again for at least 1 minute.
8.3.2 Manual ignition
Open the oven door fully and turn the oven knob. Bring a lighted match close to the mouth of flame pipe A at the centre of the oven surface and press the oven knob Once it is lit, keep the knob pressed down for a few seconds to allow the thermocouple to heat up and make sure that it has remained lit by looking through inspection hole B. The cooking temperature is selected by turning the knob clockwise to the desired setting, between 50°C and 275°C.


If the burner goes out accidentally while in use, turn the knob to the off position (●) and wait for at least one minute before relighting it.
8.4 Using the gas grill
8.4.1 Manual ignition of the gas grill burner
Having opened the oven door, press in the knob and turn it clockwise to the grill position , then bring a lit flame close to the burner on the roof of the oven.
When it is lit, keep the knob held down for about 10 send s. If the burner does not remain lit after this period, release the knob and wait for at least 1 minute before making a new attempt to light it. If the burner goes out accidentally, turn the knob to the off position (●) and wait for at least 1 minute before re-lighting it.
8.4.2 Electrical ignition of the gas grill burner
Having opened the oven door, press in the knob and turn it clockwise to the grill position.
When it is lit, keep the knob held down for about 10 seconds. If the burner has not lit after this period, release the knob and wait for at least 1 minute before making a new attempt to light it. If the burner goes out accidentally, turn the knob to the off position (●) and wait for at least 1 minute before re-lighting it.
If there is no electrical power, it is still possible to light the burner using matches.

WARNING: IT IS NOT POSSIBLE TO OPERATE THE GAS OVEN AND THE GAS GRILL AT THE SAME TIME.

Never open the storage compartment when the oven is on and still hot. The temperature inside may be very high.
If your cooker is equipped with knob guard, when cooking using the grill or grill + rotisserie it must be fitted as shown here, fitting the slots "A" onto the pins "B" in the top of the oven.

Instructions for the user
8.5 Using the rotisserie
8.5.1 Using the rotisserie in maxi oven cookers
Thread the support frame onto the second runner from the bottom so that the rod's housing protrudes from the oven. Position the rod as shown in figure (1) and push the frame into the oven until the end of the rod lines up with the rotisserie motor's hole. At this point, raise the rotisserie rod and push it to the left until it is in the position illustrated in figure (2). To activate this function, turn the switch to (1).
These operations must be performed with the oven off and cold.
At the end of cooking, use the tool provided to slide the rod out of the hole (3) and remove the frame so that the rotisserie rod can be taken out of the oven (4).
Note: The piece of meat or fisch you cook in the rostisserie can't weight more of 3 Kg.

natural_image
Interior view of an oven with a rack and double-headed arrows indicating flow or direction (no text or symbols visible)
natural_image
Close-up of a metallic screw or screw assembly with a central threaded component (no visible text or symbols)
natural_image
Close-up of a metallic mechanical component with threaded end and shaft (no visible text or symbols)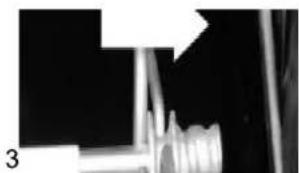
natural_image
Close-up of mechanical components with a white arrow pointing to a component (no visible text or symbols)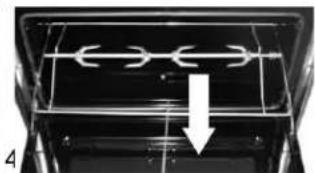
natural_image
Diagram of a mechanical component with internal flow arrows and a downward arrow, no readable text or symbols present.How to use the grill
When the oven has come on, confirmed by the red light switching on, leave it to heat up for 5 minutes before placing foods inside.
Food must be seasoned before cooking. Foods should also be coated with oil or melted butter before cooking. Use the oven tray to collect juice.
The foods to be cooked must be placed on the oven rack, which must then be placed on one of the runners fitted in the various types of ovens, following the guidelines below:


natural_image
Close-up of a metallic cylindrical object with three parallel rods, possibly a tool or component (no visible text or symbols)


FOODS
Flat, thin pieces of meat
Rolled roasts
Poultry
RACK ON THE SHELF
3
2-3
2-3
PRECAUTIONS

• Grilling processes must never last more than 60 minutes.
- In models with a gas oven, grill and grill + rotisserie cooking must be carried out with the door partially open to the first click.
• In models with a gas grill, the oven door must be closed during grill cooking operations.
- To prevent hazardous overheating, the appliance's glass lid must always be raised when using the oven or grill. The electric grill and the gas oven must never be used at the same time.
- Accessible parts may be very hot during and after use of the grill; keep children well away from the appliance.
- During rotisserie cooking operations, one of the trays supplied with the cooker should be placed on the bottom of the oven, on the first bottom runner, to collect any grease and fat produced.
- When using the oven, remove all unused trays and racks from its interior.
8.6 Storage compartment
The storage compartment is in the bottom of the cooker, underneath the oven. To open it, pull on the top of the door. Never use it to store flammable materials such as rags, paper, etc.; it is intended for storing the appliance's metal accessories only.

natural_image
Close-up of a white air conditioner drawer with a handle, showing interior opening and side profile (no text or symbols visible)
Do not open the storage compartment when the oven is on and still hot. The temperatures inside it may be very high.

Never use it to store flammable materials such as rags, paper, etc.; it is intended for storing the appliance's metal accessories only.
OKIDA
OT-3000-VFD OVEN TIMER USER'S MANUAL
GENERAL OVERVIEW
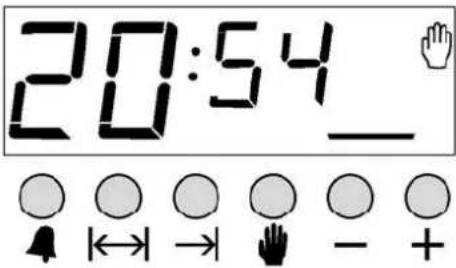
OT-3000-VFD is an electronic timer, which enables your oven to get the food ready to serve at the desired time. The only thing to be done is to program the cooking time and ready time. It can also be used as an alarm clock, where you just give in the amount of time after which it should remind you by a buzzer tone.
TIME OF DAY ADJUSTMENT
You can adjust the displayed time only if no automatic cooking program is in progress (there is just the time and the hand icon on the screen). Press the button, the double point icon between the hours and minutes will start to flash, use the (+) or (−) buttons for adjustment. Long presses of those buttons will enable fast adjustments.
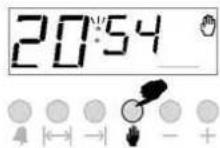
1) Switch into time adjustment mode.

2) Adjust the time using the + or - buttons.
-1-
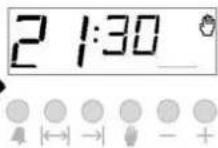
3) Screen will be stabilized in 5 seconds.

1) Switch your oven OFF
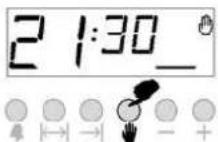
2) Reset the timer
Note. Your oven will be inoperative until you reset the timer.
In the example shown, cooking time has been programmed first, the ready time was calculated automatically and was edited by us. It is also possible first to program the ready time, in that case the cooking time will be calculated automatically and should be edited thereafter.
IN CASE MAINS POWER LOSS
Mains power interrupts will switch your oven into OFF mode. In that case the hand icon on the screen will flash and 12:00 will be displayed. Any cooking program will also be cancelled. Press the button to get your oven operative, press once again to the button switch to adjust the clock (See TIME OF DAY ADJUSTMENT) Note: If you will not use your oven right now, be sure that it is in OFF position.
FLASHING HAND ICON INDICATES THAT YOUR OVEN IS INOPERATIVE AND YOU SHOULD PRESS THE ⏻ BUTTON TO RESET
BUZZER TONE ADJUSTMENT
1) Reset the timer pressing 🔊 button once.
2) Pressing and holding the (-) button pressed, you can hear the current beep tone. Releasing and pressing the same button will result in the next tone. There are 3 different tones.
3) The last tone is stored as the preferred one and applied from now on.
Note : The factory setting is the highest tone. In case of a power interrupt, this tone will be the applied one.
1) Reset the timer pressing 🎯 button once.
2) By pressing and releasing the (+) button, you can scroll through the 3 available brightness settings. Every press will result in the next brightness setting.
3) The last setting is stored as the preferred one and applied from now on.
Note : The factory setting is the highest brightness. In case of a power interrupt, this will be applied.
-4-
ADJUSTING THE BUZZER ALARM
With this feature, you can program after how much elapsed time you should be warned by a buzzer sound.

1) Switch into buzzer alarm mode.

2) Give in the period of time to be counted down.

3) After a few seconds, the screen will return to clock mode.
Note: Once programmed, the remaining time can be seen by pressing the 🔊 button once

1) Buzzer will sound after the programmed amount of time elapses.


2) Press the 🔊 button to cancel.
AUTOMATIC COOKING PROGRAM
If you want to start cooking immediately, you just have to give in the cooking time.
Example: We placed our food into the oven and want it to be cooked for 2 hours and 15 minutes

1) Current time is 18:30.

2) Switch into cooking time mode.

3) Adjust the cooking time using the + or - buttons.
-2-
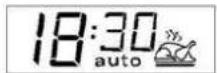

4) After a few seconds, the screen will indicate that cooking has started and show the current time
Now, you have programmed your oven to cook the food for 2 hours and 15 minutes. Please do not forget to bring the function and/or temperature knobs of your oven to appropriate positions.
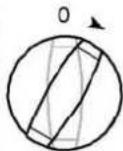
Note: You may cancel the automatic cooking mode any time by pressing the ⏻ button.
In the above example, cooking immediately started after giving in the cooking period. By pressing the button, you can see the ready time, ie. the time when the food will be ready to serve, and if you want, you can also change it. In the example below, the ready time will be changed to 21:30.


1) Displayed is the ready time 10:30+2:15=20.45.
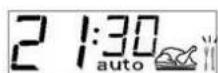

2) Set it to the desired time by using the + or - buttons.


3) In a few seconds, screen switches to clock mode
We now have programmed our oven to get the food ready at 21:30. Since the cooking time was preprogrammed as 2 hours 15 minutes, your oven will start cooking at 19:15, so that the food is ready at 21:30.


When automatic cooking is completed, a buzzer alarm is heared and will sound, if not stopped, for 7 minutes.
-3-
12 CLEANING AND MAINTENANCE
12.1 Cleaning stainless steel and enamelled versions

To keep stainless steel in good condition, it must be cleaned regularly when you are done using the cooker, after it has cooled.
12.1.1 Ordinary daily cleaning
To clean and preserve the stainless steel surfaces, always use only specific products that do not contain abrasives or chlorine-based acids.
How to use: pour the product onto a damp cloth and wipe the surface, rinse thoroughly and dry with a soft cloth or chamois leather.
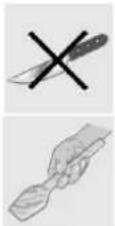
12.1.2 Food stains or residues
Do not use steel sponges or sharp scrapers as they will damage the surface.
Use normal non-abrasive products and a wooden or plastic tool if necessary.
Rinse thoroughly and dry with a soft cloth or chamois leather.
Do not allow residues of sugary foods (such as am) to set inside the oven. If left to set for too long, they might damage the enamel lining of the oven.
12.2 Cleaning the cooking hob's parts
12.2.1 Glass lid
For easier cleaning, the lid can be extracted from its hinges.
1- position it in the open position.
2- lift it upwards.

natural_image
Technical line drawing of a mechanical bracket or clamp assembly (no text or symbols)
If liquids fall on the lid when it is closed, carefully remove them with a cloth before opening it.
To replace the lid, insert it into the guides.

Make sure never to touch the lid glass with pots and pans that are still hot. The glass could crack and break with the heat.
12.2.2 Racks
Remove the racks and clean them with lukewarm water and non-abrasive detergent, making sure to remove any encrustations. Replace them on the cooking hob.
Continuous contact between the racks and the flame can cause modifications to the enamel over time in those parts exposed to heat. This is a completely natural phenomenon which has no effect on the operation of this component.

Warning:
If using cast iron racks (optional extra), at the end of cooking using pans with aluminium bases, you may find white residues on the racks. These residues are usually caused by the pan base rubbing against the rack and are difficult to remove with normal cleaning. Using abrasive or excessively aggressive products to clean the rack could damage its enamel surface.
Instructions for the user

12.2.3 Burner caps and flame-spreader crowns
For easier cleaning, the burner caps and the flame spreader crowns can be removed; wash them with warm water and a non-abrasive detergent making sure to remove any encrustations and wait until they are perfectly dry.


WARNING: never wash these parts in a dishwasher. The burners can be left to soak in warm water and detergent.
Replace the flame spreader crowns, making sure that they are correctly in place with their respective burner caps and ensuring that the holes A in the flame-spreaders are aligned with the igniters and thermocouples.
12.2.4 Igniters and thermocouples
For correct operation the igniters and thermocouples must always be perfectly clean (on certain models). Check them frequently and clean them with a damp cloth if necessary. Remove any dry residues with a wooden toothpick or a needle.

12.3 Cleaning the oven

For the best oven upkeep, clean it regularly after having allowed it to cool. Take out all removable parts.

- Clean the oven rack with hot water and non-abrasive detergent. Rinse and dry.
12.4 Door glazing
The glass in the door should always be kept thoroughly clean. Use absorbent kitchen roll. In the case of stubborn dirt, wash with a damp sponge and neutral detergent.

Instructions for the user
The oven may require extraordinary maintenance or replacement of parts subject to wear such as gaskets, bulbs, etc. The following instructions describe how to carry out these minor maintenance operations.

Before performing any operations requiring access to powered parts, disconnect the appliance from the power supply.
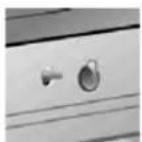
13.1 Lubrication of gas oven taps and thermostat knob
Over time the gas taps and the thermostat knob may become difficult to turn and get blocked. Clean them internally and replace the lubrication grease. This operation must be carried out by a specialised technician.
13.2 Replacing the light bulb
Remove the bulb protector A by turning it anticlockwise and replace bulb B with a similar one (25 W). Re-fit bulb protector A.


Use oven bulbs only (T 300°C).
13.3 Removing the door
Lift the levers B until they touch the hinges A and take hold of the two sides of the doors with both hands close to the hinges. Raise the door to an angle of about 45^ and remove it. To reassemble, fit the hinges A into their grooves, then lower the door into place and release the levers B.

natural_image
Technical illustration of a mechanical assembly with a 45-degree angle annotation (no text or symbols on the diagram itself)13.4 Oven door seal
To permit thorough cleaning of the oven, the seal may be removed. Before removing the seal, take off the oven door as described above. Once the door has been taken off, lift the tabs at the corners as shown in the figure.

natural_image
Diagram of a door with internal components and a dotted line indicating a measurement or alignment (no text or symbols present)Instructions for the user

14 AVAILABLE ACCESSORIES
The main oven has 4 runners for positioning trays and racks at different heights and a roof lining.
The auxiliary oven has 2 runners.
Oven rack: for cooking food inside dishes, small cakes, roasts or foods that require slight grilling.
Oven tray: useful for collecting fat from foods placed on the rack above.
Deep tray: useful for cooking cakes, pizza and baked desserts.


The chromium-plated gripper is a very useful accessory in the kitchen; as well as guaranteeing a solid grip on trays and racks, it avoids direct contact (which cannot be avoided when using fabric pot holders or oven gloves).


Some models are not provided with all accessories.

Accessories available on request
The oven accessories intended to come into contact with food are made of materials that comply with the provisions of Directive 89/109/EEC, dated 21/12/88, and of Legislative Decree 108, dated 25/01/92.
Instructions for the User

11.COOKING IN THE OVEN
11.1 Description of the selected functions
ECO
ECO:
Using the grill and the bottom heating element is particularly suitable for cooking small quantities of food, as it provides low energy consumption.


STATIC:
As the heat comes from above and below at the same time, this system is particularly suitable for certain types of food. Traditional cooking, also known as static or thermal radiation cooking, is suitable for cooking just one dish at a time. Perfect for all types of roasts, bread, and cakes and in any case particularly suitable for fatty meats such as goose and duck.


GRILL:
The heat coming from the grill element gives perfect grilling results above all for thin and medium thickness meat and in combination with the rotisserie (when present) gives the food an even browning at the end of the cooking. Perfect for sausages, ribs and bacon. This function allows you to grill large quantities of food, particularly meat, evenly.


ROTISSERIE GRILL:
(on some models only)
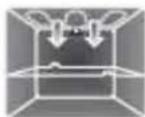
The rotisserie functions in combination with the grill element to give perfect browning to food.

FAN-ASSISTED STATIC:
The operation of the fan, combined with traditional cooking, ensures uniform cooking even with complex recipes. Perfect for biscuits and cakes, even when simultaneously cooked on several levels.


FAN-ASSISTED GRILL:
The air produced by the fan softens the strong heatwave generated by the grill, giving perfect grilling even to very thick foods. Perfect for large cuts of meat (e.g. shank of pork).


FAN-ASSISTED BOTTOM:
The combination of the fan with only the bottom heating element allows cooking to be completed more rapidly. This system is recommended for sterilising or for finishing off the cooking of foods already well-cooked on the surface, but not inside, which therefore need a little more heat. Perfect for any type of food.


CIRCULAR:
The combination of the fan and the circular element (incorporated in the rear of the oven) allows you to cook different foods on several levels, as long as they need the same temperatures and cooking time. Air circulation ensures instant and uniform distribution of heat. It will be possible, for instance, to cook fish, vegetables and biscuits simultaneously without mixing smells and flavours.


TURBO:
The combination of fan-assisted cooking and traditional cooking allows you to cook different foods on several levels extremely quickly and efficiently.

Perfect for large volumes that call for intense cooking.

THAWING:
Rapid thawing is helped by switching on the fan provided and the top heating element that ensure uniform distribution of low temperature air inside the oven. In certain models this function integrates the proving. The choice to thaw or to prove depends on the temperature selected. Set the temperature to choose the function: thawing (30°C) or proving (40°C).

Instructions for the User
Table of predefined recipes:
| Class | Type | Qty. | Temp.(°C) | Cookingduration(min.) | Funct. | Runnerrecommended | |||
 | Beef | Roast-beef | 0.7 | Kg | 200 | 30 | * |  |  |
| 1 | Kg | 200 | 40 | ||||||
| 1.5 | Kg | 200 | 65 | ||||||
 | Pork | Roast | 0.5 | Kg | 180 | 50 | * |  |  |
| 1 | Kg | 190 | 75 | ||||||
| 1.5 | Kg | 180 | 110 | ||||||
 | Chicken | Roast chicken | 0.5 | Kg | 190 | 40 | * |  |  |
| 1 | Kg | 190 | 60 | ||||||
| 2 | Kg | 180 | 90 | ||||||
 | Lamb | Roast leg of lamb | 1.0 | Kg | 190 | 65 | * |  |  |
| 1.5 | Kg | 190 | 90 | ||||||
 | Fish | Bass baked in foil | 0.7 | Kg | 200 | 35 | * |  |  |
| 1.0 | Kg | 200 | 45 | ||||||
 | Vegetables | Stuffed peppers | 1 | Kg | 170 | 45 | * |  |  |
| 1.5 | Kg | 160 | 50 | ||||||
| 2 | Kg | 160 | 60 | ||||||
 | Pizza | Stuffed Pizza | 1 pizza | 280 | 8 | * |  |  | |
 | Cakes | Apple pie | 8 people | 170 | 60 | * |  |  | |


The cooking times specified in the table refer to the food indicated in the recipe and may vary depending on the weight.
The table gives the factory-set data. To reset a recipe with the original settings after it has been modified, just enter the data given in the table. (*original settings).
If the energy saving mode is activated (see secondary menu) the cooking times can vary from those indicated.
Association display icon - function
 |  |  |  |  |  |  |  |
| ECO | Static | Rotisserie grill | Fan-ass. static | Fan-ass. grill | Fan-ass. bottom | Circular | Turbo |
Instructions for the User

Cooking tables:
| FUNCTION | LEVEL FROM BELOW | TEMP. °C | TIME IN MINUTES | |||
| FIRST COURSES | ||||||
| LASAGNE | [KYZ] | Static | 1 | 220 - 230 | 50 - 60 | |
| OVEN-BAKED PASTA | [Y4DZ] | Static | 1 | 220 - 230 | 40 | |
| MEAT | ||||||
| ROAST VEAL |  | Fan-ass. static | 2 | 180 - 190 | 70 - 80 | |
| LOIN OF PORK | [30XS] | Fan-ass. static | 2 | 180 - 190 | 70 - 80 | |
| SHOULDER OF PORK |  | Turbo | 2 | 180 - 190 | 90 - 100 | |
| ROAST RABBIT | [77BZ] | Circular | 2 | 180 - 190 | 70 - 80 | |
| TURKEY BREAST | [XDSK] | Fan-ass. static | 2 | 180 - 190 | 110 - 120 | |
| ROAST NECK OF PORK |  | Turbo | 2 | 180 - 190 | 190 - 210 | |
| ROAST CHICKEN |  | Turbo | 2 | 180 - 190 | 60 - 70 | |
| GRILLED MEATS | 1 SURF | 2 SURF | ||||
| PORK CHOPS | [SYAH] | Fan-ass. grill | 4 | 260 | 7 - 9 | 5 - 7 |
| FILLET OF PORK | [TYAS] | Grill | 3 | 260 | 9 - 11 | 5 - 9 |
| FILLET OF BEEF | [08S2] | Grill | 3 | 260 | 9 - 11 | 9 - 11 |
| LIVER |  | Fan-ass. grill | 4 | 260 | 2 - 3 | 2 - 3 |
| SAUSAGES |  | Fan-ass. grill | 3 | 260 | 7 - 9 | 5 - 6 |
| MEAT-BALLS |  | Grill | 3 | 260 | 7 - 9 | 5 - 6 |
| FISH | ||||||
| SALMON TROUT | [A8OA] | Bottom fan-a.circ. | 2 | 150 - 160 | 35 - 40 | |
| PIZZA | [28DB] | Fan-ass. static | 1 | 250 - 280 | 6 - 10 | |
| BREAD |  | Circular | 2 | 190 - 200 | 25 - 30 | |
| MUFFINS | [66KB] | Turbo | 2 | 180 - 190 | 15 - 20 | |
| DESSERTS | ||||||
| DOUGHNUT | [4DTG] | Fan-ass. static | 2 | 160 | 55 - 60 | |
| FRUIT TART | [3WAS] | Fan-ass. static | 2 | 160 | 30 - 35 | |
| SHORT PASTRY | [3SED] | Bottom+ f.-a.circ. | 2 | 160 - 170 | 20 - 25 | |
| JAM TARTS |  | Turbo | 2 | 160 | 20 - 25 | |
| PARADISE CAKE |  | Fan-ass. static | 2 | 160 | 55 - 60 | |
| ECLAIR | [82AS] | Turbo | 2 | 150 - 160 | 40 - 50 | |
| LIGHT SPONGE CAKE | [DTDS] | Circular | 2 | 150 - 160 | 45 - 50 | |
| CROISSANTS | [ZSHA] | Circular | 2 | 160 | 25 - 30 | |
COMMERCIAL GUARANTEE CONDITIONS FOR WHITE PRODUCTS
This appliance has a two-year repair guarantee, from the date of sale, against all malfunctions originating from manufacturing, including labor and spare parts. To justify the purchase date, it will be mandatory to present the invoice or purchase receipt. This guarantee will only be effective in Spain.
GUARANTEE EXCLUSIONS
- Remote controls, drain intake rubbers, dockings and door seals, weather stripping.
- Damage to enamels, paints, nickel plating, chrome plating, oxidation or other types of aesthetic parts or components that do not affect the internal functioning of the appliance.
- Damage to wear parts due to use, corrosion or oxidation, whether caused by normal use of the appliance or accelerated deterioration due to unfavorable environmental or climatic circumstances. Not suitable for outdoor use.
- Damage to fragile pieces of glass, glass ceramic, plastics, handles, baskets, doors or light bulbs when their failure or breakage is not attributable to a manufacturing defect.
- Faults produced by fortuitous causes or accidents of force majeure, or as a consequence of abnormal, negligent or inappropriate use of the device.
- Civil liabilities of any nature.
- Consequential damage to the appliance as long as it has not been caused by an internal malfunction.
- Maintenance or upkeep of the appliance: periodic reviews, adjustments and greases.
- Faults that accessories and complements, adapters, external cables, bags, spare parts of all kinds, lamps, as well as any part considered consumable by the manufacturer, may suffer.
- Faults caused by incorrect or illegal installation, inadequate ventilation, lack of grounding in the home, power disturbances, inappropriate modifications or use of non-original spare parts.
- Appliances used in industrial applications or for commercial purposes.
- Appliances with illegible or altered serial number.
-
Defects or breakdowns produced as a result of fixes, repairs, modifications, or disassembly of the installation of the device by the user or by a technician not authorized by the manufacturer, or as a result of manifest non-compliance with the manufacturer's instructions for use and maintenance.
-
During the warranty period it is essential to keep all manuals together with the equipment. If the equipment is sold, donated or given away, the manual and all related documents must be given to the new user. If any of these are lost, their replacement cannot be claimed.
-
Faults that have their origin or are a direct or indirect consequence of: contact with liquids, chemicals and other substances, as well as conditions derived from the climate or the environment: earthquakes, fires, floods, excessive heat or any other external force, such as insects, rodents and other animals that may have access to the interior of the machine or its connection points.
-
Damages derived from terrorism, riot, riot or popular tumult, legal or illegal demonstrations and strikes; facts of actions of the Armed Forces or the State Security Forces in times of peace; armed conflicts and acts of war (declared or not); nuclear reaction or radiation or radioactive contamination; vice or defect of the goods; facts classified by the Government of the Nation as "national catastrophe or calamity".
Design and specifications are subject to change without prior notice for product improvement.

EAS ELECTRIC
SMART TECHNOLOGY
www.easelectric.es
- ES
- Contents
- Presentation
- INSTRUCTIONS FOR SAFETY AND USE
- The environment – Instructions for recycling
- RECYCLING INSTRUCTIONS - OUR ENVIRONMENT POLICY
- INFORMATION FOR USERS:
- Instructions for the installer
- INSTALLING THE APPLIANCE
- Electrical connection
- Room ventilation
- Extraction of the combustion products
- Connection to gas
- Connection with a rubber hose
- Connection to natural and city gas
- Connection to LPG gas
- Connection with a flexible steel hose (for all types of gas)
- ADAPTATION TO DIFFERENT TYPES OF GAS
- Replacement of nozzles on the hob
- Arrangement of the burners on the hob
- HOB
- Oven burner adjustment (only for models with a gas oven)
- Replacing the oven burner nozzle
- Primary air adjustment for the oven burner
- FINAL OPERATIONS
- Regulation of the hob burner minimum for natural gas
- Adjusting the hob burner minimum for LPG gas
- Adjustment of the oven burner minimum
- Positioning and levelling the appliance
- DESCRIPTION OF FRONT PANEL CONTROLS
- HOB BURNER CONTROL KNOB
- FUNCTION SELECTOR KNOB
- Instructions for the user
- DESCRIPTION OF THE CONTROLS ON THE FRONT PANEL
- HOB BURNERS CONTROL KNOB (ON SOME MODELS ONLY)
- BURNER IGNITION BUTTON (ON SOME MODELS ONLY)
- GAS OVEN THERMOSTAT KNOB (ON SOME MODELS ONLY)
- OVEN LIGHT / ROTISSERIE / GRILL SWITCH KNOB
- (ON SOME MODELS ONLY)
- TIMER KNOB
- OVEN LIGHT KEY
- THERMOSTAT KNOB
- USING THE HOB
- Lighting the hob burners
- Practical hints for using the hob burners
- Pan diameters (60X90 cm model)
- WARNING
- USING THE OVEN
- General warnings and advice
- Using the gas oven
- Electronic spark ignition (on some models only)
- Manual ignition
- Using the gas grill
- Manual ignition of the gas grill burner
- Electrical ignition of the gas grill burner
- Using the rotisserie
- Using the rotisserie in maxi oven cookers
- How to use the grill
- FOODS
- RACK ON THE SHELF
- PRECAUTIONS
- Storage compartment
- OKIDA
- OT-3000-VFD OVEN TIMER USER'S MANUAL
- TIME OF DAY ADJUSTMENT
- IN CASE MAINS POWER LOSS
- FLASHING HAND ICON INDICATES THAT YOUR OVEN IS INOPERATIVE AND YOU SHOULD PRESS THE ⏻ BUTTON TO RESET
- BUZZER TONE ADJUSTMENT
- ADJUSTING THE BUZZER ALARM
- AUTOMATIC COOKING PROGRAM
- CLEANING AND MAINTENANCE
- Cleaning stainless steel and enamelled versions
- Ordinary daily cleaning
- Food stains or residues
- Cleaning the cooking hob's parts
- Glass lid
- Racks
- Warning:
- Burner caps and flame-spreader crowns
- Igniters and thermocouples
- Cleaning the oven
- Door glazing
- Lubrication of gas oven taps and thermostat knob
- Replacing the light bulb
- Removing the door
- Oven door seal
- AVAILABLE ACCESSORIES
- Accessories available on request
- 11.COOKING IN THE OVEN
- Description of the selected functions
- ECO
- ECO:
- STATIC:
- GRILL:
- ROTISSERIE GRILL:
- FAN-ASSISTED STATIC:
- FAN-ASSISTED GRILL:
- FAN-ASSISTED BOTTOM:
- CIRCULAR:
- TURBO:
- THAWING:
- COMMERCIAL GUARANTEE CONDITIONS FOR WHITE PRODUCTS
- GUARANTEE EXCLUSIONS
- EAS ELECTRIC
- SMART TECHNOLOGY
Brand : EAS Electric
Model : EFG9H60X
Category : Frying Pan