
Torino - Baby bed Lorelli - Free user manual and instructions
Find the device manual for free Torino Lorelli in PDF.


| Product Type | Stroller |
| Model | Torino |
| Brand | Lorelli |
| Dimensions (Open) | Approx. 100 x 60 x 110 cm |
| Dimensions (Folded) | Approx. 80 x 60 x 35 cm |
| Weight | Approx. 10 kg |
| Maximum Weight Capacity | Up to 22 kg (approx. 4 years) |
| Power Source | Manual (no batteries required) |
| Main Features | Reclining seat, adjustable handlebar, large canopy, storage basket, 5-point harness |
| Seat Recline Positions | Multiple positions including flat for newborns |
| Handlebar Adjustment | Yes, height adjustable |
| Canopy | Extendable with UV protection |
| Brake Type | Foot-operated rear brakes |
| Safety Harness | 5-point harness |
| Wheels | Front swivel wheels with suspension, rear wheels with lock |
| Folding Mechanism | One-hand compact fold |
| Care & Cleaning | Wipe frame with damp cloth; fabric removable and machine washable (30°C) |
| Safety Standards | Complies with EN 1888 |
| Spare Parts Availability | Available from Lorelli or authorized dealers |
| Warranty | 2 years against manufacturing defects |
Frequently Asked Questions - Torino Lorelli
User questions about Torino Lorelli
0 question about this device. Answer the ones you know or ask your own.
Ask a new question about this device
Download the instructions for your Baby bed in PDF format for free! Find your manual Torino - Lorelli and take your electronic device back in hand. On this page are published all the documents necessary for the use of your device. Torino by Lorelli.
USER MANUAL Torino Lorelli
Sweet dreams. Sweet p
baby cot TORINO
2 layers plus age range: 0+ months

natural_image
Line drawing of a mechanical device with no text or symbolsMANUAL INSTRUCTION
designed in EU
V 2.3
www.lorelli.eu


find us on
CONTENT / СЪДЪРЖАНИЕ
EN Manual Instruction....7
BG Инструкция за употреба....9
RO Instructiuni de utilizare....11
EN-Scan the QR code to get more product information and manual instruction in more languages. Download QR Scanner App onto your device.
SRB/HR/ME/BIH
Skenirajte QR kod kako bi ste dobili više informacija o proizvodu i uputsva za upotrebu na više jezika. Preuzmite aplikaciju QR Scanner na svoj uređaj.
natural_image
Gray fabric bag with straps and a numbered label (6) pointing to the side, no visible text or symbols on the bag itself.
natural_image
3D rendering of a metallic cylindrical object with four legs and a labeled point '4' (no text or symbols on the object itself)

natural_image
Black and white striped fabric item with a numbered label pointing to the side (no text or symbols on the object itself)
natural_image
Close-up of a metallic fabric bag with crumpled texture and a labeled section (3), no visible text or symbols.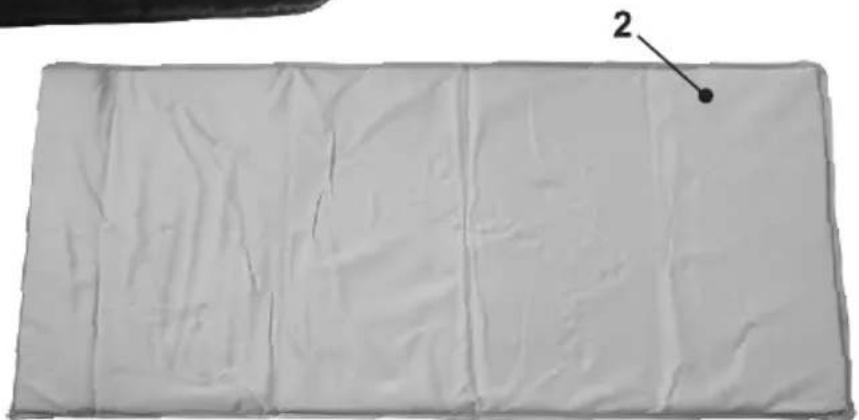
natural_image
Close-up of a rectangular object with visible cracks and texture, labeled with number 2 (no text or symbols on the object itself)
natural_image
Back view of a gray bag with four numbered labels (2, 3, 4) and a white object inside, no text or symbols on the bag itself.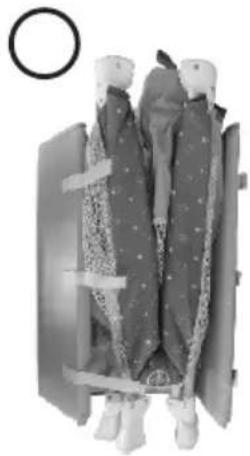
natural_image
Two children's clothes dressed in patterned dresses, viewed from behind a door (no text or symbols visible)
natural_image
Black-and-white photo of a baby play mat with patterned bedding and a circular inset showing a circle (no text or symbols)
natural_image
Top-down view of a person's back cover with mesh net, showing internal mesh structure and hand movement indicator (no text or symbols)
natural_image
Person handling a mesh net with a small object inside, no visible text or symbols
natural_image
Interior view of a rectangular container with textured walls and a hand holding an object (no visible text or symbols)


14
natural_image
Interior view of a room with hands holding a tool, showing a black arrow pointing upward (no text or symbols visible)15

IMPORTANT! RETAIN FOR FUTURE REFERENCE: READ CAREFULLY!
SAFETY REQUIREMENTS

-
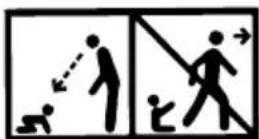
WARNING! Do not leave the child unattended.
-
WARNING! Be aware of the risk of open fire and other sources of strong heat, such as electric bar fires, gas fires, etc. in the near vicinity of the cot and of the changing unit.
-
WARNING! Do not use the cot if any part is broken, torn or missing and use only spare parts approved by the manufacturer.
-
WARNING! Do not leave anything in the cot or place the cot close to another product which could provide a foothold or present a danger of suffocation or strangulation, e.g. strings, blind/curtain cords etc.!
-
WARNING! Do not use more than one mattress in the cot!
-
WARNING! Only use the mattress sold with this cot, do not add a second mattress on this one, suffocation hazards!

natural_image
Two simple geometric diagrams showing a rectangular frame and a cross-shaped grid pattern (no text or symbols)-
WARNING! The cot is ready for use, only when the locking mechanisms are engaged and check carefully that they are fully engaged before using the folding cot.
-
WARNING! The lowest position is the safest and the base should always be used in that position as soon as the baby is old enough to sit up.
-
WARNING ! It is from essential to remove the detachable support rails before the cot is used in it's lowest position.
-
WARNING ! All assembly fittings should always be tightened properly, should be checked regularly and retightened as necessary.
-
WARNING ! To prevent injury from falls when the child is able to climb out of the cot, the cot shall no longer be used for that child.
-
WARNING! The diaper changing table is intened for children with a maximum age of 12 months and with a maximum weight up to 11 kg.
-
WARNING ! Any additional or replacement parts shall only be obtained from the manufacturer or distributor.
-
WARNING ! The second level can be used for baby's maximum weight up to 8 kg or till the moment when the baby begins to push up on hands and knees whichever comes first.
-
WARNING! Images on the title page and in the instruction manual are only illustrative and may differ from the real product, manufacturer or distributor.
-
WARNING ! Before using the product for the first time, remove all advertising material from it as well as the materials used to attach them to the product.
EN 716-1:2017+AC:2019, EN 716-2:2017, EN 12221-1.2, EN 71
MAINTENANCE AND CARE

ATTENTION! If you use the cot outdoors, please clean all parts throughly after each use.
Cleaning. To clean use soapy water or soft cleaning detergent. Handwash the bag with soapy water. Do not iron. Do not bleach.
ATTENTION! Do not put bulk objects in the cot that can help the baby to jump out from the cot. Do not place the cot near heating devices because it will damage the plastic and fabrics.
ATTENTION! Use the cot regarding to these instructions!
PARTS
Picture 1
-
Cot
-
Mattress
-
Second level of the cot
-
Metal pipes of second level of the cot
-
Diapers changing table
5.1. Short pipe of changing mat
- 1 pc.
- 1 pc.
- 1pc.
- 4 pc.
- 1 pc
-2 pc
5.2. Long pipe of changing mat - 2 pc.
-
Bag - 1 pc.
-
Auxiliary supports - 2 pc.
-
Toy bar - 1 pc.
-
Wheels -2 pc.
ASSEMBLING OF THE COT
- Take out the cot from the bag. Picture 2
- Put away the mattress which is placed around the cot by unsticking the three soft bands. Picture 3
- Unfold the cot at half. Catch the middle part of the short upper tubes and lift it up till the mechanism situated in the middle of the tube is locked. Picture 4 In the same time the vertical tubes (baby cot legs) should be close to each other at its lower end and the middle part of the cot should stay at upper position. This provides the easy locking of mechanisms! Repeat the same procedure with the rest of the upper tubes.
Picture 5 Check if the lockers of each one are well locked by slightly pressing downwards the middle part of the tube. - Press downwards the middle part of the cot till the lower tubes are straightened and locked. Picture 6 Then the all sides are straightened and stabled. Unfold the mattress and put it on the bottom of your cot. Picture 7 Insert the velcro strips in the two openings at both sides of the bottom. Picture 8. Stick the velcro strips tightly. Picture 8.1. Your cot is ready for use.
ASSEMBLING THE SECOND LEVEL OF THE COT
- Take off the mattress from the bottom of the cot.
- Install the second level in the inside of the baby cot with the zipper over the entire inner length, and then close the lid. Pic. 9 position 1;2;3;4
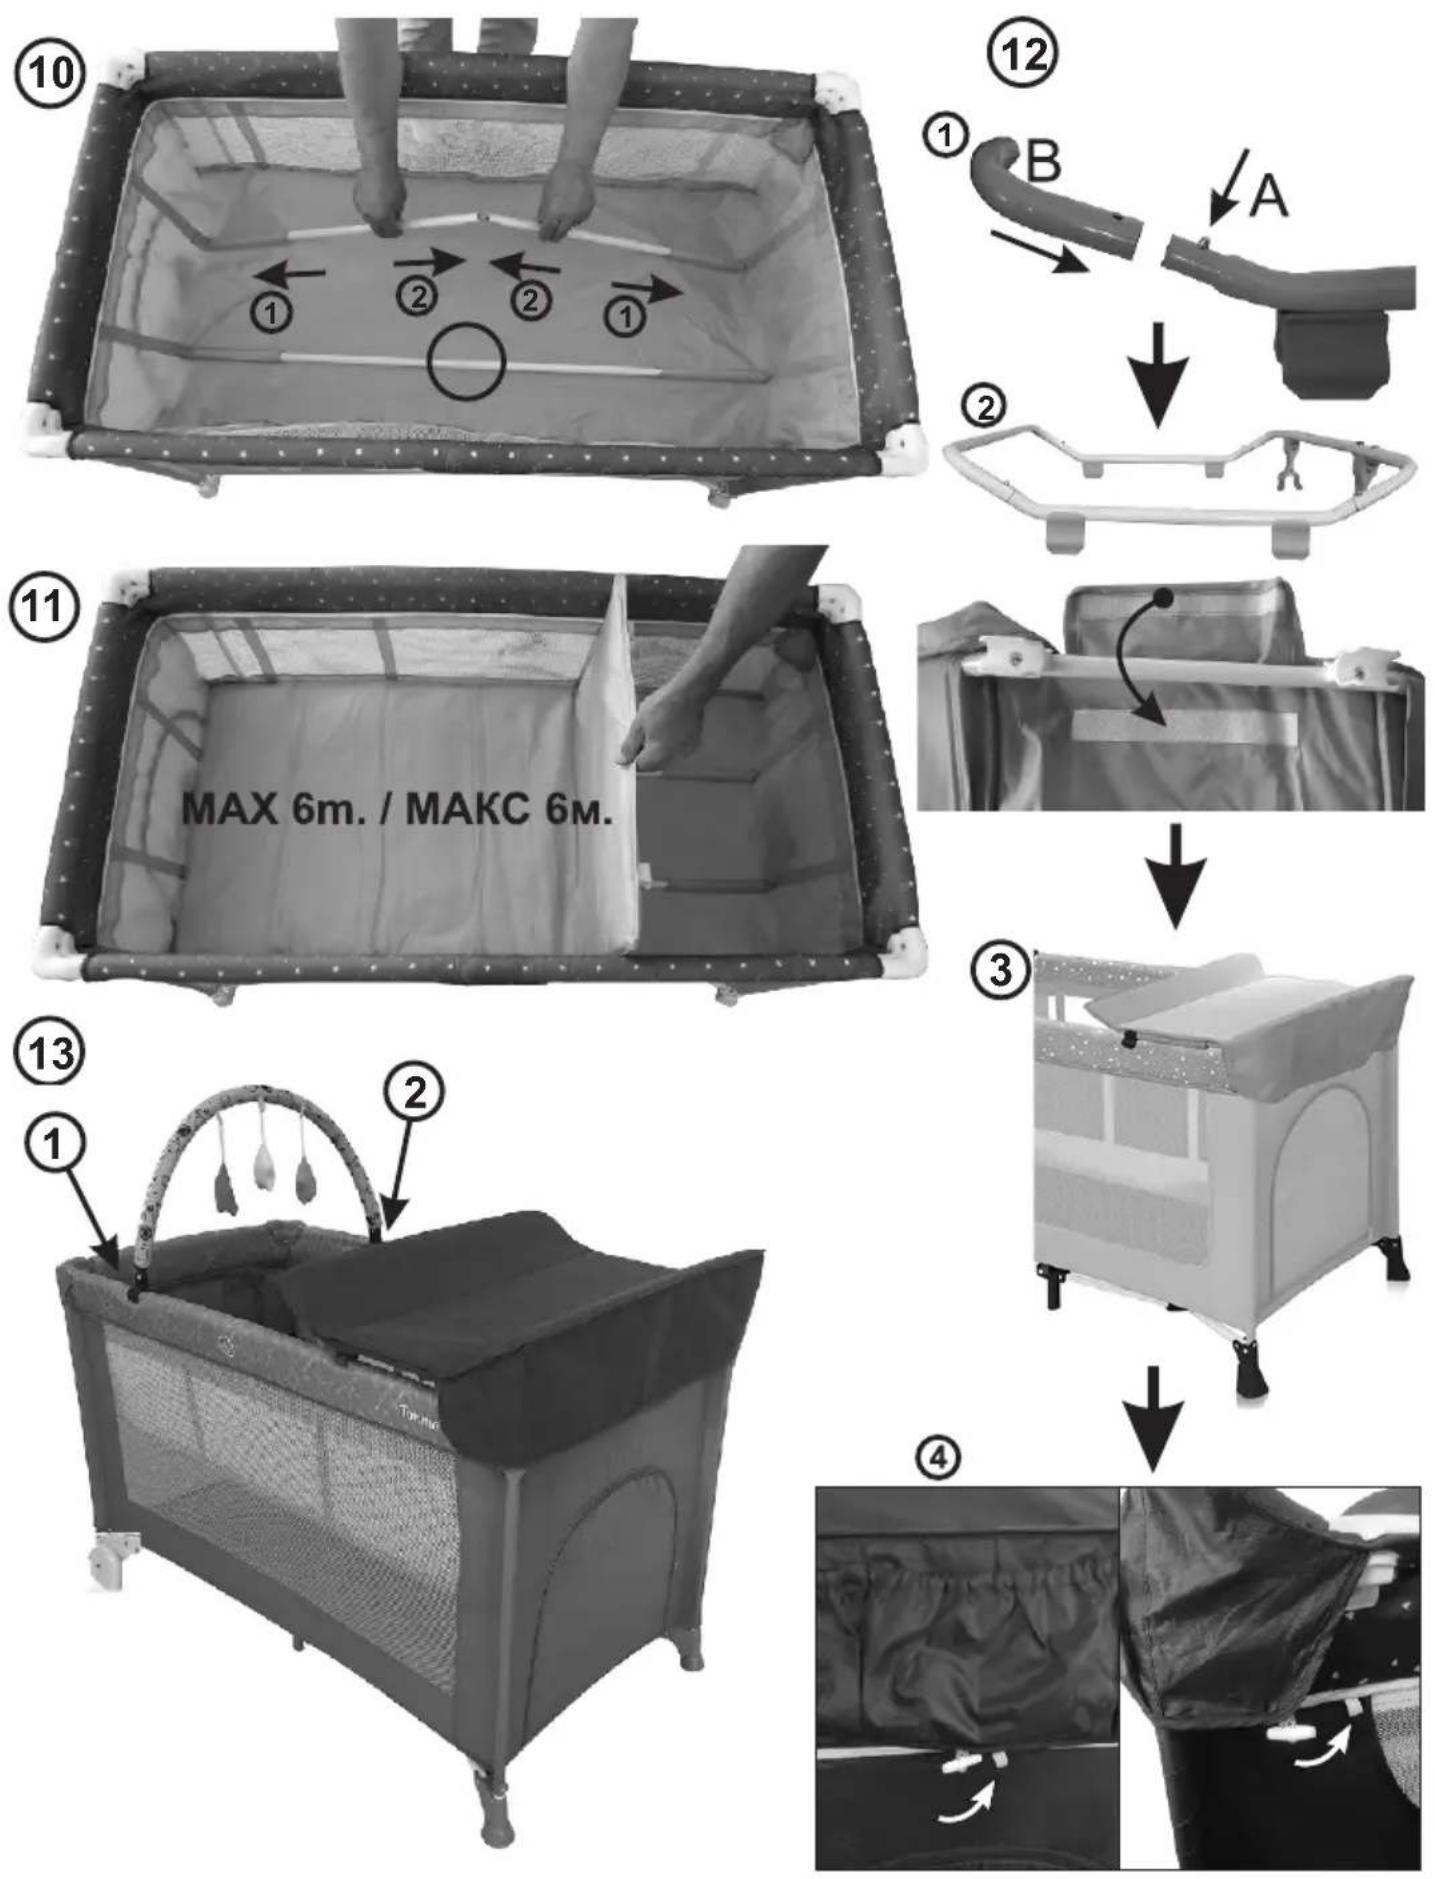
- Fit the tubes together. Picture 10
- Now place the pad inside the support. Picture 11
ASSEMBLING THE DIAPER CHANGING TABLE OF THE COT
-
Assemble the tubes of diaper changing table. Push the button „A“ Picture 12 -1 and insert the pipe „B”. Installation is successfully completed when the spring leaf extend out.
-
Fix the clip on the back of diaper changing table (Picture 12-2)
-
Attach the changing table for the long tubes of the cot. (Picture 12-3)
-
Attach the buttons of the fabric cover for both long sides of the cot and on the middle of the short side (Picture 12-4)
Note: Make sure that all the assembly fittings are tightened properly when it is ready to use.
WARNING! Please take the diaper changing table away when finishing using it.
Waning! Do not leave the child unattended when it is placed on the changing mat!
ASSEMBLING THE TOY BAR OF THE COT
- Fix the toy bar with clips on the two long rail of the cot (Picture 13)
DISMANTLING OF THE COT
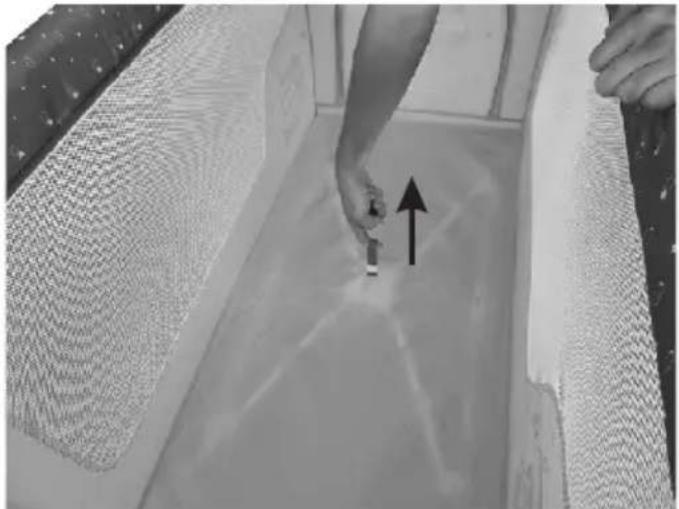
- Take out the mattress and pull the center band up to higher. (Picture 14)
- Release the button up on rails center, make it droop as "V". (Picture 15) Please, pull the center band up more, if not be completely droopy, then press again. Secure the bulge fully up and push four legs together.
- Wrap it into the mattress and clip tightly. (Picture 3)
- Put the whole wrap in the carry bag for travel. (Picture 2)
ATTENTION! For easier unlock of the mechanism by pressing the buttons you need to lift the tube up. (Picture 15) The hard pushing of the tube downward with locked mechanism leads to serious damage!
BG
natural_image
Two simple geometric diagrams showing a rectangular frame and a cross-shaped grid, both without any text or symbols.natural_image
Two simple geometric diagrams showing a rectangular frame with a horizontal base and an X-shaped cross-section (no text or symbols)-1 pce. 6. Sac - 1 pce.
natural_image
Two simple line drawings of a rectangular frame with a horizontal base and a cross-shaped grid pattern on the right (no text or symbols)natural_image
Two simple geometric diagrams showing a rectangular frame and a cross-shaped grid pattern (no text or symbols)natural_image
Two simple line drawings of a rectangular frame with a horizontal base and a cross-shaped border, no text or symbols present.natural_image
Two simple line drawings of a rectangular frame with a horizontal base and a diagonal cross dividing it into two sections (no text or symbols)natural_image
Two simple line drawings of a rectangular frame with horizontal and vertical lines, no text or symbols present.- UPOZORENJE! Dečji krevetac je spreman za korišćenje samo ukoliko su aktivirani mehanizmi za blokiranje, tako da proverite pažljivo pre korišćenja dečjeg kreveca na sklapanje da li su potpuno aktivirani.
- UPOZORENJE! Najniži položaj je najsigurniji, tako da se osnova mora uvek koristiti u ovom položaju još od trenutka, kada je dete dovoljno veliko da stoji uspravno u krevecu.
- UPOZORENJE! Neophodno je ukloniti pokretne nosače pre nego što se kolevka koristi u najnižoj poziciji.
- UPOZORENJE! Svi delovi za pričvršćivanje se moraju uvek pravilno stegnuti, redovno da se proveravaju i stegnu ponovo, ako je potrebno.
- UPOZORENJE! Kako bi sprečili ozleđivanje pri padu, kada je dete u stanju da se popne ili da izađe iz kreveca, krevetac se više ne mora koristiti.
- UPOZORENJE! Tablica za promenu pelene je namenjena deci sa maksimalnom starošću od 12 mjeseci i maksimalnom težinom do 11 kg.
- UPOZORENJE! Svi rezervni ili dopunski delovi moraju da primaju samo od proizvođača ili distributera
- UPOZORENJE! Drugi nivo se može koristiti za bebu maksimalne težine od 8 kg ili dok beba ne počne da se diže na rukama i kolenima, u zavisnosti od toga koji se događaj prvi dogodi.
- UPOZORENJE! Slike na naslovnoj stranici i u uputstvu su primeri i mogu se razlikovati od stvarnog proizvoda.
- UPOZORENJE! Pre prve upotrebe proizvoda, uklonite sa njega sve reklamne materijale, kao i uređaje koji se koriste za njihovo pričvršćivanje na proizvod.
EN 716-1:2017+AC:2019, EN 716-2:2017. EN 12221-1.2. EN 71
BRIGA I ODRŽAVANJE

UPOZORENJE! U slučaju da koristite krevetac napolje, očistite noge od prašine, kao i ostale delove, jer prašina u mehanizmu za zaključavanje može prouzrokovati ozbiljno oštećenje.
Čišćenje. Po potrebi koristite blagi sapun i toplu vodu. Možete oprati ručno torbu u toploj vodi, bez peglanja. Ne koristite belilo.
UPOZORENJE! Ne ostavljajte obimne predmete u krevecu, koji mogu pomoci detetu da se prebaci iznad pregradnih mreža. Ne postavljajte krevetac blizu grejnih tela, jer to može prouzrokovati oštećenje plastičnih i tekstilnih delova.
UPOZORENJE! Za pravilni eksploataciju i čuvanje Vašeg kreveca pažljivo pročitajte ova uputstva i pridržavajte se striktno ih!
Slika 1
- Dečji krevetac
- Dušek
- Drugi nivo za kreveca
- Metalne cevi
- Pult za povijanje beba
5.1. Dugačke cevi na postolju koje je moguće savijati- 1kom. 9. Točkovi - 1 kom.savijati
- 1kom.6.Torba
- 1 kom.5.2. Kratke cevi na postolju koje je moguće
- 4 kom.7. Dodatne postavke
-
1 kom.8. štap s igračkama
-
1 kom.
- 1 kom.
-2 kom. - 1 kom.
-2 kom.
POSTAVLJANJE KREVECA
- Izvadite krevetac iz torbe. Slika 2
- Uklonite dušek koji se nalazi oko kolevke, uklanjajući tri mekana priključka. Slika 3
- Otvorite kolevku na pola i držite centar gore. Ugvatite gornje kratke cevi i podignite do zaključavanja mehanizma koji se nalazi u sredini cevi. Pažnja! Kada se rasklapa, ne hvatajte mehanizam za otključavanje koji se nalazi u sredini cevi! Slika 4 U isto vreme vertikalne cevi (noge kreveta) trebalo bi da bude blizu jedna do druge na donjem kraju i sredini kreveta i da ostanu u najvišem položaju. Ovo obezbeđuje lako zaključavanje mehanizma. Ponovite istu proceduru za ostale gornje cevi. Slika 5 Proverite da li mehanizmi rade tako što lagano potiskujete cev na dole.
- Pritisnuti sredinu preklopa dok se donje cevi ne zategnu i ne zaključaju. Slika 6 Zatim sve strane i dno moraju biti dobro zategnuti i da kolevka bude stabilna na podu.
Otvorite dušek i postavite ga na dno vašeg kreveta. Slika 7 Ubacite lepljive trake dušeka u dve rupe na obe strane dna kolevke. Slika 8 Čvrsto pričvrstite lepljive trake na spoljašnjost dna. Vaš krevetac je spreman za upotrebu. Slika 8.1
POSTAVLJANJE DRUGOG NIVOA KREVECA
- Oslobodite velkro trake dušeka sa dna olovke i uklonite dušek.
- Instalirajte drugi nivo okretne strane preklopa tako što ga držite zategnutim preko cele unutrašnje dužine, a zatim zatvorite poklopac. Slika 9 Pozicije 1; 2; 3; 4
- Postavite metalne cevi jedna prema drugu. Slika 10
- Postavite podloga na dno drugog nivoa kreveca. Slika 11
POSTAVLJANJE Pult za povijanje beba
- Sastavite cevi ploče za promenu pelene. Pritiskom na "A" slika 12-1 i ubacite cev "V". Instalacija je uspešna kada igla sa oprugom izađe kroz otvor.
- Priključite jedan po jedan, pomoću plastičnih kopča na zadnjem delu postolja za bebu. Slika 12-2
- Fik nosioca dva duge cevi krevetac. Slika 12-3
- Postavite dugmad za pokrivanje za dužoj strani kreveta u sredini na kraćoj strani . Slika 12-4
Napomena: Proverite da li sve stavke su zategnuti dobro kada je spreman za upotrebu.
UPOZORENJE! Molimo Vas da uklonite tabelu kada završite ga koristite.
UPOZORENJE! Ne ostavljajte dete bez nadzora kada se stavlja na promenjivu podlogu!
POSTAVLJANJE štap s igračkama
- Pričvrstite palac za dvostruke cevi na plaštu. Slika 13
RASTAVLJANJE KREVECA
- Skinite dušek i povucite traku na dole sa donje strane. (Slika 14)
- Pritisnite mehanizme u centru dugih i kratkih gornjih cevi i savijte ih do položaja slova "V". Slika 15 Molimo Vas, povucite traku u centru dna na gore i savijte krevetac. Spojite noge kreveca zajedno.
- Obmotati dušek oko kreveta i pričvrstite lepljive trake. Slika 3
- Stavite krevetac u torbu. Slika 2
UPOZORENJE!
Za lakše otključavanje mehanizma podignite cev na gore pritiskom dugmad. Slika 15 U slučaju da mehanizam nije otključan snažan pritisak na cevi prema dole dovodi do ozbiljnog oštećenja!
ÖNEMLİ! DİKKATLİ BİR ŞEKİLDE OKUYUN VE İLERİDE BAŞVURMAK ÜZERE SAKLAYIN.
TR
EMNİYET SİSTEMLERİ
natural_image
Two simple line drawings of a container with a horizontal lid and a cross-shaped grid pattern (no text or symbols)
natural_image
Two simple line drawings of a cabinet or enclosure with cross-bracing, no text or symbols present.
KUJDES DHE MIRËMBAJTJE
natural_image
Two simple geometric diagrams showing a rectangular frame and a cross-shaped grid (no text or symbols)natural_image
Two simple geometric diagrams showing a rectangle and a crosshatched rectangle, both without any text or symbols.natural_image
Two simple geometric diagrams showing a rectangle and a cross-shaped grid, no text or symbols present.e-mails: home.market@didis-ltd.com;
export@didis-ltd.com
Дидис ООД
e-mails: home.market@didis-ltd.com;
export@didis-ltd.com
- CONTENT / СЪДЪРЖАНИЕ
- IMPORTANT! RETAIN FOR FUTURE REFERENCE: READ CAREFULLY!
- SAFETY REQUIREMENTS
- MAINTENANCE AND CARE
- PARTS
- Picture 1
- ASSEMBLING OF THE COT
- ASSEMBLING THE SECOND LEVEL OF THE COT
- ASSEMBLING THE DIAPER CHANGING TABLE OF THE COT
- ASSEMBLING THE TOY BAR OF THE COT
- DISMANTLING OF THE COT
- BG
- BRIGA I ODRŽAVANJE
- Slika 1
- POSTAVLJANJE KREVECA
- POSTAVLJANJE DRUGOG NIVOA KREVECA
- POSTAVLJANJE Pult za povijanje beba
- POSTAVLJANJE štap s igračkama
- RASTAVLJANJE KREVECA
- UPOZORENJE!
- ÖNEMLİ! DİKKATLİ BİR ŞEKİLDE OKUYUN VE İLERİDE BAŞVURMAK ÜZERE SAKLAYIN.
- TR
- EMNİYET SİSTEMLERİ
- KUJDES DHE MIRËMBAJTJE
Brand : Lorelli
Model : Torino
Category : Baby bed