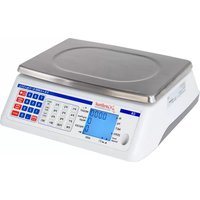
C6 - Kitchen scale Cardinal Detecto - Free user manual and instructions
Find the device manual for free C6 Cardinal Detecto in PDF.


| Type de produit | Digital Counting Scale |
| Marque | Cardinal Detecto |
| Modèle | C6 |
| Capacité | 6 lb x 0.0005 lb (3 kg x 0.2 g) |
| Dimensions | 13.39" W x 13.39" D x 5.00" H (340 mm x 340 mm x 127 mm) |
| Plateau | 12.60" W x 9.06" D (320 mm x 230 mm) |
| Alimentation | Built-in rechargeable 6V/4Ah battery or 12VDC / 110-240 VAC 50/60Hz adapter |
| Autonomie batterie | 100 hours with backlight on; 200 hours with backlight off |
| Affichage | Weight: 6 digits, Avg Piece Weight: 6 digits, Pieces: 6 digits |
| Unités de pesée | lb or kg (switchable) |
| Plage de température | 32°F to 104°F (0°C to 40°C) |
| Humidité | 25% to 95% RH |
| Tare | 100% of full scale capacity |
| Fonctions clés | Counting, accumulator, PLU (up to 99), quantity/weight preset limits, backlight, auto-off, sleep mode |
| Pesée par échantillonnage | Sample size unknown or known; insufficient sample indicator |
| Clavier | Membrane keyboard with numeric keypad, function keys |
| Nettoyage | Use damp soft cloth with mild non-abrasive detergent; do not submerge or use solvents |
| Sécurité | FCC Class A compliant; proper disposal per EU directive |
| Poids | Approximately 10 lb (estimated) |
| Pays d'origine | USA (brand based in Missouri) |
Frequently Asked Questions - C6 Cardinal Detecto
User questions about C6 Cardinal Detecto
0 question about this device. Answer the ones you know or ask your own.
Ask a new question about this device
Download the instructions for your Kitchen scale in PDF format for free! Find your manual C6 - Cardinal Detecto and take your electronic device back in hand. On this page are published all the documents necessary for the use of your device. C6 by Cardinal Detecto.
USER MANUAL C6 Cardinal Detecto
Digital Counting Scale
C Series
Operation Manual
8526-M260-O1 Rev-A PO BOX 151 WEBB CITY, MO 64870
06/14 PH (417) 673-4631 - FAX (417) 673-5001
www.cardinalscale.com
Technical Support: Ph: 866-254-8261 • techsupport@cardet.com
INTRODUCTION
Thank you for purchasing our Cardinal C Series Digital Counting Scale. Your scale is equipped with a rechargeable battery pack that is able to provide 100 hours continuous operation (with backlight on) or 200 hours continuous operation (with backlight off).
This manual will guide you through setup and operation of your scale. Please read it thoroughly before attempting to operate this scale and keep it handy for future reference.
Copyright
All rights reserved. Reproduction or use, without expressed written permission, of editorial or pictorial content, in any manner, is prohibited. No patent liability is assumed with respect to the use of the information contained herein.
Disclaimer
While every precaution has been taken in the preparation of this manual, the Seller assumes no responsibility for errors or omissions. Neither is any liability assumed for damages resulting from use of the information contained herein. All instructions and diagrams have been checked for accuracy and ease of application; however, success and safety in working with tools depend to a great extent upon the individual accuracy, skill and caution. For this reason the Seller is not able to guarantee the result of any procedure contained herein. Nor can they assume responsibility for any damage to property or injury to persons occasioned from the procedures. Persons engaging the procedures do so entirely at their own risk.
FCC Compliance Statement
This equipment generates uses and can radiate radio frequency and if not installed and used in accordance with the instruction manual, may cause interference to radio communications. It has been tested and found to comply with the limits for a Class A computing device pursuant to Subpart J of Part 15 of FCC rules, which are designed to provide reasonable protection against such interference when operated in a commercial environment. Operation of this equipment in a residential area may cause interference in which case the user will be responsible to take whatever measures necessary to correct the interference.
You may find the booklet “How to Identify and Resolve Radio TV Interference Problems” prepared by the Federal Communications Commission helpful. It is available from the U.S. Government Printing Office, Washington, D.C. 20402. Stock No. 001-000-00315-4.
Proper Disposal
When this device reaches the end of its useful life, it must be properly disposed of. It must not be disposed of as unsorted municipal waste. Within the European Union, this device should be returned to the distributor from where it was purchased for proper disposal. This is in accordance with EU Directive 2002/96/EC. Within North America, the device should be disposed of in accordance with the local laws regarding the disposal of waste electrical and electronic equipment.
It is everyone's responsibility to help maintain the environment and to reduce the effects of hazardous substances contained in electrical and electronic equipment on human health. Please do your part by making certain that this device is properly disposed of. The symbol shown to the right indicates that this device must not be disposed of in unsorted municipal waste programs.
SPECIFICATIONS
| Model: | Capacity and Division Value |
| C6 | 6 lb x 0.0005 lb (3 kg x 0.2g) |
| C15 | 15 lb x 0.001 lb (7.5 kg x 0.5g) |
| C30 | 30 lb x 0.002 lb (15 kg x 1g) |
| C65 | 65 lb x 0.005 lb (30 kg x 2g) |
| Display: WEIGHT = 6 DigitsAvg Piece Weight = 6 DigitsPIECES = 6 Digits | |
| Scale Size: 13.39" W x 13.39" D x 5.00" H(340 mm x 340 mm x 127 mm) | |
| Platform Size: 12.60" W x 9.06" D(320 mm x 230 mm) | |
| Power: Built-in rech | chargeable 6v/4Ah battery or 12VDC /110~240 VAC 50/60HzAC adapter |
| Temperature: 32° ~ 104°F (0° ~ 40°C) | |
| Humidity: 25% ~ 95% RH | |
| Zero: Established on power up routine and maintained by auto-zero circuitry | |
| Tare: 100% of full scale capacity | |
Serial Number
Date of Purchase
Purchased Form
RETAIN THIS INFORMATION FOR FUTURE USE
PRECAUTIONS
Before using this scale, read this manual and pay special attention to all NOTIFICATION symbols:

IMPORTANT

ELECTRICAL WARNING
TABLE OF CONTENTS
INSTALLATION 1
Unpacking 1
Placement 1
Level Adjustment 1
Power Connection 1
AC Operation 1
PRECAUTIONS 2
CARE AND CLEANING 2
KEY FUNCTIONS 3
ANNUNCIATORS 5
OPERATION 6
Power Switch 6
Metric Conversion 6
Weight Display 6
Displaying Weight 6
Zero the Weight display 6
Tare Weight Entry 7
Push Button Tare 7
Pre-set Tare with Known Weight of Container 7
Pre-set Tare with Container on Scale 7
To Clear the Tare 7
Quantity Preset Hi Limit 8
Weight Preset Hi Limit 8
Clear the Quantity and Weight Preset Hi Limits 8
Counting 9
Weight of Sample Unknown 9
Sample Weight is Known 9
Counting With an Insufficient Sample 9
Accumulator 10
Adding to the Weight Accumulator 10
Displaying the Accumulator 10
Clearing the Accumulator 10
PLU Operation Using Numeric Keypad 11
PLU Operation Using Preset P1 through P9 11
SCALE SETTINGS 12
Accessing the User Setup Mode 12
To Navigate in the User Setup Mode 12
RECHARGEABLE LEAD-ACID BATTERY 16
Battery Charging 16
Low Battery 16
Notice 16
ERROR AND STATUS MESSAGES 17
INSTALLATION
Unpacking
Before beginning installation of your C Series Digital Counting Scale, make certain the scale has been received in good condition. Carefully remove the scale from the shipping carton and inspect it for any evidence of damage (such as exterior dents or scratches) that may have taken place during shipment. Keep the carton and packing material for return shipment if it should become necessary. It is the responsibility of the purchaser to file all claims for any damages or loss incurred during transit.
Placement
Place the scale on a stable, vibration-free level surface away from direct sunlight and from any rapidly moving air source (heating/cooling vents, fans, etc.). Make certain the power cord and peripheral cables are routed out of the way of normal traffic.

CAUTION! DO NOT place the scale on any unstable cart, stand or table. The scale may fall causing injury to the operator, and seriously damage the unit, or proper operation of the scale may be inhibited.
Level Adjustment
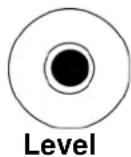
Check to make certain the scale is level. The level indicator is located at the front of the scale. If the scale is not level (the bubble will not be centered), loosen the locking ring on all four (4) mounting feet and adjust them as required to center the bubble and attain a level scale. Once a level condition has been obtained, lock the mounting feet in place by tightening the adjustment locking rings against the bottom of the scale.

Power Connection
The scale contains a power supply that converts the 110/120/220/240 VAC 50/60Hz wall supply to the power required by the scale circuitry. The power supply also contains the circuitry necessary to monitor and recharge the battery and is capable of operating the scale and recharging the battery simultaneously.
AC Operation
Plug the power cord into a grounded, polarized wall receptacle that supplies 110/120 VAC 50/60Hz power. If it is necessary to use an extension cord, make certain it is a 3-wire, fully grounded type using a minimum of 18-gauge wire. Be certain the power cord is routed out of the way of normal traffic. If only an ungrounded wall receptacle is available, it is the customer's responsibility to contact a qualified electrician to replace the ungrounded receptacle with a properly grounded polarized wall receptacle or have a grounding adapter properly installed.

WARNING! To avoid electrical hazard, DO NOT under any circumstances, cut, remove, alter, or in any way bypass the power cord-grounding prong.
It is the responsibility of the customer to contact a qualified electrician to install the proper power cord connector. Plug the power cord into a grounded, polarized wall receptacle that supplies 220/240 VAC 50/60Hz power. Be certain the power cord is routed out of the way of normal traffic.
PRECAUTIONS
Most scales are designed for an office type environment. The C Series Digital Counting Scale is no exception to that rule. The following should be used as a guideline for the proper environment to operate your scale:
- The environment should be free of excessive dust and moisture.
- Provide a comfortable temperature. In general, the scale will perform well over a temperature range of 32 to 104^ (0 to +40^ ).
- To keep cooling requirements to a minimum, the scale should be placed out of direct sunlight and to provide adequate air circulation, keep the area around the scale clear.
- Make certain the scale is not directly in front of a heating or cooling vent. Such a location will subject the scale to sudden temperature changes and air currents that may result in unstable weight readings.
- Insure that the scale has good, clean AC power and is properly grounded. In areas subject to lightning strikes, additional protection to minimize lightning damage, such as surge suppressors, should be installed.
CARE AND CLEANING
- DO NOT submerge the scale in water, pour or spray water directly on it.
- DO NOT use acetone, thinner or other volatile solvents for cleaning.
- DO clean the indicator with a damp soft cloth and mild non-abrasive detergent.
- DO remove power before cleaning with a damp cloth.
- DO clean and store the scale in a plastic bag (in a dry environment) if the scale is not going to be used for some time. A desiccant packet may be included to prevent moisture build up.
- DO recharge the internal battery every three months while in storage.
KEY FUNCTIONS
This section describes the use of each of the keys on the C Series Digital Counting Scale. It will be helpful to refer to the scale keyboard or the figure below when reading this section.
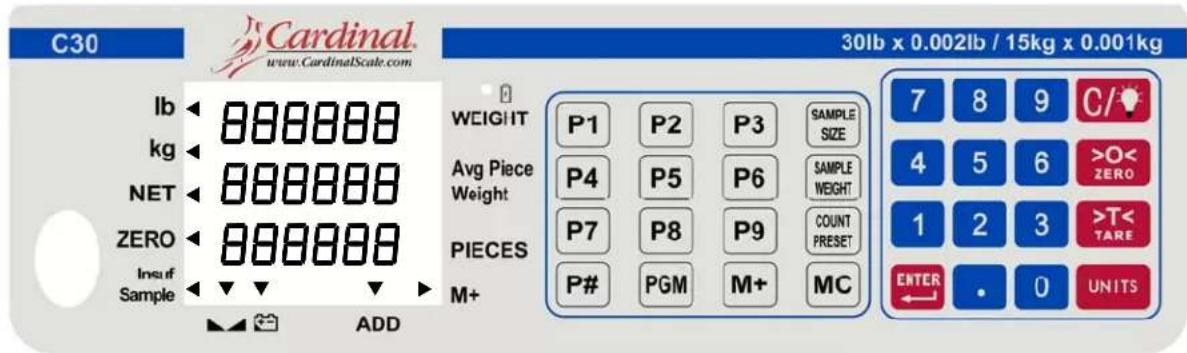

The membrane keyboard is not to be operated with pointed objects (pencils, pens, fingernails, etc). Damage to keyboard resulting from this practice will NOT be covered under warranty.
SAMPLE SIZE
This key is used to weigh a known number of pieces in preparation for a new counting operation. Sample quantities are entered using the numeric keypad in any quantity desired.
SAMPLE WEIGHT
Pressing this key will display the calculated average piece weight from the current sampling and counting operation. It will also allow the manual entry of a known average piece weight (using the numeric keys) to be used in the next counting operation.
COUNT PRESET
This key is used when setting the Quantity and Weight Preset limits. During a counting operation (with the limits set) if the quantity or weight exceeds the limits, the error beeper will sound and an error message will flash on the display.
The MC key is used to clear the accumulator. The M+ and ADD annunciators will turn off to indicate the clearing has taken place.
Pressing the M+ key will cause the scale to display the contents of the accumulator (the number of pieces accumulated since the last time the accumulator was cleared).
The M+ key is also used to add the current piece count value to the accumulator. The M+ annunciator will be selected to indicate the accumulation has taken place.
KEY FUNCTIONS, CONT.
The PGM key is used to add or edit product look up (PLU) numbers. Up to 99 PLU numbers can be programmed. Note that the first 9 PLU's are assigned to the P1-9 keys and that all PLU's can be selected using the numeric keys.
Pressing the P# key will cause the scale to recall the average piece weight along with the saved tare weight (if a tare weight was programmed) associated with the product look up (PLU) number.
P1 Pressing these keys will cause the scale to recall the average piece weight to along with the saved tare weight (if a tare weight was programmed) associated with the product look up (PLU) number assigned to the key.
The C / √ key is used to perform different functions depending on the current mode of operation:
- Data Entry: The C / √ key is used to clear an incorrect entry from the display without processing the data. If an incorrect entry is made, press the C / √ key and re-enter the correct data.
- Pressing and holding the C / - key for 3 seconds will toggle the display backlight on and off.
0< The ZERO key is used to perform a variety of functions depending on the ZERO current mode of operation:
Weight Display Mode (lb or kg annunciator on): Pressing the ZERO key will set the weight display to zero and turn on the ZERO annunciator if the displayed weight is within ± 4% of scale capacity.
T< The TARE key is used to display the current tare weight (or zero if no tare has been entered) and/or using the numeric keypad, to enter a new tare weight. It is also used when entering a tare under a Preset number.
UNITS Pressing this key will toggle the weighing units between pounds (lb) and kilograms (kg). The currently selected weighing unit is indicated by illuminating either the lb or kg annunciator.
These keys are used to enter numeric data during normal operations as well as 0 \~ 9 during calibration and operational setup.
This is the decimal point key. It is used to enter a decimal point where required when entering numeric data.
Enter ← The Enter/←key is used to signal completion of the entry of data and causes the scale to process the data entered.
ANNUNCIATORS
lb
The lb annunciator is illuminated to show that the weight displayed is in pounds. The UNITS key may be used to select pounds as the weighing units.
kg
The kg annunciator is illuminated to show that the weight displayed is in kilograms. The UNITS key may be used to select kilogram as the weighing units.
NET
The NET annunciator is illuminated to show that the weight displayed is the net weight. Net weight is determined by subtracting the stored tare weight from the gross or scale weight. The tare weight, usually the weight of the container, is entered using the tare key. Note that the NET annunciator is only active when a zero tare weight or tare weight value is stored and the display is in the weight mode as shown by the illumination of the lb or kg annunciator.
ZERO (Center-of-Zero)
The Center-of-Zero annunciator is located on the left of the display and is illuminated to indicate that the weight is within +/- 1/4 division of the center of zero.
Insuf Sample
The Insuf Sample annunciator is located on the lower left of the display and is illuminated to show that the sample is too small to calculate an accurate piece weight. If the counting function is continued without increasing the sample size, the scale will still operate even though accuracy will be affected.

(Stable)
The (Stable) annunciator is located at the bottom left of the display and is illuminated when the WEIGHT display is stable.
ADD
The ADD annunciator is located at the bottom right of the display and is illuminated when the scale is in the accumulator mode (M+).
M+
The M+ annunciator is located on the lower right of the display and is illuminated to show that the display is in the Accumulator mode and that the value displayed is the current contents of the accumulator. Individual counts are adjusted via the (M+) and (MC) keys or optionally, any count may be entered using the numeric keypad. Note that when both the M+ and ADD annunciators are illuminated, the current count has been added to the accumulator.

(Low Battery)
The Low Battery annunciator will illuminate to indicate that the internal battery requires charging. No change in operation will occur until just before the battery voltage drops to a level where operation is affected. At this level, the scale will automatically turn itself off. NOTE! When the battery needs to be recharged, the CHARGING LED will turn Red. After the battery has been recharged, the CHARGING LED will turn Green.
OPERATION
Power Switch
The Power Switch is located on the bottom left side panel towards the front of the scale. Place the power switch in the on position. The scale will perform a brief lamp test. This test consists of illuminating all display segments and annunciator LED's to allow the operator to make a visual verification that the display is operational. After completion of the lamp test, the scale will display the model number and software revision level and then the WEIGHT display will change to show zero weight, indicating the scale is ready for use.

Metric Conversion
To change weighing units, press the UNITS key to toggle between pounds and kilograms. Note that either the LB or KG annunciator will illuminate to indicate which weighing unit is active.

Before using the scale, it should be “warmed up” (turned on and unloaded for approximately 15 to 20 minutes).
WEIGHT Display
Displaying Weight
- With the scale in the Weight mode (0.000 will be displayed for WEIGHT and 0 will be displayed for the Avg Piece Weight and PIECES displays), place the item to be weighed on the scale platform.
- The display will show the weight on the scale platform. The lb or kg annunciators will illuminate to indicate which unit of weight has been selected and that the scale is in the Weight mode. Note that the Avg Piece Weight and PIECES display will remain at 0 (zero).
Zero the WEIGHT Display
- With the scale in the Weight mode (0 will be displayed for the Avg Piece Weight and PIECES displays), press the ZERO key.
- The WEIGHT display will show 0.000 and the ZERO and Stable annunciators will illuminate, indicating a center-of-zero, stable gross weight condition.
OPERATION, CONT.
Tare Weight Entry
Push Button Tare
- With the scale in the Weight mode, place the empty container on the scale platform.
- Press the TARE key. The WEIGHT display will change to zero and the NET annunciator illuminates, indicating net weight is being displayed. The empty container's weight has been entered as "tare weight".
Pre-set Tare with Known Weight of Container
- With the scale in the Weight mode, press the TARE key. The display will change to show PrEER and the PIECES display will show ---- (six dashes).
- Using the numeric keypad, enter the desired tare (container) weight.
- After the desired tare value has been entered, press the TARE key. The display will show the Net weight (Gross minus tare) and the NET annunciator will illuminate.
- Proceed with the counting or weighing operation.
Pre-set Tare with Container on Scale
- With the scale in the Weight mode, place the container on the scale.
- Read the weight of the container.
- Using the numeric keypad, enter the container weight and press the TARE key.
- The display will show the Net weight (Gross minus tare) and the NET annunciator will illuminate.
- Proceed with the counting or weighing operation.
To Clear the Tare
To return to a zero tare, simply remove all material from the scale platform and press the TARE key. This will reset the tare weight to zero.
OPERATION, CONT.
Quantity Preset Hi Limit
The scale can store a Quantity Preset Hi Limit value. The scale will beep and the Avg Piece Weight will display a blinking -0.8 y - if the quantity is over the Hi limit value set.
- Press the COUNT PRESET key (items can be on scale or platform can be empty).
- The WEIGHT display will change to show P_rESE .
- Using the numeric keypad, enter the Quantity Preset Hi Limit.
- Press the SAMPLE SIZE key, followed by the COUNT PRESET key.
- The scale will return to the Weight mode.
Weight Preset Hi Limit
The scale can store a Weight Preset Hi Limit value. The scale will beep and the Avg Piece Weight will display a blinking -LJPSE - if the weight is over the Hi limit value set.
- Press the COUNT PRESET key (items can be on scale or platform can be empty).
- The WEIGHT display will change to show PrE5\&E .
- Using the numeric keypad, enter the Weight Preset Hi Limit.
- Press the SAMPLE WEIGHT key, followed by the COUNT PRESET key.
- The scale will return to the Weight mode.
Clear the Quantity and Weight Preset Hi Limits
To clear the Quantity and/or Weight Preset Hi Limit, simply enter a "0" for the limit value.
OPERATION, CONT.
Counting
Weight of Sample is Unknown
- With the scale in the Weight mode, place the sample on the scale platform.
- On the numeric keypad, enter the number of pieces in the sample.
- While the display is blinking, press the SAMPLE SIZE key.
- The display will change to show S P and then show the average piece weight and number of pieces.
- Add the pieces to be counted and read the total count on the PIECES display.
- Remove the pieces from the scale.
- Press the C / √ key to complete the counting operation and return to the Weight mode.
Sample Weight is Known
- With the scale in the Weight mode, using the numeric keypad, enter the piece weight of the sample.
- Press the SAMPLE WEIGHT key.
- Add the pieces to be counted and read the total count on the PIECES display.
- Remove the pieces from the scale.
- Press the C / 🔒 key to complete the counting operation and return to the Weight mode.
Insufficient Sample

IMPORTANT! If the sample weight is too small the PIECES display will show ---- (six dashes) for a few seconds and then the Insuf Sample annunciator will illuminate. Continued use of the scale with the Insuf Sample annunciator illuminated, will result in an “inaccurate” count. Press the C / key to cancel the counting operation and return to the Weight mode. Increase the number of pieces for the sample and repeat the counting operation to achieve an “accurate” count.
OPERATION, CONT.
Accumulator
Adding to the Weight Accumulator
- With the scale in the Weight mode and displaying zero weight, place the item on the scale platform.
- Press the M+ key to add to the value of the Weight Accumulator.
- The Avg Piece Weight display will change to show the accumulator values and the ADD annunciator will be illuminated (to indicate the addition to the accumulator has taken place). After 3 seconds, the scale will return to the weight mode.
- Remove the item from the scale.
- The scale is ready for the next counting or weight operation.
NOTE: Additional Weight Accumulator additions can not take place until the current weighing operation (scale weight returns to zero) has been completed.
Displaying the Accumulator
With the scale in the Weight mode and displaying zero weight, press the M+ key to display the content of the accumulators. The values of the accumulator will be displayed for 3 seconds, then return to the Weight mode display.
Clearing the Accumulator
With the scale in the Weight mode and displaying zero weight, press the MC key. The accumulator will be reset to zero.
- With the scale in the Weight mode, press the PGM key. The Weight display will change to show PLU.
- Touch the P1 through 9 key or using the numeric keys, enter the desired number of PLU 10 through 99 to change and press the ENTER key. The PLU number will be shown on the Weight display.
- Using the numeric keypad to enter the average piece weight and then press the ENTER key to accept it. Note that if the PLU currently has an average piece weight, you can press the ENTER key to accept it or change it at this time.
- The PIECES display will change to show EArE.
- Press the ENTER key to accept it.
- The next sequential PLU number will be displayed. Repeat steps 2 through 5 to program the remaining PLU's.
- To exit PLU programming, simply press the PGM key and the scale will return to the normal weight mode.
PLU Operation Using Numeric Keypad
- With the scale in the Weight mode, press the P# key. The Weight display will change to show PLU.
- Enter the desired PLU number (1 through 99) and press the ENTER key.
- The recalled PLU and average piece weight will display along with the associated tare weight (if a tare weight was programmed).
- Add the pieces to be counted and read the total weight on the WEIGHT and the total count on the PIECES display.
- Remove the pieces from the scale.
- Press the C / √ key to complete the counting operation and return to the Weight mode.
PLU Operation using Preset P1 through P9
- With the scale in the Weight mode, press the desired PLU key P1 through P9.
- The recalled PLU and average piece weight will display along with the associated tare weight (if a tare weight was programmed).
- Add the pieces to be counted and read the total weight on the WEIGHT and the total count on the PIECES display.
- Remove the pieces from the scale.
- Press the C / √ key to complete the counting operation and return to the Weight mode.
SCALE SETTINGS
Accessing the User Setup Mode
To access the User Setup Mode, with the scale off press and hold the UNITS key while switching the scale on. The Scale will display SETUP.
To Navigate in the User Setup Mode
Use the following keys to navigate the User Setup settings.
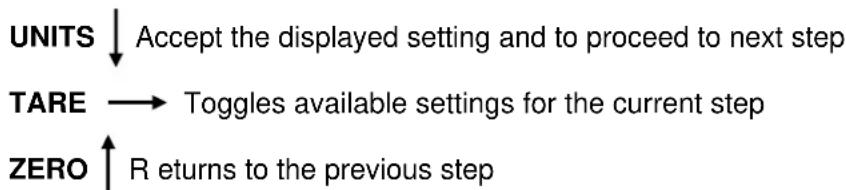
flowchart
graph TD
    A["UNITS"] --> B["Accept the displayed setting and to proceed to next step"]
    C["TARE"] --> D["Toggles available settings for the current step"]
    E["ZERO"] --> F["R returns to the previous step"]
C / Exit setup and proceed to SAVE
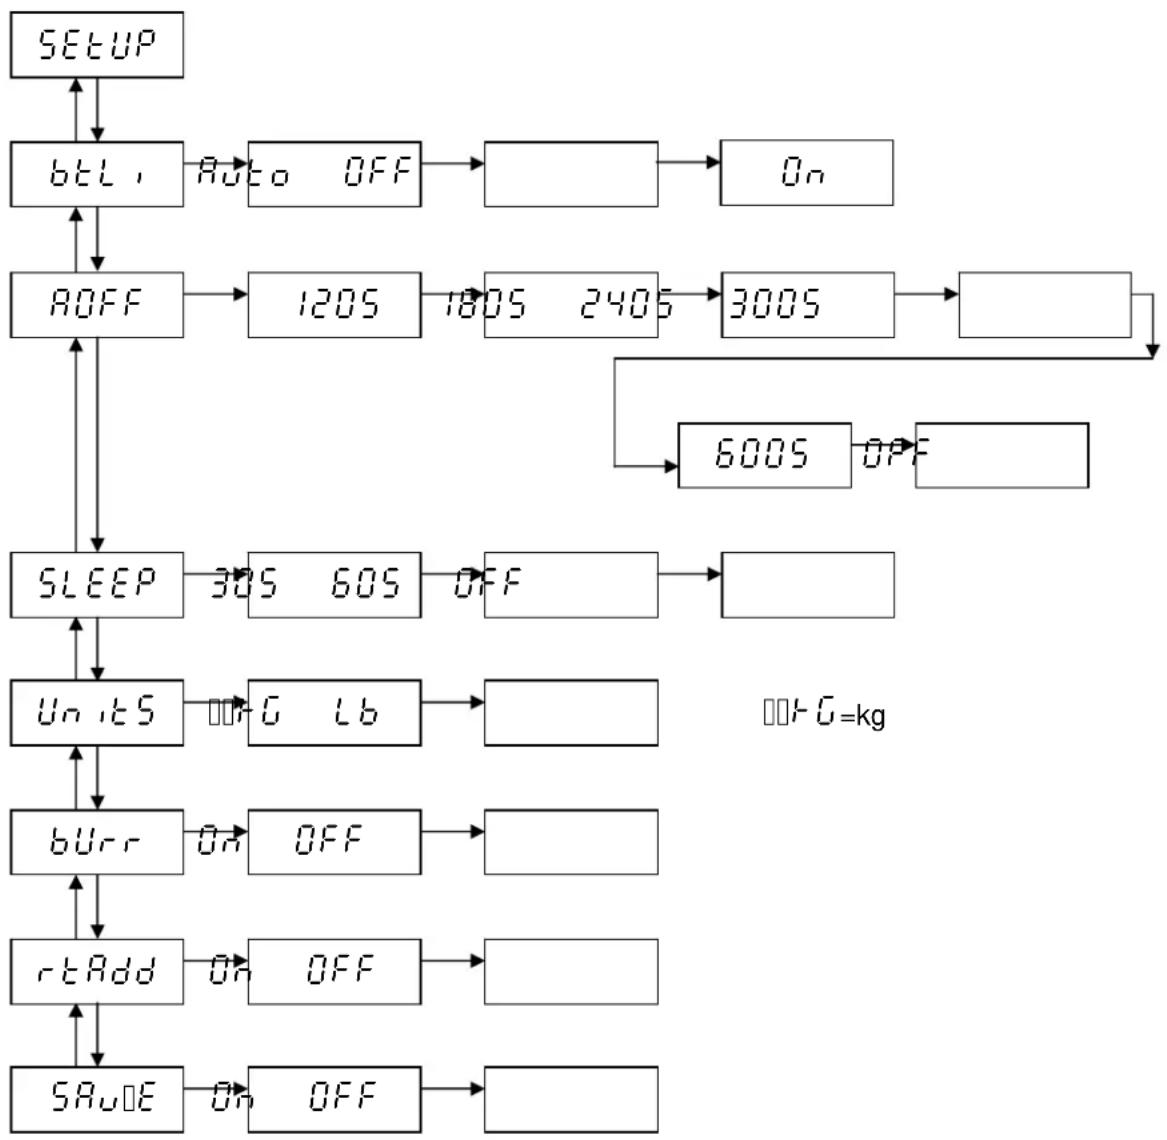
flowchart
graph TD
    A["SETUP"] --> B["btL,"]
    B --> C["Auto OFF"]
    C --> D["On"]
    B --> E["ROFF"]
    E --> F["120S"]
    F --> G["180S 240S"]
    G --> H["300S"]
    H --> I["600S OFF"]
    I --> J["SLEEP"]
    J --> K["30S 60S"]
    K --> L["OFF"]
    L --> M[" "]
    J --> N["Units"]
    N --> O["G Lb"]
    O --> P[" "]
    N --> Q["burr"]
    Q --> R["ON OFF"]
    R --> S[" "]
    N --> T["rtAdd"]
    T --> U["ON OFF"]
    U --> V[" "]
    T --> W["SAUOE"]
    W --> X["ON OFF"]
    X --> Y[" "]
    style A fill:#f9f,stroke:#333
    style B fill:#ccf,stroke:#333
    style C fill:#cfc,stroke:#333
    style D fill:#fcc,stroke:#333
    style E fill:#cff,stroke:#333
    style F fill:#ffc,stroke:#333
    style G fill:#ffc,stroke:#333
    style H fill:#ffc,stroke:#333
    style I fill:#ffc,stroke:#333
    style J fill:#ffc,stroke:#333
    style K fill:#ffc,stroke:#333
    style L fill:#ffc,stroke:#333
    style M fill:#ffc,stroke:#333
    style N fill:#ffc,stroke:#333
    style O fill:#ffc,stroke:#333
    style P fill:#ffc,stroke:#333
    style Q fill:#ffc,stroke:#333
    style R fill:#ffc,stroke:#333
    style S fill:#ffc,stroke:#333
    style T fill:#ffc,stroke:#333
    style U fill:#ffc,stroke:#333
    style V fill:#ffc,stroke:#333
SCALE SETTINGS, CONT.
bE□, - Backlight Mode
With SETUP, bEL, displayed the current setting for the Backlight Mode parameter will be shown. If the setting displayed is acceptable, press the UNITS key to proceed to the next parameter.
Otherwise, use the TARE key to toggle between the selections and then press the UNITS key to save it and proceed to the next parameter. The available settings are:
Auto = Auto Backlight – While weighing, the backlight will be turned ON automatically when the weight is over 10 divisions or any key is pressed. The backlight will turn OFF automatically when the scale has not been used for 10 minutes.
OFF = The will be no backlight (always OFF).
On = The backlight will always be ON.
ROFF – Automatic Power-Off
With SETUP, ROFF displayed the current setting for the Automatic Shut-Off function parameter will be shown. If the setting displayed is acceptable, press the UNITS key to proceed to the next parameter.
Otherwise, use the TARE key to toggle between the selections and then press the UNITS key to save it and proceed to the next parameter. The available settings are:
1205 = After 120 seconds (2 minutes) of no activity the scale will shut off and must be turned on using the ON/OFF switch.
1805 = After 180 seconds (3 minutes) of no activity the scale will shut off and must be turned on using the ON/OFF switch.
2405 = After 240 seconds (4 minutes) of no activity the scale will shut off and must be turned on using the ON/OFF switch.
3005 = After 300 seconds (5 minutes) of no activity the scale will shut off and must be turned on using the ON/OFF switch.
6005 = After 600 seconds (10 minutes) of no activity the scale will shut off and must be turned on using the ON/OFF switch.
☐☐☐ OFF= The Auto Shut-Off function is disabled.
SCALE SETTINGS, CONT.
SLEEP – Sleep Mode
With SEETUP, SLEEP displayed the current setting for the Sleep Mode function parameter will be shown. If the setting displayed is acceptable, press the UNITS key to proceed to the next parameter.
Otherwise, use the TARE key to toggle between the selections and then press the UNITS key to save it and proceed to the next parameter. The available settings are:
305 = If no activity occurs on scale for 30 seconds, the scale will enter Sleep Mode. The display will be blank except for a flashing cursor. To activate the scale, press any key or add/remove weight from scale.
605 = If no activity occurs on scale for 60 seconds, the scale will enter Sleep Mode. The display will be blank except for a flashing cursor. To activate the scale, press any key or add/remove weight from scale.
OFF = The Sleep Mode function is disabled.
Unit - Weighing Units
With SETUP, Unit displayed the current setting for the Weighing Units parameter will be shown. If the setting displayed is acceptable, press the UNITS key to proceed to the next parameter.
Otherwise, use the TARE key to toggle between the selections and then press the UNITS key to save it and proceed to the next parameter. The available settings are:
$$ \begin{array}{l} \vdash G = \mathrm{kg} (\text { Kilograms }) \ \text { 口 } L b = L b \quad (\text { Pounds }) \ \end{array} $$
burr - Beeper
With SETUP, buffer displayed the current setting for the Beeper parameter will be shown. If the setting displayed is acceptable, press the UNITS key to proceed to the next parameter.
Otherwise, use the TARE key to toggle between the selections and then press the UNITS key to save it and proceed to the next parameter. The available settings are:
$$ \begin{array}{l} O n = \text { Enable Beeper } \ \square O F F = \text { Disable Beeper } \ \end{array} $$
rtAdd - Return Add
With SETUP, rEAdd displayed the current setting for the Return Add parameter will be shown. If the setting displayed is acceptable, press the UNITS key to proceed to the next parameter.
Otherwise, use the TARE key to toggle between the selections and then press the UNITS key to save it and proceed to the next parameter. The available settings are:
$$ \begin{array}{l} \text { On } = \text { The weight have to return to 0.0 then you can execute the M+ } \ \text { OFF } = \text { You can execute the M+ even the weight did not return to 0.0 } \ \end{array} $$
SCALE SETTINGS, CONT.
SROU E - Save User Setup
With SETUP, SAVE displayed the current setting for the Save Setting parameter will be shown. If the setting displayed is acceptable, press the UNITS key to proceed to the next parameter.
Otherwise, use the TARE key to toggle between the selections and then press the UNITS key to save it and proceed to the next parameter. The available settings are:
$$ \begin{array}{l} \begin{array}{r l} \text { On } & = \text { The changes are saved and the scale is ready for use with the new } \ & \text { settings. } \end{array} \ \begin{array}{r l} \text { OFF } & = \text { The changes are NOT saved and the scale will continue to operate with } \ & \text { the previous settings. } \end{array} \ \end{array} $$
The scale will reset and perform a lamp test. Next, the display will show the model number; the software revision level and then the WEIGHT display will show zero weight.
RECHARGEABLE LEAD-ACID BATTERY
Battery Charging
The scale can charge the battery (lead-acid rechargeable battery, 6v/4Ah). Just connect the scale to the external power supply to charge it. The battery will be charged regardless if the scale is on or off. It takes approximately 12 hours to charge the battery to full capacity depending on the voltage of the battery. If the battery has been-discharged, a prolonged charging time is required to bring the battery back to full capacity.

Red light: The battery is charging.
Green light: The battery is fully charged.
Low Battery
When the battery voltage falls below 5.7v, the low battery annunciator will be turned on. The battery must be recharged. Continued use (approximately 15 minutes later), the display will show Lo bRE in the weight field. If the battery voltage drops too low for accurate weighing, the scale will automatically shut off and you will be unable to turn it back on. When the low battery indicator is displayed, the operator should plug the power supply into the scale and then into the proper electrical wall outlet. The scale will begin charging the battery.
Notice
The battery should be recharged at least every 5 months regardless if it is used or not. After a long time storage, e.g. over 3 months, it is desired to cycle (charge/discharge) the battery 3 times to let it restore to full capacity.
When replacing the battery, pay much attention to the poles. The positive (+) terminal must be connected to the red connector and the negative (-) terminal must be connected to the black connector. If connected wrongly, the battery will be damaged.
NOTE: The battery cover can be removed by loosening a single captive screw. This screw remains attached to the cover which prevents it from falling out of the cover or being dropped and lost.
The capacity of the batteries will reduce over the years and therefore also the total operation time of the scale. This is not an error of the scale, but it is normal behavior or rechargeable batteries.
ERROR AND STATUS MESSAGES
The Cardinal C Series Digital Counting Scale is equipped with a diagnostic software program that tests various portions of the scale's circuitry and verifies proper operation. Should a problem be detected, an error or status message will be displayed alerting the operator to that condition. The following lists these error messages and their description.
| ERROR MESSAGE DESCRIPTION | |
| Err | Over capacity |
| Lo bAt | Low battery |
| 00000 | Zero value is too low when starting |
| 00000 | Zero value is too high when starting |
| ErrH | Zero value is too high |
| ErrL | Zero value is too low |
| ErrE | EEprom Error |
| ErrS | Keypad Error |

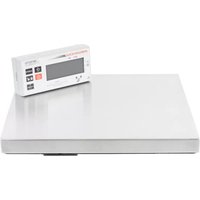
- Digital Counting Scale
- C Series
- Operation Manual
- INTRODUCTION
- Copyright
- Disclaimer
- FCC Compliance Statement
- Proper Disposal
- PRECAUTIONS
- TABLE OF CONTENTS
- INSTALLATION 1
- PRECAUTIONS 2
- CARE AND CLEANING 2
- KEY FUNCTIONS 3
- ANNUNCIATORS 5
- OPERATION 6
- Weight Display 6
- Counting 9
- Accumulator 10
- SCALE SETTINGS 12
- RECHARGEABLE LEAD-ACID BATTERY 16
- ERROR AND STATUS MESSAGES 17
- INSTALLATION
- Unpacking
- Placement
- Level Adjustment
- Power Connection
- AC Operation
- CARE AND CLEANING
- KEY FUNCTIONS
- SAMPLE SIZE
- SAMPLE WEIGHT
- COUNT PRESET
- KEY FUNCTIONS, CONT.
- ANNUNCIATORS
- lb
- kg
- NET
- ZERO (Center-of-Zero)
- Insuf Sample
- ADD
- M+
- OPERATION
- Power Switch
- Metric Conversion
- WEIGHT Display
- Displaying Weight
- Zero the WEIGHT Display
- OPERATION, CONT.
- Tare Weight Entry
- Push Button Tare
- Pre-set Tare with Known Weight of Container
- Pre-set Tare with Container on Scale
- To Clear the Tare
- Quantity Preset Hi Limit
- Weight Preset Hi Limit
- Clear the Quantity and Weight Preset Hi Limits
- Counting
- Weight of Sample is Unknown
- Sample Weight is Known
- Insufficient Sample
- Accumulator
- Adding to the Weight Accumulator
- Displaying the Accumulator
- Clearing the Accumulator
- PLU Operation Using Numeric Keypad
- PLU Operation using Preset P1 through P9
- SCALE SETTINGS
- Accessing the User Setup Mode
- To Navigate in the User Setup Mode
- SCALE SETTINGS, CONT.
- bE□, - Backlight Mode
- ROFF – Automatic Power-Off
- SLEEP – Sleep Mode
- Unit - Weighing Units
- burr - Beeper
- rtAdd - Return Add
- SROU E - Save User Setup
- RECHARGEABLE LEAD-ACID BATTERY
- Battery Charging
- Low Battery
- Notice
- ERROR AND STATUS MESSAGES
Brand : Cardinal Detecto
Model : C6
Category : Kitchen scale