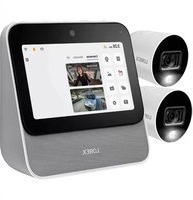
L871T8E-2CA2 - Security Camera Lorex - Free user manual and instructions
Find the device manual for free L871T8E-2CA2 Lorex in PDF.


| Product Type | Security Camera |
| Brand | Lorex |
| Model | L871T8E-2CA2 |
| Connectivity | Wi-Fi (2.4 GHz/5 GHz) |
| Resolution | 4K (8 MP) |
| Night Vision | Up to 100 ft (30 m) |
| Field of View | 130° diagonal |
| Power Source | Power adapter (included) |
| Weather Resistance | IP67 (indoor/outdoor) |
| Audio | Two-way audio with built-in microphone and speaker |
| Motion Detection | Yes, with customizable zones |
| Storage | MicroSD card (optional) or Lorex Home Center (hub) |
| Mounting | Wall or ceiling mount (hardware included) |
| Dimensions | 2.5 x 2.5 x 4.5 inches (without mount) |
| Weight | 0.5 lbs (0.23 kg) |
| Operating Temperature | -4°F to 122°F (-20°C to 50°C) |
| Compatibility | Lorex Home Center (hub) and Lorex Home app |
| Power Consumption | 12V DC, 1A |
| Warranty | 1 year limited |
Frequently Asked Questions - L871T8E-2CA2 Lorex
User questions about L871T8E-2CA2 Lorex
0 question about this device. Answer the ones you know or ask your own.
Ask a new question about this device
Download the instructions for your Security Camera in PDF format for free! Find your manual L871T8E-2CA2 - Lorex and take your electronic device back in hand. On this page are published all the documents necessary for the use of your device. L871T8E-2CA2 by Lorex.
USER MANUAL L871T8E-2CA2 Lorex
From all of us at Lorex, we welcome you to our community – thanks for your purchase of the Lorex Home Center. We designed this product with you in mind, to provide a new and seamless home monitoring solution. With its quality features that are easy to navigate, the Lorex Home Center will be more than a security system, but an extension of your home. Here’s how to get started.
What you'll find in the box
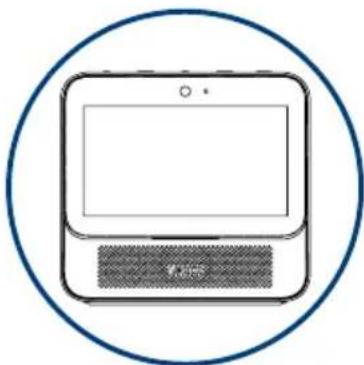
natural_image
Simple line drawing of a tablet device with a button labeled 'T-100' inside a circle (no text or symbols on the device itself)Lorex Home Center

natural_image
Simple line drawing of a charging plug and cable with a connector, enclosed in a circle (no text or symbols)Power Adapter
natural_image
Simple line icon of a card inside a circle (no text or symbols)Storage (Pre-inserted)*
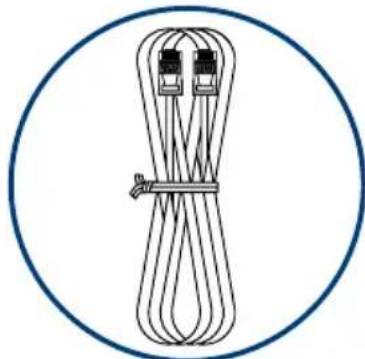
natural_image
Simple line drawing of a rope tied with two clips, enclosed in a circle (no text or symbols)Ethernet Cable
* See product packaging for details on storage configuration.
Overview
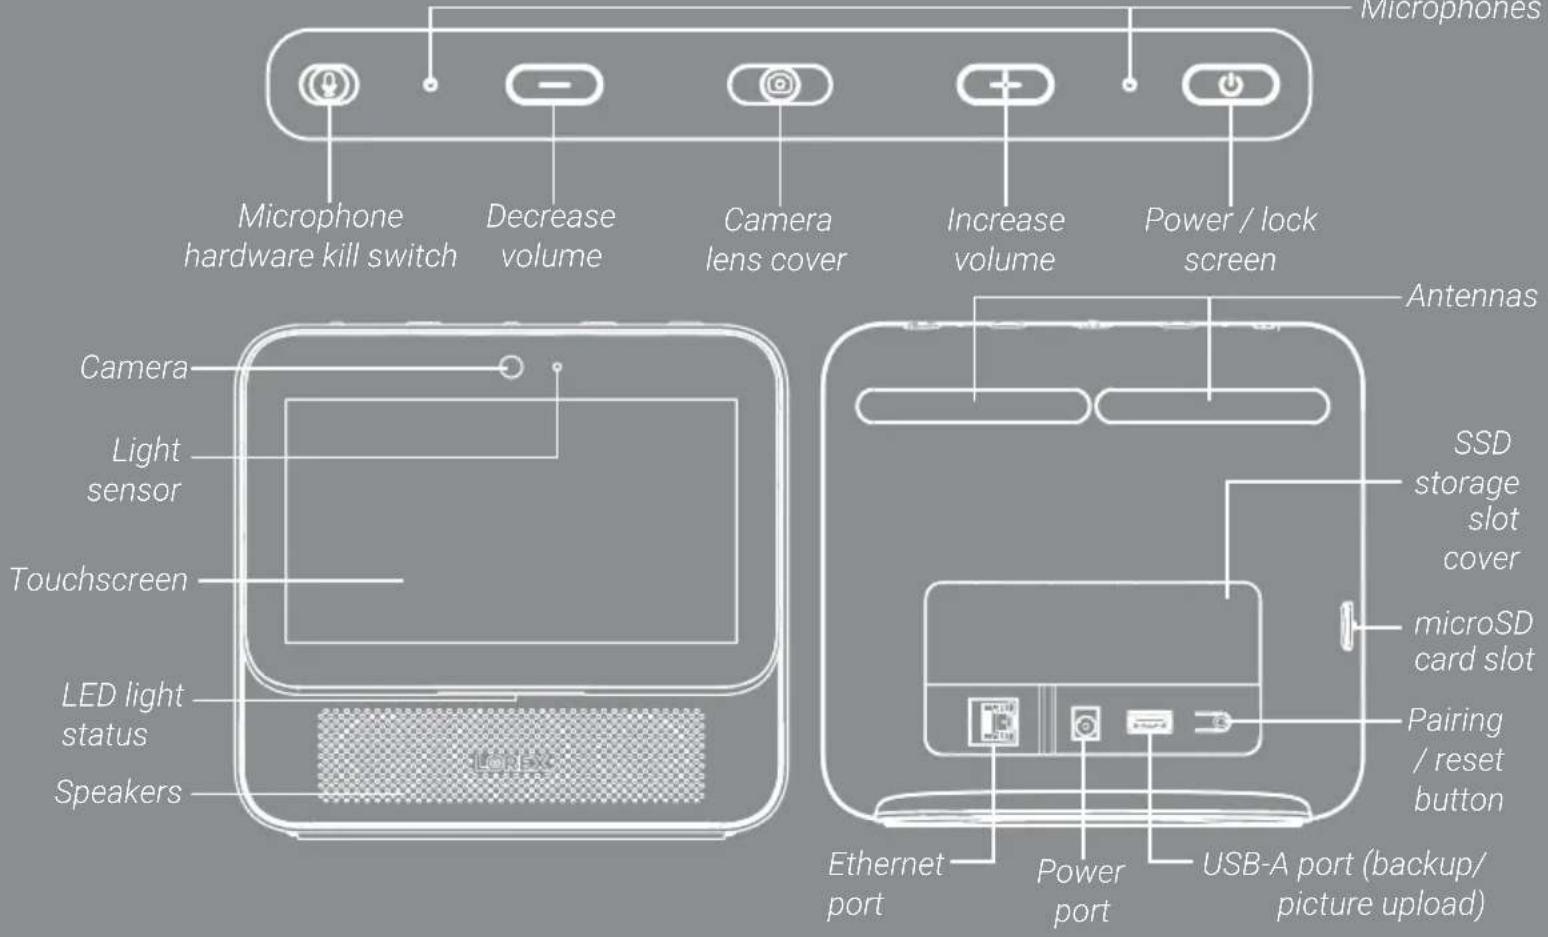
Placement of the Lorex Home Center
Choose a central location with good connectivity to your router and devices. Limit the amount of walls, ceilings, and other major obstructions between the Lorex Home Center and your devices.
Recommendations for improving range:
- Ensure the antennas are in the upright position.
- If you need to extend the Lorex Home Center's Wi-Fi signal, we recommend adding the Lorex Home Center Extender (model #AX62TR). Place the extender halfway between the Lorex Home Center and your other devices.

Connect the Lorex Home Center
- Plug the power cable into the Lorex Home Center.
Then plug the power adapter into a wall outlet.
Follow the on-screen prompts to complete first-time setup.
- Create your passcode.
Passcode – This is a 6-digit passcode used to unlock your device or disarm your sensors (in case you use sensors with the system). You do not have to enter the passcode manually if the Face Unlock feature has been activated. You also have the option to skip this step.
- Create your device password.
Device Password – This password is used to add the Lorex Home Center to the Lorex Home app. It must consist of at least 8 characters and contain a combination of numbers, letters, and special characters.
Note: If you forget both your passcode and device password, you must do a hardware reset. Press down on the reset button until a warning pop up appears. Select Yes.

natural_image
Line drawing of a simple electrical device with a plug, cable, and socket (no text or symbols)- Set up Face Unlock.
Face Unlock – This feature allows you to unlock the Lorex Home Center with the built-in camera. Make sure that the camera lens is not covered, that nothing is covering your face, and that you position your face directly in front of the camera. A reasonable amount of light is required to have this function work properly. You also have the option to skip this step and cover the camera with the built-in lens cover for privacy.
Important: Only one device owner's face can be stored.
- Power on your new cameras and/or doorbell near the Lorex Home Center.
Note: If you are adding existing cameras that were previously set up through the Lorex Home app, you will need to ensure that you are running the latest Lorex Home compatible firmware and then reset the cameras. See page "Troubleshooting: Adding/Updating Cameras" steps 7-10 for details. This will not erase any of the recordings stored on the cameras.
- Choose your preferred connection set up method from the following three options:

natural_image
Three blue icons: a USB port, Wi-Fi signal, and a wireless signal symbol (no text or labels)Wired Wireless Offline
Network Setup
Option A - Wired
Tap the wired icon and connect the Lorex Home Center to your home router using the provided Ethernet cable. The Lorex Home Center must be placed near your home router and positioned centrally relative to the different Lorex devices.

natural_image
Diagram showing a cable connector connected to a network device with two USB connectors (no text or labels)Option B - Wireless
Tap the wireless icon, select your Wi-Fi network from the list, then enter the Wi-Fi password to connect. The Lorex Home Center can be placed wherever there is a good connection to your home router and positioned centrally relative to the different Lorex devices.
Note: Requires a dual-band router (2.4GHz/5GHz) with 5GHz Wi-Fi network enabled.
Option C - Offline
Tap the offline icon to setup through a direct connection. The Lorex Home Center can work offline and no internet connection is required to operate it or connect it to different Lorex devices. Central placement is important for the Lorex devices to communicate directly with the Lorex Home Center. You will not be able to use the Lorex Home App to access the Lorex Home Center remotely and will not receive automatic update notifications.
Device Setup
- In the Device Setup screen, select the device that you want to add and tap Next.
List of compatible devices:
| Cameras Add a Wi-Fi indoor | or outdoor camera or a floodlight camera. |
| Doorbell Add a Lorex video | doorbell camera. |
| Sensors Add a compatible | Lorex sensor. |
| Extender Add a Lorex Home | Center Extender to expand the range of cameras and sensors. |
| Previously set up compatible Lorex devices | If your device is already set up through the Lorex Home app, press the link "I already have devices set up through the Lorex Home App". |
Note: Make sure your devices are compatible, powered on and nearby the Lorex Home Center for initial setup. Once set up, you can unplug them and move them to their final locations as long as they are within range of the Lorex Home Center.

Important: If your camera has not been detected, you will need to update the camera's firmware by connecting it directly to the router and update the firmware through the Lorex Home app. See page "Troubleshooting: Adding/Updating Cameras" for more details.
- Pair the Lorex Home Center to the Lorex Home app for remote access and viewing.
Notes:
- Use the device password when asked (Step 3 in "Connect the Lorex Home Center").
- This does not apply if you are using the offline connection method.
Guide to Basic Operations
Touchscreen Gestures

natural_image
Hand icon pointing at a circular button with an arrow, no text or symbols presentSwipe right from the left edge of the screen to return to the previous screen

natural_image
Hand icon showing a finger pressing a circular button with an upward arrow (no text or symbols)Swipe up from the bottom edge of the screen to return to the home screen

natural_image
Hand icon with finger pressing a circle, no text or symbols presentSwipe down from the top edge of the screen for the drop-down menu
Light Status Indicators

Away* Home*


Disarmed*

System Error Voice Assistant Activated
* This status only applies to the Lorex sensors.
Home Screen
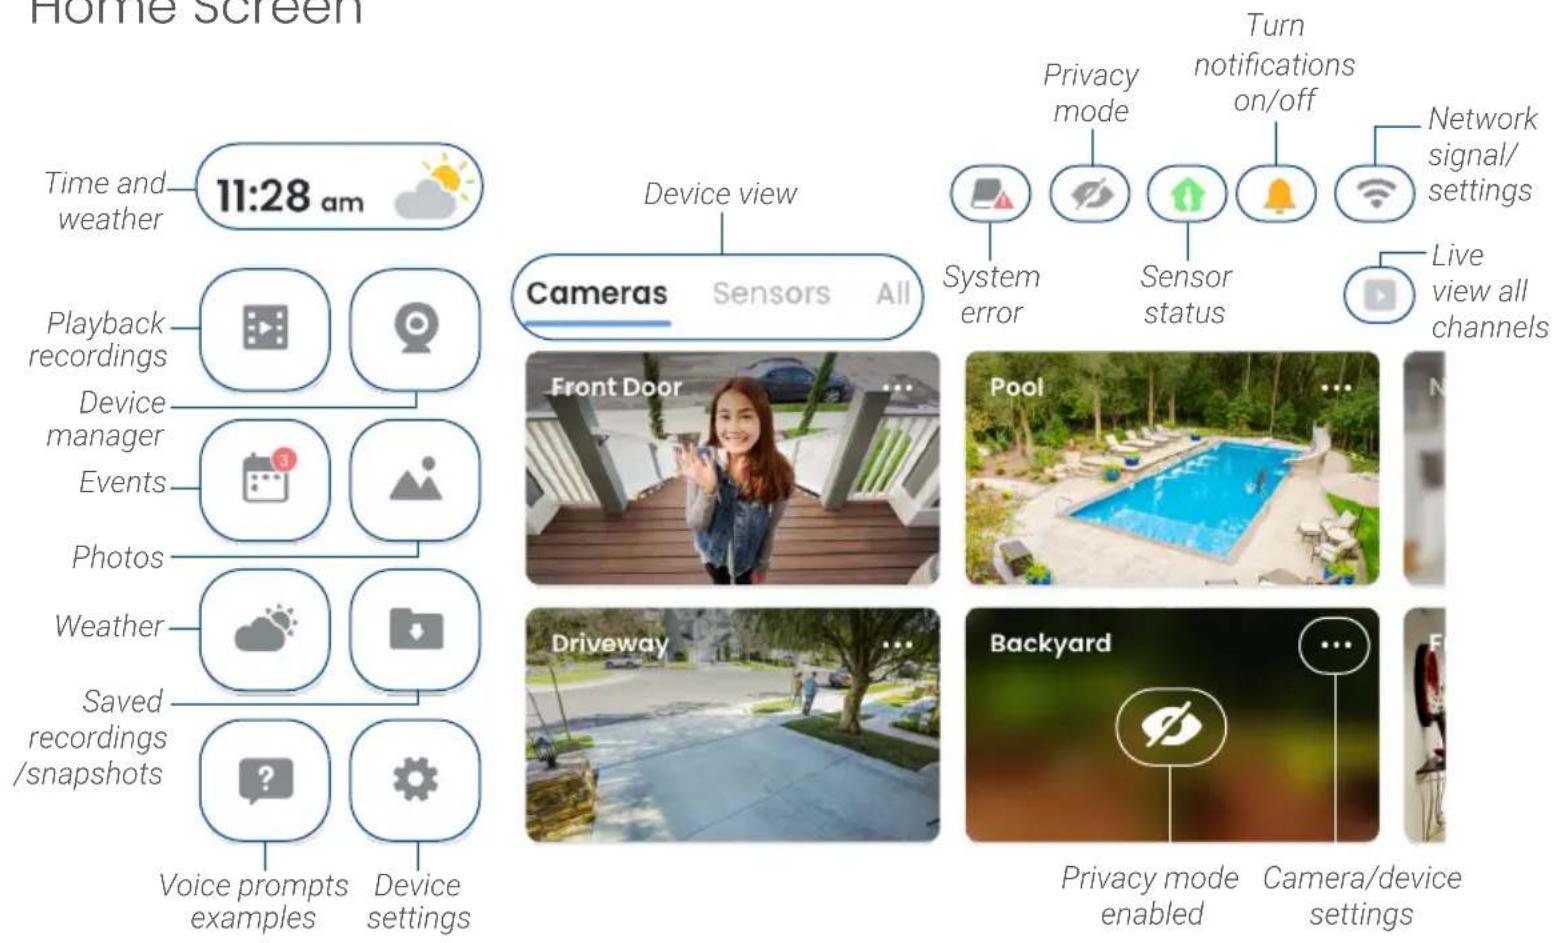
flowchart
graph TD
    A["Time and weather 11:28 am"] --> B["Playback recordings"]
    B --> C["Device manager"]
    C --> D["Events"]
    D --> E["Photos"]
    E --> F["Weather"]
    F --> G["Saved recordings /snapshots"]
    G --> H["Voice prompts examples"]
    G --> I["Device settings"]
    J["Device view"] --> K["Cameras Sensors All"]
    K --> L["Front Door"]
    K --> M["Pool"]
    K --> N["Driveway"]
    K --> O["Backyard"]
    L --> P["System error"]
    M --> Q["Sensor status"]
    N --> R["Privacy mode enabled"]
    O --> S["Camera/device settings"]
    T["Turn notifications on/off"] --> U["Network signal/settings"]
    V["Live view all channels"] --> W["Play icon"]
Live View
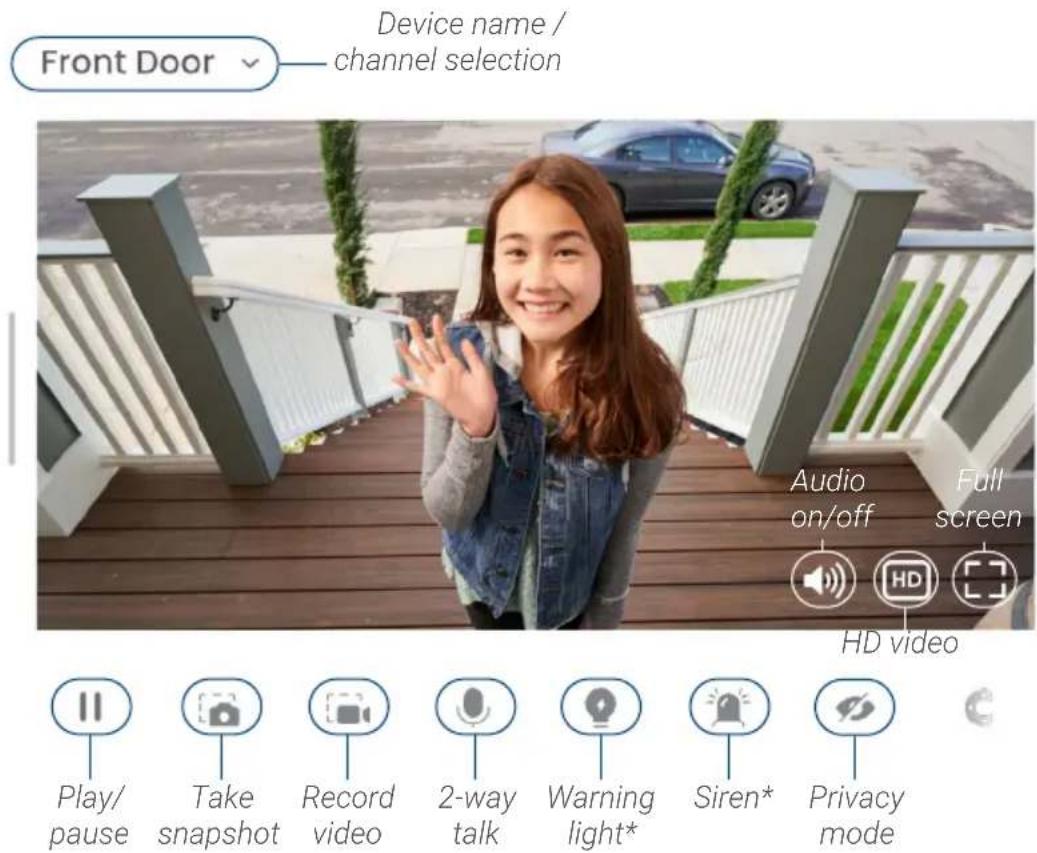
Device settings

Recent Events

Event type


Swipe-down Menu

Definitions
- Do Not Disturb mode: Tap to silence alerts, notifications, and light statuses that you get while your device is locked. Tap again to disable DND mode.
- Privacy mode: Tap to turn off live feed from all cameras. Tap again to disable privacy mode.
- Panic mode: Press and hold panic mode for 5 seconds to turn on all lights and sirens from compatible active or smart deterrence cameras/doorbell. Tap again to turn off.
- Bluetooth audio: Any bluetooth capable device can play audio through the Lorex Home Center's speakers. Go to your bluetooth capable device's Settings > Bluetooth, turn on Bluetooth, then select "Lorex Home Center". Complete the pairing process to begin streaming music/audio.
Lorex Voice Assistant
The Lorex Voice Assistant is a specially designed voice assistant for the Lorex Home Center. It was developed with your privacy in mind. All voice processing is done inside the Lorex Home Center. This means that no voice information leaves the device and makes response time quick. To enable this feature make sure that the microphone hardware kill switch is turned on and say the wake up word “Lorex”.
A sample voice command: "Lorex, show me all cameras!"
For a sampling of the different voice commands, tap on the Voice Prompts icon on the home screen. For a full list of supported voice commands, visit the product page at lorex.com.
Note: Voice control also works in offline mode.
Troubleshooting: Adding/Updating Cameras

For compatible cameras that have already been set up in the Lorex Home app, follow steps 7-10. For cameras that have not been detected during set up, follow the instructions below to update them with the latest firmware.
- Make sure the camera is powered on.
-
Scan the QR code on the right side of the page to install the free Lorex Home app from the App Store or Google Play Store.
-
Tap the Lorex Home icon to launch the app. If you don't already have an account, tap Sign up, then follow the on screen prompts to create an account.
-
Once the status LED on the camera is flashing green and the startup chime sounds, tap +.
-
Scan the QR code on the camera using your mobile device's camera (or tap Manually enter Device ID).
-
Follow the rest of the in-app instructions until your camera is set up.
-
After setup, tap the camera's settings icon ⚙ and then tap Upgrade Firmware. Your camera will automatically reboot. If there is no "Upgrade Firmware" message, then you have the latest firmware installed.
-
Tap the camera's settings icon and tap Remove Device at the bottom.
-
Press and hold the reset button on your camera and wait for the chime.
-
Return to step 1 on the Device Setup page.


Do more with the Lorex Home Center
For up-to-date information and support, visit help.lorex.com/series/LHC.
To purchase the Lorex Home Center Extender (AX62TR), additional cameras and sensors, visit lorex.com and/or authorized resellers.
| Important:The Lorex Home Center is rated for indoor use only. Do not use outdoors.Only use with included power supply.Only use with compatible memory. See product support page for details on compatible memory. |
| FCC NOTICETHIS DEVICE COMPLIES WITH PART 15 OF THE FCC RULES. OPERATION IS SUBJECT TO THE FOLLOWING TWO CONDITIONS:(1) THIS DEVICE MAY NOT CAUSE HARMFUL INTERFERENCE, AND(2) THIS DEVICE MUST ACCEPT ANY INTERFERENCE RECEIVED, INCLUDING INTERFERENCE THAT MAY CAUSE UNDESIRED OPERATION. |
- What you'll find in the box
- Placement of the Lorex Home Center
- Recommendations for improving range:
- Connect the Lorex Home Center
- Network Setup
- Option A - Wired
- Option B - Wireless
- Option C - Offline
- Device Setup
- Notes:
- Guide to Basic Operations
- Touchscreen Gestures
- Light Status Indicators
- Live View
- Definitions
- Lorex Voice Assistant
- Troubleshooting: Adding/Updating Cameras
- Do more with the Lorex Home Center
Brand : Lorex
Model : L871T8E-2CA2
Category : Security Camera