
Accessory 3 pk Kit Sparkle - Accessory Gel-a-Peel - Free user manual and instructions
Find the device manual for free Accessory 3 pk Kit Sparkle Gel-a-Peel in PDF.


| Product Type | Nail Art Accessory Kit |
| Brand | Gel-a-Peel |
| Model | Sparkle |
| Kit Contents | 3 pieces (stencils, glitter, or decorative elements) |
| Quantity | 3 pieces per pack |
| Material | Flexible plastic and glitter |
| Color | Sparkle / multi-color shimmer |
| Dimensions (each) | Approx. 5 cm x 5 cm (2 in x 2 in) |
| Weight (pack) | Approx. 20 g (0.7 oz) |
| Usage | Create sparkle effects on gel nails |
| Applicable Products | Gel-a-Peel gel nail polish kits |
| Compatibility | All Gel-a-Peel bases and top coats |
| Application Method | Place on wet gel, cure under UV/LED lamp |
| Removal | Peel off or soak in remover |
| Cleaning | Wipe with damp cloth; avoid harsh chemicals |
| Storage | Store in cool, dry place away from direct sunlight |
| Safety Warnings | Keep away from children under 3 years; small parts choking hazard |
| Warranty | Manufacturer warranty against defects |
| Country of Origin | China (typical) |
| Manual Included | Yes, in English (downloadable PDF) |
Frequently Asked Questions - Accessory 3 pk Kit Sparkle Gel-a-Peel
User questions about Accessory 3 pk Kit Sparkle Gel-a-Peel
0 question about this device. Answer the ones you know or ask your own.
Ask a new question about this device
Download the instructions for your Accessory in PDF format for free! Find your manual Accessory 3 pk Kit Sparkle - Gel-a-Peel and take your electronic device back in hand. On this page are published all the documents necessary for the use of your device. Accessory 3 pk Kit Sparkle by Gel-a-Peel.
USER MANUAL Accessory 3 pk Kit Sparkle Gel-a-Peel
Conforms to ASTM D-4236.

AGES 8+
GETTING STARTED
- Secure the template and clear drawing sheet to the work surface with masking tape.
- Work from the top of the template to the bottom. If you are right handed, work around the design from left to right to prevent smearing. If you are left handed, work from right to left.
- Draw outside the template lines to make designs bigger or inside the template lines to make them smaller.

CLEANING, REPAIRING & STORING
- If you make a mistake, wipe the gel off of the clear drawing sheet with a paper towel before it hardens.
• To repair a broken piece, reapply gel over the broken section and wait for it to dry. - Lay your designs flat when displaying or storing to keep their shape.
• To clean the tips, allow gel in the tip to harden. Then use the spatula tool to scoop out the hardened gel.

DESIGNING
- With a steady hand, squeeze the tube slowly over the template for straight and precise lines.
• Always make sure the gel lines, spikes, different colors and other designs are touching.
• To make your design sturdy, overlap your lines and make your designs thick. - Reinforce any thin spots or lines that don't touch by adding extra gel.
- Rotate the template and clear drawing sheet as you create your design.
- Wipe the tip on a paper towel to remove excess gel before starting a new design technique or project to keep designs neat and precise.

DRYING & WEARING
- Wait 5-10 minutes before adding additional colors to your design to allow the first color to dry slightly.
- Roll bracelets onto your wrist. Don't stretch your finished projects or they might break.

CAUTIONS
WARNING: Not suitable for children under 6 years. Use under adult supervision.
• May contain functional sharp point.
- Keep away from eyes. Use in a well-ventilated area. Do not eat or drink while handling this product.
- Avoid contact with skin before the compound is completely dry.
- Do not apply on furniture. To remove compound, wait for it to dry completely and peel off. Product may not be completely removed from all surfaces.
- Wash hands after use.
• Color transfer may occur.
• This gel is not edible.

PLEASE KEEP THIS MANUAL AS IT CONTAINS IMPORTANT INFORMATION
The preferred method of contact for Customer Service is through our e-mail contact form at www.mgae.com
16300 Roscoe Blvd. Van Nuys, CA 91406 U.S.A. (800) 222-4685
Printed in China U.S. Patent Pending
MGA Entertainment UK Ltd. 50 Presley Way, Crownhill Milton Keynes, MK8 0ES Bucks, UK + 0800 521 558

www.gelapeel.com
© 2016 MGA Entertainment, Inc. GEL-A-PEEL ™ is a trademark of MGA in the U.S. and other countries. All logos, names, characters, likenesses, images, slogans, and packaging appearance are the property of MGA.
0416-2-E/INT
Gel-a-Peel TM
CREATE & DESIGN
IMPORTANT: Protect the play area before use.
![graph TD A["CAP"] --> B["PLUG"] B --> C["TIP"] C --> D["Return to CAP"]](/content/2026/05/1087627/images/ccbbaf6c26c014078a0ec5d74524e589014a3541a6cae3cba67e2c4455b775c0.jpg)
① TIP
Uncap the tube. Remove and keep the protective plug. Then, twist on a tip.
② DRAW
Place a template under the clear drawing sheet on a flat surface. Press the tube tip against the clear drawing sheet and squeeze as you slowly follow the pattern.


4 PLUG & CAP
When you finish using a color, remove the tip. Then, squeeze the gel as close to the tube opening as possible and firmly push the plug into the tube. Twist on the cap.

③ ROLL
Roll the tube down from the top as you squeeze to push the compound toward the tip. Tape down the rolled portion if necessary.

⑤ PEEL
Let your design dry completely according to the time on the template. Then, use the included spatula to peel it from the clear drawing sheet.
DESIGN STYLES
Apply these design styles to any of your creations.
Twist on a design tip, press it against the clear drawing sheet, and squeeze. The longer you squeeze, the bigger the shape will be.
Try these techniques with the design tips included in some Gel-a-Peel™ packs. Purchase other packs to collect them all!
① ROUND TIP
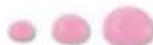

②STAR TIP
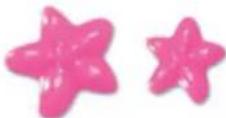


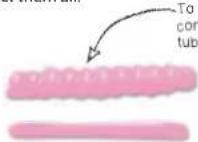
③ RAKE TIP

To create a wavy ribbon effect, use the rake tip to continually pull and push the tube at an angle.

SPIKE EFFECT
To create a spike effect, squeeze out the gel until it reaches the size you want.
Then stop squeezing and pull the tube away. Repeat this step with all of the spikes touching.


⑤ RAINBOW EFFECT
To create a color gradient effect, put the same tip you were using on a different color tube without cleaning it and continue drawing.


Brand : Gel-a-Peel
Model : Accessory 3 pk Kit Sparkle
Category : Accessory