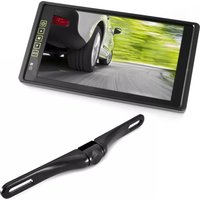
PLCM9200 - Rear Camera Pyle - Free user manual and instructions
Find the device manual for free PLCM9200 Pyle in PDF.


| Product Type | Rear View Camera |
| Brand | Pyle |
| Model | PLCM9200 |
| Image Sensor | 1/3-inch CMOS |
| Resolution | 420 TV Lines |
| Night Vision | IR LEDs for low-light visibility |
| Viewing Angle | 170° wide angle |
| Power Supply | 12V DC (vehicle reverse light) |
| Video Output | Composite RCA (1.0V p-p, 75 ohms) |
| Housing Material | Metal and plastic |
| Water Resistance | IP67 rated (waterproof) |
| Mounting Type | License plate frame / bracket |
| Dimensions (W x H x D) | 2.5 x 1.5 x 1.1 inches |
| Weight | 0.2 lbs (approx. 90 g) |
| Operating Temperature | -20°C to 70°C |
| Included Accessories | Camera, mounting bracket, 20 ft RCA cable, power wire |
| Maintenance | Clean lens with soft cloth; avoid harsh chemicals |
| Safety Precautions | Disconnect power before installation; secure wiring |
| Repairability | Non-user-serviceable; contact support for issues |
Frequently Asked Questions - PLCM9200 Pyle
User questions about PLCM9200 Pyle
0 question about this device. Answer the ones you know or ask your own.
Ask a new question about this device
Download the instructions for your Rear Camera in PDF format for free! Find your manual PLCM9200 - Pyle and take your electronic device back in hand. On this page are published all the documents necessary for the use of your device. PLCM9200 by Pyle.
USER MANUAL PLCM9200 Pyle
natural_image
Black PYLE digital camera with keychain and lock, no visible text or symbols on device body
natural_image
Four black star-shaped symbols arranged horizontally: two with stars and one with a plus sign (no text or labels)
natural_image
Row of abstract geometric symbols including stars, circles, and dots (no text or labels)Wireless Camera (Audio & Video Recording) Night Vision, Waterproof, Additional Micro SD Card Slots for Removable Memory, Includes Remote Control
USER MANUAL
PPBCM92 BODY CAMERA DIAGRAM


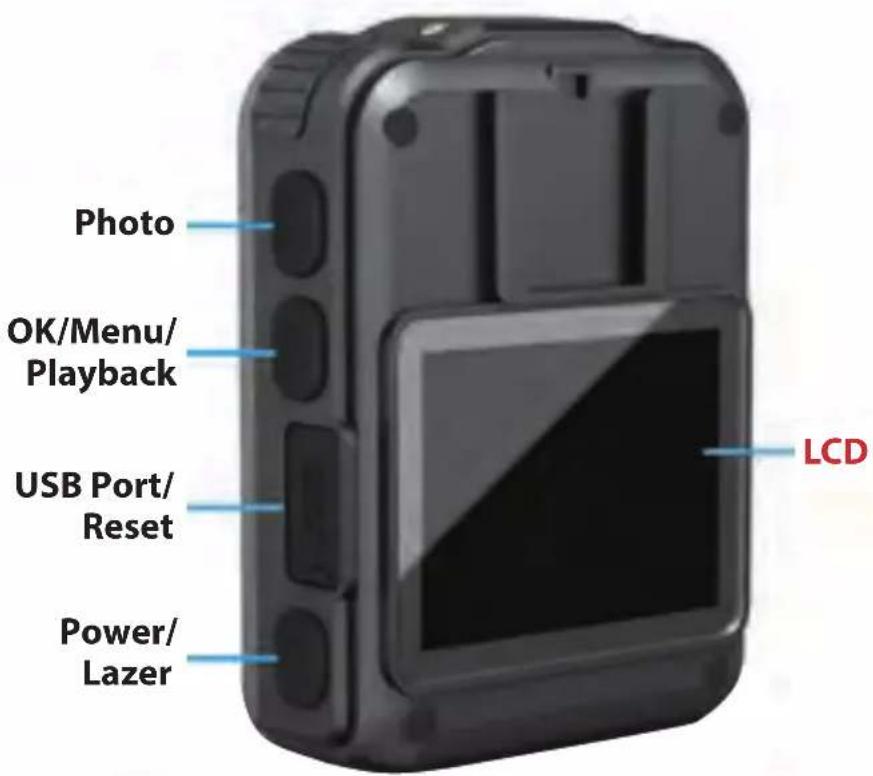

POWER ON/OFF
POWER ON
- Press "Power" button, the LED Status Indicator will light up green with power on sound and LCD screen will display the PYLE logo.
- The camera system will enter into recording standby mode and the LED Status Indicator will remain lit green.
- The LCD will display the currently recording interface and your body camera is ready to use.
Note: If you have set the screen saver setting to be 1min/3min/5min, if there is no interaction with the camera, the camera LCD screen will turn off.
POWER OFF
- Press and hold the "Power" button for at least two seconds.
- The current file will be saved to the internal storage and the device will power down.
VIDEO RECORDING
- Press the "Video" button until the LED Status Indicator lights up red and flash. The camera will beep audibly.
- The camera will enter into Video Recording Mode and begin to record. It will save a file every 3min/5min/10min/20min. The recording time can be set in video setting menu list.
Note: If you have set the Auto night vision in the system setting list to be Manual. When the lighting is insufficient, press the Up/IR button can enable Night Mode and the IR LEDs. If you have set the Auto night vision to be Auto. When the lighting is insufficient, the camera will automatically enable Night Mode and the IR LEDs. It will automatically return to the normal recording mode when light conditions improve.
Stop Video Recording
- Press the "Video" button until the LED Status Indicator Lights up green.
- The camera will enter Recording Standby Mode.
Note: If press OK button during Video recording, the file will be marked as important file, the file name will be with a LOCK word.
AUDIO RECORDING
-
Press the "Audio" button until the LED Status Indicator flashes green.
-
The camera will beep, the LCD screen will show the Audio Recording Mode Screen to indicate it has begun recording audio only.
Stop Recording Audio
-
Press the "Audio" button until the LED Status Indicator shows solid green.
-
The camera will enter Recording Standby Mode.
TAKING A PHOTO
-
When the camera is in Recording Standby Mode or during Video Recording Mode, press the "Photo" button to take a photo.
-
The LED Status Indicator will flash green once if take a photo in Recording Standby Mode. There is photo capturing sound when taking a photo.
FILES PLAYBACK
-
Press and hold the "OK/Menu/Playback" button until the camera enters into Playback Mode.
-
To play the currently recording file, press the "OK" button again.
-
To play another file, use the "UP" or "Down" button to cycle through the files. Press the "OK" button when you have found the file to play it.
EXIT PLAYBACK MODE
-
To exit the Playback Mode, press and hold the "OK/Menu/Playback" button.
-
The camera will return to the Recording Standby Mode.
EXTERNAL/INTERNAL MICRO SD CARD STORAGE
-
Short press OK/Menu button to setting menu mode, press Down selection button to select the Micro SD card, press OK button to enter submenu, press UP/Down button to select micro SD card storage path External/Internal, press OK again to confirm your selection.
-
If you select External, the files recorded will be saved to external micro SD card; if select internal, the files recorded will be saved to internal micro SD card.
-
By default, the storage path is Internal, when internal micro SD card is full, files will be saved to external micro SD card automatically. (If user has inserted the external micro SD card in camera, it will work as this.)
-
The external micro SD card icon on LCD is white color, the internal micro SD card icon on LCD is red color.
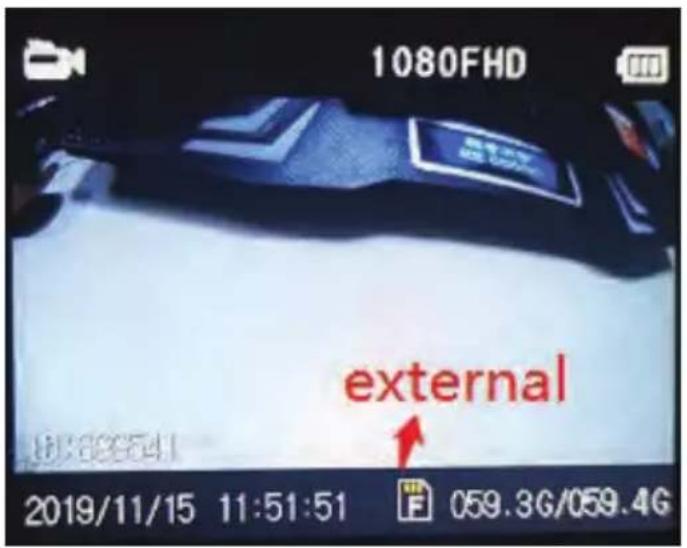
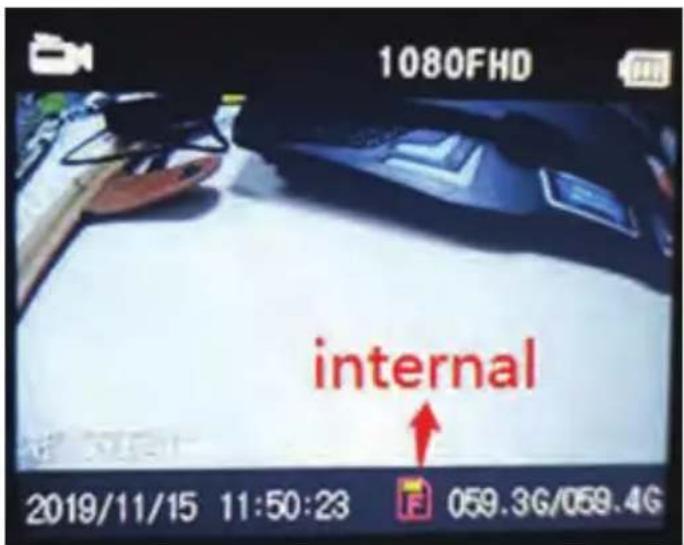
Note: Please format your micro SD card format to be FAT32 format before inserting into external micro SD card slot.
CODING WITH REMOTE CONTROL
- Turn on camera, long press photo button on camera for 3 seconds, will display "Coding with remote control".
- Press and hold photo button on remote control for 3 seconds, the camera will take a photo, the coding is successful.
Note: The coding mode can only be activated within 30 seconds after camera is turned on.)
REMOTE CONTROL FUNCTIONS
After coding remote control with camera, short press the buttons on remote to control camera button functions. The LED will flash red color once when press remote button once.

CHARGING BATTERY WITH USB CABLE
- Connect a USB cable with a compatible connector to a computer/wall charger.
- Connect the USB cable to the USB port on the body camera.
BATTERY STATUS ICONS
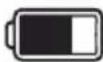
Low Power
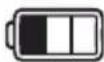
Not Fully Charged

Fully Charged
When charging battery while camera is power off, the LED Status Indicator will light up red. When the battery is fully charged, the red LED Status Indicator will turn off.
CONNECT TO PC
Connect to PC via mini USB cable, on camera LCD, it will display "Connected Computer". You will find the camera disk on PC.
CONNECT TO TV
Connect to TV via HDMI cable (HDMI cable is not in standard accessories kit), the connector on camera is HDMI-C, if your TV HDMI connector is HDMI-A, please use HDMI C to A cable. After camera is connected to TV, the camera will enters to playback mode automatically, press UP/Down button to select files and press OK button to confirm the playback on TV.
PARAMETER SETTING
Short press Menu button to enter menu setting mode, press down button once to select parameter items. Press and hold Menu button to return to video recording standby mode.
Submenu details are as below:
- Resolution: 2304*1296 20P, 1920x1080 30P, 1440x1080 30P, 1280x720 30P, 800x480 30P, 640x480 30P
• Video Quality: Fine, Normal, Economy. (Bitrate is different for different options) - Loop Recording: Off, On
• Recording Time: 3minutes, 5minutes, 10minutes, 20minutes
• Video Delay: Off, On
• Motion Detection: Off, On
• Photo Size: 36M, 21M, 16M, 12M, 10M, 8M, 5M, 2M
• Continuous Shoot: Off, 2 sheets, 3 sheets, 5 sheets, 10 sheets - Micro SD card: External/Internal
• Volume: Off, Low, Medium, High
• Screen Saver: Off, 1 Minute, 3 Minutes, 5 Minutes
• Auto Power Off: Off, 3 Minutes, 5 Minutes, 10 Minutes
• Auto night vision: Manual, Auto
• Frequency: 50Hz, 60Hz
- Date/Time: YYYY/MM/DD, HH/MM/SS. Press UP/Down button to select correct date and time, press OK button to confirm each figure, after date and time fixed, press Menu button to get back to System parameters setting list.
• Language: English, Traditional Chinese, Simplify Chinese, Japanese, Korean, Russian
- ID setting: 6 figures ID number. Press UP/Down button to select correct each figure and confirm by pressing OK button, after ID number is fixed, press Menu button to get back to System parameters setting list.
- Format: Cancel, OK
- Default Setting: Cancel, OK
- Version: version number
Other features:
- Torch light: short press "Up/Torch" button to turn on/off torch light. Torch light is for using in dark situation to add more light.
- Laser pointer: short press "Power" button to turn on/off laser pointer. Laser pointer can show the direction where lens is recording.
TROUBLE SHOOTING AND HANDLING
1. Camera cannot boot.
- Please charge camera battery for more than 2 hours first then try to turn on camera again.
2. Camera cannot respond.
- Please press reset button for 2 seconds then restart camera.
3. Device failed to connect to computer.
- Please change to another USB port on computer to connect the camera or change another USB cable.
Note: If above solutions cannot solve the problems, please contact customer service staff to return for factory repair.
Features:
• Waterproof and Shockproof
• Anti-fog, Laser Indicator, 6 IR Night Vision
- Motion Detection
• Dual Micro SD Card Slots Support Up to 128GB
• Built-in Micro SD Cards (Up to 16GB by Default)
• Lightweight, Portable, Versatile & Wearable Body Camera
- Multi-Functional: Camera + Camcorder + Voice Recorder
- Record Full HD 1080p Video, Snap up to 36MP Hi-Res Images
- Button-Activated Night Vision Illumination
• Water-Resistant Design
• 2.0" Digital LCD Display
• Displays Video Recording Time/Memory Remaining
• Built-in Microphone & Speaker for Audio Recording
- Ability to Instantly Playback Captured Media Files (Audio +Video)
- Removable Memory Slot Up to 128GB MAX Support
• Built-in Rechargeable Battery
- Input Interface: USB Mini Connector
- Simple Touch-Button Control Operation
• Durable ABS Construction
- Date + Time Setting / Display
• Auto Exposure & Picture Adjustment
- Connect to Computer: Easy To Save, Share & Transfer Files
• HDMI Interface for Connecting to TV
- Integrated Torch Light to Add More Light in Dark Situation
- Integrated Laser Pointer to Show Direction where the Lens is Recording
Video Recording:
• Simple One-Button Video Recording
• Displays Time Remaining While Video Recording
- Motion Detector Function
- Loop Recording Ability (2 Minutes, 5 Minutes)
- Selectable Recording Options: 1296p, 1080p, 720p, 480p (2304x1296@20fps, 1920 x 1080@30fps, 1280 x 720@30fps, 800x480@30fps, 640 x 480@30fps)
• Video File Format: MOV
• Captures Over 8+ Hours of Video
Picture Snapping:
- Simple One-Button Image Snap Ability
• Photo Resolution: 2M/5M/8M/10M/12M/16M/21M/36M
• Image File Format: JPG
• Capture Over 10,000+ Images
Audio/Voice Recording:
- Simple One-Button Voice Record Ability
• Audio File Format: WAV
• Record Over 10+ Hours of Audio
What's in the Box:
- Body Camera
• USB Wall Adapter & Charging Cable
• (2) Mounting Clip - Remote Control
Technical Specs:
• Material: ABS and PC
• Night Vision: Manual/Auto IR Switch. 32.81 ft. can recognize the face.
• Waterproof: IP56, Rainproof
- Shockproof: up to 2-3 meters free-fall
- Motion Detection: On/Off
• Display: 2.0 inch. 4:3 FHD Color Display
- Operating System: Windows XP/Windows 7/Windows 8/Windows 10
• Built-in Night Vision IR LED Lights
- Interface: USB 2.0
• LCD Display: 320 x 240 Output, 4:3
• Extra Wide 130° Degree Angle Lens
- Imaging Sensor: 1/3" Full-Color CMOS
• Electronic Shutter: 1/2 - 1/2000s
- Battery: 2650mAh, 3.7V (Up to 8 Hours Recording 720p)
- Dimensions: 3.15" x 2.3" x 0.98"-inches

This product can expose you to a chemical or group of chemicals, which may include "Lead (Pb)" which is known in the state of California to cause cancer, birth defects, or other reproductive harm. For more info, go to https://www.p65warnings.ca.gov/.
PYLE
PyleUSA.com

natural_image
Illustration of a laptop with a red checkmark icon on screen (no text or symbols)VISIT US ONLINE:
Have a question?
Need service or repair?
Want to leave a comment?
PyleUSA.com/ContactUs
PYLE
Questions? Issues?
We are here to help!
Phone: (1) 718-535-1800
Email: support@pyleusa.com
- POWER ON/OFF
- POWER ON
- POWER OFF
- VIDEO RECORDING
- Stop Video Recording
- AUDIO RECORDING
- Stop Recording Audio
- TAKING A PHOTO
- FILES PLAYBACK
- EXIT PLAYBACK MODE
- EXTERNAL/INTERNAL MICRO SD CARD STORAGE
- CODING WITH REMOTE CONTROL
- REMOTE CONTROL FUNCTIONS
- CHARGING BATTERY WITH USB CABLE
- BATTERY STATUS ICONS
- CONNECT TO PC
- CONNECT TO TV
- PARAMETER SETTING
- Submenu details are as below:
- Other features:
- TROUBLE SHOOTING AND HANDLING
- Camera cannot boot.
- Camera cannot respond.
- Device failed to connect to computer.
- Features:
- Video Recording:
- Picture Snapping:
- Audio/Voice Recording:
- What's in the Box:
- Technical Specs:
- PYLE
- PyleUSA.com
Brand : Pyle
Model : PLCM9200
Category : Rear Camera