
MosicGO Lite MGFU-L - Video projector Elite Screens - Free user manual and instructions
Find the device manual for free MosicGO Lite MGFU-L Elite Screens in PDF.


| Product Type | Video Projector |
| Brand | Elite Screens |
| Model | MosicGO Lite MGFU-L |
| Projection Technology | DLP |
| Light Source | LED |
| Brightness | 200 ANSI Lumens |
| Native Resolution | 854 x 480 (WVGA) |
| Supported Resolution | Up to 1080p |
| Contrast Ratio | 1000:1 |
| Projection Size | 20 - 100 inches |
| Keystone Correction | ±15° Vertical (Manual) |
| Inputs | HDMI, USB, 3.5mm Audio Out |
| Built-in Speaker | 2W Mono |
| Operating System | None (Plug-and-Play) |
| Dimensions (W x D x H) | 6.3 x 4.7 x 1.9 inches (160 x 120 x 48 mm) |
| Weight | 0.9 lbs (400 g) |
| Power Supply | DC 5V via USB |
| Power Consumption | 15W |
| Battery Life | N/A (Mains Powered) |
| Maintenance | Clean lens with microfiber cloth; avoid dust |
| Safety | Avoid exposure to moisture; do not disassemble |
| Repairability | Parts available via Elite Screens support |
Frequently Asked Questions - MosicGO Lite MGFU-L Elite Screens
User questions about MosicGO Lite MGFU-L Elite Screens
0 question about this device. Answer the ones you know or ask your own.
Ask a new question about this device
Download the instructions for your Video projector in PDF format for free! Find your manual MosicGO Lite MGFU-L - Elite Screens and take your electronic device back in hand. On this page are published all the documents necessary for the use of your device. MosicGO Lite MGFU-L by Elite Screens.
USER MANUAL MosicGO Lite MGFU-L Elite Screens
MosaicGO® Projector User's Guide
Model: Sport MGFU-S Lite MGFU-L
EYE SAFETY WARNINGS
To avoid retinal damage, do not stare directly or indirectly into the projector's light beam.
Rather than stand in the projector's light beam to point on the screen, use a laser pointer or pointer stick instead.
Make sure that students and other viewers observe the eye safety warnings and stay out of the direct light beam.
Use window blinds and turn down interior light sources to reduce the washout glare of ambient light.
IMPORTANT SAFETY INSTRUCTIONS
- The ventilation ports prevent overheating. Never block these ports located on the sides and bottom of the projector. (See page 12) Direct obstruction, confined spaces or placing on a cluttered surface restricts airflow, and ruins the projector.
- To reduce risk of fire or electric shock, do not expose the projector to any liquids, rain, snow or airborne moisture.
- Do not install near heat sources such as radiators, heaters, stoves or any other apparatus such as amplifiers that emit heat.
- Do not use the projector in direct sunlight.
- Do not use near any appliance generating a strong magnetic field.
- Do not use the projector in areas susceptible to excessive dust and dirt.
- Turn off the product before cleaning.
- Disconnect the power cord if the product is not being used for a long period of time.
- Ensure that the ambient room temperature is within 0-40°C (32-104°F).
- Ensure that relative humidity is 5 - 35°C (41 - 95°F), 80% (Max.), non-condensing.
- Do not drop, throw or try to bend your product.
- Dispose of your projector in an environmentally appropriate manner and according to local disposal laws. Disposing the projector in a fire may cause an explosion.
- Clean only with dry cloth.
- Only use attachments/accessories specified by the manufacturer.
- Do not use the unit if it has been physically damaged or abused. Physical damage/abuse would be (but not limited to):
→ Unit has been dropped.
→ Charger or plug has been damaged.
→ Liquid has been spilled on the projector.
→ Projector has been exposed to rain or moisture.
Something has fallen into the projector or something is loose inside.
Do not attempt to service the unit yourself. Opening or removing covers may expose you to dangerous voltages or other hazards. Please contact your local reseller or service center before you send the unit for repair.
- Do not let objects or liquids enter the projector. They may touch dangerous voltage points and short out parts that could result in fire or electric shock.
- Follow all warnings and cautions in this manual and on the projector.
- The unit should only be repaired by appropriate service personnel.
- Projector lamps generate a lot of heat. This causes much of the projector's surface area to heat up. If the projector seems to be excessively hot, turn it off so that it can cool down and then call customer service.
CAUTION – RISK OF BATTERY EXPLOSION IF INCORRECT TYPE IS USED. MAKE SURE TO PROPERLY DISCARD USED BATTERIES ACCORDING TO LOCAL REGULATIONS.
COPYRIGHT / TRADEMARK
© Copyright 2019. All rights reserved.
The manufacturer reserves the right to make technical changes. The manufacturer assumes no liability for damages incurred directly or indirectly from errors, omissions, or discrepancies between the device and this documentation.
Other brands or logos are trademarks or registered trademarks of their respective companies.
This device is not intended for use in the direct field of view at visual display workplaces.
DECLARATION OF CONFORMITY
We declare under our sole responsibility that this projector conforms to the following directives and norms:
EMC Directive 2014/30/EU
ErP Directive 2009/125/EC
EMC: EN 301489-1
EN 301489-17
EN 55032
EN 55024
Low Voltage Directive : 2014/35/EU
Safety: EN 62368, EN62133+Annex.M
TRADEMARKS
Apple, Macintosh, iPod, iPod nano, and iPhone are trademarks or registered trademarks of Apple Computer, Inc. IBM is a trademark or registered trademark
Microsoft, PowerPoint, and Windows are trademarks or registered trademarks of Microsoft Corporation. Adobe and Acrobat are trademarks or registered trademarks of Adobe Systems Incorporated.
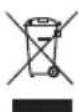
NOTE: This product is covered electrical and electronic equipment under the European Union's Waste from Electrical and Electronic Equipment ("WEEE") Directive (2002/96/EC). The WEEE Directive requires that covered equipment be collected and managed separately from typical household waste in all EU member states. Please follow the guidance of your local environmental authority or ask the shop where you purchased the product for collection or recycling options.
FCC WARNING
This device complies with part 15 of the FCC Rules. Operation is subject to the following two conditions: (1) This device may not cause harmful interference, and (2) this device must accept any interference received, including interference that may cause undesired operation.
Note: This equipment has been tested and found to comply with the limits for a Class B digital device, pursuant to part 15 of the FCC Rules. These limits are designed to provide reasonable protection against harmful interference in a residential installation. This equipment generates, uses and can radiate radio frequency energy and, if not installed and used in accordance with the instructions, may cause harmful interference to radio communications. However, there is no guarantee that interference will not occur in a particular installation. If this equipment does cause harmful interference to radio or television reception, which can be determined by turning the equipment off and on, the user is encouraged to try to correct the interference by one or more of the following measures:
--Reorient or relocate the receiving antenna.
--Increase the separation between the equipment and receiver.
--Connect the equipment into an outlet on a circuit different from that to which the receiver is connected.
-Consult the dealer or an experienced radio/TV technician for help.
Changes or modifications not expressly approved may void authority to operate the equipment.
FCC CAUTION
Any changes or modifications not expressly approved by the grantee of this device could void the user's authority to operate the equipment
The changes or modifications not expressly approved by the party responsible for compliance could void the user's authority to operate the equipment.
FCC RF exposure warning
This equipment must be installed and operated in accordance with provided instructions and the antenna(s) used for this transmitter must be installed to provide a separation distance of at least 20 cm from all persons and must not be co-located or operating in conjunction with any other antenna or transmitter. End-users and installers must be provide with antenna installation instructions and transmitter operating conditions for satisfying RF exposure compliance.
AGENCY APPROVALS
FCC, CE, and LVD
Other specific Country Approvals may apply. Please see product certification label.
Input ratings: AC 100 - 240V, 6.3A, 50 - 60Hz
Product offerings and specifications may be altered at any time without notice.


- Kensington Lock Slot
- Ventilation Port
- USB TPOWER OUT
- USB
- 12V Trigger (To Screen)
- DC IN 19V
- Power On/OffSwitch
- USB Type C Display Port (DP)/USB Type C POWER OUT
- HDMI 2
- HDMI 1
- Earphone Jack
- Touch Keypad
- Focus Ring


- Ventilation Port
- Tripod Mount Hole
- Wireless Speaker Indicator
- Projector Indicator
- Wireless Speaker On /Off Button
- Projector On /Off Button
- Battery / Power Status Indicator (Battery indicator only for MGFU-S model)
*Note:
Follow the steps to open I/O cover.

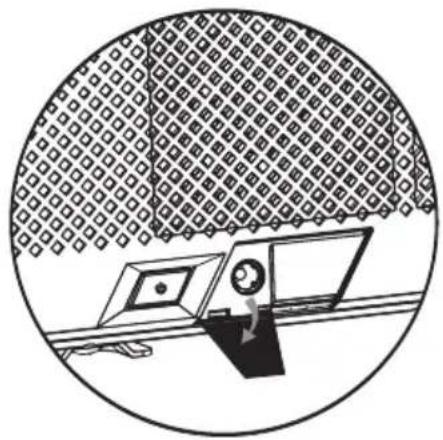

Touch Keypad
![graph TD A["1"] --> B["△"] C["4"] --> D["<"] E["5"] --> F["→"] G["2"] --> H["↓"] I["6"] --> J["←"] K["7"] --> L["←"] M["3"] --> N["→"] O["8"] --> P["←"] Q["9"] --> R["←"]](/content/2026/05/1087359/images/e96e28faae8979c9b24926ee4f4f2e8f35e0ab8158808b5610441b7b7943fc2e.jpg)
- Up (adjust keystone up)
- Down (adjust keystone down)
- Right
- Left OK/Enter5.
- Menu
- Mute
- Input Source Selection
- Home
Remote Control

- Wireless Speaker On/Off, Audio Source Selection(Note)
- Projector On/Off, Brightness Adjustment (Note)
- Up
- Down
- Right
- Left
- OK / Enter
- Adjust Keystone Up
- Adjust Keystone Down
- Menu
11.Home 17.Mute - Video Source Search 18. Volume Down
- Audio Source Search 19. Volume Up
- HDMI1 20. Wireless Audio Input
15.HDMI2 21. Projector Audio Input
16.DP * No Funtion
*Note:
When projector is off, short press PJ button on remote control to turn on projector.
When projector is ON, short pressing the PJ button on the remote control will cycle through
the following brightness modes: MAX, ECO, and MIN.
When projector is on, long press PJ button on remote control over 1 second , after prompt message
and then short press PJ button again to turn off projector.
When Wireless Speaker is off, short press BT button on remote control to turn on Wireless Speaker.
When Wireless Speaker is on, long press BT button on remote control over 1 second to turns off Wireless Speaker
When both of projector and wireless speaker are ON, short pressing the BT button will cycle through the source of speaker between projector and wireless audio source.
PRODUCT ACCESSORIES LIST
1

3

6

2

4

7

-
1-A AC Adaptor 1-B Power Cord
-
HDMI Cable x1
-
USB Type C Cable (*Note: only apply for Sport MGFU-S model)
-
4-A Remote Control 4-B Battery (AAAx2)
-
User's Guide (with Warranty Card)
-
Tripod 7. Carrying bag
POWER ON/OFF

- Connect the power cord to the DC input jack.

- Insert the plug into power outlet.


- MosicGO ® has an internal battery pack. Please fully charge the battery before using the projector. (*Note: Only Sport MGFU-S model has a battery pack)

- Press the Power On/Off Switch. The OK icon on the touch keypad will illuminate.

- Press the PJ button to turn the projector on and the status LED indicator will light up. To turn off the projector, press and hold the PJ button for over 1 second. After seeing prompt message, short press PJ button again to confirm. The MosicGO logo will show briefly before the device powers off. The status LED indicator light will be flashing as the projector powers down. When projector is ON, short pressing the PJ button on the remote control will cycle through the following brightness modes: MAX, ECO, and MIN.
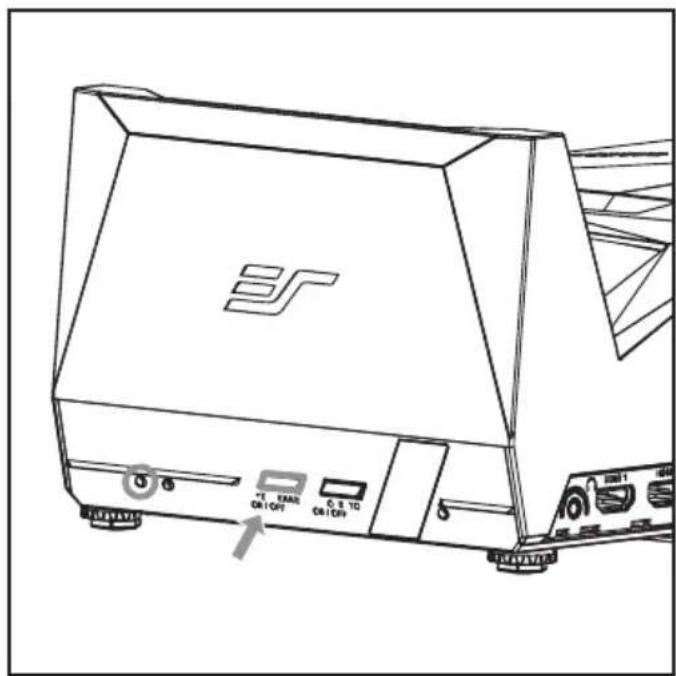
- Press the Wireless Speaker button to activate this feature. It's blue LED lamp will flash when the Wireless Speaker is in pairing mode. Check "MoscGO" on your device to connect to MosicGO Wireless Speaker. When device is connected successfully, the blue LED lamp will light persistently. To turn off the Wireless Speaker, press down and hold the BT button for over 1 second. When both projector and Wireless Speaker are ON, short pressing the Wireless Speaker button on the remote control will switch audio source between projector and Wireless Speaker.
*Note:
An audible tone sounds when the Wireless Speaker powers on/off, or when the projector connects/disconnects to a device.
*Note:
Press the 18 Wireless Speaker button / 19 PJ button to turn off Wireless Speaker / projector before press 7 power off switch. Avoid press 7 power off switch directly when projector / Wireless Speaker still on
BATTERY STATUS INDICATOR

LEDs indicate battery and charging status as following table.
| Adapter Mode Battery Mode | ||
| Geen(100%) Solid Solid | ||
| Green (80% ~) | Flash Solid | |
| Orange(15%~79%) | Flash Solid | |
| Red(~14%) Flash Solid | ||
In battery mode, MosicGO ® will be forced to power off if battery capacity is under 10% Suggest charging the battery Immediately if LED Indicator Is Red.
*Note:
There is no battery in Lite MGFU-L version. Power LED is green solid when DC adapter is inserted.)
BATTERY FOR POWER SOURCE
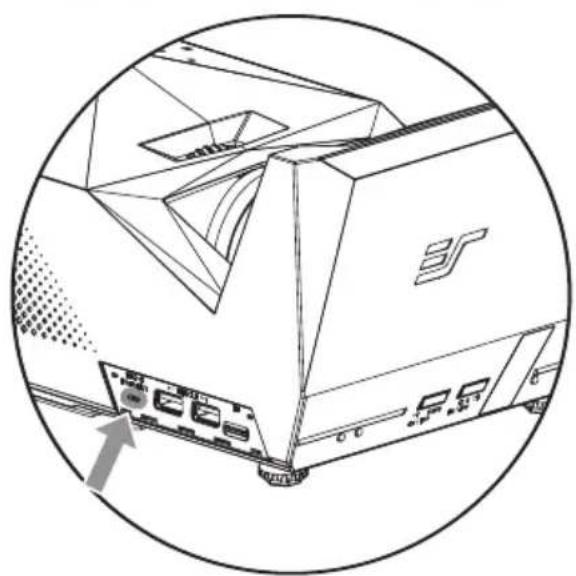

- USB Type C power Delivery: Type C support PD function. Please refer specification section for details.
*Note: When projecting video connect, USB type C ports automatically switch to a lower (5V1A) power rail.
- USB Type A : Provide 5V/1A max power.
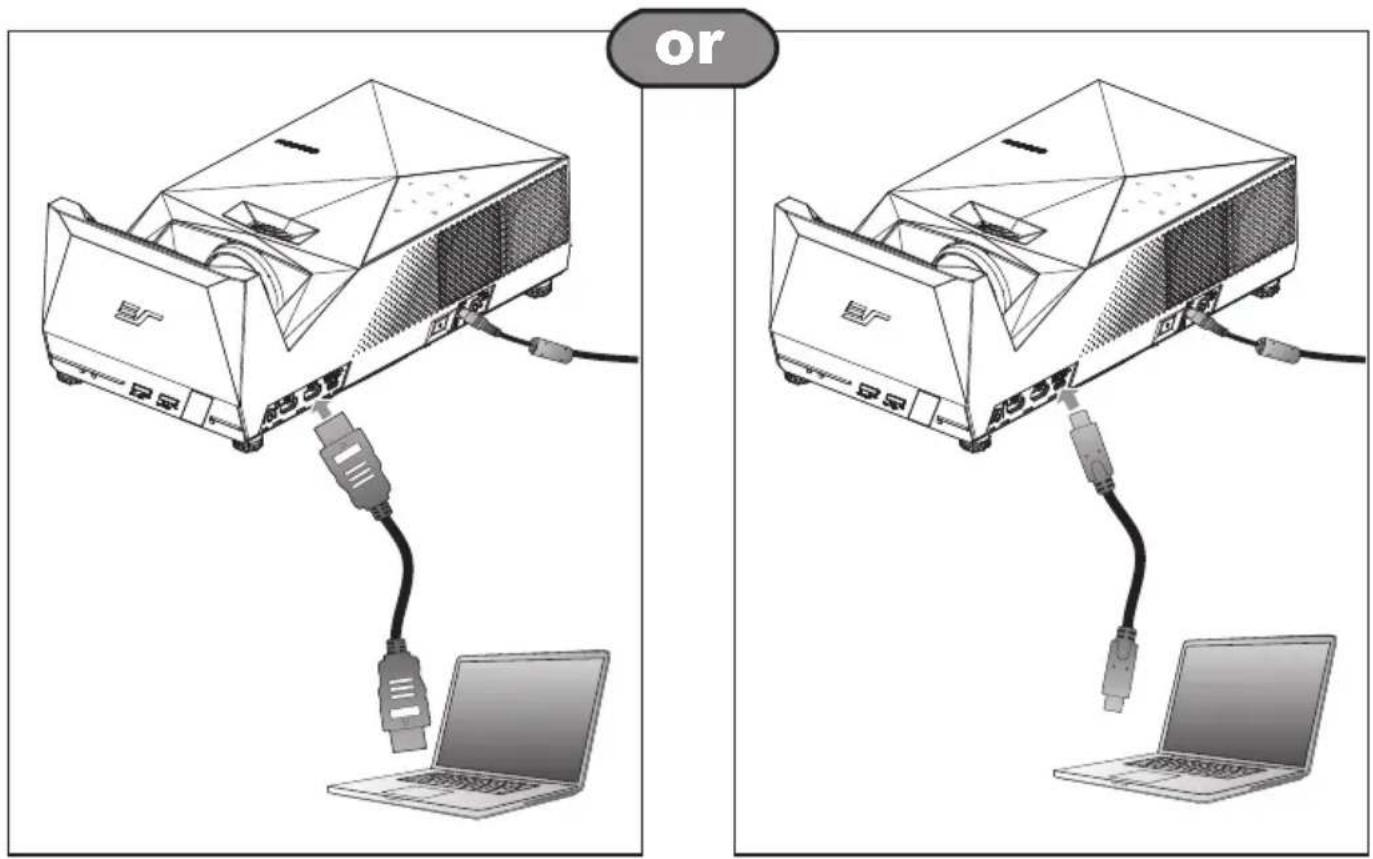
- Connect the device using HDMI or USB type C cable.
ADJUST PROJECTION IMAGE TILT

The projector is equipped with four elevator feet for adjusting the projected image tilt.
To adjust the tilt:
Turn the elevator feet to adjust the projected image position to the desired tilt.

Adjust the focus until the image is clear.
| A B C D E | Note | ||||
| Projector Front Edge Distance to Screen | Screen lower edge to projector table | Projector Screen diagonal | Projector Screen width | Projector Screen height | |
| inch inch inch inch inch | |||||
| 3.82 9.41 60 | 52.3 29.4 | ||||
| 6.42 10.75 | 70 61.0 34.3 | ||||
| 9.17 11.89 | 80 69.7 39.2 | ||||
| 11.97 13.35 | 90 78.4 44.1 | *Note | |||
| 14.53 14.37 | 100 | 87.2 49.0 | |||
| 21.38 | 17.56 | 125 | 108.9 | 61.3 | |
| A B C D E | Note | ||||
| Projector Front Edge Distance to Screen | Screen lower edge to projector table | Projector Screen diagonal | Projector Screen width | Projector Screen height | |
| cm cm cm | cm cm | ||||
| 9.7 23.9 15 | 2 133 75 | ||||
| 16.3 27.3 1 | 78 155 87 | ||||
| 23.3 30.2 2 | 03 177 100 | ||||
| 30.4 33.9 2 | 29 199 112 | *Note | |||
| 36.9 36.5 2 | 54 221 125 | ||||
| 54.3 44.6 3 | 18 277 156 |
*Note:
The MosicGO ® (Lite MGFU-L & Sport MGFU-S) portable UST (ultra-short throw) projectors are specifically designed for creating 60-80" imagery in a 16:9 aspect ratio.
Throwing larger (90"-125") images will have corner distortion and is more recommended for videos than in still shot / training presentations.


*Note:
The tolerance is around 5% .

• Earphone, 3.5mm Jack Pin assignment
HPL : Left Channel Audio Signal
HPR : Right Channel Audio Signal
GND : Signal Ground

• 12V Trigger Port, 3.5mm Jack Pin assignment
12V : 12V trigger signal for screen rolling up/down
GND : Signal Ground
i *Note:
The Earphone output is not design as a line out (AUX out) to connect to an amplifier/ stereo or powered speaker. If you want to connect this type of device, we recommend purchasing a Ground Loop Noise Isolator to help eliminate the hum noise emitting from the devices.


Screw a standard tripod into the screw hole on the projector.
*Note:
Tripod should support loading above 3Kg, and mounting screw spec is 1/4"

- Loosen 4 screws to metal plate from MosicGO
- Fasten screws (M4) to ceiling mount kits.
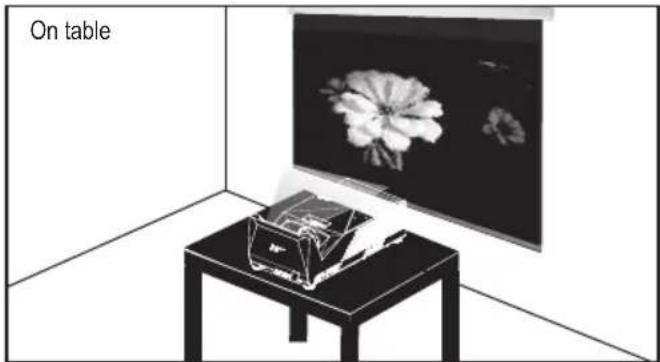
Note1


Keep enough space from speakers and ventilations (30 cm above)

*Note:
Please keep air vents opend for heat ventilation. Otherwise, projector will be turned off if it's over heat.

- Contrast: adjust color contrast.
- Sharpness: adjust picture sharpness.
- Pattern Test: present pattern picture to verify focus and color situation of display. Press "OK" will return to current video port.
- Picture Test: circularly present red, green, blue, and white screen to verify picture color. Press "OK" will return to current video port.
*Note:
- Contrast and Sharpness can be configured only when video signal is ready.
- Reset to default setting by selecting 'Menu'->'Other'->'Reset

- Auto Power Off: Configure the time before power off if there is no signal to projector.
• H / V Position: Adjust the display position
*Note:
1.H Position and V Position can be configured only when video signal is ready.
2. Reset to default setting by selecting 'Menu' -> 'Other' -> 'Reset'
![MosaicGO RGB COLOR Gamma [ Off ] Color Temp [ Off ] Color Effect [ Standard ] Color Format [ RGB ] HUE + Saturation +](/content/2026/05/1087359/images/c7ac2ae16bc69c1461821b63a3ed7d3ed7f4ade6d68be6ed2686ec467e1e717d.jpg)
- Configure color properties.
1 *Note:
- All COLOR Menu can be configured only when video signal is ready.
- Some features might not be supported in current model.
- Reset to default setting by selecting 'Menu'->'Other'->'Reset'
![MosaicGO ADVANCE Aspect Ratio [ Full ] Projector Installation [ FrontTable ] Ultra Vivid [ Off ]](/content/2026/05/1087359/images/5d805027feb0051aa97ab766c36654d1c0e94b2d09110ce599e38ec909668d0c.jpg)
- Set other configuration.
- Aspect Ratio: configure ratio of display area.
- Projector Installation: according to your projector installation, configure the orientation of display.
- Ultra vivid: enable/disable supporting vivid color.
I *Note:
- Aspect Ratio and Ultra Vivid can be configured only when video signal is ready
- Some features might not be supported in current model.
- Reset to default setting by selecting 'Menu'->'Other'->'Reset'
![MosaicGO® OTHER 12V Trigger [ Off ] Keystone [ On ] Language [ English ] Transparency - S.P.M(SPORT) [ Off ] Buzzer [ On ] Reset [ No ]](/content/2026/05/1087359/images/7bd87456a2579e7751a5278fcd198f910b71b231d4d2087c7f34cc93790b61d2.jpg)
- 12V Trigger: Enable/disable the output of 12V Trigger Out.
- Keystone: adjust the rectangle shape of display.
• Language: configure language - Transparency: configure the transparency of OSD(on-screen display).
- S.P.M: enable/disable Smart Projector Mode. If enable, MosicGO will automatically adjust brightness according current battery and power situation.
- Buzzer: enable/disable "beep" alert sound.
- Rest: reset to default setting.
*Note:
-
Brightness cyclic MAX/ECO/MIN will be disabled when S.P.M is ON.
-
If Keystone is enabled, the projector will automatically adjust the image
display within 2-3 seconds. Press up/down key to adjust slightly also.
- Reset to default setting by selecting 'Menu' -> 'Other' -> 'Reset'

- Present current video signal information.
SPECIFICATIONS
| Item Description | |
| Imager DLP | |
| Native Resolution | 1920 x 1080 Full-HD |
| Projection Distance | 9.7-36.9cm (3.82"-14.53") from wall to projector body edge |
| Projection Image Size | 1.52-2.54 m (60" - 100") diagonal |
| Focus Manual | |
| Throw Ratio 0. 3 (80"@0.5m) | |
| Keystone Vertical keystone | |
| Projection Modes | Front Table, Rear Table, Front Ceiling, Rear Ceiling |
| Standard Input Resolution | Up to F(1920 x 1080) |
| SDTV/EDTV/HDTV | 480i, 480p, 576i, 576p, 720p, 1080p |
| Horizontal Frequency | 30.5 - 91.1kHz |
| Vertical Frequency | 50 - 85Hz |
| Operating Temperature | 0 - 40°C |
| Dimensions (WxHxD) | 319 x 168 x 9(ack) / 127(front) mm |
| AC adapter | 100 - 240V, 50 - 60Hz |
| Power Input | 19V DC, 6.3A |
| Power Consumption | Less than 120W |
| Lamp RGB LED | |
| Lamp Life 25,000 Hours | |
| Speakers 8W x 2 music power | |
| Battery Capacity | 37200mAh (135 Watt-Hours) |
| Battery Life (for MGFU-S model) | Up to 3 hours play time in Eco mode. |
| Eco Mode: Lowest brightness and low volume. | |
| Input/Output Ports | Alt-DP (USB type C connector) x 1 |
| HDMI 1.4 x 2 | |
| USB type A poewr charging port (5V1A) x 2 | |
| USB type C PD power source port x 2 (Note) | |
| Earphone out | |
| 12V Trigger Out (0.1A output max.) | |
| Wireless Speaker audio in x 1 | |
| Waterproof IPX2 | |
| Security Kensington Slot | |
*Note:
Power Delivery (PD): maximum 5V/3A,9V/3A,15V/3A,20V/4.35A for port 8 USB type-C port
maximum 5V/3A,9V/3A,15V/2A,20V/1.5A for port 3 USB type-C port
TROUBLESHOOTING
If you experience a problem with your projector, please refer to the following information. If a problem persists, please contact your local retailer or service center.
☆ No image appears on screen
- Ensure the power cord is correctly and securely connected.
- Ensure the cable is fine.
• Make sure the projector is switched on.
☆ Image is out of focus
• Make sure the projection distance is in valid range (refer to page 10).
- Projecting test pattern ("Menu" -> "Picture", press "OK" -> "Pattern Test", press "OK")
- Adjust the focus ring, make the line pattern on four corners and center clear.Exit "Pattern" by press "OK" again.
☆ Image is too small or too large
- Move the projector closer to or further from the screen.
☆ No sound
- During music playback, press 📄 / 📋 on the remote control.
☆ Lens with dust or water drops
- Use a hairdryer on a low heat setting to clear away dust, water or other particles. To Prevent Damaging the Surface Coating, DO-NOT Touch, Wipe or Clean the Lens. If the projection surface is heavily soiled, contact the manufacturer for further assistance.
☆ Frequently asked questions
- https://www.eliteprojector.com/faqs.html
*Note:
When the projector's temperature is too high, the projector automatically shuts down due to the built-in temperature protection. This is not a malfunction. Let the projector cool down before switching it on again.
1 *Note:
MGFU-S/MGFU-L is splash resistant and was tested under controlled laboratory conditions with a rating of IPX2 under IEC standard 60529. Splash resistance are not permanent conditions and resistance might decrease as a result of normal wear. Do not attempt to charge a wet MGFU-S/MGFU-L; Liquid damage not covered under warranty. "To Prevent Damaging the Surface Coating, DO-NOT Touch, Wipe or Clean the Lens." Consult the manufacturer for special cleaning instructions.
Supported HDMI input video signal:
| Resolution | Horizontal Frequency (kHz) | Vertical Frequency (Hz) |
| 640 x 350 | 31.468 | 70.09 |
| 720 x 400 | 31.469 | 70.08 |
| 640 x 480 | 31.469 | 59.94 |
| 800 x 600 | 37.879 | 60.31 |
| 1024 x 768 | 48.363 | 60.00 |
| 1152 x 864 | 54.348 | 60.053 |
| 1360 x 768 | 47.712 | 60.015 |
| 1280 x 1024 | 63.981 | 60.020 |
| 1920 x 1080 | 67.5 | 60 |
* If an invalid signal is input into the projector, it will not be displayed properly on the screen or a message such as 'not support' will be displayed.
* To provide the best picture quality, 1920 x 1080 (1080p) resolution is recommended.
TROUBLESHOOTING
☆ 3 continuous beep sound
You may hear 3 continuous beep sound accompany following icon on the screen

Low battery: projector is turned off immediately. Please plug power adapter to charge the battery. You can turn on the projector during charging.
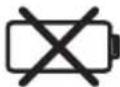
Battery fail: if the power adapter is plugged. You can turn on and use projector. If you pull out the power adapter, the projector may be turned off without any warning. If the problem still occurs, please check your vendor.

Over heat: projector is turned off immediately. Suggest to let projector be off for a while before it is turned on again.

Fan error: projector is turned off immediately. If the problem still occurs, please check your vendor.
*Note:
Projector may be over heat and turned off immediately. Suggest to let projector be off for a while before it is turned on again.

•Actual Height and Distance May Vary

13 Months Warranty Card
| Customer's name: | |
| Phone number: | |
| Email: | |
| Address: | |
| Date of purchase: (M) (D) (Y) | |
| Model No:S/N: | |
* To ensure your right, please ask the Dealer to fill in the information above, and have Dealer's stamp on this card.* If date of purchase cannot be provided with dealer's stamp, the manufacture date as recorded will be deemed to be the start of the Warranty Period. MosicGO MOVIES MUSIC POWER GO MosicGO MOVIES MUSIC POWER GO |
Elite Screens Visual & Sound Co., Ltd.
MosaicGO®
- MOSAICGO® PROJECTOR USER'S GUIDE
- EYE SAFETY WARNINGS
- IMPORTANT SAFETY INSTRUCTIONS
- CAUTION – RISK OF BATTERY EXPLOSION IF INCORRECT TYPE IS USED. MAKE SURE TO PROPERLY DISCARD USED BATTERIES ACCORDING TO LOCAL REGULATIONS
- COPYRIGHT / TRADEMARK
- DECLARATION OF CONFORMITY
- TRADEMARKS
- FCC WARNING
- FCC CAUTION
- FCC RF EXPOSURE WARNING
- AGENCY APPROVALS
- NOTE
- PRODUCT ACCESSORIES LIST
- POWER ON/OFF
- BATTERY STATUS INDICATOR
- BATTERY FOR POWER SOURCE
- ADJUST PROJECTION IMAGE TILT
- I *NOTE
- 1 *NOTE
- SPECIFICATIONS
- TROUBLESHOOTING
- ☆ NO IMAGE APPEARS ON SCREEN
- ☆ IMAGE IS OUT OF FOCUS
- ☆ IMAGE IS TOO SMALL OR TOO LARGE
- ☆ NO SOUND
- ☆ LENS WITH DUST OR WATER DROPS
- ☆ FREQUENTLY ASKED QUESTIONS
- ☆ 3 CONTINUOUS BEEP SOUND
- 13 MONTHS WARRANTY CARD
- MOSAICGO®
Brand : Elite Screens
Model : MosicGO Lite MGFU-L
Category : Video projector