
F450 - Fan N'oveen - Free user manual and instructions
Find the device manual for free F450 N'oveen in PDF.


| Product Type | Pedestal Fan |
| Model | F450 |
| Brand | N'oveen |
| Power Supply | AC 220-240V, 50Hz |
| Power Consumption | 60W |
| Fan Diameter | 40 cm (16 inches) |
| Height | Adjustable, max 130 cm |
| Weight | 5 kg |
| Speed Settings | 3 speeds (Low, Medium, High) |
| Oscillation | Yes, wide-angle oscillation |
| Control Type | Remote control and touch panel |
| Timer | 7.5 hours |
| Airflow | Up to 70 m³/min |
| Noise Level | ≤ 60 dB |
| Safety Features | Overheat protection, tip-over switch |
| Maintenance | Clean grille with damp cloth; do not immerse |
| Spare Parts | Blades, motor, remote available separately |
| Repairability | User-serviceable parts; consult manual for disassembly |
| Certifications | CE, RoHS |
Frequently Asked Questions - F450 N'oveen
User questions about F450 N'oveen
0 question about this device. Answer the ones you know or ask your own.
Ask a new question about this device
Download the instructions for your Fan in PDF format for free! Find your manual F450 - N'oveen and take your electronic device back in hand. On this page are published all the documents necessary for the use of your device. F450 by N'oveen.
USER MANUAL F450 N'oveen
OPIS URZĄDZENIA F455
natural_image
Three hand-drawn illustrations of a car's head, showing different cable configurations (no text or symbols)PLEASE READ THESE INSTRUCTIONS CAREFULLY AND SAVE IT
Thank you for choosing our product. Read carefully before assembling, installing, turning on or maintaining this device. Protect yourself and others by following the safety instructions.
SAFETY INSTRUCTIONS
■ Never put your fingers or other objects inside the cover to avoid injury.
- Keep the fan away from moisture, chemicals and oil.
■ Do not spray water during cleaning and do not use oil, alcohol or chemicals as they can cause deformation of the fan body and cause electrical hazard.
■ Do not pull the power plug by pulling the power cord, it may cause an electric shock.
- Keep the fan away from curtains, clothing or other items that may affect the operation of the fan.
■ Turn off all switches and unplug the power plug when you will not be using the fan for a long time.
■ This device is not intended for use by persons (including children) with impaired physical, sensory or mental abilities or lack of experience and knowledge, unless they have received supervision or instructions regarding the use of the device by the person responsible for their safety.
■ Children should be supervised to ensure that they do not play with the device.
■ Never use the fan before assembly is completed to avoid injury.
■ If the power cord is damaged, it must be repaired by the manufacturer or an authorized service center to avoid any danger.
■ If the device does not work, please check that the plug is in the socket before sending it to the service center.
■ Do not use the fan during rain.
■ Do not touch the fan when it is wet.
■ Do not touch the fan blades.
■ Do not mount the fan on a wall or ceiling.
F445 DESCRIPTION

- Cover ring 9. Back plate
- Front cover 10. Cover
- Blade securing nut 11. Mounting pipe
- Fan blade 12. External connector
- Back cover nut 13. Pipe cover
- Rear cover 14. Cover
- Output shaft 15. Base
- Connector 16. Oscillation button
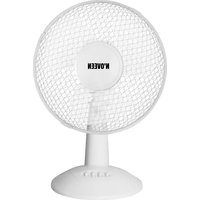
F450 DESCRIPTION
- Front cover
- Blade screw
- Blade
- Rear cover nut
- Rear cover
- Oscillation button
- Motor housing
- Control panel
- Pipe holder
- Pipe
- Pipe locker
- Blocking pipe
- Base

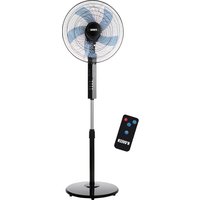
F455 DESCRIPTION
- Handle
- Timer
- Oscillation button
- Speed button
- On / off button
- Pipe
- Base
- Front cover
- Rear cover
- Motor housing
- Remote control

Assembly and operation
Assemble and connect the base with the assembly pipe and support pipe. Take out the base. Then assemble the pipe and cover for the mounting pipe and support pipe. Match four holes in the bottom of the support tube into the holes in the base and tighten the screws. Insert cover to the base next to the support tube and set the support tube on the appropriate height. Then tighten the external connector.
Installation of the fan blade
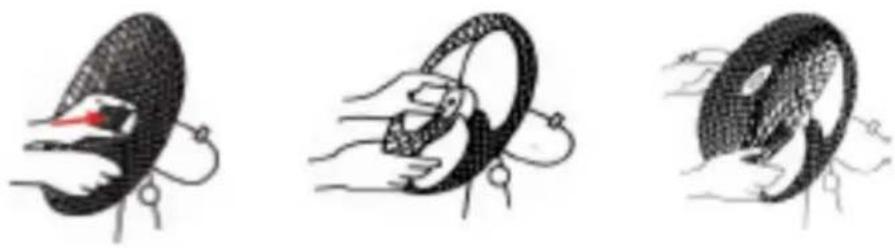
1) Mount the cover and cover ring.
Tighten the rear cover housing to the motor with a nut. (Pay attention to the rotation direction). Align the bezel ring connector down and cover the deep groove of the bezel ring to rear cover housing side ring. Then tighten the screws at the connection point with a nut.
When installing the fan blade, align the groove on the back of the fan blade with a distance pin of the motor output shaft. Then tighten fan blade anticlockwise with fixing nut.
3) Mount the front cover
Insert the circle of the front cover into the groove of the cover ring that has been attached to rear cover. Finally, attach the cover ring connector to the screw.
natural_image
Three hand-drawn diagrams showing a car wheel being held, with no text or symbols present.Assembly (F450 model):
- Mount the pipe (12) on the base with 4 screws.
• Fix the base on the black bottom with 4 screws (If it is available) - Unscrew the pipe locker, pull the pipe to the correct height and then tighten the locker.
- Unscrew the pipe holder. Mount the fan firmly on top of the pipe and tighten the pipe holder.
- Remove the nut and place the rear cover in front of the motor housing, tighten the nut firmly, and then mount the blades on the motor axis (remember to align the screw with the groove on blades) and tighten the screw counterclockwise.
- Put the front cover and close or screw the ring to connect the covers.
Operation
- Setting the air flow direction
You can adjust the angle of inclination using the knob under the motor housing.
- Oscillation setting
Press the oscillation button and the fan head will start to rotate. Then pull it out and the fan stops rotating.
- Speed setting
Adjust the rotation speed:
- 0: the fan is off
- 1: low speed
- 2: medium speed
- 3: high speed
Speed and timer settings (F455 model)
■ Press the SPEED button to adjust the airflow rate from highest to lowest (HIGH / MED / LOW).
■ Timer setting: The fan can be set to run for 0.5 hours (0.5H), 1 hour (1H), 2 hours (2H) or 4 hours (4H).
Cleaning and maintenance
Before cleaning, turn the power off and pull the plug out of the socket.
- This device requires only ordinary external cleaning and wiping.
- Place in the packaging and store in a dry place.
Technical specification
| Model Power Diameter Dimensions Weight Noise dB | |||||
| F445 45W | 40cm 450 x 350 x | 600 mm | 2,4 kg 55 | ||
| F450 45W | 40 cm 450 x 435 x | 1300 mm | 4,4 kg 55 | ||
| F455 55W | 40 cm 450 x 435 x | 1350 mm | 5 kg 56 | ||
KARTA GWARANCYJNA
IMPORTER / GWARANT :
- OPIS URZĄDZENIA F455
- PLEASE READ THESE INSTRUCTIONS CAREFULLY AND SAVE IT
- SAFETY INSTRUCTIONS
- F445 DESCRIPTION
- F450 DESCRIPTION
- F455 DESCRIPTION
- Assembly and operation
- Installation of the fan blade
- Assembly (F450 model):
- Operation
- Speed and timer settings (F455 model)
- Cleaning and maintenance
- KARTA GWARANCYJNA
- IMPORTER / GWARANT :
Brand : N'oveen
Model : F450
Category : Fan