
381320-19 - Car kit PIONEER - Free user manual and instructions
Find the device manual for free 381320-19 PIONEER in PDF.


| Product Type | Car Multimedia Kit |
| Brand | Pioneer |
| Model | 381320-19 |
| Category | Car Kit |
| Dimensions (W x H x D) | 178 mm x 50 mm x 160 mm (Double DIN) |
| Weight | 1.2 kg |
| Power Supply | 12 V DC (negative ground) |
| Power Output | 4 x 50 W max |
| Display Type | 6.2-inch TFT LCD touchscreen |
| Radio Tuner | FM/AM tuner with RDS |
| Bluetooth | Built-in for hands-free calls and audio streaming |
| USB Input | Front USB port for playback and charging |
| AUX Input | 3.5 mm front auxiliary input |
| Steering Wheel Control | Compatible with adapter (sold separately) |
| Remote Control | Included wired remote |
| Speaker Outputs | 4 channels (front/rear) |
| Preamp Outputs | 2 pairs (front/rear) at 2V |
| Installation | ISO/DIN mounting kit required |
| Maintenance | Clean with soft dry cloth; avoid liquids |
| Safety | Built-in detachable face for theft prevention |
Frequently Asked Questions - 381320-19 PIONEER
User questions about 381320-19 PIONEER
0 question about this device. Answer the ones you know or ask your own.
Ask a new question about this device
Download the instructions for your Car kit in PDF format for free! Find your manual 381320-19 - PIONEER and take your electronic device back in hand. On this page are published all the documents necessary for the use of your device. 381320-19 by PIONEER.
USER MANUAL 381320-19 PIONEER
Installation Manual Double DIN Kit 381320-19 / 391320-19
Pioneer
sound.vision.soul
Installation Manual
Double DIN Kit
Standard: 381320-19
Rubber-Touch: 391320-19
• Audi TT (8J) 2006 →
Compatible with these Pioneer double DIN devices
Pioneer Navigation
natural_image
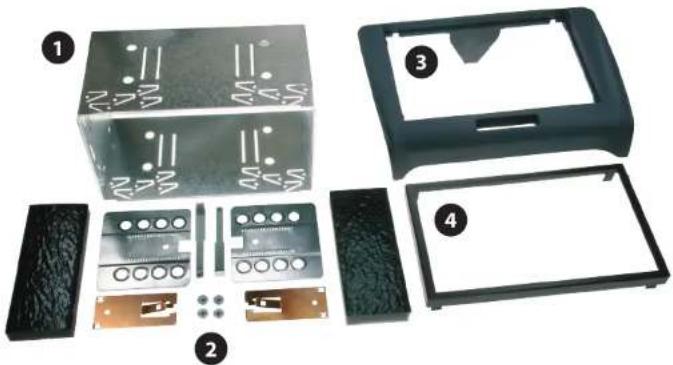
Exploded view of a device housing and panel assembly (no text or symbols visible)Double DIN Set contents
• (1) Metal Frame
• (2) Installation Kit
• (3) Facia Plate
• (4) Trim Frame
Installation Manual Double DIN Kit 381320-19 / 391320-19
natural_image
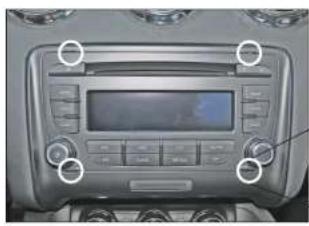
Interior view of a car dashboard with control panel and buttons (no visible text or symbols)- Positions of the radio release keys. Clip out the „PASSENGER AIRBAG OFF" control light


natural_image
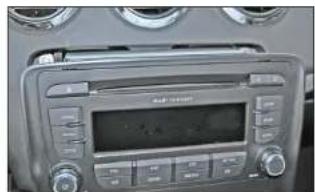
Interior view of a car dashboard with control buttons and a digital display (no visible text or symbols)- Put four radio release keys in the appropriate slots of the OEM head unit.
natural_image
Interior view of a car infotainment panel with digital display and control buttons (no visible text or symbols)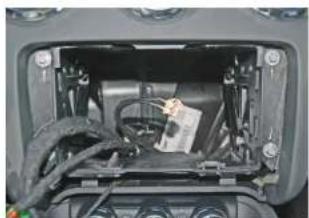
natural_image
Interior view of a car showing internal components and wiring (no visible text or symbols)- Remove the OEM head unit by pulling it towards your direction.

natural_image
Interior view of a mechanical or electronic device with labeled components and directional arrows (no readable text or symbols)(sample photo) (sample photo)

natural_image
Pure electrical circuit lines without any symbolsMount the metal brackets to the double DIN head unit.
The position of the copper coloured holder can be adjusted to your needs for perfect fit. (see sample)
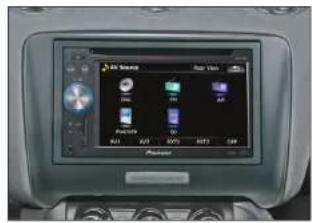
- Push the Metal Frame into the facia plate, place both into the dashboard.
Connect all required circuit points and push the double DIN head unit in the metal frame until it snaps in. Fix the facia plate with the original screws, place the trim frame.
Reinstall everything in reverse order to finish installation.
All installation work must be performed by a qualified professional installer only. The manufacturer / dealer is not liable for any kind of incidental or indirect damages.
Brand : PIONEER
Model : 381320-19
Category : Car kit