
KMC-350-L2F - Ice machine Avantco - Free user manual and instructions
Find the device manual for free KMC-350-L2F Avantco in PDF.


| Product Type | Ice Machine (Modular) |
| Brand | Avantco |
| Model | KMC-350-L2F |
| Ice Production Capacity | Up to 350 lbs per day |
| Ice Type | Full Cube or Half Cube (depending on kit) |
| Storage Bin Capacity | Approx. 200 lbs (with compatible bin) |
| Condenser Type | Air-Cooled |
| Refrigerant | R-404A or R-290 (check label) |
| Electrical Requirements | 115V/60Hz, 15A (dedicated circuit) |
| Dimensions (W x D x H) | 22" x 26" x 36" (approximate) |
| Weight | Approx. 120 lbs |
| Key Features | Self-cleaning cycle, front air intake, stainless steel exterior |
| Maintenance | Regular cleaning of condenser and water system |
| Safety Features | Low water safety shut-off, freeze protection |
| Spare Parts Available | Water pump, evaporator, control board, etc. |
| Repairability | Modular design allows easy component replacement |
| Warranty | 3 years parts and labor (standard) |
| Certifications | ETL or NSF (verify model) |
Frequently Asked Questions - KMC-350-L2F Avantco
User questions about KMC-350-L2F Avantco
0 question about this device. Answer the ones you know or ask your own.
Ask a new question about this device
Download the instructions for your Ice machine in PDF format for free! Find your manual KMC-350-L2F - Avantco and take your electronic device back in hand. On this page are published all the documents necessary for the use of your device. KMC-350-L2F by Avantco.
USER MANUAL KMC-350-L2F Avantco
natural_image
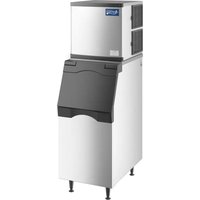
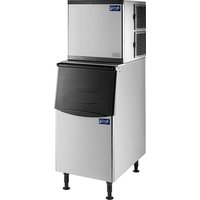
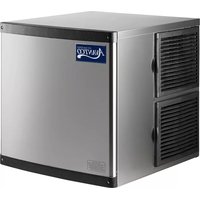
Exterior view of three AYVTO ice machines (no signage or text visible on the main body)Modular Ice Machine User's Manual
194MC35022FA, 194MC35022HA, 194MC42022FA, 194MC42022HA, 194MC50030FA, 194MC50030HA, 194KMC350B2F, 194KMC350B2H, 194KMC420B2F, 194KMC420B2H, 194KMC500B3F, 194KMC500B3H, 194BIN23022, 194BIN27530, 194KMC350L2F, 194KMC350L2H, 194KMC420L2F, 194KMC420L2H, 194KMC500L3F, 194KMC500L3H, 194BIN40022, 194BIN54030, 194KMC350H2F, 194KMC350H2H, 194KMC420H2F, 194KMC420H2H, 194KMC500H3F, 194KMC500H3H, 194HBN12022, 194HBN18030
12/2021
Please read the manual thoroughly prior to equipment set-up, operation and maintenance.
User Manual
AVANTCO ICE MACHINES
Table of Contents
1. Modular Ice Machine and Bin User's Manual
a. Warning and Safety....3
b. Installation....4
c. Startup and Operation....7
d. Maintenance....12
e. Clean Function....13
f. Manual Cleaning & Sanitizing....14
g. Service Call....17
h. Troubleshooting....18
2. Hotel Ice Dispenser User's Manual
a. General Description....21
b. Basic Specifications & Dimensioned Illustrations....21
c. Unpacking....26
d. Installation....27
e. Final Check List/Initial Start Up....29
f. Use....30
g. General Care and Cleaning....31
h. Maintenance....33
i. Adjustments....34
j. Service Diagnosis....35
3. Warranty
Warning and Safety
DANGER – RISK OF FIRE OR EXPLOSION. FLAMMABLE REFRIGERANT USED. TO BE REPAIRED ONLY BY TRAINED SERVICE PERSONNEL. DO NOT PUNCTURE REFRIGERANT TUBING.
PELIGRO - RIESGO DE INCENDIO O EXPLOSION. REFRIGERANTE INFLAMABLE UTILIZADO. PARA SER REPARADO SOLAMENTE POR PERSONAL DE SERVICIO CALIFICADO. NO PINCHAR LA TUBERÍA REFRIGERANTE.
DANGER – RISQUE DE FEU OU D'EXPLOSION. LE FRIGORIGÈNE EST INFLAMMABLE. CONFIER LES RÉPARATIONS À UN TECHNICIEN SPÉCIALISÉ. NE PAS PERFORER LA TUBULURE CONTENANT LE FRIGORIGENE.
CAUTION – RISK OF FIRE OR EXPLOSION. FLAMMABLE REFRIGERANT USED. CONSULT REPAIR MANUAL/OWNER'S GUIDE BEFORE ATTEMPTING TO SERVICE THIS PRODUCT. ALL SAFETY PRECAUTIONS MUST BE FOLLOWED.
This product cannot be used in outdoor environments. Not intended for use by children, persons with reduced physical, sensory or mental capabilities or lack of experience and knowledge.
- The installation, repair or maintenance of this ice machine must be carried out by professional and qualified personnel. Electric shock, fire, personal injury may result from incorrect operation.
- After the ice machine is delivered, please keep the machine upright for at least 24 hours to have the refrigerant be fully precipitated before startup. Otherwise the compressor may be damaged.
- When handling, keep the cabinet upright with the inclination not exceeding 45 degrees. Do not invert the machine or lay it horizontally.
- This ice machine should not be placed in wet or easily splashed areas.
- The grounding of this ice machine cannot be connected to a gas pipe, water pipe, telephone line or lightning rods, etc.
- There are rotating components in this ice machine. Do not insert slim objects into ventilation or exhaust ports, or serious mechanical damage and injury may occur.
- Do not store volatile or flammable substances in this ice machine or it may result in an explosion or fire.
- Do not store any sundries or freeze any food in the storage bin. Keep the ice scoop clean.
- The ice machine must be placed on a floor sufficient enough to support its weight. An insufficient base may cause the equipment to fall over and cause injury.
- There should be sufficient ventilation space around the ice machine. See page 5 for clearance requirements.
- Only the power supply specified on the machine nameplate can be used with this ice machine.
- This ice machine cannot be connected to hot water.
- Outlet for this ice maker must be reliably grounded with leakage protection.
- The ice machine must be disconnected from power before manual cleaning, repairing and maintenance.
- Before cleaning, repairing and maintenance, the remaining ice in the ice bin should be removed from the ice machine to avoid contamination to ice.
- Do not splash water directly onto the surface of the ice machine during the cleaning process; otherwise it may cause short circuit, leakage or other faults.
- Flammable foaming agent is used during the foaming process. The ice maker should be disposed of and recycled by qualified personnel and institutions.
- The ice machine should be properly managed to ensure that children will not play with the machine.
- When the ice machine malfunctions, turn off the power and contact professional personnel to be repaired.
User Manual
ICE MACHINES AVANTCO
This ice machine is fully automatic. With proper installation and connection to potable water and power source, the ice making will start properly. When the ice cubes fill up the storage bin, the machine will automatically stop. The ice machine is generally used in the following and similar occasions:
- Indoor, ambient controlled environments only.
- The kitchen area of a store, office or other workplace;
• Hotel and restaurant; - Catering and similar non-retail occasions;
• This ice machine is not intended for residential use

Food Service Water Filtration
C Pure creates specialty water filters to be used with common restaurant equipment, ensuring that the water utilized by the equipment is both clean and clear. These filters are easily installed into water lines, and their cartridges can be quickly swapped out for fast, easy and efficient replacements. The water filters below are approved for use with Avantco Ice Machines. Failure to use and maintain an appropriate water filter will void warranty coverage on your Avantco Ice Machine. For installation instructions, refer to the C Pure water filtration manual or contact a C Pure water filtration dealer.
Modular Ice Machine
| Item Number | Ice Shape | Ice Production Per 24 Hrs. | Recommended Water Filtration System | Replacement Cartridge |
| 194MC35022FA | Full Dice 350 lbs. | 790OCLOKITM | 790OCLOCARTM | |
| 194MC35022HA | Half Dice 350 lbs. | 790OCLOKITM | 790OCLOCARTM | |
| 194MC42022FA | Full Dice 420 lbs. | 790OCLOKITM | 790OCLOCARTM | |
| 194MC42022HA | Half Dice 420 lbs. | 790OCLOKITM | 790OCLOCARTM | |
| 194MC50030FA | Full Dice 500 lbs. | 790OCLOKITM | 790OCLOCARTM | |
| 194MC50030HA | Half Dice 500 lbs. | 790OCLOKITM | 790OCLOCARTM |
User Manual
Modular & Bin
| Item Number | Ice Shape | Ice Production Per 24 Hrs. | Recommended Water Filtration System | Replacement Cartridge |
| 194KMC350B2F | Full Dice 350 lbs. | 790OCLOKITM 790OCLOCARTM | ||
| 194KMC350B2H | Half Dice | 350 lbs. | 790OCLOKITM | 790OCLOCARTM |
| 194KMC420B2F | Full Dice 420 lbs. | 790OCLOKITM 790OCLOCARTM | ||
| 194KMC420B2H | Half Dice 420 lbs. | 790OCLOKITM 790OCLOCARTM | ||
| 194KMC500B3F | Full Dice 500 lbs. | 790OCLOKITM 790OCLOCARTM | ||
| 194KMC500B3H | Half Dice 500 lbs. | 790OCLOKITM 790OCLOCARTM | ||
| 194KMC350L2F | Full Dice 350 lbs. | 790OCLOKITM 790OCLOCARTM | ||
| 194KMC350L2H | Half Dice 350 lbs. | 790OCLOKITM 790OCLOCARTM | ||
| 194KMC420L2F | Full Dice 420 lbs. | 790OCLOKITM 790OCLOCARTM | ||
| 194KMC420L2H | Half Dice 420 lbs. | 790OCLOKITM 790OCLOCARTM | ||
| 194KMC500L3F | Full Dice 500 lbs. | 790OCLOKITM 790OCLOCARTM | ||
| 194KMC500L3H | Half Dice 500 lbs. | 790OCLOKITM 790OCLOCARTM |
Modular & Hotel Dispenser
| Item Number | Ice Shape | Ice Production Per 24 Hrs. | Recommended Water Filtration System | Replacement Cartridge |
| 194KMC350H2F | Full Dice 350 lbs. | 790OCLOKITM | 790OCLOCARTM | |
| 194KMC350H2H | Half Dice 350 lbs. | 790OCLOKITM | 790OCLOCARTM | |
| 194KMC420H2F | Full Dice 420 lbs. | 790OCLOKITM | 790OCLOCARTM | |
| 194KMC420H2H | Half Dice 420 lbs. | 790OCLOKITM | 790OCLOCARTM | |
| 194KMC500H2F | Full Dice 500 lbs. | 790OCLOKITM | 790OCLOCARTM | |
| 194KMC500H2H | Half Dice 500 lbs. | 790OCLOKITM | 790OCLOCARTM |
User Manual
Installation
The ice machine should be installed in a proper location meeting the following conditions:
- Indoors, ambient temperature: 40-90°F;
• Power supply: the rated voltage indicated on the machine nameplate ±6%;
• Water source: potable water, with water pressure from 18.75 psi to 80 psi; water temperature: 40-90°F; - The ice machine should be kept away from heat sources, and should be prohibited to use in an extremely high or low temperature environment, and should avoid direct sunlight.
- There should be sufficient ventilation space around the ice machine; the distance from the ice maker to the wall should be no less than 12" for the front, 6" for the sides, and 8" for the rear.
- The ice machine must be placed on a floor sufficient to support its weight;
- The socket for the ice maker must be reliably grounded and have leakage protection;
- Proper floor drainage must be provided near the installation location of the ice machine.
Schematic Diagram

Installation Steps
- Check to see if the ice machine is in good condition and the accessories are all present; check the machine model and the machine nameplate.
- Clean the ice storage bin and the food area inside with a sponge soaked in warm water and soap. Then rinse with potable water and dry.
- Place the ice machine in the operation area; ensure that the machine is placed on a leveled floor so the water flows evenly into the evaporator.
- The compressor chamber is located below the front of the ice bin where the compressor and condenser are installed. It requires good ventilation so the ice maker must have ventilation space of more than 8" in the rear, 6" on the sides, and 12" in the front.
- The bottom of the ice machine is equipped with adjustable legs for level adjustment and clearance for floor cleaning.
- Connect the machine's inlet water filter and water line referring to the installation instructions of your water filter brand; if the installation site is already equipped with a drinking water system, the water filter may not be needed.
- Connect the machine to the water supply using the 3/4" inlet fitting supplied with the machine. It is recommended to install a water ball valve (not supplied with this machine) on the water supply line.
- Connect the drain line to the drain connector. To achieve a proper draining, it is recommended that the drain pipe should have a difference in level of more than 1" per 3'; and confirm that the drain line is not blocked. It is recommended that the drain line be connected to an open drainage port.
- Any joint in the drain line must not be higher than the machine drainage port; any joint in the drain line cannot be higher than the previous joint.
- Confirm the power requirements stated in the machine's nameplate; ensure that the power supply meets the requirements.
- A circuit breaker or switch with leakage protector and reliable grounding is required.
- Turn off the switch on the power line and connect the machine to the power source.
NOTE: the filter flow direction should be correctly installed as per the direction marker on the filter head cover or the filter body. The filter cartridge should be replaced every 3 to 6 months.
Startup and Operation
-
Before you start up the machine, please check and confirm:
-
That the packaging tape inside the ice machine has been removed;
- The accessories or items in the ice bin have been taken out;
- The ice machine has been adjusted to a leveled state;
- The water line has been connected and the water valve is open;
- The plug has been connected to the power supply and the power switch is off.
-
The ambient temperature, water temperature, and pressure of the water supply meet the above requirements.
-
Start up: turn on the power switch. After power-on, the machine begins to make ice automatically.
-
For normal operation, please confirm:
-
There is water in the water trough and no overflow occurs;
- The pump is working properly and water is flowing evenly in the evaporator;
- The compressor is running normally, the temperature of the evaporator and the ice making water is gradually decreasing;
- For air cooled machines, make sure the fan is running normally, and there is stable air flow in the inlet and outlet of the ice machine;
- The ice machine has no abnormal noise;
- The ice machine has no abnormal vibration;
- It takes about 10 to 20 minutes to make one batch of ice, depending on the ambient temperature and the temperature of the water. The higher the temperature is, the longer the ice making will take;
- Ice cubes can be properly harvested from the machine.
User Manual
Operation Instructions
- Startup: after proper installation, connect the water source and turn on the power supply to turn on the machine. Please confirm that the machine is operating normally when you turn it on for the first time.
- Self-check: with power on for the first time, the ice maker will do a self-check and pump out any remaining water.
- Preparing: after the ice machine has finished the self-check, the inlet valve opens and the inlet water will flow in until it reaches the set level; then the ice maker will defrost one time.
- Ice making: after pre-cooling for 30 seconds, the water pump starts, the water flows through the evaporator smoothly and evenly, the ice cubes are gradually formed in the ice cube tray.
- Ice Harvest (Drop): after the ice making process finishes and the water pump is turned off, the defrosting valve is turned on. After the hot gas enters into the evaporator for about 1-2 minutes the ice cubes slide from the evaporator into the storage bin.
Warning: Do not put your hand into the ice storage bin during the ice-falling process to prevent the ice from hitting your hand!
- Shutdown: The ice maker will stop working when you push the "on/off" button on the control panel during the running process.
- Bin full stop: Once the ice storage bin is filled to a certain height, the ice making process will stop after 40 seconds. There is a sensor at the top of the bin which will trigger this stop in production. In order to maximize the bin space make sure to spread around the ice that piles up in front of the sensor
- Repeat ice-making: When the ice cubes triggering this sensor are moved or taken away, the ice maker will go back to the ice making process within seconds
Control Panel

-
LED Display:
-
Self-check: Display "ini" code.
• Preparing: Counts (in seconds) forwards.
- Ice making: Counts (in seconds) forwards prior to the water reaching 32 degrees F. Counts seconds backwards to 0 seconds afterwards.
- Ice Harvest: Counts (in seconds) forwards.
- Clean: Display “CLE” during cleaning and descaling; Display “STL” during sanitizing; Display “RIN” during rinsing.
-
LED Lamps: Turns lights on/off
-
Ice cube thickness adjustment: During the ice making process, if you are not satisfied with the ice thickness, press the ice cube “−” button for 3 seconds, then click the button “+” or “-” on the panel to adjust the thickness of ice cube.
- Note: By clicking the “+” or “-” button one time, the ice making time is extended or shortened by 1.5 minutes.
User Manual
- Cleaning: During the normal operation, hold the cleaning button for 3 seconds to enter the cleaning process. During the entire cleaning process, cleaning agents and disinfectants need to be put into the water trough. When the cleaning process is finished, the ice maker will go to the ice making process.
Note: All cleaning and sanitizing chemicals used must be nickel safe
- ON/OFF: Press this button to switch the machine OFF/ON.
- Please open and close the storage bin door gently. Do not slam the door. Keep door closed when not removing ice.
- If the ice maker is not in use for a long time, it should be energized and run for 2 to 4 hours every 2 months.
Other Special Protection - Shutdown
- If the ice machine has not detected ice harvest in three cycles, it will shut down for safety and protection. The ice maker needs to be checked.
- If the ice machine detects that the ambient temperature is too high it will stop for safety and protection.
- The fault code and its comments are displayed as follows:
| Code | Comments | Machine Action |
| E01 | Sliding board failure | Protective shutdown |
| E02 | Ice making overtime | Protective shutdown |
| E03 | Overtime of ice making | Protective shutdown |
| E04 | High temperature | Protective shutdown |
| E05 | Water shortage | Protective shutdown |
| E06 | High pressure | Protective shutdown |
| E07 | Condensation sensor open circuit | Does not shutdown, Error LED light on every 5 seconds |
| E08 | Condensation sensor short circuit | Does not shutdown, Error LED light on every 5 seconds |
| E09 | Evaporator sensor open circuit | Does not shutdown |
| E10 | Evaporator sensor short circuit fault | Does not shutdown |
| E11 | Refrigeration system failure | Protective shutdown |
| E12 | Water level control fault | Protective shutdown |

Noble Chemical offers a full line of products to clean and sanitize your commercial ice machine. These chemicals are approved for use with Avantco Ice Machines. Failure to regularly clean and sanitize your Avantco Ice Machine will void warranty coverage. For information and instructions, contact a Noble Chemical dealer. The ice machine needs to be cleaned every other month, or once a month for high yeast environments.
Cleaners
| Item Number Size Type | ||
| 147ARCTIC 16 oz. Concentrate | ||
| 147ARCTICRPT 16 oz. Ready to use | ||
| 147ARCTICR1G 1 Gallon Ready to use | ||
Sanitizers
| Item Number Size Type | ||
| 147QKSANICE 12 Pack/16 oz. Bottles Concentrate | ||
| 999QKSANICE 16 oz. Concentrate | ||
Maintenance
NOTE: Maintenance must be done by a qualified technician.
WARNING: Before maintenance or manual cleaning, be sure to shut off the water source and power supply.
Exterior Cleaning
- Frequently clean the environment around the ice machine to keep it clean.
Do not block the vents. - The outer enclosure should be cleaned with a mild detergent and then wiped clean.
If necessary, use commercial stainless steel cleaners and polishes.
NOTE: Stainless steel may rust without proper maintenance.
Inlet Water Filter
- The water filter should be inspected regularly. It is recommended to replace the filter cartridge every 3 to 6 months.
Interior Cleaning
- The inside of the ice storage bin can be washed with water and cleaner solution.
Rinse thoroughly with water. Repeat this process with a water and sanitizer solution. - Note: Check and confirm the water pressure is lower than the maximum allowed pressure.
Do not flush the part above the water pump or the evaporator directly for water protection.
Condenser
- For the air-cooled ice maker, the condenser should be cleaned every three weeks. Use a soft brush or a vacuum cleaner with a brush to brush it up and down along the fin direction, to avoid damage to the fins and further affecting the cooling effect.
- The condenser filter should be cleaned every 2 weeks.
NOTE: Be careful when cleaning the condenser as the edges of the fins are sharp.
Water Line
- In order to ensure food safety, the water line of the ice machine should be cleaned regularly.
Winterizing
- Turn off the water and power supply, drain the residual water from the water trough inlet pipe and drain pipe.
NOTE: The maintenance of the ice machine is not covered by the manufacturer's warranty!
Clean Function
NOTE: Please empty the bin of ice in advance.
NOTE: Please clean and sanitize the bin and do a complete rinsing.
NOTE: Please clean and sanitize the ice sliding board, water distribution line,
water supply line, water pump, then do a complete rinsing.
- Turn on the ice maker; push “clean” button for 3 seconds, the ice maker will begin the cleaning process. Put in the proper amount of cleaning solution manually into the water trough followed by the clean and sanitizing process instruction.
- Push the "clean" button. The ice maker will do auto clean for about 15 minutes. Please spray the evaporator with the cleaning solution in the meantime to ensure a complete clean. When finished, the LED display will flash "Clean" slowly again.
- Put in the proper amount of sanitizing solution manually into the water trough followed by the clean and sanitizing process instruction. Push the “clean” button again, the ice maker will do auto sanitizing for about 15 minutes. Please spray the evaporator with the sanitizing solution in the meantime to ensure complete sanitization. When finished, the ice maker will go into the rinsing process, this process will take about 5 minutes, and do 5 rinsing cycles. Refer to your cleaner and sanitizer for proper mixing & coding instructions.
- The ice maker will go back to making ice as soon as the cleaning process ends.
- Please throw away the next batch of ice in case of residual cleaner.
Manual Cleaning & Sanitizing
Cleaning Instructions

natural_image
Two-panel image showing a white plastic bag on a blue surface and a close-up of a white electronic device with a yellow tool (no visible text or symbols)-
Remove all ice from the ice bin to avoid contamination.
-
Remove the 4 screws from the top and bottom of the ice machine's front panel and remove the front panel.
-
To empty the water from the tank while the machine is running, press and hold the "Clean" button for 3 seconds and enter the cleaning mode to display CLE. In the cleaning mode, press the "-" button for 3 seconds to drain.

Note: Cut off the power supply after draining
User Manual
AVANTCO ICE MACHINES
-
Make sure the power supply is cut off. Remove the water curtain.
-
Remove the 2 screws which are securing the spray pipe and remove it.
-
Remove the 2 screws which are securing the water pump.

natural_image
Close-up of a hand inserting a small electronic component into a white surface, with a red circle highlighting the component (no text or symbols visible)
natural_image
Person in camouflage uniform holding a tool near a grid-patterned panel (no visible text or symbols)
natural_image
Two-panel photo showing a white cylindrical container with wires and cables, next to a grid-patterned panel (no visible text or symbols)-
Pull out the pump and sensor wiring harness.
-
Pull out inlet water pipe. 9. Pull out the hose hoop of the upper water pipe.

natural_image
Close-up of a hand holding a small white object with a red circular overlay, next to a device panel (no visible text or symbols)
natural_image
Close-up of a medical procedure with a red circle highlighting a specific area (no visible text or symbols)
natural_image
Close-up of a mechanical component with red circles highlighting a specific area (no visible text or symbols)- Disassemble fixed screws which are in the spray pipe. Dismantle the spray pipe.

natural_image
Hand holding a white cylindrical object with a small dark spot, circled in red (no text or symbols visible)
natural_image
Close-up of a white cylindrical object with a red oval highlight, no visible text or symbols- Mix a solution of cleaner and water according to your ice machine cleaner instructions. Ensure the cleaning agent dissolves completely. Soak the water pipe, inlet and outer spray pipe, head, spray pipe fixing seat and screws, etc. in the cleaning solution for 5 minutes (or 15 minutes for heavily scaled components). Rinse all components thoroughly with clean water.

natural_image
Close-up of a transparent cylindrical container with a white liquid inside, placed on a surface (no visible text or symbols)
natural_image
Close-up of a gloved hand holding a white panel with grid lines, next to a white shelf (no visible text or symbols)User Manual
AVANTCO ICE MACHINES
- After soaking, scrub the spray pipe, water curtain and pump base bracket with cleaning solution, and rinse with clean water.

natural_image
Close-up of gloved hands holding a small cylindrical object with a metal rod inserted, no visible text or symbols
natural_image
Hand cleaning a white plastic tray with a green cloth (no text or symbols visible)
natural_image
Close-up of hands cleaning a green cylindrical container with plastic and white components (no visible text or symbols)
natural_image
Person washing a green bowl with a white plastic container (no text or symbols visible)- Spray the cleaning solution into the evaporator and wipe clean. Repeatedly wipe the water tank, ice plate and its plastic parts, side plates, ice buckets and other sanitary areas with cleaning solution. Rinse all areas thoroughly with clean water.

natural_image
Hand cleaning a wall-mounted air conditioner unit (no visible text or symbols)
natural_image
Laboratory setup with a gloved hand handling a blue liquid container (no visible text or symbols)
natural_image
Close-up of a hand holding a small, textured green object against a white background (no text or symbols visible)
natural_image
Close-up of a hand holding a pipette next to a grid-patterned panel (no visible text or symbols)
natural_image
Hand applying a sponge to a white surface, no text or symbols visible
natural_image
Close-up of a hand holding a red spray bottle against a blue tiled surface (no text or symbols visible)Sanitizing Instructions
- Mix a solution of sanitizer and water according to your ice machine sanitizer instructions. Ensure the sanitizer dissolves completely. Soak the water pipe, inner and outer spray pipe, head spray pipe fixing seat and screws, etc. in the solution for 5 minutes. If using a no-rinse sanitizer, there is no need to rinse.

natural_image
Close-up of a transparent cylindrical container with a white liquid inside, placed on a surface (no visible text or symbols)
natural_image
Close-up of a hand holding a white plastic edge against a tiled wall (no text or symbols visible)User Manual
ICE MACHINES AVANTCO
- Spray the spray pipe, water curtain and pump base bracket with the sanitizer solution. If using a no-rinse sanitizer, there is no need to rinse.

natural_image
Close-up of gloved hands holding a small container with a pipette, in a lab setting (no visible text or symbols)
natural_image
Hand cleaning a green surface with a plastic sheet, no visible text or symbols
natural_image
Close-up of hands cleaning a green cylindrical container with plastic and white components (no visible text or symbols)
natural_image
Person washing a green soap in a bucket, no visible text or symbols- Spray the sanitizer solution into the ice evaporator with a spray bottle. Spray the water tank, ice plate and its plastic parts, side plates, ice bin and other sanitary areas with sanitizer solution. If using a no-rinse sanitizer, there is no need to rinse.

natural_image
Hand holding a blue plastic bag attached to a wall-mounted panel (no visible text or symbols)
natural_image
Laboratory technician in protective suit handling a grid-patterned chamber (no visible text or symbols)
natural_image
Close-up of a hand holding a green textured sponge on a white surface (no text or symbols visible)
natural_image
Close-up of a hand holding a tool interacting with a grid-patterned panel (no visible text or symbols)
natural_image
Hand applying a sponge to a white surface (no text or symbols visible)
natural_image
Close-up of a hand holding a red spray bottle against a light blue surface (no text or symbols visible)- Allow the dismantled spray pipe, water pump, water pipe, and water curtain to dry. Then install them back to their original position.
Service Call
If the ice machine works abnormally, please confirm below before making a service call:
-
Check the water supply
-
Whether there is water in the water trough;
-
Whether the water pressure is 18.75 psi to 80 psi; the water temperature is 40-90°F;
• Whether the water valve is open;
• Whether there is no water leakage; -
Check the power
-
Whether the indicator on the display panel is ON;
- Whether the panel display does not display the OFF standby state;
- If the LED on the display panel is not ON, check whether the plug and socket are normal, and whether the power supply switch is ON.
User Manual
3. Check nameplate and serial number
- Check the nameplate located on the side or back of the ice machine and record the model and series number of the ice machine.
Note: If the machine fails due to the user's faults, such as failure to use and maintain a water filter, no supply of water, electricity or environmental factors, rather than the fault of the ice maker, the door-to-door service will be charged.
Troubleshooting
| Fault Potential Cause Troubleshooting | ||
| Not working Power switch not turned | on Turn on the power switch | |
| Indicator is OFF Plug is loose Check | plug and socket | |
| Shutdown every 3 minutes after startup; | The ambient temperature is too high | Normal working temperature range of 41-95°F |
| The display shows E04 high temperature | Condenser is dirty and blocked High pressure switch wires fallen off | Clean the condenser |
| The display shows E06 high pressure protection | Fan does not start Check and correct | high pressure switch wiresCheck and correct the fan |
| Ice defrost abnormal Ambient temp | erature too low | Normal working temperature range of 41-95°F |
| Defrost valve does not start normally | Check and correct the defrosting valve | |
| Ice thickness too thin or too thick | check and correct ice thickness setting | |
User Manual
ICE MACHINES AVANTCO
| Poor transparency of ice cubes; ice cubes too thin or incomplete | Ice thickness is too thin | Check and correct ice thickness setting |
| Water pressure is too low | Check that the water supply pressure is 1.3 bar to 5.5 bar | |
| Water temperature is too high | Normal working temperature range of 41-95°F | |
| Inlet water valve does not work Check and correct the inlet water valve | Check and correct the inlet water valve | |
| Inlet water valve is dirty and blocked | Check whether water leaks and correct | |
| Water leaking Check and correct the inlet water filter and water connection | Inlet water filter and water connection | |
| Inlet water filter has not been replaced for a long time | ||
| Too slow in ice making The condenser or air filter is dirty Clean the condenser and filter screen | ||
| Too much noise The ice machine is not placed in a leveled foundation or the ice maker is not leveled | Level the ice machine | |
ICE MACHINES AVANTCO
Hotel Ice Dispenser User's Manual
Models: 194HBN12022, 194HBN18030

natural_image
Technical line drawings of two identical industrial cabinets with internal compartments and mounting feet (no text or symbols)User Manual
AVANTCO ICE MACHINES
General Information
The 194HBN12022 22"W and is designed to use an Avantco Ice 194MC35022HA/FA or 194MC42022HA/FA cube ice machine as the source for ice production.
The 194HBN18030 is 30"W and designed to use an Avantco Ice 194MC50030HA/FA cube ice machine as the source for ice production.
Ice from the cuber falls into the insulated hopper, where it is stored until needed. When a user pushes the dispense chute a rotating wheel scoops the ice up to the top front of the hopper where there is an outlet to the ice chute.
| Cuber Model Fits Dispenser Adapter | ||
| 194MC35022HA/FA 194HBN12022 194BKTHBN | ||
| 194MC42022HA/FA 194HBN12022 | 194BKTHBN | |
| 194MC50030HA/FA 194HBN18030 | 194BKTHBN | |
Basic Specifications
| Model Dimensionsw”xh”xd”with6”leg | BasicElectricalvolts/hertz/phase | Model Description | BinStorageCapacity | ||
| 194HBN12022 22 x 53 x 33 1⁄2 115/60/1 Basic | 22" model | 60 Hz | 120 lb | ||
| 194HBN18030 30 x 53 x 33 1⁄2 115/60/1 Basic | 30" model | 60 Hz | 180 lb | ||
User Manual
ICE MACHINES AVANTCO
Specifications & Limitations
This ice dispenser is designed to be installed and operated indoors in a controlled environment. Follow the Installation Instructions in the Ice Machine Manual to ensure the ice machine has been installed properly.
| Minimum | Maximum | |
| Air Temp | 50 °F. | 100°F. |
| Voltage 60 Hz | 104 | 126 |
Check the nameplate, located on the back of the cabinet for specific information.
Avantco Ice Machines assumes no liability or responsibility of any kind for products manufactured by Avantco Ice Machines that have been altered in any way, including the use of any parts and/or other components not specifically approved by Avantco Ice Machines.
194HBN18030
Dimensioned
Illustration
![[451.1] 17 3/4" [26.1] 1" POWER CORD (WATER INLET 3/8 FLARE (WATER FILLER ONLY) 179.1 7" 444.4 17 1/2" 3/4 FPT DRAIN 189.4 7 1/2" 189.7 7 1/2" BACK](/content/2026/05/1086625/images/0593df37fb6c908312342da8474fdbd3717c728004f6c191a32e32c1777721fd.jpg)
![762.4 30' ICE HEAD 7'11.2 28" Note: Ice lstation depth is curved to match large ice buckets. Listed number is the maximum depth. ICE FILL STATION 8 3/4 [221.5] HEIGHT 13 1/2 [342.9] WIDTH 8 1/2 [215.9] DEPTH 1351.3 53 1/4" FRONT RIGHT SIDE 809.6 24" 2062.5 81 1/4" 650.5 25 5/8" 849.4 33 1/2"](/content/2026/05/1086625/images/a11dba7a1cf1c488ac373767c9b5116dc55e9613ef196484c5a701cc367cfdda.jpg)
User Manual
194HBN12022 Dimensioned Illustration
![[406.4] 16' [24.1] 1' POWER CORD [1/9.1] 7' 3/4 FFT DRAIN [88.9] 3 1/2'](/content/2026/05/1086625/images/75d2d246dc6ececcf7091baf7826e8653d6450f1ffc5b11a3f9520fe65bc751a.jpg)
![[558.6] 22' ICE HEAD [711.200] 28" Note: Ice Imita curved to mat buckets. Liste the maximum ICE FILL STATION 8 3/4 (221.5) HEIGHT 13 1/2 (342.9" WIDTH 8 1/2 (215.9" DEPTH [1351.3] 53 1/4" [152.4] 6" [152.4]](/content/2026/05/1086625/images/cc30dd53ba1a1e27f2c0bdaa6f5c0938e00f4f46ca4d0ad1b09f770709e18829.jpg)
FRONT

RIGHT SIDE
User Manual
Product Description
All models consist of a plastic lined, insulated hopper mounted to a metal base. The hopper contains a 15 blade plastic dispense wheel and a stainless steel sweep arm. The top front of the hopper has a removable door to facilitate maintenance and cleaning of the hopper without removal of the ice machine.
The dispense wheel and sweep arm rotate when the dispense drive motor is actuated. The drive motors actuation is controlled by the agitation timer or the vend switch. When the ice dispense chute is pushed back it moves the actuation lever up. The actuation lever releases the chute door and pushes the vend switch arm up. When the vend switch arm has moved a preset distance the vend switch contacts close, providing power to the dispense drive motor. Ice is delivered to the top end of the ice chute by the dispense wheel and it slides down the chute to the container below. The container rests on a grill, the grills openings are over the ice catch pan, and any spilled ice goes there. The grill has a flange at the front to help contain the ice i fit spills during vending. After the ice dispense chute is released, the ice chute door closes to stop ice flow. Ice in the chute will eventually melt. Melted ice water is routed to the drain through a hose attached to the bottom of the chute. Spilled ice is contained in an insulated ice catch pan. Melted ice water from the ice catch pan is routed to the drain. User debris is kept away from the drain in the catch pan by a slotted shield.
The side and front exterior panels are stainless steel. The vending area and top panel are made of plastic.

User Manual
AVANTCO ICE MACHINES
Unpacking
After removing the carton, check for the loose-shipped parts packed in the storage bin. The parts will include a carton with four legs. Remove the leg carton and any other loose-shipped items.
To remove the skid, place part of the carton behind the unit and tip the unit on its back. Remove the bolts holding the skid to the base of the HBN dispenser and separate the skid from the unit.
Install the legs into the base of the unit, using the holes where the skid bolts were. Turn the leg leveler part of the legs in all the way, adjust them later after the unit is in its final installed position.
Move the dispenser to an upright position and set it in the location where it will be installed. Note where drain lines and electrical connections will be made.
FrontPanelRemoval
The front panel rests on the base and is located with pins that stick up from the base. It is retained to the side panels by strikes and latches. The top panel keeps the front panel from moving forward.
To remove:
- Disconnect electrical power.
- Remove the two screws holding the top panel to the dispenser. Lift the top panel up and off the dispenser.
- Pull the top edge of the front panel forward until the two snaps disengage.
- Lift the front panel up and off the base.

User Manual
AVANTCO ICE MACHINES
Installation-Plumbing
Drain:
All models of the dispenser have a 3/4" FPT drain fitting at the bottom of the back panel. Connect 3/4" rigid tubing to this connection, a vent is recommended for most installations. Route the drain tubing to the building drain.
Note: Drain fittmaterial is plastic. If using copper, sweat the copper tube to copper fitting together before installing on the dispenser.
Note: Keep PVC solvent away from all plastic parts of the dispenser.
Followallapplicableplumbingcodes.
Because the drain tubing will be very cold, insulation is recommended for the tubing.

natural_image
Line drawing of a rectangular industrial machine with a central square top and four base legs, no text or symbols present.Drain Connection, Back View of Dispenser
User Manual
Installation-Electrical and Ice Machine Assembly
The dispenser is supplied with a power cord. Do not use with an extension cord. The unit must be plugged into a properly grounded outlet.
The dispenser must be installed so that it is a separate piece of equipment from the ice machine. The drains and electrical supply must be separate.
FollowAllLocalStateandNationalCodes
IceMachine
All models: Place the dispenser in the location where it will be used. Level the top edge of the dispenser front to back and left to right ensuring a seal between ice machine and dispenser.
Sanitizethedispenserbinwithalocally approved sanitizer.See page 11.
Place the ice machine on the dispenser and secure it to the dispenser with the hardware from 194BKTHBN Kit.
If using a compatible Oceanloch filter system, use the included M4 bolts from 194BKTHBN Kit to attach filter system to the ice machine through the the brackets provided holes.

natural_image
Pure technical line drawing of a mechanical assembly without any text, numbers, or symbolsFasten Ice Machine to Dispenser

Back View of 194HBN18030 Installation

Back View of 194HBN12022 Installation
User Manual
Final Check List/Initial StartUp
- Check that electrical power has been supplied.
- Check that a drain, separate from the ice machine, insulated and made of rigid tubing, has been connected to the dispenser.
- Check that the ice machine has been properly installed per the ice machines installation directions.
- Check that the ice machine/dispenser assembly is level front to back and left to right.
ToStart:
- Connect electrical power. The dispensing system will cycle on for a few seconds.
- Go thru ice machine start up procedures. Let ice machine make two harvests.

natural_image
Line drawing of a two-tiered industrial machine with a potted plant inside, no text or symbols present.- Push the ice chute in.
- Dispense wheel turns.
- Ice will be dispensed from ice chute.
- Give the operator any keys and the instructions on the operation and maintenance of the product.
Check that the operator knows who to call for service, and has the product/service manuals for the machines.
ElectricalSequence
Pushing the ice chute closes a contact to the gear motor.
The gearmotor will have power and the dispenser will continue to operate as long as the ice chute is pushed in. This model also has a agitation cycle of 3 seconds every 6 hours. Since the ice chute is not pushed in during agitation no ice is dispensed.
User Manual
AVANTCO ICE MACHINES
Use
No ice is dispensed.

natural_image
Line drawing of a room interior with a hand placing a container into a curved storage unit (no text or symbols)Push the chute back to dispense ice
User Manual
AVANTCO ICE MACHINES
General Care and Cleaning
Periodically inspect and clean the ice dispenser to keep it operating at peak performance.
Wash the outside of the dispenser with warm water and soap. Rinse off and wipe dry.
CleaningandSanitizingofthelceStorageBin:
The minerals, chlorine and other impurities in the water are rejected from the water during the freeze cycle of the ice machine. These minerals will collect in the storage bin. The ice storage bin should be cleaned and sanitized every 90 days.
- Remove all of the ice stored inside the dispenser bin and shut off the ice maker.
- Disconnect electrical power to the dispenser.

- Remove top front panel (in front o fice machine).
-
Remove the front panel.
-
Lift up and remove the access door at the front of the bin
- Reach into the opening, locate the hair pin and pull it out of the shaft
- Pull the sweep arm off the shaft and remove it from the dispenser.
- Pull the dispense wheel off the drive shaft and remove it from the dispenser.
- Mix a solution of 5 ounces o fice machine cleaner to 1 gallon of warm (95 °F.-115 °F.) water. Wash the entire bin area and the delivery area. Use a clean brush or cloth.

User Manual
General Care And Cleaning-Continued
- Rinse all areas washed with clean, fresh water.
- Using the ice machine cleaning solution, clean the ice grill, sink, sweep arm and dispense wheel. Rinse these parts with clean, fresh water.
- To sanitize: Use a locally approved sanitizer. A possible sanitizer: Mix a solution of fice machine sanitizer and water: 1 ounce of household bleach to 2 gallons of (95 °F.-115 °F.) water. Wash all interior surfaces, the sweep arm and the dispense wheel with the sanitizer solution. Use a clean cloth.
- Allow the parts to air dry.
- Reassemble wheel and sweep arm onto drive shaft. Be sure to reinsert hairpin.
- Replace all panels.
- Reconnect power, be sure ice machine is switched back on.
Be sure to clean and sanitize your ice machine following the instructions that came with your ice machine. The cleaning instructions in this manual are only for the ice dispenser.

User Manual
Maintenance
Spilled ice and user debris will collect in the ice catch pan, located just below the sink grill.
Occasionally the debris will need to be removed and the drain flushed out to prevent water back ups.
Note: Failure to clean out the ice catch pan will likely result in a water leak, one that is NOT covered by warranty.
Tocleanouttheicecatchpan:
- Remove the front panel.
- Disconnect electrical power.
- Remove the two screws holding the top panel to the dispenser. Lift the top panel up and off the dispenser.
- Pull the top edge of the front panel forward until the two snaps disengage.
If the unit is a coin op model, reach behind the front panel and disconnect the coin mechanism harness from the front panel.
If the unit is a water station model, reach behind the front panel and shut o ff the water supply valve to the water faucet. Then disconnect the water line from the shut o ff valve.
- Lift the front panel up and off the base.
- Pull the ice catch pan forward a few inches until the drain hose can be reached.
- Pull the drain hose from the ice catch pan.
- Slide the ice catch pan out of the ice dispenser and clear it of any debris. Wash out the drain.
- Return the ice catch pan to its normal position.
- Re-attach the drain hose.
Ice Catch Pan


natural_image
Technical line drawing of a mechanical device with internal components and mounting feet (no text or symbols)User Manual
AVANTCO ICE MACHINES
Adjustments
The dispenser is preset at the factory. Adjustments are rarely needed.
Agitation Time Recommendations:
The standard time is 3 seconds on every 6 hours. Adjust to agitate more frequently if the unit is installed in a low temperature environment. However, if the ice being produced by the ice machine is cloudy and crumbles easily, adjust to agitate less frequently.

Agitation Timer, Shown Pre-set to 3 seconds every 6 hours
User Manual
Service Diagnosis
| P r o b a | b IS e r o p u l t e m | |
| No ice is dispensed | No power to dispenser | Check for proper power, is dispenser plugged in? |
| e No | r n h | |
| Vend switch does not close | Check vend switchCheck chute for proper motion | |
| Chute cannot be pushed back | Check door lock for proper operation | |
| Interlock switch open | Check interlock switch, be sure top panel is in place | |
| Drive motor windings open | Check drive motor | |
| Drive gears failed | Check gear reducer | |
| No ice is dispensed | Same as above plus coin switch does not close | Check coin switch |
| Vend timer does not work | Connect power to post 6 of coin mech timer, timer should activate, ready light should be on and pushing the chute should start the gear motor, if not replace the vend timer | |
| Only dispenses small amount ofice | Sweep arm damaged | Check/replace sweep arm |
| No water is dispensed | shut off valve inside cabinet | |
| kæ l r æ W a | ugdpri a D | |
| Ice catch pan has overfilled | Remove excess ice | |
| Ice catch pan screen is plugged | Clean screen | |
| Seal between ice machine and dispenser is leaking | Remove ice machine and replace gasket tape | |
| Water drip from spout | Some dripping is normal, but if severe | Check spout drain for restriction |
| "Ready" light is on all the time | Resistor is open | Replace resistors (15K, 2 watt in parallel) |
- Modular Ice Machine User's Manual
- User Manual
- AVANTCO ICE MACHINES
- Table of Contents
- Modular Ice Machine and Bin User's Manual
- Hotel Ice Dispenser User's Manual
- Warranty
- Warning and Safety
- This product cannot be used in outdoor environments. Not intended for use by children, persons with reduced physical, sensory or mental capabilities or lack of experience and knowledge.
- ICE MACHINES AVANTCO
- Food Service Water Filtration
- Installation
- Schematic Diagram
- Installation Steps
- Startup and Operation
- Operation Instructions
- Control Panel
- Note: All cleaning and sanitizing chemicals used must be nickel safe
- Other Special Protection - Shutdown
- Maintenance
- Exterior Cleaning
- Inlet Water Filter
- Interior Cleaning
- Condenser
- Water Line
- Winterizing
- Clean Function
- Manual Cleaning & Sanitizing
- Cleaning Instructions
- Sanitizing Instructions
- Service Call
- Check nameplate and serial number
- Hotel Ice Dispenser User's Manual
- General Information
- Specifications & Limitations
- 194HBN12022 Dimensioned Illustration
- Product Description
- Unpacking
- Installation-Plumbing
- Installation-Electrical and Ice Machine Assembly
- Final Check List/Initial StartUp
- ToStart:
- ElectricalSequence
- Use
- General Care and Cleaning
- General Care And Cleaning-Continued
- Adjustments
Brand : Avantco
Model : KMC-350-L2F
Category : Ice machine