AX-HYKIA4-SWC - Car audio interface Metra - Free user manual and instructions
Find the device manual for free AX-HYKIA4-SWC Metra in PDF.


| Product Type | Vehicle Data Interface with Steering Wheel Control Retention |
| Compatible Vehicles | Hyundai Tucson (2010-2013)†, Kia Forte (2010-2013)‡, Kia Sorento (2011-2013)^+ († with amplified system, ‡ with auto climate control or NAV, + with NAV) |
| Power Supply | 12V DC (vehicle battery) |
| Current Draw | ~100 mA (typical) |
| Dimensions (approx.) | 2.5 x 1.5 x 0.8 inches |
| Weight (approx.) | 0.15 lbs |
| Key Functions | Retains factory steering wheel audio controls, backup camera, AUX-IN jack, NAV outputs (park brake, reverse, speed sense), balance, and fade. Designed for amplified models with SPDIF systems. USB updatable. |
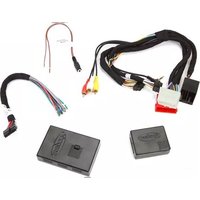
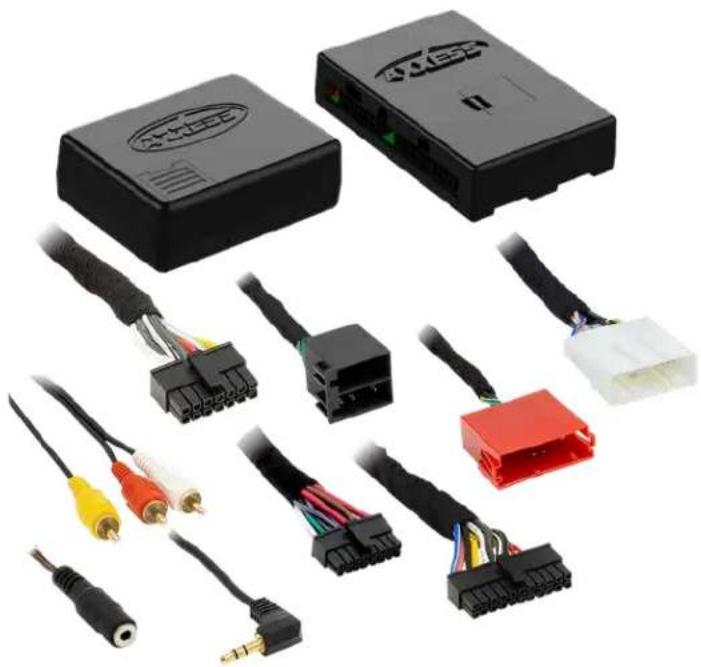
| Included Components | AX-HYKIA4-SWC interface, AX-HYKIA4-SWC harness, AX-HYKIA-SPDIF interface, 16-pin harness with stripped leads, female 3.5mm connector with stripped leads |
| Connection Type | 16-pin harness and 3.5mm SWC jack for steering wheel control |
| Firmware Update | Via Micro-B USB (using Axxess Updater App) |
| LED Feedback | Internal LED indicates programming status and radio type detection |
| Steering Wheel Control Retention | Retains factory steering wheel audio controls; supports dual assignment (long press) for additional functions |
| Compatible Aftermarket Radios | Supports major brands: Alpine, Clarion, Eclipse, JVC, Kenwood, Pioneer, Sony, Dual, Metra OE, XITE, Parrot, LG, Philips, JBL, Valor, Visteon, and others via generic 3.5mm jack |
| NAV Outputs | Park brake (light green wire), reverse (green/purple wire), VSS/speed sense (blue/pink wire) |
| Backup Camera Retention | Retains factory backup camera via yellow RCA jack |
| Factory AUX-IN Retention | Retains factory AUX-IN jack via red/white RCA jacks |
| Installation Tools Required | Crimping tool, solder gun, heat shrink, tape, wire cutter, zip ties, small flat-blade screwdriver |
| Audio Level Adjustment | Adjustable potentiometer on the interface |
| Warranty | 1 year limited warranty (contact Metra) |
| Technical Support | Phone: 1-800-253-TECH, Email: techsupport@metra-autosound.com |
Frequently Asked Questions - AX-HYKIA4-SWC Metra
User questions about AX-HYKIA4-SWC Metra
0 question about this device. Answer the ones you know or ask your own.
Ask a new question about this device
Download the instructions for your Car audio interface in PDF format for free! Find your manual AX-HYKIA4-SWC - Metra and take your electronic device back in hand. On this page are published all the documents necessary for the use of your device. AX-HYKIA4-SWC by Metra.
USER MANUAL AX-HYKIA4-SWC Metra
INTERFACE COMPONENTS
- AX-HYKIA4-SWC interface • AX-HYKIA4-SWC harness
- AX-HYKIA-SPDIF interface • 16-pin harness with stripped leads
• Female 3.5mm connector with stripped leads
APPLICATIONS
Hyundai
Tucson † 2010-2013
Kia
Forte ‡ 2010-2013
Sorento + 2011-2013
+ With NAV
‡ With auto climate control or NAV
Hyundai/Kia Data Interface with SWC 2010-2013
Visit AxkessInterfaces.com for more detailed information about the product and up-to-date vehicle specific applications
INTERFACE FEATURES
- Provides NAV outputs (park brake, reverse, speed sense)
- Retains audio controls on the steering wheel
- Designed for amplified models
- Retains the factory AUX-IN jack
• Retains the factory backup camera - Retains balance
- Micro-B USB updatable
TABLE OF CONTENTS
Connections 2
Installation 3
Programming 3
Audio Level Adjustment ....3
Steering Wheel Control Settings
- L.E.D. feedback ....4
- Changing radio type ....4
- Remapping the steering wheel control buttons 5-6
- Dual assignment instructions (long button press) .6-7
Troubleshooting ....7
TOOLS REQUIRED
- Crimping tool and connectors, or solder gun, solder, and heat shrink • Tape • Wire cutter
- Zip ties • Small flat-blade screwdriver
Attention! Let the vehicle sit with the key out of the ignition for a few minutes before removing the factory radio. When testing the aftermarket equipment, ensure that all factory equipment is connected before cycling the key to ignition.
CONNECTIONS
From the 16-pin harness with stripped leads to the aftermarket radio:
- Connect the Red wire to the accessory wire.
- Connect the Blue/White wire to the amp turn-on wire.
- Connect the Gray wire to the right front positive speaker output.
- Connect the Gray/Black wire to the right front negative speaker output.
- Connect the White wire to the left front positive speaker output.
- Connect the White/Black wire to the left front negative speaker output.
The following (1) wire is only for a multimedia/navigation radio that requires this wire.
- Connect the Light Green wire to the parking brake wire.
- Tape off and disregard the following (8) wires, they will not be used in this application: Blue/Pink, Brown, Green, Green/Black, Green/Purple, Orange/White, Purple, Purple/Black
From the AX-HYKIA4-SWC harness to the aftermarket radio:
- Connect the Black wire to the ground wire.
- Connect the Yellow wire to the battery wire.
- Connect the Blue wire to the power antenna wire.
- If the aftermarket radio has an illumination wire, connect the Orange wire to it.
The following (2) wires are only for a multimedia/navigation radio that requires these wires.
- Connect the Blue/Pink wire to the VSS/speed sense wire.
- Connect the Green/Purple wire to the reverse wire.
- If the factory AUX-IN jack is desired to be retained, connect the Red & White RCA jacks to the audio AUX-IN jacks.
- Connect the Yellow RCA jack to the backup camera input.
3.5mm jack steering wheel control retention:
The 3.5mm jack is to be used to retain audio controls on the steering wheel control.
- For the radios listed below: Connect the female 3.5mm connector with stripped leads, to the male 3.5mm SWC jack from the AX-HYKIA4-SWC harness. Any remaining wires tape off and disregard.
- Eclipse: Connect the steering wheel control wire, normally Brown, to the Brown/White wire from the connector. Then connect the remaining steering wheel control wire, normally Brown/White, to the Brown wire from the connector.
- Metra OE: Connect the steering wheel control Key 1 wire (Gray) to the Brown wire.
- Kenwood or select JVC with a steering wheel control wire: Connect the Blue/Yellow wire to the Brown wire.
Note: If the Kenwood radio auto detects as a JVC, manually set the radio type to Kenwood. See the instructions under Changing Radio Type.
- XITE: Connect the steering wheel control SWC-2 wire from the radio to the Brown wire.
- Parrot Asteroid Smart or Tablet: Connect the 3.5mm jack to the AX-SWC-PARROT (sold separately). Then connect the 4-pin connector from the AX-SWC-PARROT to the radio
Note: The radio must be updated to rev. 2.1.4 or higher software.
- Universal "2 or 3 wire" radio: Connect the steering wheel control wire, referred to as Key-A or SWC-1, to the Brown wire from the connector. Then connect the remaining steering wheel control wire, referred to as Key-B or SWC-2, to the Brown/White wire from the connector. If the radio comes with a third wire for ground, disregard this wire.
Note: After the interface has been programmed to the vehicle, refer to the manual provided with the radio for assigning the SWC buttons. Contact the radio manufacturer for more information
- For all other radios: Connect the 3.5mm jack from the AX-HYKIA4-SWC harness to the jack on the radio designated for an external steering wheel control interface. Please refer to the aftermarket radios manual if in doubt as to where the 3.5mm jack goes to.
INSTALLATION
With the key in the off position:
- Connect the 16-pin harness with stripped leads, and the AX-HYKIA4-SWC harness, to the AX-HYKIA4-SWC interface.
- Connect the AX-HYKIA-SPDIF interfaceto the 14-pin connector from the HYKIA4-SWC harness.
Attention! Do not connect the AX-HYKIA4-SWC harness to the wiring harness in the vehicle just yet.
Attention! If retaining steering wheel controls, ensure that the jack/wire is connected to the radio before proceeding. If this step is skipped, the AX-HYKIA4-SWC interface will need to be reset for the steering wheel controls to function.
PROGRAMMING AUDIO LEVEL
For the steps below, the L.E.D. located inside the AX-HYKIA4-SWC interface can only be seen while active. The interface does not need to be opened to see the L.E.D.
- Start the vehicle.
- Connect the AX-HYKIA4-SWC harness to the wiring harness in the vehicle.
- The L.E.D. will initially turn on solid Green, then turn off for a few seconds while it auto detects the radio installed.
- The L.E.D. will then flash Red up to (18) times indicating which radio is connected to the interface, and then turn off for a couple of seconds. Pay close attention to how many red flashes there are. This will help in troubleshooting, if need be. Refer to the L.E.D. feedback section for more information.
PROGRAMMING (CONT.)
- After a couple seconds the L.E.D. will turn on solid Red while the interface auto detects the vehicle. The radio will shut off at this point. This process should take 5 to 30 seconds.
- Once the vehicle has been auto detected by the interface, the L.E.D. will turn on solid Green, and the radio will come back on, indicating programming was successful.
- Cycle the key off, then back on. If the driver's door is closed, open and close the door.
- Test all functions of the installation for proper operation, before reassembling the dash.
- If the interface fails to function, refer to the Troubleshooting section.
Note: The L.E.D. will turn on solid Green for a moment, and then turn off under normal operation after the key has been cycled.
DJUSTMENT
- With the vehicle and radio turned on, turn the volume up 3/4 of the way.
- With a small flat-blade screwdriver, adjust the potentiometer clockwise to raise the audio level; counter clockwise to lower the audio level.
- Once at a desired level, audio adjustment is complete.
STEERING WHEEL CONTROL SETTINGS
L.E.D. feedback
The (18) Red L.E.D. flashes represent the radio the AX-HYKIA4-SWC interface believes it's connected to. Each flash represents a different radio Manufacturer. For example, if you are installing a JVC radio, the AX-HYKIA4-SWC interface will flash Red (5) times, and then stop. Following is a legend that dictates which radio Manufacturer corresponds to which flash.
L.E.D. feedback legend
Flash Count Radio
| 1 | Eclipse (type 1) † |
| 2 | Kenwood † |
| 3 | Clarion (type 1) † |
| 4 | Sony / Dual |
| 5 | JVC |
| 6 | Pioneer / Jensen |
| 7 | Alpine * |
| 8 | Visteon |
| 9 | Valor |
Flash Count Radio
| 10 | Clarion (type 2) † |
| 11 | Metra OE |
| 12 | Eclipse (type 2) † |
| 13 | LG |
| 14 | Parrot ** |
| 15 | XITE |
| 16 | Philips |
| 17 | TBA |
| 18 | JBL |
* If the AX-HYKIA4-SWC interface flashes Red (7) times, and you do not have an Alpine radio connected to it, that means the AX-HYKIA4-SWC interface does not detect a radio connected to it. Verify that the 3.5mm jack is connected to the correct steering wheel jack/wire in the radio.
** The AX-SWC-PARROT is required (sold separately). Also, the Parrot radio must be updated to rev. 2.1.4 or higher through www.parrot.com.
If you have a Clarion radio and the steering wheel controls do not work, change the radio type to the other Clarion radio type; same for Eclipse. The following section explains how to do this.
If you have a Kenwood radio and the L.E.D. feedback comes back showing as a JVC radio, change the radio type to Kenwood. The following section explains how to do this.
Attention: The Axxess Updater App can also be used to program the following (3) sub-sections as well, pending that the AX-HYKIA4-SWC interface has been programmed and is functional.
Changing radio type
If the L.E.D. flashes do not match the radio you have connected, you must manually program the AX-HYKIA4-SWC interface to tell it what radio it is connected to.
- After (3) seconds of turning the key on, press and hold the Volume Down button on the steering wheel until the L.E.D. in the AX-HYKIA4-SWC interface goes solid.
- Release the Volume Down button; the L.E.D. will go out indicating the AX-HYKIA4-SWC interface is in Changing Radio Type mode.
- Refer to the Radio Legend to know which radio number you would like to have programmed.
- Press and hold the Volume Up button until the L.E.D. goes solid, then release. Repeat this step for the desired radio number you have selected.
- Once the desired radio number has been selected, press and hold the Volume Down button on the steering wheel until the L.E.D. goes solid. The L.E.D. will remain on for about (3) seconds while it stores the new radio information.
- Once the L.E.D. goes out, the Changing Radio Type mode will then end. You can now test the steering control wheel controls.
Note: If at any time the user fails to press any button for a period longer than (10) seconds, this process will abort.
Continued on the next page
STEERING WHEEL CONTROL SETTINGS (CONT.)
Radio legend
Radio # Radio
| 1 | Eclipse (type 1) |
| 2 | Kenwood |
| 3 | Clarion (type 1) |
| 4 | Sony / Dual |
| 5 | JVC |
| 6 | Pioneer / Jensen |
| 7 | Alpine |
| 8 | Visteon |
| 9 | Valor |
Radio # Radio
| 10 | Clarion (type 2) | |
| 11 | Metra OE | |
| 12 | Eclipse (type 2) | |
| 13 | LG | |
| 14 | Parrot | |
| 15 | XITE | |
| 16 | Philips | |
| 17 | TBA | |
| 18 | JBL | |
Remapping the steering wheel control buttons
Once the AX-HYKIA4-SWC interface has been programmed, the button assignment for the steering wheel controls may be reassigned if so desired. For example, if Seek Up is preferred to be Mute instead. Follow the steps below to remap the steering wheel control buttons.
- Ensure that the AX-HYKIA4-SWC interface is visible so you can see the L.E.D. flashes to confirm button recognition.
Tip: Turning the radio off is recommended.
- Within the first twenty seconds of turning the ignition on, press and hold the Volume Up button on the steering wheel until the L.E.D. goes solid.
- Release the Volume Up button, the L.E.D. will then go out. The Volume Up button has now been programmed.
- Follow the list in the Button Function Legend to reference the order in which the steering wheel control buttons need to be programmed.
Note: If the next function on the list is not present on the steering wheel, press the Volume Up button for (1) second until the L.E.D. comes on to skip that function, then release the Volume Up button. This will tell the AX-HYKIA4-SWC interface that this function is not available, and to move on to the next function.
- To complete the remapping process, press and hold the Volume Up button until the L.E.D. in the AX-HYKIA4-SWC interface goes out.
Continued on the next page
STEERING WHEEL CONTROL SETTINGS (CONT.)
Button function legend
Function # Function
| 1 Volume-Up | 10 Band |
| 2 Volume-Down | 11 Play/Enter |
| 3 Seek-Up/Next | 12 PTT (Push to Talk) |
| 4 Seek-Down/Prev | 13 On-Hook |
| 5 Source/Mode | 14 Off-Hook |
| 6 Mute | 15 Fan-Up* |
| 7 Preset-Up | 16 Fan-Down* |
| 8 Preset-Down | 17 Temp-Up* |
| 9 Power | 18 Temp-Down* |
* Not applicable in this application
Note: Some radios may not have these commands. Please refer to the manual provided with the radio, or contact the radio Manufacturer for specific commands recognized by that particular radio.
Function # Function
| 10 | Band |
| 11 Play/Enter | |
| 12 | PTT (Push to Talk) |
| 13 On-Hook | |
| 14 | Off-Hook |
| 15 | Fan-Up* |
| 16 | Fan-Down* |
| 17 Temp-Up* | |
| 18 | Temp-Down* |
Dual assignment instructions (long button press)
The AX-HYKIA4-SWC interface has the capability to assign (2) functions to a single button, except Volume Up and Volume Down. Follow the steps below to program the button(s) to the desired setting.
Note: Seek Up and Seek Down come pre-programmed as Preset Up and Preset Down for a long button press.
- Turn the key to ignition but do not start the vehicle.
- Press and hold the desired steering wheel control button for (10) seconds, or until the L.E.D. flashes rapidly. At this point release the button; the L.E.D. will then go solid.
- Press and release the Volume Up button the number of times corresponding to the new button number selected. Refer to the Dual Assignment Legend. The L.E.D. will flash rapidly while the Volume Up button is being pressed, and then go back to a solid L.E.D. once released. Proceed to the next step once the Volume Up button has been pressed the desired number of times.
Caution: If more than (10) seconds elapses between pressing the Volume Up button, this procedure will abort, and the L.E.D. will go out.
- Press the desired button to store it to memory. The L.E.D. will now go out indicating the new information has been stored to memory.
Note: These steps must be repeated for each button desired to assign a dual assignment feature to. To reset a button back to its default state, repeat Step 1, then press the Volume Down button. The L.E.D. will go out, and the dual assignment feature for that button will be erased.
Continued on the next page
STEERING WHEEL CONTROL SETTINGS (CONT.)
Dual assignment legend
Function # Function
| 1 | Not allowed |
| 2 | Not allowed |
| 3 | Seek-Up/Next |
| 4 | Seek-Down/Prev |
| 5 | Mode/Source |
| 6 | ATT/Mute |
| 7 | Preset-Up |
| 8 | Preset-Down |
| 9 | Power |
Function # Function
| 10 | Band |
| 11 Play/Enter | |
| 12 | PTT |
| 13 On-Hook | |
| 14 | Off-Hook |
| 15 | Fan-Up* |
| 16 | Fan-Down* |
| 17 Temp-Up* | |
| 18 | Temp-Down* |
* Not applicable in this application
TROUBLESHOOTING
Resetting the AX-HYKIA4-SWC
- The Blue reset button is located inside the AX-HYKIA4-SWC interface, between the two connectors. The button is accessible outside the AX-HYKIA4-SWC interface, no need to open the AX-HYKIA4-SWC interface.
- Press and hold the reset button for two seconds, then let go to reset the AX-HYKIA4-SWC interface.
- Refer to Programming from this point.

AX-HYKIA4-SWC
INSTALLATION INSTRUCTIONS

If you are having difficulties with the installation of this product, contact our Tech Support line either by phone at 1-800-253-TECH, or email at techsupport@metra-autosound.com. Before doing so, look over the instruction booklet a second time and ensure that the installation was performed exactly as the instruction booklet is stated. Have the vehicle apart and ready to perform troubleshooting steps before contacting Metra/Axxess Tech Support.

KNOWLEDGE IS POWER
Enhance your installation and fabrication skills by enrolling in the most recognized and respected mobile electronics school in our industry. Log onto www.installerinstitute.com or call 800-354-6782 for more information and take steps toward a better tomorrow.

Metra recommends MECP certified technicians
HYUNDAI/KIA AMPLIFIED BLUE LINK INTERFACE 2010-UP


AX-HYKIA4-SWC
HYUNDAI/KIA AMPLIFIED BLUE LINK INTERFACE 2010-UP

SALES 800-221-0932
- Retains factory Blue link (if equipped)
- Provides navigation outputs
- USB updatable
- Retains fade and balance
• Used with the SPIDIF systems - Retains factory backup camera
- Retains factory 3.5 mm jack
• High level speaker input
- INTERFACE COMPONENTS
- APPLICATIONS
- HYUNDAI
- KIA
- HYUNDAI/KIA DATA INTERFACE WITH SWC 2010-2013
- INTERFACE FEATURES
- TABLE OF CONTENTS
- TOOLS REQUIRED
- CONNECTIONS
- FROM THE 16-PIN HARNESS WITH STRIPPED LEADS TO THE AFTERMARKET RADIO
- FROM THE AX-HYKIA4-SWC HARNESS TO THE AFTERMARKET RADIO
- 3.5MM JACK STEERING WHEEL CONTROL RETENTION
- INSTALLATION
- WITH THE KEY IN THE OFF POSITION
- PROGRAMMING AUDIO LEVEL
- PROGRAMMING (CONT.)
- DJUSTMENT
- STEERING WHEEL CONTROL SETTINGS
- L.E.D. FEEDBACK
- L.E.D. FEEDBACK LEGEND
- CHANGING RADIO TYPE
- STEERING WHEEL CONTROL SETTINGS (CONT.)
- RADIO LEGEND
- REMAPPING THE STEERING WHEEL CONTROL BUTTONS
- BUTTON FUNCTION LEGEND
- DUAL ASSIGNMENT INSTRUCTIONS (LONG BUTTON PRESS)
- DUAL ASSIGNMENT LEGEND
- TROUBLESHOOTING
- RESETTING THE AX-HYKIA4-SWC
- AX-HYKIA4-SWC
- HYUNDAI/KIA AMPLIFIED BLUE LINK INTERFACE 2010-UP
Brand : Metra
Model : AX-HYKIA4-SWC
Category : Car audio interface