
BT-13B - Turntable Boytone - Free user manual and instructions
Find the device manual for free BT-13B Boytone in PDF.


| Product Type | Turntable (Record Player) |
| Brand | Boytone |
| Model | BT-13B |
| Dimensions (approx.) | 42 x 36 x 12 cm |
| Weight | 3.5 kg |
| Power Supply | AC 100-240V, 50/60 Hz (via external adapter) |
| Drive System | Belt drive |
| Speeds | 33 1/3, 45, 78 RPM |
| Built-in Speakers | Yes, stereo speakers |
| Outputs | Headphone jack (3.5 mm), Line out (RCA) |
| Inputs | USB port for recording to computer |
| Additional Functions | Vinyl to MP3 recording, auto-stop, dust cover |
| Maintenance | Clean dust cover and platter with soft dry cloth; keep away from liquids |
| Safety Precautions | Do not use near water; unplug during storms or long inactivity; keep out of reach of children |
| Spare Parts & Repairability | Replaceable stylus/needle; contact manufacturer for other parts |
| General Information | Vintage-style wooden cabinet; includes RCA cable and power adapter |
Frequently Asked Questions - BT-13B Boytone
User questions about BT-13B Boytone
0 question about this device. Answer the ones you know or ask your own.
Ask a new question about this device
Download the instructions for your Turntable in PDF format for free! Find your manual BT-13B - Boytone and take your electronic device back in hand. On this page are published all the documents necessary for the use of your device. BT-13B by Boytone.
USER MANUAL BT-13B Boytone
Turntable With AM/FM Radio
Model Number BT-13B | BT-13G
INSTRUCTION MANUAL
READ INSTRUCTIONS CAREFULLY BEFORE USE AND STORE IN A SAFE PLACE FOR FUTURE REFERENCE
1
General Safety Instructions
Read this manual thoroughly before first use and keep it in a safe place for future reference, along with the completed warranty card, purchase receipt and carton. The safety precautions enclosed herein reduce the risk of fire, electric shock and injury when correctly adhered to.
Follow all instructions and take notice of all warnings to reduce the risk of fire or electric shock.
Electrical safety and cord handling
- Before installing this equipment, make sure your outlet voltage corresponds to the voltage stated on the appliance rating label.
- To prevent contact with high voltage components inside, do not attempt to open the equipment.
- When connecting the equipment, align the plug properly and insert it fully to prevent electric shock.
- Only use this equipment with the cord and plug supplied, and do not overload the power outlet.
- If the power cord is damaged, do not use the equipment. The cord must be replaced by the manufacturer or similarly qualified personnel in order to avoid a
hazard. Contact the after sales support line for advice.
- CAUTION: To reduce the risk of fire or electric shock, do not expose this equipment, the power supply cord and plug to rain or moisture; do not use it anywhere near water or where water splashes or drips; do not touch the power
2
plug with wet hands. In the event that water or other liquids enter the device, unplug the unit immediately and clean and dry it as best as possible. Then have it checked for damage by a qualified technician. Contact the after sales support line for advice.
- Do not repair the unit yourself. Only have it serviced by qualified personnel. Contact the after sales support line for advice.
- Unplug the unit from the power outlet after use to avoid possible damage during electrical storms, or when the equipment will be unattended or unused for a long period of time.
- Do not let the cord hang over the edge of a table or counter, or touch any hot surface. Do not allow anything to rest on or roll over the power cord, and run any cords so that no one steps on or trips over them.
- Do not run the cord near heat-producing appliances such as radiators, stoves or irons. The excessive heat could melt the insulation and expose live wires.
- Always grasp the plug, not the cord, when disconnecting the unit. Pulling the cord can damage the internal wires and may cause a fire.
Installation
- When installing the unit, make sure to place it:
- Away from heat sources, radiators or other products that produce heat.
- Away from areas with high temperatures, high humidity or direct sunlight.
- Away from excess dirt and dust.
- Away from open windows and any place where water may get into the unit
3
and damage it.
- Make sure there is free circulation of air around the unit. Do not place it on a thick carpet, bed or any place where ventilation holes are obstructed. Leave at least 10cm clearance around the unit.
- Make sure the mains socket is readily accessible at all times.
Usage conditions and restrictions
- Openings on the cabinet are provided for ventilation and to protect the unit from overheating. To ensure proper operation, do not cover them with things such as newspapers, tablecloths, curtains etc.
- Do not place heavy objects on top of the equipment or step on it.
- Do not place objects filled with water (such as vases) or any naked flame sources (such as lit candles, incense sticks or cigarettes) on top of the unit.
- The equipment is not intended for use by persons (including children) with reduced physical, sensory or mental capabilities, or lack of experience and knowledge, unless they have been given supervision or instruction concerning use of the appliance by a person responsible for their safety.
- Young children should be supervised to ensure they do not play with the equipment. Close supervision is always necessary when an appliance is used
by or near children.
- Unplug the unit from the power outlet before cleaning.
- Clean the unit only with a dry, clean cloth. Do not use liquid or aerosol cleaners.
• We assume no liability for any damage caused by non-compliance with these instructions or any other improper use or mishandling of the equipment.
Description

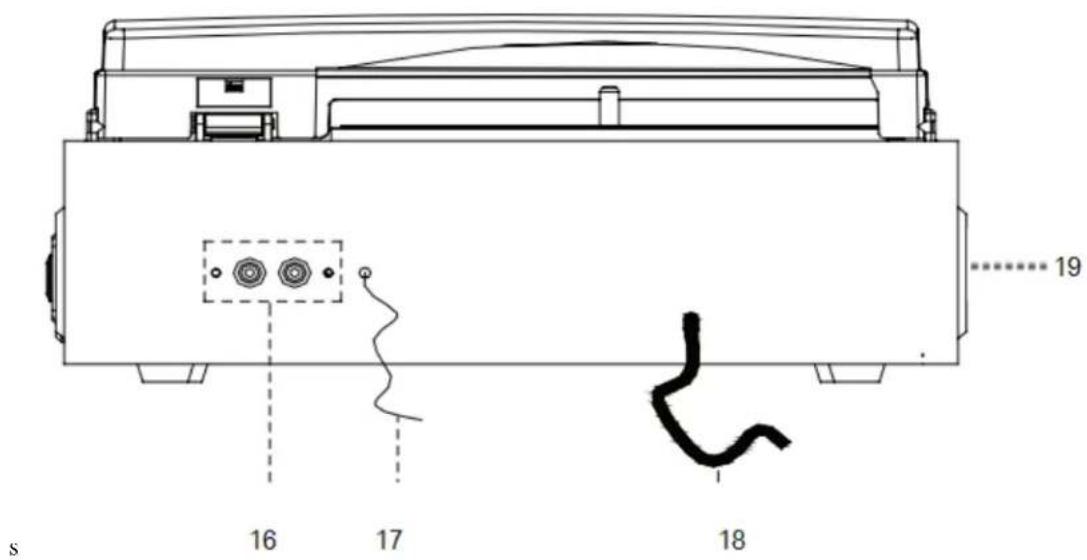
-
Plastic dust cover 2. Turntable
-
Adapter - Use this when playing 45rpm records with cut out centres.
-
Tonearm lift lever
-
Auto stop control
-
Tonearm
-
Speed selection - Three speed for choice: 33.3, 45, 78 rpm.
-
Ceramic cartridge with diamond needle
-
Volume button
-
3.5mm headphone socket
-
Tuning button
-
Auxiliary Input
-
Radio Full range Power
-
Line out sockets
-
AM/FM channel selector
-
FM wire antenna
-
Function selector
-
AC power cord
INITIAL SET-UP
MAINS CONNECTION
Ensure that the mains voltage of your home corresponds to the operating voltage of the unit. Your unit is ready to be connected to a mains voltage of 110V/60Hz.
AMPLIFIER CONNECTION (if required)
Whilst you listen to your new vinyl disc through the speakers of turntable player, you may wish to connect to your existing Hi Fi system. Connect the audio to achieve it - plugs to the AUX input on your mixer or amplifier
using an RCA cable (not supplied).
● Red plug into R/H channel input.
● White plug into L/H channel input.
Playing :
- Place the record of your choice on the turntable. If required, do not forget to place the adaptor on the record spindle.
- Choose the desired playing speed using the speed selection switch between 33.3, 45 and 78rpm.
-
Turn on the Rotary Power Switch. Heads up! This also controls volume. Release the tone arm lock.
-
Raise the arm with your hand lightly.
- Place the stylus vertically over the first track of the record, the turntable will start turning automatically.
- Put down the stylus slowly on to the record to play.
- When a record comes to the end, the turntable will stop automatically if the auto-stop switch is in the ON position. If the switch is in the off position then it will keep revolving until the tone arm is returned to the tone arm rest.
- Lift up the tone arm and put it on the rest when finished.
- Replace the protective cap on the stylus and close the tone arm lock.
- Turn off power at mains.
Instructions
Listening to radio (Radio tuning)
- Turn the volume knob in a clockwise direction to turn the equipment on.
- Use the function selector to select TUNER mode.
- Use the radio band selector to select the desired band (AM, FM or FM-Stereo).
- Turn and hold the tuning knob for a few seconds to tune into a radio station.
The unit will start searching automatically and stop when a radio station is found. Release the knob once a station has been found.
- Repeat the above step until your desired radio station is found.
- Adjust the volume knob to your desired volume level.
- AM reception: the receiver has a built-in AM bar antenna. If reception is weak, slightly rotate or reposition the unit to improve AM reception.
- FM reception: the receiver has a built-in FM wire antenna hanging at the rear cabinet. For best reception, completely unravel and extend this wire.
- When you have finished listening to the radio, turn the volume knob in a counterclockwise direction to switch the unit off. Unplug it from the power supply if you are not going to use it for a while.
FM and FM-stereo mode
- FM mode: use the radio band selector to select the FM band. Programs are received in mono mode. Use this mode when stereo reception is weak.
- FM-Stereo mode: use the radio band selector to select FM-ST for receiving stereo programs. Once a stereo signal is received, the ST icon will light up on the display.
The record player

IMPORTANT!
When using the turntable:
- Make sure to remove the stylus protector, as illustrated on the right. (It should easily slide off the stylus assembly.)
• Make sure to unclip the tone arm lock before use and to secure it again after use.

Playing a record
-
Open the dust cover and turn the volume knob clockwise to turn the equipment on.
-
Use the function selector to select PHONO mode.
-
Set the speed selector to the appropriate position: 33, 45 or 78, depending on the record to be played.
-
Set the auto stop control to ON if you want the turntable to stop turning when it has reached the end of the record. If the switch is set to OFF, the turntable will continue turning at the end of the record.
-
Place the record on the turntable (use the 45 rpm adaptor, if required).
-
Move the lift lever towards the back to raise the tone arm from the arm park, then slowly move the arm to the record, as illustrated on the right. The turntable will start rotating.
-
Move the lift lever towards the front, the tone arm will gently drop onto the record and playback will start.
-
To stop playback, move the lift lever towards the back to raise the tone arm. The turntable will still be rotating but the record will stop playing. To continue playback, move the lift lever towards the front.
-
To play a different piece on the record, move the lift lever towards the back,
move the raised tone arm to the start of the piece and then move the lift lever towards the front to lower the tone arm and start playback.
- To adjust the volume level, turn the volume knob to the right or left.
- At the end of the record, move the lift lever towards the back to raise the tone arm and move it back to the tone arm park, and then move the lift lever towards the front to lower the arm onto its rest.
- Alternatively, lift the tone arm off the record and return it to the arm rest manually.
- When you have finished playing records, engage the tone arm lock to protect it from accidental movement. Turn the volume knob in a counterclockwise direction to switch the unit off. Unplug it from the power supply if you are not going to use it for a while.
NOTE: Should your record stop before the last track finishes, set the auto stop control to OFF. Your record will now play to the end, but you will have to stop the turntable rotation manually. (Return the tone arm to its rest manually and if the turntable is still rotating, switch off the unit by the volume control knob. Then set the auto stop control back to ON.)
Problems with radio Reception
*Make sure you are in an area that can receive signals for your selected radio station.
*If AM reception is weak, rotate or reposition the equipment to improve reception.
*If FM reception is weak, try to following to improve reception:
*Completely unravel the wire aerial at the back of the cabinet.
* Slightly move the wire aerial for better reception.
*If none of these measures improve stereo reception, try the same station on the FM(mono) band.
*Try moving your radio to an alternative location to see if the reception improves.
*Check that you do not have other electrical equipment too close to your
radio, which may cause interference.
Maintenance
REPLACING THE STYLUS
-Refer to the figures 1-8

push the arm lock to release the tone-arm.

take off cap of the cartridge to expose the needle out.

separate the cartridge from the socket lightly.
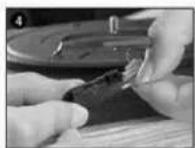
take off the audio-line from the cartridges completely.


to fit a new one just in opposite deals, insert the audio-line accordingly, and install the cartridge to the socket lightly.
NOTE: Please exercise extreme care whilst performing this operation so as to avoid the tone arm and audio line wires from any damage.
INSTALLING A NEW STYLUS CARTRIDGE
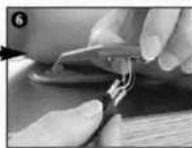
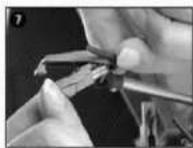
-Refer to the figures 5 & 6


NOTES: We advise you to clean your records with an anti-static cloth to gain maximum enjoyment from them and to make them last.
We would also point out that for the same reason your stylus should be replaced periodically (approximately every 250 hours)
Dust the stylus from time to time using a very soft brush dipped in alcohol (brushing from back to front of the cartridge)
WHEN TRANSPORTING YOUR RECORD PLAYER DO NOT FORGET TO:
Replace the protective cap on the stylus.
Put the rest clip into the pick-up arm.
- TURNTABLE WITH AM/FM RADIO
- READ INSTRUCTIONS CAREFULLY BEFORE USE AND STORE IN A SAFE PLACE FOR FUTURE REFERENCE
- GENERAL SAFETY INSTRUCTIONS
- FOLLOW ALL INSTRUCTIONS AND TAKE NOTICE OF ALL WARNINGS TO REDUCE THE RISK OF FIRE OR ELECTRIC SHOCK
- ELECTRICAL SAFETY AND CORD HANDLING
- 2
- INSTALLATION
- 3
- USAGE CONDITIONS AND RESTRICTIONS
- DESCRIPTION
- INITIAL SET-UP
- MAINS CONNECTION
- AMPLIFIER CONNECTION (IF REQUIRED)
- PLAYING
- INSTRUCTIONS
- LISTENING TO RADIO (RADIO TUNING)
- FM AND FM-STEREO MODE
- THE RECORD PLAYER
- IMPORTANT
- PLAYING A RECORD
- PROBLEMS WITH RADIO RECEPTION
- MAINTENANCE
- REPLACING THE STYLUS
- INSTALLING A NEW STYLUS CARTRIDGE
Brand : Boytone
Model : BT-13B
Category : Turntable