SC-253 - Frying Pan Scarlett - Free user manual and instructions
Find the device manual for free SC-253 Scarlett in PDF.


| Product Type | Frying Pan |
| Brand | Scarlett |
| Model | SC-253 |
| Diameter | 28 cm |
| Material | Aluminum with non-stick coating |
| Handle Material | Phenolic |
| Oven Safe | Up to 180°C |
| Stovetop Compatibility | Gas, electric, ceramic, halogen |
| Induction Compatible | No |
| Dishwasher Safe | Hand wash recommended |
| Weight | Approx. 0.8 kg |
| Dimensions (with handle) | 46 x 28 x 7 cm |
| Non-Stick Coating | PTFE-based (Teflon) |
| Cleaning Instruction | Use soft sponge; avoid abrasive cleaners |
| Safety Warning | Do not overheat empty pan; avoid metal utensils |
| Warranty | 1 year limited |
Frequently Asked Questions - SC-253 Scarlett
User questions about SC-253 Scarlett
0 question about this device. Answer the ones you know or ask your own.
Ask a new question about this device
Download the instructions for your Frying Pan in PDF format for free! Find your manual SC-253 - Scarlett and take your electronic device back in hand. On this page are published all the documents necessary for the use of your device. SC-253 by Scarlett.
USER MANUAL SC-253 Scarlett
natural_image
Modern vertical stand with a horizontal panel and three star-shaped base (no text or symbols visible)www.scarlett.ru

АЯ46

002

010
GB DESCRIPTION
- Air outlet
- Temperature controller
- Fasteners (4 pcs.)
- Screw (2 pcs.)
Tripod is supplied in a separate box: - Metal washers (2 pcs.)
- Plastic plates (2 pcs.)
- Metal pin
- Nuts to secure the fasteners (2 pcs.)
- Telescopic tube
- Locking nut
- Cross piece (4 legs)
- Clip
UA ОПИС
natural_image
Illustration of a person sitting at a desk with a computer and plant, no visible text or symbolsnatural_image
Illustration of a man sitting at a desk with a computer and plant in the background (no text or symbols)Right/Bepno/Bipno
natural_image
Black-and-white photo of a person sitting at a desk with a computer and a plant, no visible text or symbolsnatural_image
Black-and-white illustration of a man sitting at a desk with a phone, under a spotlight (no text or symbols visible)Right/Верно/Вірно
natural_image
Interior scene of a person sitting at a desk with a lamp and window, no visible text or symbolsnatural_image
Illustration of a man sitting at a desk in an office with a window and plant (no text or symbols visible)Right/Bepno/Bipno
Рис. 2. /Fig. 2
GB INSTRUCTION MANUAL
IMPORTANT SAFEGUARDS
- Please read all the instruction manual before use and save it for future references.
- Before first switching on check that the voltage indicated on the rating label corresponds with the mains voltage in your home.
- For home use only. Do not use for industrial purposes. Use the appliance only for its intended use.
- Do not use outdoors or in damp area.
- Do not immerse the appliance and the cord in water or other liquids.
- Do not use the appliance in immediate proximity to a bath, a shower or a swimming pool.
- Never pull the cord while disconnecting from the power outlet; instead, grasp the plug only and pull to disconnect.
- Do not allow the cord to touch sharp edges and hot surfaces.
• Always unplug the appliance from the power supply when not in use. - Do not operate the appliance with damaged cord or plug, or after the appliance malfunctions, or has been dropped or damaged in any manner. To avoid the risk of electric shock, do not disassemble the appliance; take it to a service center for examination, repair or mechanical adjustment.
- This appliance is not intended for use by persons (including children) with reduced physical, sensory or mental capabilities, or lack of experience and knowledge, unless they have been given supervision or instruction concerning use of the appliances by a person responsible for their safety.
- Children should be supervised to ensure that they do not play with the appliance.
- Do not leave appliance unattended while operating.
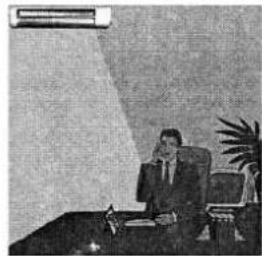
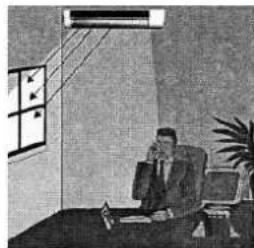
- The heater can be fastened to a wall and ceiling (Fig. 1).
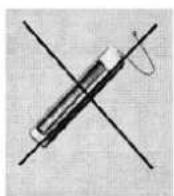
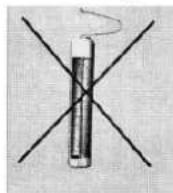
- The appliance must be used only in the horizontal position (Fig.2).
- Unit surface temperature of the appliance is high, thus do not touch it.
- Operating unit should be far away from the flammable or easy bulging under high temperature objects.
- The heater must not be located immediately below a socket-outlet.
CAUTION:
- To avoid a circuit overload, do not operate another high wattage appliance on the same circuit.
- Do not cover the appliance when in use.
- If the product has been exposed to temperatures below 0^ C for some time it should be kept at room temperature for at least 2 hours before turning it on.
- The manufacturer reserves the right to introduce minor changes into the product design without prior notice, unless such changes influence significantly the product safety, performance, and functions.
ASSEMBLY
- Before assembly, unpack the heater supplies and lay the content as near as possible to the place of assembly.
- Assemble the cross piece by connecting the four legs with the clip as shown in Picture C.
- Insert the telescopic tube into the clamp and secure it to the cross piece with a fixing nut.
- Tripod is assembled.
- Fix the heater to the tripod with the fasteners, so that the heater is located exactly in the middle of the tripod, otherwise it may fall. The assembly scheme is shown in Picture A.
- To mount the heater to the wall two fasteners are to be fastened with a bolt (Pic. B). The other two fasteners are fastened in the same way. Then, fasten bonded fasteners to the back of the heater and attach the heater to the wall with screws and dowels (supplied).
• After assembly the heater is ready to use.
OPERATION
- Set the temperature controller to MIN position. Connect the device to the power supply.
- Set the temperature controller to maximum MAX position.
- When indoor air is sufficiently heated, slowly turn the temperature controller anti-clockwise. The device will automatically maintain the steady temperature in the room.
- To change the temperature turn the controller anti-clockwise to reduce it and clockwise to increase.
- After use, set the temperature controller to the minimum position and unplug the device.
WARNING:
- To avoid heat loss room should be kept closed, otherwise it will not get warm.
CLEAN AND CARE
- Unplug from the power supply and allow the appliance to cool down.
- Wipe out with a soft damp cloth. Do not use detergent or abrasives.
- Do not scrap the surfaces of fins with sharp hard tools, to avoid surfaces getting rusty, because of damage of the paint coat.
STORAGE
- Switch off and unplug the appliance. Ensure the heater is completely cool.
- Complete all requirements of chapter CLEAN AND CARE.
- Reel on the power cord.
- Keep the appliance in a dry cool place.
Brand : Scarlett
Model : SC-253
Category : Frying Pan