
PMD670 - Voice recorder Marquant - Free user manual and instructions
Find the device manual for free PMD670 Marquant in PDF.


| Product Type | Voice Recorder |
| Brand | Marquant |
| Model | PMD670 |
| Dimensions (approx.) | 10 x 4 x 1.5 cm |
| Weight (approx.) | 60 g (with batteries) |
| Power Supply | 2 AAA batteries or USB power (5V) |
| Recording Format | MP3 / WAV (bitrate adjustable) |
| Recording Modes | HQ, SP, LP |
| Built-in Microphone | Omnidirectional electret |
| Built-in Speaker | 0.5 W mono |
| Storage | Internal memory 8 GB (non-expandable) |
| Battery Life | Up to 20 hours (LP mode) |
| Interface | USB 2.0, 3.5 mm headphone jack, micro-USB for data/power |
| Controls | Play, pause, record, stop, volume +/-, mode, menu |
| Display | LED indicator for recording/battery; no screen |
| Compatible Systems | Windows, macOS, Linux (mass storage class) |
| Maintenance | Clean with dry soft cloth; avoid liquids and dust |
| Safety Notes | Do not disassemble; keep away from moisture and heat |
| Spare Parts & Repairability | Contact Marquant support; no user-serviceable parts |
| Manufacturer | Marquant (distributed by various retailers) |
| Manual Languages | English, French, Spanish, German (PDF available) |
Frequently Asked Questions - PMD670 Marquant
User questions about PMD670 Marquant
0 question about this device. Answer the ones you know or ask your own.
Ask a new question about this device
Download the instructions for your Voice recorder in PDF format for free! Find your manual PMD670 - Marquant and take your electronic device back in hand. On this page are published all the documents necessary for the use of your device. PMD670 by Marquant.
USER MANUAL PMD670 Marquant
Portable Solid State Recorder
marantz®

CAUTION
RISK OF ELECTRIC SHOCK DO NOT OPEN

CAUTION: TO REDUCE THE RISK OF ELECTRIC SHOCK,
DO NOT REMOVE COVER (OR BACK)
NO USER-SERVICEABLE PARTS INSIDE
REFER SERVICING TO QUALIFIED SERVICE PERSONNEL

The lightning flash with arrowhead symbol within an equilateral triangle is intended to alert the user to the presence of uninsulated "dangerous voltage" within the product's enclosure that may be of sufficient magnitude to constitute a risk of electric shock to persons.

The exclamation point within an equilateral triangle is intended to alert the user to the presence of important operating and maintenance (servicing) instructions in the literature accompanying the product.
WARNING
TO REDUCE THE RISK OF FIRE OR ELECTRIC SHOCK, DO NOT EXPOSE THIS APPLIANCE TO RAIN OR MOISTURE.
CAUTION: USE OF CONTROLS OR ADJUSTMENTS OR PERFORMANCE OF PROCEDURES OTHER THAN THOSE SPECIFIED HEREIN MAY RESULT IN HAZARDOUS RADIATION EXPOSURE.
Important Safety Instructions
READ BEFORE OPERATING EQUIPMENT
This product was designed and manufactured to meet strict quality and safety standards. There are, however, some installation and operation precautions which you should be particularly aware of.
-
Read Instructions – All the safety and operating instructions should be read before the product is operated.
-
Retain Instructions – The safety and operating instructions should be retained for future reference.
-
Heed Warnings – All warnings on the product and in the operating instructions should be adhered to.
-
Follow Instructions – All operating and use instructions should be followed.
-
Cleaning – Unplug this product from the wall outlet before cleaning. Do not use liquid or aerosol cleaners. Use a damp cloth for cleaning.
-
Attachments – Do not use attachments not recommended by the product manufacturer as they may cause hazards.
-
Water and Moisture – Do not use this product near water—for example, near a bath tub, wash bowl, kitchen sink, laundry tub, swimming pool, in a wet basement, and the like.
-
Accessories – Do not place this product on an unstable cart, stand, tripod, bracket, or table. The product may fall, causing serious injury to a child or adult, and serious damage to the product. Use only with a cart, stand, tripod, bracket or table recommended by the manufacturer, or sold with the product. Any mounting of the product should follow the manufacturer's instructions, and should use a mounting accessory recommended by the manufacturer.
-
A product and cart combination should be moved with care. Quick stops, excessive force, and uneven surfaces may cause the product and cart combination to overturn.
-
Ventilation – Slots and openings in the cabinet are provided for ventilation and to ensure reliable operation of the product and to protect it from overheating. These

natural_image
Symbolic icon of a person climbing a ladder inside a circle (no text or symbols)openings must not be blocked or covered. The openings should never be blocked by placing the product on a bed, sofa, rug, or other similar surface. This product should not be placed in a built-in installation such as a bookcase or rack unless proper ventilation is provided or the manufacturer's instructions have been adhered to.
-
Power Sources – This product should be operated only from the type of power source indicated on the marking label. If you are not sure of the type of power supply to your home, consult your product dealer or local power company. For products intended to operate from battery power or other sources, refer to the operating instructions.
-
Power Cord Protection – Power supply cords should be routed so that they are not likely to be walked on or pinched by items placed upon or against them, paying particular attention to cords at plugs, convenience receptacles, and the point where they exit from the product.
-
Protective Attachment Plug – The product is equipped with an attachment plug having overload protection. This is a safety feature. See Instruction Manual for replacement or resetting of protective device. If replacement of the plug is required, be sure the service technician has used a replacement plug specified by the manufacturer that has the same overload protection as the original plug.
-
Outdoor Antenna Grounding – If an outside antenna or cable system is connected to the product, be sure the antenna or cable system is grounded so as to provide some protection against voltage surges and built-up static charges. Article 810 of the National Electrical Code, ANSI/NFPA 70, provides information with regard to proper grounding of the mast and supporting structure, grounding of the lead-in wire to an antenna discharge unit, size of grounding conductors, location of antenna-discharge unit, connection to grounding electrodes, and requirements for the grounding electrode. See Figure 1.
-
Lightning – Lightning – Unplug the unit from the wall outlet and disconnect the antenna or cable system for added protection during a lightning storm or when it is left unattended and unused for long periods of time. This will prevent damage to the product due to lightning and power line surges.
-
Power Lines - An outside antenna system should not be located in the vicinity of overhead power lines or other electric light or power circuits, or where it can fall into such power lines or circuits. When installing an outside antenna system, extreme care should be taken to keep from touching such power lines or circuits as contact with them might be fatal.
-
Overloading – Do not overload wall outlets, extension cords, or integral convenience receptacles as this can result in a risk of fire or electric shock.
-
Object and Liquid Entry – Never push objects of any kind into this product through openings as they may touch dangerous voltage points or short-out parts that could result in a fire or electric shock. Never spill liquid of any kind on the product.
-
Servicing – Do not attempt to service this product yourself as opening or removing covers may expose you to dangerous voltage or other hazards. Refer all servicing to qualified service personnel.
-
Damage Requiring Service – Unplug this product from the wall outlet and refer servicing to qualified service personnel under the following conditions:
a. When the power supply cord or plug is damaged.
b. If liquid has been spilled, or objects have fallen into the product.
c. If the product has been exposed to rain or water.
d. If the product does not operate normally by following the operating instructions. Adjust only those controls that are covered by the operating instructions, as an improper adjustment of other controls may result in damage and will often require extensive work by a qualified technician to restore the product to its normal operation.
e. If the product has been dropped or damaged in any way, and
f. When the product exhibits a distinct change in performance – this indicates a need for service.
-
Replacement Parts – When replacement parts are required, be sure the service technician has used replacement parts specified by the manufacturer or have the same characteristics as the original part. Unauthorized substitutions may result in fire, electric shock, or other hazards.
-
Safety Check – Upon completion of any service or repairs to this product, ask the service technician to perform safety checks to determine that the product is in proper operating condition.
-
Wall or Ceiling Mounting – The product should be mounted to a wall or ceiling only as recommended by the manufacturer.
-
Heat - The product should be situated away from heat sources such as radiators, heat registers, stoves, or other products (including amplifiers) that produce heat.
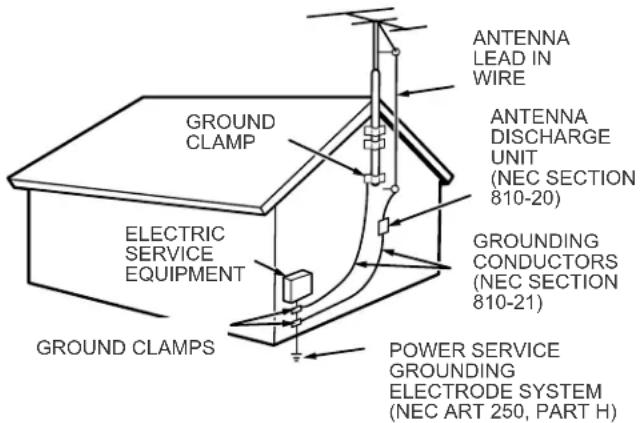
FIGURE 1 EXAMPLE OF ANTENNA GROUNDING AS PER NATIONAL ELECTRICAL CODE, ANSI/NFPA 70 NEC - NATIONAL ELECTRICAL CODE
NOTE TO CATV SYSTEM INSTALLER:
This reminder is provided to call the CATV (Cable-TV) system installer's attention to Article 820-40 of the NEC, which provides guidelines for proper grounding and, in particular, specifies that the cable ground shall be connected to the grounding system of the building, as close to the point of cable entry as practical.
NOTE:
This equipment has been tested and found to comply with the limits for a Class B digital device, pursuant to Part 15 of the FCC Rules. These limits are designed to provide reasonable protection against harmful interference in a residential installation. This equipment generates, uses and can radiate radio frequency energy and, if not installed and used in accordance with the instructions, may cause harmful interference to radio communications. However, there is no guarantee that interference will not occur in a particular installation. If this equipment does cause harmful interference to radio or television reception, which can be determined by turning the equipment off and on, the user is encouraged to try to correct the interference by one or more of the following measures:
- Reorient or relocate the receiving antenna.
- Increase the separation between the equipment and receiver.
- Connect the equipment into an outlet on a circuit different from that to which the receiver is connected.
- Consult the dealer or an experienced radio/TV technician for help.
NOTE: Changes or modifications may cause this unit to fail to comply with Part 15 of the FCC Rules and may void the user's authority to operate the equipment.
WARNINGS
Do not expose the equipment to rain or moisture.
Do not remove the cover from the equipment.
Do not insert anything into the equipment through the ventilation holes.
Do not cover the ventilation with any items such as tablecloths, newspapers, curtains, etc.
No naked flame sources, such as lighted candles, should be placed on the equipment.
When disposing of used batteries, please comply with governmental regulations or environmental public instruction's rules that apply in your country or area.
When setting up the recorder ensure that:
- it will not be exposed to interference from external equipment.
- it will not be exposed to electrostatic discharges.
- it will not be exposed to direct sunlight.
- heavy objects are not placed on the recorder.
Copyright
Recording and playback of any material may require consent. For further information refer to the following US ordinances:
• Copyright act of 1956
• Dramatic and Musical Performance Act 1958
• Performers Protection Acts 1963 and 1972
- any subsequent statutory enactments and orders
CE marking (only EU version)
CE English This product is in conformity with the EMC directive and low-voltage directive.
CE Français
Cet appareil est cnforme à la directive EMC et à la de directive sur les basses tensions.
Deutsch
Dieses Greät entspricht den EMC-Richtlinien und den Richtlinien für Niederspannungsgeräte.
Nederlands
Dit apparaat voldoet aan de EMC-richtlijnene en de richtlijnen voor apparatuur met laag voltage.
CE Italiano
Quest' unità è conforme alle diretive EMC ed alla direttiva sulle basse tensioni.
Português
Esta unidade está em conformidade com as directivas EMC e as directivas de baixa voltagem.
C€ Español
Esta unidad está de acuerdo con las normas EMC y las relacionadas con baja tensión.
Equipment mains working system
This product complies with household power and safety requirements in your area.
This Class B digital apparatus complies with Canadian ICES-003.
Follow the instructions on this page to Quick Start your new PMD670 Portable Solid State Recorder and begin recording.
Note: Outside of the USA a CF card is not included. See page 41 for installing a CF card and page 22 to format a CF card.
Quick Start Basic Instructions
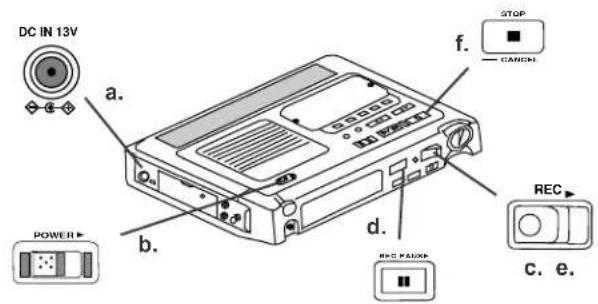
a. Plug the AC adapter in.
b. Slide the POWER switch to turn on.
c. Slide the REC switch to start recording.
d. Push and release REC PAUSE when recording is not necessary.
e. Slide the REC switch to resume recording.
f. Push the STOP button to stop recording.
Quick Start Detailed Instructions
The PMD670 comes factory preset for recording voice using its built-in (internal) microphone. These are settings for recording a meeting, not settings for recording a vocal performance. Quick Start ignores your changing any of these presets, it even ignores installing batteries.
- Unpack the AC adapter and the PMD670.
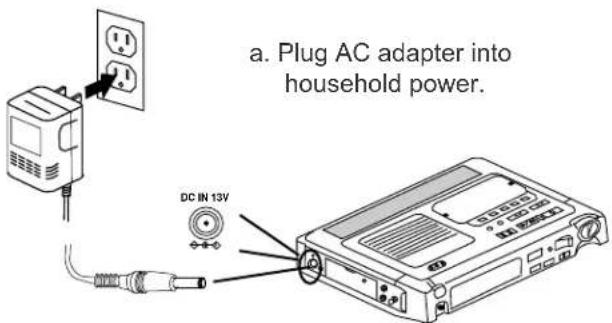
b. Plug the adaptor jack into the PMD670 at DC IN 13V.
- Slide the POWER switch to the right and release.

On first power up, wait for the PMD670 to initialize.
A full display will appear momentarily.
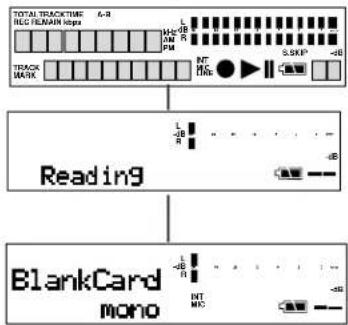
The display will change to Loading then to Reading.
The display will change to this display for a newly formatted CF card.
flowchart
graph TD
    A["TOTAL TRACKTIME REG REMAIN CODE"] --> B["TRACK MARK"]
    B --> C["Reading"]
    C --> D["BlankCard mono"]
    D --> E["+/-"]
    style A fill:#f9f,stroke:#333
    style B fill:#ccf,stroke:#333
    style C fill:#cfc,stroke:#333
    style D fill:#fcc,stroke:#333
- Slide the REC button to the right and release. Recording begins.

The Rec indicator (a) will be lit and steady while recording.
The display will show the recording time (b) of the current track (c).
- Push and release the STOP button to stop recording and end the track (close the audio file).

example shows 4 hours 21 minutes and 02 seconds remaining
To transfer audio files to your computer: transfer the CF card, see page 37, or connect via I/O, see page 43.
Table of Contents
Precautions
Warnings and Cautions 2
Important Safety Instructions .... 3
Regulatory Compliance 4
Quick Start 6
Table of Contents 7
US/Europe models 8
Package Contents 8
Control and Connection Diagrams
Top 9
Front 10
Left side 10
Right side 10
Bottom 10
Display 11
Introduction 12
Features 13
Controls and Connections
Top 14
Speaker 14
MIC (internal microphone).... 14
POWER switch 14
Security cover 14
Recording setup controls
AUTO MARK switch 14
PRE REC switch 15
INPUT LOCK switch 15
ANALOG OUT switch 15
MIC ATTEN switch 15
REPEAT switch 16
ANC switch 16
EDL PLAY switch 16
LEVEL CONT. switch 16
INPUT button 17
What the Input selections do: ..... 17
Recording (file) parameters 17
Input device(s) and channels..... 18
A-B REPEAT button 18
A-B Repeat playback 18
MARK/ ▲ EDIT buttons ...... 19
EDL Marks 19
Adding EDL Marks 19
Locating EDL Marks 19
Custom playback sequences...... 19
Editing EDL Marks 19
EDL A-B looping 20
Edit mode 20
How to renumber tracks 20
How to erase tracks 20
How to erase all EDL marks
within one track 21
How to erase all track EDL marks ..... 21
How to format a CF card 22
The Menu choices are: 25
How to set or change the
Date and time 25
Date Format 27
Algor/File 28
How to set or change the Algor/file parameters 29
Other menu choices: Manual track incrementing .... 31
Seamless play 31
Silent Skip 32
Auto Cue 33
Single Play 34
Beep 34
Automatic Power Off 35
Battery Type 35
Remote Mode 36
bwf ID numbers 36
Menu Default 37
PLAY/PAUSE /
ENTER button ▶/II 38
PLAY/PAUSE button ▶/II 38
ENTER button ▶/II 38
STOP/CANCEL button ■ 38
Front
HP/SP VOLUME control 39
Display 39
REC PAUSE button 39
REC indicator 39
REC switch.... 39
REC LEVEL controls 39
PHONES jack.... 40
DISPLAY button 40
LIGHT button 40
KEY LOCK switch 41
Left side
CHARGE indicator 41
CF card compartment 41
To eject a CF card 41
To insert a CF card 41
DIGITAL IN/OUT jacks 42
DC IN 13V jack....42
I/O port 42
How to connect via I/O port.... 43
Right side
Remote jack 44
Remote Mode 44
LINE OUT/IN jacks 44
MIC IN jacks 44
PHANTOM +48V switch 45
Microphone recommendations ..... 45
Carry studs 45
Installing the carry strap 45
Bottom
Battery compartment 46
Battery power 46
Installing AA size batteries 46
Installing an optional
Ni-Cd or Ni-MH battery 46
Display 47
Care and maintenance 48
Recording time chart 49
Troubleshooting 50
Record setting recommendations 50
Specifications 51
Optional accessories 51
Menu defaults.... 51
Warranty 52
US/Europe models
The US model, PMD670/UIB distributed in the USA, and European model, PMD670/W1B distributed elsewhere, differ slightly in supplied accessories and default settings. Those differences are noted in this User Guide.

Package contents
- PMD670
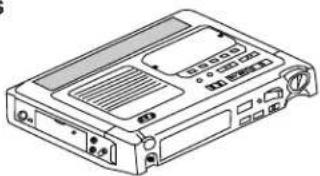
natural_image
Line drawing of a rectangular electronic device with ports and ventilation slots (no text or symbols)- 64MB CF card (US only) (shipped formatted and installed)

- AC adapter

• I/O cable (3 ft)

- AA battery holder

- Carry strap

- Carry strap retainers (2)

• Security screws (3) ISO 3x10 (3mm x 10mm long) For Memory compartment door (1) or Security cover (2 spares).

- Plastic pin and retainer (spare - for Memory compa#tn

• CD Contents of the CD may vary. Contents usually include:
- PDF format manual(s)
Several languages may be included.
• Demonstration copy of PMD Edit software -
Instructions for obtaining full copy of PMD Edit
-
This User Guide
- Customer Registration Document

Control and Connection Diagrams
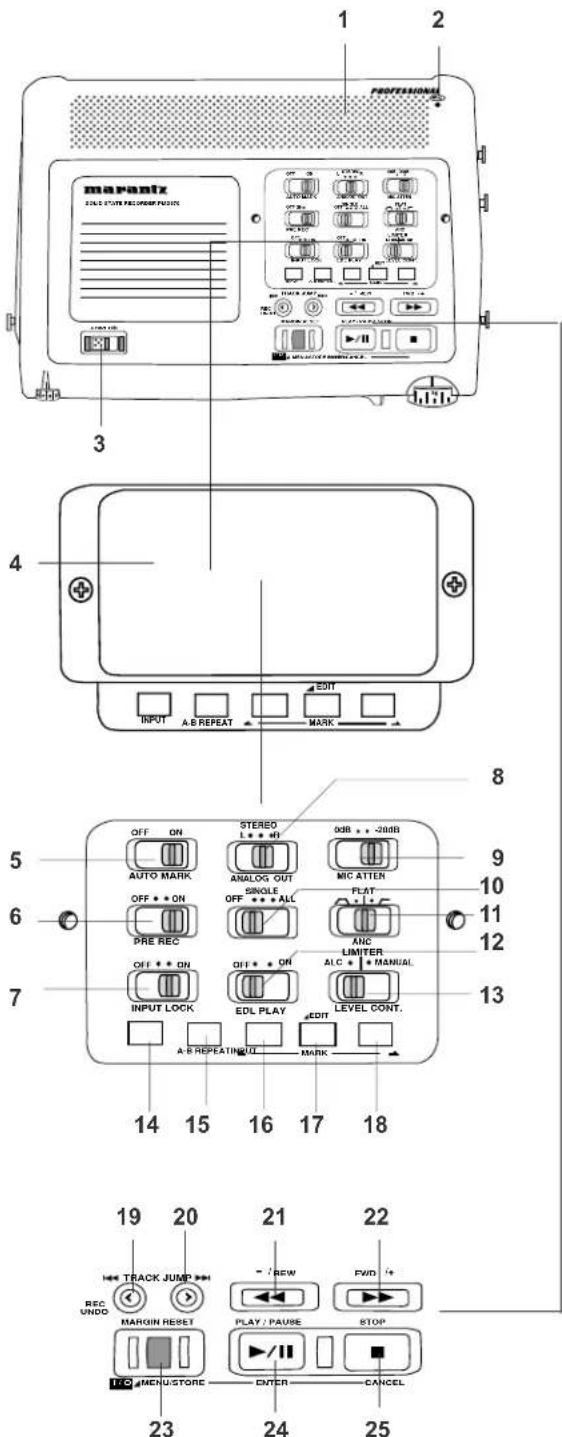
# Control
Page
Top
1 Speaker 14
2 MIC (internal microphone).... 14
3 POWER switch.... 14
4 Security cover 14
Setup controls
5 AUTO MARK switch 14
6 PRE REC switch 14
7 INPUT LOCK switch 15
8 ANALOG OUT switch 15
9 MIC ATTEN switch 15
10 REPEAT switch 15
11 ANC switch.... 16
12 EDL PLAY switch 16
13 LEVEL CONT. 16
14 INPUT button 17
15 A-B REPEAT button 18
MARK/ EDIT controls
16 Mark reverse button 18
17 MARK/▲ EDIT button.... 18
18 Mark forward button 18
Record/Playback controls
19 TRACK JUMP reverse button ←←
( playback).... 23
REC UNDO button (record).... 23
20 TRACK JUMP forward button ▶▶
( playback).... 23
21 -/REW button ◀ 23
22 FWD/+ button ▶▶ 23
23 MARGIN RESET/
I/O ▲MENU/STORE button
MARGIN RESET button ( playback) ..... 24
I/O button ..... 24
▲MENU/STORE button ..... 24
24 PLAY/PAUSE button ▶/Ⅱ ( playback).... 38
PAUSE button (record).... 38
ENTER button ▶/Ⅱ (menu).... 38
25 STOP/CANCEL button ■ 38

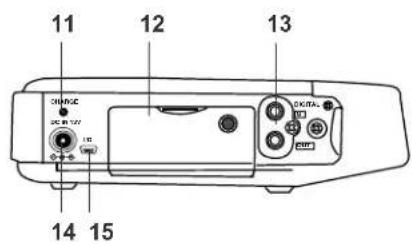

# Control Page
Front
1 HP/SPK VOLUME control 39
2 Display (see next page) 39
3 REC PAUSE button 39
4 REC indicator. 39
5 REC switch ▶ 39
6 REC LEVEL controls 39
7 PHONES jack 40
8 DISPLAY button 40
9 LIGHT button 40
10 KEY LOCK switch 41
Left side
11 CHARGE indicator 41
12 CF card compartment 41
13 DIGITAL IN/OUT jacks 42
14 DC IN 13V jack.... 42
15 I/O port 42
Right side
16 REMOTE jack 44
17 LINE IN/OUT jacks 44
18 MIC IN jacks 44
19 PHANTOM power switch 45
20 Carry studs 45
Bottom
21 Battery compartment 46

# Control Page
Display
1 REC label 47
2 TOTAL label 47
3 REMAIN label 47
4 TRACK label 47
5 TIME label 47
6 kbps label 47
7 A-B label 47
8 Upper alphanumeric display 47
9 AM/PM label.... 47
10 kHz label 47
11 L -dB R level meter labels 47
12 Left level meter 47
13 -dB over scale 47
14 Right level meter 47
15 TRACK label 47
16 MARK label 47
17 Lower alphanumeric display ..... 47
18 INT MIC label 48
19 LINE label 48
20 Record ● 48
21 Play ▶ 48
22 Pause 48
23 Battery 48
24 S. SKIP label 48
25 Peak level 48
26 -dB label 48
Hint:
When making major changes to your recording setup we suggest the following procedure:
-
Identify the appropriate input device (internal microphone, microphone(s), Line input).
-
Select the input menu choice corresponding to your input device selection. (See page 17.)
-
If necessary, set or change the default Algor/File parameters for your recording situation. (See page 28.)
Introduction
Thank you for selecting the Marantz Professional PMD670 Portable Solid State Recorder. The PMD670 is an audio recorder that records in digital audio formats onto a Compact Flash ^™ memory card (CF card) or Microdrive ^™ .
Compact flash memory cards, also used in digital cameras, are widely available at consumer electronics retailers and computer resellers.
Audio inputs may be from:
• the built-in microphone,
- condenser or dynamic microphone(s) connected to the XLR jacks,
• line level audio sources connected to the LINE IN jacks, or
- digital audio sources in SP/DIF format connected to the DIGITAL IN jack.
Audio outputs may be from:
• the built-in speaker,
• headphones connected to the PHONES jack,
- analog audio devices such as an amplifier or other device connected to the LINE OUT jacks, and/or
- digital audio devices using SP/DIF format connected to the DIGITAL OUT jack.
Computer compatible
The PMD670 records directly onto CF cards. Recordings can be transferred to your desktop or laptop computer by removing the CF card from the PMD670 or by using the supplied cable to connect the PMD670 to your computer via the I/O port. Audio recorded in the popular MP3 compression format is directly available for intranet or internet file sharing.
- log and archive audio files
- play audio files on your computer
- save audio files to:
- your hard drive
- a floppy
- a CD-R disc
• post streaming audio files on your web site - use software and your computer to transcribe digital recordings
- An editing program (PMD Edit, available from Marantz Professional for PC users) lets you
convert and edit audio files that were recorded on the PMD670.
Voice recording
The PMD670 has several helpful features for voice recording in situations such as meetings, conferences or other events.
- Use less memory (longer recording time)
For voice recording the recording quality level (bit rate recorded and/or sampling frequency) can be set to the lowest levels permitting more time recorded on the CF card.
- Easy to use for recording
One control begins recording. Simply slide and release the red REC switch.
• Security – Input settings
After you have set up the input settings* for your application the settings can be set to ON with the INPUT LOCK switch.
As an added precaution the input setting switches (including the ability to change input devices) can be protected with the supplied screw-on cover preventing unintentional changes.
*Settings for recording meetings for example, will usually be the same from meeting to meeting.
- Security – CF cards
For added security the CF card compartment door can be secured with a screw. This is especially recommended if you transfer audio files via the I/O cable.
Playback aids
A common problem with lengthy voice or other recordings is difficulty in locating one or more specific passages for playback. The PMD670 has several ways to mark or tag specific record starting points.
- Date and time
A built-in date and time generator marks the beginning of each track.
- Tracks
A new track (file) is automatically started each time recording is stopped using the STOP button.
• Automatic recording
The PMD670 can be set to stop recording when there is silence (Silent Skip) and automatically start when sound resumes. The PMD670 can be set to automatically add an EDL mark to the track at each such starting point.
• EDL marks\*
EDL (Edit Decision List) marks can be created during recording manually or automatically. EDL marks help you find those specific points in the recording.
*The EDL marking system is proprietary to Marantz Professional solid state recorders.
- During playback you can search for EDL marks in forward or reverse.
- You can change an EDL mark into a skip mark or an A-B repeating point. That lets you create custom playback sequences which include skipping audio between EDL marks or repeating audio between EDL marks.
- Up to 255 EDL marks can be added to a CF card. EDL marks are numbered consecutively starting at one. During recording you can manually add an EDL mark by pressing MARK. EDL marks can be added automatically, for example at the beginning of each track.
- PMD Edit computer software, is specifically designed for the PMD670. PMD Edit recognizes EDL marks generated by the PMD670. This is especially useful for editing audio files on your PC. For more information visit www.marantzpro.com/Products/PMDEdit.html.
Features
- Stereo (2 channels) and mono (1 channel) audio recording and playback.
- Records onto various types of CF cards. (Please refer to the Marantz Professional web site at www.marantzpro.com for a complete updated list of approved cards.)
-
Two different recording formats.
-
Compressed recording using MPEG1 Layer II (MP2) or MPEG1 Layer III (MP3) mono and stereo.
-
Uncompressed recording using 16-bit linear Pulse Code Modulation (PCM).
-
MS-DOS™ and Windows compatible file system.
-
Selectable file types:
-
Wave (.wav)
- Broadcast Wave Format (.bwf)
• RAW MP2 (.mpg)/MP3 (.mp3).
• recording bit rate is selectable
- .mpg/mp3 compressed at 32kbps (recommended for dictation), 32, 48, or 64kbps (recommended for voice recording), or 128, or 192 kbs (recommended for recording music)
- PCM (.wav) uncompressed at 768kbps (mono) (very high quality mono audio recording)
- PCM (.wav) uncompressed at 1536kbps (stereo) (recommended for very high quality audio recording)
- Manual, manual with limiter and automatic record level control (ALC).
- An ANC (Ambient Noise Cancel) switch for reducing unwanted background noise.
- Pre-Recording memory buffer that records 2 seconds of audio before recording is started.
-
Portions of multiple recordings can be played back in sequence using EDL marks.
• There are four ways to power the PMD670: -
Included AC adapter
• AA Alkaline batteries (\~ 6 hours) - Optional rechargeable Ni-Cd battery pack RB1100 (\~ 5 hours).
- Optional rechargeable Ni-MH battery RB1650 (\~ 7 hours).
- Built-in Time and Date generator marks the beginning of each track.
- REMOTE jack permits a wired remote button for controlling the recording process.
Controls and Connections

Top
1. Speaker
The played back audio signal is simultaneously output to the built-in speaker, the PHONES jack, LINE OUT jacks and DIGITAL OUT jack. Headphones plugged into the PHONES jack mutes the internal speaker. The HP/SPK VOLUME control controls the built-in Speaker and Headphone volume.

2. MIC (internal microphone)

3. POWER switch
Slide to the right and release to turn Power on or off. If the AC adaptor is con-
nected at DC IN and plugged in, it powers the PMD670.
If power is not detected at DC IN, battery power is automatically used if available.
When first powered up the PMD670 takes some time to initialize.
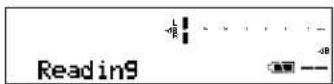
Loading is dis- played, then a blank screen for a while.
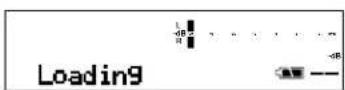
Reading is dis- played while the CF card is read.
4. Security cover
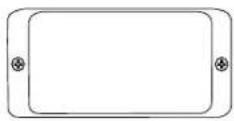
Use a small Phillips screw-driver to remove or replace the Security cover.
The Security cover makes setup controls relatively unavailable. The setup controls allow you to setup the PMD670 for your unique application. You can then have someone operate the PMD670 without concern that they might change something that could cause failure to record.
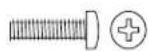
Note: Two 3mm machine screws 10mm long are used for the security cover.
Recording setup controls

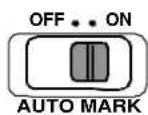
5. AUTO MARK switch
Turns the automatic EDL mark feature on or off.
ON: During record, a pause (pushing the REC PAUSE button) adds an EDL mark to the track. During record an EDL mark is added to the track if a remote device (plugged into the REMOTE jack) is used to pause recording.
OFF: Pausing during record does not add an EDL mark to the track.
Factory default: AUTO MARK switch ON.

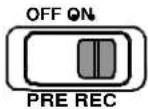
6. PRE REC switch
Lets you turn off pre record cache if it is not desired.
When power is on the PMD670 is constantly saving 2 seconds of audio input. This is called pre record cache. When recording is started by sliding the REC switch, or resumed from REC PAUSE by sliding the REC switch the pre-recorded 2 seconds is recorded.
OFF: Turns the 2 second pre-record cache off.
ON: Leaves the 2 second pre-record cache on.
Factory default: PRE REC switch at ON.

7. INPUT LOCK switch
The INPUT LOCK switch lets you lock your selected input settings with a switch covered by the Security cover.
OFF: When the INPUT LOCK switch is at OFF push and release the INPUT button (a) to tab through the input choices. The selection "times out" to the displayed input choice in 5 seconds.
Example display:

ON: When the INPUT LOCK switch is at ON pushing the INPUT button (a) does nothing (skips the input selection choices).
Factory default: INPUT LOCK switch at OFF.
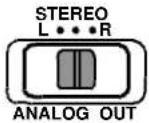
8. ANALOG OUT switch
Selects the audio output channel for playback.
Applies to playback output to LINE OUT, and Internal speaker or headphones.
L: Audio recorded on the Left channel is output to both the left and right output channels.
If the recording is dual level mono (a mono input was recorded onto both the right and left channels) the L setting outputs the audio at a normal level while the right is reduced -15dB.
STEREO: Audio recorded on the Left channel is output to the left output channel, and audio recorded on the Right channel is output to the right output channel. Both channels are output to the internal speaker.
R: Audio recorded on the Right stereo channel is output to both the left and right output channels.
Factory default: ANALOG OUT switch at STEREO.
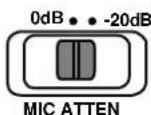
9. MIC ATTEN switch
The microphone attenuation switch permits the direct use of microphones that differ in sensitivity.
0dB: No microphone attenuation.
-20dB: Input from a microphone(s) connected to the XLR MIC IN jacks is cut by -20dB.
Factory default: MIC ATTEN switch at 0dB.

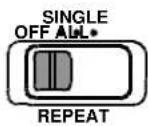
10. REPEAT switch
Lets you endlessly repeat playback of a track or entire memory card.
OFF: No repeat.
SINGLE: During playback the current track is repeated. When playback reaches the end of the track it automatically starts playback from the beginning of that track.
ALL: During playback all tracks are repeated. When playback reaches the end of the last track it automatically starts playback from the beginning of the first track.
Factory default: REPEAT switch at OFF.
Note:
For other methods of repeat playback see the A-B REPEAT button and/or EDL A-B looping.
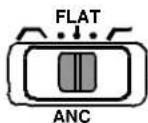
11. ANC switch
The ANC (Ambient Noise Cancel) switch lets you choose to reduce ambi-
ent noise before recording on the internal microphone or MIC inputs.
Ambient Noise Cancel positions do not change the memory used in recording. Examples of low ambient noise sources include: traffic, air conditioning hum, and wind noise.
☐: Band pass position reduces the lows and highs and passes (records) the center (voice level) audio frequencies. This reduces the recording of high and low frequency ambient noise.
FLAT: No filtering applied.
☐ : High pass position reduces low frequency ambient noise only.
US default: ANC switch at Band pass Europe default: ANC switch at FLAT.

2. EDL PLAY switch
The EDL PLAY switch turns EDL PLAY off or on.
OFF: When the EDL PLAY switch is at OFF PMD670 playback does not respond to EDL mark instructions.
ON: When EDL PLAY is ON PMD670 playback follows EDL mark instructions regarding play-back order, skipping sections of recording on the memory card, or repeating a section of recording on the memory card.
Note: If the EDL PLAY switch is at ON and there are no EDL marks on the CF card (recording was done with the AUTO MARK switch at OFF) playback is not available. Switch to OFF for playback.
Factory default: EDL PLAY switch at OFF.

- LEVEL CONT. switch The LEVEL CONT(rol) switch lets you select the type of input level control.
MANUAL: At MANUAL you control the input level with the REC LEVEL controls.
LIMITER: At LIMITER peak sound levels that would distort the recording are limited.
ALC: At ALC (Automatic Level Control = Automatic Gain Control) the PMD670 automatically responds to changes in input level. If recording is quiet the input level is increased. If recording is loud the input level is decreased. This is a desirable feature when recording a meeting with several speakers, because a speaker close to the microphone and/or with a loud voice will be automatically recorded at a reduced level and a quiet speaker will be recorded at an increased level and is less likely to have their input missed.

ALC is usually not desired when recording music (voice or instrument) because the transitions in input level may be audible in the recording, and can make the recording ‘hissy’ by raising the level during quiet passages and recording ambient noise.
The REC LEVEL controls do not work when the LEVEL CONT. switch is set at ALC.
US default: LEVEL CONT. switch at ALC. Europe default: LEVEL CONT. switch at MANUAL.

14. INPUT button
The INPUT button lets you select the audio input and audio channels for recording.
When the INPUT LOCK switch (a) is at OFF, press and release the INPUT button to tab through the input choices. When the desired input is displayed switch the INPUT LOCK switch (a) to ON.
Example display:

The nine input choices are:
mono with INT MIC input stereo with LINE input mono with LINE input (L only) LR mono with LINE input (L + R mix) Digiln (digital input) stereo with MIC input DLmono with MIC input (dual level mono, L only) mono with MIC input (L only) LRmono with MIC input (L + R mix)
Note: The PMD670 'listens' only to the selected input. For example if the input selected is LRmono with LINE input, and no input source is connected to the LINE IN jacks the PMD670 will record silence.
US default: mono with INT MIC input.
Europe default: stereo with MIC input.
What the input selections do:
Selects the input device(s) and channels
The input selection chooses which input(s) the PMD670 is using for recording and how many channels are recorded.
Selects the recording (file) parameters
The input selection also determines which set of algorithm/file parameters are used (stereo file, mono file, or digital file).
Recording (file) parameters:
stereo (recorded as a stereo file): stereo with LINE input, stereo with MIC input, DLmono with MIC input.
mono (recorded as a mono file): mono with INT MIC input, mono with LINE input, LR mono with LINE input, mono with MIC input, LRmono with MIC input.
digital (recorded as a digital file): DIGITAL IN input.
The default algorithm/file parameters are:
stereo file: MP2, 48kHz sample frequency, 128kbps per channel, and file extension .mpg.
mono file: MP3, 44.1kHz sample frequency, 32kbps, and file extension .mp3.
digital file: MP2, 44.1kHz or 48kHz sample frequency (dependent on input source rather than default or PMD670 menu selection), 128kbps, and file extension .mpg.
Via the Algor/File Menu choice, the algorithm/file parameters for stereo, mono or digital files can be changed. See Algor/File Menu choice on page 29.
Input device(s) and channels:
mono with INT MIC input
Mono audio input from the internal microphone is recorded as a mono file.
stereo with LINE input
Audio input from the L LINE IN jack is recorded on the Left channel.
Audio input from the R LINE IN jack is recorded on the Right channel.
mono with LINE input
Audio input from the L LINE IN jack is recorded as a mono file.
LR mono with LINE input
Audio input from the L LINE IN jack and the R LINE IN jack are combined and recorded as a mono file.
Digiln
Digital audio data at 44.1kHz or 48kHz input through the DIGITAL IN jack can be recorded.
stereo with MIC input
The microphone connected to the L MIC IN XLR jack is recorded on the Left channel and the microphone connected to the R MIC IN XLR jack is recorded on the Right channel.
DLmono with MIC input
In Dual Level mono with MIC input the microphone input from the L MIC IN XLR jack is recorded on both the Left and Right channels. The Right channel is reduced -15dB.
mono with MIC input
In mono with MIC input the microphone input from the L MIC IN XLR jack is recorded as a mono file.
LRmono with MIC input
In LR mono with MIC input the microphone input from the L MIC IN XLR jack and the R MIC IN XLR are combined and recorded as a mono file.

15. A-B REPEAT button
While in playback press and release to start point A to point B repeat playback.
A-B Repeat playback
Point A (starting point) is set when the A-B RE-PEAT button is pressed and released. The next press and release sets point B (ending point). Playback repeats between A and B.
Note:
You can use the -/REW or FWD/+ buttons between setting the A and B points.
You cannot use the TRACK JUMP forward or reverse buttons.
You can pause during A-B repeat playback by pressing and releasing the PLAY/PAUSE button ▶/II. Resume A-B playback by pressing the PLAY/PAUSE button ▶/II again.
Exit and cancel A-B repeat by pressing the STOP button ■ or pressing the A-B REPEAT button.

Note:
For other methods of repeat playback see the REPEAT switch and/or EDL A-B looping.


16, 17, 18. MARK/ ▲EDIT buttons
This button group
controls EDL Marks and Editing functions.
EDL Marks
Mark functions: manually adding Marks, and locating Marks.
Adding EDL Marks
Press and release the MARK/▲EDIT button to manually add an EDL Mark during recording.
Press the MARK/ EDIT button during pause, recording, or playback to add an EDL Mark. During recording adding an EDL Mark introduces an audible click in the recording when using the internal microphone.
Locating EDL Marks
From Stop press and release the Mark forward button (18) or Mark reverse button (16) to tab through the EDL marks on the CF card.
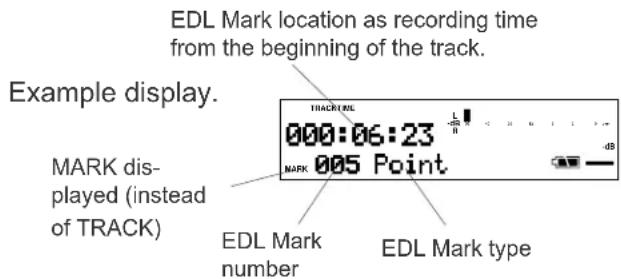
To start playback from the displayed EDL Mark press and release the PLAY/PAUSE button.
Edit functions: editing EDL Marks to create custom playback sequences, erasing and renumbering Tracks, and formatting the CF card.
Custom playback sequences
EDL Marks are numbered consecutively from 001 and automatically renumbered when an EDL Mark is added or erased. Playback is also consecutive from the point that playback begins.
EDL Mark custom playback can:
Skip playback from the beginning of a 'Skip' EDL Mark to the beginning of the next EDL Mark.
A-B loop from a 'Loop_A' EDL Mark to a 'Loop_B' EDL Mark.
Note: EDL Marks are not automatically placed at the beginning of tracks. If you want your custom playback sequence to include track beginning points add EDL Marks to coincide with track beginning points by:
a. Start playback by pressing and releasing PLAY/Pause ▶/Ⅱ and then pause playback by pressing and releasing PLAY/Pause ▶/Ⅱ again.
b. Press and release TRACK JUMP forward or TRACK JUMP reverse until the desired track number is displayed.
c. Press and release the MARK/ ▲EDIT button.
Editing EDL Marks:
All EDL Marks are initially entered as 'Point' marks.
From Stop display the EDL Mark by pressing and releasing the Mark forward button (18) or Mark reverse button (16) to tab through the EDL marks on the CF card.
When the EDL mark to be edited is displayed press and release the MARK/▶EDIT button. The current EDL Mark type will be flashing.
Example display.

19 -
19 -
19 -
19 -
19
Press and release the MARK/▲EDIT button to tab through the EDL Mark types: Point, Skip, Loop_A, Loop_B, and Erase. When the type you want to change the EDL Mark to is flashing press and release the ENTER button ▶/■.

Writing will be displayed briefly and the PMD670 will return to stop mode.
Skip
An EDL Mark changed to 'Skip' will be skipped during EDL playback (playback with EDL PLAY switch at ON). Playback will skip to the beginning of the next EDL Mark.
A skipped EDL recording is not erased. The recording is still on the CF card. The skipped EDL recording will play if the EDL PLAY switch is at OFF. You can change the type later.
EDL A-B looping
To playback an EDL A-B loop press the PLAY/PAUSE button to begin playback then press and release the A-B REPEAT button.
If there is an error, for example there is an EDL Mark of type Loop_A but no EDL Mark of type Loop_B an error message is displayed.
Example display.
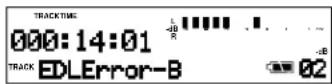
Only one EDL A-B loop can programmed. When a 'Loop_A' or 'Loop_B' exists on a CF card and another is created the old mark automatically changes to a 'Skip'.
Erase
When an EDL mark is erased the remaining EDL marks are automatically renumbered from 1 through the number of EDL marks on the CF card.
Edit mode
Edit mode includes: Renumber (renumber tracks), TrkERASE (erase a track), TrkMkERASE (erase an EDL mark), AllMkERASE (erase all EDL marks), and FOR-MAT (format the CF card).
How to renumber tracks
If you have erased tracks from the CF card it is easier to locate recordings if the tracks are renumbered.
From stop press and hold the MARK/▲EDIT button for about 2 seconds to enter Edit mode.
Renumber flashing in the display.

While Renumber is flashing (5 seconds) press and release the ENTER button ▶/■. (Or press and release the STOP button ■ to cancel.)

EXECUTING will be displayed and the percentage executing will increase to 100%.

100% done will be displayed momentarily. Then the PMD670 and the display will return to stop mode.
How to erase tracks
From stop press and hold the MARK/▲EDIT button for about 2 seconds to enter Edit mode.
Renumber flashing in the display.

While Renumber is flashing (5 seconds) press and release the MARK/▲EDIT button again.
TrkERASE flashing in the display.

While TrkERASE is flashing (5 seconds) press and release the ENTER button ▶/II.
Track number flashing in the ERASE display.
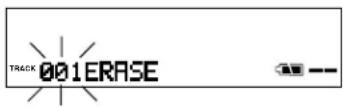
Press and release the FWD/+ button ▶▶ or the -/REW button ◀◀ to select the track number you want to erase.
Example track 34.

While the track to be erased is flashing (5 seconds) press and release the ENTER button ▶/Ⅱ. (Or press and release the STOP button ■ to cancel.)
EXECUTING will be displayed momentarily.

Done will be dis- played momen- tarily.

The PMD670 and the display will return to stop mode.
The recording time (file space on the CF card) used by the erased track is available for recording.
How to erase all EDL marks within one track
From stop press and hold the MARK/▲EDIT button for about 2 seconds to enter Edit mode. Renumber flashing in the display.
While the display is flashing (5 seconds)

press and release the MARK/▲EDIT button two more times.
TrkMkErase flashing in the display.

While TrkMkERASE is flashing (5 seconds) press and release the ENTER button ▶/II.
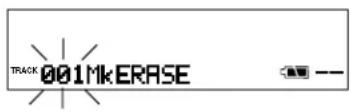
Press and release the FWD/+ button ▶▶ or the -/REW button ◀◀ to select the track that contains the EDL Marks you want to erase.
Example Track 12.

While the track number is flashing (5 seconds) press and release the ENTER button ▶/Ⅱ. (Or press and release the STOP button ■ to cancel.)
EXECUTING will be displayed momentarily.

Done will be displayed momentarily.
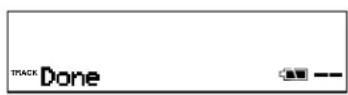
The PMD670 and the display will return to stop mode.
How to erase all EDL marks
From stop press and hold the MARK/▲EDIT button for about 2 seconds to enter Edit mode.
Renumber flashing in the display.

While the display is flashing (5 seconds) press and release the MARK/▲EDIT button three more times.
AllMkErase flashing in the display.

While AllMkERASE is flashing (5 seconds) press and release the ENTER button ▶/■.
AllMkErOK? flashing in the display.

The display asks you to confirm that you want to erase all EDL Marks on the CF card. While AIIIMkErOK? is flashing press and release the ENTER button ▶/□ to confirm. (Or press and release the STOP button ■ to cancel.)
EXECUTING will be displayed momentarily.

Done will be dis- played momentarily.
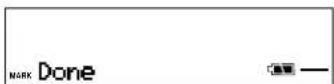
The PMD670 and the display will return to stop mode.
How to format a CF card
From stop press and hold the MARK/▲EDIT button for about 2 seconds to enter Edit mode.
Renumber flashing in the display.

While the display is flashing (5 seconds) press and release the MARK/▲EDIT button four more times.
FORMAT flashing in the display.

While FORMAT is flashing (5 seconds) press and release the ENTER button ▶II.
FORMAT OK? flashing in the display.

The display asks you to confirm that you want to format the CF card. Formatting the CF card will erase all recordings on the card.
While FORMAT OK? is flashing press and release the ENTER button ▶/II to confirm. (Or press and release the STOP button ■ to cancel.)
EXECUTING will be displayed momentarily.

Done will be dis- played momentarily.

The PMD670 returns to stop mode.
BlankCard will be displayed.

The CF card formats used by the PMD670 are Windows compatible. You can copy audio files using a Windows compatible computer* that can read a CF card or be connected via the I/O port.
*Or a Macintosh computer that can recognize Windows compatible removable drives.
CF cards with less than 2 GB capacity are automatically formatted FAT16 (FAT = File Allocation Table).
CF cards with 2 - 8 GB capacity are automatically formatted FAT32.
The maximum CF card that can be formatted in the PMD670 is 8 GB. If larger cards are used please format in your computer.
Controls and Connections Top continued

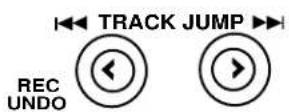
19, 20. TRACK JUMP buttons
TRACK JUMP reverse button REC UNDO button TRACK JUMP forward button
19. TRACK JUMP reverse button
During playback press and release to jump to the previous track. If pressed while playing the first track jumps to the last track on the CF card.
19. REC UNDO button
During recording press and release twice to undo (erase) the recording and pause recording at the beginning of the track.
Example display during record.
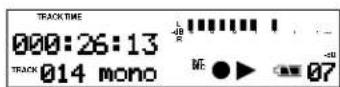
Example display for 3 seconds after REC UNDO button is pressed.

Example if REC UNDO button is pressed again within the 3 seconds.

Recording is at REC pause at the beginning of the track.
20. TRACK JUMP forward button ▶▶
During playback press and release to jump to the next track. If pressed while playing the last track jumps to the first track on the CF card.

21. - /REW button ◀◀
22. FWD/+ button ▶▶
During playback press and hold the -/REW button ◀◀ to "rewind", do an audible search in the reverse direction. Press and hold the FWD/+ button ▶▶ to "forward", do a 2X speed audible search in the forward direction. Release to return to normal forward playback.
During play pause, press and hold the -/REW button ◀◀ or the FWD/+ button ▶rewind or fast forward quickly. The rewind or fast forward is at 10X speed for three seconds, then automatically speeds up to 140X speed.
Notes:
If the -/REW button ◀◀ or the FWD/+ button ▶▶ is held past the beginning or end of a track the rewind or fast forward will continue onto the previous or next track. If REPEAT SINGLE or REPEAT ALL is on, the rewind or fast forward will follow the repeat order. Does not function in EDL playback or EDL A-B repeat.
During Editing and Menu functions press and release the -/REW button ◀◀ to increment a parameter in the - direction and press and release the FWD/+ button ▶▶ to increment a parameter in the + direction.
Controls and Connections Top continued


23. MARGIN RESET/ I/O ▲ MENU/STORE button
Several functions depending on state of the PMD670.
MARGIN RESET button
During record press and release to reset the peak level margin.
Example display with level margin at -02dB before pressing the MARGIN RESET button.
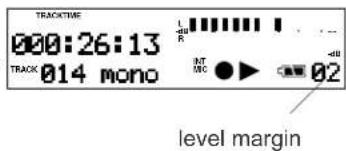
The level margin displays the highest level achieved since the track began or the MARGIN RESET button was pressed and released. OV indicates a margin over 0dB.
I/O button
Connects the CF card via the I/O port to a connected device (usually a computer).
From power off press and hold the I/O button while you slide the POWER switch on the PMD670 to the right to power on.
This display appears.

The CF card in the PMD670 appears as an external drive on a connected computer.
Power off to disconnect.
See page 43, How to connect via the I/O port.
MENU/STORE button
The PMD670 Menu lets you preset various parameters. To access the Menu with POWER on and the PMD670 in Stop:

Menu operations
- Press and hold the ▲MENU/STORE button for about 2 seconds. MENU will appear (flashing) in the display.
Example display:
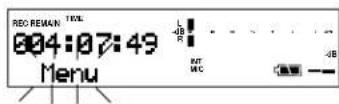
- While MENU is flashing (for about 3 seconds) press and release the ENTER button ▶/Ⅱ . The Menu choice will appear. If the flashing MENU times out start over at 1.
The last Menu choice entered appears, the following starts from the Date/Time menu choice.

-
Press and release the FWD/+ button ▶▶
-
or the -/REW button to tab through the menu choices.
The rest of the menu setting procedure differs slightly depending on the menu item. In general you:
-
Press and release the ENTER button ▶/II to select a menu choice.
-
Press and release the FWD/+ button ▶▶ or the -/REW button ◀◀ to change the menu setting.
-
Press and release the ENTER button ▶/II to confirm the menu setting.
Then either:
8a. Press and release the FWD/+ button ▶▶ or the -/REW button ◀◀ to tab to another menu choice, or
8b. Press and release the ▲MENU/STORE button to write the menu changes and return to stop mode, or
8c. Press and release the CANCEL button ■ to cancel any menu changes and return to stop mode.
The Menu choices are:
Date/Time – For setting or changing the Date and Time associated with when an audio track (file) was created.
DateForm – For selecting the date order.
Algor/File – For setting or changing the recording compression algorithm, associated bit rate, audio file type, and channels recorded.
M. Track – Turn manual track incrementing feature on or off.
SeamlsPly – Turn the Seampless play feature on or off.
S.Skip – Turn Silent Skip feature on or off, set the number of seconds the dB level must meet or exceed the set threshold, and set the dB threshold level.
A.Cue – Turn the Auto Cue feature on or off, set the number of micro-seconds the dB level must meet or exceed the set threshold, and set the dB threshold level.
S.Play – Turn the single track play feature on or off.
Beep – Turn the beep on or off.
A. PowOff – Enable or disable the Automatic Power Off feature.
Batt_Type - Set the battery type.
RemoteMode – Set the effect of the optional wired remote switch.
ID1 – Set the description ID code for broadcast wave file recordings.
ID2 – Set the origin ID code for broadcast wave file recordings.
ID3 – Set the origin reference ID code for broadcast wave file recordings.
Default – Reset all Menu settings to factory default settings.
How to set or change the Date and time
The date and time are written on each audio track (file) when the track is started. When an audio track is viewed on a computer this date and time appears as when the file was 'modified'. (US date format is illustrated.)
- From stop, press and hold the ▲MENU/STORE button for about 2 seconds. MENU will appear (flashing) in the display.
Example display:

- While MENU is flashing (for about 3 seconds) press and release the ENTER button ▶/II.
The Date/Time Menu choice will appear.

(If the flashing MENU times out start over at 1.)
- Press and release the ENTER button ▶/II again. The current date and time information will be displayed with the month flashing.
Example display.

- With the month flashing press and release the FWD/+ button ▶or the -/REW button ◀◀ to tab through the months. When the month is correct, Press and release the ENTER button ▶/II.
The day will be flashing.
Example display.

- With the day flashing press and release the FWD/+ button ▶▶ or the -/REW button ▶▶ tab through days. When the day is correct, press and release the ENTER button ▶/II. The year will be flashing.
Example Display

- With the year flashing press and release the FWD/+ button ▶▶ or the -/REW button ▶▶ tab through years (2003 - 2099). When the year is correct, press and release the ENTER button ▶/■. The hour will be flashing.
Example display.

- With the hour flashing press and release the FWD/+ button ▶▶ or the -/REW button ◀▶ tab through hours. AM, PM will change when you pass 12, check that it is correct. When the hour and AM/PM is correct, Press and release the ENTER button ▶/II. The minute will be flashing.
Example display.
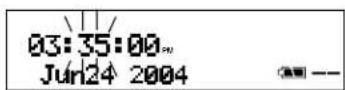
- With the minute flashing press and release the FWD/+ button ▶▶ or the -/REW button ◀◀ to tab through minutes. When the minute is correct, Press and release the ENTER button ▶/II.
Date/Time will be flashing.

- Press and release the ▲MENU/STORE button. If you have made changes to the date and/or time Stored will be displayed briefly.

The display will return to stop mode.
Note:
The date and time settings will remain for about a month if the AC Adapter is not plugged in and no batteries are installed.
How to set or change the Date Form
The date form is the date order month/day/year or day/month/year.
The US default is M/D/Y (month/day/year).
The Europe default is D/M/Y (day/month/year).
- From stop, press and hold the ▲MENU/STORE button for about 2 seconds. MENU will appear (flashing) in the display.
Example display:
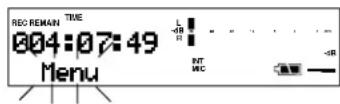
- While MENU is flashing (for about 3 seconds) press and release the ENTER button ▶/II. The Date/Time Menu choice will appear.

(If the flashing MENU times out start over at 1.)
- While Date/Time is flashing (for about 3 seconds) press and release the FWD/+ button ▶▶. The DateForm Menu choice will appear

- Press and r lease the ENTER button ▶/II again. TheM/D/Y choice will flash.
Example display.

-
Press and release the FWD/+ button ▶▶ or the -/REW button ◀◀ to toggle between M/D/Y and D/M/Y. When the desired form appears press and release the ENTER button ▶/II.
-
Press and release the FWD/+ button ▶▶ or the -/REW button ◀◀ to tab to another menu choice, or
-
Press and release the ▲MENU/STORE button to write the menu changes and return to stop mode, or
-
Press and release the CANCEL button ■ to cancel all menu changes and return to stop mode.
Algor/File
The PMD670 can record in a variety of compression algorithm, associated bit rate, file format, and recording type (channels recorded) parameters. See explanations below and chart in right column.
First select your input device (internal microphone, microphone(s), Line in, or digital input).
Second select your input channel choice with the INPUT button, see page 17.
Recording Type
The recording type can be stereo (two channels of recording) mono (one channel of recording) or digital. This is set by your choice of input device and input channel choice.
Algorithm
The PMD670 can record using three methods two of which are compression algorithms: PCM, MP3, and MP2.
PCM (Pulse Code Modulation) is uncompressed. These are high quality audio files used in the recording industry. For example, for recording CD quality music. PMD Edit and other professional level computer applications are available for computer processing of PCM files.
MP3 (MPEG1 Layer III) is highly compressed, and creates relatively small files that are commonly used to transfer files on the internet.
MP2 (MPEG1 Layer II) is a compressed file format that is commonly used in broadcasting. MP2 audio is a higher quality than MP3. This is especially useful when lower bitrates are used. If you are a news reporter you will probably want to record in MP2 format using the .bwf extension.
Sample Frequency
Sample frequency is measured in kHz (kilo Hertz). The sample frequency is the number of samples of the audio wave(s) per second. For example, the PMD670 can record PCM at 48 kHz that is 48,000 samples per second.
Bit Rate
The bit rate for PCM is constant at 768kbps/ch. MP2 and MP3 can be recorded at a number of different bit rates.
File Format
The file format (3 character computer file extension) might be .wav, .bwf, .mpg or .mp3. Broadcast Wave Files (.bwf) include identification codes in the file header.
1 Algor/File
default
| 2 | 3 | 4 | 5 | 6 |
| Stereo | PCM | 48 | - - - - - - - - | .wav/.bwf |
| 44.1 | ||||
| 32 | ||||
| 24 | ||||
| 22.05 | ||||
| 16 | ||||
| MP2 | 48 | 384,256,192,128,96,64 | .mpg/.bwf | |
| 44.1 | ||||
| 32 | ||||
| MP3 | 48 | 320,256,160,128,80,64 | .mp3/.bwf | |
| 44.1 | ||||
| 32 | ||||
| 24 | 160,128,80,64,40,32 | |||
| 22.05 | ||||
| 16 | ||||
| Mono | PCM | 48 | - - - - - - - - | .wav/.bwf |
| 44.1 | ||||
| 32 | ||||
| 24 | ||||
| 22.05 | ||||
| 16 | ||||
| MP2 | 48 | 192,128,96,64,48,32 | .mpg/.bwf | |
| 44.1 | ||||
| 32 | ||||
| 24 | ||||
| 22.05 | ||||
| 16 | ||||
| MP3 | 48 | 160,128,80,64,40,32 | .mp3/.bwf | |
| 44.1 | ||||
| 32 | ||||
| 24 | ||||
| 22.05 | ||||
| 16 | ||||
| Dig-In | PCM | -- | - - - - - - - - | .wav/.bwf |
| MP2 | 384,256,192,128,96,64 | .mpg/.bwf | ||
| MP3 | 320,256,160,128,80,64 | .mp3/.bwf |
Chart of Algorithm/File Parameters
Column
- selected by input device and input channel choice
- file choice
- sample frequency
- bit rate
6 file extension
1 Algor/File
default
| 2 | 3 | 4 | 5 | 6 |
| Stereo | PCM | 48 | - - - - - - - - | .wav/.bwf |
| 44.1 | ||||
| 32 | ||||
| 24 | ||||
| 22.05 | ||||
| 16 | ||||
| MP2 | 48 | 384,256,192,128,96,64 | .mpg/.bwf | |
| 44.1 | ||||
| 32 | ||||
| MP3 | 48 | 320,256,160,128,80,64 | .mp3/.bwf | |
| 44.1 | ||||
| 32 | ||||
| 24 | 160,128,80,64,40,32 | |||
| 22.05 | ||||
| 16 | ||||
| Mono | PCM | 48 | - - - - - - - - | .wav/.bwf |
| 44.1 | ||||
| 32 | ||||
| 24 | ||||
| 22.05 | ||||
| 16 | ||||
| MP2 | 48 | 192,128,96,64,48,32 | .mpg/.bwf | |
| 44.1 | ||||
| 32 | ||||
| MP3 | 48 | 160,128,80,64,40,32 | .mp3/.bwf | |
| 44.1 | ||||
| 32 | ||||
| 24 | ||||
| 22.05 | ||||
| 16 | ||||
| Dig-In | PCM | -- | - - - - - - - - | .wav/.bwf |
| MP2 | 384,256,192,128,96,64 | .mpg/.bwf | ||
| MP3 | 320,256,160,128,80,64 | .mp3/.bwf |
How to set or change the Algor/File parameter defaults.
The Chart of Algorithm/File Parameters reflects the menu setting procedure of those parameters. The factory defaults are circled.
- Select the Algor/File menu choice:
a. From stop, press and hold the ▲MENU button for about 2 seconds. MENU will appear (flashing) in the display.
Example display:

b. While MENU is flashing (for about 3 seconds) press and release the ENTER button ▶II. The Date/Time Menu choice, or the last menu choice, will appear. (If the flashing MENU times out start over at a.)

c. Press and release the FWD/+ button ▶▶ repeatedly until the Algor/File is flashing.

d. Press and release the ENTER button ▶/II. You are now at column 2 of the chart of Algorithm File Parameters where you choose between the parameters for Stereo, Mono, or Dig-in input selections.
Mono flashing in display.
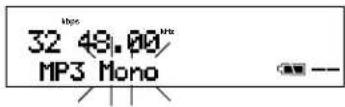
- Press and release the FWD/+ button ▶▶ or the -/REW button ◀◀ to tab to your recording type choice.
Example display with Stereo chosen.
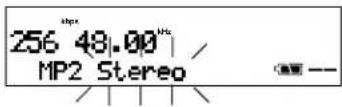
Press and release the ENTER button ▶/II to accept the Stereo choice and switch to column 3.
- Press and release the FWD/+ button ▶▶ or the -/REW button ◀◀ to tab to your algorithm choice.
Example display with MP2 chosen.

How to set or change the Algor/File parameters continued
1 Algor/File
default
| 2 | 3 | 4 | 5 | 6 |
| Stereo | PCM | 48 | - - - - - - - - | .wav/.bwf |
| 44.1 | ||||
| 32 | ||||
| 24 | ||||
| 22.05 | ||||
| 16 | ||||
| MP2 | 48 | 384,256,192,128,96,64 | .mpg/.bwf | |
| 44.1 | ||||
| 32 | ||||
| MP3 | 48 | 320,256,160,128,80,64 | .mp3/.bwf | |
| 44.1 | ||||
| 32 | ||||
| 24 | 160,128,80,64,40,32 | |||
| 22.05 | ||||
| 16 | ||||
| Mono | PCM | 48 | - - - - - - - - | .wav/.bwf |
| 44.1 | ||||
| 32 | ||||
| 24 | ||||
| 22.05 | ||||
| 16 | ||||
| MP2 | 48 | 192,128,96,64,48,32 | .mpg/.bwf | |
| 44.1 | ||||
| 32 | ||||
| MP3 | 48 | 160,128,80,64,40,32 | .mp3/.bwf | |
| 44.1 | ||||
| 32 | ||||
| 24 | ||||
| 22.05 | ||||
| 16 | ||||
| Dig-In | PCM | -- | - - - - - - - - | .wav/.bwf |
| MP2 | 384,256,192,128,96,64 | .mpg/.bwf | ||
| MP3 | 320,256,160,128,80,64 | .mp3/.bwf |
In our example we press and release the ENTER button ▶/II to accept the MP2 choice and switch to column 4.
- Press and release the FWD/+ button ▶▶ or the -/REW button ◀◀ to tab to your sample frequency choice.
Example display with 44.1 chosen.

In our example we press and release the ENTER button ▶/II to accept the 44.1 choice and switch to column 5.
- Press and release the FWD/+ button ▶▶ or the -/REW button ◀◀ to tab to your bit rate choice.
Example display with 128 chosen.

In our example we press and release the ENTER button ▶/II to accept the 128 choice and switch to column 6.
- Press and release the FWD/+ button ▶▶ or the -/REW button ◀◀ to tab to your file format choice.
Example display with .bwf chosen.
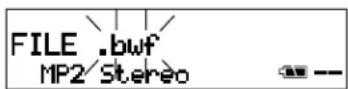
In our example we press and release the ENTER button▶/II to accept the .bwf choice and switch to Algor/File.

In this example we press and release the ▲MENU/STORE button to save the change and exit menu. Stored is displayed briefly.

The display returns to stop mode.
Note: Changes to Algor/File usually also mean hardware and INPUT menu changes. In our example we changed the default MP2 Stereo.mpg with to MP2 Stereo.bwf. We would expect to connect microphones, change the INPUT settings from mono with INT MIC input to stereo with MIC input, and enter ID numbers for the .bwf file header.
Other menu choices:
Manual track incrementing.
When Manual track incrementing is on, during recording slide and release the REC switch ▶ to increment the track. A new track is created at that point. There is no break in recording. When Manual track incrementing is off, sliding and releasing REC switch ▶ during recording does nothing.
Default setting is On.
- Select the M. Track menu choice:
a. From stop, press and hold the ▲MENU button for about 2 seconds. MENU will appear (flashing) in the display.
b. While MENU is flashing (for about 3 seconds) press and release the ENTER button ▶/II. The last Menu choice selected will appear. (If the flashing MENU times out start over at a.) - Press and release the FWD/+ button ▶▶ repeatedly until M. Track is displayed and flashing.
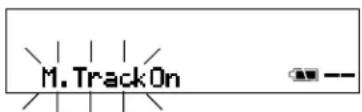
- Press and release the ENTER button ▶/II to accept the M. Track choice and switch to ON or OFF.

-
Press and release the FWD/+ button ▶▶ or the -/REW button ◀◀ to toggle between On and Off.
-
When correct Press and release the ENTER button ▶/II.
-
Press and release the FWD/+ button ▶▶ to switch to another menu choice, or press and release the ▶MENU/STORE button to write the menu change(s) and return to stop mode.
Seamless Play.
When Seamless Play is On, during playback multiple tracks will be played back in sequence without any break (space) between the tracks. When Seamless Play is Off, during playback multiple tracks will be played back in sequence with breaks (brief periods of silence) between the tracks.
Default setting is Off.
- Select the Seamls Ply menu choice:
a. From stop, press and hold the ▲MENU button for about 2 seconds. MENU will appear (flashing) in the display.
b. While MENU is flashing (for about 3 seconds) press and release the ENTER button ▶/II. The last Menu choice selected will appear. (If the flashing MENU times out start over at a.)
- Press and release the FWD/+ button ▶▶ repeatedly until Seamls Ply is displayed and flashing.

- Press and release the ENTER button ▶/II to accept the SeamlsPly choice and switch to Off or On.

-
Press and release the FWD/+ button ▶▶ or the -/REW button ◀◀ to toggle between Off and On.
-
When correct Press and release the ENTER button ▶/II.
-
Press and release the FWD/+ button ▶▶ to switch to another menu choice, or press and release the ▶MENU/STORE button to write the menu change(s) and return to stop mode.
Silent Skip.
Silent skip automatically pauses recording when there is a period of silence and continues recording when sound resumes. Silent Skip looks for sound below a preset level for a preset period of time. When that occurs the PMD670 switches to record pause. When a signal of about -30 dB is input recording resumes.
For example, if you are both the recorder and master of ceremonies for an event, you can preset the PMD670 for recording and automatically start recording when you start speaking into the microphone.
When the AUTO MARK switch is at ON resumption of recording after a record pause by Silent Skip adds an EDL mark.
Default settings are Off, 03 seconds, and -40 dB.
- Select the S.Skip menu choice:
a. From stop, press and hold the ▲MENU button for about 2 seconds. MENU will appear (flashing) in the display.
b. While MENU is flashing (for about 3 seconds) press and release the ENTER button ▶/II. The last Menu choice selected will appear. (If the flashing MENU times out start over at a.) - Press and release the FWD/+ button ▶▶ repeatedly until S.Skip is displayed and flashing.

- Press and release the ENTER button ▶/II to accept the S.Skip choice and switch to On or Off.

-
Press and release the FWD/+ button ▶▶ or the -/REW button ◀◀ to toggle between ON and OFF.
-
When correct Press and release the ENTER button ▶/II to switch to set or change seconds.
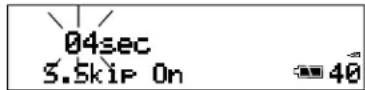
- Press and release the FWD/+ button ▶▶ or the -/REW button ◀◀ to change the number of seconds of silence. The range is 1 to 5.
- When correct Press and release the ENTER button ▶/II to switch to the decibel threshold level.

- Press and release the FWD/+ button or the -/REW button ◀ to change the (-dB) decibel threshold level. The range is 20 to 60 in 5 dB increments.
- When correct Press and release the ENTER button ▶/II to switch to S.Skip flashing.

- Press and release the FWD/+ button ▶▶ to switch to another menu choice, or press and release the ▶MENU/STORE button to write the menu change(s) and return to stop mode.
Auto Cue
Auto Cue skips the silence at the beginning of an audio track and pauses playback at the point where the sound is loud enough for long enough. You can adjust how loud (how many dB) and how long (milliseconds) the audio has to be before playback is cued.
If S.Play is selected (see next page), when the end of the track is reached Auto Cue pauses playback cued to the sound of the next track.
Default settings are Off, 20 milliseconds, and -40 dB.
- Select the A.Cue menu choice:
a. From stop, press and hold the ▲MENU button for about 2 seconds. MENU will appear (flashing) in the display.
b. While MENU is flashing (for about 3 seconds) press and release the ENTER button ▶/II. The last Menu choice selected will appear. (If the flashing MENU times out start over at a.) - Press and release the FWD/+ button ▶▶ repeatedly until A.Cue is displayed and flashing.
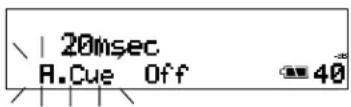
- Press and release the ENTER button ▶All to accept the A.Cue choice and switch to On or Off.

- Press and release the FWD/+ button ▶▶ or the -/REW button ◀◀ to toggle between On and Off.
- When correct Press and release the ENTER button ▶/II to switch to set or change milliseconds.
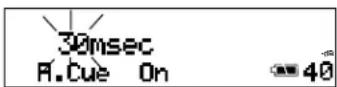
- Press and release the FWD/+ button ▶▶ or the -/REW button ◀◀ to change the number of milliseconds of sound exceeding the threshold. The range is 5 to 60 in five millisecond increments.
- When correct Press and release the ENTER button ▶/II to switch to the decibel threshold level.

- Press and release the FWD/+ button ▶▶ or the -/REW button ◀◀ to change the decibel threshold level. The range is -60dB to -20dB in 5dB increments.
- When correct Press and release the ENTER button ▶/II to switch to A.Cue flashing.

- Press and release the FWD/+ button ▶▶ to switch to another menu choice, or press and release the ▶MENU/STORE button to write the menu change(s) and return to stop mode.
Single Play
During playback, when Single Play and Auto Cue are Off, and the end of a track is reached the next track automatically starts playing.
During playback, when Single Play is On, and the end of a track is reached the PMD670 automatically pauses. This differs from Auto Cue in that Single Play does not cue to start of audio.
Default is S.Play Off.
- Select the S.Play menu choice:
a. From stop, press and hold the ▲MENU button for about 2 seconds. MENU will appear (flashing) in the display.
b. While MENU is flashing (for about 3 seconds) press and release the ENTER button ▶/II. The last Menu choice selected will appear. (If the flashing MENU times out start over at a.)
- Press and release the FWD/+ button ▶▶ repeatedly until S.Play is displayed and
flashing.
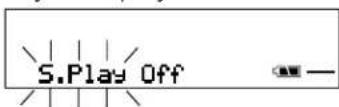
- Press and release the ENTER button ▶/II to accept the S.Play choice and switch to On or
Off.

-
Press and release the FWD/+ button ▶▶ or the -/REW button ◀◀ to toggle between ON and OFF.
-
When correct Press and release the ENTER button ▶/II to switch to S.Play flashing.

- Press and release the FWD/+ button ▶▶ to switch to another menu choice, or press and release the ▶MENU/STORE button to write the menu change(s) and return to stop mode.
Beep
When battery charge can provide no more than 1-3 minutes of recording or playback and Beep is set to On, the battery indicator will flash, the REC indicator will flash and the PMD670 will beep.
If the PMD670 is not operated for 30 minutes during stop or play pause, power can be automatically shut off to conserve battery life. (See A.PowOFF next page.) If A.PowOFF is set to Y, and Beep is set to ON, the PMD670 will beep to alert you that the power is shutting off.
Default is Beep On.
- Select the Beep menu choice:
a. From stop, press and hold the ▲MENU button for about 2 seconds. MENU will appear (flashing) in the display.
b. While MENU is flashing (for about 3 seconds) press and release the ENTER button ▶/II. The last Menu choice selected will appear. (If the flashing MENU times out start over at a.)
- Press and release the FWD/+ button ▶▶ repeatedly until Beep is displayed and flashing.
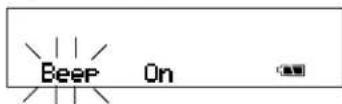
- Press and release the ENTER button ▶/Ⅱ to accept the Beep choice and switch to On or Off.
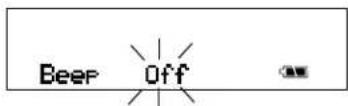
-
Press and release the FWD/+ button ▶▶ or the -/REW button ◀◀ to toggle between ON and OFF.
-
When correct Press and release the ENTER button ▶/II to switch to Beep flashing.

- Press and release the FWD/+ button to switch to another menu choice, or press and release the ▲MENU/STORE button to write the menu change(s) and return to stop mode.
Automatic Power Off
If the PMD670 is not operated for 30 minutes during stop or play pause, power can be automatically shut off to conserve battery life.
Default is A.PowOFF Y (on).
- Select the A.PowOFF menu choice:
a. From stop, press and hold the ▲MENU button for about 2 seconds. MENU will appear (flashing) in the display.
b. While MENU is flashing (for about 3 seconds) press and release the ENTER button ▶/Ⅱ. The last Menu choice selected will appear. (If the flashing MENU times out start over at a.) - Press and release the FWD/+ button ▶▶ repeatedly until A.PowOff is displayed and flashing.

- Press and release the ENTER button ▶/II to accept the A.PowOff choice and switch to Y or N.
- Press and release the FWD/+ button ▶▶ or the -/REW button ◀◀ to toggle between Y and N.
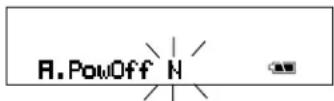
- When correct Press and release the ENTER button ▶/II to switch to A.PowOff flashing.
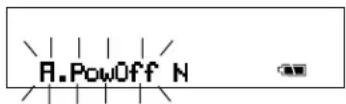
- Press and release the FWD/+ button ▶▶ to switch to another menu choice, or press and release the ▶MENU/STORE button to write the menu change(s) and return to stop mode.
Battery Type
The PMD670 can operate on 8 store bought AA size Alkaline, Ni-Cd* or Ni-MH* batteries. *Not charged by the built-in charger.
An optional Ni-Cd battery pack (Model RB1100 available from Marantz Professional) will be charged by the built-in charger when the AC adaptor is plugged in.
An optional Ni-MH battery pack (Model RB1650 available from Marantz Professional) can be used but is not charged by the built in charger and requires Marantz Professional charger model BC600.
Default is Alkaline.
- Select the Batt_Type menu choice:
a. From stop, press and hold the ▲MENU button for about 2 seconds. MENU will appear (flashing) in the display.
b. While MENU is flashing (for about 3 seconds) press and release the ENTER button ▶/II. The last Menu choice selected will appear. (If the flashing MENU times out start over at a.)
2. Press and release the FWD/+ button ▶▶ repeatedly until Batt_Type is displayed and
flashing.

- Press and release the ENTER button ▶/II to accept the Batt_Type choice and switch to the type of battery.
- Press and release the FWD/+ button ▶▶ or the -/REW button ◀◀ to tab between Alka-line, Ni-Cd, and Ni-MH.

- When correct Press and release the ENTER button ▶/II to switch to Batt_Type flashing.

- Press and release the FWD/+ button ▶▶ to switch to another menu choice, or press and release the ▶MENU/STORE button to write the menu change(s) and return to stop mode.
Remote Mode
Use a wired remote, not supplied, to control the PMD670. There are four remote modes:
- StartStop – during recording or playback switch the remote off to pause, on to resume.
- EDL Mark – during recording or playback switch remote to on to add an EDL mark.
- PWR REC – during power off, switch remote to on to turn power on and begin recording. During recording switch remote to off to stop recording and power off.
- M.Track – during recording, switch remote to on to increment the track. A new track is created at that point.
Default is StartStop.
- Select the RemoteMode menu choice:
a. From stop, press and hold the ▲MENU button for about 2 seconds. MENU will appear (flashing) in the display.
b. While MENU is flashing (for about 3 seconds) press and release the ENTER button ▶II. The last Menu choice selected will appear. (If the flashing MENU times out start over at a.) - Press and release the FWD/+ button ▶▶ repeatedly until RemoteMode is displayed and flashing.
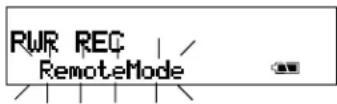
- Press and release the ENTER button ▶/II to accept the RemoteMode choice and switch to RemoteMode choices.

- Press and release the FWD/+ button ▶▶ the -/REW button ◀◀ to tab through the RemoteMode choices: StartStop, EDL Mark, PWR REC, or M.Track

- When correct Press and release the ENTER button ▶/II to switch to RemoteMode flashing.
- Press and release the FWD/+ button ▶▶ to switch to another menu choice, or press and release the ▶MENU/STORE button to write the menu change(s) and return to stop mode.
Broadcast Wave ID numbers
Broadcast Wave Format (.bwf) has three identification numbers in the header (Extension Chunk): Description, Originator, and Originator Reference.
For example, if the IDs are used for a broadcast station ID1 could be the identifier of the station, ID2 could be used for the department code, and ID3 for the badge number of the reporter.
Default is all ID number at 000000.
- Select the ID1 menu choice:
a. From stop, press and hold the ▲MENU button for about 2 seconds. MENU will appear (flashing) in the display.
b. While MENU is flashing (for about 3 seconds) press and release the ENTER button ▶/II. The last Menu choice selected will appear.
(If the flashing MENU times out start over at a.)
2. Press and release the FWD/+ button ▶▶ repeatedly until ID1 is displayed and flashing.
- Press and release the ENTER button to "accept the ID# choice and switch to the highest number position.

- Press and release the FWD/+ button ▶▶ or the -/REW button ◀◀ to tab through the digits 0 through 9.
- When correct Press and release the ENTER button ▶/□ to switch to the next digit.
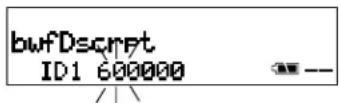
- Press and release the FWD/+ button ▶▶ or the -/REW button ◀◀ to tab through the digits 0 through 9.

Repeat steps 5 and 6 until all six digits are set.
- Press and release the ENTER button ▶/Ⅱ to switch to ID# flashing.
- Press and release the FWD/+ button ▶▶ to switch to the next ID#.

- Repeat 5 - 8 for all three ID numbers. When ID3 is flashing,
- Press and release the FWD/+ button ▶▶ to switch to another menu choice, or press and release the ▶MENU/STORE button to write the menu change(s) and return to stop mode.
Menu Default
The Default menu choice resets all menu items to their defaults. This is handy if you are setting up a new setting configuration because you don't have to check all the settings, you know they are at the default.
Defaults are listed for each menu item.
Note:
US defaults are used for illustration. See page 51 for a table of menu defaults.
- Select the Default menu choice:
a. From stop, press and hold the ▲MENU button for about 2 seconds. MENU will appear (flashing) in the display.
b. While MENU is flashing (for about 3 seconds) press and release the ENTER button ▶/II. The last Menu choice selected will appear. (If the flashing MENU times out start over at a.) - Press and release the FWD/+ button ▶▶ repeatedly until Default is displayed and flashing.

3a Press and release the ENTER button ▶/II to write the defaults. EXECUTING will be displayed,

then Done will be displayed briefly.

3b. Or, press and release the CANCEL button ■ to exit menu mode without changing menu settings.
Controls and Connections Top continued


24. PLAY/PAUSE button ▶/II ( playback)
ENTER button ▶/II
(menu)
PLAY/PAUSE button ▶/II
From stop press and release to begin playback. During playback press and release to pause playback.
During playback pause, press and release to resume playback.

ENTER button ▶/II
During menu functions press and release to accept the current setting and switch to the next menu item to be set.
25. STOP/CANCEL button
During recording, press and release to stop recording and end the track (file).
During playback, press and release to stop playback and end the playback session. When you resume playback starts at the beginning of the first track.
During menu operations press and release to cancel all entries made and return to stop mode.
Front


1. HP/SPK VOLUME control
Turn to adjust the volume of headphones plugged into the PHONE jack or the built-in speaker.
Audio on the built-in speaker is automatically interrupted when recording with the internal microphone.
During playback what is heard on the L or R headphone depends on the recording and for a Stereo or Dual Mono recording, the setting of the ANALOG OUT switch.
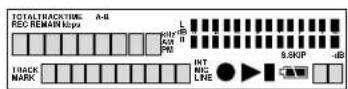
2. Display
See Display on page 43 for details.

3. REC PAUSE button II
During recording push and release to pause.
When paused the REC indicator will flash.
Example display.

The Pause symbol (a) will be displayed.
The Record symbol (b) will flash in the display
The Level meter (c) will remain active.
To resume recording slide the REC switch to the right and release.
A REC PAUSE does not increment the track.
If the AUTO MARK switch is at ON, a REC PAUSE adds an EDL mark. When recording is resumed the following is displayed for a couple of seconds.
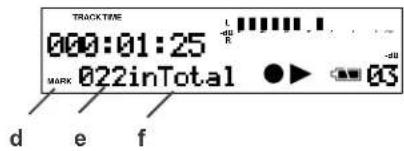
MARK (d) is displayed to indicate that the number (e) indicates the count of EDL marks.
"inTotal" (f) reminds you that EDL marks are counted from the beginning the Flash memory card not the beginning of the current track.

REC
4. REC indicator
Red indicator light is lit and steady during
Record, flashing during Record pause.
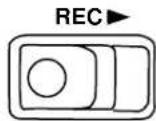
5. REC switch ▶
From Stop slide to the right and release to start recording.
From REC PAUSE slide to the right and release to resume recording.
During recording slide to the right and release to increment the track (start a new audio file).
To stop recording press and release STOP ■

6. REC LEVEL controls
Turn to adjust the record level when the LEVEL CONT. switch is at MANUAL.
The inside control (Right channel) and outside control (Left channel) turn together unless you hold one while turning the other.
The optimum record level is when the level meter goes as close to 0dB as possible but does not go OVER.
Front continued
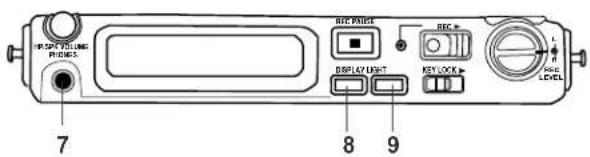
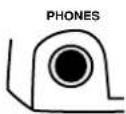
7. PHONES jack
Plug stereo head- phones in here.
Adjust headphone volume with the HP/SPK volume control.
Headphones are active during recording and playback.
During playback plugging in headphones mutes the internal speaker.

8. DISPLAY button
Press and release to tab through alternate information displays.
Displays are slightly different in Stop, Record and Play.
During Stop: Default display is Remaining record time for the card.
remaining record time on card

Example display.
After the first press track information is displayed.
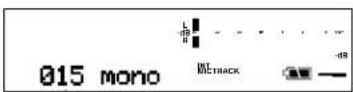
Total tracks on CF card.
After the second press EDL mark information is displayed.

Total EDL marks on CF card.
After the third press file parameters are displayed.

After the fourth press Date and Time information is displayed.

After the fifth press the display returns to the default: remaining record time on the card.
During Record the default display is Record time on the current track.

The first press of the DISPLAY button switches to remaining record time for the card.
The second press switches to file parameters.
The third press switches to date and time.
The fourth press returns to the default.
During Playback the default display is playing time on the current track.

The first press switches to file parameters.
The second press switches to date and time.
The third press returns to the default.

9. LIGHT button
Press and release to momentarily turn the Display light on.
Press and hold for three seconds to switch the Display light on.
Press and release to switch the Display light off.
Front continued
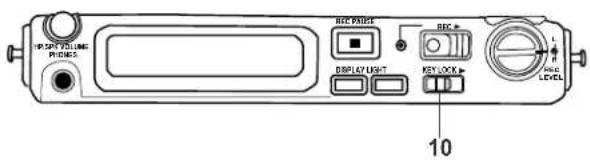

10. KEY LOCK switch
The KEY LOCK switch secures the PMD670 in the state it is in during Record, Playback or Stop.
Slide the switch to the right to turn KEY LOCK on.
Only these controls will work:
Display LIGHT button.
POWER switch - Works during Playback or Stop. PRE REC switch.
If you try to operate a button or switch that is locked, "HOLD" appears briefly in the display.
Example display:
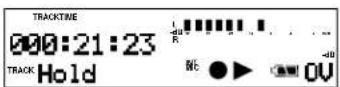
Left side

CHARGE

11. CHARGE indicator
Lit when optional Ni-Cd battery is charging.
12. CF card compartment
Pull to open to access the CF card.

natural_image
Diagram showing a device with a cable being inserted into a case, alongside its external card (no text or symbols visible)OpenDoor Power Down is displayed for about one second.
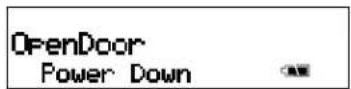

Card eject button
The Card eject button has two positions: click out (a) and click in (b).

To eject a CF card:
- If recording or in playback push STOP ■. If other operations are in progress cancel them by pushing STOP ■ or wait for them to complete.
- Open the CF card door*.
- Push and release the Card eject button so it is in click out position (a).
- Push the Card eject button from the click out position to the click in position (b).
*Opening the CF card door turns power off. If recording is in progress, opening the Memory card door automatically stops recording and writes critical track information to properly close the file before powering off.
To insert a CF card:
-
Push and release the Card eject button so it is in the click in position (b above).
-
Fully insert the CF card.
- Close the CF card door.
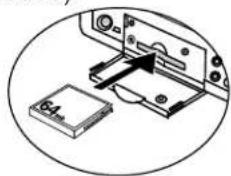
natural_image
Diagram of a device with an attached component and a separate labeled part (no text or symbols present)Note: If the CF card door won't latch, check that the Card eject button is in the click in position (b above).
Security
The supplied Memory compartment security screw requires using a small Phillips screwdriver to open the Memory compartment (3mm x 10mm long)

door. That reduces the possibility that the CF card will be misplaced or stolen.
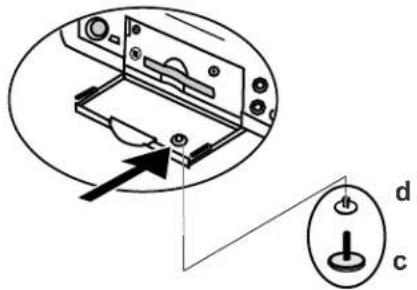
- Remove the plastic pin (c) and then the retainer (d).
- Add the screw. Tighten the screw with a small Phillips screwdriver tight enough so the screw cannot be removed with a fingernail.

natural_image
Diagram showing a cable connector inserted into a device, with an inset close-up of the cable being inserted (no text or symbols present)Left side continued


13. DIGITAL IN/OUT jacks
RCA jacks for connecting the PMD670 to an audio component that accepts or outputs digital audio signals.
IN: Connect to the digital out of a digital audio component. PCM audio data input at 44.1 and 48 kHz can be recorded.
This input has to be selected in the Input menu for the signal to be recorded. See INPUT button.
OUT: Connect to the digital in of a digital audio component.
- Only files with sample frequencies of 48 or 44.1kHz can be output.
• Digital audio is only output during normal or EDL playback.
• The receiving component must be able to accept audio in SPDIF (IEC-958-II) format.
• The receiving component must be able to accept a sampling frequency of 48 or 44.1kHz.
DC IN 13V

14. DC IN 13V jack
Plug the supplied AC adapter in here. The power supplied is 1.0A at 13V AC. The PMD670 automatically switches to adapter power
if it was running on battery power. If AC power is interrupted by a power outage or unplugging the adapter the PMD670 automatically switches to battery power.

15. I/O port
Plug the supplied I/O cable in here and connect the other end to your computer (PC or MAC).
The connection makes it easy to copy audio files to your computer's hard drive or a CD. The I/O connection can only be made active when the PMD670 is off (neither recording or during play-back).
How to connect via the I/O port

- Connect the cable to the PMD670 and your computer.
- Slide the POWER switch on the PMD670 to the right and release to power off.
- Press and hold the I/O MENU/STORE button while you slide the POWER switch on the PMD670 to the right and release to power on.

This display appears:
The CF card in the PMD670 appears as a removable device on your computer. The audio files are in a MPGLANG1 folder.
CAUTION: Only copy audio files (tracks) to other volumes. Do not modify or delete the EDL file. If the EDL file is missing or damaged PMD670 will not be able to recognize one or more recorded tracks or all tracks.
See the enclosed CD for demo PMDEdit software for computer audio file manipulation. PMDEdit is a full featured software suite designed for Marantz Professional digital recorders available for purchase at www.marantzpro.com/Products/PMDEdit.html or at (630) 741-0330.
Power off and power the PMD670 back on to resume recording or playback.
What will appear on your computer is a file titled PMD670.EDL and a folder (directory) titled MPGLANG1. Files within the MPGLANG1 folder are numbered from 1001 through the number of tracks recorded to a maximum of 1999. The file extension will be .mp3, .wav, .bwf or .mpg depending on the Algor/File parameters that were set for the recording.
Diagram of file structure (assuming .mp3 files).

flowchart
graph TD
    Root --> PMD670.EDL
    Root --> MPGLANG1
    PMD670.EDL --> 1001.MP3
    MPGLANG1 --> 1002.MP3
    MPGLANG1 --> 1003.MP3
    MPGLANG1 --> 1999.MP3
    1001.MP3 -.-> 1002.MP3
    1002.MP3 -.-> 1003.MP3
    1003.MP3 -.-> 1999.MP3
Changes made to file names or file structure made on your computer will prevent file recognition and therefore playback in the PMD670.
However audio files from your computer that are renamed using the file names above and put into the structure above may be playable on the PMD670. For example, if you name an mp3 audio file 1234.MP3 and place it in MPGLANG1 folder the PMD670 may play it.
Right side
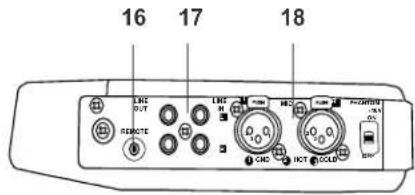
REMOTE

Wiring diagram
16. Remote jack
Plug a wired remote (not supplied) in here.

A switch connected to the 2.5mm mini jack off (open) and on (closed) does the following depending on the RemoteMode setting:
RemoteMode:
Start Stop
During record or playback switch remote off to pause, on to resume.
EDL Mark
During record or playback switch remote to on to add an EDL mark.
PWR REC
During POWER off, switch remote to on to turn power on and begin recording. During recording, switch remote to off to stop recording and power off.
M.Track
During recording, switch remote to on to increment the track. A new track is created at that point. There is no break in recording.
See Remote Mode on page 36 to set or change the Remote Mode.
LINE OUT

LINE IN
L
17. LINE OUT/IN jacks
Plug external line level audio devices in here.
R
LINE OUT jacks
Plug Left and Right RCA audio cables in here to connect to the input of an amplifier or other external unit.
During playback what is output on the L or R channel depends on the recording and for a Stereo or Dual Mono recording, the setting of the ANALOG OUT switch.
LINE IN jacks
Plug Left and Right RCA audio cables in here to connect to the output of an external unit.
To record, mono, stereo, or LR mono LINE input must be selected in the input select menu. See INPUT button.

18. MIC IN jacks
Plug external micro- phones in here.
For mono recording use the Left jack.
To record, stereo with MIC input, DLmono with MIC input, mono with MIC input, or LRmono with MIC input must be selected in the input select menu. See INPUT button.
Notes:
XLR pinout is 1 ground, 2 hot and 3 cold. Microphones with a PHONE jack can be used with an adapter (not supplied) from PHONE to XLR.
Right side continued
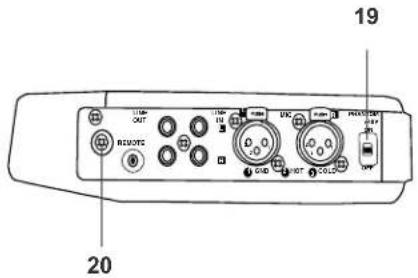
PHANTOM +48V
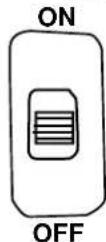
19. PHANTOM +48V switch
Switch to ON to provide 48V of power for a condenser microphone(s).
ON: +48V is supplied to power condenser microphone(s).
OFF: No microphone power is supplied.
Microphone recommendations
Professional condenser microphone(s) (which require additional power either phantom power from the PMD670 or from another source) are recommended because they provide greater sensitivity, and higher quality audio recording.
Dynamic microphone(s) can be used but do not yield optimum audio quality recordings.
Consult with your local dealer to select the appropriate microphone(s) for your specific application. In many cases they can demonstrate the various performances and characteristics of microphones for your use.
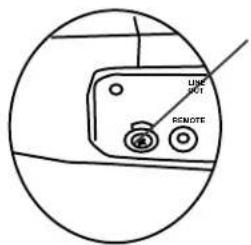
20. Carry studs
Attach the supplied carry strap here.
Installing the carry strap
-
Attach a strap retainer through the round hole.
-
Add carry strap.
-
Close strap retainer.
Bottom


natural_image
Isometric line drawing of a mechanical housing or enclosure with a handle and mounting holes (no text or symbols)21. Battery compartment
Press and slide at arrow to open the Battery compartment.
Battery power
The PMD670 can operate on several types of battery power.
Hint:
Keep fully charged batteries in the PMD670 when recording using AC power. Otherwise if AC power is interrupted, as much as 30 minutes of your recording could be lost.
Eight AA alkaline batteries and the supplied battery carrier can be used. Alkaline batteries can power recording or playback for about *6 hours.
AA size rechargeable Ni-Cd or Ni-MH batteries can be used in the supplied battery carrier, but those cannot be recharged with the PMD670's built in charger.
An optional Ni-Cd battery model RB1100 can be charged in the PMD670. The RB1100 can also be charged with an optional charger model BC600. Ni-Cd batteries can power recording or playback for about *5 hours.
An optional Ni-MH (Nickel metal hydride) battery model RB1650 can be used, but cannot be recharged with the PMD670's built-in charger. It requires charger model BC600. Ni-MH batteries can power recording or playback for about *7 hours.
*Using compact flash media.
Installing AA size batteries:
Power off, turn the PMD670 over.
Press and push in the direction of the arrow to remove the battery compartment cover.

natural_image
Technical line drawing of a mechanical housing or enclosure with mounting holes and a small component, no text or symbols present.
Install 8 AA size batteries to the battery carrier with the - ends towards the springs.
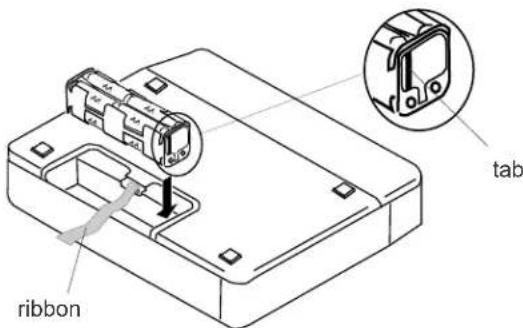
Install the battery carrier with tab as shown and over the ribbon for easy battery carrier removal.
Replace the battery compartment cover*.
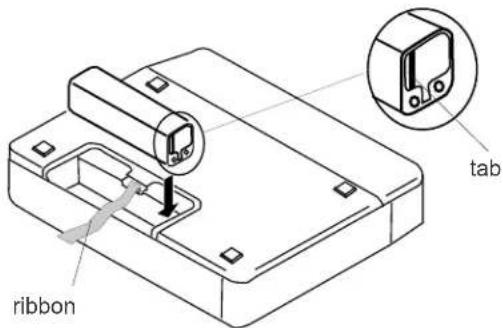
Installing an optional Ni-Cd or Ni-MH battery
Install the battery with tab as shown and over the ribbon for easy battery removal*.
*When changing battery type, for optimal battery performance, be sure you change the Batt_Type menu setting.
The optional Ni-Cd battery is charged only when:
• The AC adaptor is connected.
- The Ni-Cd battery is loaded correctly in the battery compartment.
• The power to the PMD670 is off.
While charging (about 3 hours) the CHARGE indicator will blink.
When the Ni-Cd battery charge cycle is complete the CHARGE indicator will be lit and steady.
Display
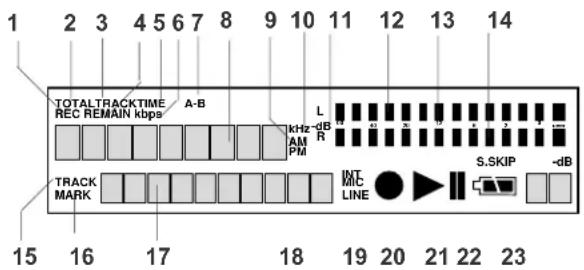
1. REC label
The REC label appears with other labels in this area to indicate TOTAL REC TIME or REC TIME REMAINING displayed on the upper alphanumeric display.
2. TOTAL label
The TOTAL label appears with other labels in this area to indicate TOTAL REC TIME, or TOTAL REC TIME REMAINING displayed on the upper alphanumeric display.
3. TRACK label
The TRACK label appears with other labels in this area to indicate TRACK TIME displayed on the upper alphanumeric display.
4. REMAIN label
The REMAIN label appears with other labels in this area to indicate REC TIME REMAINING, or TOTAL REC TIME REMAINING displayed on the upper alphanumeric display.
5. TIME label
The TIME label appears with other labels in this area to indicate REC TIME REMAINING, TOTAL REC TIME REMAINING, or TRACK TIME displayed on the upper alphanumeric display.
6. kbps label
The kbps label appears to indicate that the first five places in the upper alphanumeric display are kilobytes per second.
7. A-B label
A- indicates that the beginning (A point) of an A-B loop has been set.
A-B indicates that the ending (B point) of an A-B loop has also been set.
8. Upper alphanumeric display
Displays a variety of information including remaining recording time, clock time, menu settings etc. Associated labels are display items 1-7 and 9-10.
9. AM / PM label
Displays AM or PM when clock time is displayed.
10. kHz label
The kHz label appears to indicate that the last five places in the Upper alphanumeric display is frequency in kiloHertz.
11. L -dB R level meter labels
L is the label for the upper (Left) level meter. -dB is the label for the center level meter scale in decibels.
R is the label for the lower (Right) level meter.
12. Upper level meter
The louder the sound input to the recorder on the Left channel the more bars are displayed.
13. Decibel scale
The scale in dB (decibels) for the upper and lower level meters.
14. Lower level meter
The louder the sound input to the recorder on the Right channel the more bars are displayed.
15. TRACK label
The TRACK label appears to indicate that the number displayed on the left of the lower alphanumeric display is the track number.
16. MARK label
The MARK label appears to indicate that the number displayed on the left of the lower alphanumeric display is the EDL Mark number.
17. Lower alphanumeric display
Displays a variety of information including remaining recording algorithm, date, track number, number of tracks on CF card, EDL

Mark number, number of EDL Marks on CF card etc. Associated labels are display items 15 and 16.
18. MIC/INT MIC label
The MIC label appears when external microphones are selected.
The INT MIC label appears when input selected for recording is the internal microphone.
19. LINE label
The LINE label appears when input(s) selected for recording is (are) the LINE IN jacks.
20. Record ●
The Record symbol appears when the PMD670 is in record mode. Appears with the Play symbol when recording. Appears flashing when in record pause.
21. Play ▶
The Play symbol appears when the PMD670 is in playback, playback pause, recording, record pause.
22. Pause ||
The Pause symbol appears when the PMD670 is in playback pause, or record pause.
23. Battery
The Battery symbol appears in most displays to indicate battery charge.
indicates that battery charge is okay.
indicates that battery charge is getting low and there is approximately 5 to 10 minutes of record or playback time available.
flashing indicates that battery has approximately 1 to 3 minutes of record or playback time remaining.
The REC indicator light will flash. If BEEP is set to On the PMD670 will also beep.
If the PMD670 continues to operate it will automatically shut down. If recording it will write track information, stop recording and power off. If in playback it will stop playback and power off.
indicates that battery charge is depleted or no battery is installed.
24. S.SKIP label
The Silent Skip label appears when Silent Skip is enabled.
25. Margin level
The Margin level is displayed. The PMD670 holds this display at the highest level achieved during the current recording. If more than 0 dB, OV is displayed. To reset the Margin level press and release the MARGIN RESET button.
26. -dB label
The -dB label applies to the Peak level display.
Care and Maintenance
Use a soft cloth slightly moistened with mild detergent solution.
Recording time chart
The recording time available on a CF card depends on the size of the card in MB, the recording type (.mp3, .mp2 or PCM), the bitrate of the recording and if recording in mono or stereo.
This Recording time chart lists approximate recording times based on those factors.
| bitrate | 32 kbps | 64 kbps | 40 kbps | 80 kbps | 64 kbps | 128 kbps | 80 kbps | 160 kbps | 128kbps | 256 kbps | 160 kbps | 320 kbps | |
| .mp3 | mono | stereo | mono | stereo | mono | stereo | mono | stereo | mono | stereo | mono | stereo | |
| CARD SIZE | 32 MB | 2:13:00 | 1:06:30 | 1:46:24 | 0:53:12 | 1:06:30 | 0:33:15 | 0:53:12 | 0:26:36 | 0:33:15 | 0:16:38 | 0:26:36 | 0:13:18 |
| 64 MB | 4:26:00 | 2:13:00 | 3:32:48 | 1:46:24 | 2:13:00 | 1:06:30 | 1:46:24 | 0:53:12 | 1:06:30 | 0:33:15 | 0:53:12 | 0:26:36 | |
| 128 MB | 8:52:00 | 4:26:00 | 7:05:36 | 3:32:48 | 4:26:00 | 2:13:00 | 3:32:48 | 1:46:24 | 2:13:00 | 1:06:30 | 1:46:24 | 0:53:12 | |
| 256 MB | 17:44:00 | 8:52:00 | 14:11:12 | 7:05:36 | 8:52:00 | 4:26:00 | 7:05:36 | 3:32:48 | 4:26:00 | 2:13:00 | 3:32:48 | 1:46:24 | |
| 340 MB | 23:33:08 | 11:46:34 | 18:50:30 | 9:25:15 | 11:46:34 | 5:53:17 | 9:25:15 | 4:42:38 | 5:53:17 | 2:56:38 | 4:42:38 | 2:21:19 | |
| 512 MB | 35:28:00 | 17:44:00 | 28:22:24 | 14:11:12 | 17:44:00 | 8:52:00 | 14:11:12 | 7:05:36 | 8:52:00 | 4:26:00 | 7:05:36 | 3:32:48 | |
| (1 GB) 1024 MB | 70:56:00 | 35:28:00 | 56:44:48 | 28:22:24 | 35:28:00 | 17:44:00 | 28:22:24 | 14:11:12 | 17:44:00 | 8:52:00 | 14:11:12 | 7:05:36 |
| bitrate | 32 kbps | 64 kbps | 48 kbps | 96 kbps | 64 kbps | 128 kbps | 96 kbps | 192 kbps | 128 kbps | 256 kbps | 192 kbps | 384 kbps | |
| .mp2 | mono | stereo | mono | stereo | mono | stereo | mono | stereo | mono | stereo | mono | stereo | |
| CARD SIZE | 32 MB | 2:13:00 | 1:06:30 | 1:39:45 | 0:49:53 | 1:06:30 | 0:33:15 | 0:49:53 | 0:24:56 | 0:33:15 | 0:16:38 | 0:24:56 | 0:12:28 |
| 64 MB | 4:26:00 | 2:13:00 | 3:19:30 | 1:39:45 | 2:13:00 | 1:06:30 | 1:39:45 | 0:49:53 | 1:06:30 | 0:33:15 | 0:49:53 | 0:24:56 | |
| 128 MB | 8:52:00 | 4:26:00 | 6:39:00 | 3:19:30 | 4:26:00 | 2:13:00 | 3:19:30 | 1:39:45 | 2:13:00 | 1:06:30 | 1:39:45 | 0:49:53 | |
| 256 MB | 17:44:00 | 8:52:00 | 13:18:00 | 6:39:00 | 8:52:00 | 4:26:00 | 6:39:00 | 3:19:30 | 4:26:00 | 2:13:00 | 3:19:30 | 1:39:45 | |
| 340 MB | 23:33:08 | 11:46:34 | 17:39:51 | 8:49:55 | 11:46:34 | 5:53:17 | 8:49:55 | 4:24:58 | 5:53:17 | 2:56:38 | 4:24:58 | 2:12:29 | |
| 512 MB | 35:28:00 | 17:44:00 | 26:36:00 | 13:18:00 | 17:44:00 | 8:52:00 | 13:18:00 | 6:39:00 | 8:52:00 | 4:26:00 | 6:39:00 | 3:19:30 | |
| (1 GB) 1024 MB | 70:56:00 | 35:28:00 | 53:12:00 | 26:36:00 | 35:28:00 | 17:44:00 | 26:36:00 | 13:18:00 | 17:44:00 | 8:52:00 | 13:18:00 | 6:39:00 |
| fs | 32 kHz | 44.1 kHz | 48 kHz | ||||
| PCM | mono | stereo | mono | stereo | mono | stereo | |
| CARD SIZE | 32 MB | 0:08:20 | 0:04:10 | 0:06:03 | 0:03:01 | 0:05:33 | 0:02:47 |
| 64 MB | 0:16:40 | 0:08:20 | 0:12:06 | 0:06:03 | 0:11:07 | 0:05:33 | |
| 128 MB | 0:33:20 | 0:16:40 | 0:24:11 | 0:12:06 | 0:22:13 | 0:11:07 | |
| 256 MB | 1:06:40 | 0:33:20 | 0:48:23 | 0:24:11 | 0:44:27 | 0:22:13 | |
| 340 MB | 1:28:33 | 0:44:16 | 1:04:15 | 0:32:07 | 0:59:02 | 0:29:31 | |
| 512 MB | 2:13:20 | 1:06:40 | 1:36:45 | 0:48:23 | 1:28:54 | 0:44:27 | |
| (1 GB) 1024 MB | 4:26:41 | 2:13:20 | 3:13:30 | 1:36:45 | 2:57:47 | 1:28:54 | |
ALL TIMES ARE APPROXIMATE
TROUBLESHOOTING
Should faults occur, it is in many cases not necessary to consult your dealer or technical service department. On the basis of the following checks, you will be able to rectify a number of conditions yourself without difficulty. If the condition cannot be remedied after the following check, please consult your dealer or contact Marantz Professional at 630 741 0330.
The PMD670 does not turn on Check power
• install fresh batteries
- check AC adaptor connections
The PMD670 turns on then turns itself off
• install fresh batteries
The PMD670 seems to record but there is no sound on playback
- check input settings (For example, if LINE input is selected and no input is connected to the LINE IN jacks the PMD670 will record silence.)
The PMD670 will not playback
- check EDL switch, if ON switch to OFF
No audio playback through headphones or internal speaker
- check HP/SPK VOLUME control setting
- check a different track or CF card
The PMD670 will not record
- check that the maximum of 999 tracks have not been recorded
- check that the PMD670 acknowledges the CF card
No signal from microphone input
- check input selection
- check REC level control settings
- check if microphone(s) require Phantom power
Excessive noise
- check cable connections
Playback on a PC results in poor sound
- check quality of PC sound card and program
- check frequency conversion program*
*The PMD670 records audio files with a sampling frequency of 48kHz. Some PC programs convert the files to 44.1kHz (using a sample rate converter). Only high quality sample rate converters should be used.
PC cannot read files
- check if the files are MP2 or MP2 with a .wav file extension Some PC's cannot interpret this combination. Try renaming the MP2 file so it has a .mp2 or .mp3 file extension.
- check the capability of the PC program
Some playback and editing programs do not support MP2/MP3 or Broadcast Wave (.bwf) formats. Consult the Marantz Professional website at www.marantzpro.com for links to programs that support MP2/MP3 and Broadcast Wave Format.
The rechargeable battery not recharging
- check that the CHARGE indicator is flashing during charging and lit and steady when charging is complete.
- check AC adaptor connections
- check that Power is turned off on the PMD670
Rechargeable battery life low
- make sure you fully charge and discharge the Ni-Cd battery during each charge cycle
- replace battery
Media cards that are heavily used should be occasionally reformatted to avoid audio problems due to fragmentation.
If the PMD670 exhibits erratic behavior, the microprocessor can be reset by, powering off, disconnecting AC power and removing batteries.
Record setting recommendations
Recording a meeting
LEVEL CONT. switch at ALC.
ANC switch at
Factory default settings.
Input: INT MIC mono or MIC mono
Menu settings:
Algor/File: mono, MP3, 44.1kHz, 32 kbps, .mp3.
M.Track: On
S.Skip: On
Beep: On
A.PowOff: Yes
Recording music
LEVEL CONT. switch at MANUAL.
ANC switch at FLAT.
Input: MIC stereo
Menu settings:
Algor/File: Stereo, MP3,44.1kHz, 128kbps, .mp3.
M.Track: Off
S.Skip: Off
Beep: Off
A.PowOff: Yes
Menu settings (highest quality):
Algor/File: Stereo, PCM, 44.1kHz, 128kbps, .wav.
M.Track: Off
S.Skip: Off
Beep: Off
A.PowOff: Yes
SPECIFICATIONS\*
Digital audio system
System ...... Solid State Recorder
Usable Media CF memory cards
(Microdrive) cards
Recording and media methods
.mp2 ...... MPEG1 Layer II compression
.mp3 ...... MPEG1 Layer III compression
.mp3 ...... MPEG2 Layer III compression*
*for all half sample rates.
PCM 16 bit linear PCM
Recording bit rate (selectable)
MP2 mono 192, 128, 96, 64, 48, 32 kbps
MP2 stereo 384, 256, 192, 128, 96, 64 kbps
MP3 mono 160, 128, 80, 64, 40, 32 kbps
MP3 stereo 320, 256,160,128, 80, 64 kbps
Sampling frequency
Analog 48, 44.1, 32, 24*, 22.05*, 16* kHz
*except MP2
Digital 48, 44.1 kHz
Number of channels ...... 2 (stereo), 1 (mono)
Frequency response 20,000 Hz (-0.5dB)
Signal-to-Noise Ratio
IEC-A weighted ..... LINE 86 dB
MIC 65 dB
Total Harmonic Distortion
at 0 VU (PCM) ..... LINE 0.03%
MIC 0.08%
Dynamic Range 86 dB
Inputs
MIC IN L/R
Type .... XLR (1:GND, 2:HOT, 3:COLD)
Input Sensitivity (MIC) ...... 1.2 mVrms/6.5 kohms
LINE IN L/R
Type ...... RCA jack
Input Sensitivity 300 mVrms/20 kohms
DIGITAL IN
Type ...... RCA jack
Input impedance 75 ohms
Standard input level 0.5 Vp-p
Sampling frequency 44.1/48 kHz
Format ...... SPDIF (IEC 958 Typell)
Outputs
LINE OUT L/R
Type ...... RCA jack
Standard level ...... 2 Vrms max./2 kohms
DIGITAL OUT
Type RCA jack
Output impedance.... 75 ohms
Standard output level 0.5 Vp-p
Sampling frequency 44.1/48 kHz
Format ...... SPDIF (IEC-958 Type II)
General
Headphone Output power 20 mW/32 ohms
Speaker Output power 100 mW/4 ohms
Phantom power ....+48V, 10mA
Power consumption
Recording/Playback 5.2 W
Charging 12 W max
Standby (battery driven) 2.2 mW
Battery life (Alkaline) 6 hours (typical)
Dimensions
Width 264 mm (10.4")
Height 55 mm (2.0")
Depth 185 mm (7.3")
Weight 1.3 kg (2 lbs. 14 oz.)
Included accessories
AC adapter 1
Battery carrier 1
Carry strap 1
Carry strap retainers 2
Screws (ISO 3x10 mm) 3
Plastic pin and retainer 1
I/O cable 1
User Guide 1
Optional accessories**
Ni-Cd battery pack RB1100
Ni-MH battery pack RB1650
Battery charger .... BC600
Carrying cover (vinyl) CLC670
Carrying bag PRC300
Professional reporter's bag PRC600
Attache carrying case ...... CA200
**See www.marantzpro.com for details.
*Specifications subject to change without notice.
Menu defaults
| Menu | default selection US Europe | ||
| Date/Time | |||
| 2003-2099 2003 2003 | |||
| JAN-DEC | JAN | JAN | |
| 1-31 | 1 | 1 | |
| AM/PM 0:00-11:59 | AM 0:00 | AM 0:00 | |
| DateForm | M/D/Y | D/M/Y | |
| Algor/File | |||
| stereo/mono | Mono | Stereo | |
| PCM/MP2/MP3 | MP3 | MP2 | |
| kHz | 44.1 | 48 | |
| bit rate kbps | 32 | 128 | |
| extension | .mp3 .mpg | ||
| M.Track | On | On | |
| SeamlsPly | Off | Off | |
| S.Skip | Off | Off | |
| seconds | 03 | 03 | |
| dB | -40 | -40 | |
| A.Cue | Off | Off | |
| milliseconds | 20 | 20 | |
| dB | -40 | -40 | |
| S.Play | Off | Off | |
| Beep | On | On | |
| A.PowOFF | Y | Y | |
| Batt_Type | Alkaline | Alkaline | |
| RemoteMode | Start/Stop | Start/Stop | |
| ID1 | 0000000 | 0000000 | |
| ID2 | 0000000 | 0000000 | |
| ID3 | 0000000 | 0000000 | |
LIMITED WARRANTY
Your Marantz Professional product is warranted against manufacturer defects in material and workmanship for a period of one year parts and labor.
Except as specified below, this warranty covers defects in material and workmanship. The following are not covered under warranty:
-
Damage, deterioration, malfunction or failure to meet performance specifications resulting from:
a) Accidents, acts of nature, misuse, abuse, neglect or unauthorized product modification.
b) Improper installation, removal or maintenance, or failure to follow supplied instructions.
c) Repair or attempted repair by a non-Marantz authorized agent.
d) Any shipment (claims must be presented to the carrier).
e) Any cause other than a defect of manufacturing. -
Cleaning, check-ups with no fault found or changes incurred for installation, removal or reinstallation of the product.
-
Any serialized product on which the serial number has been defaced, modified or removed.
-
Batteries and battery chargers.
-
Accessories, including but not limited to: cables, mounting hardware and brackets, cleaning accessories, power cords and adapters, and carry cases.
-
Products purchased outside of the United States, its possessions or territories.
Non-transferable warranty
This Warranty may be enforced only by the original purchaser.
What We Will Pay For
We will pay for all labor and material expenses for items covered by the warranty.
How You Can Get Service
- If your unit needs service in the USA, contact our service referral at the appropriate telephone number indicated below. We will advise you of the name and location of one or more authorized service centers from which service may be obtained. Please do not return the unit directly to us.
- You must pay any shipping charges if it is necessary to ship the product for service. If the necessary repairs are covered by the warranty, we will pay return shipping charges to your location anywhere in the United States or its territories.
- Whenever warranty service is required, you must present the original dated sales receipt or other proof of date purchased.
Limitation of Implied Warranties
All implied warranties, including warranties of merchantability and fitness for a particular purpose, are limited in duration to the length of this warranty.
Exclusion of Damages
Liability for any defective product is limited to repair or replacement of the product at manufacturer's option. Manufacturer shall not be liable for damage to other products caused by any defects in Marantz products, damages based on inconvenience or loss of use of the product, or any other damages, whether incidental, consequential, or otherwise.
Some States do not allow limitations on how long an implied warranty lasts and/or do not allow the exclusion or limitation of incidental or consequential damages, so the above limitations and exclusions may not apply to you.
How State Law Relates to the Warranty
This warranty gives you specific legal rights, and you may have other rights which may vary from State to State.
Marantz Professional Service Number:
Marantz Professional Factory Service (630) 741-0330
This warranty is enforceable only in the United States and its possessions or territories.
- CAUTION
- WARNING
- Important Safety Instructions
- READ BEFORE OPERATING EQUIPMENT
- NOTE TO CATV SYSTEM INSTALLER:
- NOTE:
- WARNINGS
- Copyright
- CE marking (only EU version)
- Quick Start Detailed Instructions
- Table of Contents
- Recording setup controls
- Front
- Left side
- Right side
- Bottom
- US/Europe models
- Package contents
- Control and Connection Diagrams
- # Control
- Page
- Top
- Setup controls
- MARK/ EDIT controls
- Record/Playback controls
- # Control Page
- Display
- Hint:
- Introduction
- Audio inputs may be from:
- Audio outputs may be from:
- Computer compatible
- Voice recording
- Playback aids
- - Tracks
- • Automatic recording
- • EDL marks\*
- Features
- Controls and Connections
- Speaker
- MIC (internal microphone)
- POWER switch
- Security cover
- AUTO MARK switch
- PRE REC switch
- INPUT LOCK switch
- ANALOG OUT switch
- MIC ATTEN switch
- REPEAT switch
- ANC switch
- EDL PLAY switch
- INPUT button
- What the input selections do:
- Selects the input device(s) and channels
- Selects the recording (file) parameters
- Recording (file) parameters:
- Input device(s) and channels:
- mono with INT MIC input
- stereo with LINE input
- mono with LINE input
- LR mono with LINE input
- Digiln
- stereo with MIC input
- DLmono with MIC input
- mono with MIC input
- LRmono with MIC input
- A-B REPEAT button
- A-B Repeat playback
- EDL Marks
- Adding EDL Marks
- Locating EDL Marks
- Custom playback sequences
- Editing EDL Marks:
- Skip
- EDL A-B looping
- Erase
- Edit mode
- How to renumber tracks
- How to erase tracks
- How to erase all EDL marks within one track
- How to erase all EDL marks
- How to format a CF card
- TRACK JUMP reverse button
- REC UNDO button
- TRACK JUMP forward button ▶▶
- - /REW button ◀◀
- FWD/+ button ▶▶
- Notes:
- MARGIN RESET/ I/O ▲ MENU/STORE button
- MARGIN RESET button
- I/O button
- MENU/STORE button
- Menu operations
- The Menu choices are:
- How to set or change the Date and time
- How to set or change the Date Form
- Algor/File
- Recording Type
- Algorithm
- Sample Frequency
- Bit Rate
- File Format
- Chart of Algorithm/File Parameters
- Algor/File
- default
- How to set or change the Algor/File parameters continued
- Other menu choices:
- Manual track incrementing.
- Seamless Play.
- Silent Skip.
- Auto Cue
- Single Play
- Beep
- Automatic Power Off
- Battery Type
- Remote Mode
- Broadcast Wave ID numbers
- Menu Default
- PLAY/PAUSE button ▶/II
- ENTER button ▶/II
- STOP/CANCEL button
- HP/SPK VOLUME control
- Display
- REC PAUSE button II
- REC indicator
- REC switch ▶
- REC LEVEL controls
- PHONES jack
- DISPLAY button
- LIGHT button
- Front continued
- KEY LOCK switch
- CHARGE
- CHARGE indicator
- CF card compartment
- Card eject button
- To eject a CF card:
- To insert a CF card:
- Security
- Left side continued
- DIGITAL IN/OUT jacks
- DC IN 13V
- DC IN 13V jack
- I/O port
- How to connect via the I/O port
- Remote jack
- RemoteMode:
- Start Stop
- EDL Mark
- PWR REC
- M.Track
- LINE OUT/IN jacks
- LINE OUT jacks
- LINE IN jacks
- MIC IN jacks
- PHANTOM +48V switch
- Microphone recommendations
- Carry studs
- Installing the carry strap
- Battery compartment
- Battery power
- Installing AA size batteries:
- Installing an optional Ni-Cd or Ni-MH battery
- REC label
- TOTAL label
- TRACK label
- REMAIN label
- TIME label
- kbps label
- A-B label
- Upper alphanumeric display
- AM / PM label
- kHz label
- L -dB R level meter labels
- Upper level meter
- Decibel scale
- Lower level meter
- TRACK label
- MARK label
- Lower alphanumeric display
- MIC/INT MIC label
- LINE label
- Record ●
- Play ▶
- Pause ||
- Battery
- S.SKIP label
- Margin level
- -dB label
- Care and Maintenance
- Recording time chart
- TROUBLESHOOTING
- Record setting recommendations
- Recording a meeting
- Recording music
- SPECIFICATIONS\*
- Digital audio system
- Inputs
- Outputs
- General
- LIMITED WARRANTY
- Non-transferable warranty
- What We Will Pay For
- How You Can Get Service
- Limitation of Implied Warranties
- Exclusion of Damages
- How State Law Relates to the Warranty
- Marantz Professional Service Number:
Brand : Marquant
Model : PMD670
Category : Voice recorder