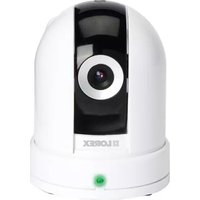
Live Sense PT - Security Camera Lorex - Free user manual and instructions
Find the device manual for free Live Sense PT Lorex in PDF.


| Product Type | Security Camera |
| Brand | Lorex |
| Model | Live Sense PT |
| Power Input | 5V DC via included power adapter |
| Power Switch | On/Off slide switch |
| Pairing Method | Pair button on camera side and monitor menu |
| Pairing Distance | 12 inches (30 cm) during initial setup |
| Maximum Cameras | Up to 4 wireless cameras per monitor |
| Channel Selection | Selectable via monitor pairing menu |
| Default Channel | Channel 1 for included camera |
| Pair Button Activation | Requires pen or paperclip to press |
| Transmission Obstacles | Avoid concrete, cement, and metal structures |
| Installation Consideration | Plan cable routing before installation |
| Included Accessories | Power adapter, user manual (PDF) |
| User Manual Language | English (available for download) |
| Device Category | Wireless Security Camera |
Frequently Asked Questions - Live Sense PT Lorex
User questions about Live Sense PT Lorex
0 question about this device. Answer the ones you know or ask your own.
Ask a new question about this device
Download the instructions for your Security Camera in PDF format for free! Find your manual Live Sense PT - Lorex and take your electronic device back in hand. On this page are published all the documents necessary for the use of your device. Live Sense PT by Lorex.
USER MANUAL Live Sense PT Lorex
Before you install the camera, carefully plan where and how it will be positioned, and where you will route the cable that connects the camera to the power adaptor.
Avoid installing in a location which requires the wireless signal to pass through cement, concrete and metal structures. This will reduce the transmission range.
Powering the Camera
- Connect the Power Adaptor to the 5V Input on the back of the camera.
- Connect the power adapter to a power outlet.
- Slide the power switch to the ON position.

natural_image
Close-up of a hand inserting a small electronic device into a white package, with a yellow circle highlighting the component (no visible text or symbols)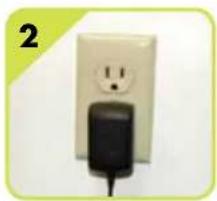
natural_image
White electrical outlet wall with a black socket and a smiley face (no text or symbols visible)
NOTE:
- Only use the included power adapter to power the camera(s).
Pairing the Camera
1 Place the camera and video monitor 12 inches apart. Turn on the camera first and then the video monitor.
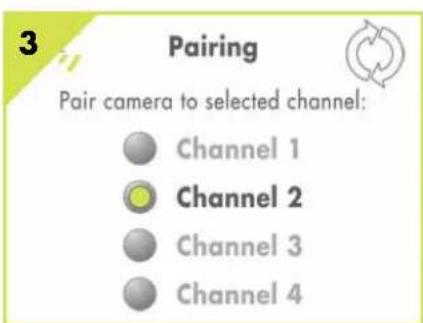
2 Press the Menu button on the monitor, then select Pairing and press the OK button.
3 Select an available channel, and press the OK button.
NOTE: By default, the camera included with the system is paired to channel 1.
4 Use a pen or paperclip to press the Pair button on the side of the camera within 30 seconds. You should immediately see video from the camera on the video monitor.
NOTE:
- To pair multiple cameras, repeat steps 2\~4, selecting a different channel in the pairing menu.
- You can add a maximum of four (4) wireless cameras to the video monitor.

4 Pair Button
Use a pen or paper clip to press the Pair button during the pairing process with the video monitor.
Brand : Lorex
Model : Live Sense PT
Category : Security Camera