
LE42H300 - Television HAIER - Free user manual and instructions
Find the device manual for free LE42H300 HAIER in PDF.


| Product Type | LED Television |
| Screen Size | 42 inches (diagonal) |
| Resolution | 1920 x 1080 (Full HD) |
| Refresh Rate | 60 Hz |
| Dimensions (without stand) | 975 x 574 x 64 mm (W x H x D) |
| Dimensions (with stand) | 975 x 630 x 220 mm |
| Weight (without stand) | 10.5 kg |
| Weight (with stand) | 11.8 kg |
| Power Consumption (typical) | 65 W |
| Standby Power Consumption | < 0.5 W |
| Power Supply | AC 100-240 V, 50/60 Hz |
| HDMI Inputs | 2 |
| USB Ports | 1 (USB 2.0) |
| Composite Video Input | 1 (shared with component) |
| Component Video Input | 1 (Y/Pb/Pr) |
| RF Input | 1 (for antenna/cable) |
| Digital Audio Output | 1 (optical) |
| Headphone Jack | 1 (3.5 mm) |
| Tuner | Analog & Digital (DVB-T/C) |
| Supported Video Formats (USB) | MPEG-2, MPEG-4, H.264, DivX |
| Supported Audio Formats (USB) | MP3, AAC, WMA |
| VESA Mount Pattern | 200 x 200 mm |
| Energy Efficiency Class | A+ (EU) |
| Remote Control Included | Yes |
Frequently Asked Questions - LE42H300 HAIER
User questions about LE42H300 HAIER
0 question about this device. Answer the ones you know or ask your own.
Ask a new question about this device
Download the instructions for your Television in PDF format for free! Find your manual LE42H300 - HAIER and take your electronic device back in hand. On this page are published all the documents necessary for the use of your device. LE42H300 by HAIER.
USER MANUAL LE42H300 HAIER
LB32R3A/LB42R3A/LB46R3A/LB55R3A
LE32H300/LE42H300/L32K3/L42K3
LED-LCD TELEVISION
Please READ this manual carefully before operating your TV, and retain it for future reference.
Contents
Warning 3
Important Safety Instructions 4
Introduction 6
Panel Control 6
Connection Options ....7
Remote Control 8
Battery loading 8
Precautions 8
Remote Control Function 9
Function introduction ......9
External Equipment Connections 10
Antenna Connection ....10
Choose Your Connection ....11
VCR Connection 11
External AV Source Setup 11
Connecting a DVD player 11
HDMI or DVI Setup 12
PC Setup 12
Monitor Out Setup 13
Power source 13
Basic Receiving and Playing Operations 14
Switching ON/OFF the TV set 14
Switching ON/OFF the TV set 14
Choose the Menu Language 14
Choose the Input source 14
Picture Menu 14
How to select the picture mode 14
How to customize your own picture status 15
Sound Menu 15
How to select the sound mode 15
How to customize your own sound status.... 16
Channel Menu 16
Programme Edit 16
Auto Tuning 17
Exchange....17
Function Menu ....18
Function Menu Set 18
Adjust Menu 19
Time Menu 19
Lock Setup 20
How to use the password function 20
Streaming Media Playing System ......21
Start/Exit Streaming Media Playing system 22
Operating Method of Streaming Media Menu ..... 22
Playing a Picture 22
Playing a Movie 23
Playing Music 23
Text 23
Settings 23
Maintenance 24
Troubleshooting 24
Specification 25
Format 25
Warning

WARNING
RISK ELECTRIC SHOCK DO NOT OPEN

WARNING:
TO REDUCE THE RISK OF ELECTRIC SHOCK DO NOT REMOVE COVER (OR BACK). NO USER SERVICEABLE PARTS INSIDE. REFER TO QUALIFIED SERVICE PERSONNEL.
*To avoid electric hazards, it is strongly suggested that the back cover not be opened, as there is no any accessory inside the casing.
*If necessary, please contact authorized after-sales services.
^* A lighting flash mark in a triangle: A potentially hazardous situation, which, if not avoided, could result in serious injury by high voltage.
*An exclamation mark in a triangle: Major part or accessory of which technical specifications must be followed if it is to be replaced.
WARNING: To avoid fire or electric hazards, never place your television receiver in an area with heavy moisture. Attention should be paid to avoid accidental scratches or impacts onto the screen.
CAUTION: ☐ Please read this manual carefully before using your television and keep this manual in a good place for future reference.
To achieve the best performance of your television, read this User's Manual carefully and properly store it for future reference.
Information of screen displays and figures in the User's Manual may vary due to technical innovations.
CAUTION: ☐ Unauthorized disassembly of this product is prohibited.
Important Safety Instructions
The product should be tightly fixed to avoid drop damages and even fire.

To avoid fire hazards, do not use this product under direct sunlight or closely to heat sources.

natural_image
Simple line drawing of a sun shining on a book with a sad face, next to a blank board (no text or symbols)Do not locate the product close to water or oil, which may cause fire hazards.
Unplug the power supply and antenna of the product when there is a rainstorm, especially
Thunderstorm.

natural_image
Cartoon illustration of a character with a cloud above rain and falling, no text or symbols presentDo not use damaged or worn electric plugs, and keep electric cord away from heat sources to avoid electric shocks or fire hazards.

Do not connect excessive sockets in parallel or share the same socket by multiple plugs to avoid fire hazards.

The product must be placed on a solid and stable surface to avoid collapse.

Unauthorized disassembly of the television is prohibited to avoid electric shocks or fire hazards. Contact
authorized after-sales service if technical service is needed.

Keep the product away from a transformer or heat source to avoid fire hazards.
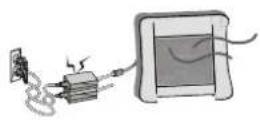

Disconnect the product from power supply and contact authorized after-sales service if abnormal sound is heard in the product.
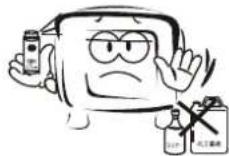
Don't use or store inflammable materials near the product to avoid explosion or fire hazards.
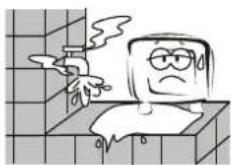
Don't place the product in a humid area to avoid fire hazards.

The antenna of the product should be away from electric cable to avoid electric shocks.

Never touch the plug when your hand is wet as this might cause electric shocks.
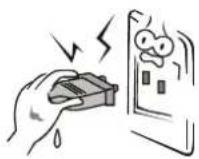
Always make sure that the television is well plugged as poor electric connection might cause fire.

When antenna is used, measures should be taken to prevent water from flowing down along the cable into the television.

Unplug the television, use soft fabric, never chemicals, if you are going to make cleaning of the product. Make sure that no water drops in the product.
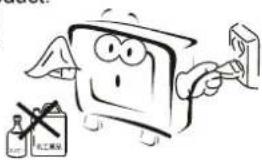
The plug and electric cable must be kept clean to avoid electric shocks or fire hazards.

natural_image
Cartoon illustration of a smiling computer character with a thought bubble and a bottle, accompanied by a crossed-out 'X' symbol (no text or symbols present)Disconnect the television from power supply and antenna when there is a rainstorm or thunderstorm to avoid electric shocks or fire hazards.

Disconnect the television from power supply to avoid electric shocks or fire hazards in a long vocation.

natural_image
Cartoon illustration of a smiling computer with arms raised, next to a hand holding a phone (no text or symbols)Introduction
- This is a simplified representation of front panel.
- Here shown may be somewhat different from your TV.
Panel Control

| 1 | TV/AV | Press this key to open/close signal source options menu. |
| 2 | MENU | Menu display. Press to access the on-screen menu display. |
| 3 | VOL +/- | Press to adjust the volume. In the MENU screen, these buttons serve as right/left buttons. |
| 4 | CH +/- | Press to scan through channels. To scan quickly through channels, press and hold down either +/- . In the MENU screen, these buttons serve as up/down buttons. |
| 5 | POWER Press to turn on and off the TV. | |
| 6 | USB jack | Connect a USB flash drive to view videos,images or listen music. |
| 7 | Mini USB | Connect a USB flash drive to view videos,images or listen music. |
| 8 | SPDIF | Digital Audio Optical output. |
| 9 | AV OUT | Connect the audio L/R and video cables to your other video equipment. |
| 10 | ANT IN | Connect cable pr antenna signal to the TV, either directly or through your cable box. |
| 11 | AV1 IN | Connect the video signal from a video device. |
| 12 | HDMI IN | Connect a HDMI device to receive digital audio and uncompressed digital video. |
| 13 | S-VIDEO | Connect the S-VIDEO cable from an external signal source to this jack. |
| 14 | Headphone | Headphone audio output terminal. |
Connection Options
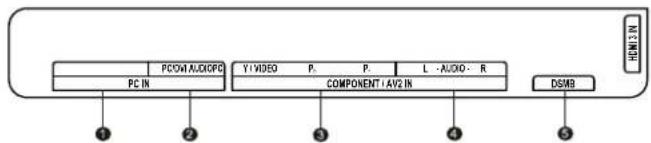
Back panel connections

LE32H300/LE42H300/LE32A300/LE42A300/LE55A300
flowchart
graph LR
    A["PC IN"] --> B["PCOWI AUDIOPC"]
    B --> C["Y1VIDEO"]
    C --> D["COMPONENT1AV2 IN"]
    D --> E["L -AUDIO R"]
    E --> F["DSMB"]
    style A fill:#f9f,stroke:#333
    style B fill:#ccf,stroke:#333
    style C fill:#cfc,stroke:#333
    style D fill:#fcc,stroke:#333
    style E fill:#cff,stroke:#333
    style F fill:#ffc,stroke:#333
| 1 | PC Video In | Connect a video cable from a computer to this jack.. |
| 2 | PC/DVI Audio In | Connect the audio L/R cables from a computer to this jack. |
| 3 | Component Video In | Connect a component video device to these jacks. |
| 4 | AV2 In Connect the video signal from a video device. | |
| 5 | DSMB Mo-Box jack . | |
| 6 | ANT In | Connect cable pr antenna signal to the TV, either directly or through your cable box. |
| 7 | HDMI 3 IN | Connect a HDMI device to receive digital audio and uncompressed digital video. |
| 8 | AV OUT | Connect the audio L/R and video cables to your other video equipment. |
Remote Control
Battery loading
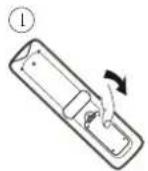
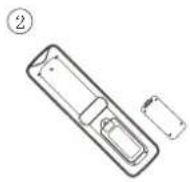
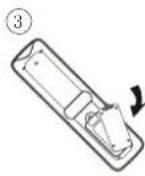
- Slide open the cover of the battery compartment on the back of the remote controller.
- Load two 7# (AAA) alkaline batteries in the compartment, (plus and minus poles to respective mark)
- Replace the cover of the battery compartment.
Precautions
As strong light may interfere the signals, change your position to operate the remote controller if the television cannot be turned on or off as you expect.

natural_image
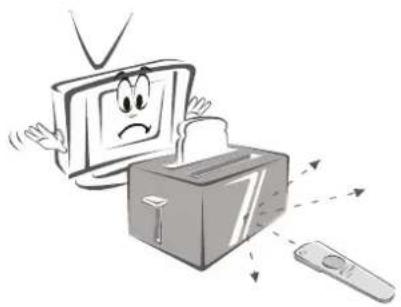
Cartoon illustration of a sad computer monitor with a frowning face, accompanied by a lightbulb and flying birds (no text or symbols)Keep the remote controller away from heat source or humid area to ensure effective performance of the remote controller.

natural_image
Cartoon illustration of a sad computer monitor with a surprised expression, next to a flat-screen monitor and a remote (no text or symbols)Make sure that two AAA alkaline batteries are loaded. The batteries must be of the same type. The batteries must be located properly. The batteries are not rechargeable.


Make sure that there is no obstacle between the remote controller and television set.
natural_image
Cartoon illustration of a computer monitor with a sad face and a box, accompanied by a remote (no text or symbols)Remote Control Function
- The remote control cannot be operated unless the batteries are properly loaded.
- When using the remote control, aim it at the remote control sensor on the TV.
Function introduction

| 1 | POWER | Press this key to start TV from standby mode, press it again to return to standby mode. |
| 2 | USB Press this key for quick switching of streaming media. | |
| 3 | H. LOCK Refer to the Functional Description on Page 20. | |
| 4 | SOURCE Press this key to open/close signal source options menu. | |
| 5 | DSMB Press this key for quick switching of MO-Car. | |
| 6 | STILL | Press this key to freeze the image. Press it again to return to normal screen. (Note: Do not display a still picture for a long time to prevent the screen from burns.). |
| 7 | ARC | Press this key to select the screen display proportion. |
| 8 | MUTE | Press this key to mute the sound, press it again to activate the sound. The sound may be activated by turning the TV on again or increasing the volume. |
| 9 | 0-9 | These keys are used to select a channel. |
| 10 | Q. VIEW | Press this key to return to the previous TV program(only work in the TV mode). |
| 11 | VOL+/- | Used to adjust the volume when the screen menu is closed. |
| 12 | CH+/- | Used to select a TV channel when the screen options menu is closed, specifically, press P^ to decrease the channel and press P^ to increase the channel. |
| 13 | Sound Mode | Press this key continuously to select the sound mode. |
| 14 | Picture Mode Press this key continuously to select the picture mode. | |
| 15 | TV.MENU Press this key to display or exit the main menu. | |
| 16 | D.MENU | Press this key to display the Special Function Menu (it functions when special modules are inserted). |
| 17 | THUMBSTICK (Up/Down/Left/Right) | Allows you to navigate the on-screen menus and adjust the system settings to your preference. |
| 18 | OK Press this key to confirm the selection. | |
| 19 | EXIT | Clears all on-screen displays and returns to TV viewing from any menu. |
| 20 | USB | Control the USB System. |
| Backward Forward II Play/Pause BACK: Back REC: no available ZOOM: Press to magnify/minify an image D.CALL: Press to display program information. | ||
| 21 | TV.CALL | Display on/off. |
| 22 | TIMESHIFT | No available. |
| 23 | VOD | No available. |
| 24 | AUDIO | No available. |
| 25 | PAGE+ | No available. |
| 26 | GUIDE | No available. |
| 27 | TV/FM No available. | |
| 28 | INFO No available. | |
| 29 | PAGE- No available. | |
| 30 | CH.LIST No available. | |
| 31 | FAV | Press this key to display the favorite program list menu. |
| 32 | STOCK | No available. |
| 33 | SLEEP | Displaying the sleep time. |
| 34 | INTERACTION | No available. |
| 35 | Fn | No available. |
| 36 | DDS | No available. |
| 37 | BUSINESS | No available. |
| 38 | GAME | No available. |
External Equipment Connections
Antenna Connection
- Antenna or Cable Service without a Cable Box Connections.
- For optimum picture quality, adjust antenna direction if needed.

flowchart
graph TD
    A["VHF"] --> B["Outdoor antenna (not supply)"]
    C["UHF"] --> D["Single-family Dwellings / Houses (Connect to wall jack for outdoor antenna)"]
    D --> E["Antenna input (75Ω standard coaxial type)"]
    E --> F["ANT"]
    F --> G["Multi-family Dwellings/Apartments Connect to wall antenna socket"]
    G --> H["300Ω twin-lead cable"]
    H --> I["Antenna adapter (not supply)"]
    I --> J["75Ω coaxial cable"]
    J --> K["Plug (additional purchase)"]
Note:
* It is recommended that you'd better use 75Ω coaxial cable to remove the disturbance caused by airwave.
* Don't bind antenna cable and electric wire together.

To improve picture quality in a poor signal area, ■ purchase and install a signal amplifier. If the antenna needs to be split for two Tv's, install a ■ "2-WaySignal Splitter" in the connections. If the antenna is not installed properly, contact your ■ dealer for assistance.
Note
All cables shown are not included with the TV. □
Choose Your Connection
There are several ways to connect your television, depending on the components you want to connect and the quality of the signal you want to achieve. The following are examples of someways to connect your TV. Take LE32A300 as an example, Choose the connection which is best for you.
VCR Connection
To avoid picture noise (interference), leave an adequate distance between the VCR and TV.

flowchart
graph TD
    A["Switch"] --> B["VCR"]
    B --> C["Component 1"]
    B --> D["Component 2"]
    C --> E["External Circuit"]
    D --> F["External Circuit"]
    E --> G["Output 1.5V"]
    E --> H["Output 1.6V"]
    E --> I["Output 1.7V"]
    E --> J["Output 1.8V"]
    E --> K["Output 1.9V"]
    E --> L["Output 2.0V"]
    E --> M["Output 2.1V"]
    E --> N["Output 2.2V"]
    E --> O["Output 2.3V"]
    E --> P["Output 2.4V"]
    E --> Q["Output 2.5V"]
    E --> R["Output 2.6V"]
    E --> S["Output 2.7V"]
    E --> T["Output 2.8V"]
    E --> U["Output 2.9V"]
    E --> V["Output 3.0V"]
    E --> W["Output 3.1V"]
    E --> X["Output 3.2V"]
    E --> Y["Output 3.3V"]
    E --> Z["Output 3.4V"]
    E --> AA["Output 3.5V"]
    E --> AB["Output 3.6V"]
    E --> AC["Output 3.7V"]
    E --> AD["Output 3.8V"]
    E --> AE["Output 3.9V"]
    E --> AF["Output 4.0V"]
    E --> AG["Output 4.1V"]
    E --> AH["Output 4.2V"]
    E --> AI["Output 4.3V"]
    E --> AJ["Output 4.4V"]
    E --> AK["Output 4.5V"]
    E --> AL["Output 4.6V"]
    E --> AM["Output 4.7V"]
    E --> AN["Output 4.8V"]
    E --> AO["Output 4.9V"]
    E --> AP["Output 5.0V"]
Connection Option 1
Set VCR output switch to channel 3 or 4 and then tune the TV to the same channel number.
Connection Option 2
Connect the audio and video cables from the VCR's output jacks to the TV input jacks, as shown in the figure. When connecting the TV to VCR, match the jack colors (Video = yellow, Audio Left = white, and Audio Right = red).
2 Insert a video tape into the VCR and press PLAY on the VCR. (Refer to the VCR owner's manual.)
3 Select the input source with using the SOURCE button on the remote control, and then press ◀ / ▶ button to
select the source, press the OK button to confirm.
External AV Source Setup
How to connect
Connect the audio and video cables from the • external equipment's output jacks to the TV input jacks, as shown in the figure.
When connecting the TV to external equipment, match the jack colors (Video = yellow, Audio Left = white, and Audio Right = red).

flowchart
graph TD
    A["Central Network Interface"] --> B["Node 1"]
    A --> C["Node 2"]
    A --> D["Node 3"]
    A --> E["Node 4"]
    A --> F["Node 5"]
    A --> G["Node 6"]
    A --> H["Node 7"]
    A --> I["Node 8"]
    A --> J["Node 9"]
    A --> K["Node 10"]
    A --> L["Node 11"]
    A --> M["Node 12"]
    A --> N["Node 13"]
    A --> O["Node 14"]
    A --> P["Node 15"]
    A --> Q["Node 16"]
    A --> R["Node 17"]
    A --> S["Node 18"]
    A --> T["Node 19"]
    A --> U["Node 20"]
    A --> V["Node 21"]
    A --> W["Node 22"]
    A --> X["Node 23"]
    A --> Y["Node 24"]
    A --> Z["Node 25"]
How to use
1 Select the input source with using the SOURCE button on the remote control.
2 Press ◀ / ▶ button to select the desired source.
3 Press OK button to confirm.
4 Operate the corresponding external equipment.
Connecting a DVD player
How to connect
1 Connect the DVD video outputs (Y, P_b/C_b , P_r/C_r ) to the COMPONENT (Y, P_b/C_b , P_r/C_r ) input jacks on the TV and connect the DVD audio outputs to the AUDIO jacks on the TV' as shown in the figure.

flowchart
graph TD
    A["PC"] --> B["PC/W/AUDR/P"]
    B --> C["Y/VIDEO"]
    C --> D["P0"]
    D --> E["COMPONENT / AV2/IN"]
    E --> F["L-AUDR - R"]
    F --> G["DSINS"]
    G --> H["USB13"]
How to use
Turn on the DVD player, insert a DVD.1
Use the SOURCE button on the remote control and then press ◀ / ▶ button to to select COMPONENT mode, press the OK button to confirm.
3 Press Play button on external equipment for program play.
4 Refer to the DVD player's manual for operating instructions.
HDMI or DVI Setup
To watch digitally broadcast programs, purchase and connect a digital set-top box.
How to connect
Use the TV's COMPONENT (Y, P_b/C_b , P_r/C_r ) INPUT jacks, VGA or HDMI port for video connections, depending on your set-top box connections available. Then, make the corresponding audio connections.
How to use
Turn on the digital set-top box. 1 (Refer to the owner's manual for the digital set-top box.)
Use SOURCE on the remote contralto select PC or 2 HDMI (Y, P_b/C_b , P_r/C_r ) mode.
3 Prelay button on external equipment for
program play.

PC Setup
How to connect
1 Use the TV's PC IN port for video connections.
2 Then, make the corresponding audio connection. If using a sound card, adjust the PC sound as required.
How to use
1 Turn on the PC and the TV.
2 Turn on the display by pressing the POWER button on the TV's remote control.
3 Use SOURCE on the remote control to select PC source.
4 Check the image on your TV. There may be noise associated with the resolution, vertical pattern, contrast or brightness in PC mode. If noise is present, change the PC mode to another resolution, change the refresh rate to another rate or adjust the brightness and contrast on the menu until the picture is clear. If the refresh rate of the PC graphic card can not be changed, change the PC graphic card or consult the manufacturer of the PC graphic card.

flowchart
graph TD
    A["Power Supply"] --> B["Switch"]
    B --> C["Device 1"]
    B --> D["Device 2"]
    B --> E["Device 3"]
    B --> F["Device 4"]
    B --> G["Device 5"]
    style A fill:#f9f,stroke:#333
    style B fill:#ccf,stroke:#333
    style C fill:#cfc,stroke:#333
    style D fill:#fcc,stroke:#333
    style E fill:#cff,stroke:#333
    style F fill:#ffc,stroke:#333
    style G fill:#cfc,stroke:#333

Note
Avoid keeping a fixed image on the TV's screen for □ along period of Time. The fixed image may become permanently imprinted on the screen.
The synchronization input form for Horizontal and □ Vertical frequencies is separate.
To obtain the best picture, do not play the USB, □ YPbPr, HDMI or PC source at the same time.
Monitor Out Setup
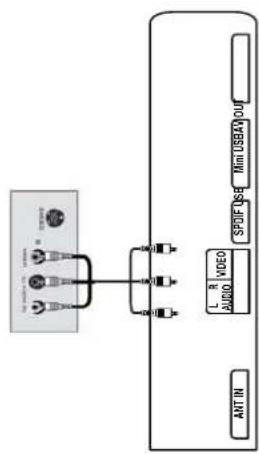
The TV has a special signal output capability which allows you to hook up a second TV or monitor.
Connect the second TV or monitor to the TV's AV OUT by the tie line. See the Operating Manual of the second TV or monitor for further details regarding that device's input settings.
flowchart
graph TD
    A["Device"] --> B["SPDF (S)"]
    A --> C["Audio"]
    A --> D["Video"]
    A --> E["Ant IN"]
    B --> F["Min USAO"]
    C --> G["Video"]
    D --> H["Ant IN"]

Note
Component, PC, HDMI input sources cannot be □ used for Monitor out.
When connecting with external audio equipments, □ such as amplifiers or speakers, please turn the TV speakers off.
Power source
TO USE AC POWER SOURCE
Use the AC polarized line cord provided for operation on AC. Insert the AC cord plug into a standard polarized AC outlet.

Polarized AC Cord Plug

Note
Never connect the AC line cord plug to other than □ the specified voltage. Use the attached power cord only.
If the polarized AC cord does not fit into a non polarized AC outlet, do not attempt to file or cut the blade. It is the user's responsibility to have an electrician replace the obsolete outlet.
☐ If you cause a static discharge when touching the unit and the unit fails to function, simply unplug the unit from the AC outlet and plug it back in. The unit should return to normal operation. Polarized AC Cord Plug.
Basic Receiving and Playing Operations Playing Operations
Switching ON/OFF the TV set
In the manual, the OSD (on screen display) may be different from your TV's because it is just an example to help you with the TV operation.
Switching ON/OFF the TV set
First, connect power cord correctly and the power indicator will light.
2 PROVER on the remote control again.
3 If you want to exchange to standing by status, please press down POWER on the remote control
4 Disconnect the power supply or unplug the television if it is intended to completely cease the television performance.
Choose the Menu Language
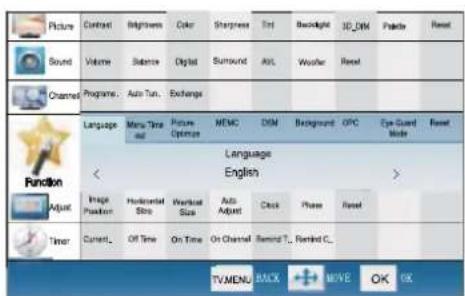
When you satisfied with your set for the first time, you must select the language which will be used for displaying menus and indications.
1 PMENU and ▲ / ▼ to select Function menu.
2 Press ◀ / ▶ button to select language option.
3 Select a particular language by pressing OK repeatedly.
4 WHEN you satisfied with your choice, press return to normal viewing.
Choose the Input source
Change the picture source so you can watch your TV, VCR, Cable, or any other devices that are connected to your TV.
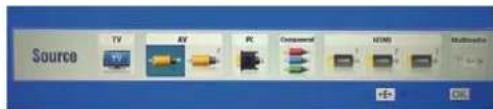
Press SOURCE button to enter the Input Source menu and then use ◀ / ▶ button to select the desired items (TV, AV1, AV2, Component, PC, HDMI1, HDMI2, HDMI3, Multimedia).
2 Press OK button to confirm.
Picture Menu
The TV menu gives you an overview of the menus you can select.

Depending on the input signal, one or more menu items may not be selectable.
How to select picture mode
The picture mode provides the pre-defined images settings: Standard, Mild, User, Dynamic and EyeGuard.
You can press P.MODE button on the remote control to select the option Standard, Mild, User, Dynamic and EyeGuard.
How to customize your own picture status
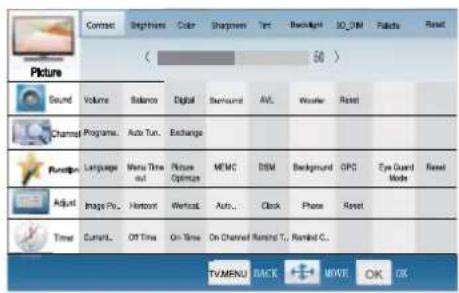
Press 1 MENU button and then ▲se▼ button to select Picture menu.
2 Press ◀ / ▶ button to select the desired items., press OK to enter its submenu.
3 Press ◀ / ▶ button to adjust the setting.
Contrast □
This will adjust the intensity of bright parts in the picture but keep the dark parts unchanged.
Brightness
This will adjust the light output of the complete picture, which will mainly affect the darker areas of the picture.
Color
This will adjust the saturation level of the colors to suit your personal preference.
Sharpness □
This will adjust the sharpness of fine details in the picture.
Note
The picture options can only be adjusted in the ☐ User mode. The other picture modes are preset.
Tint
Allows you to select the color mix (Tint) of the picture.
Backlight
press ◀ /▶ to adjust the backlight(0----10).
3D\_DIM □
Select the 3D-DIM Demo or 3D-DIM Calibration, Press OK to set.
Palette:
Press ◀ / ▶ to select the Palette option, and then press OK to enter its submenu, and finally press
▲ /▼ to select a toner pattern from six patterns (Cool2, Cool1, Standard, Warm1, Warm2, User) to your color preference. Normally, the Standard mode is selected.
If the User mode is selected, press ◀/▶ to enter the palette menu, (as shown in the below figure), and then press ◀/▶ to select a benchmark in the range of 2500K\~15000K from warm color to cold color, afterwards press ▲/▼ to adjust; if a different benchmark is selected for adjustment, the original adjustment data will be automatically cleared.

Reset
Press ◀ / ▶ to select OK or Cancel.
Sound menu
How to select sound mode
Press 1 MENU button and then ▲se▼ button to select Sound menu.
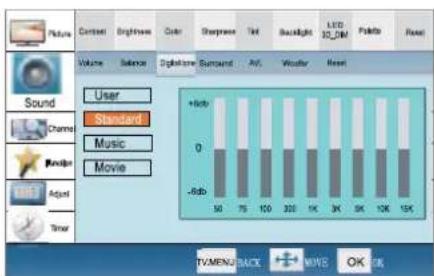
2 Press ◀/▶ button to select Digital tone Mode. press OK to enter its submenu.

3 Press ▲ / ▼ button to select the option Standard, Music, Movie and User.
- You can also press S.MODE button on the remote control to select the Audio Mode: Standard, Music, Movie and User.
How to Customize your own sound status
Press 1 MENU button and then use▼ button to select Sound menu.
2 Press ◀ / ▶ button to select the desired items, press OK to enter its submenu.
3 Press ◀ / ▶ button to adjust the setting.
Volume □
Press ◀ / ▶ to adjust the volume of a TV Program.
Balance □
This will adjust the output of the right and left speakers to obtain the best stereo reproduction for your listening position.
The intermediate value is 0. When indication value of Balance increases toward 50, sound of the right and left speakers becomes stronger and weaker, respectively. When indication value of Balance decreases toward -50, sound of the right and left speakers becomes weaker and stronger.
Digital tone □
This select the modes for sound reproduction dependent on the broadcast signals or signals from external inputs received.
Select the mode of sound (User/Standard/Music/Movie). If the User mode is selected, press ◀ /▶ to select a benchmark in the range of 50\~15K from bass to treble, afterwards press ▲ /▼ to adjust, if a different benchmark is selected for adjustment, the original adjustment data will be automatically cleared.
Surround □
The surround sound feature expands the audio listening field wider and deeper to create exceptional sound quality from the TV's speakers.
AVL (Automatic Volume Limit) □
This will reduce the differences in volume level among broadcasters.
Woofer
To adjust the super bass. Press ◀ / ▶ to select super bass off, low, high or Middle.
Reset
Return to factory default settings.
Channel menu
Display channel menu by pressing SOURCE button then use ◀/▶ button to select the source of TV item.
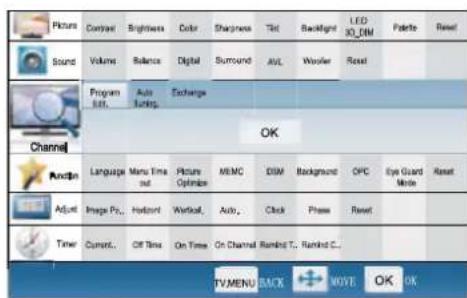
1 PMENU button and then use ▲ / ▼ button to select Channel menu.
2 Press ◀ / ▶ button to select the desired items, press OK to enter its submenu.
Programme Edit
You can add a label to a channel to make it easier to find.
1 Press MENU button and then use ▲ / ▼ button to select Channel menu.
2 Press ◀ / ▶ button to select the Programme Edit, and then press OK to enter submenu.
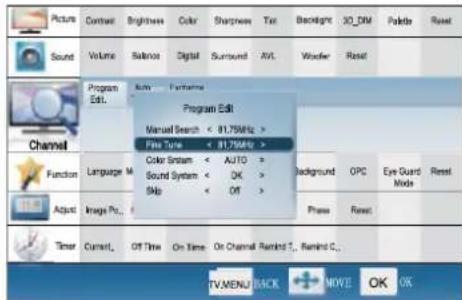
Manual Search □
Press ▲ / ▼ to select the Search option, and finally press ◀ / ▶ to start manual search. Upon finding a program, the search will automatically stop, and the program will be stored onto the current channel. You may stop the search by pressing OK or MENU.
Fine Tune □
Press ▲ / ▼ to select the Fine Tune option, and then press ◀ / ▶ to start UP or DOWN fine tuning until obtaining a relatively good picture effect. The fine tuning function is for the purpose of improving picture effect through fine tuning when that of a certain program is not good enough. Normally, the optimal picture effect can be obtained without fine tuning when watching TV programs, and fine tuning is to meet the need of adjusting a certain program.
Color system □
Press ▲ / ▼ to select the Color Systems option, and then press ◀ / ▶ to select correct color system.
The TV is designed with three systems for your choice, i.e. Auto, PAL, SECAM and NTSC. Generally, the system is set as Auto and it is not necessary to make an adjustment. The system is normally set as Auto during auto search.
Sound system □
The TV is designed with four systems for your choice, i.e. DK, M, BG and I. Generally, it is not necessary to adjust the system. The system is normally set as DK during auto search.
Skip □
When the skip is set ON, the channel will be skipped when pressing CH ∧ or CH ∨ and only can be selected by pressing 0-9 numerical keys.
If you want to recover the skipped channel
-
Use Direct-digit Choosing button to select the number of the channel to be recovered.
-
Do the above steps again.
-
Press ◀ / ▶ to set Skip as Off.
Auto Tuning
Press MENU button and then ▲se▼ button to select Channel menu.
2 Press ◀ / ▶ button to select Auto Tuning, then press OK the menu opens.

Press 📄 / ▶ button to select OK, press OK button on the remote to start to scan. Press MENU button to return to the previous menu, press EXIT button to EXIT the menu screen.
All channels now available will be automatically preset in order. After the search has finished, the first program
number will display on the screen.
This search automatically adds only the active channels in your area to the TV's memory.
It deletes any channels on which there is no broadcast or a poor signal.
The channels found are automatically saved.
Exchange
Press MENU on the remote control unit or MENU on the TV's front panel to display main menu, and then press ▲/▼ to select Channel menu.
2 Press ◀ / ▶ to select the Prog. Exchange option, and then press OK to enter its submenu.
Press ? /▼ to select the To Channel option, and then press ◀/▶ to set the found to be exchanged to.

After adjusting the current channel and the found to be exchanged to, press ▲ /▼ to move the cursor to the Exchange option, and then press OK to start exchange and exchange the program on current channel to the channel you set for exchange.
Function Menu
Function Menu Set
Press MENU on the remote control unit or MENU on the TV's front panel to display the main menu, and then press ▲ / ▼ to select the Function menu.
Press 2 / ▶ to select the option to be adjusted, and then press ◀ / ▶ to adjust it.
Language
Two languages (i.e. Simplified Chinese and English) are available for your choice.
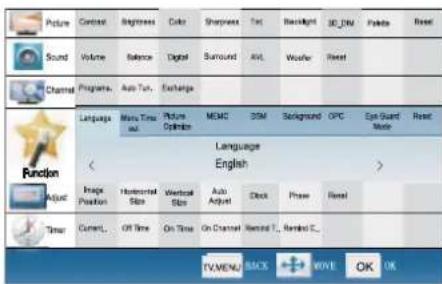
Menu Timeout □
The option is for adjusting the menu display time. Press ◀/▶ to set the desired time (5-15s).
Picture Optimize □
Press ◀◀ / ▶ to select the Picture Optimize option.
Press •OK to enter the submenu.
Press ▲ /▼ to select theDCDI/Color
Management to be adjusted, and then press ◀ / ▶ to select ON or OFF.
Press ▲ / ▼ to select the DNR to be adjusted, and then press ◀ / ▶ to select Low/Middle/High/ Off.

MEMC
Press ◀ /▶ to set ON, Demo1, Demo2 or OFF, the moving picture will be better when MEMC is on function. (This function is only available for LE55A300/LB55R3)
DSM
Press ◀ /▶ to select DEMO OFF, DEMO1, DEMO2, DEMO3.
Blackground
Press ◀ /▶ to set ON or OFF, if you select ON, the TV screen will be blue if no signals are available.
OPC
Press ▲ / ▼ to select the OPC, then press OK and ◀ / ▶ to select Uesr/Dynamic/Daylight/Normnal/Night. Press ▲ / ▼ to select the Adjust, then press ◀ / ▶ to set 0-10. Press ▲ / ▼ to select the Dynamic Contral to be adjusted, and then press ◀ / ▶ to select ON or OFF.
Eye guard Mode
Press ◀ / ▶ to select the Eye guard Mode option. Press •OK to enter the submenu. Press ▲ / ▼ to select the Power E.G.Mode, then press ◀ / ▶ to select Standard/Eye Guard/Curtain. Press ▲ / ▼ to select the Change Ch.E.G/Watching E.G/Watching E.G.Delay to be adjusted, and then press ◀ / ▶ to select ON or OFF.

Reset □
Press ◀ / ▶ to select OK or Cancel which with Do you want to reset option values.
Adjust Menu
The TV can be used as a display, and you may adjust relevant settings. Press SOURCE to switch the signal input to PC mode.
1 PMENU to display the screen main menu, and then press ▲ / ▼ to select the Adjust menu as shown in the below figure.
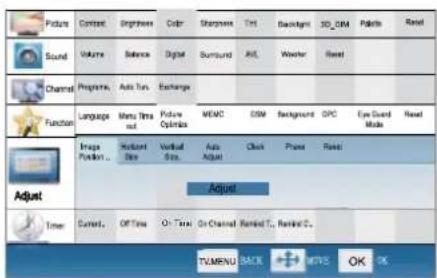
Press 2 / ▶ to select the option to be adjusted.
3 Press ◀ / ▶ to adjust it.
Image Position □
This is used to adjusting H-Position and V-Position.
H-Size □
Horizontal size of picture can be adjusted in this item.
V-Size □
Vertical size of picture can be adjusted in this item.
Auto Adjust □
Vertical and Horizontal position of picture can be adjusted in this item.
Clock □
This is used for adjusting the phase of pixel clock in PC mode.
Phase □
This is used for adjusting H Position and V Position as well as relative parameters in PC modes.
Reset □
Return to factory default settings.
Time Menu
Press 1 MENU button and then▲use▼ button to select Time menu.
2 Press ◀ / ▶ to select the desired option, press OK to enter its submenu.

Current Time: The current time is calculated from the moment upon turning the TV on. At first, check whether the time indicated on the TV's clock is consistent with the standard time of your time zone; if not, adjust the clock as follows:
- Press MENU on the remote control unit or MENU on the TV's front panel to display the main menu, and then press ▲ / ▼ to select the Timer menu, afterwards press ◀ / ▶ to select the Current Time option, press OK to enter the submenu.
- Press ◀ / ▶ to set hour and minute.
Press ▲ / ▼ to adjust the time.
- After finishing time setting, press OK or MENU to confirm.
Off Time/On Time: Set a time for the TV to turn off or on. This function allows the TV to automatically turn on or enter standby mode upon reaching the preset time.
- Press OK to enter the setting screen, and then press ▲ / ▼ to select ON or OFF, if you select ON, press ◀ / ▶ to set hour and minute. ON indicates
the On/Off Time function is enabled while OFF indicates the function is disabled.
. After finishing time setting, press OK or MENU to confirm.

Note
After setting the On/Off Time function, if the TV is AC off or forcible DC off, the function will be automatically cleared.
On channel: This function is used in combination with the On/Off Time function. When the TV turns on upon reaching the On time, it automatically enters the preset channel.
Press •OK first and then press/▶ to set the On Channel or OFF.
Remind Time/Remind channel: The remind time and remind channel functions allow the TV to automatically enter the preset channel at preset time. If the TV is AC off or forcible DC off, the preset time will be cleared.
- Press MENU on the remote control unit or MENU on the TV's front panel to display the main menu, and then press ▲ / ▼ to select the Timer menu, afterwards press ◀ / ▶ to select the Remind Time option.
Press OK to enter the setting screen, and then press ▲ /▼ to select ON or OFF, if you select ON, press ◀ /► to set hour and minute, and then press ▲ /▼ to adjust time.
- After finishing time setting, press OK or MENU to confirm
Press ◀ /▶ to select the Remind Channel option, and press OK first and then press ◀ /▶ to set the found.
Lock Setup
The television has the function of security default lock. Password needs to be entered when the program lock mode is to be set.
How to use the password function
Press H. LOCK, the TV screen will display Enter Password to prompt the user to enter password by pressing corresponding numerical keys; if the password is correct, the user enters the Lock Set menu; if incorrect, the user is required to enter a password again.
If there is no operation for a few seconds, the display will automatically disappear.
The Lock Set menu is as follows:
| Lock Set | ||
| Change Password | OK | |
| Tuning Lock | < | off > |
| Preset Source | < | off > |
| Preset Prog | < | off > |
| Source Lock | OK | |
| Child Lock | < | off > |
| Max Volume | < | 100 > |
| Power On Volume | < | off > |
| Unlock | OK | |
Change Password □
After entering the Lock Set menu, press ▲ / ▼ to select the Change Password option, and then press OK to display the Change Password menu, afterwards enter a new 4-digit password by pressing numerical keys and repeat entering this password once again. If the user does not want to change the password in halfway, he may press MENU to exit from this menu.

Note
The initial password is 0000, and the password setting will not be changed after executing the Unlock option.
Tuning Lock □
Press ▲ /▼ to select the Tuning Lock option, and then press ◀ /▶ to set ON or OFF.
(If set ON, the Tuning Menu is not available in TV mode. To make any operation related to the Tuning Menu, it need to enter the Lock Set menu to set Tuning Lock OFF or execute the Unlock option.)
Preset Source Setting □
Preset Source may be set as Off, TV, AV, Component, HDMI, PC and USB. When the Preset Source is set as TV, after entering the Preset Channel menu, press ◀ / ▶ to select the preset channel, and the channel will be forcibly switched to the preset one upon turning the TV on; when the Preset Source is set as other signal sources, the TV will be forcibly switched to the preset source upon turning on. For example, when the Preset Source is set as YP b P r /YC b C r , the TV will be switched to YP b P r /YC b C r upon turning on; when set as OFF, the preset function will be closed.
Preset Prog □
Only when the Preset Source is set as TV can the Preset Channel option be available. Press ◀ / ▶ to select preset channels from 0-254.
Source Lock □
This function is used to prohibit watching a program from various external inputs, e.g. AV and PC, etc. Press ▲ / ▼ to select a certain option, and then press OK to enter the submenu, press ◀ / ▶ to set an external input lock ON or OFF. If an external input lock is set ON, after entering this mode, the screen will display blue background with muting and a prompt Source Lock; during Source Lock prompt, Source Lock will remain if there is no other display on the screen. To watch a program from a locked external input, just enter Source Lock submenu to set corresponding status as OFF or execute the Unlock option in the Lock Set menu.
Child Lock Setting □
Press ▲ /▼ to select the Child Lock option, and then press ◀ /▶ to set ON or OFF. If set ON, this control key will not respond, and the screen will display Child Lock when the key is pressed; if no other operation is made, the display will automatically disappear later. To resume Child Lock function, just enter the Lock Set menu to set Child Lock OFF or execute the Unlock option.
Max Volume Setting □
Press ▲ / ▼ to select the Max Volume option, and then press ◀ / ▶ to freely adjust the max volume within the range of 0\~100. After finishing the setting, the max volume in the Volume menu will not exceed the preset max volume; for example, if the preset max volume is 30, the volume in the Volume menu can not be increased any longer upon reaching 30; if the preset max volume is less than the value in the Volume menu, the latter will decrease along with the decrease of preset max volume.
Power on Volume □
Press ▲ / ▼ to select the Power on Volume option, and then press ◀ / ▶ to freely adjust the volume within the range of 0\~100.
Unlock Setting □
Press ▲ /▼ to select the Unlock option, and then press OK to clear all the lock settings, namely set all the lock setting options as OFF; the Preset Channel is set as OFF and max volume returns to 100 (except password).
Streaming Media Playing System
Note
The diagrams in the following section are ☐ schematic and only for your reference. Please see the actual product if necessary.
1 Supported file formats:
Picture: ♦. JPEG; PNG; BMP;
Music: *. Mp3(8-320kbps; WMA(32-192kbps); AAC(16-576kbps)
•Movie:
MPEG4: *. avi files in accordance with Div*4. x/5. x Protocol;
MPEG2: some *.mpeg files;
MPEG1:*.dat and some *.mpeg files; RealVideo
- Text:*.Txt.
Note
☐ Due to the particularity of file coding, some files may be unable to be read.
2 Supported equipment:
Support the equipment that supports Mass Storage Protocol and whose file system is FAT/NTFS/FAT16/FAT32, such as some USB disks, mobile hard disks, card readers, MP3 players and digital cameras. If USB equipment could not be identified due to unsupported file system, please format the equipment to the above-mentioned file system;
3 The external card reader supports most of the digital cards in the current market; the types of digital cards that can be read are relevant to the performance of selected card reader; you may attach standard mobile hard disks (working voltage 5.0V, working current not higher than 500mA); during media playing, do not pull out storage media, otherwise it may cause system halt, damage the files in storage media or damage USB equipment; sometimes, the TV may halt due to overhigh information error rate, in which case you should restart the system; there are a lot of nonstandard USB mobile equipment in the market, they may not be identified when connected to the streaming media playing system; the above phenomena may also occur on computers and are not the TV's fault.
To achieve smooth playing, ensure the following:4
The file code rate should be lower than 300KB/S; • Due to the limitation of USB signal transmission • distance, it is recommended not to use USB patch cord, in case of using the cord, make sure that its length is not over 1m;
Use high-speed USB equipment in conformity with USB2.0 Interface Standard; if USB equipment in conformity with USB1.1 Interface Standard is used, the playing may be unsmooth.
5 Although many movie files are with such postfixes as avi and mpeg, actually there are several formats in the files; however, the TV can only play some files in avi and mpeg formats. Some files with the postfix "dat" are not movie files, but data files commonly used in computers, and they can not be played as movies.
Start/Exit Streaming Media Playing System
1 Press USB on the remote control unit to select the streaming media function.
2 Insert USB equipment into corresponding USB interface 2s after starting the system.
3 After entering the system menu, press ◀ / ▶ on the remote control unit to select the required USB equipment, and then press ▲ / ▼ on the remote control unit to select the required file.
4 Poksto enter the selected file.
To exit the streaming media playing system and watch a TV program, you must return to the streaming media main menu at first (to protect equipment), and then press SOURCE to select TV or directly press USB to return to the TV mode.

Operating Method of Streaming Media Menu
Press 🔒 /▼ to scroll through main menu or submenu and select your desired option.
2 Pok to confirm your selection.
3 PREV/FWD to achieve the FF (fast forward) and FB (fast back) of the movie or music being played.
4 PLAY/PAUSE to pause playing, and press it again or press OK to continue playing.
5 PZOOM to magnify pictures; in zoom mode, press ◀ / ▶ and ▲ / ▼ to move the picture.
6 Press OK to display and press EXIT to exit the screen display information while playing.
7 BACK to stop playing, or return to the previous menu, and press BACK repeatedly to return to the main menu.
Playing a Picture
After entering USB main interface, press 🔔 / ▶ to select a harddisk partition, and then press ▲ / ▼ to select the Picture option.

2 Press OK to confirm the selection and enter the picture playing interface.
3 Press ◀ / ▶ to change page, and press ◀ / ▶ to select the picture you want to play, and then press OK to enter the playing display interface.
- Press ZOOM to magnify the picture, and then press ◀ / ▶ / ▲ / ▼ T to move the picture. Press ◀ / ▶ to select the last or next picture. Press ▲ / ▼ to rotate the picture.
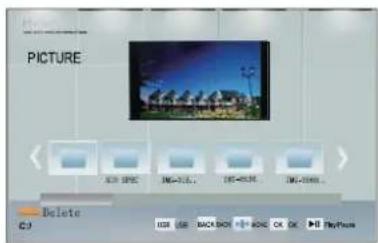
4 To exit playing, just press BACK repeatedly.
Playing a Movie
After entering USB main interface, press 1 / ▶ to select a harddisk partition, and then press ▲ / ▼ to select the "Movie" option.

2 Press OK to confirm the selection and enter the movie playing interface.
3 Press ▲ /▼ to change page, and press ◀ /► to select the movie you want to play, and then press OK to enter the playing display interface.
Press ◀ / ▶ to select the last or next movie.
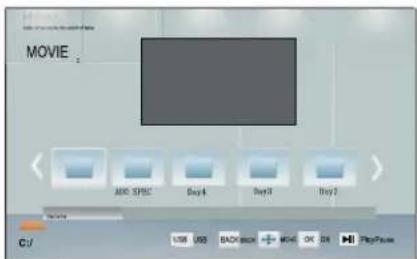
4 To exit playing, just press BACK repeatedly.
Note
The menu display varies with the number and □ names of files in your equipment.
Playing Music
After entering USB main interface, press 1 / ▶ to select a harddisk partition, and then press ▲ / ▼ to select the Music option.
2 Press OK to confirm the selection and enter the music playing interface.
3 Press ◀ /▶ to change page, and press ▲/▼ to
select the music you want to play, and then press OK to play the music.

4 To exit music playing, just press BACK repeatedly.
Text
After entering USB main interface, press 1 / ▶ to select a harddisk partition, and then press ▲ / ▼ to select the Text option.
2 Poksto confirm the selection and enter the text playing interface.
3 Press ▲/▼/◄/► to select the text you want to read, and then press OK to play the text reading interface. Press ▲/▼ to change page, and press BACK to exit the reading interface.

4 To exit the Text mode, just press BACK repeatedly.
Settings
After entering USB main interface, press 🔒 /▼ to select the Settings option.
2 Pok to confirm the selection and enter the settings selection interface, and then press ▲/▼ to select the required options.

Photo Slide Time □
Set the scan speed of pictures to be scanned in slide form.
There are three options (Middle/Slow/fast). Press
◀ / ▶ to select the desired option.
Movie Subtitle □
Select "ON" or "OFF".
Maintenance
Maintenance
Early malfunctions can be prevented. Careful and regular cleaning can extend the amount of time you will have your new TV. Be sure to turn the power off and unplug the power cord before you begin any cleaning.
Cleaning the Screen
Here's a great way to keep the dust off your screen for a while. Wet a soft cloth in a mixture of lukewarm water and a little fabric softener or dish washing detergent. Wring the cloth until it's almost dry, and then use it to wipe the screen.
2 Make sure the excess water is off the screen, and then let it air-dry before you turn on your TV.
Cleaning the Cabinet
To remove dirt or dust, wipe the cabinet with a soft, dry, lint-free cloth. Please be sure not to use a wet cloth.
Extended Absence
If you expect to leave your TV dormant for a long time
(such as a vacation), it's a good idea to unplug the power cord to protect against possible damage from lightning or power surges.
Troubleshooting
For the sake of time and cost, it is strongly recommended that you checkout the problem by yourself according to the instructions listed hereunder before contacting the after-sales service for technical assistance.
Problem Possible remedies
| No picture, no sound | Turn onthe power supply; Properly plug theTV setto the powersocket; Check to see if the power cable of other appliance is plugged in the TV set. Make sure that the power cable of the TV set is properly connected. |
| Problem Possible remedies | |
| Good picture, no sound | Depress the volume button; Check out theaudio frequency input signals. |
| Failure of remote controller | Check to see if the remote controller display receiving window are blocked by other objects and if batteries are properly loaded. |
| No color, weak color or poor picture | Designate the item of color from the Picture menu and depress the volume button; Keep the display and VCR separate a reasonable space; Activate some functions to store picture brightness; Make sure that the display and signal source are available and turned on. |
| Excessive brightness or darkness | Adjust brightness or contrast. |
| Picture too big or small | Adjust the setup of sizes. |
| One speaker failure | Balance the sound in the menu. |
| Slight sound from display | It is a normal phenomenon. |

Note
Do not leave the television with static picture in an extended period as it may result in residual image on your television screen.

Note
Production of the screen requires high and precision technologies. However, there might be some dank or bright (red, blue or green) spots, or some anomalous stripes or spots. This is not defect. If the TV set is used in an area 2,400 meters above the sea level where the air pressure is below 750 hpa, the picture on the screen maybe affected and a muffled sound might be produced. These phenomena might happen in the area 1,500 meters above the sea level. This is resulted from difference between air pressures inside and outside the display. This is not a defect covered by the limited warranty.
Specification
Basic specification and parameter
| Power ~ 150-240V 50/60Hz | |
| Color System PAL, SECAM,NTSC | |
| Stand-by Consumption | D/K, B/G, I, M |
| Video Input USB,AV, Component, HDMI or PC, | |
| Environmental condition | Operating temperature range: +5°C - +35°C Operating humidity range: 20%-80% Storage Temperature: -15°C~+45°C Storage Humidity: 5%-90%, non-condensing If the storage temperature is lower than 0 °C, please first lays the machine aside after in the operating temperature environment carries on restores 2 hours, then electrifies the use again, protects your television not to receive the damage. |
Accessories
Owner's manual x1
Remote Control x1
Alkaline battery x2
(This is only available for certain
models, please refer to actual products.)
Product main size (contain stand)
| MODEL | Power Consumption | Net Size(LxWxH) | Net Weight |
| LE32A300 | 60W | 788x210x559mm | 8.7Kg |
| LE42A300 | 110W | 1019x265x705mm | 19.5Kg |
| LE55A300 | 160W | 1315x280x689mm | 28.5Kg |
| LB32R3A | 100W | 796x230x590mm | 11.8Kg |
| LB42R3A | 160W | 1020x290x724mm | 27.5Kg |
| LB46R3A | 180W | 1122x330x789mm | 29.0Kg |
| LB55R3A | 300W | 1328x365x895mm | 39.0Kg |
| LE32H300 | 60W | 782x160x557mm | 10.8Kg |
| LE42H300 | 110W | 1019x265x705mm | 19.5Kg |
| L32K3 | 100W | 798x230x575mm | 12.6Kg |
| L42K3 | 160W | 1021x290x704mm | 20.5Kg |

Note
Design and specifications are subject to change ☐ without notice. The dimension in this manual is a approximation.
Format
Recommendatory HDTV/SDTV(YPbPr/YCbCr) format
| Sequence Number | Format | Refresh Frequency (Hz) |
| 1 480i/480p 60 | ||
| 2 576i/576p 50 | ||
| 3 720p | 50/60 | |
| 4 | 1080i/1080p | 50/60 |
Recommendation PC connection input format
| sequence number | Format | H-Frequency (KHz) | V-Frequency (Hz) |
| 1 640*480@60Hz 31.5 60 | |||
| 2 800*600@60Hz 37.88 60 | |||
| 3 | 1024*768@60Hz (Recommendatory) | 48.36 60 | |
Recommendation DVI connection input format
| Sequence Number | Resolution | Refresh Frequency (Hz) |
| 1 640*480 60 | ||
| 2 800*600 60 | ||
| 3 1024*768 60 |
Recommendation HDMI connection input format
| Sequence Number | Format | Refresh Frequency (Hz) |
| 1 480i/480p 60 | ||
| 2 576i/576p 50 | ||
| 3 720p 50/60 | ||
| 4 1080i/1080p | 50/60 |
- LED-LCD TELEVISION
- Contents
- Warning 3
- Important Safety Instructions 4
- Introduction 6
- Remote Control 8
- Remote Control Function 9
- External Equipment Connections 10
- Basic Receiving and Playing Operations 14
- Switching ON/OFF the TV set 14
- Picture Menu 14
- Sound Menu 15
- Channel Menu 16
- Function Menu ....18
- Adjust Menu 19
- Time Menu 19
- Lock Setup 20
- Streaming Media Playing System ......21
- Maintenance 24
- Troubleshooting 24
- Specification 25
- Format 25
- Warning
- WARNING:
- Important Safety Instructions
- Introduction
- Connection Options
- Back panel connections
- Remote Control
- Battery loading
- Precautions
- Remote Control Function
- Function introduction
- External Equipment Connections
- Antenna Connection
- Note:
- Note
- Choose Your Connection
- VCR Connection
- Connection Option 1
- Connection Option 2
- External AV Source Setup
- How to connect
- How to use
- Connecting a DVD player
- HDMI or DVI Setup
- PC Setup
- Monitor Out Setup
- Power source
- TO USE AC POWER SOURCE
- Basic Receiving and Playing Operations Playing Operations
- Switching ON/OFF the TV set
- Choose the Menu Language
- Choose the Input source
- Picture Menu
- How to select picture mode
- How to customize your own picture status
- Contrast □
- Brightness
- Color
- Sharpness □
- Tint
- Backlight
- 3D\_DIM □
- Palette:
- Reset
- Sound menu
- How to select sound mode
- How to Customize your own sound status
- AVL (Automatic Volume Limit) □
- Channel menu
- Programme Edit
- Manual Search □
- Fine Tune □
- Color system □
- Sound system □
- Skip □
- If you want to recover the skipped channel
- Auto Tuning
- Exchange
- Function Menu
- Function Menu Set
- Language
- Menu Timeout □
- Picture Optimize □
- MEMC
- DSM
- Blackground
- OPC
- Eye guard Mode
- Reset □
- Adjust Menu
- Image Position □
- H-Size □
- V-Size □
- Auto Adjust □
- Clock □
- Phase □
- Time Menu
- Lock Setup
- How to use the password function
- The Lock Set menu is as follows:
- Change Password □
- Tuning Lock □
- Preset Source Setting □
- Preset Prog □
- Source Lock □
- Child Lock Setting □
- Max Volume Setting □
- Power on Volume □
- Unlock Setting □
- Streaming Media Playing System
- Start/Exit Streaming Media Playing System
- Operating Method of Streaming Media Menu
- Playing a Picture
- Playing a Movie
- Playing Music
- Text
- Settings
- Photo Slide Time □
- Movie Subtitle □
- Maintenance
- Cleaning the Screen
- Cleaning the Cabinet
- Extended Absence
- Troubleshooting
- Specification
- Accessories
- Format
- Recommendation PC connection input format
Brand : HAIER
Model : LE42H300
Category : Television