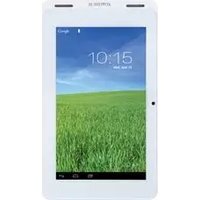
T752 - Tablet AUDIOVOX - Free user manual and instructions
Find the device manual for free T752 AUDIOVOX in PDF.


| Product Type | 7-inch Android Tablet |
| Model | Audiovox T752 |
| Operating System | Android 4.1 (Jelly Bean) |
| Processor | Dual-Core, 1.5 GHz |
| RAM | 1 GB DDR3 |
| Storage | 8 GB internal, expandable up to 40 GB via microSD card (up to 32 GB) |
| Display | 7-inch IPS panel, 1024 x 600 pixels, capacitive 5-point touch |
| Cameras | Front: 0.3 MP, Rear: 2.0 MP |
| Connectivity | Wi-Fi 802.11 b/g/n, micro HDMI output, micro USB 2.0 (OTG/charging), 3.5 mm headphone jack |
| Battery | Built-in rechargeable, 2-hour typical usage; charge time: 4-6 hours (off), 12-14 hours (on) |
| Speakers | Two front-facing speakers |
| Microphone | Built-in |
| Dimensions (approx.) | 190 x 122 x 10 mm (7.5 x 4.8 x 0.4 in) |
| Weight (approx.) | 300 g (0.66 lb) |
| Power Adapter | Input: 100-240 V AC; Output: 5 V DC, 2 A |
| Supported Memory Cards | microSD™ up to 32 GB |
| Sensors | G-sensor (accelerometer) |
| Video Output | Up to 1080p via micro HDMI (cable not included) |
| Operating Temperature | 32°F to 95°F (0°C to 35°C) |
| Storage Temperature | -4°F to 113°F (-20°C to 45°C) |
| Cleaning | Use a soft, lint-free cloth; mild soap and water if needed; avoid harsh chemicals |
| Safety | Do not disassemble, expose to moisture or open flames; use only approved charger |
| In the Box | Tablet, USB cable, USB power adapter, earbuds, warranty card, product registration card, quick start guide |
Frequently Asked Questions - T752 AUDIOVOX
User questions about T752 AUDIOVOX
0 question about this device. Answer the ones you know or ask your own.
Ask a new question about this device
Download the instructions for your Tablet in PDF format for free! Find your manual T752 - AUDIOVOX and take your electronic device back in hand. On this page are published all the documents necessary for the use of your device. T752 by AUDIOVOX.
USER MANUAL T752 AUDIOVOX
This device complies with Part 15 of the FCC Rules. Operation is subject to the following two conditions:
(1) this device may not cause harmful interference, and
(2) this device must accept any interference received, including interference that may cause undesired operation.
This device has been tested and found to comply with the limits for a Class B digital device, pursuant to part 15 of the FCC Rules. These limits are designed to provide reasonable protection against harmful interference in a residential installation. This device generates, uses, and can radiate radio frequency energy, and if not installed and used in accordance with the instructions, may cause harmful interference to radio communications. However, there is no guarantee that interference will not occur in a particular installation. If this device does cause unacceptable interference to radio or television reception, which can be determined by turning the device OFF and ON, the user is encouraged to try to correct the interference by one or more of the following measures:
- Increase the separation between the device and receiver.
- Consult your dealer or an experienced radio/TV technician for help.
To access the Spanish and French language Audiovox T752 7" Tablet for Android™ Quick Start Guides and User Manuals, please visit www.audiovoxproducts.com/tablets.
Android is a trademark of Google Inc.
Google, Google Play, Gmail, Google Apps, Google Plus, YouTube, and Adwords are trademarks of Google Inc.
microSD is a trademark or registered trademark of SD-3C, LLC in the United States, other countries or both.
Wi-Fi is a registered trademark of the Wi-Fi Alliance.
HDMI, the HDMI logo, and High-Definition Multimedia Interface are trademarks or registered trademarks of HDMI Licensing, LLC in the United States or other countries.
Contents
Warnings and Cautions ....4
Placement....4
Objects and Liquids....4
Disassembly 4
Headphones....4
Files 4
Operating and Storage Temperatures....4
Recycling the Tablet 4
Features......5
What's In the Box....6
Charging the Tablet 7
Use and Maintenance of the Rechargeable Battery....8
Controls and Features 9
Initial Setup 10
Power/Lock/Unlock....20
Turning the Tablet On or Off 20
Unlocking or Locking the Tablet 21
Home Screen 22
Customizing the Home Screen....23
Adding Apps or Widgets....23
Moving Apps or Widgets....24
Removing Apps or Widgets....25
Launching/Switching/Closing Apps 26
Connecting to Wi-Fi ® 27
Adding a Google™ Account on the Tablet....28
Downloading Apps From Google Play™ 30
Uninstalling Apps from the Tablet 31
Using the Camera....32
Camera Controls....33
Using the On-Screen Keyboard....34
Connecting to a PC....35
Connecting to a High Definition TV (HDTV)....37
Settings....38
Settings Options......38
Cleaning the Tablet....41
Troubleshooting 42
Warnings and Cautions
Placement
• To prevent fire or electric shock, do not expose the tablet to rain or moisture.
• To prevent the tablet from falling, do not place it on an unstable cart, stand, tripod, bracket or table.
- Keep the tablet away from strong magnets, heat sources, direct sunlight or excessive dust.
- If the tablet is brought directly from a cold to a warm location, condensation may occur within the tablet.
- When the tablet is moved from a cold to a warm location, wait approximately one hour for temperature stabilization.
Objects and Liquids
- Do not place anything heavy on the tablet.
- Do not place any open flame sources, such as lighted candles, on the tablet.
- Do not spill, splash or spray liquid of any kind on or in the tablet (this may result in a fire or electric shock).
- If the tablet gets wet, turn it off immediately. Let it dry before turning it back on. Never use a hair dryer, oven or microwave to try to accelerate the drying.
Disassembly
- Do not attempt to disassemble the case or replace the battery. There is a risk of electric shock. Contact qualified service personnel if your tablet is in need of repair.
Headphones
- Excessive sound pressure from headphones can cause hearing loss.
- Connect earphones or headphones to the headphone jack with the volume set low and increase it if required. When earphones or headphones are connected, no sound will be emitted from the tablet's speaker system.
Files
- Back up your files. Ensure that you have retained the original files that you downloaded to your tablet. Audiovox is not responsible for any loss of data if the tablet becomes damaged or not readable.
Operating and Storage Temperatures
- Operate in a place where temperature is between 32°F (0 °C) and 95°F (35 °C).
- Store in a place where temperature is between -4°F (-20 °C ) and 113°F (45 °C ).
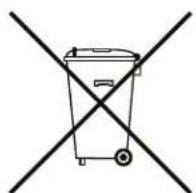
Recycling the Tablet
This symbol on the product or on its packaging indicates that the device shall not be treated as household waste. Instead it shall be handed over to the applicable collection point for the recycling of electrical and electronic equipment. By ensuring this device is disposed of correctly, you will help prevent potential negative consequences for the environment and human health, which could otherwise be caused by inappropriate waste handling of this device. The recycling of materials will help to conserve natural resources. For more detailed information about recycling of this device, please contact your local city office, your household waste disposal service or the shop where you purchased the device.
Congratulations on your purchase of the Audiovox T752 7" Tablet for Android™. Please read the user's manual for this tablet before use. The documentation provided will allow you to fully enjoy all the features that are available.
Features
- 7" Tablet with Android 4.1
- Google Play
- Processor: Dual-Core, 1.5 GHz
• RAM: DRR3 1Gbyte - Memory: 8 GB (expandable to 40 GB using a 32 GB microSD™ card)
- Two front facing speakers
- Front camera: 0.3 Megapixel
• Rear camera: 2.0 Megapixel
• IPS panel: 1024 x 600 pixels - Touch screen: Capacitive 5 point
- Wi-Fi® connectivity
• Built-in microphone - HDMI output
- microSD™ card slot (up to a 32 GB card can be installed)
What's In the Box

natural_image
Line drawing of a tablet device with 'AUDIOFOX' branding on top (no other text or symbols)Audiovox T752 7" Tablet for Android™


natural_image
Coiled black cable with two connectors and a connector icon (no text or symbols)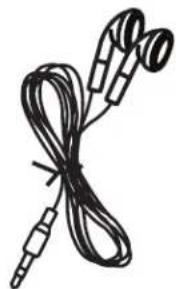
natural_image
Simple line drawing of a cord with two earbuds (no text or symbols)USB Power Adapter USB Cable Earbuds


Warranty Card Product Registration Start Guide
Card
Charging the Tablet
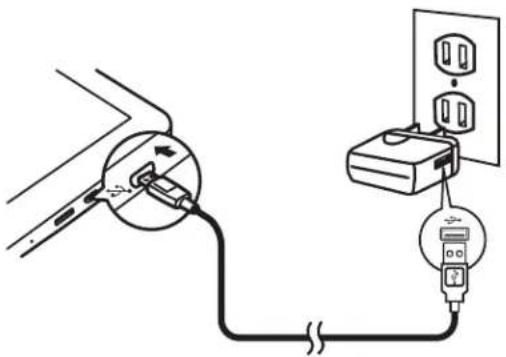
The Audiovox T752 tablet has a built-in battery that can be charged using the supplied USB cable and USB Power Adapter. The tablet can be recharged when it is powered on or off. When the power is off, it takes approximately 4 to 6 hours to fully charge the battery. When the power is on, it takes approximately 12 to 14 hours to charge the battery. When fully charged, the battery can be used for approximately two hours.
To charge the battery using the USB Power Adapter:
-
Plug the mini-USB end of the USB cable into the mini-USB port on the tablet, then plug the other end of the cable into the USB Power Adapter.
-
Plug the USB Power Adapter into a 120 VAC outlet.
natural_image
Simple line drawing of a cable being inserted into a socket connected to a wall-mounted device (no text or symbols present)To charge the battery using a PC:
- Plug the mini-USB end of the USB cable into the mini-USB port on the tablet, then plug the other end of the cable into a USB port on a PC.
Note: Charging time with a PC can be four times longer as most USB ports on PCs are limited to 0.5 mA capacity. The wall charger capacity is 2.0 amps and is the best method of charging.

To conserve battery power and increase the play time:
Switch off functions such as apps, widgets, and Wi-Fi ® when they are not being used.
Set the Sleep timer to a low value (go to Settings > Display > Sleep). The options are:
• 15 seconds
• 30 seconds
• 1 minute
• 2 minutes
- 5 minutes
- 10 minutes
• 30 minutes
- Never timeout
Use and Maintenance of the Rechargeable Battery
- Before using the tablet for the first time, charge the tablet for at least eight hours.
- If the battery is fully discharged, the tablet may not turn on, even when the charger is connected. Charge the tablet for at least thirty minutes before powering on the tablet.
- Rechargeable batteries have a limited number of charge cycles. Battery life and number of charge cycles vary by use and settings.
- Battery capacity may be shortened in low temperature conditions.
- Always unplug the tablet when it is not being used or charged.
- If you do not plan on using the tablet for an extended period of time (one week or longer), it is recommend that you fully charge the battery. For longer periods of storage, please recharge the battery at least once every two months to maintain the battery in optimum condition.
- Once the battery is fully discharged, immediately recharge the battery in order to maximize battery life.
- Recharge efficiency will degrade when temperatures drop below 50 °F (10°C) or exceed 95 °F (35°C).
- Heat is produced during charging and play. This is normal.
- Keep the tablet away from humidity and excessive heat.
- The battery is not user serviceable. Please contact Audiovox in the event the battery will not charge.
Controls and Features
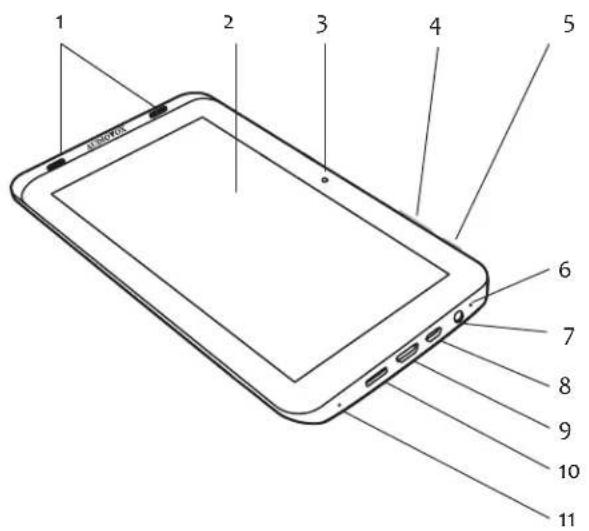
Front View
natural_image
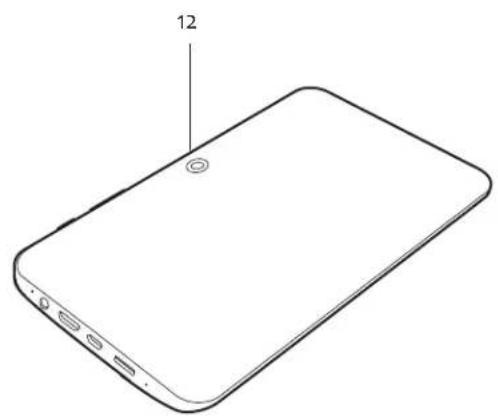
Line drawing of a smartphone with labeled screen and buttons (no text or symbols beyond label)Rear View
- Front Facing Speakers
- Touch Screen
- Front Facing Camera
-
VolumeControl
-
Press + to increase the volume.
-
Press - to decrease the volume.
-
Power/LockButton
-
Press and hold for three seconds to power on/power off the tablet.
-
Press for one second to lock/unlock the tablet.
-
Microphone
-
3.5 mm Headphone Jack
When headphones are connected, no sound will be emitted from the speakers. - Mini USB connector for data transfer and power/charging.
- Mini HDMI connector for audio/video output.
- microSD™ Card Slot
Insert microSD TM card for external data storage. - ResetButton
If the tablet is locked up or unresponsive, insert a paperclip into the reset opening for three seconds. - Rear Facing Camera
Initial Setup
When the tablet is powered on for the first time, the user will be prompted to set up the tablet.
Note: The initial setup requires the use of the on-screen keyboard. See "Using the On-Screen Keyboard" on page 34 for a brief tutorial.
- Press and hold the Power/Lock button for three seconds.
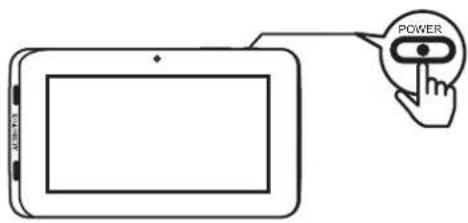
- TheWelcome screen appears.
Scroll through the language list to select a language. Tap the desired language.
Note: The default language is English (United States).
- TaptheStart button.

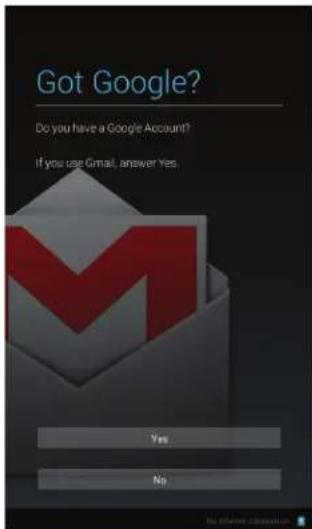
- TheGot Google? screen appears.
Note: In order to use the tablet with Google's apps and services, you will need a Google™ account.
Tap the Yes button if you have a Google™ account and proceed to "If you have a Google™ account:" on page 11.
Tap the No button if you do not have a Google™ account. The Make it Google screen appears. Proceed to "If you do not have a Google™ account:" on page 14.
If you have a Google™ account:
1. TheSelect Wi-Fi screen appears.
The screen lists available Wi-Fi ® networks. To select an available Wi-Fi ® network, tap a network on the list.
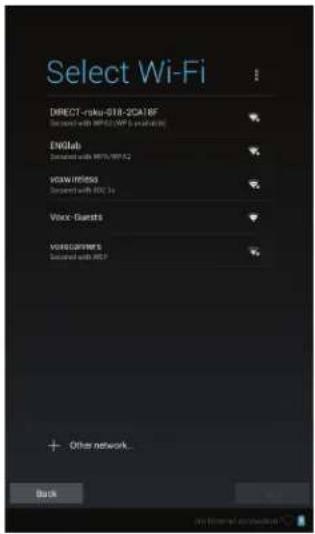
- Enter the Wi-Fi® network's password using the on-screen keyboard, if required. Tap the Connect button when finished. Tap the Next button after the tablet establishes a network connection.

3. TheSign in screen appears.
Enter your Gmail™ address and password using the on-screen keyboard. Tap the Done button when finished.

4. TheJoin Google+ screen appears.
To set up a Google Plus™ account, tap the Join Google+ button. Follow the on-screen prompts.
To proceed to the next screen in the initial setup, tap the Not now button.

5. The Entertainment screen appears.
To set up a credit account, tap the Set up credit card button. Follow the on-screen prompts.
To proceed to the next screen in the initial setup, tap the Not now button.

6. The Backup and restore screen appears.
To restore a previously backed up Google™ account, check the Restore from my Google Account to this tablet check box.
To use your Google™ account to back up your apps, settings, and other data, check the Keep this tablet backed up with my Google Account check box.
To proceed to the next screen in the initial setup, tap the ▶ button.

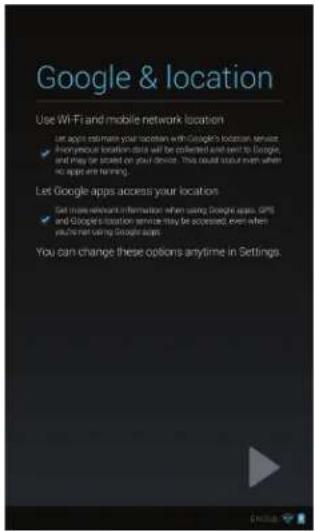
- TheGoogle & location screen appears.
To let apps estimate your location with Google's location service, check the Use Wi-Fi and mobile network location check box.
To get relevant information when using Google™ apps, check the Let Google Apps access your location check box.
To proceed to the next screen in the initial setup, tap the ▶ button.
- TheSetup complete screen appears.
The tablet is set up and ready to use. Tap the Finish button.

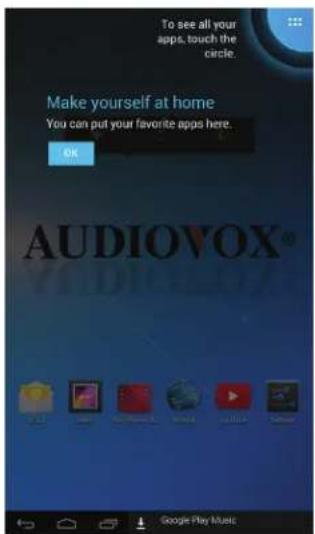
- The Make yourself at home screen appears.
To go to the Home screen, tap the OK button.
To see all your apps, touch the circle in the upper right hand corner of the screen. The App Drawer appears.
If you do not have a Google™ account:
- The Make it Google screen appears. Tap the Get an account button.

- TheSelect Wi-Fi screen appears.
The screen lists available Wi-Fi® networks. To select an available Wi-Fi® network, tap a network on the list.
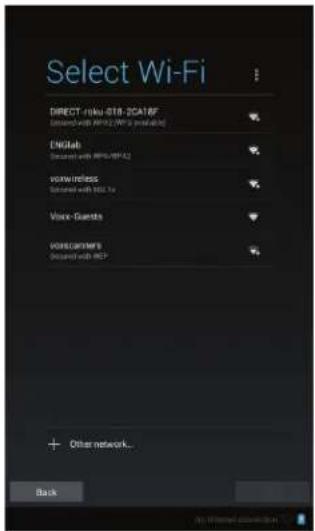
- Enter the network's password using the on-screen keyboard if required. Tap the Connect button when finished. Tap the Next button after the tablet establishes a network connection.

7. The Recovery information screen appears.
Choose a security question, then enter an answer and an e-mail address. Tap the Done button when finished. 8. TheJoin Google+ screen appears.
To set up a Google Plus™ account, tap the Join Google+ button. Follow the on-screen prompts. To proceed to the next screen in the initial setup, tap the Not now button. 9. TheFinish account screen appears.
To proceed to the next screen in the initial setup, tap the ▶ button.  10. The Authenticating... screen appears. Enter the text that you see in the box. Tap the Done button when finished. 11. The Entertainment screen appears. To set up a credit account, tap the Set up credit card button. Follow the on-screen prompts. To proceed to the next screen in the initial setup, tap the Not now button. 12. The Backup screen appears. To use your Google™ account to back up your apps, settings, and other data, check the Keep this tablet backed up with my Google Account check box. To proceed to the next screen in the initial setup, tap the ▶ button.   13. The Google & location screen appears.
To let apps estimate your location with Google's location service, check the Use Wi-Fi and mobile network location check box. To get relevant information when using Google™ apps, check the Let Google Apps access your location check box. To proceed to the next screen in the initial setup, tap the ▶ button. 14. The Google services screen appears.
To proceed to the next screen in the initial setup, tap the ▶ button. 15. TheSetup complete screen appears.
The tablet is set up and ready to use. Tap the Finish button.  16. The Make yourself at home screen appears. To go to the Home screen, tap the OK button. To see all your apps, touch the circle in the upper right hand corner of the screen. The App Drawer appears. Power/Lock/Unlock
Turning the Tablet On or Off
To turn the power on: Press and hold the Power/Lock button for three seconds. To turn the power off:
1. Press and hold the Power/Lock button for three seconds. 2. ThePower off pop-up message appears. 3. Tap the OK button. Unlocking or Locking the Tablet
To unlock the tablet:
1. PressthePower/Lock button for one second.  2. Touch the Lock 🔒 icon on the Home screen, then swipe your finger towards the Unlock 🔒 icon. Note: This is the default setting. To lock the tablet:
Press the Power/Lock button for one second. The display turns off, indicating the tablet is locked. Home Screen
The Home screen is the starting point for using the tablet. The Home screen consists of a home panel, plus four additional panels that extend beyond the display width to provide more space for adding shortcuts, widgets, and folders. Slide your finger horizontally across the screen to scroll to the left or right side panels. On-screen objects can be manipulated by tapping, swiping, pinching, and reverse-pinching.  1. g Google Tap to access the Google™ search function. The tablet must be connected to the Internet. 2. ↓Microphone Tap to activate the Google ™ voice search function. The tablet must be connected to the Internet. Speak the desired search criteria into the microphone. 3. Power Control Widget On/off switches for Wi-Fi ® , Cbackground sync (for some apps, like e-mail), and screen brightness. 4. App Drawer Icon Tap to open the App Drawer. The App Drawer displays all the apps and widgets that are installed on the tablet. 5. 1/ Battery Charge Indicator indicates the battery is charged. indicates the battery is charging. 6. Wi-Fi ® Indicator Displays Wi-Fi ® signal strength. 7. Current Time Indicator 8. Notification Bar Drag the bottom bar up to check notifications, status, and events. 9. AppShortcut Tap to open an app. 10. □Recent Apps Icon Tap to view recently opened apps. 11. Home Icon Tap to go to the Home screen. 12. ← Back Icon Tap to return to the previous page.Customizing the Home Screen
Apps and widgets can be added to the Home screen for quick access. Apps and widgets can also be removed or rearranged allowing for personal customization of the Home screen. The tablet comes pre-loaded with several useful apps and widgets. To download new apps or widgets, please refer to "Downloading Apps From Google Play™" on page 30.Adding Apps or Widgets
To add an app or widget to the Home screen: 1. TaptheApp Drawer icon.  2. TheApp Drawer appears. To add an app to the Home screen, touch and hold an icon until the icon appears on the Home screen.  To add a widget to the Home screen, tap the Widgets tab. Touch and hold an icon until the icon appears on the Home screen. Moving Apps or Widgets
To move an app or widget on the Home screen: 1. Touch and hold an icon.  2. Drag the icon in any direction. The icon can be placed anywhere on the screen. Removing Apps or Widgets
To remove an app or widget from the Home screen: 1. Touch and hold an icon.  2. Drag the icon to the X Remove symbol at the top of the screen. Note: This will not delete the app or widget, it will just remove the shortcut from the Home screen. Launching/Switching/Closing Apps
To launch an app:
1. Tap the desired app icon. The app opens. To switch to another open app:
1. Tap the Recent Apps 📄 icon to view thumbnails of open apps. The open app thumbnails appear on the left hand side of the screen.  2. To switch to a recently opened app, tap the app's thumbnail.To close an app:
1. Tap the Recent Apps 📋 icon to view thumbnails of open apps. The open app thumbnails appear on the left hand side of the screen.  2. Touch and hold the app's thumbnail and drag it towards the left edge of the screen. The app closes.Connecting to Wi-Fi®
The tablet can be connected to the Internet via Wi-Fi ® .To connect the tablet to the Internet via Wi-Fi ® :
1. To access Wi-Fi ® in the Settings menu, tap the Settings icon.  2. To see a list of networks in range or previously connected networks, slide the Wi-Fi switch to ON. Note: The tablet will connect to a previously connected network. If two or more previously connected networks are available, the tablet will connect to the most recently connected network.  3. Select an available Wi-Fi® network to connect to the Internet. A secured network will require a password to be entered. Enter the password if required. Tap the Connect button. Note: To connect to the Internet, the tablet comes pre-loaded with a generic browser and Google Chrome™. Adding a Google™ Account on the Tablet
A Google™ account allows access to all your personal information from any computer or mobile device. - Google Play™: Google Play™ allows access to all your favorites such as movies, books, music, magazines, apps, and more. - Synchronize and back up: Makes your information accessible across all computers and mobile devices. - Access Anywhere: Check all your personal information from any computer or mobile device such as email, calendar, contacts, etc. You must have a Google™ account in order to download apps from the Google Play™ store.To add a Google™ account:
1. TaptheSettings ✉ icon to access the Settings menu.  2. Scroll down to Add account. Tap Add account.  3. The Add an account pop-up message appears. Tap the Google icon.  4. The Add a Google Account screen appears. Tap the Existing or New button. Note: You may use an e-mail address from the following services: - Gmail™ - Google Apps™ - Google Plus™ - YouTube™ - Adwords™  5. If Existing was selected, sign in using the e-mail address and password you created for your Google™ account. 6. If New was selected, follow the on-screen prompts to create a new Google™ account.Downloading Apps From Google Play™
You may download apps to your tablet from Google Play™. To download apps from Google Play™, you must first set up a Google™ account on your tablet. An e-mail address from the following services allows access to Google Play™: - Gmail™ - Google Apps™ - Google Plus™ - YouTube™ - Adwords™ 1. TaptheApp Drawer 🐘icon.  2. The App Drawer appears. Tap the Play Store icon.  Note: If prompted, sign in using the e-mail address and password you created for your Google™ account.  3. The Google Play Store app launches. You can shop for Apps, Games, Movies & TV, Music, Books or Newstand by tapping on the related tabs on the top of the screen. You can also search by tapping the Search Icon at the top of the screen. Uninstalling Apps from the Tablet
Apps downloaded from the Google Play Store can be uninstalled from the tablet. Note: Some apps that have been pre-installed cannot be uninstalled.To uninstall an app:
1. Tap the App Drawer 🎨 icon.  2. The App Drawer appears. Touch and hold the app icon that you want to uninstall.  3. The icon appears on the Home screen. Drag the icon to the ☐ Uninstall symbol. Using the Camera
To launch the camera app:
1. TaptheApp Drawer 🎯 icon.  2. TheApp Drawer opens. Tap the Camera icon. 3. The camera app opens.  Camera Controls     1. Switch Still Camera Icon Tap to switch between the front and rear still camera. 2. Shutter Button. Tap to take a photo or start/stop video recording. 3. Settings Icon Tap to access the still and video camera exposure settings. 4. Panoramic Camera Icon Tap to switch to the panoramic camera. 5. ■Video Camera Icon Tap to switch to the video camera. 6. 📷 till Camera Icon Tap to switch to the still camera. 7. Zoom Control Drag to zoom in or out. 8. A white Balance Icon Tap to select options according to the light source: Aw auto, ✦ incandescent, ✦ daylight, ✦ flourescent and ▲ cloudy. 9. ↗ Return Icon Tap to exit camera exposure settings. 10. Camera Action Bar Tap to open Camera settings dialog box. 11. Exposure Icon Tap to select the exposure. Options: -4 to +4. 12. Time Lapse Icon Tap to select a time lapse interval for video recording. Options: Off to 10 seconds. 13. Switch Video Camera Icon Tap to switch between the front and rear video camera.Using the On-Screen Keyboard
Your tablet uses an on-screen keyboard. Tap a field where you need to enter information and a keyboard appears. Use it in the same way you would use a physical keyboard.To enter information:
1. Tap a field where you need to enter information. A keyboard appears. At first, the keyboard shows lower case letters. 2. To show upper case letters, tap the Upper Case key. 3. To return to lower case letters, tap the Lower Case key. 4. For CAPS LOCK (all upper case letters) tap and hold the key for two seconds. The key will change to this 5. To release CAPS LOCK, tap and hold the ☐ for two seconds. 6. To show numbers and other symbols, tap the ?123 key. 7. To return to lower case letters, tap the ABC ABC key. 8. To go to the next field (if required), tap the Next key, or tap the Done Done if finished.   Connecting to a PC
You can connect your tablet to a PC to transfer files between the devices and charge the tablet.To connect the tablet to a PC for the fisrt time:
1. Plug the mini-USB end of the USB cable into the mini-USB port on the tablet, then plug the other end of the cable into a USB port on a PC. Note: The first time you connect your tablet to a PC, the Found New Hardware Wizard may appear on your PC. Click the Cancel button to dismiss the Wizard.  2. Tap the Notification bar.  3. TapConnected as a Media device.  4. The Settings screen appears. Tap Mass Storage.  5. The USB connected screen appears. Tap the Turn on USB storage button.  6. On your PC, follow the prompts to connect to your tablet. Use Windows Explorer to drag and drop files between the devices.To disconnect the tablet from a PC:
1. On the tablet, tap the Turn off USB storage button.Connecting to a High Definition TV (HDTV)
You can view photos or watch videos that play on the tablet on an HDTV.To connect the tablet to an HDTV:
1. Use a Mini HDMI-to-HDMI cable (sold separately) to connect the tablet to an HDTV.  2. Use the source button on the TV to choose the appropriate HDMI input. Note: By default, video will be displayed on both the tablet and the HDTV. Some protected streaming video, such as Netflix, will only appear on the HDTV. Settings
Open the Settings menu to configure the tablet.To select your settings options:
1. On the Home screen, tap the Settings ✝ icon to access the Settings menu. 2. Swipe up or down to scroll through the list of settings options. 3. Tap an option to select it.Settings Options
Wireless and Network Settings
Wi-Fi
The Wi-Fi ® setting allows the user to select any available Wi-Fi ® network. To turn the Wi-Fi ® function off or on, tap or swipe the OFF/ON switch.Data Usage
Tap to view tablet data usage by application.More...
Tap More... to access the following settings: - Airplane mode: Switch on the airplane mode when you need to disable the access to Wi-Fi ® for safety purposes, such as on an airplane. Tap the check box to turn airplane mode on or off. - VPN: Use Virtual Private Networks (VPN) settings to access private networks, such as corporate networks. Tap VPN, then follow the on-screen prompts. - Portable hotspot: You can use your tablet as a portable Wi-Fi hotspot, letting you share your data connection on your tablet wirelessly with up to five other devices, including cell phones, other tablets, and computers. Tap Set up Wi-Fi hotspot, then follow the on-screen prompts. Tap Portable Wi-Fi hotspot to activate/deactivate your hotspot.Device Settings
HDMI
Tap to access the following setting: \- Enable auto switch: Automatically outputs video to an HDTV if connected via an HDMI cable. Tap the check box to turn auto switch on or off.Sound
Tap to access default notifications, touch sounds, and screen lock sound settings.Display
Tap to access brightness, wallpaper, sleep, and font size settings.Storage
Tap to display memory use by application and free space available. You may view memory used by RAM, internal SD card storage, or externally mounted SD or USB storage.Battery
Tap to check the battery use by apps.Apps
Tap to view apps, then swipe the scroll bar to view downloaded apps, apps on the SD card, running apps or all apps. Tap an app icon to manage the app.Personal Settings
Location Services
Tap to set up the following location services: - Google's location service: Allows anonymous location data to be sent to Google™ and allows permitted apps to use data from Wi-Fi® sources to determine your approximate location. Tap the check box, then agree to the location consent to enable location services. - Location & Google search: Allows Google™ to use your location to improve search results and other services. Tap the check box to turn Location & Google search on or off.Security
Tap to access the following security settings: - Screen Lock: Selects none, slide, a pattern, PIN, or password as the unlock security. To unlock the screen, such unlock security is required. By default, press the power/lock button, then drag the lock towards the unlock icon. - Owner info: Displays owner's information on the lock screen. Tap Owner info, then tap the check box. Enter the text to be displayed using the on-screen keyboard. - Make passwords visible: Allows characters to be briefly visible when entering passwords. Tap the check box to turn password visibility on or off. - Device administrators: Tap to access the Android Device Manager. The Android Device Manager allows the Google Play™ services app to erase all data, change the screen unlock password, and lock the screen. - Unknown sources: Allows apps from sources other than the Google Play Store to be installed. The tablet and personal data are more vulnerable to attack by apps from unknown sources. Tap the check box, then tap the OK button. - Trusted credentials: Tap to display system and user certificates installed on the tablet. • Install from SD card: Tap to install a certificate from an SD card.Language & input
Tap to access the following settings: • Language: Tap to display the available languages. Scroll down the list, then select the desired language. - Spell checker: Tap the check box to turn the spell checker on or off. When the spell checker is enabled, tap the Settings icon to access the spell checker settings menu. - Personal dictionary: Tap to open the personal dictionary. Add words or phrases by tapping the Add (+) button, then enter the word or phrase. - Default: Tap to display a list of available input methods. The default method is Android keyboard. - Google keyboard: Tap the Settings icon to access the Google keyboard settings menu. - Google voice typing: Tap the check box to turn Google voice typing on or off. Tap the Settings icon to access the Google voice typing settings menu. • Voice Search: Tap to access voice search settings. - Text-to-speech output: Text-to-speech is used by Android apps for accessibility purposes. Tap to set up the preferred text-to-speech engine. - Pointer speed: Tap to access the pointer speed slider bar. Swipe the slider bar then tap the OK button.Backup & reset
Tap to back up, restore or erase data as follows: \- Back up my data: Backs up data, Wi-Fi® passwords, and other settings to Google™ servers. Tap the check box to turn back up on or off. \- Backup account: Selects a backup account. Tap Backup account, then follow the on-screen prompts. \- Automatic restore: Restores backed up data and settings when reinstalling an app. Tap the check box to turn automatic restore on or off. \- Factory data reset: This setting will erase all data from your tablet's internal storage, including your Google™ account, downloaded apps, and system and app data and settings. Tap Factory data reset, then tap the Reset tablet button.Accounts Settings
Add account
Tap to add a corporate, e-mail or Google™ account. Select the desired type of account, then follow the on-screen prompts.System Settings
Date & time
Tap to set up the following date and time information displayed on the screen:| • Automatic date & time: | When on, the tablet gets its time from the network. Tap the check box to turn automatic date and time on or off. |
| • Set date: | This setting is disabled when automatic date & time is enabled. When enabled, tap Set date, then enter the date. |
| • Set time: | This setting is disabled when automatic date & time is enabled. When enabled, tap Set time, then enter the time. |
| • Select time zone: | Displays the current time zone. To change the time zone, tap Select time zone, then select your time zone from the list. |
| • Use 24-hour format: | Switches time display between 12-hour and 24-hour format. Tap the check box to turn 24-hour format on or off. |
| • Choose date format: | Sets date format. Tap Choose date format, then select the format from the list. |
Accessibility
| • TalkBack: | When Talkback is on, your tablet provides spoken feedback to help blind and low-vision users. Tap Talkback, then follow the on-screen prompts. |
| • Large text: | Selects large or normal text. Tap the check box to turn large text on or off. |
| • Auto-rotate screen: | Switches on/off the screen rotation between the landscape and portrait views. Tap the check box to turn screen rotation on or off. |
| • Touch & hold delay: | Selects short, medium or long touch and hold settings. Tap Touch & hold delay, then select a setting from the list. |
| • Enhance web accessibility: | Allows apps to install scripts from GoogleTM that make their web content more accessible. Tap Enhance web accessibility, then follow the on-screen prompts. |
Developer options
Swipe the OFF/ON switch to turn the development settings function off or on. These settings are intended for development use only.About tablet
Tap to access status and other information about the tablet. Tap Status to access the following information: - Battery status: Displays the power charging status. - Battery level: Displays the remaining power by percentage. • IP address: Displays the IP address of the tablet. - Wi-Fi MAC address: Displays the unique identifier that is assigned to the network adapter of the tablet. - Serial number: Displays the serial number of the tablet. - Up time: Displays how long the tablet has been switched on. Tap Legal information to access open source license and Google™ legal information for the tablet. Model number displays the model number of the tablet. Android version displays the firmware version of the Android platform that the tablet is running. Build number displays the software version of the tablet.Cleaning the Tablet
- Make sure the tablet is turned off and unplugged from the power source when cleaning. - Never use window cleaners, harsh chemicals or cleaning solvents on your tablet. - Never spray anything directly on to the screen. \- To clean the screen on your tablet, use a soft, lint-free cloth. Never use a paper towel or other paper-based towels as they can scratch the screen. For fingerprint smudges, dust, and lint, wipe the screen gently using a dry microfiber cloth. \- For more stubborn contaminants or stains, turn your tablet off. Lightly dampen a section of a microfiber cloth with water and gently wipe the screen, then go over it again with a dry section of the cloth to wipe away any moisture. Avoid getting moisture in any openings. If the stain remains, you can also try using a mild soap-and-water solution. When your tablet is completely dry, turn it on.Troubleshooting
If the tablet locked up or unresponsive, reset the tablet to regain functionality. Insert a paperclip into the Reset opening for three seconds.   For Customer Service Visit Our Website At www.audiovoxproducts.com Product Information, Photos, FAQ's Owner's Manuals
- Contents
- Warnings and Cautions
- Placement
- Objects and Liquids
- Disassembly
- Headphones
- Files
- Operating and Storage Temperatures
- Recycling the Tablet
- Features
- What's In the Box
- Charging the Tablet
- To charge the battery using the USB Power Adapter:
- To charge the battery using a PC:
- To conserve battery power and increase the play time:
- Use and Maintenance of the Rechargeable Battery
- Controls and Features
- Initial Setup
- If you have a Google™ account:
- TheSelect Wi-Fi screen appears.
- $ % & • - + ( ) Done
- TheSign in screen appears.
- TheJoin Google+ screen appears.
- The Entertainment screen appears.
- The Backup and restore screen appears.
- If you do not have a Google™ account:
- $ % & • - + ( ) Dome
- The Recovery information screen appears.
- TheJoin Google+ screen appears.
- TheFinish account screen appears.
- The Google & location screen appears.
- The Google services screen appears.
- TheSetup complete screen appears.
- Power/Lock/Unlock
- Turning the Tablet On or Off
- To turn the power off:
- Unlocking or Locking the Tablet
- To unlock the tablet:
- To lock the tablet:
- Home Screen
- Customizing the Home Screen
- Adding Apps or Widgets
- Moving Apps or Widgets
- Removing Apps or Widgets
- Launching/Switching/Closing Apps
- To launch an app:
- To switch to another open app:
- To close an app:
- Connecting to Wi-Fi®
- To connect the tablet to the Internet via Wi-Fi ® :
- Adding a Google™ Account on the Tablet
- To add a Google™ account:
- Downloading Apps From Google Play™
- Uninstalling Apps from the Tablet
- To uninstall an app:
- Using the Camera
- To launch the camera app:
- Using the On-Screen Keyboard
- To enter information:
- Connecting to a PC
- To connect the tablet to a PC for the fisrt time:
- To disconnect the tablet from a PC:
- Connecting to a High Definition TV (HDTV)
- To connect the tablet to an HDTV:
- Settings
- To select your settings options:
- Settings Options
- Wireless and Network Settings
- Wi-Fi
- Data Usage
- More...
- Device Settings
- HDMI
- Sound
- Display
- Storage
- Battery
- Apps
- Personal Settings
- Location Services
- Security
- Language & input
- Backup & reset
- Accounts Settings
- Add account
- System Settings
- Date & time
- Accessibility
- Developer options
- About tablet
- Cleaning the Tablet
- Troubleshooting
Brand : AUDIOVOX
Model : T752
Category : Tablet