
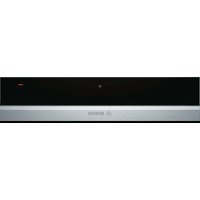
HSC140650 - Warming Drawer BOSCH - Free user manual and instructions
Find the device manual for free HSC140650 BOSCH in PDF.


| Brand | BOSCH |
| Model | HSC140650 |
| Product Type | Warming Drawer |
| Category | Built-in |
| Dimensions (HxWxD) | 140 x 596 x 548 mm |
| Weight | Approx. 20 kg |
| Voltage | 220-240 V |
| Frequency | 50/60 Hz |
| Power Consumption | 800 W |
| Temperature Range | 30°C - 80°C |
| Capacity | 25 L |
| Functions | Keep Warm, Defrost, Proofing, Preheating Plates |
| Control Type | Electronic touch controls |
| Display | LED |
| Material | Stainless steel front, glass interior |
| Safety Features | Child lock, automatic switch-off |
| Cleaning | Stainless steel cleaner recommended |
| Installation Type | Built-in |
| Energy Consumption | 0.8 kWh/24h |
| Noise Level | < 50 dB |
| Spare Parts Availability | Yes |
| Warranty | 2 years |
Frequently Asked Questions - HSC140650 BOSCH
User questions about HSC140650 BOSCH
0 question about this device. Answer the ones you know or ask your own.
Ask a new question about this device
Download the instructions for your Warming Drawer in PDF format for free! Find your manual HSC140650 - BOSCH and take your electronic device back in hand. On this page are published all the documents necessary for the use of your device. HSC140650 by BOSCH.
USER MANUAL HSC140650 BOSCH
What to do if there is a malfunction? 13
Customer service 14
Technical data 14
The warming drawer 18......
Preheating ovenware 19......
General ovenware 19......
Drinks containers 19......
Method 20
Keeping food warm 21
Method 21
Uses 22
Slow cooking 23
Cleaning and caring for your warming drawer . 25
Warming drawer exterior 25
Heating plate 25
Troubleshooting 26
After-sales service 27
Technical data 27
Important information
Read this instruction manual carefully. This will enable you to operate your appliance safely.
Please keep the instruction and installation manual in a safe place. Please pass on the instruction manual to the new owner if you sell the appliance.
Before installation
Disposing in an environmentally-responsible manner
This appliance is intended only for domestic use.
Please observe the installation manual enclosed.
Unpack oven and remove all packing material.

This appliance is labelled in accordance with the European Directive 2002/96/EC concerning used electrical and electronic appliances (waste electrical and electronic equipment—WEEE).
The guideline determines the framework for the return and recycling of used appliances as applicable.
Transport damage
Check the appliance after unpacking it. Do not connect the appliance if it has been damaged in transport.
Electrical connection
The appliance is fitted with a plug and must only be connected to a properly installed earthed socket. The mains voltage must correspond to the voltage specified on the rating plate.
The socket must only be installed and the connecting cable replaced by a qualified electrician. If the plug is no longer accessible following installation, an all-pin disconnecting device must be present on the installation side with a contact gap of at least 3 mm.
Adapters, multiway strips and extension leads must not be used. Overloading can result in a risk of fire.
Safety precautions
Use the appliance only for warming meals and ovenware.
Children must only be allowed to use the appliance if they have been properly instructed. They must be able to operate the appliance correctly and understand the risks outlined in this instruction manual.
This product is not designed for use by small children or the infirm without supervision.
Hot surface
The heating plate in the warming drawer becomes very hot. There is a risk of burning.
Children must be kept at a safe distance from the appliance. Always use oven gloves or an oven cloth when removing ovenware.
Do not store flammable objects or plastic containers in the warming drawer. Risk of fire.
Cleaning
Do not use a steam jet cleaner to clean the drawer. There is a risk of short-circuiting.
Repairs
Incorrect repairs are dangerous. There is a risk of electrocution.
Repairs may only be carried out by after-sales service technicians.
Chips in the heating plate
There is a danger of electrocution if there are breaks, chips, or cracks in the heating plate.
Pull out the plug or switch off the circuit breaker for the drawer in the fuse box.
Contact the after-sales service.
The warming drawer
You can use the warming drawer to preheat ovenware or to keep food warm.
"Power on" indicator light
The indicator light flashes when you switch on the appliance. It lights up when the drawer is closed.

Fan and heater
run when the 4 preheat ovenware setting is selected.
Function selector
The following settings are available:
0 = Off 1 = Proving yeast pastry, defrosting 2 = Keeping bread warm, defrosting, preheating drinks containers 3 = Keeping food warm 4 = Preheating ovenware
The appliance will only heat up if the drawer is closed correctly.
Preheating ovenware
Food stays warm for longer in preheated ovenware. Drinks also remain warm for longer.
General ovenware
Only load the warming drawer up to 25 kg. You can preheat dinnerware for 6 or 12 people, for example.
| Lowdrawer,14 cminheight | Talldrawer,29cminheight | |
| 6dinnerplates∅24cm | 12dinnerplates∅24cm | |
| 6soupbowls∅10cm | 12soupbowls∅10cm | |
| 1servingdish∅19cm | 1servingdish∅22cm | |
| 1servingdish∅17cm | 1servingdish∅19cm | |
| 1meatplate32cm | 1servingdish∅17cm | |
| 2meatplates32cm |
Arranging ovenware
As far as possible, distribute the ovenware over the entire surface. It takes longer to warm through all stacks of plates than individual pieces of ovenware, e.g. 2 serving dishes.
Drinks containers
Always heat drinks containers, e.g. espresso cups, using setting 2.

At setting 3 or 4, the drinks containers will get very hot. There is a risk of burning.
Method
| 1. Placetheovenwareinthedrawer.2. Setthefunctionselectortosetting4. Alwaysheatdrinkscontainersusingsetting2. The"poweron"indicatorlightflashes.3. Closethewarmingdrawer. The"poweron"indicatorlightlightsup. The applianceheatsup. | |
| Howlongdoespreheating take? | Thelengthoftimerequiredforpreheatingdependson thematerialtheovenwareismadeofandits thickness,aswellasthequantity,heightand arrangementoftheovenware. |
| Asfaraspossible,distributetheovenwareoverthe entiresurface. Ittakesapproximately15-25minutestopreheat dinnerwarefor6people. | |
| Switchingoff | Openthedrawer.Switchoffthefunctionselector. |
| Removingovenware | Removeovenwarefromthedrawerusingovengloves oranovencloth. |
| Theuppersurfaceoftheheatingplatewillbehot. Thebaseoftheovenwarewillbehotterthanthetop. |
Keeping food warm
Do not place hot saucepans or pans on the glass surface of the warming drawer immediately after removing them from the hot hob. This could damage the glass surface.
Do not fill the ovenware to such an extent that food spills over.
Cover the food with a heat-resistant lid or aluminium foil.
It is recommended that you do not keep food warm for longer than an hour.
Suitable foods
The appliance is suitable for keeping meat, poultry, fish, sauces, vegetables, side dishes and soups warm.
Method
- Place the ovenware in the drawer.
- Set the function selector to setting 3 and preheat the appliance for 10 minutes. 3. Add the food to the preheated ovenware.
- Close the drawer again. The "power on" indicator light lights up. The appliance heats up.
Switching off
Switch off the function selector. Remove the food from the drawer using oven gloves or an oven cloth.
Uses
The table shows various uses for the warming drawer.
Set the function selector to the desired setting.
Preheat the ovenware as indicated in the table.
| Level | Food/ovenwareNote | |
| 1 Delicatedeep-frozenfood | Defrost | |
| 1 LeavingyeastdoughtoriseCover | ||
| 2 Deep-frozenfood | Defrost | |
| 2 Keepingeggswarm | Preheatovenware,coverfood | |
| 2 Keepingbreadwarm | Preheatovenware,coverfood | |
| 2 Preheatingdrinkscontainerse.g.espressocups | ||
| 2 Delicatefood | e.g.slow-cookedmeat | Coverovenware |
| 3 Keepingfoodwarm | Preheatovenware,coverfood | |
| 3 Keepingdrinkswarm | Preheatovenware,coverdrinks | |
| 3 Warmingflatdough-basedfoods | e.g.pancakes,wraps,tacos | Preheatovenware,coverfood |
| 3 Warmingdrycakes | e.g.crumblecakes,muffins | Preheatovenware,coverfood |
| 3 Meltingcookingchocolateorchocolate coating | Preheatovenware,breakupfoodinto smallpieces | |
| 3 DissolvinggelatineOpen,approximately20minutes | ||
| 4 Preheatingovenware | Notsuitablefordrinkscontainers | |
Slow cooking
Slow cooking is the ideal cooking method for all tender pieces of meat which are to be cooked rare or very rare. The meat remains very juicy and turns out as soft as butter. Advantage: this gives you flexibility when planning meals, since the cooking times for slow cooking are generally longer. Slow-cooked meat can be kept warm easily.
Suitable ovenware
Use ovenware made out of glass, porcelain or ceramic and with a lid, e.g. a glass roasting dish.
Method
- Preheat the warming drawer containing the ovenware at setting 4.
- Rapidly heat a little fat in a pan. Sear the meat over a high heat and then place it directly into the warmed ovenware. Place the lid on top.
- Put the ovenware with the meat back in the warming drawer and complete the cooking. Set the function selector to setting 3.
Notes on slow cooking
Only use high-quality, fresh meat for this. Carefully remove sinews and fat. Fat develops a strong, distinct taste during slow cooking.
The meat should not be turned even if it is a large joint.
You can cut the meat immediately after slow cooking. It is not necessary to leave the meat to stand.
This particular cooking method always leaves the inside of the meat medium rare. However, this does not mean that it is raw or not properly cooked.
Meat that has been slow-cooked is not as hot as meat that has been cooked conventionally. Serve the sauce very hot. Place the plates in the warming drawer for the last 20-30 minutes.
Turn the oven back to setting 2 after slow cooking in order to keep the slow-cooked meat warm. You can keep small pieces of meat warm for up to 45 minutes, and large pieces for up to two hours.
Table
All tender joints of beef, pork, veal, lamb, game, and poultry are suitable for slow cooking. Searing and braising times depend on the size of the piece of meat.
The times for searing refer to the meat being placed in hot fat.
| Meal | SearingonthehotplateCompletingintheoven |
| Smallpiecesofmeat | |
| Cubesorstrips1-2minutesallover20-30minutes | |
| Smallcutlets,steaksormédaillons1-2minutesperside35-50minutes | |
| Medium-sizedpiecesofmeat | |
| Fillet(400-800g)4-5minutesallover75-120minutes | |
| Saddleoflamb(approx.450 g)2-3minutesperside50-60minutes | |
| Leanjoint(600-1000g)10-15minutesallover120-180minutes | |
| Largepiecesofmeat | |
| Fillet(from900g)6-8minutesallover120-180minutes | |
| Roastbeef(1.1-2kg)8-10minutesallover210-300minutes |
Cleaning and caring for your warming drawer
Do not use high-pressure cleaners or steam jets.
Only clean the oven when it is switched off.
Function selector: Setting = 0
Warming drawer exterior
Wipe the appliance with water and a little detergent. Dry it with a soft cloth.
Caustic or abrasive substances are not suitable. If any such substance comes into contact with the front of the warming drawer, wipe it off immediately with water.
Stainless steel surfaces
Always remove any flecks of limescale, grease, cornflour, or egg white immediately. Corrosion can form under such flecks.
For cleaning, use water with a little detergent. Dry the surface with a soft cloth.
Appliances with an aluminium front
Use a mild window-cleaning detergent and a soft window cloth or a fluff-free micro-fibre cloth. Wipe the surface using a horizontal motion and do not apply pressure.
Do not use aggressive cleaning products, abrasive sponges, or harsh cleaning cloths.
Heating plate
Clean the heating plate using water and a little detergent.
Troubleshooting
| Malfunctionsoftenhavesimpleexplanations.Please readthefollowinginstructionsbeforecallingthe after-salesservice: | |
| Theovenwareorfood remaincold | Checkwhether-theapplianceisswitchedon-therehasbeenapowercut-thedrawerisclosedcompletely. |
| Theovenwareorfoodare notwarmedsufficiently | Thismayindicatethat-theovenwareorfoodwerenotwarmedfora sufficientlengthoftime-thedrawerwasleftopenforalongtime. |
| The”poweron”indicator lightflashes | Checkwhetherthedrawerisclosed. |
| Theindicatorlightflashes rapidlywhenthewarming drawerisclosed | Calltheafter-salesservice |
| The”poweron”indicator lightdoesnotlightup | Theindicatorlightisfaulty.Consulttheafter-salesservice |
| Thefuseinthefusebox hasblown | Disconnecttheapplianceatthemainsandconsult theafter-salesservice. |
| Repairsmustonlybecarriedoutbyqualified specialists.Incorrectrepairsmayresultinserious injurytotheuser. |
After-sales service
Our after-sales service is there for you if your oven should need to be repaired. You will find the address and telephone number of your nearest after-sales service centre in the phone book. The after-sales service centres listed will also be happy to advise you of a service point in your local area.
E-number and FD-number
When contacting the after-sales service, always specify the product number (E no.) and the production number (FD no.) of your appliance. The rating plate bearing these numbers can be found by opening the warming drawer. Make an annotation of these numbers in the space below to save time in the event of your appliance malfunctioning.
E no. FD no.
After-sales service
Technical data
Power supply: 230 V, 50 Hz Total connected load: 810 W
VDE-inspected: Yes CE mark: Yes
Important remarks 29......
Before embedding 29......
Safety instructions 30......


- WHAT TO DO IF THERE IS A MALFUNCTION
- CUSTOMER SERVICE
- THE WARMING DRAWER
- PREHEATING OVENWARE
- KEEPING FOOD WARM
- USES
- CLEANING AND CARING FOR YOUR WARMING DRAWER
- TROUBLESHOOTING
- AFTER-SALES SERVICE
- IMPORTANT INFORMATION
- BEFORE INSTALLATION
- SAFETY PRECAUTIONS
- HOT SURFACE
- CLEANING
- REPAIRS
- CHIPS IN THE HEATING PLATE
- POWER ON" INDICATOR LIGHT
- FAN AND HEATER
- FUNCTION SELECTOR
- GENERAL OVENWARE
- ARRANGING OVENWARE
- DRINKS CONTAINERS
- METHOD
- SUITABLE FOODS
- SWITCHING OFF
- SLOW COOKING
- SUITABLE OVENWARE
- NOTES ON SLOW COOKING
- WARMING DRAWER EXTERIOR
- STAINLESS STEEL SURFACES
- APPLIANCES WITH AN ALUMINIUM FRONT
- HEATING PLATE
- E-NUMBER AND FD-NUMBER
- TECHNICAL DATA
- IMPORTANT REMARKS
Brand : BOSCH
Model : HSC140650
Category : Warming Drawer