
MC-CC14 - Dash cam ModeCom - Free user manual and instructions
Find the device manual for free MC-CC14 ModeCom in PDF.


| Product Type | Dash Cam (Car DVR) |
| Brand | ModeCom |
| Model | MC-CC14 |
| Video Resolution | 1080P (1920x1080) at 30fps, 720P (1280x720) at 30fps |
| Photo Resolution | 5M, 3M, 2M, 1.3M, VGA |
| Display | Touchscreen |
| Storage | MicroSD card (not included) |
| Loop Recording | Off, 1 min, 3 min, 5 min |
| G-Sensor | Built-in gravity sensor (sensitivity: High, Regular, Off) |
| Motion Detection | Yes, with zone selection |
| Time Stamp | Date & time, date only, off |
| Emergency Recording | Manual lock button; automatic on G-sensor trigger |
| Sound Recording | On/Off via M button |
| Power Supply | Car charger (12V/24V to 5V) via cigarette lighter socket |
| Operating Temperature | -10°C to +60°C |
| Installation | Windshield mount with suction cup holder |
| Languages | Polski, Russian, Français, Deutsch, Slovak, Español, Português, Hungarian, Czech |
| Auto Power On/Off | Automatic with car ignition; auto off after 10s delay |
| Screensaver | Off, 1 min, 3 min, 5 min |
| Maintenance | Clean lens and screen with soft, lint-free cloth; keep windshield clean |
| Safety | Do not disassemble; install without obstructing driver's view or airbags; keep away from strong magnetic fields |
Frequently Asked Questions - MC-CC14 ModeCom
User questions about MC-CC14 ModeCom
0 question about this device. Answer the ones you know or ask your own.
Ask a new question about this device
Download the instructions for your Dash cam in PDF format for free! Find your manual MC-CC14 - ModeCom and take your electronic device back in hand. On this page are published all the documents necessary for the use of your device. MC-CC14 by ModeCom.
USER MANUAL MC-CC14 ModeCom
MODECOM
REC MC-CC14 FHD TS

Car Camera
Úvod

Instalace
Betätigung
Instalación
Installation
Instalacija

Installálás:
Instalacja
7.4. Motion detection: the motion detection can recognize changes in image within a selected zone. The motion detection function can automatically record and save in case of any scene change, which can be used as a parking monitor to prevent the car being sabotaged intentionally.

Instalare
Установка

Namestitev
Inštalácia

Установка
This product should be installed in a proper manner, without interfering with the driver's eyesight or the airbag deployment, otherwise it may easily cause accident and personal injury.
Do not throw the device.
Protect the device from sharp temperature change (temperature working range from: -10 C degree to +60 C degree).
Far away from strong magnetic area.
Clean soft-non-dust cloth is recommended to clean the screen and lens. It is recommended to keep the windshield ahead the device clean for better recording effect.
Only use the dedicated charger and related accessories compatible with this product.
Do not dismantle device. This result in loss warranty.
Protect against children.
REC MC-CC14 FHD TS

Car Camera
Introduction
Thank you for your trust and purchasing DVR MODECOM MC-CC14. Camera is equipped with high-quality components to enable accurate recording of videos and touch screen to be easy and comfortable to use. This excellent product is intended for all road users.
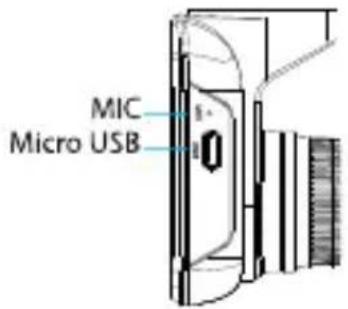
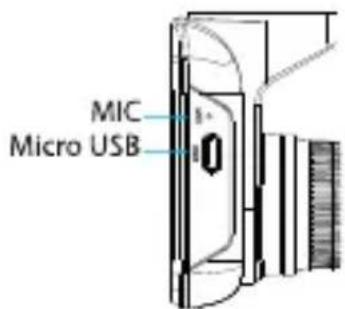
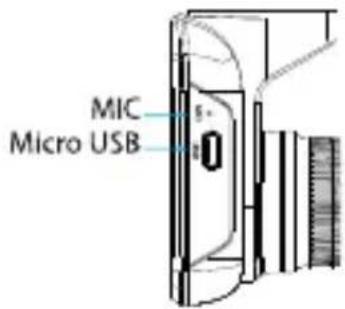
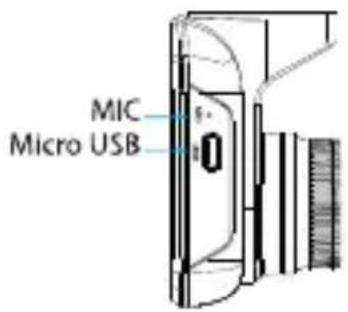
Physical interface

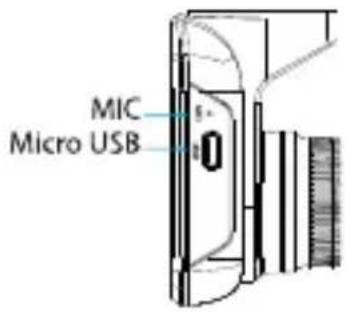
Installation
Fix the car camera with the holder, then set it to a suitable place on the glass of car, adjust to the best angle, insert MicroSD card and connect with car charger.
Plug car charger to the lighter socket of your car and connect MC-CC14 DVR to power adapter, then camera will start recoding automatically. When you shut down your car, DVR will be automatically turned off and all recorded video will be saved.
Functions
I. ON/OFF
- Auto Switch
a) Switch on automatically the soon as any external power is connected and the recording starts along with it (when car's engine starts).
b) When the external power is stopped a prompt will show up that the external power is cut off and the system will switch off automatically in
REC MC-CC14 FHD TS

Car Camera
10s (counting down).
- Manual switch off
a) Press the power button until it switches off.
b) Press the shut-down icon on the Main Interface to switch off.
II. Main Interface
To go into main interface press ✗ in every other modes.
III. Video recording
-
The system will prompt the Auto-Recording every time the machine switches on and memory card was put into camera.
-
Every switch to Video mode initials recording, example: press video icon in main interface to start recording.
-
Manual emergency video recording: You can directly click 🔒 to lock the current video segment as an emergency video.
-
Auto emergency video recording: it will enter emergency recording in case of a car crash or if G-sensor value reaches the fixed value set for G-sensor, and lock current video segment as an emergency video.
-
On ⏻ during recording, click M button to sound record the current recorded video.
-
Off during recording, click M button to cancel sound recording of the current recorded video.
-
In Video interface, click ⏻ and ahead to set the record video. It can be set below item:
7.1. Set resolution: 1080P 30fps, 720P 30fps
7.2. Time mark: set time watermark for the recorded video, either date and time, date or OFF.
7.3. Loop video recording: 5min, 3min, 1min or off for choosing.
7.4. Motion detection: the motion detection can recognize changes in image within a selected zone. The motion detection function can automatically record and save in case of any scene change, which can be used as a parking monitor to prevent the car being sabotaged intentionally.
REC MC-CC14 FHD TS

Car Camera
- In the Main interface mode please press Photo button to go into Photo interface. Press touching screen to take photos.
8.1. In the Photo interface, click 🔒 to enter setting.
8.2. Photo resolution choose: either 5M, 3M, 2M, 1.3M or VGA.
8.3. Time mark: namely to display imaging time, either date and time, date or OFF.
8.4. Interval setting: namely the time length between photo shootings, either 5min, 3min, 1min, or one shot.
9. In the Main interface mode please press Playback button to go into Playback interface.
- play/pause
- previous file
- next file
9.1. In the Playback interface, click 🔒 to enter setting.
9.2. Delete: delete videos or images. You can choose to delete current file, ALL, or cancel.
9.3. Protect: lock or unlock videos. You can choose to set current (lock the current file), cancel current (unlock the current file), set ALL (lock all files), cancel ALL (unlock all files), or cancel (cancel protection setting and return).
9.4. Sound volume: adjust the sound volume of the system via pageup/pagedown button.
10. General Setting
10.1. Formatting: format microSD card.
10.2. Language type: choose OSD language for the system: Polski, Russian, Français, Deutsch, Slovak, Español, Português, Hungarian, Czech.
10.3. Beep keys: either ON or OFF
10.4. Auto OFF: namely the auto shutdown time length without operation (5min, 3min, 1min or OFF).
10.5. Screen OFF: namely the screensaver time, either 5min, 3min, 1min or OFF.
REC MC-CC14 FHD TS

Car Camera
10.6. Gravity sensor: namely the gravity sensor's sensitivity (regular, high or OFF).
10.7. Optical frequency: either 50Hz or 60Hz.
10.8. Date format: either Y/M/D, M/D/Y, D/M/Y.
10.8.1. Date setting: set date by pageup/pagedown icon
10.8.2. Date setting: set date by pageup/pagedown icon
10.9. Reset: restore the system to the factory setting.
10.10.Version number: click to view the software version.
General Maintenance
This product should be installed in a proper manner, without interfering with the driver's eyesight or the airbag deployment, otherwise it may easily cause accident and personal injury.
Do not throw the device.
Protect the device from sharp temperature change (temperature working range from: -10 C degree to +60 C degree).
Far away from strong magnetic area.
Clean soft-non-dust cloth is recommended to clean the screen and lens. It is recommended to keep the windshield ahead the device clean for better recording effect.
Only use the dedicated charger and related accessories compatible with this product.
Do not dismantle device. This result in loss warranty.
Protect against children.
cz
This device was designed and made of high-quality reusable materials and components. If the device, its packaging, user's manual, etc. are marked with crossed waste container, it means they are subject to segregated household waste collection in compliance with the Directive 2012/19/UE of the European Parliament and of the Council. This marking informs that electric and electronic equipment shall not be thrown away together with household waste after it's been utilised. The user is obliged to bring the utilised equipment to electric and electronic waste collection point. Those running such collection points, including local collection points, shops or commune units, provide convenient system enabling to scrap such equipment. Appropriate waste management aids in avoiding consequences which are harmful for people and environment and result from dangerous materials used in the device, as well as improper storage and processing. Segregated household waste collection aids recycle materials and components of which the device was made. A household plays crucial role in contributing to recycling and reusing the waste equipment. This is the stage where the basics are shaped which largely influence the environment being our common good. Households are also one of the biggest users of small electrical equipment. Reasonable management at this stage aids and favours recycling. In the case of improper waste management, fixed penalties may be imposed in accordance with national legal regulations.
Brand : ModeCom
Model : MC-CC14
Category : Dash cam