KACAMWBUSBA - Webcam Kogan - Free user manual and instructions
Find the device manual for free KACAMWBUSBA Kogan in PDF.


| Product Type | Webcam |
| Brand | Kogan |
| Model | KACAMWBUSBA |
| Resolution | 1080p Full HD |
| Frame Rate | 30 fps |
| Field of View | 90 degrees |
| Microphone | Built-in omnidirectional |
| Focus Type | Fixed focus |
| Connection Interface | USB 2.0 |
| Cable Length | 1.5 meters |
| Dimensions (W x H x D) | 95 x 63 x 45 mm |
| Weight | 120 grams |
| Power Source | USB bus-powered |
| Compatible Operating Systems | Windows, macOS, Linux |
| Mounting | Clip-on monitor / tripod mount |
| Main Functions | Video calling, streaming, recording, low-light correction |
| Cleaning Instructions | Wipe lens with a soft dry cloth; avoid liquids |
| Safety Precautions | Do not expose to moisture or extreme temperatures; disconnect when not in use |
| Spare Parts Availability | Contact Kogan support for replacement cables or stands |
| Repairability | Not user-repairable; refer to authorized service center |
| General Information | Plug-and-play; no additional drivers required for most systems |
Frequently Asked Questions - KACAMWBUSBA Kogan
User questions about KACAMWBUSBA Kogan
0 question about this device. Answer the ones you know or ask your own.
Ask a new question about this device
Download the instructions for your Webcam in PDF format for free! Find your manual KACAMWBUSBA - Kogan and take your electronic device back in hand. On this page are published all the documents necessary for the use of your device. KACAMWBUSBA by Kogan.
USER MANUAL KACAMWBUSBA Kogan
natural_image
Black desktop computer with a circular lens and stand (no visible text or symbols)User's Notice
No part of this manual, including the products and software described in it, may be reproduced, transmitted, transcribed, stored in a retrieval system, or translated into any language in any form or by any means, except documentation kept by the purchaser for backup purposes, without the express written permission of us.
Product warranty or service will not be extended if: (1) the product is repaired, modified or altered, unless such repair, modification of alteration is authorized in writing by us; or (2) the serial number of the product is defaced or missing.
Products and corporate names appearing in this manual may or may not be registered trademarks or copyrights of their respective companies, and are used only for identification or explanation and to the owners' benefit, without intent infringe.
● Windows, MS-DOS, and DirectX are registered trademarks of Microsoft Corporation.
- Adobe and Acrobat are registered trademarks of Adobe Systems Incorporated.
The product name and revision number are both printed on the product itself. Manual revisions are released for each product design represented by the digit before and after the period of the manual revision number. Manual updates are represented by the third digit in the manual revision number.
SPECIFICATIONS AND INFORMATION CONTAINED IN THIS MANUAL ARE FURNISHED FOR INFORMATION USE ONLY, AND ARE SUBJECT TO CHANGE AT ANY TIME WITHOUT NOTICE, AND SHOULD NOT BE CONSTRUED AS A COMMITMENT BY US. WE ASSUME NO RESPONSIBILITY OR LIABILITY FOR ANY ERRORS OR INACCURACIES THAT MAY APPEAR IN THIS MANUAL, INCLUDING THE PRODUCT AND SOFTWARE DESCRIBED IN IT.
Copyright 2013. All Rights Reserved.
Chapter 1: Introduction
1.1 Package Contents
Upon receiving your USB PC camera, please make sure the following items are included in the the USB PC camera package.
The USB Camera
1.2 System Requirements
- IBM PC or compatible
Intel Pentium II 700 MHz CPU or better processor
● Minimum 256 MB memory
● One free USB slot
● Microsoft Windows XP/Vista/7/8 - CD-ROM drive
● MODEM or ETHERNET card inquired when using Net meeting.
Chapter 2: Install the USB PC Camera utility software

- Plug the camera into a spare USB port on your computer. The software should be detected and load automatically. Click "Next" button to start installing.

- In this part, please read the agreement and print a copy if required. Hit next where you will see the installation guide, reminding you to select the path where the software will be installed. Click “Browse” to change the path, and then click “Next” to the next step. If you do not wish to change the installation path, click “Next”.

- Please click "Install" button to start installing the software.
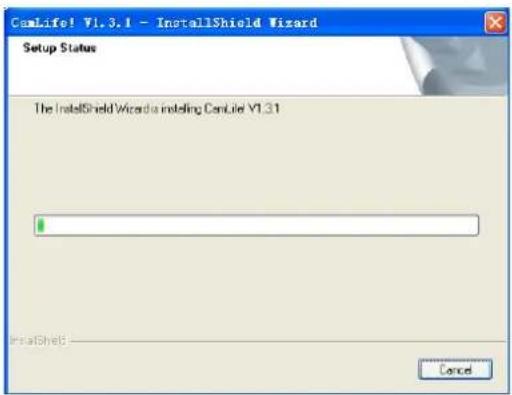
- Windows will then install the driver files.
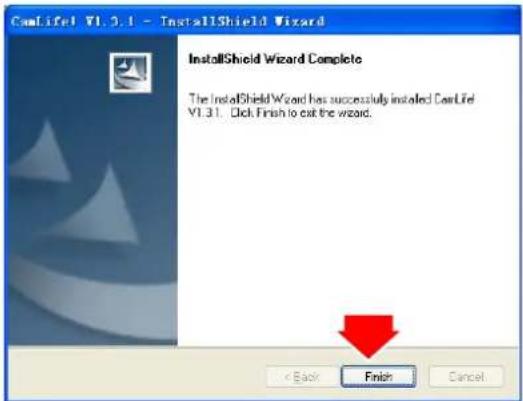
- Click "Finish" to complete install.
Chapter 3: Launch the Software
3.1 Running Camlife

Click Start on Windows Taskbar, and then select Programs\Camlife\Camlife.
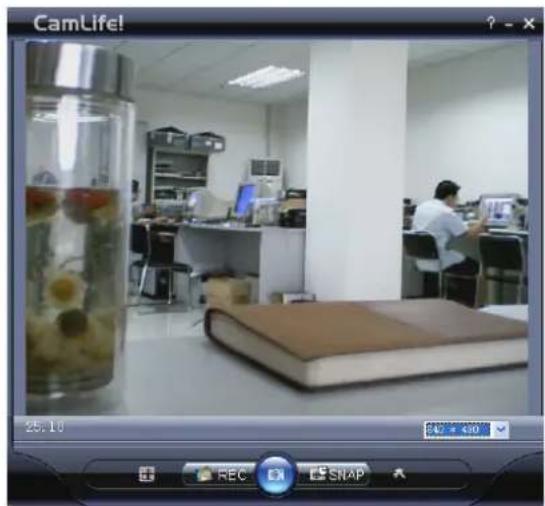
3.2 Watch Video
natural_image
Interior view of a modern office or lab space with a person working at a desk, featuring a glass jar containing food and a closed book on the floor (no visible text or symbols)Video preview
After the program starts up, the video stream from the video capture device will be displayed in the video window. You may drag and resize the video window at your discretion.

Snapshot:
Press to capture a still image/photograph and save it as BMP or JPG file, named by the current time. The save directory can be configured in the settings window.

Autosnapshot:
Press to capture continuous shots over a minute.

Record:
Press to capture a video stream and save it as an MPG file named by the time, to the directory you assigned. Press again to stop recording.

Image Browse:
Press to browse the images captured. For details, please go to the Browse images section.
Settings:
Press to configure the following settings:
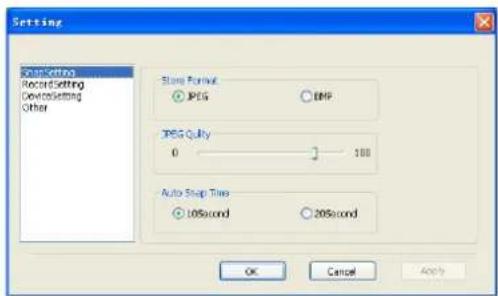
A. Snapshot settings: support BMP and JPEG image formats. Please choose your desired format.

B. Recording settings: Customize the recorded video files' quality settings. The file format is MPEG.

C. Device settings: Here, you can change the video or audio capture device if possible.

D. CamLife "file settings" can set the save path for recording and snapping.
Choose "digital zoom" mode to zoom in or zoom out picture size.
Choose" resolution" mode to select the image resolution. It can up to 10 million pixels.
Choose "Remote Control" mode to start remoter control function (if you have a compatible remote control).
Choose "Picture frame rate" mode to display real time picture frame rate.
Brand : Kogan
Model : KACAMWBUSBA
Category : Webcam