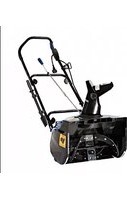
SJ622E - Snow blower Snow Joe - Free user manual and instructions
Find the device manual for free SJ622E Snow Joe in PDF.


| Product Type | Snow Blower |
| Brand | Snow Joe |
| Model | SJ622E |
| Motor Type | Electric (corded) |
| Motor Power | 15 A |
| Clearing Width | 22 in. |
| Intake Height | 13 in. |
| Throwing Distance | Up to 30 ft |
| Chute Control | Manual 180° rotation |
| Tire Size | 10 in. |
| Weight | 35 lbs |
| Dimensions (L x W x H) | 40 x 22 x 40 in. |
| Starting System | Push-button with safety key |
| Safety Features | Key lock, overload protection |
| Maintenance | Clean after use, check bolts, replace scraper bar |
| Repairability | Replaceable scraper bar, belt, and chute |
| Power Source | 120 V AC, 60 Hz |
| Extension Cord Requirement | 14 AWG or thicker, max 100 ft |
Frequently Asked Questions - SJ622E Snow Joe
User questions about SJ622E Snow Joe
0 question about this device. Answer the ones you know or ask your own.
Ask a new question about this device
Download the instructions for your Snow blower in PDF format for free! Find your manual SJ622E - Snow Joe and take your electronic device back in hand. On this page are published all the documents necessary for the use of your device. SJ622E by Snow Joe.
USER MANUAL SJ622E Snow Joe
IMPORTANT! Safety Instructions
All Operators Must Read These Instructions Before Use
Any electrical appliance can be dangerous if used incorrectly. Some of the safety precautions given in this manual apply generally to many appliances. Other warnings are specific to the use of this snow thrower. Keep this manual for future reference.
General Safety WARNINGS!
You and any other operator of this snow thrower must read, understand and follow these instructions in their entirety, and should reread them at the start of each snow season. Failure to follow these instructions may result in ELECTRIC SHOCK, FIRE and/or serious PERSONAL INJURY.
Notice the personal safety alert symbol △ used in this manual to draw your attention to a WARNING given along with the particular operating instruction. This means that the operation requires special ATTENTION, CAUTION and AWARENESS.
Work area safety
- Keep work area clean and well lit. Cluttered, dark areas invite accidents.
- Do not operate the snow thrower in an explosive atmosphere, such as in the presence of flammable liquids, gases or dust. Electrical appliances create sparks that may ignite the dust or fumes.
- Keep children, pets and bystanders away from the work area. Be aware that the normal noise of the machine when turned on may make it difficult for you to hear approaching people. Spectators should wear safety glasses and be kept a safe distance away from the work area. Do not let spectators touch the snow thrower or the extension cord.
Electrical Safety
- Electrical plugs must match the outlet. Never modify the plug in any way. Do not use any adapter plugs with grounded appliances. Unmodified plugs and matching outlets will reduce the risk of electric shock.
- Avoid body contact with earthed or grounded surfaces (i.e. upper and lower water pipes, radiators, ranges, refrigerators, microwave ovens and outer frames of
heating equipment). Take necessary precautions to avoid electric shock. There is an increased risk of electric shock if your body is earthed or grounded.
- Do not abuse the cord. Keep cord away from heat, oil, sharp edges or moving parts. Never carry the snow thrower by its cord or yank the cord to disconnect it from the electrical outlet. Damaged or entangled cords increase the risk of electric shock.
- Replace or properly repair damaged cords. If the cord becomes damaged in any manner while plugged into the wall receptacle, immediately pull the extension cord plug from the receptacle.
- Contact with water while operating the snow thrower can result in electric shock and serious bodily injury. Do not use the snow thrower in damp or wet locations or expose to rain. Do not handle the plug or the appliance with wet hands or while standing in water.
- ⚠WARNING – Only use a UL-rated extension cord for OUTDOOR, all-weather use (usually orange color). To prevent the extension cord from disconnecting during operation, refer to Fig. 12 (p. 7).
- Turn off the power switch and disconnect the power cable before making any adjustments to the unit and before inspecting, servicing, changing accessories or cleaning the snow thrower. Follow the same procedure if any other dangerous conditions present during operation. Any adjustments to the unit should be performed after revolving parts inside the snow thrower stop completely. Such preventative safety measures reduce the risk of starting the power tool accidentally.
- If you find the main power cable or the extension cable damaged, please pull out the plug from the socket and disconnect the power immediately. Repair the cable or replace it if necessary.
- When replacing any parts, you must strictly observe the instructions and procedures described in this operator's manual. Special care should be paid to any rubber parts, since these parts may increase the engine load and decrease its mechanical power if damaged.
- Do not move or transport the snow thrower when the plug is connected to the power socket and the switch is turned on.
- If, during use, you notice that the unit runs unstably or hear abnormal sounds from the engine, stop the machine, disconnect the power immediately and contact an authorized Snow Joe®/Sun Joe® service center.
Personal Safety
- Stay alert – Watch what you are doing and use common sense when operating the snow thrower. Do not use the machine when tired, ill or under the influence of drugs, alcohol or medication. A moment of inattention may result in serious personal injury.
- Wear proper clothing – Wearing rubber boots offers additional protection from electric shock. Do not wear loose clothing or jewelry that may become caught in the machine. Wear protective headgear to keep hair away from revolving parts of the machine. Safety glasses offer better protection than everyday eyeglasses.
- Moving parts present risks – Keep your face, hair, clothing, hands and feet away from moving parts. All guards and safety attachments must be installed properly before using the unit. Shut off and disconnect the cord before touching any parts other than the handles and the switch.
- Surfaces – This snow thrower is intended for use on paved surfaces. Do not use on gravel, stone or other unpaved surfaces unless the snow thrower is adjusted for such surfaces according to the instructions given in this operator's manual.
- Avoid accidental starting – Make sure the switch is in the off position before plugging in the unit. Do not carry the snow thrower with your finger on the switch.
- Body position – Maintain proper footing and balance at all times. Place heels firmly on the ground and tightly grasp the handle bar. Watch for uneven surfaces and do not overreach. In case you fall or collide with the snow thrower, inspect the unit for any damages or cracks. When stepping backwards, be careful to avoid obstacles beneath your feet or behind you to avoid falling.
- If the snow thrower strikes any object, immediately stop the snow thrower, then inspect for damage - Repair any damage before restarting and operating the snow thrower.
Safety Instructions for Walk-Behind Snow Throwers
- Read the operator's manual carefully – Learn your snow thrower's applications and limitations as well as the specific potential hazards related to this machine. Do not use this machine for any purpose other than the one for which it was designed. Otherwise, it may cause mechanical defaults, serious damage or personal injury.
- Preliminary unit inspection – Thoroughly inspect the unit before use. Make sure all the parts are secure and installed correctly. If you notice any abnormalities, do not use the machine until it has been properly repaired. Always perform a test run the first time you use the snow thrower or after replacing parts to ensure that the unit is functioning properly.
- Preliminary area inspection – Clear the area to be plowed before each use. Remove all objects, such as rocks, broken glass, nails, wire or string, which can be thrown by or become entangled in the snow thrower. Keep the area of
operation clear of all spectators, particularly children and pets.
- Excessive force – The snow thrower was designed to respond at a certain rate for various snow conditions for optimum safety and performance. Do not force it; keep pressure constant.
- Malfunctioning switch – Do not use the snow thrower if the switch does not turn it on and off. Any electrical appliance that cannot be controlled by the switch is not safe to use and must be repaired.
- Hitting an object – If the snow thrower accidentally strikes an object, follow these steps:
i) Stop the snow thrower and unplug the unit
ii) Inspect for damage
iii) Repair or replace any damaged part before restarting and operating the snow thrower.
- Discharge chute safety – Never direct the snow discharge chute at the operator, at bystanders, at vehicles or at windows. The discharged snow stream and foreign objects accidentally picked up by the snow thrower can cause serious damage and personal injury. Do not use your hands to unclog the discharge chute. Stop the motor before removing debris.
- Hand-held operating position – Operation of the snow thrower in the hand-held position is unsafe.
- Abnormal operation – If you notice the snow thrower running in an unstable state or hear abnormal sounds from the engine, immediately stop the machine, disconnect the power and contact an authorized Snow Joe®/Sun Joe® service center.
- Noise control – When using the snow thrower, you must respect local laws and regulations regarding noise control and environmental protection. To avoid noise disturbance, you should carefully decide upon an appropriate operation time and consider the surrounding conditions.
- When work is completed – Disconnect the snow thrower from the power source when not in use, when changing accessories and before performing any maintenance function.
- Store safely – Store the snow thrower indoors in a dry area between uses. Keep it in a locked area, where children and unauthorized users cannot gain access. Do not store the machine while it is still connected to the power source as this may result in damage and injury.
- Maintain for safety and longevity – Check for misalignment or binding of moving parts, breakage of parts and any other conditions that may affect the unit's operation. If damaged, repair or replace the damaged part before use. Use only original replacement parts designed specifically for your model. When replacing any parts, you must strictly observe the instructions and procedures described in this manual. Special care should be paid to any rubber parts, since these parts may increase the engine load and decrease its mechanical power if damaged.
Always check that all bolts, nuts and knobs are tight before using the snow thrower!
Safety Symbols
The following table describes safety symbols that may appear on this product. Read, understand and follow all instructions on the machine before attempting to assemble and operate.
| Symbols | Descriptions Symbols | Descriptions | |
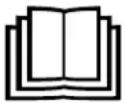 | READ THE OPERATOR'S MANUAL(S) - Read, understand and follow all instructions in the user manual(s) before attempting to assemble and operate. | 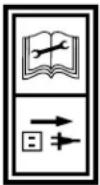 | Disconnect the plug before conducting maintenance or when it is damaged or tangled. Do not use this product in the rain or leave outdoors while it is raining. |
 | SAFETY ALERT - Indicates a precaution, a warning or a danger. | 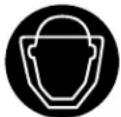 | It is obligatory at all times to wear goggles or a visor to protect the eyes and face. |
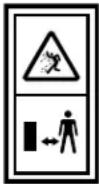 | Beware of stones and other objects that could be thrown from the appliance. Keep all bystanders and domestic animals a safe distance away from the work area. |  | Keep the flexible power supply cord away from the cutting blades. |
 | Wear safety gloves during use to protect hands. |  | Wear safety footwear at all times to provide protection against objects that may accidentally fall on feet. |
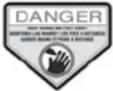 | Keep hands and feet away from the rotating parts. | 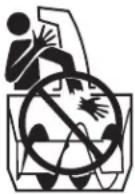 | Keep hands away from the moving parts of the snow thrower. The rotating parts can cause severe bodily injury. |
 | |||
 | Keep feet away from the moving parts of the snow thrower. The rotating parts can cause severe bodily injury. | 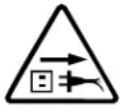 | Always keep the power cable away from heat sources, oils or sharp edges. Immediately remove plug from the mains if the cable is damaged or entangled. |
 | Double insulation. |  | The rotating part will continuously run for several seconds after you turn off the machine. |
Know Your Electric Snow Thrower
Read the owner's manual and safety rules carefully before operating your electric snow thrower. Compare the illustration below to the actual unit in order to familiarize yourself with the location of the various controls and adjustments. Save this manual for future reference.

Figure 1-1 (Model SJ622E)
- Handle bar
- ON/OFF switch lever
- Safety switch button
- Cable restraint holder
- Middle frame
- Lower frame
- Wheels (located at the back of the machine)
- Polarized cable plug
- Upper frame
- Upper chute crank
- Joint fixing T-Bolt and knob (4 pcs)
- Lower chute crank
- Chute deflector
- Discharge chute
- Main cover
- Rubber-tipped steel plates
- Auger
- Scraper bar
- Chute clean-out tool
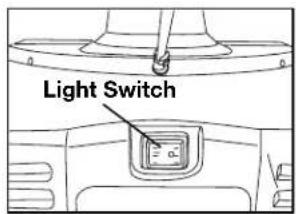
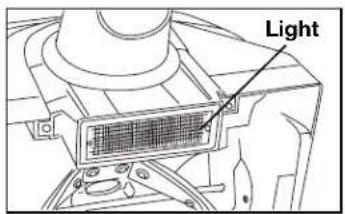
Figure 1-2 (Model SJ623E with 20 W Halogen Light)
Technical Data
| Rated Voltage | 120 V ~ 60 Hz | Throw Distance (max) | 25 ft (7.6 m) | ||
| Power | 15 | A | Plowing Capacity (max) | 720 lbs/min (327 kg/min) | |
| Light (Model SJ623E only) | 12 V, 20 W halogen | Directional Control | 180° adjustable chute | ||
| No Load Speed | 2450 rpm | Rotor | 4 rubber-tipped steel blades | ||
| Clearing Width | 18 in. (45.7 cm) | Weight (SJ622E) | 32.3 lbs (14.7 kg) | ||
| Clearing Depth | 10 in. (25.4 cm) | Weight (SJ623E with light) | 33.7 lbs (15.3 kg) |
NOTE: The only difference between the SJ622E and SJ623E models is the halogen light system.
Assembly

CAUTION

Inspect wiring, which, if damaged during shipping, may cause serious bodily injury during equipment use. If any damage is seen or suspected, do not assemble. Instead, contact the Snow Joe®/Sun Joe® customer service center at 1-866-SNOWJOE (1-866-766-9563) for assistance.
Handle with care during assembly so that electrical wiring does not become damaged.
Getting Started
- Remove the snow thrower and all other items from the box.
- Determine the left and right hand side of the snow thrower by standing in the normal operating position.
- Check all items for shipping damage. If damage is found or suspected or if any of the parts are missing, do not assemble. Instead, promptly inform the dealer where you bought the snow thrower or contact the Snow Joe®/Sun Joe® customer service center for assistance.
- Check to make sure the upper chute crank is included.
Upper, Middle and Lower Frame Assembly
- For easy assembly, the unit comes complete with most parts already connected. To complete the handle assembly, simply pull the middle frame back and pull the upper frame up (Fig. 2).

natural_image
Line drawing of a mechanical device with a hand operating it, no text or symbols present- Secure the connection of the lower frame to the middle frame by fastening the first set of joint fixing T-bolts and knobs on each side (Fig. 3).

natural_image
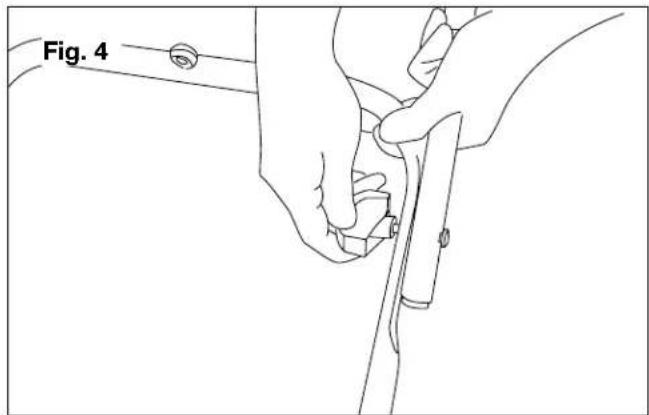
Line drawing of a hand operating a mechanical component, labeled 'Fig. 3' (no other text or symbols)- Secure the connection of the middle frame to the upper frame by fastening the second set of joint fixing T-bolts and knobs on each side (Fig. 4).
Discharge Chute Assembly
- Loosen the knob to lift the chute deflector (Fig. 5).

natural_image
Line drawing of a hand adjusting a mechanical component, labeled 'Fig. 5' (no text or symbols on the diagram itself)- Lift the chute deflector and lock it securely onto the discharge chute (Fig. 6).

natural_image
Line drawing of a person using a medical pressure monitor to adjust the cup (no text or symbols present)- Raise or lower the chute deflector to the desired height of the snow stream and tighten the knob (Fig. 7).
NOTE: Do not overtighten the knob.

natural_image
Line drawing of a hand holding a medical bag, labeled 'Fig. 7' (no other text or symbols)Chute Crank Assembly
- Slide the upper chute crank through the rubber ring located on the middle frame (Fig. 8).

natural_image
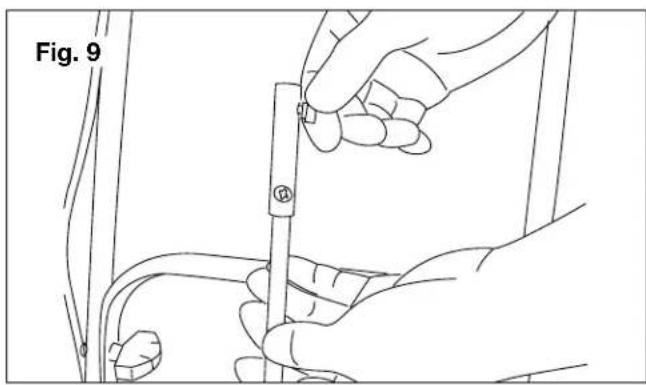
Simple line drawing of a mechanical component with a rod and circular base, labeled Fig. 8 (no text or symbols on the diagram itself)- Loosen the screw on the lower chute crank by hand (Fig. 9).
natural_image
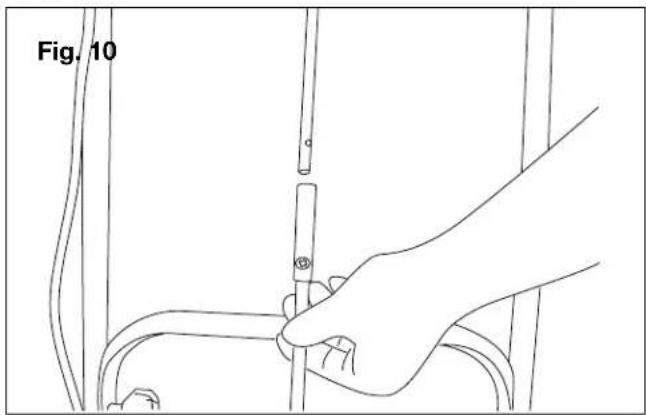
Line drawing of a hand using a tool to adjust or install a component, labeled 'Fig. 9' (no other text or symbols)- Slide the upper chute crank into the lower chute crank (Fig. 10).
natural_image
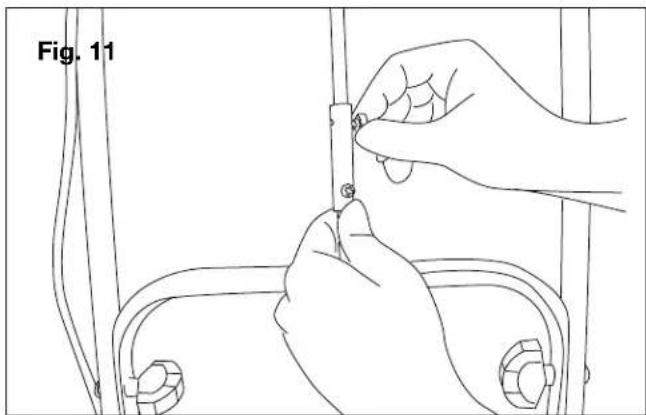
Line drawing of a hand holding a tool near a pipe or tube, labeled 'Fig. 10' (no other text or symbols)- Align the screw holes and tighten the screw by hand (Fig. 11).
natural_image
Line drawing of a hand adjusting a small component inside a vehicle (no text or symbols)Operation
NOTE: Before using this machine, make sure that the power source you will use complies with the specifications detailed in this manual. Before inserting the plug into the socket, verify that the snow thrower's roll shaft and rubber plates are firmly secured with screws, and that the rubber plates are facing the correct direction. Perform a test run to ensure that the rotor turns freely.
Securing the Extension Cord
- For safe and efficient use of your snow thrower, use only a UL-rated extension cord recommended for outdoor use. Refer to the Extension Cord Chart that follows.

WARNING

Electric shock may cause SEVERE INJURY or DEATH. Heed these warnings:
- Do not allow any part of snow thrower to make contact with water while powered on. If the appliance becomes wet while turned off, wipe dry before starting.
- Use only a UL-, CSA- or ETL-rated extension cord for outdoor, all-weather use. Do not use an extension cord over 100 ft (30 m).
- Do not touch the appliance or its plug with wet hands or while standing in water. Wearing rubber boots offers some protection.
EXTENSION CORD CHART
| Cord length is: 50 ft (15 m) 100 ft (30 m) |
| Wire gauge is: 14 AWG 12 AWG |
- Push the loop of the extension cord through the slot from the opposite side of the restraint hook. Position the loop over the hook and pull the cable back through the slot (Fig. 12).
Fig. 12
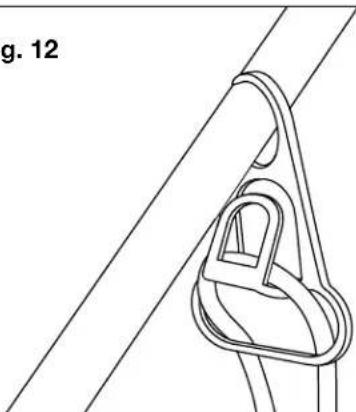
natural_image
Line drawing of a rope knot securing a cable, labeled 'g. 12' (no text or symbols on the diagram itself)- Insert the female end of the extension cord into the appliance's polarized male plug (Fig. 13).
Fig. 13
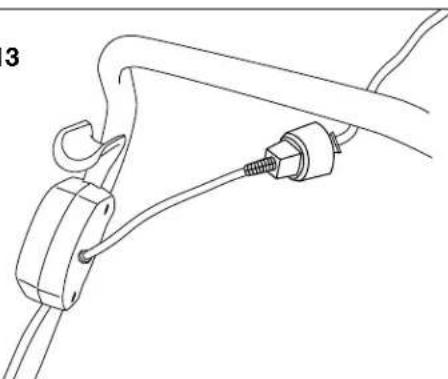
natural_image
Line drawing of a cable connector with connectors and wires (no text or symbols)- Note that the snow thrower has a polarized male plug – one prong in the plug is slightly longer and wider than the other (Fig. 14). The extension cord female end should be likewise polarized so that the extension cord fits snugly into the appliance plug.
Fig. 14

natural_image
Technical line drawing of a mechanical clamp or bracket with a coiled cable (no text or symbols)
WARNING

Damaged electrical cords present risk of fire, electrical shock and serious bodily injury.
Before operating the snow thrower, carefully examine the electrical cord. If the cord is damaged, do not use the snow thrower. Replace or repair the damaged cord immediately. If you need assistance, contact an authorized Snow Joe®/Sun Joe® service center.
Powering On and Off
- To power on, depress and hold the safety switch button found alongside the switch housing (Fig. 15).

natural_image
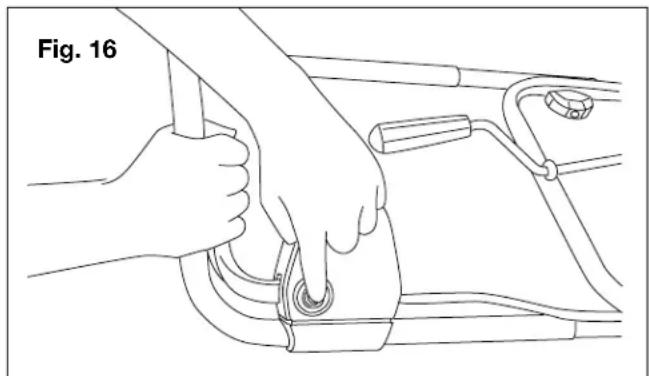
Line drawing of a hand pressing down on a car seatbelt component (no text or symbols)- While depressing the safety switch button, pull the ON/OFF switch lever toward you. Once the machine powers on, release the safety switch button and begin operation (Fig. 16). The machine can only be started by depressing the safety switch button first, followed by squeezing the ON/OFF switch lever; reverse operation will not start the machine.
natural_image
Line drawing of hands using a tool to adjust or install a component, labeled 'Fig. 16' (no text or symbols on the diagram itself)- To power off, release your grip on the ON/OFF switch lever.
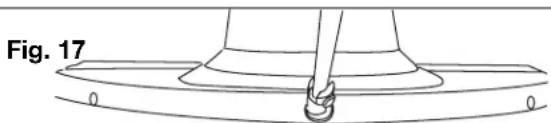
- On the SJ623E model, the halogen light can be used to illuminate the forward road in the dark. To use the light, turn on the light switch located on the back side of the snow thrower (Fig. 17).
natural_image
Technical line drawing of a mechanical component with a base and central pin (no text or symbols)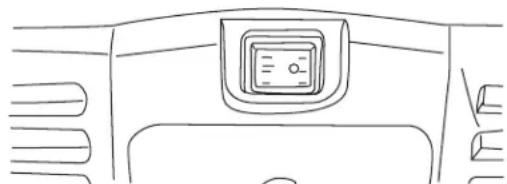
natural_image
Line drawing of a car front view showing the dashboard and rear seats (no text or symbols)NOTE: The light will only turn ON when the snow thrower is running. After finishing your work session, REMEMBER to TURN OFF the light switch.
Moving the Machine and Plowing the Snow

WARNING

Foreign objects, such as rocks, broken glass, nails, wire, or string, can be picked up and thrown by the snow thrower, causing serious personal injury.
Remove all foreign objects from the area to be plowed before operating the snow thrower.
- Keep the area of operation free of foreign objects that can become thrown by the rotor blades. Perform a thorough inspection of the area since some objects may be hidden from view by surrounding snow. If the snow thrower hits an obstruction or picks up a foreign object during use, stop the snow thrower, disconnect the extension cord, remove the obstruction and inspect the unit for damage. Repair or replace any damaged part before restarting and operating the unit.
- Keep children, pets and bystanders away from the area of operation. Be aware that the normal noise of the machine when turned on may make it difficult for you to hear approaching people.
- When moving the snow thrower, use the wheels on one side as the pivot point. Slightly tilt the snow thrower on this pivot point to move it forward or backward.
- Start your clearing path near the electrical outlet and work outward, throwing snow in a back and forth motion. To clear in the opposite direction, step over the cord and pivot the snow thrower on its wheels. Make sure to overlap clearing paths.
- Note the wind direction. If possible, move in the same direction as the wind so that the snow is not thrown against the wind (and thus back into your face and onto the just cleared path).
- While moving the snow thrower, do not drag the power cable violently or roughly. The snow thrower should move within the range that the cable can reach.
- Do not push the snow thrower with excessive force. You should push the machine gently and evenly in accordance with the unit's throw rate.
-
Do not apply additional man-made load to the engine since this may cause engine damage.
-
Some parts of the snow thrower may freeze under extreme temperature conditions. Do not attempt to operate the snow thrower with frozen parts. If the parts freeze while the snow thrower is in use, stop the snow thrower, unplug the extension cord and inspect for frozen parts. Free all parts before restarting or operating the snow thrower. Never force controls that have frozen.
-
When working on pebbles, gravel or unpaved surfaces, avoid throwing loose surface material along with the snow by pushing down on the handle to raise the scraper bar at the base of the unit above the pebbles or gravel.
Changing Throw Direction and Throw Height

WARNING

Never direct the snow discharge chute at the operator, at bystanders, at vehicles or at nearby windows. The discharged snow and foreign objects accidentally picked up by the snow thrower can cause serious damage and personal injury.
Always orient the discharge chute in the opposite direction from where you, bystanders, surrounding vehicles or windows are located.
- The discharge chute can be adjusted 180 degrees by rotating the chute crank. Rotate the chute control crank clockwise to move the discharge chute to the left (Fig.18) and counterclockwise to move the chute to the right (Fig.19).
Fig. 18
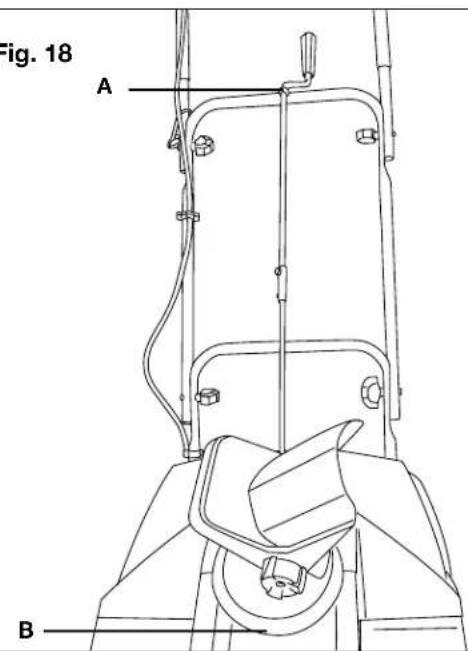
NOTE: A little lubricant, such as WD-40, will provide a smoother operation of the chute (spray at points A and B as indicated in Fig. 18).
Fig. 19

natural_image
Technical line drawing of a mechanical device with no visible text or symbols- The chute deflector on the top of the discharge chute controls the height of the snow stream. Loosen the knob to raise or lower the deflector to the desired height of snow you wish to throw. Tighten the knob to secure the deflector (Fig. 20).


WARNING

Make sure that the chute deflector snaps and locks completely onto the discharge chute. An opening between the discharge chute and the chute deflector may allow foreign objects to be picked up by the snow thrower and thrown in the direction of the operator causing serious boldly injury.
- Do not advance the chute deflector too far forward causing an opening to appear between the deflector and discharge chute.
- Do not overtighten the knobs on the chute deflector (Fig. 20).
Maintenance

WARNING

Make sure to turn off the switch and disconnect the extension cord before performing any maintenance task on your snow thrower.
Lifetime Lubrication (Motor and Auger)
Lubrication is not necessary and may damage the unit. The snow thrower is lubricated for lifetime use at the factory before shipment.
General Maintenance Tips
- Do not attempt to repair the machine unless you have the proper tools and instructions for disassembly and repair of the machine.
- Check bolts and screws at frequent intervals for proper tightness to ensure that the equipment is in safe working condition.
- After each snow removal session, run the snow thrower for a few minutes to prevent the collector/impeller from freezing. Shut off the motor, wait for all revolving parts to stop completely and wipe residual ice and snow off the unit. Rotate the chute crank several times to remove any excess snow.
Replacing the Rubber Plates
NOTE: When replacing worn rubber plates, pay close attention to carefully distinguish between the coarse and smooth side of the plates. Place the coarse side inside and the smooth side outside.
- Detach the worn rubber plate assembly by removing the two sets of nuts and bolts used to secure it to the auger assembly (Figs. 21 & 22).


- Loosen the middle two sets of nuts and bolts to detach the worn rubber plate from the metal frame (Fig. 23).

- Attach the new rubber plate onto the metal frame by replacing and tightening the middle two sets of nuts and bolts (Fig. 23).
- Reassemble the rubber plate assembly to the auger assembly by replacing and tightening the two sets of nuts and bolts used to secure it (Figs. 21 & 22).
Replacing the Scraper Bar
- The scraper bar is located at the base of the snow thrower beneath the rotor housing (Fig. 24).

natural_image
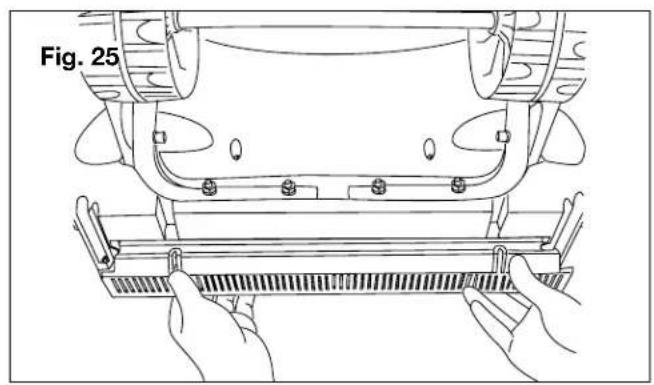
Technical line drawing of a robotic vehicle with visible structural components and mounting brackets (no text or symbols)- Detach the worn scraper bar from the snow thrower by removing the two screws that hold it in place (Fig. 25).
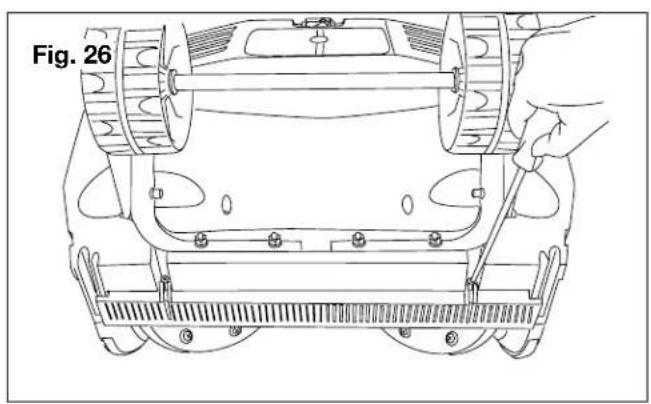
- Install the new scraper bar and fasten it securely to the snow thrower with the two screws (Fig. 26).
natural_image
Technical line drawing of a robotic vehicle with a hand adjusting the base panel (no text or symbols)Replacing the Belt and Pulley
NOTE: Determine the left and right hand side of the snow thrower by standing behind the unit in the normal operating position
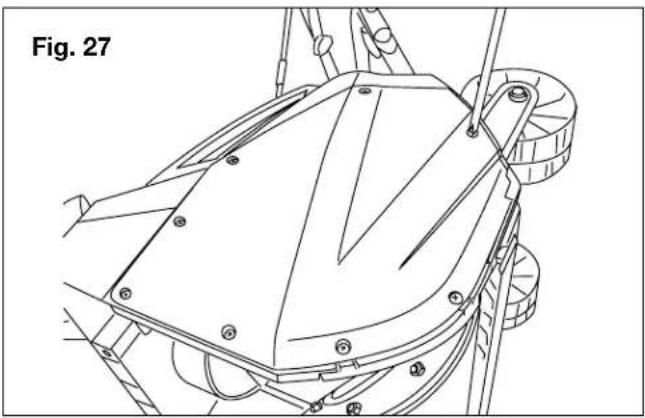
- Remove the screws from the left panel of the snow thrower and remove the left panel (Fig. 27).
natural_image
Technical line drawing of a mechanical component with mounting holes and structural supports (no text or symbols)- Lift the belt tension pulley and roll the worn belt up and off the big pulley from the top of the big pulley (Fig. 28).

- To replace the big pulley, remove the screw and washer from the middle of the pulley. While securing the auger so it does not spin, use a 7/8-inch socket to turn the outer nut of the pulley clockwise (the pulley is left-handed, so loosening and tightening occur in reverse orientation; clockwise to loosen and counterclockwise to tighten). Once the old pulley is removed, replace the big pulley and tighten the outer nut counterclockwise with the 7/8-inch socket. Replace and tighten the screw and washer (Fig. 28).
NOTE: Heavy wet snow puts a load on belts, thus requiring more frequent belt replacement.
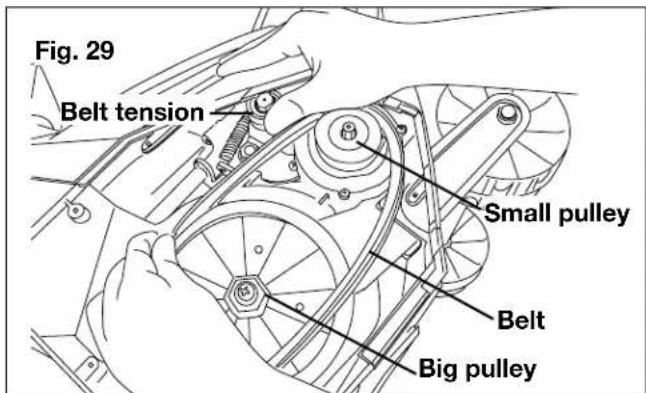
- To install the new belt, lift the belt tension and roll the new belt onto the little pulley at an angle. Then roll the belt onto the top of big pulley by rotating the big pulley counterclockwise as the belt grips the top of the big pulley (Fig. 29).
- Replace the left panel of the snow blower with all screws (Fig. 27).
Replacing the Skid Shoes
The skid shoes are located at the bottom of the side panel. Unfasten the two screws on the side panel to remove the worn skid shoes (Fig. 30). Install the replacement by fastening it to the side panel with the same two screws.

Automatic Reset
Both Snow Joe ^® SJ622E and SJ623E models have built-in automatic reset functions. In the event of a major obstruction that halts auger movement, simply unplug your unit, clear the auger obstruction, wait 60 seconds and then resume use of your machine.
Storage
- Allow the engine to cool completely before cleaning, storing or transporting the snow thrower. Be sure to secure the unit while transporting.
-
Disconnect the extension cord from the snow thrower. Inspect the extension cord closely for signs of wear or damage. Replace it if it is worn or damaged.
-
Inspect the snow thrower carefully for worn, loose or damaged parts. Check connections and screws and tighten if necessary. For repairing or replacing parts, contact your authorized Snow Joe ^® /Sun Joe ^® dealer or the Snow Joe ^® /Sun Joe ^® customer service center at 1-866-SNOWJOE (1-866-766-9563).
-
Store the unit, along with the disconnected extension cord, in a locked, dry place out of the reach of children to prevent unauthorized use or damage. Cover loosely with a tarp or with Snow Joe®'s universal 18-inch electric snow thrower cover (Model SJCVR) for added protection. Visit snowjoe.com to purchase the cover online.
Service and Support
If your Snow Joe ^® SJ622E/SJ623E electric snow thrower requires service or maintenance, please call 1-866-SNOWJOE (1-866-766-9563) for assistance.
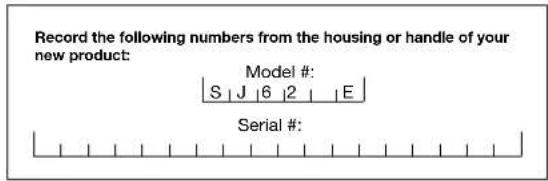
Model and Serial Numbers
When contacting the company, reordering parts or arranging service from an authorized dealer, you will need to provide the model and serial numbers, which can be found on the decal on the main cover of the unit to the left of the discharge chute. Copy these numbers into the space provided below.
NOTES
NOTES

SNOW JOE® + SUN JOE® CUSTOMER PROMISE
ABOVE ALL ELSE, Snow Joe ^® + Sun Joe ^® are dedicated to you, our customer. We strive to make your experience as pleasant as possible. Unfortunately, there are times when a product does not work or breaks under normal operating conditions. We think it's important that you know what you can expect from us. That's why we created the Snow Joe ^® + Sun Joe ^® promise.
OUR PROMISE: Snow Joe® + Sun Joe® warrant new products for two years from the date of purchase. If your product does not work, or there's an issue with a specific part, we will fix this by either sending you a free replacement part or by sending you a new or comparable product at no charge. How cool is that! Before you know it, you'll be back in action cutting, sawing, mowing, washing and...?
GENERAL CONDITIONS:
Snow Joe ^® + Sun Joe ^® operating under Snow Joe ^® , LLC warrants this new product to the original purchaser for two years against defects in material or workmanship when used for normal residential purposes. If a replacement part or product is needed, it will be sent free of charge to the original purchaser except as noted below.
The duration of this warranty applies only if the product is put to personal use around the household. If the product is put to any business, commercial or industrial use or is rented or leased, then the duration of this warranty is 90 days from the date of original purchase. It is the owner's responsibility to correctly perform all maintenance and minor adjustments explained in the owner's manual.
HOW TO OBTAIN YOUR REPLACEMENT PART OR PRODUCT:
To obtain a replacement part or product, please visit snowjoe.com/help or email us at help@snowjoe.com for instructions. Please be sure to register your unit beforehand to speed up this process. Certain products may require a serial number, typically found on the decal affixed to the housing or guard of your product. All products require a valid proof of purchase.
EXCLUSIONS:
- Wearing parts like belts, augers, chains and tines are not covered under this warranty. Wearing parts can be purchased at snowjoe.com or by calling 1-866-SNOWJOE (1-866-766-9563).
- Batteries are covered in full for 90-days from the date of purchase.
Snow Joe ^® + Sun Joe ^® may from time to time change the design of its products. Nothing contained in this warranty shall be construed as obligating Snow Joe ^® + Sun Joe ^® to incorporate such design changes into previously manufactured products, nor shall such changes be construed as an admission that previous designs were defective.
This warranty is intended to cover product defects only. Snow Joe ^® , LLC is not liable for indirect, incidental or consequential damages in connection with the use or misuse of the Snow Joe ^® + Sun Joe ^® products covered by this warranty. This warranty does not cover any cost or expense incurred by the purchaser in providing substitute equipment or service during reasonable periods of malfunction or non-use of this product while waiting for a replacement part or unit under this warranty. Some states do not allow exclusions of incidental or consequential damages so the above exclusions may not apply in all states. This warranty may give you specific legal rights in your state.
HOW TO REACH US:
We're here to help Monday through Friday from 9AM to 6PM EST. You can reach us at 1-866-SNOWJOE (1-866-766-9563), online at snowjoe.com, via email at help@snowjoe.com or tweet us @snowjoe.
EXPORTS:
Customers who have purchased Snow Joe ^® + Sun Joe ^® products exported from the United States and Canada should contact their Snow Joe ^® + Sun Joe ^® distributor (dealer) to obtain information applicable to your country, province or state. If for any reason, you are not satisfied with the distributor's service, or if you have difficulty obtaining warranty information, contact your Snow Joe ^® + Sun Joe ^® seller. If in the event your efforts are unsatisfactory, please reach out to us directly.
- IMPORTANT! Safety Instructions
- All Operators Must Read These Instructions Before Use
- General Safety WARNINGS!
- Work area safety
- Electrical Safety
- Personal Safety
- Safety Instructions for Walk-Behind Snow Throwers
- Safety Symbols
- Know Your Electric Snow Thrower
- Assembly
- CAUTION
- Getting Started
- Upper, Middle and Lower Frame Assembly
- Discharge Chute Assembly
- Chute Crank Assembly
- Operation
- Securing the Extension Cord
- WARNING
- Electric shock may cause SEVERE INJURY or DEATH. Heed these warnings:
- EXTENSION CORD CHART
- Damaged electrical cords present risk of fire, electrical shock and serious bodily injury.
- Powering On and Off
- Moving the Machine and Plowing the Snow
- Changing Throw Direction and Throw Height
- Maintenance
- Lifetime Lubrication (Motor and Auger)
- General Maintenance Tips
- Replacing the Rubber Plates
- Replacing the Scraper Bar
- Replacing the Belt and Pulley
- Replacing the Skid Shoes
- Automatic Reset
- Storage
- Service and Support
- Model and Serial Numbers
- NOTES
- SNOW JOE® + SUN JOE® CUSTOMER PROMISE
- GENERAL CONDITIONS:
- HOW TO OBTAIN YOUR REPLACEMENT PART OR PRODUCT:
- EXCLUSIONS:
- HOW TO REACH US:
- EXPORTS:
Brand : Snow Joe
Model : SJ622E
Category : Snow blower