
EM-V860 - Microwaves SANYO - Free user manual and instructions
Find the device manual for free EM-V860 SANYO in PDF.


| Type | Microwave oven |
| Brand | Sanyo |
| Model | EM-V860 |
| Capacity | 0.9 cu ft |
| Power Output | 900 watts |
| Power Levels | 10 |
| Turntable | Yes, 10.6 inches diameter |
| Timer | Digital up to 99 minutes 99 seconds |
| Clock | Yes |
| Child Lock | Yes |
| Dimensions (WxHxD) | 20.5 x 12.2 x 17.8 inches |
| Cavity Dimensions (WxHxD) | 14.5 x 9.4 x 16.2 inches |
| Weight | 30 lbs |
| Voltage | 120V / 60Hz |
| Functions | Defrost, auto cook, multi-stage cooking |
| Exterior Material | Stainless steel |
| Interior Material | Ceramic |
| Cleaning | Wipe with damp cloth and mild detergent |
| Safety Features | Interlock system, auto shut-off |
| Spare Parts Availability | Yes, through authorized service centers |
| Repair Service | Available at Sanyo service centers |
Frequently Asked Questions - EM-V860 SANYO
User questions about EM-V860 SANYO
0 question about this device. Answer the ones you know or ask your own.
Ask a new question about this device
Download the instructions for your Microwaves in PDF format for free! Find your manual EM-V860 - SANYO and take your electronic device back in hand. On this page are published all the documents necessary for the use of your device. EM-V860 by SANYO.
USER MANUAL EM-V860 SANYO
Setting up & Getting to Know Your Oven
■ Earthing Instructions 2
■ Installation 2
■ Names of Oven Parts and Accessories ..... 3
■ Control Panel and Features 4
■ Setting Clock 5
■ Child Lock-Out 5
■ Utensils 6
Operating Instructions
■ Quick Set Cooking.... 7
■ Automatic Defrost by Weight 7
■ Automatic Meat Cooking by Weight..... 8
■ Direct Access Food Cooking 9
■ Time Cooking 10
■ Minute Timer.... 11
■ Multistage Cooking 11
■ Turntable Off.... 11
Care of Your Microwave Oven
■ Questions and Answers 12
■ Cleaning 13
■ Before Calling for Service 13
Chart
■ Quick Set Cooking Chart 14
■ Automatic Defrost Chart 15
■ Direct Access Food Cooking Chart ..... 16
Easy Use Chart .... back cover
Read these instructions
carefully before use.
If you follow the instructions, your microwave oven will provide you with many years of good service.
SAVE THESE INSTRUCTIONS
SPECIFICATIONS
| EM-V758 | EM-V860 | |
| Power Consumption | 1300W | 1500W |
| Maximum Output | 800W* | 1000W* |
| Oven Capacity | 0.8 cu. ft. | 1.1 cu. ft. |
| Turntable Diameter | 340 mm | 360 mm |
| Dimensions (w x h x d) | 525 mm x 283 mm x 417 mm | 550 mm x 312 mm x 450 mm |
| Weight (Approx.) | 18.2 kg | 20.0 kg |
*According to IEC-705 test procedures.
Specifications subject to change without notice.
PROPER AND SAFE USE OF YOUR OVEN
• The oven must be level.
- The turntable and turntable roller rest must be in the oven during cooking.
- Place the cookware gently on the turntable and handle it carefully to avoid possible breakage.
- The oven has several built-in safety switches to ensure that the power remains off when the door is open. Do not tamper with these switches.
- Do not operate the microwave oven empty.
- Do not overcook food. A small quantity of food with low moisture content or high fat or sugar content can burn.
- Do not cook bacon directly on the turntable. Excessive local heating of the turntable may cause it to break.
- Do not heat baby bottles or baby food in the microwave oven. Uneven heating may occur and could cause physical injury.
- Do not heat narrow-necked containers, such as syrup bottles.
- Do not attempt to deep-fry in your microwave oven as the temperature of oil cannot be controlled.
- Do not heat cans. Transfer the contents into a microwave-safe dish before heating.
- Do not use this microwave oven for commercial purposes. This microwave oven is made for household use only.
NOTE
- It is quite normal for steam to be emitted around the door, for misting to occur on the door, or even for water droplets to appear below the door during the cooking cycle. This is merely condensation from the heat of the food.
PRECAUTIONS TO AVOID POSSIBLE EXPOSURE TO EXCESSIVE MICROWAVE ENERGY
(a) Never interfere or tamper with safety interlocks.
(b) Do not place any object between the oven front face and the door or allow soil or cleaner residue to accumulate on door sealing surfaces. Wipe the door sealing area frequently with a mild detergent, rinse and wipe dry. Never use abrasive powders or pads.
(c) When open, the door must not be subjected to strain; for example, a child hanging on the opened door or any load on it could cause the oven to fall forward, and the weight could also damage the door.
(d) Do not operate the oven if it is damaged. It is particularly important that the oven door closes properly and that there is no damage to the:
(1) DOOR (bent)
(2) HINGES AND LATCHES (broken or loosened)
(3) DOOR SEALS AND SEALING SURFACES
IMPORTANT SAFETY INSTRUCTIONS
When using electrical appliances, basic safety precautions should be followed, including the following:
WARNING – To reduce the risk of burns, electric shock, fire, injury to persons or exposure to excessive microwave energy:
- Read all instructions before using.
- As with most cooking appliances, close supervision is necessary to reduce the risk of a fire in the oven cavity.
If a fire should start:
- Keep the oven door closed
• Turn the oven off, and - Disconnect the power cord or shut off power at the fuse or circuit breaker panel.
Keep in mind the following rules at all times:
a. Do not overcook food. Overcooked food can cause fires in the oven. Carefully attend to the oven's activities, especially if paper, plastic, or other combustibles are inside.
b. Do not store combustible items such as bread, cookies, paper products, etc. inside the oven. They may catch fire if turned on accidentally.
c. Do not use wire twist-ties in the oven. Be sure to inspect purchased items for wire twist-ties and remove before placing food in the oven.
- Some products such as eggs in the shell, water with oil or fat, sealed containers and closed glass jars may explode and therefore should not be heated in this oven.
- Use this oven only for its intended uses as described in the manual. It is not designed for industrial or laboratory use. Never use corrosive chemicals or vapors in this oven.
- As with any appliance, children should use the oven only under adult supervision.
- Do not store or use this appliance outdoors.
- Keep the oven away from heat and water sources. Exposure to heat and water can lower efficiency and lead to malfunctioning.
- When heating water or other liquids, use a wide necked container to allow air bubbles to escape freely. Using narrow-necked containers may cause the liquid to boil over. This may happen even after the cooking has stopped.
- It is important to keep the door and the oven interior clean. (See "Cleaning" instructions on page 13.)

WARNING
(a) Do not adjust or repair microwave oven yourself. Do not operate the oven if it is damaged, until it has been repaired by a service engineer trained by the manufacturer.
(b) It is dangerous for anyone other than a properly qualified engineer trained by the manufacturer to carry out adjustments or repairs.
(c) If the power supply cord is damaged, it must be replaced by the manufacturer, as a specially prepared cord is required.
(d) On no account remove or interfere with any parts or screws. THIS COULD PROVE VERY DANGEROUS.
SAVE THESE INSTRUCTIONS
EARTHING INSTRUCTIONS
This appliance must be earthed. If there is an electrical short circuit, earthing reduces the risk of electric shock by providing an escape wire for the electric current. This appliance is equipped with a cord that has a earthing wire with a earthing plug. The plug must be plugged into an outlet that is properly installed and earthed.
The electrical power cord must be kept dry and must not be pinched or crushed in any way.
WARNING - Improper use of the earthing plug can result in electric shock.
INSTALLATION
Remove all packing material and accessories.
Examine the oven for any damage such as dents or a broken door. Do not install if oven is damaged.
- Select a level surface that provides enough open space (see illustration at right) for the inlet and/or outlet vents.
- Leave a minimum clearance of 7.5 cm above the oven.
- Do not remove the legs from the bottom of the oven.
- Blocking the inlet and/or outlet openings can damage the oven.
- Do not install oven over a range, cooktop or other heat-producing appliance.
- Place the oven as far away from radios and T.V.'s as possible.
- Cabinet is covered with a protective film which should be removed to fully show the intended color and finish.
- Plug your oven into a standard household outlet. Be sure that your microwave oven is the only appliance on the circuit.
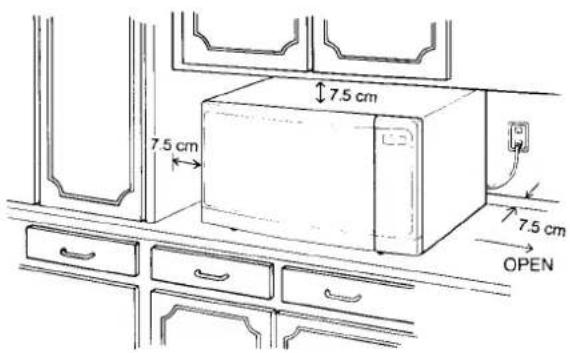
A minimum clearance of 7.5 cm is required between the oven and any adjacent wall. One side must be open.
NOTE:
This oven is designed for countertop installation only. Insertion into a cabinet or wall will damage the product and void the warranty.
NAMES OF OVEN PARTS AND ACCESSORIES
Remove the oven and all materials from the carton.
your oven comes with the following accessories:
Turntable 1
Turntable roller rest 1
Instruction Manual 1
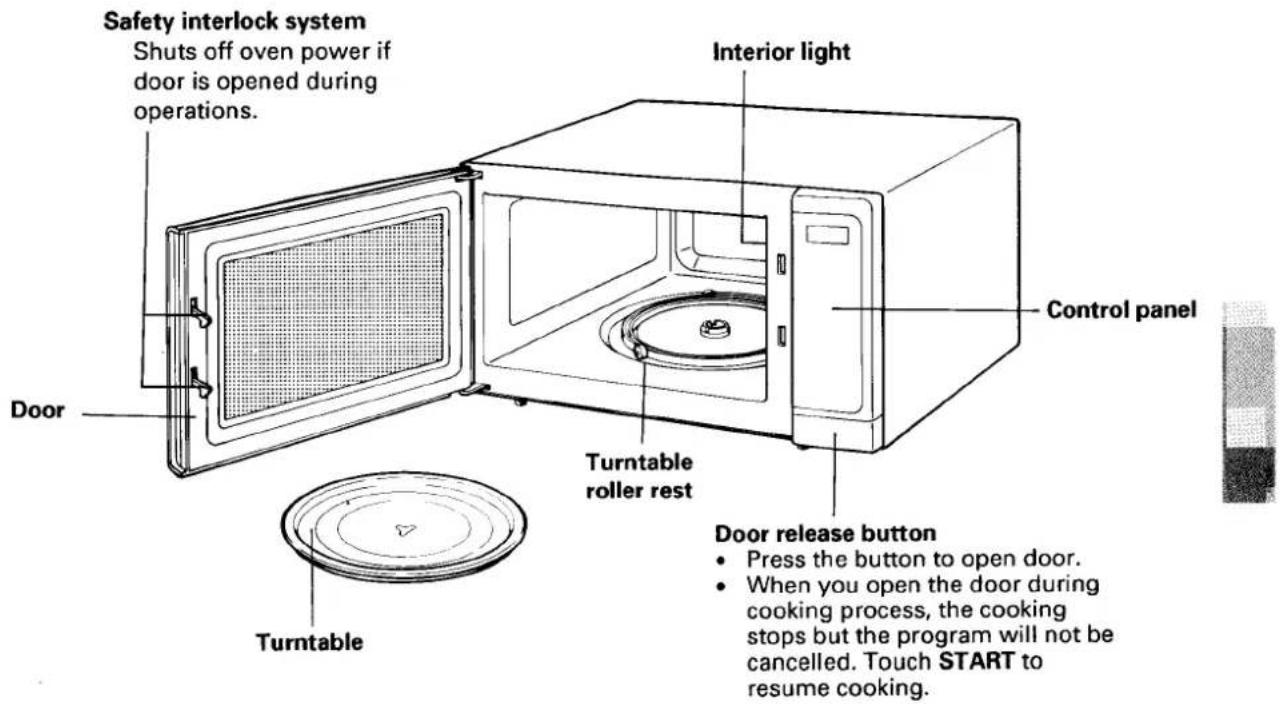
TURNTABLE INSTALLATION
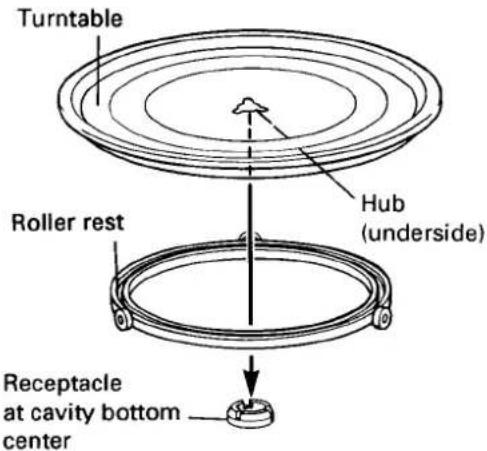
- Place the roller rest on the cavity bottom.
-
Place the turntable on top of the roller rest as shown in the diagram. Make sure the turntable hub is securely locked in the receptacle. Never place the turntable upside down.
-
Both turntable and roller rest must always be used during cooking.
- All food and containers of food are always placed on this turntable for cooking.
- This turntable returns to its original starting position when cooking is finished.
- This turntable rotates clockwise and counterclockwise; this is normal.
![[2] AUTO DEF ST1 ST2 ST3 PAUSE 88:88 Kg LB OZ TIME POWER SERV. [1] [12] DIRECT ACCESS FRESH VEGETABLES FISH FILLET FROZEN VEGETABLES START POTATO RICE BEVERAGE [3] [4] MEAT QUICK AUTO 1 CHICKEN SET DEFROST 2 LAMB AUTO DEFROST 3 BEEF TURNTABLE 4 PORK TIME POWER OFF [5] [6] [7] 1 2 3 4 5 6 7 8 9 - STOP 0 CLEAR [10] [11]](/content/2026/05/1071188/images/19c9929d430a922284064034d3a4731ab309405058f38421c7b2fbb6f2bd27d8.jpg)
[1] Display Window
Counts down time in seconds during operation. Shows clock time when oven is not in use.
[2] Indicators
ST1/ ST2/ ST3 : Cooking stage indicators AUTO/ DEF/ PAUSE : Cooking mode indicators TIME/ POWER/ SERV./Kg : A flashing indicator prompts you to enter desired cooking time, power setting, food weight or number of servings.
DIRECT ACCESS menu keypads
[3] Cooking menu keypads (page 9)
Auto menu keypads
[4] MEAT (page 8)
[5] QUICK SET (page 7)
[6] AUTO DEFROST (page 7)
[7] TIME keypad (page 10)
[8] POWER (Power Level) keypad (page 10)
[9] TURNTABLE OFF keypad (page 11)
[10] Number keypad
[11] Clock keypad (page 5)
[12] START keypad
[13] STOP/CLEAR keypad
Clears all previous setting, if pressed before cooking starts. During cooking: touch once to stop oven; twice to stop and clear all entries.
Beep Sound
A beep tone sounds when a keypad on the control panel is touched, to indicate a setting has been entered.
SETTING CLOCK
When your oven is plugged in for the first time or when power resumes after a power interruption, the numbers in the display reset to 0:00. Set the clock.
Example: To set 3:15 :
1.
Touch STOP/CLEAR.
2.

Touch

3.

Touch number keypads 3, 1 and 5.
4.

Touch ⏻. The clock starts counting.
Remember:
- If the clock (or display) shows any abnormality, unplug the oven from the AC outlet. Plug it in again and then reset the clock.
CHILD LOCK-OUT
Your oven has a safety feature to prevent a playful or accidental running of the oven by a child. If the oven is accidentally programmed to cook, no cooking takes place when this feature is set.
To set :
- Touch STOP/CLEAR.
- Touch ⏻ (clock symbol).
- Touch 9 four times.
- Touch START.
Indicator L lights and clock display reappears.
To cancel :
- Touch STOP/CLEAR.
- Touch ⏻ (clock symbol).
- Touch 7 four times.
- Touch START.
Indicator L disappears and clock display reappears.
MATERIALS YOU CAN USE IN MICROWAVE OVEN
| Utensils | Use | Remarks |
| Aluminium foil | Shielding | Small smooth pieces can be used to cover thin parts of meat or poultry to prevent overcooking. Arcing can occur if foil is too close to oven walls. Should be at least 2.5 cm away from oven walls. Do not cover food completely with aluminium foil. |
| Browning dish | Searing meats | Follow manufacturer's instructions. The bottom of browning dish must be at least 5 mm above the turntable. Incorrect usage may cause the turntable to break. |
| Dinnerware | Reheating and short-term cooking | Microwave-safe only. Follow manufacturer's instructions. Do not use cracked or chipped dishes. |
| Glass jars | Warming | Always remove lid. Use only to heat food until just warm. Most glass jars are not heat resistant and may break. |
| Glassware | Cooking | Heat-resistant oven glassware only. Make sure there is no metallic trim. Do not use cracked or chipped dishes. |
| Oven cooking bags | Cooking | Follow manufacturer's instructions. Do not close with metal tie. Make slits to allow steam to escape. |
| Paper plates and cups | Short-term warming and cooking | Use for short-term cooking/warming only. Do not leave oven unattended while cooking. |
| Paper towels | Reheating and short-term cooking | Use to cover food for reheating and absorbing fat. Use with supervision for a short-term cooking only. |
| Parchment paper | Cooking | Use as a cover to prevent spattering or a wrap for steaming fish. |
| Plastic | Reheating and short-term cooking | Microwave-safe only. Follow the manufacturer's instructions. Should be labeled "Microwave Safe." Some plastic containers soften as the food inside gets hot. |
| Plastic wrap | Cooking | Microwave-safe only. Use to cover food during cooking to retain moisture. |
| Thermometers | Cooking | Microwave-safe only (meat and candy thermometers). |
| Wax paper | Cooking | Use as a cover to prevent spattering and to retain moisture. |
MATERIALS TO BE AVOIDED IN MICROWAVE OVEN
| Utensils | Remarks |
| Aluminium tray | Aluminium tray may cause arcing. Transfer the frozen dinner into a microwave-safe dish before cooking. |
| Fast food carton with metal handle | May cause arcing. Transfer food into microwave-safe dish. |
| Metal or metal-trimmed utensils | Metal shields the food from microwave energy. Metal trim may cause arcing. |
| Metal twist ties | They may cause arcing and could cause a fire in the oven. |
| Paper bags | May cause a fire in the oven. |
| Plastic foam cups | Plastic foam may melt or contaminate the liquid inside when exposed to high temperature. |
| Wood | Wood will dry out used in the microwave oven and may split or crack. |
UTENSIL TEST:
Fill a microwave-safe container with 1 cup of cold water (250 mL) and place it in the oven along with the utensil in question. Cook on HI power for 1 minute. Carefully feel the utensil. If the empty utensil is warm, it should not be used for microwave cooking. Do not exceed 1 minute testing time. This test cannot be used for plastic containers.
CAUTION:
Make sure that closed containers are opened and plastic pouches pierced before cooking. Tightly-closed utensils could explode.
QUICK SET COOKING (HI-POWER)
A time-saving feature, this simplified control lets you quickly set and start microwave cooking without the need to touch START.
You can choose from nine preset cooking time selections (1 to 9 minutes) to cook at highest power level. Quick Set cooking chart appears on page 14.
Example:
To set Quick Set cooking 2 minutes:
1.
QUICK SET
Touch QUICK SET.
2.
2
Touch 2.
The oven begins cooking and display shows time counting down.
Remember:
- You may open the door to stop cooking before the selected time is over. To start again, close the door and touch START.
AUTOMATIC DEFROST BY WEIGHT
The Auto Defrost by Weight feature is an accurate defrosting method for frozen food up to 2.9 kg. The menu automatically selects 1 kg. If food weight is more or less than 1 kg, enter the weight using the number keypads.
This feature has a built-in pause mechanism to allow for checking, turning, separating or rearranging the food.
Auto Defrosting chart appears on page 15.
For manual defrosting using Time Cooking, see page 10.
Defrosting Tips:
- Check the food during defrosting.
- Remove frozen food from its original paper or plastic package (wrapper). When it is difficult to remove the wrap, remove it at pause.
- Place foods in a flat microwave-safe baking dish or roasting rack to catch drippings.
- Food should still be somewhat icy in the centre when removed from the oven.
• The Auto Defrost menu includes standing time.
Example:
To defrost 1.2 kg of chicken pieces:
1.
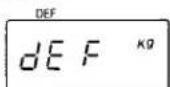
AUTO DEFROST
Touch AUTO DEFROST.
2.
1
2
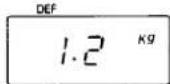
Enter the weight by touching 1 and then 2.
3.
START
Touch START.
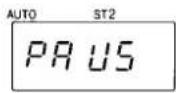
- The oven stops automatically about halfway through the complete defrosting time. Separate, rearrange or turn food over. DEF ST2
5.
START
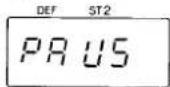
Touch START.
Remember:
• The menu automatically selects 1 kg, if the weight is not entered.
- To enter a weight of less than 1 kg, always press 0 first. For example, to enter 0.2 kg, press 0 and then 2.
- Only one digit can be entered after a decimal point. If in doubt, use the lower number.
- If you do not open the door at the pause, the oven restarts after 5 minutes.
AUTOMATIC MEAT COOKING BY WEIGHT
This feature is accurate cooking method for meat from 0.5 kg up to 2.5 kg.
The menu automatically selects 1 kg. If food weight is more or less than 1 kg, enter the weight using the number keypads.
This feature has a built-in pause mechanism to allow for checking, turning or rearranging the food.
Meat Cooking Tips:
- Doneness varies with meat of different shape and weight.
- Meat should be completely thawed before cooking.
- Place meat on a microwave-safe roasting rack or rack in a dish.
- All meat may be marinated, seasoned as desired before cooking.
- Use wax paper or plastic wrap to stop splattering.
- Aluminium foils can be used to cover thin parts of meat or chicken wings and legs to prevent overcooking. Foils should be applied at pause.
- While chicken or meat is standing, cover with foil to keep in the heat.
Example: To cook 1.2 kg of Lamb:
1.
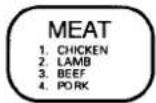
twice
Touch MEAT twice.
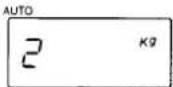
Enter the food course number by touching MEAT keypad:
| Touch MEATkeypads | COURSE Number |
| once | 1 (CHICKEN) |
| twice | 2 (LAMB) |
| 3 times | 3 (BEEF) |
| 4 times | 4 (PORK) |
2.
Enter the food weight by touching 1 and then 2.
3.
Touch START.
4.
The oven stops automatically about halfway through the complete cooking time. Rearrange or turn food over.
5.
Touch START.
Remember:
• The menu automatically selects 1 kg, if the weight is not entered.
- To enter a weight of less than 1 kg, always press 0 first. For example, to enter 0.5 kg, press 0 and then 5.
- Only one digit can be entered after a decimal point. If in doubt, use the lower number.
- If you do not open the door at the pause, the oven restarts after 5 minutes.
| Item | Directions |
| 1. CHICKEN | Whole: Remove the giblets, rinse in cold water and pat dry. Tie legs together with string.Place breast side down on a roasting rack.Turn over at pause. Let stand 10 - 20 minutes.Pieces: Arrange pieces skin side down.Turn and rearrange at pause.Let stand 5 - 10 minutes. |
| 2. LAMB | Tie meat with string.Place meat fat side down on a roasting rack.Turn over at pause.Let stand 10 - 20 minutes. |
| 3. BEEF | |
| 4. PORK |
DIRECT ACCESS FOOD COOKING
FRESH VEGETABLES, FROZEN VEGETABLES, RICE, FISH FILLET, POTATO, BEVERAGE feature keypads are present on your oven control panel. These keypads allow you to cook one to four servings of food automatically. Simply touch the appropriate keypads, once for each serving and then touch START.
Follow the directions included in the chart.
Direct Access food chart appears on page 16.
Cooking Tips:
FRESH VEGETABLES:
- Weight is given before peeling, trimming, slicing, etc.
FROZEN VEGETABLES:
- Follow package directions for venting cover, adding water, piercing pouch, replacing foil cover with plastic wrap, etc.
• Stir during cooking time.
FISH FILLET:
- Fish should be completely thawed before cooking.
- Arrange in a single layer in dish.
POTATO:
- Arrange in a circular pattern with heavier ends pointing toward the outer edge of the dish.
BEVERAGE:
- Foods must be at room or refrigeration temperature.
Example: To cook 2 servings of potato:
1.
twice
Touch POTATO twice.
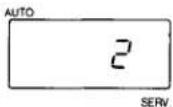
Enter the number of servings by touching a desired menu keypad:
| Touch menu keypad | To cook |
| once | 1 serving |
| twice | 2 servings |
| 3 times | 3 servings |
| 4 times | 4 servings |
2.
Touch START.
Cooking starts. The time counts down in the display.
| Item | 1 serving | Directions |
| FRESH VEGETABLES | 150 g | Place in a bowl or dish.Add 1 tbsp. water. Cover. |
| FROZEN VEGETABLES | 150 g | Place in a bowl or dish. Cover. |
| RICE (long grain) | 12 cup(125 mL) | Cook with water and salt indeep dish. Cover. See page 16. |
| FISH FILLET | 170 g | Use shallow dish.Cover with plastic wrap. |
| POTATO | 170 g | Pierce with fork. Place onpaper towel.Let stand 3 - 5 minutes. |
| BEVERAGE | 1 cup(170 - 230 mL) | Stir after reheating. |
NOTE: Use microwave-safe dish, bowl or cup.
TIME COOKING
This basic microwave cooking method allows you to cook food for a desired time. In addition to the HI (maximum) power level, you can select different microwave power from 9 levels, 1 (10% of total power) to 9 (90% power) for the foods that require slower cooking. The oven also provides power level 0 (no power).
Foods with high moisture content should be cooked on maximum power, as this is the fastest cooking method and best maintains the natural flavour and texture of the foods.
To check the power level during cooking, touch POWER. The power level appears in the display window.
Manual Defrosting
For manual defrosting (without using Auto Defrost features), use power level 3. To speed up the defrosting of dense foods over 450 g, you may start on HI for 3 minutes, then reduce to the level 3.
Example: To cook at power level 8 for 40 seconds:
1.
Touch TIME.
2.
Enter 40 seconds by touching 4 and then 0.
3.
Touch POWER.
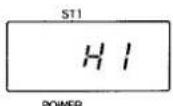
4.
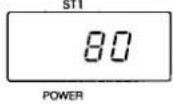
Touch 8 to select power level 8. The display shows 80 (80% power).
5.
Touch START.
Remember:
• Cooking time can be set up to 99 minutes 99 seconds.
- When you cook on HI power, skip steps 3 and 4.
MULTIPOWER SETTING GUIDE
| Power Level | Cooking Examples |
| 1 | Softening cream cheese.Keeping casseroles and main dishes warm. |
| 2 | Softening chocolate and clarifying butter.Heating breads, rolls, pancakes, tacos, tortillas and French toast.Taking the chill out of fruit. Heating small amounts of food. |
| 3 | Completing the cooking cycle of casseroles, stews and sauces.Manual Defrosting.Thawing meat, poultry and seafood. |
| 4 | Cooking less tender cuts of meat in liquid or slow-cooking dishes.Completing the cooking cycle of less tender roasts. |
| 5 | Cooking stews and soups after bringing to a boil.Cooking custards and pasta.Cooking rump roast, ham, veal and lamb. |
| 6 | Cooking scrambled eggs. Baking cakes. |
| 7 | Cooking cheese dishes, eggs and milk. |
| 8 | Reheating precooked or prepared food quickly. |
| 9 | Cooking onions, celery and green peppers quickly.Reheating meat slices quickly. |
| HI | Cooking poultry, fish, vegetables and most casseroles.Preheating a browning dish. Boiling water. |
MINUTE TIMER
You can use the timer function of your oven for purposes other than cooking.
Example: To set 3 minutes for a telephone call:
1.
TIME
Touch TIME.
2.
3
0
0
Touch 3, 0 and 0.
3.
POWER
Touch POWER.
4.
0
Touch 0 (power level 0).
5.
START
Touch START.
MULTISTAGE COOKING
You can program up to 3 stages of cooking in sequence. Auto Defrost by Weight can be programmed in the first stage to defrost first and then cook.
- To program 2-stage or 3-stage cooking, repeat the Time Cooking steps 1 to 4 on the previous page and touch START.
- Using the Minute Timer feature for the first stage, you can delay cooking start time by up to 99 minutes and 99 seconds.
TURNTABLE OFF
The turntable can be switched off if you do not want it to rotate; for example, when cooking a roast in a large dish which cannot rotate without touching the oven walls. The stirrer fan will then distribute the microwaves efficiently.
- To use the Turntable Off feature, set the desired cooking cycle following suitable instructions in this manual. Touch TURNTABLE OFF and touch START. Cooking starts without the turntable rotating.
- If you want to cancel the Turntable Off feature during cooking, stop the oven and clear entries by touching STOP/CLEAR twice and reset the desired cooking cycle.
• Automatic feature such as Auto Defrost, Auto Meat, Direct Access Food Cooking cannot use the Turntable Off feature.
QUESTIONS AND ANSWERS
OPERATION
Q. What is wrong when the oven light does not glow during cooking?
A. There may be several reasons why the oven light does not glow. Perhaps:
- Door is not closed and locked. Push firmly to be sure that door is locked properly.
• The light bulb has burned out.
Q. Why is steam coming out of the air exhaust vent?
A. Steam is normally produced during cooking. The microwave oven has been made to vent this steam.
Q. Can the microwave oven be damaged if it operates empty?
A. Yes. Never operate while empty or without the turntable positioned correctly on the roller rest.
Q. When the oven is plugged into a wall outlet for the first time, it might not work properly. What is wrong?
A. When the oven is plugged in for the first time or when power resumes after a power interruption, the microcomputer used in the oven control may temporarily become scrambled and fail to function as programmed. Unplug the oven from the wall outlet and then plug it back in. The microcomputer will then reset for proper functioning.
Q. Why do I see light reflection around the outer case?
A. This light is from the oven light located outside the oven cavity.
Q. Why is there noise coming from the turntable when the oven is turned on?
A. This noise occurs when the turntable roller rest and cavity bottom are dirty. Frequent cleaning of these parts should eliminate or reduce the noise.
Q. Instructions for aluminium foil use are confusing. When should I use foil?
A. It should be used to shield portions of food from becoming overcooked or overdefrosted. Use small flat pieces of foil for shielding.
FOODS
Q. What is wrong when baked foods have a hard, dry brown spot?
A. This is caused by overcooking. Shorten cooking or reheating time.
Q. Why do eggs sometimes pop?
A. The egg yolk may pop because of steam build-up inside the membrane. To prevent this, simply pierce the membrane with a toothpick before cooking it.
CAUTION: Never microwave eggs in the shell since they may explode.
Q. Why are scrambled eggs sometimes a little dry after cooking?
A. Eggs dry out if they are overcooked. You may need to vary the cooking time for one of these reasons:
- Eggs vary in size.
- Eggs are at room temperature one time and at refrigerator temperature another time.
- The shapes of utensils vary, which makes it necessary to vary cooking time.
• Eggs continue cooking during standing time.
Q. What is wrong when three potatoes bake thoroughly and the fourth one is still not cooked?
A. The fourth potato may be slightly heavier than the others and should be cooked 30 to 60 seconds longer. Remember to allow 2.5 cm around each potato when baking. For more even cooking, place potatoes in a circle.
Q. Why do baked apples sometimes burst during cooking?
A. The peel has not been removed from the top half of each apple to allow for expansion of the interior of the apple during cooking. As in regular cooking methods, the interior of the apple expands during the cooking process.
Q. How are boil-overs avoided?
A. Use a larger utensil than usual for cooking. If you open the oven door or touch STOP/CLEAR, the food will stop boiling.
Q. Why does the dish become hot when I microwave food in it?
A. As the food becomes hot it will conduct the heat into the dish. Use oven mitts to remove food after cooking.
CLEANING
Wipe the oven inside and outside with a soft cloth and a mild detergent solution. Then rinse and wipe dry. This should be done on a weekly basis - more often if needed. Never use cleaning powders or rough pads. Excessive oil splatters on the inside top will be difficult to remove if left for many days. Wipe spatters with a wet paper towel, especially after cooking chicken or bacon.
REMOVABLE PARTS
The following parts may be removed as described. They should be washed in warm (not hot) water with a mild detergent and a soft cloth. Once they are clean, rinse them well and dry with a soft cloth. Never use cleaning powders, steel wool or rough pads.
- The turntable may be removed at the sink. Be careful not to chip or scratch the edges as this may cause the turntable to break during use.
- The turntable roller rest should be cleaned regularly.
SPECIAL CARE
For best performance and safety, the inner door panel and the oven front frame should be free of food or grease buildup. Wipe them often with a mild detergent. Then rinse and wipe dry. Never use cleaning powders or rough pads.
After cleaning the control panel, touch
STOP/CLEAR to clear any entries that might have been entered accidentally while cleaning the panel.
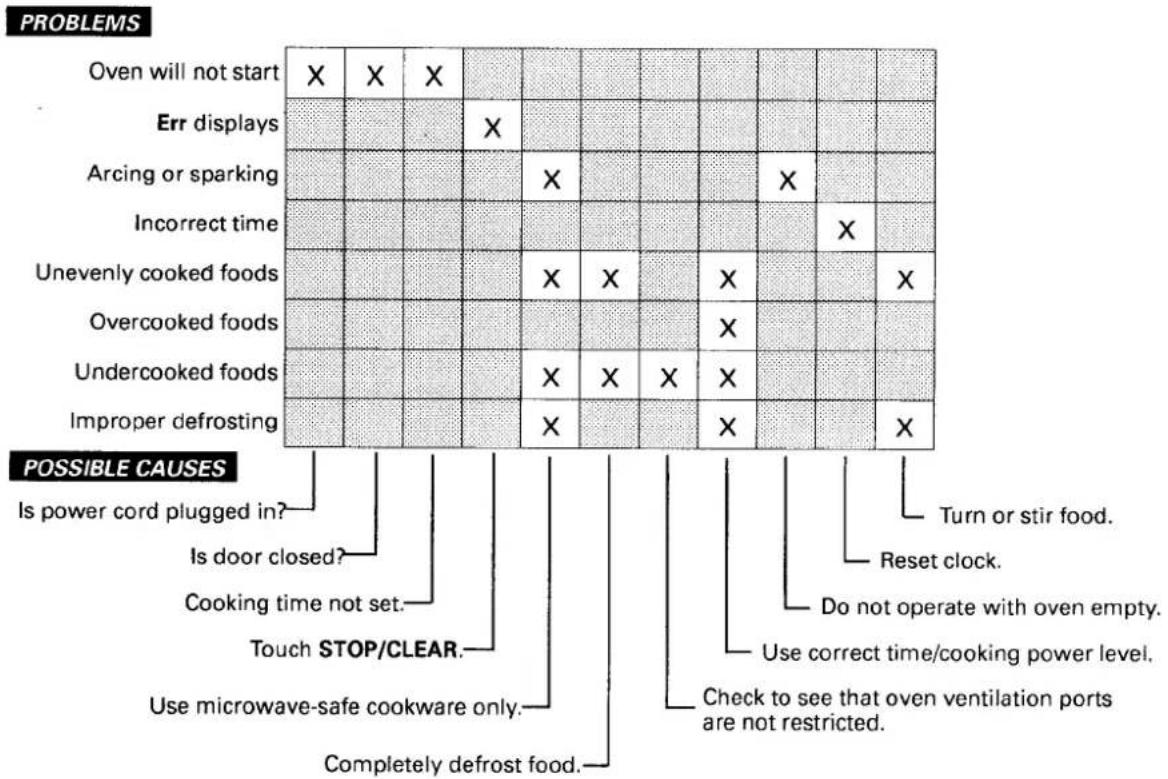
BEFORE CALLING FOR SERVICE
You can often correct operating problems yourself. If your microwave oven fails to work properly, locate the operating problem in the chart below and try the solutions marked for each problem.
If the microwave oven still does not work properly, contact the nearest authorized service centre.
AUTOMATIC DEFROST CHART
- Set Auto Defrost by Weight according to instructions on page 7.
-
Remove food from wrapper and place in a microwave-safe dish.
• Cover thin parts with aluminium foil. -
Use a microwave-safe roasting rack to hold small items, such as chicken pieces, fish, prawns and scallops.
- Large roasts should be still icy in centre. Allow to stand.
- Fish and seafood should also be slightly icy. Allow to stand.
| Item | Special Notes |
| Beef | |
| Ground beef | Turn over and remove defrosted portion at pause. |
| Liver | Drain liquid as it defrosts. Separate pieces. |
| Roasts | Turn over at pause. Cover ends with foil. |
| Sirloin steak | Turn over at pause. |
| Rib or T-bone | Turn over at pause. |
| Flank steak | Turn over at pause. |
| Stewing meat | Break apart at pause. |
| Pork | |
| Bacon | Defrost in original wrapper. Turn over at pause. Centre should be slightly icy. |
| Chops | Separate and turn over at pause. |
| Ribs | Turn over at pause. |
| Roasts | Turn over at pause. Cover ends with foil. |
| Lamb | |
| Chops | Separate and turn over at pause. |
| Ribs | Turn over at pause. |
| Roasts | Turn over at pause. Cover ends with foil. |
| Poultry | |
| Chicken, whole, up to 1.4 kg | Turn over at pause. Cover ends with foil. Rinse under cold water. |
| Pieces | Separate halfway through defrost time. |
| Cornish hens | Turn over at pause. Rinse under cold water. |
| Fish and Seafood | |
| Crabmeat, prawns | Break apart at pause. |
| Fish fillets | Turn over and rearrange at pause. Rinse under cold water to separate. |
| Fish whole, steaks | Turn over at pause. Cover head and tail with foil. |
| Scallops | Break apart at pause. Remove defrosted scallops. |
DIRECT ACCESS FOOD COOKING CHART
- Set Direct Access Food Cooking according to instructions on page 9.
- Doneness varies with food of different shape, weight and initial temperature.
| Item | Special Notes |
| FRESH VEGETABLES | Place in a suitable sized microwave-safe dish.Add 1 tbsp. water per serving. Cover. Let stand 2 - 3 minutes. |
| FROZEN VEGETABLES | Place in a suitable sized microwave-safe dish.Cover. Stir during cooking. Let stand 2 - 3 minutes. |
| FISH FILLET | Use microwave-safe shallow dish or pie plate.Cover lightly with plastic wrap. |
| POTATO | Wash and scrub well. Pierce with fork. Place on paper towel.Let stand 3 - 5 minutes.Do not place in centre of turntable. |
| BEVERAGE | |
| Coffee/Tea/Hot chocolate Soup | No cover. Stir after reheating.Cover. Stir after reheating. |
Cooking Guide - Rice (Long grain)
| Serving | Rice | Water | Salt | Container | Standing time |
| 1 | 12 cup(125 mL) | 1 cup(250 mL) | 14 tsp. | 112 litre casserole | 5 minutes |
| 2 | 1 cup(250 mL) | 2 cups(500 mL) | 12 tsp. | 2 litre casserole | |
| 3 | 112 cups(375 mL) | 212 cups(625 mL) | 314 tsp. | 212 litre casserole | |
| 4 | 2 cups(500 mL) | 3 cups(750 mL) | 1 tsp. | 3 litre casserole |
EASY USE CHART
COOKING
BY DIRECT ACCESS
- Touch
FRESH VEGETABLES, FROZEN VEGETABLES, RICE, FISH FILLET, POTATO or BEVERAGE
until desired serving number appears.
- Touch START.
QUICK SET COOKING
(HI-power only)
- Touch QUICK SET.
- Touch number (1-9) for cooking time (minutes).
TIME COOKING
- Touch TIME.
- Touch numbers for cooking time.
- Touch POWER.
- Touch number (1 - 9) for power level.
- Touch START.
NOTE: To set HI POWER cooking, skip steps 3 and 4.
AUTOMATIC MEAT COOKING
- Touch MEAT.
- Enter the weight of food in kg.
- Touch START.
- At pause, follow instructions in the chart.
- Touch START to restart.
MINUTE TIMER
- Touch TIME.
- Touch numbers for time.
- Touch POWER.
- Touch 0 (power level 0).
- Touch START.
AUTOMATIC DEFROST
- Touch AUTO DEFROST.
- Enter the weight of food in kg.
- Touch START.
- At pause, follow instructions in the chart. (See page 15)
- Touch START to restart.
CLOCK
- Touch STOP/CLEAR.
- Touch
- Touch numbers for time of day.
- Touch ⏱
For your protection in the event of theft or loss of this product, please fill in the information below :
Serial No.
(Located on the front of the oven)
Model No.
(Located on the front of the oven)
Date of Purchase
Purchased Price
Where Purchased

SANYO Electric Co., Ltd.
1/94 Printed in Singapore
Code No. 432-6-413S-74000
- Setting up & Getting to Know Your Oven
- Operating Instructions
- Care of Your Microwave Oven
- Chart
- SAVE THESE INSTRUCTIONS
- PROPER AND SAFE USE OF YOUR OVEN
- NOTE
- PRECAUTIONS TO AVOID POSSIBLE EXPOSURE TO EXCESSIVE MICROWAVE ENERGY
- IMPORTANT SAFETY INSTRUCTIONS
- If a fire should start:
- Keep in mind the following rules at all times:
- WARNING
- EARTHING INSTRUCTIONS
- INSTALLATION
- NOTE:
- NAMES OF OVEN PARTS AND ACCESSORIES
- TURNTABLE INSTALLATION
- [1] Display Window
- [2] Indicators
- DIRECT ACCESS menu keypads
- Auto menu keypads
- [10] Number keypad
- Beep Sound
- SETTING CLOCK
- Example: To set 3:15 :
- Remember:
- CHILD LOCK-OUT
- To set :
- To cancel :
- UTENSIL TEST:
- CAUTION:
- QUICK SET COOKING (HI-POWER)
- Example:
- 1.
- 2.
- AUTOMATIC DEFROST BY WEIGHT
- Defrosting Tips:
- 3.
- 5.
- AUTOMATIC MEAT COOKING BY WEIGHT
- Meat Cooking Tips:
- Example: To cook 1.2 kg of Lamb:
- 4.
- DIRECT ACCESS FOOD COOKING
- Cooking Tips:
- FRESH VEGETABLES:
- FROZEN VEGETABLES:
- FISH FILLET:
- POTATO:
- BEVERAGE:
- Example: To cook 2 servings of potato:
- Touch START.
- TIME COOKING
- Manual Defrosting
- Example: To cook at power level 8 for 40 seconds:
- MINUTE TIMER
- Example: To set 3 minutes for a telephone call:
- MULTISTAGE COOKING
- TURNTABLE OFF
- QUESTIONS AND ANSWERS
- OPERATION
- FOODS
- CLEANING
- REMOVABLE PARTS
- SPECIAL CARE
- BEFORE CALLING FOR SERVICE
- AUTOMATIC DEFROST CHART
- DIRECT ACCESS FOOD COOKING CHART
- EASY USE CHART
- COOKING
- BY DIRECT ACCESS
- QUICK SET COOKING
- (HI-power only)
- AUTOMATIC MEAT COOKING
- AUTOMATIC DEFROST
- CLOCK
Brand : SANYO
Model : EM-V860
Category : Microwaves