EE-8083 - Heating Crane - Free user manual and instructions
Find the device manual for free EE-8083 Crane in PDF.


| Product Type | Portable Electric Heater |
| Brand | Crane |
| Model | EE-8083 |
| Heating Element | Ceramic |
| Power Source | 120V AC, 60Hz |
| Wattage | 1500W (max) |
| Heat Settings | Low (750W) and High (1500W) with fan-only option |
| Thermostat | Adjustable thermostat for desired temperature |
| Safety Features | Overheat protection, tip-over auto shut-off, cool-touch housing |
| Dimensions (L x W x H) | 10.2 x 8.3 x 12.6 inches |
| Weight | 5.5 lbs |
| Coverage Area | Up to 200 sq ft |
| Control Type | Manual dials for heat setting and thermostat |
| Noise Level | Quiet operation (< 45 dB) |
| Filter | Washable dust filter (rear intake) |
| Cleaning | Wipe exterior with damp cloth; clean filter monthly |
| Maintenance | No user-serviceable parts; do not disassemble |
| Certifications | ETL listed, meets safety standards |
| Warranty | 1 year limited warranty |
| Included Accessories | User manual only |
Frequently Asked Questions - EE-8083 Crane
User questions about EE-8083 Crane
0 question about this device. Answer the ones you know or ask your own.
Ask a new question about this device
Download the instructions for your Heating in PDF format for free! Find your manual EE-8083 - Crane and take your electronic device back in hand. On this page are published all the documents necessary for the use of your device. EE-8083 by Crane.
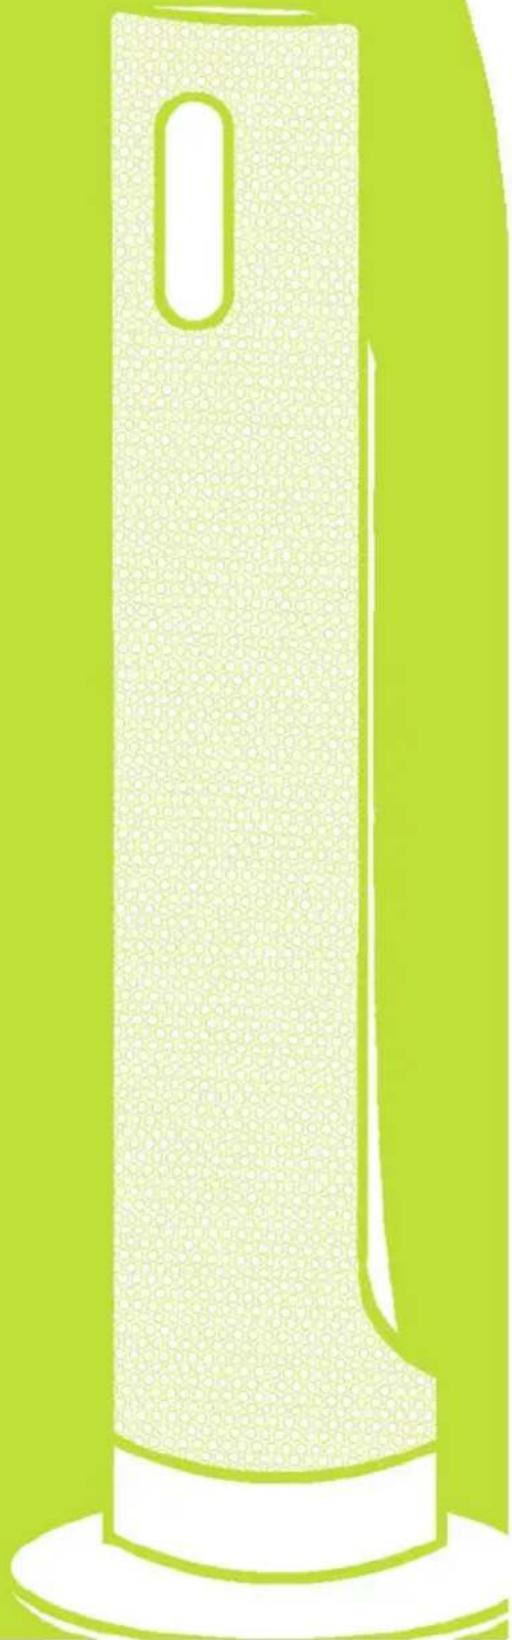
USER MANUAL EE-8083 Crane
IF YOU HAVE ANY QUESTIONS ABOUT
HEATER, PLEASE CONTACT CRANE
CUSTOMER CARE
TOLL FREE: 888-599-0992
EMAIL: CUSTOMER-SERVICE@CRANE-USA.COM
LIVECHAT: WWW.CRANE-USA.COM
PLEASE READ & SAVE ALL INSTRUCTIONS TO ENSURE
THE SAFE AND EFFECTIVE USE OF THIS HEATER.
natural_image
Illustration of a vertical cylindrical object with a handle and base, rendered in light green tones (no text or symbols)SAVE YOUR DATED PROOF OF PURCHASE!
[ you will need this in case of warranty ]
staple
tape
or paperclip
your
receipt
HERE
TABLE OF CONTENTS
LIST OF MAIN PARTS P. 2
TECHNICAL SPECIFICATIONS P. 3
ASSEMBLY INSTRUCTIONS P. 3
Crane USA is dedicated to your environment both inside and outside your home. We know that if cleaned and maintained properly, our products last for years helping to reduce unnecessary use of resources and emissions making new products.

natural_image
Green recycling symbol with three curved arrows forming a cycle (no text or symbols)Your Crane Heater came packaged in all recycled cardboard. The manual you're holding is also from recycled materials with no added finishes or harmful dyes.
If the heater should no longer operate, please be sure to dispose of the unit in an environmentally friendly way by taking it to a public collection point.
PLEASE DO NOT PLACE BROKEN HEATERS WITH YOUR REGULAR HOUSEHOLD WASTE.
LIST OF MAIN PARTS
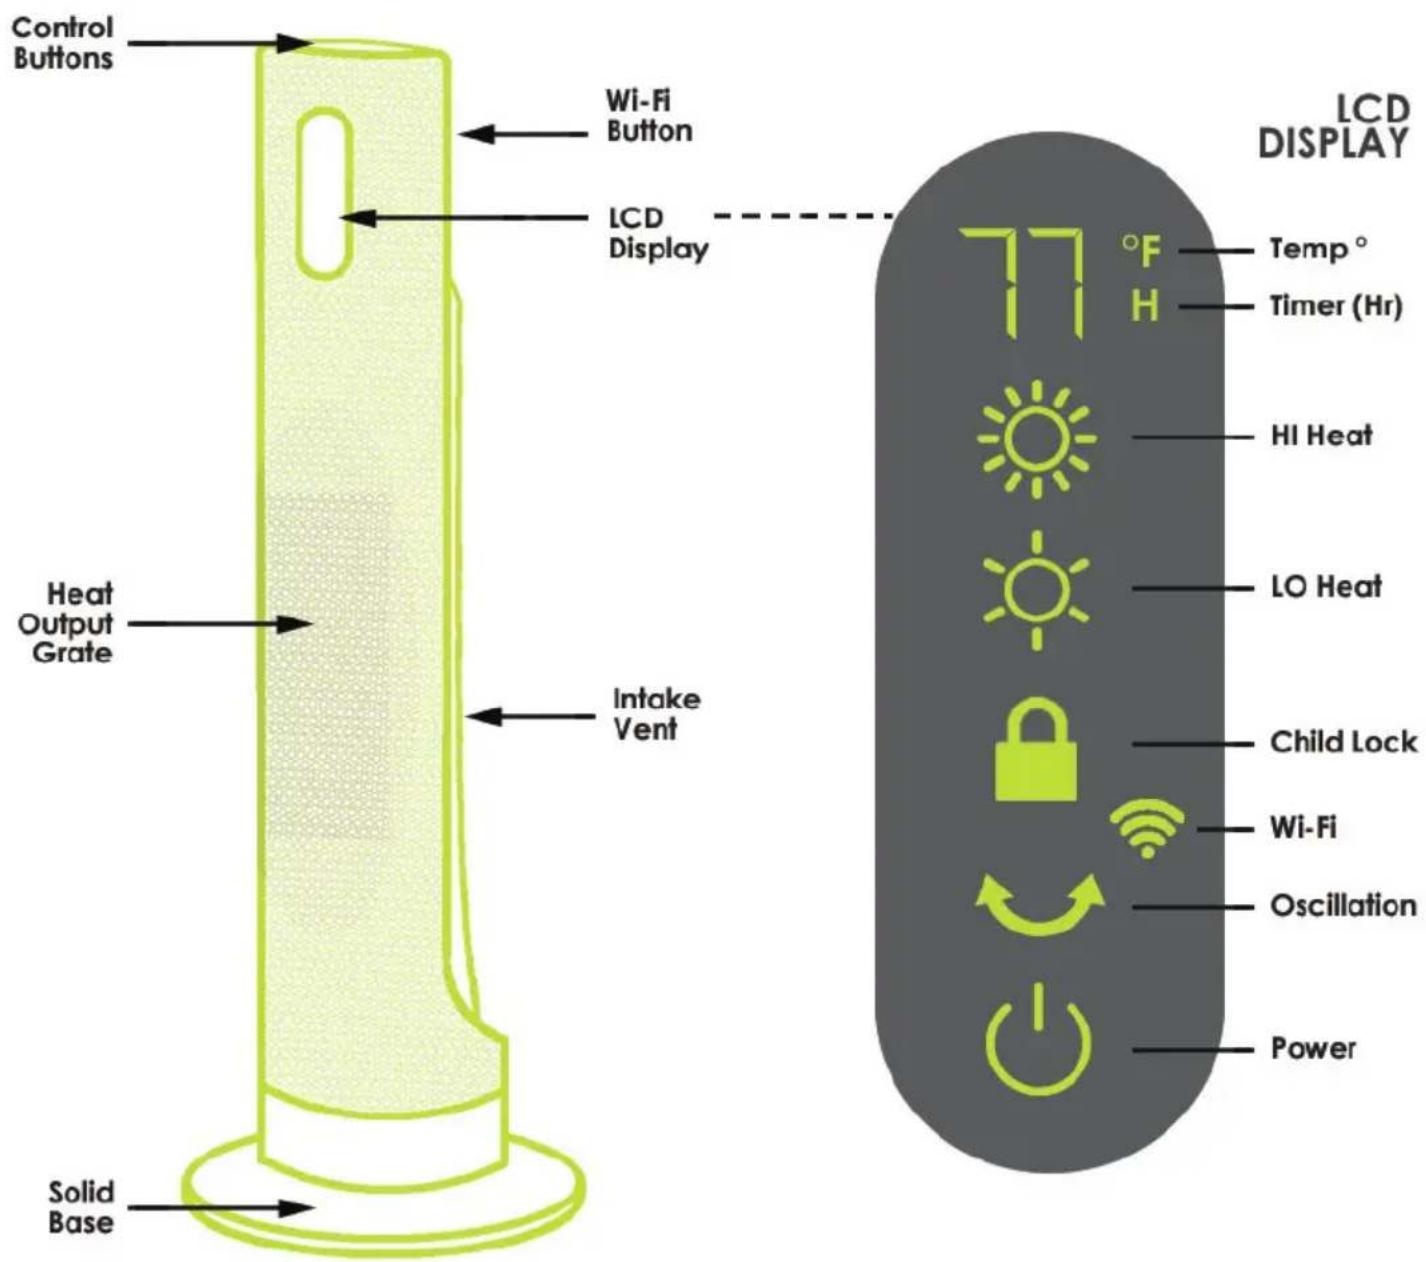
CONTROL BUTTONS

flowchart
graph TD
    A["Up/Down"] --> B["+ -"]
    C["Heat Hi/LO"] --> D["Bar Chart"]
    E["Timer"] --> F["Sun icon"]
    G["Oscillate"] --> H["✓"]
    I["Power"] --> J["Power icon"]
    K["Child Lock"] --> L["Lock icon"]
TECHNICAL SPECIFICATIONS
MAXIMUM POWER
1500 W
HEAT POWER SETTINGS
1000 W / 1500 W
VOLTAGE
120 VAC / 60 Hz
ASSEMBLY & USER INFO
WARNING: Do NOT use this tower heater if any part has been under water. Immediately contact Crane Customer Care or a qualified electrician to inspect or replace the heater if necessary. Keep plastic wrapping away from children.
ASSEMBLY:
1 • Remove tie from power cord and unravel.
2 • Slide the power cord through the base from the top.
3 • Connect the base to the tower by placing attached pegs in the matching holes and snap into place.
4 • Once base is secure, take the power cord and weave it through the channel until it exits out the hole on the side of the base. This will allow the heater to stand flat on the floor.
5 • Place heater on the floor in the desired location.
CAUTION
Do not use your tower heater if it has not been fully assembled. Make sure the base and the main unit are tightened securely before use.
OPERATION & USE
[ Keep combustible materials such as furniture, pillows, bedding, papers, clothes, and curtains at least 3 feet from the front, sides & rear of the heater. ]
1 • Plug the heater into a 120VAC outlet. This heater has a polarized plug as a safety feature to fit in an outlet 1 way to reduce the risk of electric shock.
2 • Use the Power Button to start operating your heater. When first powering on,
the LCD Display will read the current room temperature. Wait at least 10 sec. after powering on before pressing any control buttons.
3 • Use the control buttons on top of the heater to enable heater functions.
* Consult the "Heater Functions" section of the instruction manual for explanation of each function.

Use the Power Button to turn off your heater.
Note: The LCD Display will stay illuminated and count down from 10 before turning off.
10..9..8..
OVERHEAT & TIP-OVER PROTECTION
This heater has an internal, over-heating safety device which automatically switches off the heater if an over-heat situation is detected. If this should occur, unplug the appliance and wait until the unit cools off. Once cooled, ensure the air intake vent on the back is free of dust and lint. Once verified the intake vent is clear, switch on the heater.
The heater is also equipped with a tip-over safety function that shuts the heater off if it gets knocked over.
RESET THE HEATER
If your heater overheats for any reason, please do the following to reset:
1 • Make sure heater is off.
2 • Unplug the unit and wait 5-10 minutes.
2 • Ensure there is nothing obstructing the heater & intake vent.
3 • Plug the heater in and turn it on.
HEATER SETTINGS
Your smartTOWER HEATER can be controlled using the control buttons or from your smart phone when connected to wi-fi.

DESIRED ROOM TEMPERATURE
Use the +/- buttons to set the Desired Room Temperature. Temperature will blink while adjusting, then return to current room temp. The heater may take up to 6 seconds to respond.
*Temp Range: 45°F - 85°F
* When room temp. reaches 2° above the desired temp., heater will stop

bar
| Category | Value | |---|---| | 1 | 2 | | 2 | 4 | | 3 | 6 | | 4 | 8 | | 5 | 10 |HEAT POWER BUTTON
Push Button to change from the LO (1000W) or HI (1500W) Heat Power Setting. The heater may take up to 10 seconds to respond to the change.

natural_image
Simple gear icon with green border (no text or symbols)TIMER BUTTON
A number and "H" icon will begin to blink on the LCD screen. Use the +/- buttons to set the Timer to run the heater from 1 - 12 hours. When using this setting, heater will power off after number of selected hours.

natural_image
Green square icon with black Wi-Fi symbol (no text or numbers)Wi-Fi BUTTON
Wait until device has powered on for 10 seconds. Push & hold the Wi-Fi Button on the back of the heater until a long beep sounds. Wi-Fi Icon will begin to blink at a slower pace.
* See Wi-Fi connection instructions - page 6

natural_image
Simple black padlock icon inside a green rounded square frame (no text or symbols)CHILD LOCK SETTING
Push & hold button for 3 seconds to enable or disable Child Lock. The lock icon will appear on the LCD screen. When ON, all other settings are disabled, including power.
* Child Lock Setting can be changed when device is OFF.

natural_image
Simple curved arrow icon inside a green rounded square frame (no text or symbols)OSCILLATION BUTTON
Push button to turn Oscillation Function on or off. The arrow icon will appear on the LCD screen & the heater will rotate back and forth 80°
Wi-Fi CONNECTION
DOWNLOAD OUR FREE APP
iPHONES via APP STORE & ANDROID via GOOGLE PLAY
search: Crane Smart Home
OPEN THE CRANE APP ON YOUR PHONE, CHOOSE SETTINGS, THEN LOG IN OR ADD NEW USER

natural_image
Hand cursor clicking a water droplet icon on a 3x3 grid of gray cubes (no text or symbols)HOLD Wi-Fi BUTTON FOR 3 SECONDS. ICON ON SCREEN WILL BLINK SLOWLY

OPEN THE SETTINGS ON YOUR SMARTPHONE

natural_image
Icon showing a hand cursor clicking a button with a gear symbol (no text or symbols present)CLICK TO OPEN Wi-Fi SETTINGS

SELECT THE CRANE WI-FI NETWORK

RETURN TO THE CRANE APP

natural_image
Hand cursor clicking a water droplet icon on a grid of gray rounded squares (no text or symbols)CHOOSE DEVICES FROM THE APP HOMESCREEN

natural_image
Hand cursor clicking a button with a power symbol (no text or numbers visible)CHOOSE + ADD NEW DEVICE THEN CLICK START
Crane

ADD NEW DEVICE

CLICK SELECT HOME Wi-Fi NETWORK & FIND YOUR WI-FI
Select Home Wi-Fi Network

CONFIRM THE USER NAMES AND PASSWORDS ARE CORRECT
Wi-Fi Network Password:
●●●●●●●●●●●●●

SELECT THE TIMEZONE OF YOUR CRANE DEVICE
Select Time Zone:
(Where the Crane device is located)
(GMT -6:00) Central Time (US & vanna
SCROLL DOWN AND CLICK SAVE & RESTART
Save and Restart

Wi-Fi ICON ON LCD SCREEN WILL STOP FLASHING & REMAIN ON

CLICK DONE, REFRESH THE APP AND SELECT DEVICE
Crane

smartTOWER HEATER



ADD NEW DEVIC
For questions regarding Wi-Fi:
- Crane App: Click CARE, Wi-Fi ITEMS, HEATER for FAQ's & troubleshooting
- Website: Visit www.crane-usa.com/customer-care/
CRANE CUSTOMER CARE

888-599-0992
(Mon - Fri 9:00am - 4:00pm CST)

CUSTOMER-SERVICE@CRANE-USA.COM

LIVE CHAT (available at www.Crane-USA.com)
MAINTENANCE INSTRUCTIONS
CAUTION
Always be sure the heater is switched OFF, unplugged and completely cooled before cleaning or attempting to store the item. DO NOT immerse heater in water or allow water to drip into the interior of the heater, as this could create an electric shock hazard.
Please Note: Regardless of the type of heating system setup, always install and maintain at least one smoke detector in good working condition on each floor of your home. Periodically check and/or replace the battery in your smoke detector with a fresh battery.
CARE AND CLEANING
1 - Always turn off the heater and disconnect the cord from the electrical outlet before cleaning your heater.
2 - Light accumulated dust may be removed from the heater with a soft cloth or vacuum cleaner.
3 - Ensure the air intake vent on the back of the heater is free and clear of dust or lint.
4 - The removable particle filter should be cleaned and dried out at least 1-2 times per season. Remove the magnetic air intake vent cover and hand wash the particle filter with soap and water.
5 - Clean the outside of the heater by wiping with a damp cloth and buff with a dry cloth.
DO NOT use any detergents or abrasives
DO NOT allow water to run into the interior of the heater as this could create a fire or electric shock hazard.
STORING
Allow the appliance to cool completely before storing. Store in a dry location. Do not place heavy items on top of appliance during storage as this may result in possible damage of the appliance. Store the cord in a clean, dry location away from metal objects. Always check the plug before use to assure metal items have not become attached.
CRANE WARRANTY
For more information regarding the warranty policy, please visit our website: www.crane-usa.com/customer-service
LIMITED WARRANTY
Thank you for purchasing a Crane product which has been tested to meet our stringent quality standards. This product is warranted to be free from manufacturing defects under normal use and conditions for 1 year.
PLEASE CONTACT US BEFORE RETURNING THIS PRODUCT TO THE STORE. CALL CRANE CUSTOMER CARE FOR PROBLEMS AND QUESTIONS. WE CAN HELP.
WARRANTY REQUIRES A DATED PROOF OF PURCHASE.
This warranty is void if the defect is due to accidental damage, misuse, abuse, neglect, improper repair or alteration by unauthorized persons, or a failure to follow operating instructions provided with the product including the use of essential oils. This warranty does not apply to normal wear and tear or commercial use.
In no event shall liability exceed the purchase price paid by the purchaser of the product. Under no circumstances shall there be liability for any loss - direct, indirect or incidental – or consequential damage arising out of, or in connection with the use of this product.
This warranty is valid only in the 48 contiguous states plus the District of Columbia and excludes Puerto Rico and the Virgin Islands. This warranty is effective only if the product is purchased and operated in the United States of America.
Any instructions or warranty included in this manual may be subject to change without notice. For the most up-to-date instructions and warranty information, please contact us or visit our website.
TO RECEIVE WARRANTY INSTRUCTIONS AND RETURN AUTHORIZATION, PLEASE CALL, EMAIL, OR LIVECHAT CRANE CUSTOMER CARE.
CRANE USA, INC
1015 Hawthorn Dr, Itasca, IL 60143
Toll Free: 1-888-599-0992 (Monday - Friday 9:00am - 4:00pm CST)
Email: customer-service@crane-usa.com
Website: www.crane-usa.com
GENERAL SAFETY INSTRUCTIONS
!
WARNING! READ AND UNDERSTAND ALL INSTRUCTIONS.
Failure to follow all of the instructions listed below may result in electric shock, fire and/or serious personal injury. The warnings, cautions and instructions discussed in this instruction manual cannot cover all possible conditions and situations that may occur. It must be understood by the user that common sense and caution are a factor which cannot be built into this products, but must be supplied by the user.
SPECIAL INSTRUCTIONS
- To avoid a circuit overload when using this product, do not operate another high wattage product on the same electrical circuit.
- Avoid the use of an extension cord. The extension cord may overheat and cause risk of fire.
SAVE ALL INSTRUCTIONS!
CAUTION: A short Power Supply Cord is provided to reduce the risk of personal injury resulting from becoming entangled in or tripping over a longer cord. Extension cords are available from local hardware stores and may be used if care is exercised in their use. If an extension cord is required, special care and caution is necessary. Also, the extension cord must be (1) marked with an electrical rating of 125V and at least 13A., 1625W., and (2) the cord must be arranged so it will not drape over the countertop or tabletop where it can be pulled on by children or accidentally tripped over.
ELECTRIC POWER
If the electric circuit is overloaded by other appliances, your heater and/or appliances may not operate properly. The heater should be operated on a separate electrical circuit from other operating appliances.
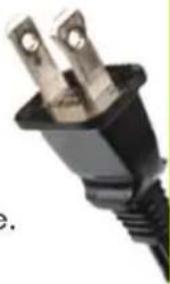
POLARIZED PLUG
This heater has a polarized plug (one blade is wider than the other). As a safety feature to reduce the risk of electrical shock, this plug is intended to fit in a polarized outlet only one way. If the plug does not fit fully in the outlet, reverse the plug. If it still does not fit, contact a qualified electrician. Do not attempt to defeat this safety feature.
natural_image
Close-up of a black electrical plug with two metallic leads (no text or symbols visible)SAFETY WARNING
Although your heater is easy to operate, for your safety, the below warnings must be followed:
- Do not place the heater near a heat source.
- Never leave the heater unattended while connected to the electrical outlet.
- To avoid any accidental burns, never place hand on top vent or side while in operation.
- Use the heater on a stable, level surface away from water.
- Do not unplug from the wall socket by pulling on the supply cord.
- The heater must be unplugged:
A. Before any cleaning
B. After each use
C. If it appears to be faulty
THIS PRODUCT IS INTENDED FOR HOUSEHOLD USE ONLY.
!

IMPORTANT SAFETY INSTRUCTIONS
Thank you for purchasing a CRANE smartTOWER Heater. Each unit has been manufactured to ensure safety and reliability. Before using for the first time, please read the instructions carefully and keep them for further reference.
WARNING! READ AND SAVE THESE INSTRUCTIONS.
Failure to follow all of the instructions listed below may result in electric shock, fire and/or serious personal injury.
TO AVOID RISK OF ELECTRICAL SHOCK, always make sure the heater is unplugged from the electrical outlet before relocating, servicing, or cleaning it.
CAUTION: To prevent electric shock, match wide blade of plug to wide outlet slot and fully insert.
- This heater is hot when in use. To avoid burns, do not let bare skin touch hot surfaces. If provided, use handles when moving this heater. Keep combustible materials, such as furniture, pillows, bedding, papers, clothes, and curtains at least 3 feet (0.9 m) from the front of the heater and keep them away from the sides and rear.
- Extreme caution is necessary when any heater is used by or near children or invalids and whenever the heater is left operating and unattended.
- Always unplug heater when not in use.
- Do not operate any heater with a damaged cord or plug or after the heater malfunctions, has been dropped or damaged in any manner. Discard heater, or return to authorized service facility for examination and/or repair.
- Do not use outdoors.
- This heater is not intended for use in bathrooms, laundry areas and similar indoor locations. Never locate heater where it may fall into a bathtub or other water container.
- Do not run cord under carpeting. Do not cover cord with throw rugs, runners, or similar coverings. Do not route cord under furniture or appliances. Arrange cord away from traffic area and where it will not be tripped over.
- To disconnect heater, turn controls to off, then remove plug from outlet.
- Connect to properly grounded outlets only.
- Do not insert or allow foreign objects to enter any ventilation or exhaust opening as this may cause an electric shock or fire, or damage the heater.
- To prevent a possible fire, do not block air intakes or exhaust in any manner. Do not use on soft surfaces, like a bed, where openings may become blocked.
- A heater has hot and arcing or sparking parts inside. Do not use it in areas where gasoline, paint, or flammable liquids are used or stored.
- Use this heater only as described in this manual. Any other use not recommended by the manufacturer may cause fire, electric shock, or injury to persons.
- Always plug heaters directly into a wall outlet/receptacle. Never use with an extension cord or relocatable power tap (outlet/power strip).
SAVE THESE INSTRUCTIONS!

natural_image
Illustration of a tall, textured cylindrical object with a circular handle and base labeled 'Crane' (no other text or symbols)- SAVE YOUR DATED PROOF OF PURCHASE!
- TABLE OF CONTENTS
- LIST OF MAIN PARTS
- TECHNICAL SPECIFICATIONS
- ASSEMBLY & USER INFO
- ASSEMBLY:
- CAUTION
- OPERATION & USE
- OVERHEAT & TIP-OVER PROTECTION
- RESET THE HEATER
- HEATER SETTINGS
- DESIRED ROOM TEMPERATURE
- HEAT POWER BUTTON
- TIMER BUTTON
- Wi-Fi BUTTON
- CHILD LOCK SETTING
- OSCILLATION BUTTON
- Wi-Fi CONNECTION
- DOWNLOAD OUR FREE APP
- Select Time Zone:
- For questions regarding Wi-Fi:
- CRANE CUSTOMER CARE
- MAINTENANCE INSTRUCTIONS
- CARE AND CLEANING
- STORING
- CRANE WARRANTY
- LIMITED WARRANTY
- WARRANTY REQUIRES A DATED PROOF OF PURCHASE.
- TO RECEIVE WARRANTY INSTRUCTIONS AND RETURN AUTHORIZATION, PLEASE CALL, EMAIL, OR LIVECHAT CRANE CUSTOMER CARE.
- GENERAL SAFETY INSTRUCTIONS
- WARNING! READ AND UNDERSTAND ALL INSTRUCTIONS.
- SPECIAL INSTRUCTIONS
- SAVE ALL INSTRUCTIONS!
- ELECTRIC POWER
- POLARIZED PLUG
- SAFETY WARNING
- IMPORTANT SAFETY INSTRUCTIONS
- WARNING! READ AND SAVE THESE INSTRUCTIONS.
- SAVE THESE INSTRUCTIONS!
Brand : Crane
Model : EE-8083
Category : Heating