
AX-475 - Typewriter BROTHER - Free user manual and instructions
Find the device manual for free AX-475 BROTHER in PDF.


| Product Type | Electronic Typewriter with LCD Display |
| Brand & Model | Brother AX-475 |
| Dimensions (W x D x H) | 16.4 x 15.1 x 5.3 in (417 x 383 x 134 mm) |
| Weight | 10 lb (4.5 kg) |
| Power Supply | AC power cord (stored in compartment); power switch on left side near rear |
| Typing Speed | 12 characters per second |
| Typing Pitches | 10, 12, 15 characters per inch (Pica, Elite, Micron) |
| Line Spacing | 1, 1½, 2 (single, 1.5, double) |
| Keyboard Memory | 48 characters |
| Correction Memory | 1 line (383 characters) |
| Display | LCD, 1 line x 16 characters |
| Paper Capacity (Width) | 12.87 in (326.9 mm) |
| Typing Capacity (Width) | 9.0 in (228.6 mm) |
| Maximum Tabs | 12 (including decimal tabs) |
| Carbon Copies | Original + 4 copies |
| Ribbon Types | Correctable film (1030, 1230), Multi strike (1031), Nylon (1032) |
| Correction Tape Types | Lift-off (3010) for film; Cover-up (4010) for nylon/multi strike |
| Included Accessories | Cassette ribbon 1030, daisy wheel M411, correction tape 3010 |
| Key Features | Automatic paper insertion, memory correction, spelling checker, display mode, centering, right margin flush, bold, underline, superscript/subscript, decimal tab, repeat function |
| Daisy Wheel Compatibility | Type A cassettes (not Type B); many pitches and styles available |
| Cleaning & Maintenance | Clean exterior with soft cloth dampened with mild detergent; avoid volatile liquids |
| Placement & Safety | Avoid direct sunlight, heat, vibration; do not block ventilation slots; use only Brother-authorized supplies |
| Regulatory Compliance | FCC Class B, DOC Class B (Canada) |
Frequently Asked Questions - AX-475 BROTHER
User questions about AX-475 BROTHER
0 question about this device. Answer the ones you know or ask your own.
Ask a new question about this device
Download the instructions for your Typewriter in PDF format for free! Find your manual AX-475 - BROTHER and take your electronic device back in hand. On this page are published all the documents necessary for the use of your device. AX-475 by BROTHER.
USER MANUAL AX-475 BROTHER
ELECTRONIC TYPEWRITER with Display
brother®
Thank you for choosing a Brother electronic typewriter! This product is designed to deliver years of reliable operation.
Your typewriter comes with the following items:
• cassette ribbon model number 1030
- caccotte dailey wheel model number M411
• correction tape model number 3010
Please make sure that all of these are included with this machine.
Please write the model number and the serial number of this typewriter in the blank spaces below. These numbers can be found on the rear panel of the typewriter.
MODEL NO.:
SERIAL NO.:
Please keep these numbers for future reference.
The power cord is stored in a compartment on the back of the machine. Power
The power switch is located on the left side of the typewriter near the rear.
Power Compartment

Power cord
FCC NOTICE
This equipment has been tested and found to comply with the limits for a Class B digital device, pursuant to Part 15 of the FCC Rules. These limits are designed to provide reasonable protection against harmful interference in a residential installation. This equipment generates, uses, and can radiate radio frequency energy and, if not installed and used in accordance with the instructions, may cause harmful interference to radio communications. However, there is no guarantee that interference will not occur in a particular installation. If this equipment does cause harmful interference to radio or television reception, which can be determined by turning the equipment off and on, the user is encouraged to try to correct the interference by one or more of the following measures:
• Reorient or relocate the receiving antenna.
- Increase the separation between the equipment and receiver.
- Connect the equipment into an outlet on a circuit different from that to which the receiver is connected.
- Consult the dealer or an experienced radio/TV technician for help.
Changes or modifications not expressly approved by Brother Industries, Ltd. could void the user's authority to operate the equipment.
DOC NOTICE
This digital apparatus does not exceed the Class B limits for radio noise emissions from digital apparatus set out in the radio interference regulations of the Canadian Department of Communications.
CONTENTS
Keyboard 3
Description 5
Features 6
PART I OVERVIEW OF YOUR TYPEWRITER 7
-
Printing mode 7
-
Display mode 8
Basic Typing 9
Inserting paper 9
Index/reverse index 9
View Mode 9
Selecting line spacing 10
Selecting pitch 10
Setting margins 11
Setting tabs 12
Clearing tabs 13
Setting decimal tabs 13
Cancelling the decimal tab mode 15
Repeat function 15
Typing uppercase characters 16
Hot zone 17
Returning the carrier 17
Backspacing 18
Memory Correction 20
Correcting one character 20
Relocation 20
Erasing one word 20
Erasing the entire line 21
Manual Correction 22
Manual correction 22
Layout Functions 23
Superscript/Subscript 23
Special characters 23
Automatic underlining 24
Boldface 25
Line indent 25
Centering 26
Cancelling the centering mode 27
Right margin flush 27
Cancelling the right margin flush mode 28
Display Mode 29
Line-by-line processing 29
Correction in display mode 31
Functions requiring a special
display 32
Functions triggering line printing 33
PART II SPELLING CHECKER 34
PART III TECHNICAL INFORMATION 36
Replacing the Ribbon, etc. 36
Replacing the cassette ribbon 36
Replacing the correction tape 37
Replacing the cassette daisy
wheel 38
Troubleshooting 39
Problem 39
Care of Unit & Specifications 40
Care of unit 40
Specifications 41
Starter kit (SK 100) 42
Index 43
Compatible Accessories 45
Accessory Order Form 47

KEYBOARD
- (*) Hold down [CODE] and press the key to activate these functions.
- (**) Hold down [ALT] and press the key to activate these functions.
- “[ALT] + appropriate key” or “[CODE] + appropriate key” will be used in this manual when the [ALT] or [CODE] must be held down while the appropriate key is pressed.
- The following functions and characters can be repeated by holding down the corresponding keys:
NORMAL CHARACTERS
HYPHEN
SPACE BAR
BACKSPACE
RETURN
TAB (carrier moves from one tab to the next)
CORRECTION
INDEX/REVERSE INDEX

Paper release lever: Pushing this lever loosens tension on the paper so that it can be adjusted as necessary.
Paper Supporter: Keyboard Cover can be used as a paper supporter as illustrated above.
FEATURES
Your Brother electronic typewriter combines advanced performance with easy operation.
Some of the outstanding functions of this typewriter are illustrated in the letter below. The numbers in brackets refer to the page where you can find further information concerning each feature.

PART I OVERVIEW OF YOUR TYPEWRITER
This typewriter is a very sophisticated machine, you will find it easier to use and a lot more convenient than an ordinary typewriter. The two main differences between an ordinary typewriter and this machine are. 1) the LCD display, and 2) the spell checker. Usually, the characters you type will be immediately printed on the paper and the display will only show the various settings of the machine. The line you are typing is actively stored in the line correction memory to allow for easy corrections of the text already printed. Sometimes, the machine will need to know the contents of the line you are typing in order to print it at the correct position. This happens, for instance, when you are centering your text. In such a case, the text is temporarily displayed on the LCD. We will call this feature the "display mode". Listed below is a short description of the printing and display modes. When you switch your machine on, you are in printing mode.
1. Printing mode
The printing mode corresponds to the traditional way of using a typewriter: when a character is typed, it is printed immediately on the paper. The basic operations that allow you to start in this mode are described in the chapter "Basic Typing" (p.9).
When you use the printing mode, the characters you type do not appear on the display. The line correction memory actively records everything you are typing on the current line. With this memory, you can erase any letter, word, or even the whole line automatically. See "Memory Correction" (p.20) for more details.
The function currently activated by an arrow.
The following illustration shows you how the status indicators work. In this example, the pitch is set to 10 and the line spacing is 1. The shift lock mode, the word spell function, the word underlining, the boldface function are on. The typewriter is in typewriter mode. The auto carrier return is on.

PART I OVERVIEW OF YOUR TYPEWRITER
| PITCH 10, 12, 15 = typing pitchLINE 1, 1 1/2, 2 = line spacingSHIFT = shift modeCAPS = caps lock modeWORD SPELL = word spell check | WORD = word underliningCONT = continuous underliningBOLD = boldfaceAUTO = auto carrier returnL/L = line by line (with auto return) |
2. Display mode
In this mode, the characters you type are shown on the display before printing. They will only be printed after you complete the line. In this mode, corrections are very easy. Since the text is displayed before printing, you may freely correct the text directly on the display.
This mode is automatically selected when you reach a decimal tab, or when you choose to print a line in centering or you choose the right margin flush feature. This is because the machine needs to know the entire contents of the line to be able to print it at the correct position on the paper. After the line is printed, the machine returns automatically to the printing mode.
You may also choose to work in display mode in order to enjoy the correction possibilities it affords. In that case, activate the line-by-line function. The line-by-line function will display your text until you finish typing the whole line. The line is then printed, and you may type the next line. At the certain point, you may want to check the current typing pitch or line spacing etc. Just press [CODE] + [ALT] to display the status indication in the display mode.
The first thing that you will need to do is to decide how you want your document to look when it is printed. To do this, go step-by-step through the following.
Inserting paper
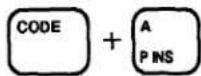
This machine is equipped with an automatic paper insertion function so that you do not need to use the platen knob to insert a sheet of paper.
1) Position a sheet of paper behind the platen and press [CODE] + [PINS] (A). The paper will be automatically inserted and will advance one inch. The prompt "PRESS RETURN" appears on the display.
2) Press [RETURN]. The prompt disappears and the carrier returns to the left margin.
3) If you want to change the position of the paper, use the index/reverse index function described next.
Index/reverse index

The index/reverse index function lets you move the paper up or down by 1/12 inch (one half line) in either direction.
Press [CODE] + [INDEX] (P) to raise the paper, or press [CODE] + [REV] (O) to lower the paper. To move the paper continuously in either direction, hold down the appropriate keys.
The paper can also be moved manually with the platen knob.
View Mode
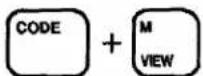
This function automatically moves the paper upward 1/12 inch (one half line) after typing so that you can easily see the typed characters.
Press [CODE] + [VIEW] (M) to turn the viewing mode on (you will hear two beeps) or off.
Viewing Mode ON
During continuous typing, the paper remains constant with the print unit on the typing line. When typing stops for more than 1 second, the paper moves upward so that you can easily view what you have typed. When typing continuous, the paper automatically returns to the correct typing line.
Viewing Mode OFF
During continuous typing and during viewing, the paper remains at the typing position. If the machine is turned off, the setting of view mode is changed to "off".
Selecting line spacing

The line spacing determines the vertical separation between the printed lines. Increasing the line spacing results in fewer printed lines per page.
Preceiving [ALT] + [LINE] (2) changes the indication under "LINE" through the following cycle:
1 → 1 1 / 2 → 2 → 1

| Indication | Meaning |
| 1 (▲) | Standard line spacing |
| 1 1/2 (▼) | 1 1/2 line spacing |
| 2 (▲) | Double line spacing |
Selecting pitch

The pitch determines the number of characters printed per inch, and should be selected to match the pitch indicated on the daisy wheel in use. Increasing the pitch results in more printed characters per line.
Pressing [ALT] + [PITCH] (1) changes the indication below "PITCH" through the following cycle:
1 0 → 1 2 → 1 5 → 1 0
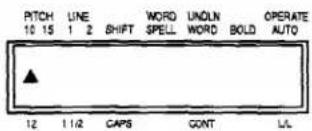
| Indication | Meaning |
| 10 (▲) | Pica pitch (10 characters per inch) |
| 12 (▼) | Elite pitch (12 characters per inch) |
| 15 (▲) | Micron pitch (15 characters per inch) |
Note: Be sure the selected pitch matches the pitch of the daisy wheel inserted in the unit.
Setting margins
The carrier movement is limited by the left and right margins (unless you press [ALT] + [M REL] (3) as explained below). Setting the margins allows you to decide where your text will be positioned on the paper.
Left margin

1) Move the carrier to the place you want to set the left margin by using [SPACE BAR] or [BACKSPACE]. If you need to move outside the current left margin, press [ALT] + [M REL] (3).
2) Press [ALT] + [L MAR] (4). The left margin is now set.
Right margin

1) Move the carrier to the place you want to set the right margin by using [SPACE BAR] or [BACKSPACE]. If you need to move outside the current right margin, press [ALT] + [M REL] (3).
2) Press [ALT] + [R MAR] (5). The right margin is now set.
Margin release
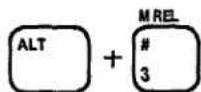
If you try to move the carrier past a margin, a beep is heard and the carrier does not move. After you have set your margins, you may sometimes find it necessary to type outside these margins. You may also need to move the carrier past a margin to reset the margin.
To move the carrier past a margin, press [ALT] + [M REL] (3).
1) To move to the left of the left margin, backspace to the left margin, press [ALT] + [M REL] (3) and then continue to backspace.
2) To move past the right margin, hold [SPACE BAR] until the carrier reaches the right margin. Press [ALT] + [M REL] (3), then continue spacing using [SPACE BAR].
- You may not move past the right margin with [SPACE BAR] if the auto carrier return function is activated. To turn this function off, see "Returning the carrier" page 17.
- The shortest possible distance between the left and right margins is two inches (20 characters in Pica pitch, 24 characters in Elite pitch, and 30 characters in Micron pitch.)
Setting tabs
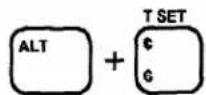
Tabs are very useful when you need to type your text in columns. Once the tabs are set, pressing [TAB] automatically moves the carrier to the next tab so that you can easily type your data in perfectly aligned columns.
1) Move the carrier to the place you want to set a tab by using [SPACE BAR] or [BACKSPACE].
2) Press the [ALT] + [T SET] (6) to set the tab. A maximum of 12 tabs can be set (decimal tabs included).
3) Repeat steps 1 and 2 to set each tab stop.
- The right margin is considered a tab position.
- To replace a decimal tab (a special tab used to align numbers) with a regular tab, first clear the decimal tab, then set a regular tab at the same position.
- If you want to use a decimal tab as a regular tab temporarily, simply press [CORRECT] at the decimal tab position. This does not change the decimal tab into a regular tab, but allows you to use that decimal tab just like a regular tab once.
- For more details on Decimal Tabs, see page 13.
Clearing tabs
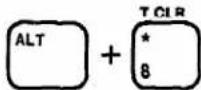
1) Using [TAB], move the carrier to the tab stop you want to clear. This may be a regular tab or a decimal tab.
2) Press [ALT] + [T CLR] (8) to clear the tab.
CAUTION: If you press [ALT] + [T CLR] (8) for more than half a second, all tabs will be deleted. A beep will sound three times.
Setting decimal tabs

When you want to print columns of numbers with their decimal points lined up, use the decimal tab set key.
1) To set a decimal tab, move the carrier to the place desired by using [BACKSPACE] or [SPACE BAR].
2) Press [ALT] + [DT SET] (7) to set the decimal tab.
- Pressing [ALT] + [DT SET] (7) at a normal tab position replaces the normal tab with a decimal tab.
Using decimal tabs
1) Press [TAB] to go to the decimal tab position. This message will appear;
4 DECIMAL TAB
The message disappears when you start typing.
2) Type in the numbers. They are not printed right away but appear on the display. The carrier moves backward for each number typed. (This lets you correct wrong entries on the display. For more details concerning correction in display mode, refer to the next section. p.29.)
3) When the decimal point is entered, or when you press [TAB] or [RETURN], the displayed numbers (and the decimal point if you used it) are printed.
4) Type whatever comes after the decimal point.
- Although the decimal tab function is mostly used to align numbers, it will also work in the same way as explained above if you type letters instead of numerals. This will align your words right flush with the decimal tab.
Cancelling the decimal tab mode
1) Before you have typed anything:

To cancel the decimal tab mode before you have typed anything, press [CORRECT] at the decimal tab position. The carrier does not move. You can now enter any character and it will print directly on the paper.
2) After entering some characters:

Press [CORRECT] until the numbers or the characters on the display disappear, then press [CORRECT] one more time. You may now start typing your text and it will print on the paper. The first character will be printed at the tab position (same as decimal point position).
3) Clearing the decimal tab:

To cancel the decimal tab altogether, press [ALT] + [T CLR] (8) at the decimal tab position.
Repeat function
The repeat function allows you to type the same characters many times by just holding down the corresponding character key. This is useful, for example, when you want to separate two parts of the text with a line made of “-” (hyphene).
To type a character repeatedly, hold down the corresponding key. The character will be printed once, then the machine will wait a short time (half a second) and then print the same character repeatedly until you release the key. The short delay is provided to prevent accidental repetition of the same character when you want it to be printed only once.
Typing uppercase characters

Uppercase characters are the capital letters, and the characters indicated in the upper part of the non-letter keys. For example, [A] (capital "a") and [!] (1) are uppercase characters.
1) To type one or a few uppercase characters, press either the right or left [SHIFT]. Releasing this key returns the keyboard to the lowercase mode.
2) For continuous uppercase typing, press [SHIFT LOCK]. This will set the keyboard in shift lock mode. To return to lowercase typing, press either the right or left [SHIFT].
Capital lock key (NOT AVAILABLE FOR USA VERSION AX-475)
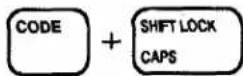
The capital lock mode is a shift lock mode restricted to the letter keys. In other words, when you are in capital mode, pressing a letter key will give the capital letter, but pressing a non-letter key will give the lowercase character.
1) Pressing [CODE] + [CAPS] once puts the system in capital lock mode. This will enable you to type your text with capital letters while keeping the lowercase status for the other characters. For example, while in capital lock mode, you can type the following text without pressing [SHIFT].
MODEL NO. G17P89SRP
2) To cancel this mode, simply press [CODE] + [CAPS] again.
3) When you are in capital lock mode and need a character like [I], simply press [SHIFT] while typing.
4) If you need to type a string of non-letter uppercase characters (ie. [!], [@], etc.) while in capital lock mode, press [SHIFT LOCK] to set the keyboard temporarily in shift lock mode.
Hot zone
The hot zone is the area that starts six (6) spaces before the right margin and extends to the right margin. A warning beep will sound when the hot zone is reached. If you are typing a word that is too long to fit into the hot zone, you will have to either divide the word by using a hyphen, or shift the whole word to the next line.
Returning the carrier

Returning the carrier to the left margin advance the paper by the number of lines set with the line space selector (1, 1 1/2, 2). This machine is provided with an automatic carrier return function which, when activated, will return the carrier automatically when you type a space or a hyphen in the hot zone.
Pressing [ALT] + [OPERATE] switches through the following "OPERATE" options:
OFF (not displayed)→ AUTO → L/L → OFF

| Indication | Meaning |
| OFF | Printing mode, manual return only (typist must press [RETURN].) |
| AUTO (▲) | Printing mode, auto carrier return function activated |
| L/L (▼) | Display mode (line-by-line), auto carrier return activated |
1) Returning the carrier manually
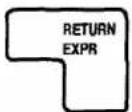
Regardless of the option selected with [ALT] + [OPERATE], pressing [RETURN] will always return the carrier. When the auto carrier return function is off (first option above), pressing [RETURN] is the only way to return the carrier. Holding down this key will feed the paper repeatedly.
2) Returning the carrier automatically

When the "AUTO" option is selected, the carrier will return automatically every time, [SPACE BAR] or [-] (hyphen) is pressed in the hot zone.
Note: When the "L/L" option is selected, the auto carrier return function is always activated. For details about these options, see "DISPLAY MODE" page 29.
- Permanent space
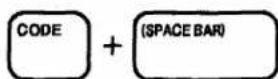
If you want to type a space in the hot zone without triggering a carrier return, press [CODE] + [SPACE BAR]. An example of when you would use [CODE] + [SPACE BAR] would be when you need to keep two words on the same line. For instance, April 9, 1995. In this example, you would press [CODE] + [SPACE BAR] after the comma to prevent the year from moving to the next line.
• Permanent hyphen

For a similar reason, if you want to type a hyphen while in the hot zone without activating the auto carrier return. press [CODE] + [-] (hyphen). For example, to type the telephone number 617-238-7098, you would press [CODE] + [-] (hyphen) after 238 if this hyphen is in the hot zone.
Backspacing
You may need to move backward along the line you have just typed. This is called "backspacing".
Your typewriter has three different backspace functions:
1) Simple backspace
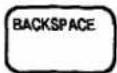
To move back one space at a time, press [BACKSPACE]. To move continuously to the left, hold this key down.
2) Express backspace
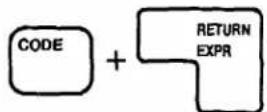
To move the carrier quickly to the beginning of the data you are typing, press [CODE] + [EXPR].
3) Half backspace

The half backspace function is used to fit a correct word in a line after erasing a misspelled word that was one character shorter or longer than the correct word (example: replacing fomulas with formulas or minnor with minor).
Delete the entire misspelled word.
If the deleted word was shorter than the correct word, align the carrier up with the first letter of the deleted word; if it was longer, align the carrier with the second letter of the deleted word.
Press [CODE] + [BS 1/2] to move the carrier half a space to the left.
Type in the correct word. Because of the half-backspace function, the corrected word is perfectly centered within the blank space left by the deleted word.
MEMORY CORRECTION
Your typewriter has a full-line correction memory that makes corrections easier. As long as you are on the current line, the machine will automatically erase for you. In addition, you may choose to erase automatically a single character, one word, or the entire line.
Correcting one character

1) Use [BACKSPACE] or [SPACE BAR] to line up the carrier with the mistyped character.
2) Press [CORRECT]. This automatically erases the mistyped character and leaves a blank. Super/subscripts, underlined and bold characters can be deleted with this function, as well as regular characters.
3) Type in the correct character.
- To erase a series of characters, merely hold down [CORRECT]. The carrier will backspace and correct continuously until you release the key.
Relocation

The [RELOC] key allows you to move to the end of your typing line rapidly. Press [RELOC] to return the carrier to the place where it was before the correction.
Erasing one word

The word out function allows you to erase one word at a time.
1) Using [BACKSPACE] or [SPACE BAR], move the carrier to the space right after the word to be deleted. (The △ triangle in the following illustration indicates the location of the carrier.)
cal formulas. Most people feel Δ
2) Press [W OUT]. This will erase the word, but leave the carrier where the first letter of that word was positioned.
cal formulas. Most people Δ
3) You can now continue with your text.
cal formulas. Most people are no longer familiar
- If the carrier is positioned in the middle of a word, only the letters from that position to the beginning of the word will be erased.
- This function erases super/subscripts, bold characters, and underlining if they are part of the word.
- To interrupt the word out function while a word is being erased, press [CORRECT].
Erasing the entire line

The line out function allows you to delete an entire line automatically. The line out function will delete the last line typed, as long as the carrier has not been moved to the next line.
1) Using [BACKSPACE] or [SPACE BAR], move the carrier to the space right after the line to be erased.
I would like to suggest some minor changes Δ
2) Press [CODE] + [L OUT] to delete the line automatically. The carrier will stop at the position previously occupied by the last character you deleted.
Δ
- If the carrier is in the middle of the line, correction will start from that position to the beginning of the line.
- Superscripts, subscripts, bold, and underlined characters will also be deleted.
• To interrupt the line out function, press [CORRECT].
MANUAL CORRECTION
If you have overlooked an error in a text and have already moved to a different line, you can still correct it by using the manual correction method.
Manual correction
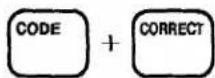
and retype wrong character
1) Return the paper to the line of the character to be corrected using [CODE] + [INDEX] (P) or [CODE] + [REV] (O).
2) Line up the carrier with the error using [BACKSPACE] or [SPACE BAR].
3) Press [CODE] + [CORRECT]. The "M. CORRECTION" prompt will appear on the display.
4 M-CORRECTION
4) Type the incorrect character to remove it. Use [SHIFT] for uppercase characters, and set the typewriter in underlining mode to correct an underlined character.
5) Type the correct character.
Superscript/Subscript

Superscripts and subscripts are used mainly for scientific text composition (for instance, exponents, chemical symbols, or reference to footnotes).

To print a superscript, press [CODE] + [,] (comma) to raise the carrier by 1/12 inch, and then type the character that you want in superscript.
e = πc ^ 2
To print a subscript, press [CODE] + [.] (period) to lower the carrier by 1/12 inch, and then type the character that you want in subscript.
C _ 2 0 H _ 4 2
To restart normal typing: After typing a superscript, press [CODE] + [. ] (period). After typing a subscript, press [CODE] + [, ] (comma). This will move the paper back to normal position.
- In super/subscript mode, the carrier will always move by 1/12 inch, regardless of the current line spacing.
- Super/subscripts of more than 1/12 inch are not possible. The beep will sound if you press twice on [CODE] + [,] / [CODE] + [.].
- If you wish to move the carriage more than 1/12 inch, use [CODE] + [INDEX] (P) or [CODE] + [REV] (O). However, in this case, the correction memory will be cleared.
Special characters

To type the special characters and symbols marked in green on the bottom of certain keys, hold down [CODE] and press the desired key.
| Character | Keys | Character | Keys |
| < | CODE + W | § | CODE + Z |
| ¶ | CODE + Y | 2 | CODE + X |
| > | CODE + U | 3 | CODE + V |
Automatic underlining

You can use this function when you want to underline a word or group of words.
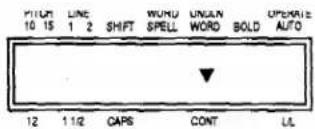
Pressing [ALT] + [UNDLN] (-) switches through the following "UNDLN" options:
OFF (not displayed) → CONT → WORD → OFF
| Indication | Meaning |
| OFF | No underlining |
| CONT (▼) | All words and spaces between them are underlined. |
| WORD (▲) | Only words are underlined, and not the spaces between them |
1) Press [ALT] + [UNDLN] (-) once to turn on the "CONT" option, or press the same keys twice to turn on the "WORD" option.
2) Type your text. The characters are underlined according to the option you selected.
Suggestion
3) To cancel the automatic underlining mode, press [ALT] + [UNDLN] (-) again, until nothing is displayed under "UNDLN".
- The spaces that triggered a carrier return in the automatic carrier return mode are never underlined.
- This function can be used together with the decimal tab, the automatic centering, boldface, and the right margin flush functions (p.13, 26, 25, 27).
Boldface

Using the boldface mode is another way to make a word or phrase stand out and catch the reader's eye.
Pressing [ALT] + [BOLD] (=) switches "BOLD" on or off:
OFF (not displayed) → BOLD → OFF

| Indication | Meaning |
| OFF | Normal printing |
| BOLD (▲) | Boldface printing |
1) Press [ALT] + [BOLD] (=) and then type your text.
New York, N.Y.
2) Press [ALT] + [BOLD] (=) once again to cancel this mode.
- This function can be used together with the decimal tab, the automatic centering, underline, and the right margin flush functions (p. 13, 26, 24, 27).
Line indent (NOT AVAILABLE FOR USA VERSION AX-475)
This function avoids having to press [SPACE BAR] five times to indent a line.
Pressing [CODE] + [L IND] (TAB) moves the carrier five (5) characters to the right.
To indent at the beginning of a line, press [CODE] + [L IND] (TAB). The carrier moves five (5) spaces to the right of its current position.
→ Thank you for your interesting paper on
Centering

The centering function allows you to center a line of text between the left and right margins.
1) To center between the margins:
Move the carrier to the left margin and press [ALT] + [CTR] (9). The carrier will move to a point halfway between the margins.
2) Type the text. The characters are not printed immediately, but will appear on the display. At this point, you can still make corrections in display mode (for more information, see the next section, p.29.) The carrier will backspace one half-space for each character typed.
- If the entered characters extend beyond the space between the margins, a beep sounds, and you will not be able to enter any more characters.
3) To print the text, press [TAB] or [RETURN]. When printing is finished, the carrier will go to the next tab, or return to the left margin on the next line.
- The centering function cannot be activated if the carrier is not positioned on the left margin.
Centering between margins

Cancelling the centering mode

1) Before you have typed anything:
To cancel the centering mode before you have typed any text, press [ALT] + [CTR] (9). The carrier then returns to its original position.
2) After entering some characters:
If you have entered some characters, press [CORRECT] until the display is blank. Then either retype your text or press [ALT] + [CTR] (9) to escape from the mode.
Right margin flush

Your typewriter can automatically print text flush (or even) with the right margin. This is particularly useful for dates and other headings.
1) Press [ALT] + [RMF] (0). The carrier will go to the right margin.
2) Type the text. The characters will not be printed immediately, but will first be displayed. At this point, you can still make corrections in display mode (for more information, see the next section, p.29.) The carrier will backspace once each time a character is entered.
- The beep will sound if you run out of room, and you will not be able to enter any more characters.
3) To print the text, preee [TAB] or [RETURN]. When printing ie finished, the carrier will go to the right margin, or return to the left margin on the next line.
Right margin
↓
December 7th, 1994
Cancelling the right margin flush mode

1) Before you have typed anything:
To cancel the right margin flush mode before typing any text, press [ALT] + [RMF] (0). This returns the carrier to the last typing position if text has previously been entered on the line. Otherwise, the carrier returns to the left margin.
2) After entering some characters:
If you have entered some characters, press [CORRECT] until the display is blank. Either retype your text or press [ALT] + [RMF] (0) to return to the last typing position or the left margin.
DISPLAY MODE
In this mode, characters are displayed before being printed. This permits you to correct the text on the screen, which is quicker and easier than making corrections on paper in the printing mode.
The display mode is automatically selected when using the decimal tab, centering, and right margin flush functions. For each of these functions the line is typed and displayed before being printed.
You may also take advantage of this mode without using one of the above layout functions by using the line-by-line function.
- The following keys cannot be used in display mode. You will have to switch back to the printing mode if you want to use them.
| Keys | Function |
| ALT + M REL | To move past a margin |
| ALT + L MAR | To set the left margin |
| ALT + R MAR | To set the right margin |
| ALT + T SET | To set a tab |
| ALT + T CLR | To clear a regular or decimal tab |
| ALT + DT SET | To set a decimal tab |
Line-by-line processing
"Line-by-line processing" means that the contents of the line will always be displayed on the display before being printed on paper. In this mode, the auto carrier return function is always activated.
Pressing [ALT] + [OPERATE] switches through the following "OPERATE" options:
OFF (not displayed) → AUTO → L/L → OFF
- It is impossible to select the line-by-line mode if the carrier is not between the margins.

| Indication | Meaning |
| OFF | Printing mode, manual return only |
| AUTO (▲) | Printing mode, auto carrier return function activated |
| L/L (▼) | Display mode (line-by-line), auto carrier return function activated |
1) Press [ALT] + [OPERATE] until "L/L" is selected.
2) Type your text. The carrier moves for each character entered. Input characters are not printed right away, which means that entries can be corrected before being printed. See "Correction in display mode" (p.31).
3) Pressing [TAB], [L IND] or [RETURN] prints the text and moves the carrier to the next tab, to five (5) spaces to the right of its current position or to the next line.
- In line by line mode, the automatic carrier return function is always activated.
- Pressing the hyphen key in the hot zone displays a "ghost hyphen" (3-dot hyphen). This hyphen does not trigger a carrier return immediately as in printing mode. However, if you type anything after this hyphen, printing and carrier return will be triggered. The hyphen will be printed at the end of the line, and the character you typed after it will appear at the first position of the display.
4) To cancel the line-by-line mode, print the displayed text, then press [ALT]
+ [OPERATE] to delete the indicator under "OPERATE", or to select the "AUTO" mode. This turns the display off and recalls the printing mode.
Correction in display mode
Deleting characters from the text

To delete characters from your text, press [CORRECT] or [BACKSPACE]. This will move the cursor one position to the left and delete the character which was at the left of the cursor.
Deleting one word from the text

To delete a word from your text, press [W OUT]. This will delete all the characters from the left of the cursor to the beginning of the word and move the cursor to the beginning of the deleted word.
Deleting the entire line
To delete the entire line, press [CODE] + [L OUT]. This will delete all the characters from the left of the cursor to the beginning of the line and move the cursor to the beginning of the line.
Functions requiring a special display
The bold, underlining, and super/subscript functions work in the same way as in printing mode, but have a special display. The following table shows how these functions are displayed.
| Function | Display |
| Underlined character | The character flashes, showing alternately the normal character and the underlining.Example: = Page and ____ |
| Bold character | The character flashes, showing alternately the normal character and an upper line.Example: = Page and ---- |
| Superscript | The character in superscript alternates with the symbol (‡). The shape of the cursor change from to .Example: mc2 = mc2 and mc ‡ |
| Subscript | The character in subscript is alternately displayed with the symbol (‡). The shape of the cursor changes from to .Example: H2O = H2O and H O |
| Permanent hyphen | Displayed with the symbol (—). |
| Ghost hyphen (hyphen typed in the hot zone) | Displayed as three dots (⋯). |
| Permanent space | Displayed with the symbol (..). |
- The super- or subscript mark appears on the display when the character is entered and disappears if the character is deleted. The mark does not appear alone - it always alternates with the character or symbol you have typed.
- To turn underlined or bolded characters back to normal, delete them and retype them after turning the underline or bold function off.
Functions triggering line printing
The following keys will trigger line printing and clear the display:
1) [RETURN]: The line is printed, the paper is fed and the carrier returns to the left margin.
2) [TAB]: The line is printed and the carrier moves to the next tab.
3) [CODE] + [L IND] : The line is printed and the carrier moves five (5) spaces to the right of its current position.
PART II SPELLING CHECKER
Important notice: This system is not a replacement for careful proofreading of your documents. It has no way of knowing, for example, whether words are missing or whether a given word is appropriate for the current syntactic or semantic context. If you type "teh" instead of "the", the program alerts you because "teh" is not a valid English word, but if you type "one" instead of "on", it does not consider it a mistake.
The spelling programs contain materials owned, developed, and copyrighted by Houghton Mifflin Company, Boston, Massachusetts, U.S.A. Reproduction or disassembly of embodied computer programs or algorithms prohibited. Based upon The American Heritage Dictionary.
To turn the Word Spell on and off: Press [ALT] + [W SPELL] (±).

When you switch the machine on, the Word Spell is automatically switched on.
When the Word Spell is on: While typing, pressing one of the following keys signals the end of a word and activates the automatic spell check:
[SPACE BAR], [CODE] + [SPACE BAR], [RETURN] (except when there is a hyphen at the end of the line), [/], or more than two periods.
You will hear three beeps whenever the word is not found in the dictionary. Check the word, and correct it if necessary.
At a certain point, you may want to recheck the words on the current line in the direct printing mode.
The line you are typing is stored in the memory until the carrier is moved to the next line so that you can recheck the words. We will call this feature the "FIND" function. The "FIND" function can be activated only in the printing mode.
Press [CODE] + [L] to recheck all the words on the current line. The carrier will move to the end of a misspelled word. The FIND function works even when the Word Spell is turned off.
You can also recheck a word on the current line with following operation.

1) Press [ALT] + [W SPELL] to turn the Word Spell on.
2) Move the carrier back to the word, then move to the right with [SPACE BAR] or [CODE] + [SPACE BAR]. The word is automatically checked again. Pressing [RETURN] will also recheck the word the carrier is on.
PART V TECHNICAL INFORMATION REPLACING THE RIBBON. ETC.
Replacing the cassette ribbon
Three types of ribbons are available:
| Ribbon Type | Brother Model |
| Correctable film ribbon | 1030 or 1230 |
| Multi strike ribbon | 1031 |
| Nylon ribbon | 1032 |
To replace the cassette ribbon:
1) Use [SPACE BAR] or [BACKSPACE] to move the carrier to the center of the platen.
2) Open the top cover.
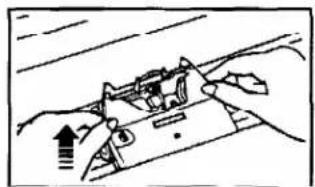
3) Holding the cassette with both hands, lift the front of the cassette up and out.
4) Move the cassette towards the platen to remove it.
5) Turn the feed knob (on the left side of the cassette) counter-clockwise to tighten the ribbon in the new cassette.
6) Align the arrow on the cassette with the arrow on the cassette holder. Use both hands to ease the cassette into the holder, back first.
7) Gently press down on the front of the cassette until it clicks into place.
8) Again turn the feed knob counter-clockwise to take up any slack.
9) Close the top cover.
10) Press [CODE] + [RESET] (Q) to move the carrier to the previous position.
- The amount of tape remaining can be checked through the viewing hole on the right side of the cassette.
• Make sure to use only Brother-authorized cassette ribbons, correction tapes and cassette daisy wheels. Brother cannot be held responsible for difficulties caused by the use of unauthorized supplies.
Note: Please do not touch the keyboard during replacing the daisy wheel, cassette ribbon or correction tape in order to avoid carrier movement.


Replacing the correction tape
Two types of correction tape are available:
- Lift-off correction tape, to be used with correctable film ribbon.
• Cover-up correction tape, to be used with nylon and multi strike ribbons.
To replace the correction tape:
1) Use [SPACE BAR] or [BACKSPACE] to move the carrier to the center of the platen.
2) Open the top cover.
3) Remove the cassette ribbon, if installed.
4) Pull off both spools, pressing against the correction tape with your thumbs. Bring it back to a position parallel with the platen, and lift it up and out.
5) Pass the new tape through the left guide, behind the ribbon guide, and out through the right guide. The rough (sticky) side of the tape should face the platen.
6) Attach the feeder spool to the pin on the loft.
7) Attach the take-up spool to the pin on the right.
8) Turn the take-up spool counter-clockwise until a small amount of white tape has wound around it.
9) Replace the cassette ribbon and close the top cover.
10) Press [CODE] + [RESET] (Q) to move the carrier to the previous position.


Replacing the cassette daisy wheel
The daisy wheel is housed in a clear plastic cassette for easy, damage-free handling and quick typeface changes.
To replace the cassette daisy wheel:
1) Open the top cover.
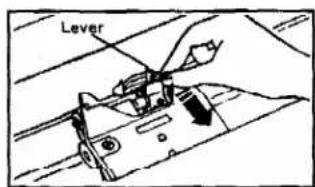
2) Pull the lever towards you to release the daisy wheel lock.
3) Remove the cassette daisy wheel by pulling it out of the machine by the protruding "ear" on the top right.
4) Insert the desired cassette daisy wheel into the slot and press down gently.
5) Slide the lever back to its original position to lock the cassette daisy wheel in place. Make sure to press the lever firmly.
6) Close the top cover.
7) Press [CODE] + [RESET] (Q) to move the carrier to the previous position.
• Make sure the cassette daisy wheel is not inserted backwards. The "ear" should always be on the upper right.
- Improper insertion of the cassette daisy wheel may cause malfunction and incorrect printing.
• It is not necessary to remove the cassette ribbon when replacing the daisy wheel.


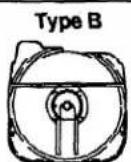
NOTE Please check the shape of your daisy wheel cassette before replacing the daisy wheel. The daisy wheel cassette type B cannot be used with this machine.

Problem
| Problem | Solution |
| Nothing happens when power switch is turned on | 1. Is the power cord plugged in? |
| Poor printing performance or printout is impossible | 1. Is the daisy wheel properly installed?(Has the lever been pressed firmly?)2. Have you run out of ribbon?3. Try to press [CODE] + [RESET] (Q) to detect the home position of the carrier. |
| Poor correction performance | 1. Has the correction tape been properly installed?2. Have you run out of correction tape?3. Are you using the proper correction tape?4. Try to press [CODE] + [RESET] (Q) to detect the home position of the carrier. |
CARE OF UNIT & SPECIFICATIONS
Care of unit
Beware of tiny objects
Be careful not to let anything slip into the typewriter or between the keys. Be especially careful of metal objects such as paper clips and staples.
Cleaning
Never use volatile liquids such as thinner or benzine to clean the exterior surface of the typewriter. Use only a soft cloth dampened with a mild detergent solution.
Location
Do not expose your typewriter to direct sunlight, heat or intense vibration.
Be sure to replace the keyboard cover when the typewriter is not in use.
Ventilation
Do not block the ventilation slots provided at the back of the unit to prevent overheating.
Specifications
| Paper capacity (width) | 12.87" (326.90mm) |
| Typing capacity | 9.0" (228.6mm) |
| Typing speed | 12 characters per second |
| Typing pitches | 10 (max. 90 characters/line)12 (max. 108 characters/line)15 (max. 135 characters/line) |
| Number of character keys | 46 (96 characters) |
| Line spacing | 1, 1 1/2, 2 |
| Keyboard memory | 48 characters |
| Correction memory | 1 line (383 characters) |
| Maximum number of tabs | 12 (including decimal tabs) |
| Display | LCD, 1 line x 16 characters |
| Carbon copies | Original + 4 copies |
| Ribbons | Correctable film - MODEL 1230 or 1030Nylon - MODEL 1032Multi Strike - MODEL 1031 |
| Correction tapes | Lift-off - MODEL 3010 for use with correctable film ribbon & cover-up - MODEL 4010 for use with nylon ribbon and multi strike ribbon |
| Dimensions (W x D x H) | 16.4" x 15.1" x 5.3" (417 x 383 x 134 mm) |
| Weight | 10 lb |
Changes or modifications not expressly approved by Brother Industries, Ltd. could void the user's authority to operate the equipment.
Starter kit (SK-100) (FOR USA ONLY)
This starter kit provides you with a good supply of ribbons, a script daisy wheel and an extra correction tape at a great savings.
This includes:
- 3 correctable film ribbons
- 1 script 1012 daisy wheel
- 1 lift-off correction tape
INDEX
A
Accessories, 36
ALT key, 4
Auto carrier return, 17
Automatic underlining, 24
B
Backspace, 18
Backspace, express, 19
Backspace, half, 19
Basic typing, 9-19
Boldface, 25
C
Capital lock key, 16
Care of unit, 40
Cassette daisy wheel, 38
Cassette ribbon, 36
Centering, 26
Cleaning, 40
Correction, 20, 22
Correction in display mode, 31
Correction tape, 37
D
Daisy wheel, 38
Daisy wheel lock, 38
Decimal tab, 13
Decimal tab Set, 13
Deletion in display mode, 31
Display mode, 29
E
Elite, 11
Express backspace, 19
F
Find function, 34
G
Ghost Hyphen, 30
H
Hot Zone, 17
Hyphen. 18. 30
1
Index, 9
Inserting paper, 9
L
Layout functions, 23-28
Line indent, 25
Line memory, 20
Line spacing, 10
Line-out, 21
Location, 40
L/L mode, 29
M
Manual correction, 22
Margin release key, 12
Margins, setting, 11
Margin, left, 11
Margin, right, 12
Memory correction. 20
0
Operate, 17, 29
P
Permanent hyphen, 18, 32
Permanent space, 18
Pica, 11
Pitch, 10
R
Repeat, 4, 15
Replacing the correction tape, 37
Replacing the daisy wheel, 38
Replacing the ribbon, 36
Return, 17
Returning the carrier, 17
Reverse index, 9
Right margin flush, 27
S
Setting tabs, 12
Shift lock, 16
Special characters, 23
Specifications, 41
Spelling check, 34
Starter kit, 42
Status indicators, 7
Subscript, 23
Superscript, 23
T
Tab, 12
Tab clear, 13
Technical information, 36
Troubleshooting, 39
U
Undorlining, 24
V
Ventilation, 40
View mode, 9
W
Word-out, 20
Word spell, 34
Compatible Accessories
Starter kit
| Item No. | |
| SK-100 | 3 Correctable Film Ribbons1 Script 1012 Daisy Wheel1 Lift-off Correction Tape USA ONLY |
Cassette Ribbons/Correction Tapes
| Item No. | Description | |
| 1030 | Correctable film ribbon | |
| 1230 | Correctable film ribbon (2 packs) | USA ONLY |
| 1031 | Multi strike ribbon | |
| 1032 | Nylon ribbon | |
| 3010 | Lift-off Correction tapes (2 pcs.) (to be used with 1030, 1230 ribbons) | USA ONLY |
| 4010 | Cover-up Correction tapes (2 pcs.) (to be used with 1031, 1032 ribbons) | USA ONLY |
| 3015 | Lift-off Correction tapes (5 pcs.) (to be used with 1030, 1230 ribbons) | ASIA ONLY |
| 4015 | Cover-up Correction tapes (5 pcs.) (to be used with 1031, 1032 ribbons) | ASIA ONLY |
Cassette Daisy Wheels
| Item No. | Type Pitch | |
| M401 | Pica 10 (Standard Pica) | 10 |
| M402 | Prestige 1012 | 10, 12 |
| M403 | Elite 12 (Standard Elite) | 12 |
| M405 | Script 1012 | 10, 12 |
| M408 | Grande 10 | 10 |
| M409 | Quadro 1012 | 10, 12 |
| M410 | Quadro 15 | 15 |
| M411 | Brougham 10 | 10 |
| M412 | Brougham 12 | 12 |
| M413 | Brougham 15 | 15 |
| M414 | Prestige Italic 1012 | 10, 12 |
| M415 | OCR-B 10 | 10 |
| M416 | OCR-A 10 | 10 |
| M417 | Letter Gothic 12 | 12 |
| M419 | Super Grande 10 | 10 |
| M421 | Legal Prestige 10 | 10 |
| M422 | Super Grande II 10 | 10 |
Keep this page intact for future reference.
For additional accessories, please consult the accessory order form included in this manual.
To Complete the Order Form: (FOR USA ONLY)
- Review the order form and select the desired items.
- Complete the form, indicating the quantity of each item.
- Total the columns. Enter the total cost on the "Supply/Accessory Total" Line.
- Add the appropriate Sales Tax and Shipping/Handling Charge.
- Clearly print your name and address on the Shipping Label below.
- Send this order form, along with proper payment, to the address below OR
Visa or MasterCard holders, call toll free, anytime, 800-284-4357, or fax both sides of your completed order form to 800-947-1445.
Shipping Label
Name: ____
Address:
City:
State: ____ Zip: ____
Daytime Phone ( ) ____
Supply/Accessory Total ____
AZ, CA, CT, FL, GA, IL, LA, MA, MI, MN, MO, NC, NY, SC, TN, TX, VA and WA residents add applicable sales tax ____
Add \$3.00 Shipping/Handling ____
TOTAL DUE
Method of Payment (check one)
() Visa () MasterCard () Check/Money Order
Account Number ____
Expiration Date ____
Signature
SEND ORDER FORM TO:
Brother International Corp.
P.O. Box 341332
Bartlett, TN 38184-1332
ACCESSORY ORDER FORM
(FOR USA ONLY)
Dear Customer,
This order form is provided for your convenience should your retailer not stock the item(s) needed or if you prefer to order by mail.
Customer name
Starter Kit/Accessories
| Item No. | Price | Quantity | Total | |
| SK-100 | 3 Correctable Film Ribbons1 Script 1012 Daisy Wheel1 Lift-off Correction tape | $41.95 |
Cassette Ribbons/Correction Tapes
| Item No. | Price | Quantity | Total | |
| 1030 | Correctable film ribbon | 6.50 | ||
| 1230 | Correctable film ribbon (2 packs) | 11.50 | ||
| 1031 | Multi strike ribbon | 11.50 | ||
| 1032 | Nylon ribbon | 7.50 | ||
| 3010 | Lift-off Correction tapes (2 pcs.) (to be used with 1030, 1230 ribbons) | 6.50 | ||
| 4010 | Cover-up Correction tapes (2 pcs.) (to be used with 1031, 1032 ribbons) | 10.50 |
Cassette Daisy Wheels
| Item No. | Type | Pitch | Price | Quantity | Total |
| M401 | American Pica 10 (Standard Pica) | 10 | 26.50 | ||
| M402 | American Prestige 1012 | 10, 12 | 26.50 | ||
| M403 | American Elite 12 (Standard Elite) | 12 | 26.50 | ||
| M405 | American Script 1012 | 10, 12 | 26.50 | ||
| M408 | American Grande 10 | 10 | 26.50 | ||
| M409 | American Quadro 1012 | 10, 12 | 26.50 | ||
| M410 | American Quadro 15 | 15 | 26.50 | ||
| M411 | American Brougham 10 | 10 | 26.50 | ||
| M412 | American Brougham 12 | 12 | 26.50 | ||
| M413 | American Brougham 15 | 15 | 26.50 | ||
| M414 | Prestige Italic 1012 | 10, 12 | 26.50 | ||
| M415 | American OCR-B 10 | 10 | 26.50 | ||
| M416 | American OCR-A 10 | 10 | 26.50 | ||
| M417 | Letter Gothic 12 | 12 | 26.50 | ||
| M419 | Super Grande 10 | 10 | 26.50 | ||
| M421 | Legal Prestige 10 | 10 | 26.50 | ||
| M422 | Super Grande II 10 | 10 | $26.50 |
* Above pricing subject to change without notice
To Complete the Order Form: (FOR USA ONLY)
- Review the order form and select the desired items.
- Complete the form, indicating the quantity of each item.
- Total the columns. Enter the total cost on the "Supply/Accessory Total" Line.
- Add the appropriate Sales Tax and Shipping/Handling Charge.
- Clearly print your name and address on the Shipping Label below.
- Send this order form, along with proper payment, to the address below OR
Visa or MasterCard holders, call toll free, anytime, 800-284-4357, or fax both sides of your completed order form to 800-947-1445.
Shipping Label
Name:
Address:
City:
State: ____ Zip: ____
Daytime Phone ( ) ____
Supply/Accessory Total ____
AZ, CA, CT, FL, GA, IL, LA, MA, MI, MN, MO, NC, NY, SC, TN, TX, VA and WA residents add applicable sales tax ____
Add \$3.00 Shipping/Handling ____
TOTAL DUE
Method of Payment (check one)
( ) Visa ( ) MasterCard ( ) Check/Money Order
Account Number ____
Expiration Date ____
Signature
SEND ORDER FORM TO:
Brother International Corp.
P.O. Box 341332
Bartlett, TN 38184-1332
List of Factory Authorized Service Departments: (FOR USA ONLY)
In case of a problem with your Brother machine please contact the Service Depot in your area listed below:
A-1 OFFICE EQUIPMENT INC. 9978 WEST 87TH "SANTE FE DRIVE" OVERLAND PARK, KS 66212 (013)041-7772
ABEL OFFICE MACHINES INC. 1101 W. MAGNOLIA AVENUE FORT WORTH, TX 76104 817-926-2235
ABM OFFICE OUTFITTERS 6803 STAPLES MILL ROAD RICHMOND, VA 23228 (804)266-4488
ACCORD OFFICE MACHINES 4362 N. MILWAUKEE AVENUE CHICAGO, IL 60641 (312)777-8744
ADDER & TYPEWRITER EXCHANGE 133 SOUTH BROADWAY BALTIMORE, MD 21231 (301)732-1717
ALABAMA TYPEWRITER 2203 6TH AVENUE SOUTH BIRMINGHAM, AL 35233 (205)322-8691
APD BUSINESS MACHINES 3514 ADAMS AVENUE SAN DIEGO, CA 92116 (619)282-6226
MTC OFFICE MACHINE CO. 1540 UNION STREET SAN FRANCISCO, CA 94123 (415)775-9250
OMNI TECHNICAL SERVICES 23052 LAKE FOREST DRIVE SUITE B1 LAGUNA HILLS CA, 92653 (714)768-6627
STAR OFFICE MACHINES 11353 SANTA MONICA BLVD. LOS ANGELES, CA 90025 (213)477-6001
ARKANSAS OFFICE EQUIPMENT 1900 JENNY LIND FORT SMITH, AR 72301 (501)782-5612
ARLINGTON BUSINESS EQUIPMENT 5837 COMMERCE STREET JACKSONVILLE, FL 32211 (904)743-3252
A-1 IDEAL BUSINESS MACHINES 3672 CORAL WAY MIAMI, FL 33145 (305)448-5867
A & B BEACON BUSINESS MACHINES 43-09 VERNON BLVD. LONG ISLAND CITY, NY 11 (718)786-0400
BUCKHEAD OFFICE MACHINES 3164 PEACHTREE ROAD N.E. ATLANTA, GA 30305 (404)237-0400
BROTHER INTERNATIONAL 3131 APPLING ROAD BARTLETT, TN 38133-1332 901-385-3375
CDT BUSINESS SYSTEMS 500 N. BLACK HORSE PIKE MT. EPHRAIM, NJ 08059-1317 (609)931-1210
CLEVELAND TYPEWRITER & COMPUTER 1955 LEE ROAD CLEVELAND, OH 44118 (216)371-2500
CONNELL'S OFFICE EQUIPMENT, INC. 708 S. 38TH TACOMA, WA 98408 (206)472-9645
DOSSMAN'S OFFICE MACHINES 121 N. KIEVIN ST. ANCHORAGE, AK 99508-1427 (907)274-5315
FACTORY ELECTRONICS 2422 PALUMBO DRIVE LEXINGTON, KY 40509 (606)269-7341
GITTINS TYPEWRITER 2926 CHICAGO AVENUE MINNEAPOLIS, MN 55407 (612)822-8277
ZISSERMAN BUSINESS MACHINES INC. 75 YORK ROAD WARMINSTER, PA 18974 (215)672-6700
LEWAN & ASSOCIATES 6300 EAST EVANS DENVER, CO 80222 (303)759-9633
MAHR BUSINESS EQUIPMENT 2723 WEST CAMELBACK ROAD PHOENIX, AZ 85017 (602)242-6035
MECHAM'S TYPEWRITER REPAIR 1753 SOUTH 7TH EAST SALT LAKE CITY, UT 84105 (601)-466-1209
MOBILE OFFICE MACHINES 2223 SOUTH BRENTWOOD BLVD. ST. LOUIS, MO 63144 (314)968-4322
MODERN BUSINESS MACHINES 4609 FAIRFIELD STREET METAIRIE, LA 70006 (504)885-5961
NASHVILLE BUSINESS EQUIPMENT 1814 CHURCH STREET NASHVILLE, TN 37203 (615)329-2011
NEVILL BUSINESS MACHINE COMPANY 2707 ROYAL LANE DALLAS, TX 75229 (214)243-5285
NORTH'S OFFICE MACHINES 2101 K STREET N.W. WASHINGTON, DC 30037 (202)466-2000
REM HAWAII OFFICE PRODUCTS 3210 KOAPAKA HONO I LILU. HI 96819 (808)337-7872
RICHARD'S BUSINESS MACHINES 10509 AURORA AVENUE NORTH SEATTLE, WA 98133 (206)362-7078
ROBBINS BUSINESS MACHINES 3069 FORT STREET LINCOLN PARK, MI 48146 (313)386-5080
TAC INC, OFFICE PRODUCTS 2605 EAST FLAMINGO LAS VEGAS, NV 89121 (702)737-1949
(FOR USA ONLY)
For technical or operational assistance you may call our customer service representatives at (901) 373-6256 (8:30 am to 4:15 pm CST).
To order brochures on other Brother products or to locate your nearest Authorized Service Center or Authorized Dealer, you may call our automated voice response system at (800) 204-4357 (anytime).
To order Brother accessories by Visa or MasterCard, you may call (800) 284-4357 or complete the order form in this user's guide and fax both sides of it to (800) 947-1445.

591010765
Printed in U.S.A.
- FCC NOTICE
- DOC NOTICE
- CONTENTS
- KEYBOARD
- FEATURES
- PART I OVERVIEW OF YOUR TYPEWRITER
- PRINTING MODE
- DISPLAY MODE
- INSERTING PAPER
- INDEX/REVERSE INDEX
- VIEW MODE
- VIEWING MODE ON
- VIEWING MODE OFF
- SELECTING LINE SPACING
- SELECTING PITCH
- SETTING MARGINS
- LEFT MARGIN
- RIGHT MARGIN
- MARGIN RELEASE
- SETTING TABS
- CLEARING TABS
- SETTING DECIMAL TABS
- USING DECIMAL TABS
- 4 DECIMAL TAB
- CANCELLING THE DECIMAL TAB MODE
- REPEAT FUNCTION
- TYPING UPPERCASE CHARACTERS
- HOT ZONE
- RETURNING THE CARRIER
- BACKSPACING
- SIMPLE BACKSPACE
- EXPRESS BACKSPACE
- HALF BACKSPACE
- MEMORY CORRECTION
- CORRECTING ONE CHARACTER
- RELOCATION
- ERASING ONE WORD
- ERASING THE ENTIRE LINE
- MANUAL CORRECTION
- SUPERSCRIPT/SUBSCRIPT
- SPECIAL CHARACTERS
- AUTOMATIC UNDERLINING
- BOLDFACE
- LINE INDENT (NOT AVAILABLE FOR USA VERSION AX-475)
- CENTERING
- CENTERING BETWEEN MARGINS
- CANCELLING THE CENTERING MODE
- RIGHT MARGIN FLUSH
- CANCELLING THE RIGHT MARGIN FLUSH MODE
- BEFORE YOU HAVE TYPED ANYTHING
- AFTER ENTERING SOME CHARACTERS
- LINE-BY-LINE PROCESSING
- CORRECTION IN DISPLAY MODE
- FUNCTIONS REQUIRING A SPECIAL DISPLAY
- FUNCTIONS TRIGGERING LINE PRINTING
- PART II SPELLING CHECKER
- PART V TECHNICAL INFORMATION REPLACING THE RIBBON. ETC
- REPLACING THE CASSETTE RIBBON
- TO REPLACE THE CASSETTE RIBBON
- REPLACING THE CORRECTION TAPE
- TWO TYPES OF CORRECTION TAPE ARE AVAILABLE
- TO REPLACE THE CORRECTION TAPE
- REPLACING THE CASSETTE DAISY WHEEL
- TO REPLACE THE CASSETTE DAISY WHEEL
- CARE OF UNIT & SPECIFICATIONS
- CARE OF UNIT
- BEWARE OF TINY OBJECTS
- CLEANING
- LOCATION
- VENTILATION
- STARTER KIT (SK-100) (FOR USA ONLY)
- INDEX
- A
- B
- C
- D
- E
- F
- G
- H
- 1
- L
- M
- 0
- P
- R
- S
- T
- U
- V
- W
- COMPATIBLE ACCESSORIES
- TO COMPLETE THE ORDER FORM: (FOR USA ONLY)
- SHIPPING LABEL
- ACCESSORY ORDER FORM
- (FOR USA ONLY)
- LIST OF FACTORY AUTHORIZED SERVICE DEPARTMENTS: (FOR USA ONLY)
Brand : BROTHER
Model : AX-475
Category : Typewriter