
GWS2151B - Warming Drawer GRUNDIG - Free user manual and instructions
Find the device manual for free GWS2151B GRUNDIG in PDF.


| Product Type | Warming Drawer |
| Brand | Grundig |
| Model | GWS2151B |
| Installation Type | Built-in (under counter) |
| Dimensions (W x D x H) | 595 x 550 x 140 mm |
| Net Weight | 13 kg |
| Power Supply | 220-240 V, 50-60 Hz |
| Power Consumption | 800 W |
| Temperature Range | 40-85 °C (depending on function) |
| Functions | Keep Warm, Defrost, Slow Cooking, Plate Warming |
| Control Type | Electronic touch controls with LED display |
| Material | Stainless steel interior and exterior |
| Capacity | Up to 30 L (fits standard dinner plates) |
| Safety Features | Child lock, auto shut-off, overheat protection |
| Cleaning and Maintenance | Wipe with soft damp cloth; do not use abrasive cleaners |
| Spare Parts Availability | Replacement parts (drawer slides, heating element) available via service centers |
| Repairability Index | High – modular components, service manuals accessible |
| Energy Efficiency Class | A+ |
| Noise Level | < 40 dB (A) |
| Warranty | 2 years (manufacturer warranty) |
Frequently Asked Questions - GWS2151B GRUNDIG
User questions about GWS2151B GRUNDIG
0 question about this device. Answer the ones you know or ask your own.
Ask a new question about this device
Download the instructions for your Warming Drawer in PDF format for free! Find your manual GWS2151B - GRUNDIG and take your electronic device back in hand. On this page are published all the documents necessary for the use of your device. GWS2151B by GRUNDIG.
USER MANUAL GWS2151B GRUNDIG
natural_image
Exterior view of a CD-ROM drive with a circular disc and top panel (no visible text or symbols)
FOR A GOOD REASON
GRUNDIG
Please read this user manual first!
Dear Customer,
Thank you for purchasing this Grundig product. We hope that you get the best results from your product which has been manufactured with high quality and state-of-the-art technology. Therefore, please read this entire user manual and all other accompanying documents carefully before using the product and keep it as a reference for future use. If you handover the product to someone else, give the user manual as well. Follow all warnings and information in the user manual.
Remember that this user manual is also applicable for several other models. Differences between models will be identified in the manual.
Please visit the "support" section on the Grundig website at www.grundig.co.uk to register your 5 year warranty.
Explanation of symbols
Throughout this user manual the following symbols are used:
| Important information or useful hints about usage. | |
| Warning of hazardous situations with regard to life and property. | |
| Warning of electric shock. |
1 Important instructions and warnings for safety and environment
1.1 General safety....4
1.1.1 Electrical safety....4
1.1.2 Product safety....5
1.2 Intended use 6
1.3 Safety for children....6
1.4 Compliance with the WEEE Directive and Disposing of the Waste Product: ..... 7
1.5 Compliance with RoHS Directive: ..... 7
1.6 Package information....7
2 General information 8
2.1 Overview....8
2.2 Technical specifications ..... 9
3 Installation 10
3.1 Installation and connection..... 14
3.1.1 Connection to the mains supply ....14
4 How to operate the warmer drawer 15
4.1 Keeping ovenware warm....15
4.2 Keeping food warm 15
5 Maintenance and care 17
5.1 General information 17
5.2 Stainless steel surfaces ..... 17
5.2.1 Appliances with an inox surface...17
5.2.2 Heating plate....17
5.2.3 Warming drawer interior.....17
5.3 Installation 17
6 Troubleshooting 18
7 Guarantee 19
8 Service 20
1 Important instructions and warnings for safety and environment
This section contains safety instructions that will help protect from risk of personal injury or property damage. Failure to follow these instructions shall void any warranty.
1.1 General safety
This appliance can be used by children aged from 8 years and above and persons with reduced physical, sensory or mental capabilities or lack of experience and knowledge if they have been given supervision or instruction concerning use of the appliance in a safe way and understand the hazards involved.
■ Children shall not play with the appliance. Cleaning and user maintenance shall not be made by children without supervision.
■ Installation and repair procedures must always be performed by Authorized Service Agents. The manufacturer shall not be held responsible for damages arising from procedures carried out by unauthorized persons which may also void the warranty. Before installation, read the instructions carefully.
- Do not operate the product if it is defective or has any visible damage.
■ Ensure that the product function
knobs are switched off after every use.
1.1.1 Electrical safety
If the product has a failure, it should not be operated unless it is repaired by an Authorized Service Agent. There is the risk of electric shock!
- Only connect the product to a grounded outlet/line with the voltage and protection as specified in the "Technical specifications". Have the grounding installation made by a qualified electrician while using the product with or without a transformer. Our company shall not be liable for any problems arising due to the product not being earthed in accordance with the local regulations.
■ Never wash the product by spreading or pouring water onto it! There is the risk of electric shock!
■ The product must be disconnected during installation, maintenance, cleaning and repairing procedures.
If the power connection cable for the product is damaged, it must be replaced by the manufacturer, its service agent or similar qualified persons in order to avoid a hazard.
■ The appliance must be installed
Important instructions and warnings for safety and environment
so that it can be completely disconnected from the mains supply. The separation must be provided by a switch built into the fixed electrical installation, according to construction regulations.
■ Do not trap the mains cable between the oven door and frame and do not route it over hot surfaces. Otherwise, cable insulation may melt and cause fire as a result of short circuit.
■ Any work on electrical equipment and systems should only be carried out by authorized and qualified persons.
In case of any damage, switch off the product and disconnect it from the mains. To do this, turn off the fuse at home.
■ Make sure that fuse rating is compatible with the product.
1.1.2 Product safety
■ The appliance and its accessible parts become hot during use. Care should be taken to avoid touching heating elements. Children less than 8 years of age shall be kept away unless continuously supervised.
There is a danger of electrocution if there are breaks, chips or cracks in the heating plate. If chips or cracks are noticed switch off the mains
supply and remove the fuse. Contact your Authorised service agent.
■ Never use the product when your judgment or coordination is impaired by the use of alcohol and/or drugs.
■ Be careful when using alcoholic drinks in your dishes. Alcohol evaporates at high temperatures and may cause fire since it can ignite when it comes into contact with hot surfaces.
- Do not place any flammable materials close to the product as the sides may become hot during use.
■ During use the appliance becomes hot. Care should be taken to avoid touching heating elements inside the oven.
- Do not heat closed tins and glass jars in the oven. The pressure that would build-up in the tin/jar may cause it to burst.
■ Do not use harsh abrasive cleaners or sharp metal scrapers to clean the oven door glass since they can scratch the surface, which may result in shattering of the glass.
■ Do not use steam cleaners to clean the appliance as this may cause an electric shock.
■ Always use heat resistant oven gloves when putting in or removing dishes into/from the
Important instructions and warnings for safety and environment
hot oven.
Prevention against possible fire risk!
■ Ensure all electrical connections are secure and tight to prevent risk of arcing.
■ Do not use damaged cables or extension cables.
■ Ensure liquid or moisture is not accessible to the electrical connection point.
1.2 Intended use
This product is designed for domestic use. Commercial use will void the guarantee.
■ The manufacturer shall not be liable for any damage caused by improper use or handling errors.
1.3 Safety for children
■ Accessible parts may become hot during use. Young children should be kept away.
■ The packaging materials will be dangerous for children. Keep the packaging materials away from children. Please dispose of all parts of the packaging according to environmental standards.
■ Electrical products are dangerous to children. Keep children away from the product when it is operating and do not allow them to play with the product.
1.4 Compliance with the WEEE Directive and Disposing of the Waste Product:
This product complies with EU WEEE Directive (2012/19/EU). This product bears a classification symbol for waste electrical and electronic equipment (WEEE).

This product has been manufactured with high quality parts and materials which can be reused and are suitable for recycling. Do not dispose of the waste product with normal domestic and other wastes at the end of its service life. Take it to the collection center for the recycling of electrical and electronic equipment. Please consult your local authorities to learn about these collection centers.
1.5 Compliance with RoHS Directive:
The product you have purchased complies with EU RoHS Directive (2011/65/EU). It does not contain harmful and prohibited materials specified in the Directive.
Important instructions and warnings for safety and environment
1.6 Package information
■ Packaging materials of the product are manufactured from recyclable materials in accordance with our National Environment Regulations. Do not dispose of the packaging materials together with the domestic or other wastes. Take them to the packaging material collection points designated by the local authorities.
2 General information
2.1 Overview

natural_image
Technical diagram of a mechanical assembly with labeled parts (1 and 2), showing structural components without any readable text or symbols.- Warmer drawer
- On/Off button (mechanical models)
- Control Knob
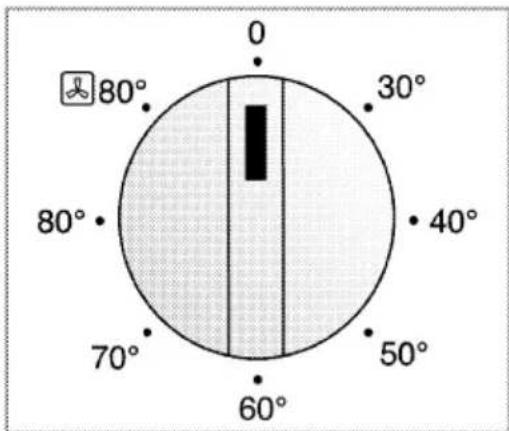
| Function selector for Electrical Models | |
| 0 | Off |
| 40-50 | Proving yeast pastry |
| 60-70 | Keeping bread warm, defrosting, preheating drinks containers |
| 80 | Keeping food warm |
| 80° | Preheating ovenweare |
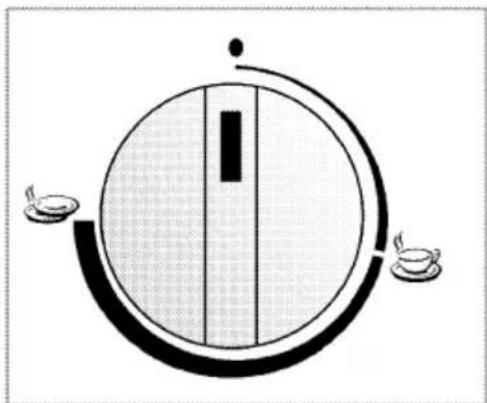
natural_image
Simple line drawing of a circular object with internal vertical bar and two small teacups on the sides (no text or symbols)| Function selector for Mechanical Models | |
| 0 | Off |
 | Cup heating |
 | Plate heating |
2.2 Technical specifications
| Electrical ModelsGWS 2151X-B | Mechanical Models | |
| Voltage/frequency | 220-240 V ~ 50 Hz | 220-240 V ~ 50 Hz |
| Total electric consumption | 800 W | 400 W |
| Fuse protection | min. 6 A | min. 6 A |
| Cable type / cross section | H05VV-FG 3 x 1.5 mm2 | H05VV-FG 3 x 0.75 mm2 |
| Cable length | max. 2 m | max. 2 m |
| Outer dimensions (height/ width/depth) for 29 cm | 290 mm/594 mm/555 mm | 290 mm/594 mm/567 mm |
| Outer dimensions (height/ width/depth) for 14 cm | 140 mm/595 mm/555 mm | 140 mm/595 mm/555 mm |
| Installation dimensions for 14 cm (height/width/depth) | *142 or 145 mm/560 mm /minimum. 550 mm | *142 or 145 mm/560 mm /minimum. 550 mm |
| Installation dimensions for 29 cm (height/width/depth) | *292 or 295 mm/560 mm /minimum. 550 mm | *292 or 295 mm/560 mm /minimum. 550 mm |

Technical specifications may be changed without prior notice to improve the quality of the product.

Figures in this manual are schematic and may not exactly match your product.

Values stated on the product labels or in the documentation accompanying it are obtained in laboratory conditions in accordance with relevant standards. Depending on operational and environmental conditions of the product, these values may vary.
3 Installation
The appliance is intended for installation in commercially available kitchen cabinets. A safety distance must be left between the unit and the kitchen walls and furniture. See figure (values in mm).
- Surfaces, synthetic laminates and adhesives used must be heat resistant (100 °C minimum).
- Kitchen cabinets must be set level and fixed

(*) min

14 cm Models

14 cm Models using with oven


29 cm Models


(*) min
Installation

3.1 Installation and connection
- For installation the appliance must be connected in accordance with all local electrical regulations.
3.1.1 Connection to the mains supply

This appliance must be earthed!
Our company shall not held responsible for any damage caused by the utilization of the product without ground socket
Risk of electric shock, short circuit or fire by unprofessional installation!
The unit may be connected to the mains supply only by an authorized qualified person and the appliance is only guaranteed after the correct installation..
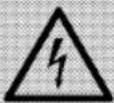
Risk of electric shock, short circuit or fire by damage of the supply cord!
The supply cord must not be clamped, bent or squeezed or come into contact with hot parts of the unit. If the supply cord is damaged, it must be replaced by a qualified electrician.
The unit connecting cable must correspond to the specifications and the power consumption; see Technical Data, page 4.
- The mains supply data must correspond to the data specified on the rating plate of the appliance. The rating plate is located at the rear housing of the appliance.

Risk of electric shock!
Before starting any work on the electrical installation, please disconnect the product from the mains
Connecting the power cable
- If a power cable is not supplied together with your product, a power cable that you would select from the table in accordance with
the electrical installation at your home must be connected to your product by following the instructions in cable diagram.
This product must only be connected by a qualified electrician such as a technician from the local electricity company or NICEIC registered contractor to a suitable double-pole control unit with a minimum contact clearance of 3 mm in all poles. This control unit must be installed accordance with the IEE regulation. Failure to obey this instruction may cause operational problems and invalidate the product warranty.

Additional protection by a residual current circuit breaker is recommended.
- Open the terminal block cover with a screwdriver.
- Insert the power cable through the cable clamp below the terminal and secure it to the main body with the integrated screw on cable clamping component.
- Connect the cables according to the supplied diagram.

- After completing the wire connections, close the terminal block cover.
- Route the power cable so that it will not contact the product and get squeezed between the product and the wall.

Power cable must not be longer than 2m because of safety reasons.
4 How to operate the warmer drawer
4.1 Keeping ovenware warm

The appliance will only heat up if the drawer is closed correctly.
You can use the warming drawer to preheat ovenware or to keep food warm.
Preheating ovenware
Food stays warm for longer in preheated ovenware. Drinks also remain warm for longer.
General ovenware
Only load the warming drawer up to 25 kg. You can preheat dinnerware for 6 or 12 people, for example
| 14 cm Models | |
| 6 dinner pates | ∅ 24 cm |
| 6 soup bowls | ∅ 10 cm |
| 1 serving dish | ∅ 19 cm |
| 1 serving dish | ∅ 17 cm |
| 1 meat plate | 32 cm. |
| 29 cm Models | |
| 12 dinner pates | ∅ 24 cm |
| 12 soup bowls | ∅ 10 cm |
| 1 serving dish | ∅ 22 cm |
| 1 serving dish | ∅ 19 cm |
| 1 serving dish | ∅ 17 cm |
| 2 serving dish | 32 cm. |
Arranging ovenware
As far as possible, distribute the ovenware over the entire surface. It takes longer to warm through tall stacks of plates than individual pieces of ovenware, e.g. 2 servicing dishes.
Drink containers
Always heat drinks containers e.g. espresso cups using setting 📁.
At setting 📋 or 📁80° ℃, the drinks containers will get very hot. There is a rick of burning.!
Method
- Place the ovenware in the drawer.
- Set the function selector to setting 📋 or 80° °C.
Always heat drinks containers using setting 60-70 °C.
- Close the warming drawer. The power on indicator light lights up. The appliance heats up.
How long does preheating take?
The length of time required for preheating depends on the material the ovenware is made of and its thickness, as well as the quantity, height and arrangement of the ovenware.
As far as possible, distribute the ovenware over the entire surface.
It takes approximately 15-25 minutes to preheat dinnerware for 6 people.
Switching off
Open the drawer. Switch off the function selector.
Removing ovenware
Remove ovenware from the drawer using oven gloves or an oven cloth.
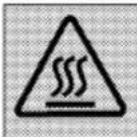
The upper surface of the heating plate will be hot. The base of the ovenware will be hotter than the top.
4.2 Keeping food warm
ADo not place hot soucepans or pans on the glass surface of the warming drawer immediately after removing them from the hot hob. This could damage the glass surface.
Do not fill the ovenware to such an extent that food spills over.
Cover the food with a heat-resistant lid or aluminium foil.
It is recommended that you do not keep food warm for longer than an hour.
Suitable foods
The appliance is suitable for keeping meat, poultry, fish, sauces, vegetables, side dishes and soups warm.
How to operate the warmer drawer
Method
- Place the ovenware in the drawer.
- Set the function selector to setting 80irc C and preheat the appliance for 10 minutes.
- Add the food to the preheated ovenware.
- Close the drawer again. The "power on" indicator light lights up.
The appliance heats up.
Switching off
Switch off the function selector. Remove the food from the drawer using on gloves or an oven cloth.
4.3 Uses
The table shows various uses for the warming drawer. Set the function selector to the desired setting.
Preheat the ovenware as indicated in the table
| Level | Food/ ovenware | Note |
| 40 - 50°C | Delicate deepfrozen food e.g. cream cakes, butter, sausages, cheese. | Defrost |
| 40 - 50°C | Leaving yeast dough to rise | Cover |
| 60 - 70°C | Deep- frozen food e.g. meat, cakes, bread | Defrost |
| 60 - 70°C | Keeping eggs warm e.g. hard boiled eggs, scrambled eggsi | Preheat ovenware, cover food |
| 60 - 70°C | Keeping bread warm e.g. toast, bread rolls. | Preheat ovenware, cover food |
| 60 - 70°C | Preheating drinks containers | e.g. espresso cups |
| 60 - 70°C | Delicate food e.g. slow-cooked meat | Cover ovenware |
| 80°C | Keeping food warm | Preheat ovenware, cover food |
| 80°C | Keeping drinks warm | Preheat ovenware, cover drinks |
| 80°C | Warming flat dough-based foods e.g. pancakes, wraps, tacos | Preheat ovenware, cover food |
| 80°C | Warming dry cakes e.g. crumble cakes, muffins | Preheat ovenware, cover food |
| 80°C | Melting cooking chocolate or chocolate coatiq. | Preheat ovenware, break up food into small pieces |
| 80°C | Dissolving gelatine | Open approximately 20 minutes |
| 80°C | Preheating ovenware | Not suitable for drinks containers |
5 Maintenance and care
5.1 General information
Service life of the product will extend and the possibility of problems will decrease if the product is cleaned at regular intervals.
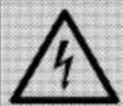
Disconnect the product from mains supply before starting maintenance and cleaning works.
There is the risk of electric shock!
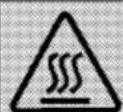
Allow the product to cool down before you clean it.
Hot surfaces may cause burns!
- Clean the product thoroughly after each use. In this way it will be possible to remove cooking residues more easily, thus avoiding these from burning the next time the appliance is used.
- No special cleaning agents are required for cleaning the product. Use warm water with washing liquid, a soft cloth or sponge to clean the product and wipe it with a dry cloth.
* Always ensure any excess liquid is thoroughly wiped off after cleaning and any spillage is immediately wiped dry. - Do not use cleaning agents that contain acid or chloride to clean the stainless or inox surfaces and the handle. Use a soft cloth with a liquid detergent (not abrasive) to wipe those parts clean, paying attention to sweep in one direction.

Do not use harsh abrasive cleaners or sharp metal scrapers to clean the oven door glass since they can scratch the surface, which may result in shattering of the glass.

Do not use steam cleaners to clean the appliance as this may cause an electric shock.
5.2 Stainless steel surfaces
Always remove any flecks of limescale, grease cornflour or egg white immediately. Corrosion can form under such flecks.
5.2.1 Appliances with an inox surface
Use a mild window-cleaning detergent and a soft window cloth or a fluff-free micro-fiibre cloth. Wipe the surface using a horizontal motion and do not apply pressure.
5.2.2 Heating plate
Clean the heating plate using water and a little detergent.
5.2.3 Warming drawer interior
The drawer can be removed if the appliance requires cleaning on the inside.
- Remove the drawer completely.
- Remove the two screws in front.
- Take hold of the front of the drawer on both sides.

- Drawer
- Screw
- Carefully remove the drawer in an upwards direction (approx. 5°) and set it down.
The appliance can now be cleaned on the inside with water and detergent.

Do not immers the drawer in water once it has been removed.
5.3 Installation
Proceed in the reverse order in water of removal to refit the warming drawer.
To do this, position the drawer on the rails. Pull the left and right rails forward until the screws sit in the recess.
Tighlen the screws.
6 Troubleshooting
You can solve the following problems yourself. Before you call the technical service, please check the following points.
The ovenware or food remain cold.
* Check the appliance is switched on
- Check there has been a power cut
* Check the drawer is closed completely.
The ovenware or food are not warmed sufficiently
This may indicate that the ovenware or food were not warmed for a sufficient length of time.
This may indicate that the drawer was left open for a long time.
The "power on" indicator light flashes.
* Check whether the drawer is closed. If it can not be closed, check the position of the tensioning hooks as described under "installation" in the "Maintenance and cleaning" section.
The indicator light flashes rapidly when the when the warming drawer is closed.
Call the after sales service
The "power on" indicator light does not light up
* The indicator light is faulty.>>> Consult the after-sales service.
The fuse in the fuse box has blown.
■ Disconnect the appliance at the mains and consult the after-sales service.

Risk of electric shock, short circuit or fire by unprofessional repairs! Repairs on the unit must be carried out by the technical service or a qualified electrician.
7 Guarantee
Guarantee for Refrigeration, Cooking Appliances, Washing Machines & Dishwashers
Your new Grundig product is guaranteed against the cost of breakdown repairs for 5 years from the date of the original purchase.
Please visit the "support" section on the Grundig website at www.grundig.co.uk to register your 5 year warranty.
What is covered?
- Repairs necessary as a result of faulty materials, defective components or manufacturing defect.
• The cost of functional replacement parts, but excluding consumable items.
• The labour costs of a Grundig approved repairer to carry out the repair.
What is not covered?
• Transit, delivery or accidental damage or misuse and abuse.
• Cabinet or appearance parts, including knobs, flaps, handles or container lids.
* Accessories or consumable items including but not limited to, ice trays, scrapers, cutlery baskets, filters and light bulbs.
- Repairs required as a result of unauthorised repair or inexpert installation that fails to meet the requirements contained in the user instruction book.
* Repairs to products used on commercial or non-residential household premises.
- Loss of frozen food in freezers or fridge/freezers.(Food loss insurance is often included within your household contents insurance policy, or may be available separately from your retailer.)
Important notes
- Your Grundig product is designed and built for domestic household use only.
- The guarantee will be void if the product is installed or used in commercial or non-residential domestic household premises.
- The product must be correctly installed, located and operated in accordance with the instructions contained in the User Instructions Booklet provided.
• Professional installation by a qualified Electrical Domestic Appliance Installer is recommended for all Washing Machines, Dishwashers and Electric Cookers
• Gas Cookers must only be installed by a Gas Safe (or BORD GAIS) registered Gas Installer.
• The guarantee is given only within the boundaries of the United Kingdom and the Republic of Ireland. - The guarantee is applicable only to new products and is not transferable if the product is resold.
- Grundig disclaims any liability for incidental or consequential damages.
• The guarantee does not in anyway diminish your statutory or legal rights.
Should you experience any difficulty in obtaining service please contact the Grundig Customer Help-Line.
Tel: 0845 603 1234
0345 603 1234
e-mail:service@Grundig.co.uk
8 Service
Please keep your purchase receipt or other proof of purchase in a safe place; you will need to have it should the product require attention under guarantee.
You should also complete the details below; it will help us assist you when requesting service. (The model number is printed on the Instruction Booklet and the serial number is printed on the Rating Label affixed to the appliance)
Model No:
Serial No:
Retailer:
Date of purchase:
For service under guarantee simply telephone the appropriate number below UK Mainland & Northern Ireland
0845 603 1234
0345 603 1234
Republic of Ireland
All Refrigeration, All Cookers
Washing Machines and Dishwashers
01 862 3411
Before requesting service please check the trouble-shooting guide in the Operating Instructions as a charge may be levied where no fault is found even though your product may still be under guarantee. Service once the manufacturers guarantee has expired.
If you have purchased an extended guarantee please refer to the instructions contained within the extended guarantee agreement document. Otherwise please call the appropriate number above where service can be obtained at a charge.
Grundig, 1 Greenhill Crescent, Watford Herts WD18 8QU
FOR A GOOD REASON
GRUNDIG
- Please read this user manual first!
- Explanation of symbols
- Important instructions and warnings for safety and environment
- General information 8
- Installation 10
- How to operate the warmer drawer 15
- Maintenance and care 17
- Troubleshooting 18
- Guarantee 19
- Service 20
- General safety
- Electrical safety
- Important instructions and warnings for safety and environment
- Product safety
- Prevention against possible fire risk!
- Intended use
- Safety for children
- Compliance with the WEEE Directive and Disposing of the Waste Product:
- Compliance with RoHS Directive:
- Package information
- General information
- Overview
- Technical specifications
- Installation
- Installation
- Installation and connection
- Connection to the mains supply
- This appliance must be earthed!
- Risk of electric shock, short circuit or fire by unprofessional installation!
- Risk of electric shock, short circuit or fire by damage of the supply cord!
- Risk of electric shock!
- Connecting the power cable
- How to operate the warmer drawer
- Keeping ovenware warm
- Preheating ovenware
- General ovenware
- Arranging ovenware
- Drink containers
- Method
- How long does preheating take?
- Switching off
- Removing ovenware
- Keeping food warm
- Suitable foods
- How to operate the warmer drawer
- Uses
- Maintenance and care
- General information
- Stainless steel surfaces
- Appliances with an inox surface
- Heating plate
- Warming drawer interior
- Installation
- Troubleshooting
- The ovenware or food remain cold.
- The ovenware or food are not warmed sufficiently
- The "power on" indicator light flashes.
- The indicator light flashes rapidly when the when the warming drawer is closed.
- The "power on" indicator light does not light up
- The fuse in the fuse box has blown.
- Guarantee
- Guarantee for Refrigeration, Cooking Appliances, Washing Machines & Dishwashers
- What is covered?
- What is not covered?
- Important notes
- Service
- For service under guarantee simply telephone the appropriate number below UK Mainland & Northern Ireland
- Before requesting service please check the trouble-shooting guide in the Operating Instructions as a charge may be levied where no fault is found even though your product may still be under guarantee. Service once the manufacturers guarantee has expired.
Brand : GRUNDIG
Model : GWS2151B
Category : Warming Drawer