
PHPW2 - Headphones Pyle - Free user manual and instructions
Find the device manual for free PHPW2 Pyle in PDF.


| Product Type | Over-Ear Headphones |
| Brand | Pyle |
| Model | PHPW2 |
| Color | Black |
| Driver Size | 40mm |
| Impedance | 32 ohms |
| Frequency Response | 20Hz - 20kHz |
| Sensitivity | 105dB |
| Cable Length | 1.2m |
| Connector | 3.5mm gold-plated |
| Weight | 200g |
| Headband Adjustment | Yes |
| Ear Cushion Material | Leatherette |
| Noise Reduction | Passive noise isolation |
| Warranty | 1 Year |
| Included in Box | Headphones, User Manual |
| Care Instructions | Clean with soft dry cloth |
| Safety Warning | Do not expose to liquids |
| Spare Parts | Earpads available separately |
| Compatibility | Smartphones, tablets, computers |
Frequently Asked Questions - PHPW2 Pyle
User questions about PHPW2 Pyle
0 question about this device. Answer the ones you know or ask your own.
Ask a new question about this device
Download the instructions for your Headphones in PDF format for free! Find your manual PHPW2 - Pyle and take your electronic device back in hand. On this page are published all the documents necessary for the use of your device. PHPW2 by Pyle.
USER MANUAL PHPW2 Pyle
User Manual of Wireless Earphone
1. Installation
Installation of receiver (Figure A)
Open battery case cover and place in two No.7 batteries Installation of transmitter (Figure B)

Connect transformer correctly (connect 3V transformer respectively to power supply and transmitter; place in two No.7 batteries instead when not using transformer for power supply).
Plug lotus jack into "AUDIO OUT" socket of transmitter/TV (or DVD, VCD)
(Note: TV, DVD, VCD uses lotus plug)
Stereo plug should be respectively inserted into transmitter's audio input socket and audio output earphone socket of computer or CD player.

(Note: volume of received sound is also determined by volume of computer or CD player)
2. Operation instructions
1) Turn power switch upward to activate transmitter; the power light should be turned on.
2) Pull up receiver's antenna, turn receiver's power switch upward and volume tuner to your desired position; the power light should be turned on.
3) Press RESET button and SELECT button to receive TV sound. (Note: the first sound received is from TV, and then FM radio, computer/DVD and similar products.)
3. Radio receiving
1) Receiver can be used as FM radio receiver when used alone.
2) Turn upward to turn on receiver's volume control, the power light should be turned on and pull up receiver's antenna.
3) Press RESET and then digital SELECT to automatically scan FM radio between 88MHz to 108MHz; one radio station will be scanned and locked for each time SELECT button is pressed.
4. Using wired earphone
Receiver is supplied with an audio wire to use as a wired earphone.

Cautions:
If sound is too loud or distorted, please turn down source volume (TV or other products) to improve receiving effect. Replace batteries when the following problems occur:
Power light is dim.
Receiver can barely receive sound.
Sound volume is low and distorted.
Turn off transmitter's power supply after usage. (It is suggested to place transmitter at high position for better signal receiving.) A Receiver
Appearance and functions
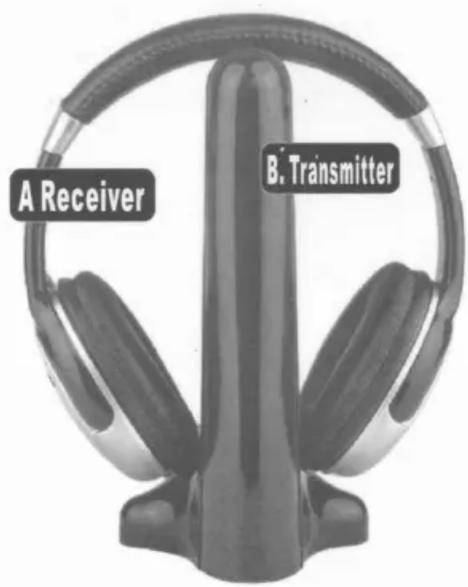

A Receiver
▶①.Antenna
②. Power switch and volume tuner
③. RESET
④.Power light indicator
⑤. SELECT
⑥.Battery case
⑦.Audio line socket
Note: this product can be used as wired earphone when connected with audio line.
B. Transmitter
1、Power switch
2、Power indicator light(front)
3、Stereo jack for audio input
Stereo jack is plugged in to earphone or audio output socket of computer, CD, tape recorder etc.
4、Lotus line left & right sound channel
socketLotus plug is inserted left & right
sound output channel of TV, DVD, and VCD.
Brand : Pyle
Model : PHPW2
Category : Headphones