
FOQLS - Cables for Computers and Peripherals Black Box - Free user manual and instructions
Find the device manual for free FOQLS Black Box in PDF.


| Product Type | Quad Laser Source for fiber optic testing |
| Model | FOQLS |
| Brand | Black Box |
| Output Wavelengths | 850 nm, 1300 nm, 1310 nm, 1550 nm |
| Output Power | -5 dBm ±1 dB (CW) |
| Modulated Wavelengths | 270 Hz, 1 kHz, 2 kHz |
| Spectral Width | 3 nm typical |
| Stability (after 15 min preheat at 25°C) | ±0.05 dB / 15 min |
| Connector Types | FC/PC, SC/PC, ST/PC (interchangeable adapters included) |
| Power Supply | 2 × AA rechargeable batteries or 6 VDC / 1 A AC adapter |
| AC Adapter Input | 100–240 VAC, 50/60 Hz |
| Display | LCD with backlighting |
| Auto-Wavelength Recognition | Yes (Twin mode) |
| Auto-Off | After 10 minutes of inactivity (can be disabled) |
| Dimensions (H × W × D) | 6.3 × 3 × 1.8 in (16 × 7.6 × 4.5 cm) |
| Weight (including batteries) | 0.59 lb (0.27 kg) |
| Operating Temperature | 14 to 122°F (-10 to +50°C) |
| Storage Temperature | -4 to 158°F (-20 to +70°C) |
| Humidity | Less than 90% |
| Laser Class | Class I (safe under normal use) |
| Safety Warnings | Never look into optical outputs; avoid short-circuit; operate away from heat, dust, humidity |
| Maintenance | Clean connectors with optical cleaning pads and anhydrous alcohol; keep dust caps on when not in use |
| What's Included | Main unit with batteries, 2× FC/SC/ST adapters, quality check report, Phillips screwdriver, 6 VDC adapter, carrying case, user manual |
Frequently Asked Questions - FOQLS Black Box
User questions about FOQLS Black Box
0 question about this device. Answer the ones you know or ask your own.
Ask a new question about this device
Download the instructions for your Cables for Computers and Peripherals in PDF format for free! Find your manual FOQLS - Black Box and take your electronic device back in hand. On this page are published all the documents necessary for the use of your device. FOQLS by Black Box.
USER MANUAL FOQLS Black Box
Emits 850-/1300-/1310-/1550-nm of accurate and stable power.

Trademarks Used in this Manual
Black Box and the Double Diamond logo are registered trademarks of BB Technologies, Inc.
Any other trademarks mentioned in this manual are acknowledged to be the property of the trademark owners.
FEDERAL COMMUNICATIONS COMMISSION AND INDUSTRY CANADA RADIO FREQUENCY INTERFERENCE STATEMENTS
This equipment generates, uses, and can radiate radio-frequency energy, and if not installed and used properly, that is, in strict accordance with the manufacturer's instructions, may cause interference to radio communication. It has been tested and found to comply with the limits for a Class A computing device in accordance with the specifications in Subpart B of Part 15 of FCC rules, which are designed to provide reasonable protection against such interference when the equipment is operated in a commercial environment. Operation of this equipment in a residential area is likely to cause interference, in which case the user at his own expense will be required to take whatever measures may be necessary to correct the interference.
Changes or modifications not expressly approved by the party responsible for compliance could void the user's authority to operate the equipment.
This digital apparatus does not exceed the Class A limits for radio noise emission from digital apparatus set out in the Radio Interference Regulation of Industry Canada.
2.1 Introduction 8
2.2 Features....8
2.3 What's Included 8
- Safety Information....9
- Preparing for Operation 10
4.1 Unpacking the Instrument....10
4.2 Power Supply 10
5. Operation....11
5.1 Display and Controls 11
5.1.1 Front, Back, and Top of the Quad Laser Source.... 11
5.1.2 LCD 13
5.1.3 Front (Panel Board) 14
5.2 Turning the Instrument On and Off 15
5.3 Switching the Wavelengths 15
5.4 Frequency Output 16
5.5 Auto-wavelength Recognition....17
5.6 Switching Backlighting of the LCD On and Off 17
5.7 Connecting with the Optical Power Meter .....18
- Maintenance....19
- Troubleshooting 20
7.1 Problems/Solutions....20
7.2 Contacting Black Box 20
7.3 Shipping and Packaging....21
1. Specifications
CW Output Power — -5 dBm ±1 dB
Laser — Class I
Modulated Wavelength — 270 Hz, 1 kHz, 2 kHz
Output Wavelength — 850, 1300, 1310, 1550 nm
Spectral Width — 3 nm typical value
Stability (15 min. preheat at 77° F [25°C]) — ±0.05 d/15 min.
Connectors — FC/PC, SC/PC, ST/PC interchangeable connectors
Power — (2) AA rechargeable batteries
AC Adapter — Input: 100–240 VAC, 50/60 Hz;
Output: 6 VDC, 1 A
Temperature Tolerance — Operating: 14 to 122°F (-10 to +50°C);
Storage: -4 to 158° F (-20 to +70° C)
Humidity — Less than 90%
Size — 6.3"H x 3"W x 1.8"D (16 x 7.6 x 4.5 cm)
Weight — 0.59 lb. (0.27 kg [including batteries])
2. Overview
2.1 Introduction
The Quad Laser Source (FOQLS) offers accurate and stable power and emits at 850-/1300-/1310-/1550-nm.
2.2 Features
- Easy-to-use, straightforward operation.
- Rechargeable batteries included.
2.3 What's Included
Your package should contain the following items. If anything is missing or damaged, contact Black Box Technical Support at 724-746-5500 or info@blackbox.com.
- Main unit (including battery)
• (2) FC, (2) SC, and (2) ST adapters
• Quality check report - Phillips screwdriver
- 6-VDC adapter
- Carrying case
- This user manual
3. Safety Information
WARNINGS!
- Never look directly into optical outputs or a fiber while the equipment is on. An invisible laser beam may damage your eyes.
- Do not short-circuit the terminal of the AC adapter/charger and the batteries. Excessive electrical current may cause personal injury from fumes, electric shock, or equipment damage.
- Connect the DC power cord with the equipment and wall socket properly. While inserting the DC plug, make sure there is no dust or dirt on the terminals and both plugs are fully seated. Incomplete engagement may cause fuming, electric shock, or equipment damage, and may result in personal injury.
- Do not operate the equipment near hot objects, in hot environments, in dusty/humid atmospheres, or when condensation is present on the equipment. This may result in electric shock, product malfunction, or poor performance.
4. Preparing for Operation
4.1 Unpacking the Instrument
- Keep the original packing material in case you need to return the unit.
- Unpack the Instrument and make sure you have all the items listed in Section 2.3.
- Check for damage in transit. If there is damage, do not attempt to operate the instrument or repair it without authorization. Doing so can cause further damage and you may lose your warranty qualification.
4.2 Power Supply
A battery indicator and a power plug icon are on the instrument's screen. When you use the 6-VDC charger, there is no battery indicator on the screen. When you do not connect the 6-VDC charger, the adapter indicator will disappear on the screen.
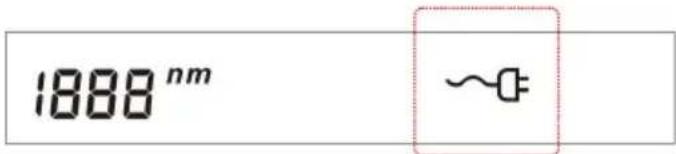
Figure 4-1. Power plug indicator.

Figure 4-2. Battery indicator.
When you use the battery, the battery indicator on the screen will show the remaining charge. An empty battery indicator means the power is almost out. When the battery charge is too low to supply the necessary power, the instrument will automatically switch off after several beeps. Change or recharge the batteries.

Figure 4-3. Battery indicator is full.

Figure 4-4. Battery indicator is empty.
5. Operation
5.1 Display and Controls
5.1.1 Front, Back, and Top of the Quad Laser Source
Figure 5-1 shows the back and top of the instrument. Table 5-1 describes its components.

Figure 5-1. Front, back, and top.
Table 5-1. Front, back, and top components.
| Number Component Description | |
| 1 Top left connector 1310 nm, 1550 nm | |
| 2 Top right connector 850 nm, 1300 nm | |
| 3 LCD display See Section 5.1.2. | |
| 4 Keypad See Section 5.1.3. | |
| 5 Power input Links to 6 VDC power | |
| 6 Charging signal light | Blinking red: Unit is charging.Solid green: Charging is finished. |
| 7 Battery plate Includes (2) AA rechargeable batteries. | |
5.1.2 LCD
Figure 5-2 shows the LCD. Table 5-2 describes its components.

Figure 5-2. LCD.
Table 5-2. LCD components.
| Number Component |
| 1 Wavelength |
| 2 DC adapter |
| 3 Battery charge |
| 4 Modulation |
| 5 Power |
| 6 Measurement unit (dBm) |
| 7 Auto-wavelength recognition |
| 8 Auto off |
5.1.3 Front (Panel Board)
Figure 5-3 shows the display and controls on the instrument. Table 5-3 describes these components.

Figure 5-3. Buttons on the instrument.
Table 5-3. Buttons functions.
| Number Key Function | ||
| 1 |  | Switches the instrument on/off. Press and hold the key while powering on to activate the instrument without Auto-Off function. |
| 2 |  | Switch between CH1 (1310/1550) and CH2 (850/1300). |
| 3 |  | Modulated Wavelength Shifting key: Switches between modulated wavelength and continuous wavelength. |
| 4 |  | Wavelength Shifting key: Switches the working wavelength between 850 nm, 1300 nm, 1310 nm, and 1550 nm. |
| 5 |  | SINGLE: Auto-wavelength recognition is off.TWIN: Auto-wavelength recognition is on. |
| 6 |  | Switches backlighting on/off. |
5.2 Turning the Instrument On and Off Press the ON/OFF key briefly (see Figure 5-4).

Figure 5-4. ON/OFF key.
The instrument powers on (see Figure 5-5).

Figure 5-5. Instrument powered on.
Press the ON/OFF key briefly again. The instrument powers off.
NOTES: Auto-off function:
- The instrument powers off automatically if no key is pressed in 10 minutes.
- Press the ON/OFF key for about two seconds to power on the instrument with Auto-off function deactivated.
5.3 Switching the Wavelengths
5.3.1 Switching the Wavelengths in Single-mode
Press the key to get to multimode, then press the key to switch the wavelength between 1310 nm and 1550 nm.
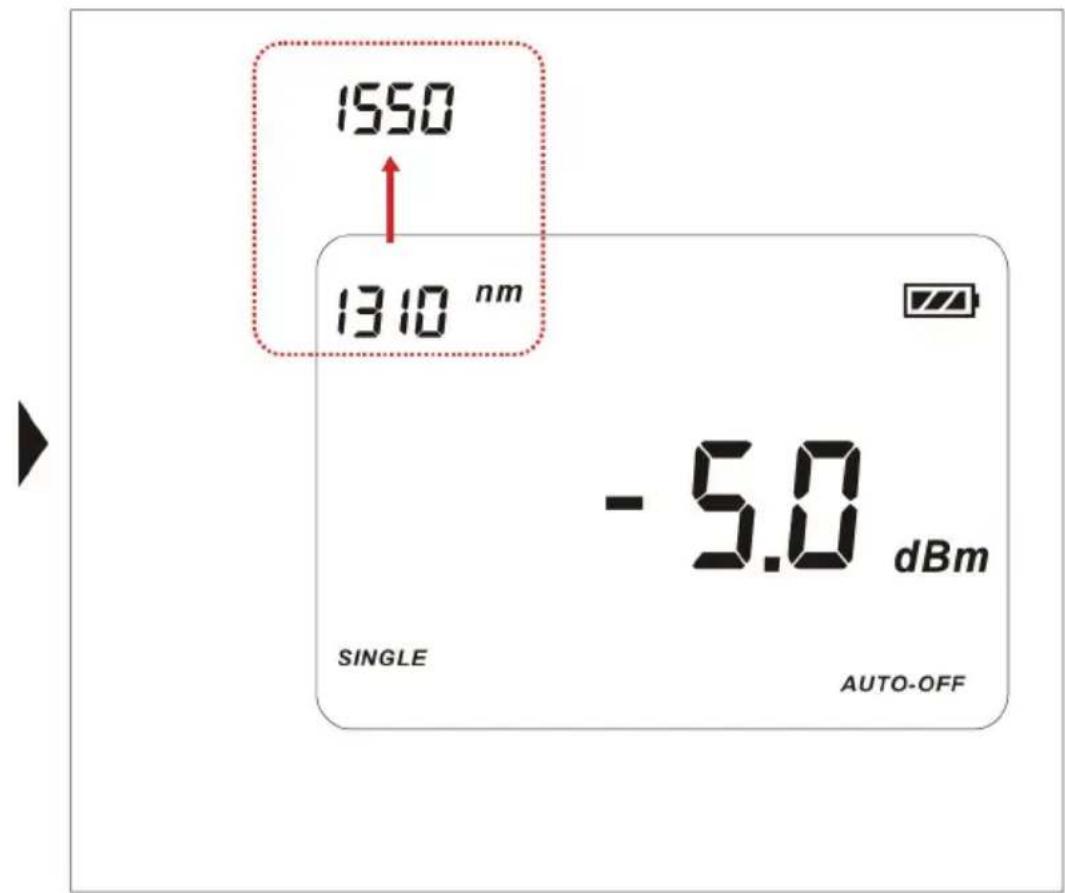
Figure 5-6. Switching the wavelength.
5.4 Frequency Output

Figure 5-7. Frequency output icon.
The instrument defaults to CW when it is switched on. When it is set to CW, there is no frequency on the display.
Press the CW/Hz key to select the output from 270 H, 1 kHz, and 2 kHz.
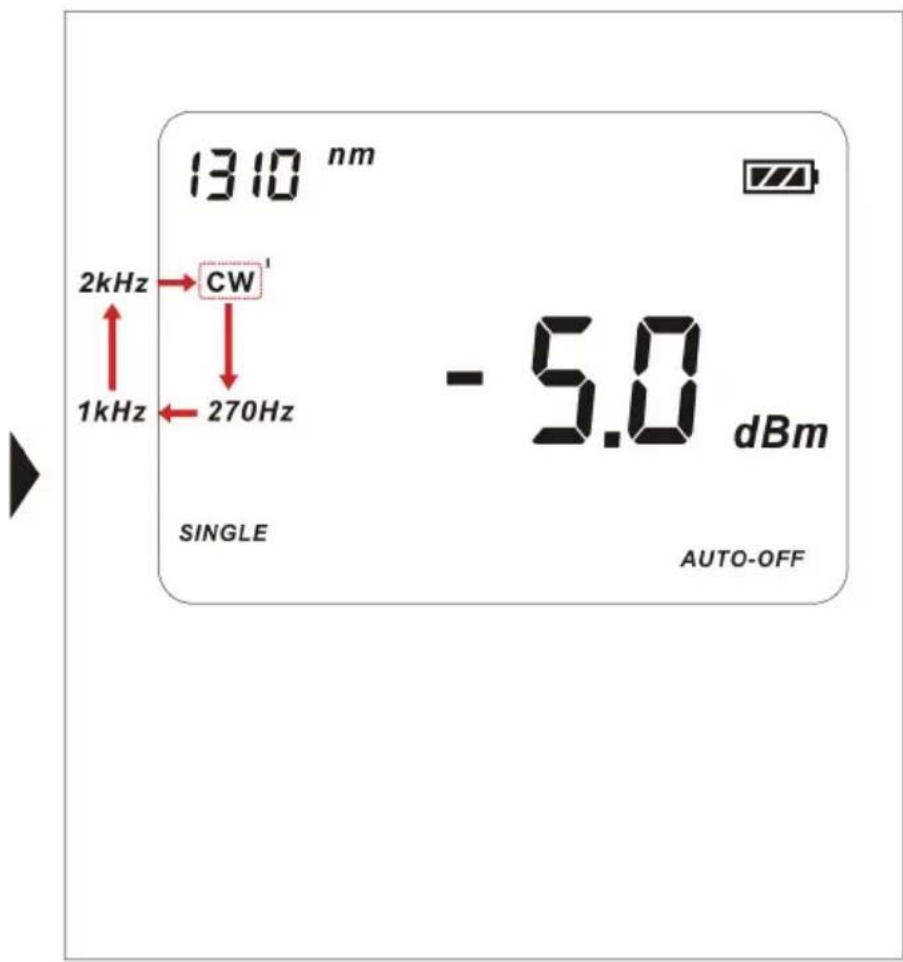
Figure 5-8. CW output selections on the LCD.
5.5 Auto-wavelength Recognition

Figure 5-9. Twin key.
Press the Twin key to turn the auto-wavelength recognition feature on and off.
5.6 Switching Backlighting of the LCD On and Off

Figure 5-10. Backlighting key.
Press the backlighting key to switch the backlighting of the LCD on and off.

Figure 5-11. Pressing the backlighting key.
5.7 Connecting to an Optical Power Meter
The Quad Laser Source works with optical power meters to measure the loss of optical fiber accurately.
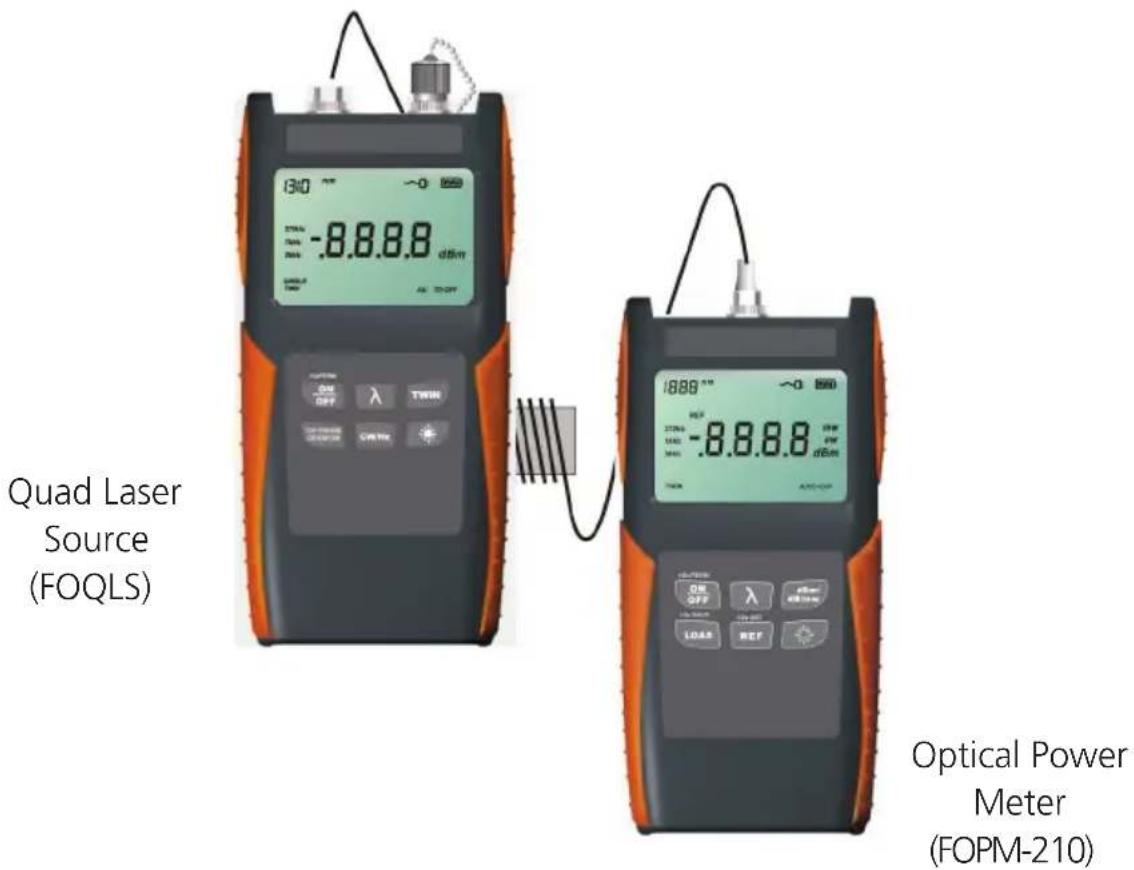
Figure 5-12. Optical power meter (part number FOPM-210) connected to the Quad Laser Source (FOQLS).
6. Maintenance
- Disconnect the DC adapter/charger and cover the protective dust cap once you finish using it.
- Clean the connector and the instrument when they get dirty from use. We recommend using optical cleaning pads and anhydrous alcohol. Be careful not to get the detergent inside the instrument.
7. Troubleshooting
7.1 Problems/Solutions
Table 7-1. Troubleshooting.
| Malfunction Possible Cause Recommended Solution Remarks | |||
| Failure to turn on/off | No power input Plug in battery or AC DIY | ||
| Battery exhausted Charge battery DIY | |||
| Reverse-installed battery Re-install battery DIY | |||
| Still doesn't work Return | |||
| ON and OFF disorder Low battery | Charge battery or use AC power supply | DIY | |
| Inaccurate measurement | Contaminated connector | Swab the dust using a thin cotton swab saturated with alcohol | DIY |
| Connected or unfitted Re-install the connector DIY | |||
| Error display | Humid environment | Try later when it is not too humid | DIY |
| Magnetic field environment | Stay far away from a magnetic field | DIY | |
| Metal dust environment | May cause damage on mainboard | Return | |
| ON and OFF failure | Keypad short circuit | Replace keypad | Return |
7.2 Contacting Black Box
If you determine that your Quad Laser Source is malfunctioning, do not attempt to alter or repair the unit. It contains no user-serviceable parts. Contact Black Box Technical Support at 724-746-5500 or info@blackbox.com.
Before you do, make a record of the history of the problem. We will be able to provide more efficient and accurate assistance if you have a complete description, including:
- the nature and duration of the problem.
-
when the problem occurs.
-
the components involved in the problem.
- any particular application that, when used, appears to create the problem or make it worse.
7.3 Shipping and Packaging
If you need to transport or ship your Quad Laser Source:
- Package it carefully. We recommend that you use the original container.
- If you are returning the unit, make sure you include everything you received with it. Before you ship for return or repair, contact Black Box to get a Return Authorization (RA) number.
Black Box Tech Support: FREE! Live. 24/7.
Tech support the way it should be.

Great tech support is just 30 seconds away at 724-746-5500 or blackbox.com.

BLACK BOX®
NETWORK SERVICES
About Black Box
Black Box provides an extensive range of networking and infrastructure products. You'll find everything from cabinets and racks and power and surge protection products to media converters and Ethernet switches all supported by free, live 24/7 Tech support available in 30 seconds or less.
© Copyright 2013. Black Box Corporation. All rights reserved. Black Box ® and the Double Diamond logo are registered trademarks of BB Technologies, Inc. Any third-party trademarks appearing in this manual are acknowledged to be the property of their respective owners.
FOQLS, version 1


- EMITS 850-/1300-/1310-/1550-NM OF ACCURATE AND STABLE POWER
- FEDERAL COMMUNICATIONS COMMISSION AND INDUSTRY CANADA RADIO FREQUENCY INTERFERENCE STATEMENTS
- SPECIFICATIONS
- OVERVIEW
- 2.1 INTRODUCTION
- 2.2 FEATURES
- 2.3 WHAT'S INCLUDED
- SAFETY INFORMATION
- WARNINGS
- PREPARING FOR OPERATION
- 4.1 UNPACKING THE INSTRUMENT
- 4.2 POWER SUPPLY
- OPERATION
- 5.1 DISPLAY AND CONTROLS
- 5.1.1 FRONT, BACK, AND TOP OF THE QUAD LASER SOURCE
- 5.1.2 LCD
- 5.1.3 FRONT (PANEL BOARD)
- 5.4 FREQUENCY OUTPUT
- 5.5 AUTO-WAVELENGTH RECOGNITION
- 5.6 SWITCHING BACKLIGHTING OF THE LCD ON AND OFF
- 5.7 CONNECTING TO AN OPTICAL POWER METER
- MAINTENANCE
- TROUBLESHOOTING
- 7.1 PROBLEMS/SOLUTIONS
- 7.2 CONTACTING BLACK BOX
- 7.3 SHIPPING AND PACKAGING
- BLACK BOX®
- NETWORK SERVICES
- ABOUT BLACK BOX
Brand : Black Box
Model : FOQLS
Category : Cables for Computers and Peripherals