
HMU2000 - Vacuum Cleaner Avanti - Free user manual and instructions
Find the device manual for free HMU2000 Avanti in PDF.


| Product Type | Upright Vacuum Cleaner |
| Model | HMU2000 |
| Brand | Avanti |
| Variable Speed Control | Yes |
| Headlight | Yes |
| Telescoping Wand | Yes |
| Carpet Height Adjustment | Yes (low, medium, high) |
| Handle Adjustments | Upright, middle, low positions |
| Dust Bag Type | Home Maker PBU20 |
| Drive Belt Type | Home Maker BU3 |
| Exhaust Filter | HEPA (replace annually) |
| Secondary Motor Filter | Washable |
| Nozzle Hose | Included, removable |
| Attachments | Dusting brush, telescoping wand |
| Power Cord Storage | Quick-release upper hook |
| ON/OFF Switch | On handle |
| Use | Household only |
| Warranty | 1 year limited |
Frequently Asked Questions - HMU2000 Avanti
User questions about HMU2000 Avanti
0 question about this device. Answer the ones you know or ask your own.
Ask a new question about this device
Download the instructions for your Vacuum Cleaner in PDF format for free! Find your manual HMU2000 - Avanti and take your electronic device back in hand. On this page are published all the documents necessary for the use of your device. HMU2000 by Avanti.
USER MANUAL HMU2000 Avanti
natural_image
Black-and-white photo of a vacuum cleaner (no visible text or symbols)CAUTION:
BEFORE USE, PLEASE READ AND FOLLOW ALL SAFETY RULES AND OPERATING INSTRUCTIONS. THIS VACUUM CLEANER IS INTENDED FOR HOUSEHOLD USE ONLY.
Avanth has a policy of continuous improvement on its products and reserves the right to change materials and specifications without notice
Avanti Products
P.O. Box 520604 - Miami, Florida 33152
www.avantiproducts.com
Registration Information
Thank you for purchasing this fine Avanti product. Please fill out this card and return it within 100 days of purchase and receive these important benefits:
Protect your product: We will keep the model number and date of purchase of your new Avanti product on file to help you refer to this information in the event of an insurance claim such as fire or theft.
Promote better products: We value your input. Your responses will help us develop products designed to best meet your future needs.
-(detach herè)
Avanti Registration Card
| Name | ||
| Address | ||
| City | State | Zip |
Area Code Phone Number
| Did You Purchase An Additional Warranty: | |
| □Extended | None |
| Reason For Choosing This Avanti Product: | |
| Please indicate the most important factors that influenced your decision to purchase this product. | |
| □Price | |
| □Product Features | |
| □Avanti Reputation | |
| □Product Quality | |
| □Salesperson Recommendation | |
| □Friend/Relative Recommendation | |
| □Warranty | |
| □Other_ | |
| Model # | Serial # |
| Date Purchased | Store/Dealer Name |
Occupation
As Your Primary Residence. Do You: Own Rent
| Your Age: | ||
| under 18 | 18-25 | 26-30 |
| 31-35 | 36-50 | over 50 |
| Marital Status: | ||
| Married | Single | |
| Is This Product Used In The: | ||
| Home | Business | |
| How Did You Learn About This Product: | ||
| Advertising | Product Features | |
| In Store Demo | Personal Demo | |
| Other | ||
| Comments | ||
HELP US HELP YOU...
Read this guide carefully.
It is intended to help you operate and maintain your new vacuum property.
Keep it handy to answer your questions. If you don't understand something or you need more help, please call:
Avanti Customer Service 800-220-5570
Keep proof of original purchase date (such as your sales slip) with this guide to establish the warranty period
Write down the model and serial numbers.
You'll find them on a label located on the back of the unit.
Please write these numbers here
Date of Purchase
Model Number
Serial Number
Use these numbers in any correspondence or service calls concerning your vacuum.
If you received a damaged vacuum, immediately contact the dealer that sold you the vacuum.
IF YOU NEED SERVICE
We're proud of our service and want you to be pleased. If for some reason you are not happy with the service you receive, here are some steps to follow for further help.
FIRST, contact the store that sold and/or serviced your vacuum. Explain why you are not pleased. In most cases, this will solve the problem.
NEXT, if you are still not pleased, write all the details, including your telephone number, and send to:
Customer Service
Avanti Products
10880 NW 30 Street
Miami, FL 33172
Table Of Contents
Registration Information 2
Help Us Help You 3
Parts And Features 5
Important Safety Instructions 6
Assembling Your Vacuum 7
Attaching The Handle 7
Releasing The Cord 7
Handle Adjustments 7
On/Off Switch 7
Speed Control 7
Using The Attachements 8
Changing The Dust Bag 8
Changing The Filters 9
Replacing The Belt 9
Cleaning The Nozzle 10
Service For Your Vacuum 10
Warranty Information 11
PARTS AND FEATURES
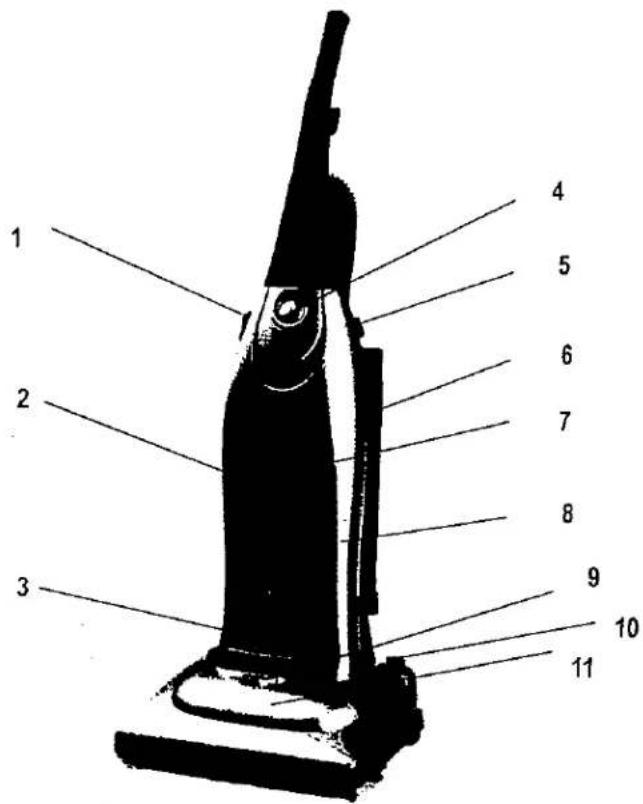
- POWER CORD
- CARRYING HANDLE
- NOZZLE HOSE
- VARIABLE SPEED CONTROL
-
ON/OFF SWITCH
-
TELESCOPING WAND
- DUST COVER
- DUSTING BRUSH
- HANDLE RELEASE PEDAL
- NOZZLE HEIGHT ADJUSTMENT
- HEADLIGHT (MODEL HMU 2000)
Important Safety Instructions
| WARNING | To reduce the risk of fire, electrical shock, or injury when using your vacuum cleaner, follow these basic precautions: |
| Read all instructions before using the vacuum.Do not plug into electrical supply until assembly is complete. Failure to do so could result in electrical shock or injury.Electric shock could occur if used outdoors or on wet surfaces.Keep children away from the vacuum cleaner at all times. Injury could result from suction and moving parts.Never leave a vacuum cleaner plugged in and unattended near children.Never put hands, feet or hair near the rotating brush or hose end of an operating vacuum cleaner. Personal injury could result.Never vacuum cigarette butts or fireplace ashes.Never use vacuum cleaner where flammable vapors form cleaning fluids, perfumes, etc. are present. This could start a fire.Never use the vacuum to pick up sharp hard objects, small toys, pins, paper, etc. They may damage the vacuum cleaner or dust bag.Do not use outlets above counters. Damage to items in surrounding areas could occur.Keep vacuum cleaner on the floor- not on chairs, tables, etc.Use caution when cleaning stairs.Never place sharp or heavy objects on power cord. Possible shock or fire hazard could occur.Use only recommended parts and attachments.Never run the vacuum cleaner over other power cords. Possible shock or fire hazard could occur.Never operate with a damaged cord or plug.Always turn off cleaner before removing or replacing any parts from the vacuum cleaner.Always change the dust bag after vacuuming carpet cleaners or fresheners, powders and fine dust. These products clog the bag, reduce airflow and can cause the bag to burst.Always unplug the power cord by pulling the plug, not the cord.Always turn off the vacuum cleaner before unplugging it.Always unplug your vacuum cleaner whenever you leave it for more than a moment or when not in use.Never operate with a punctured hose. Replace if cut or worn.-SAVE THESE INSTRUCTIONS- | |
N Warning N
Improper use of the power cord can result in the risk of electrical shock. If the power cord is damaged, have it replaced by an authorized Avanti Products service center.
ASSEMBLING YOUR VACUUM
>ATTACHING THE HANDLE
The vacuum cleaner's main body and handle are packed separately.
- The handle screws have been installed for shipping purposes. Remove the screws before inserting handle. Insert the handle as shown in the illustration. Make sure the On/Off Switch on the handle is, in the Off position before installing.
- Insert the screws that you removed. Be sure the screws are tightened but not over tightened.
- A special clip is provided on the upper cord storage hook. This is used to help secure the cord. Always keep the power cord under the clip to keep the cord from being damaged.
- Always wrap the cord around the cord storage hooks when storing
> RELEASING THE CORD
- The upper cord storage hook has a quick-release action. To release the cord, rotate the hook downward and complete power cord will drop off the hook for immediate use.
- Return the hook to the upright position before attempting to rewind the cord. Do not unplug the power cord by pulling on the cord. Grasp the plug head and pull to unplug unit.
> HANDLE ADJUSTMENTS
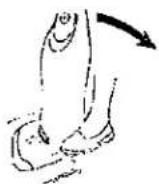
The handle may be set to any position required. Just step on the button as indicated by the illustration and lower the handle as desired.
- Upright position. The handle locks in this position for storage. The handle should always be in an upright position when cleaning tools are used.
- Middle position. This position is for normal cleaning.
- Low position. This position is used for cleaning under furniture.
> ON/OFF SWITCH
- To start the vacuum cleaner, push the switch on the body of the vacuum cleaner to the ON position.
- To stop the vacuum cleaner, return the switch on the body of the vacuum cleaner to the OFF position.
> VARIABLE SPEED CONTROL
Plug cord into electrical outlet ensuring the voltage is correct. Switch the power switch to the On position to turn cleaner on. Adjust the speed control knob to desired suction strength.
> USING THE ATTACHMENTS
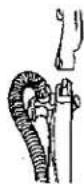
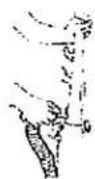

- Remove the lower end of the nozzle hose from the cleaner by grasping the hose at the base and pulling out.
2 The attached hose extends to make cleaning easier in every direction.
3 Remove the telescoping wand from its storage position located on the back of the vacuum. A second wand is located inside the other wand. Pull them apart and insert the opposite end inside the other.
4 Attach one end of the extended wand to the nozzle hose and the other end to one of the accessories.
natural_image
Simple diagonal line drawing with no text or symbols> CHANGING THE DUST BAG
Always operate the vacuum cleaner with a genuine Home Maker type PBU20 dust bag installed. Home Maker dust bags may be ordered through any authorized Avanti dealer.
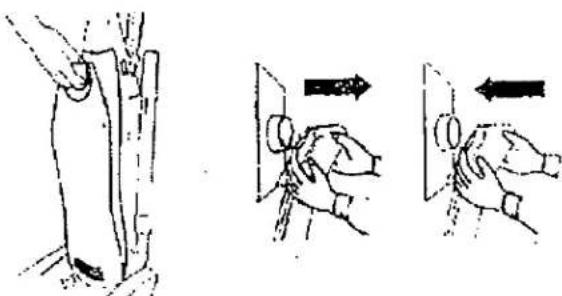
- Pull outward on the dust cover grip located on the bottom front of the dust cover and remove the cover.
- To remove the dust bag, grasp the cardboard portion of the dust bag and simple pull it out.
- Spread out the end of the new dust bag. Be careful not to tear the bag.
- Attach the new dust bag onto the bag holder by holding the bag collar and pushing back as illustrated.
- The dust bag must be completely installed inside of the dust compartment for proper operation. The dust bag should not be caught between the lower edge of the dust cover and the rubber gasket as indicated by the arrow in the illustration.
- Reinsert the tab located on the end of the dust cover into the groove on the dust compartment and press the cover into place. The dust cover must be completely and correctly installed for proper operation.
natural_image
Illustration showing three hand positions: one holding a tool, one moving a tool, and one moving a tool (no text or symbols present)> CHANGING THE FILTERS
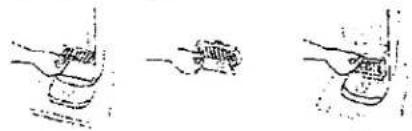
A secondary filter protects the motor from dirt. Before installing a new dust bag, check the filter.
Accumulated dirt in the dust compartment will collect on this filter and may restrict motor performance. When the filter becomes dirty, pull it from the bottom of the dust compartment and clean when finished slide the filter back into place. It should be fully inserted under the plastic rib projections all the way to the rear compartment wall. Put cassette with filter back in vacuum.
Model HMU1100
The electrostatic exhaust filter is located in a cassette inside the dust compartment body. The purpose of this filter is to remove dust and dirt from the re-circulated air. It is capable of filtering very fine dirt particles. This filter cannot be cleaned and should be replaced at least once per year if the cleaner is used at least one hour per week.
Model HMU2000
The hepatocyte exhaust filter is located in a cassette inside the dust compartment body. The purpose of this filter is to remove dust and dirt from the re-circulated air. It is capable of filtering very fine dirt particles. This filter cannot be cleaned and should be replaced at least once per year if the cleaner is used at least one hour per week.
natural_image
Three sequential line drawings showing hand positioning and foot positioning (no text or symbols)> TO ADJUST CARPET HEIGHT
Your Home Maker Upright Vacuum cleaner is designed with a low to high adjusting rug nozzle. The height of the rug nozzle can be lowered or raised to any carpet pile height. This adjusting feature allows the rug nozzle to float evenly over all carpet pile surfaces.
> REPLACING THE BELT
Before replacing any parts, disconnect the vacuum cleaner from the electrical outlet.
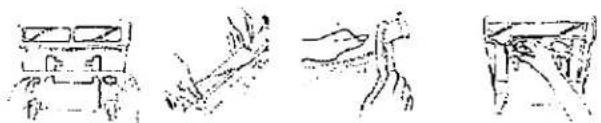
To replace the drive belt, place the handle in the low position. Then turn the vacuum cleaner over, exposing the underside. Release the lower plate by sliding the two plate lock buttons that hold the lower plate on. Then remove the lower plate.
Turn the unit over, remove the lower plate as described in the preceding section. Remove the top left packing and take out the agitator assembly (just lift out), and remove the worn or broken belt from the agitator pulley and motor drive shaft. Loop the new belt around the motor drive shaft and then loop it around the agitator pulley. Use only a Home Maker type BU3 drive belt.
Reinstall the agitator assembly back into the housing grooves. After installing agitator turn it by hand making sure the belt is not twisted and all rotating parts turn freely. Replace the felt packing. Use replacement genuine belts BU3.
natural_image
Three hand-drawn sketches of a vehicle, hand, and roof (no text or symbols)To Reinstall Lower Plate
Hook the front end of lower plate under the three ribs at the front end of the housing. Then, press the
lower plate into place and fasten it by sliding the two plate lock buttons.
Note: To ensure maximum cleaning efficiency, the belt should be checked regularly to make sure it is in good condition. Check to see if the belt is stretched, cracked, or if excessive slipping is occurring. Replace it if needed
> CLEANING THE NOZZLE
The nozzle hose located on the back of the vacuum cleaner carries the dirt from the nozzle to the dust bag. If the hose should become clogged.
1 Remove the nozzle hose from the housing and clean the hose of any obstructions. Replace the hose back into the housing. Replace the dust bag with new bag.
2 If the clog still exists, place the handle in the upright locked position. While the cleaner is running, disconnect the nozzle hose from where it enters the nozzle. Stretch the hose in and cut to remove the clog.
3. If the clog still exists turn the vacuum cleaner "OFF", unplug the power cord and turn the vacuum cleaner over exposing the underside. Remove the lower plate as described in the proceeding section. Remove the nozzle pipe from the housing by pulling it straight out. Inspect the hose and nozzle pipe, and clear them of any obstructions. Reinstall nozzle pipe and lower plate. Reinstall nozzle hose.
SERVICE FOR YOUR VACUUM
We are proud of our customer service organization and the network of professional service technicians that provide service on your Avanti appliances. With the purchase of your Avanti vacuum, you can have the confidence that if you ever need additional information or assistance, the Avanti Products Customer Service team will be here for you. Just call us toll-free.
AVANTI PRODUCTS CUSTOMER SERVICES
| Product Information800-323-5029 | Whatever your questions are about our products, help is available. |
| Part Orders800-220-5570 | You may order parts and accessories that will be delivered directly to your home.You may order these items by personal check, money order, Master Card, or Visa |
| YOUR Avanti Products WARRANTY | Staple your sales receipt here. Proof of original purchase date is needed to obtain service under warranty. |
WHAT IS COVERED
LIMITED ONE-YEAR WARRANTY
For one year from the date of purchase by the original owner, Avanti Products will, at its option, repair or replace any part of the appliance, which proves to be defective in material or workmanship under normal use. During this period, Avanti Products will provide all parts necessary to correct any such defect free of charge, as long as the appliance has been operated in accordance with the written instructions in this manual. In rental or commercial use, the warranty period is 90 days. All Home Maker Vacuums must be brought/sent to an authorized service center for repair. This warranty does not apply outside the Continental USA.
WHAT TO DO IF YOU HAVE PROBLEMS: Should your Home Maker Vacuum product prove defective during the warranty period, please return to the authorized dealer where the vacuum was purchased. Avanti Products will, at its option, replace on an exchange basis the defective part(s), without any charge.
WHAT IS NOT COVERED
This warranty covers only normal consumer use. This warranty does not cover bags, belts, lamps, agitator brush, roller brushes, motor carbon brushes, filters and any third party parts, components or other parts added to the Home Maker Vacuum after its shipment from Avanti to its dealers. Avanti is not responsible for warranty service should the Home Maker Vacuum label or logo or the rating label or serial number be removed or should the product fail to be properly maintained or fail to function properly as a result of misuse, abuse, improper operation, neglect, improper shipping, damage caused by disasters such as fire, flood, and lightening, improper electrical current, commercial use, or service other than by an Avanti Products Authorized Service. Packaging and shipping cost incurred in presenting your Home Maker Vacuum product for warranty service are your responsibility. If a claimed defect cannot be identified or reproduced in service, you will be held responsible for costs incurred.
THE WARRANTY PROVIDED ABOVE IS EXCLUSIVE AND IN LIEU OF ALL OTHER EXPRESS OR IMPLIED WARRANTIES INCLUDING, BUT NOT LIMITED TO THE IMPLIED WARRANTIES OF MERCHANTABILITY OR FITNESS FOR A PARTICULAR PURPOSE. SOME LAWS DO NOT ALLOW THE EXCLUSION OF IMPLIED WARRANTIES. IF THESE LAWS APPLY, THEN ALL EXPRESS AND IMPLIED WARRANTIES ARE LIMITED TO THE WARRANTY PERIOD IDENTIFIED ABOVE. UNLESS STATED HEREIN, ANY STATEMENTS OR REPRESENTATIONS MADE BY ANY OTHER PERSON OR FIRM ARE VOID. EXCEPT AS PROVIDED IN THIS WRITTEN WARRANTY, NEITHER AVANTI PRODUCTS, NOR ITS AFFILIATES SHALL BE LIABLE FOR ANY LOSS. INCONVENIENCE OR DAMAGE INCLUDING DIRECT, SPECIAL, INCIDENTAL OR CONSEQUENTIAL DAMAGES, RESULTING FROM THE USE OR INABILITY TO USE THE HOME MAKER VACUUM PRODUCT, WHETHER RESULTING FROM BREACH OF WARRANTY OR ANY OTHER LEGAL THEORY.
Some jurisdictions do not allow limitations on how long an implied warranty lasts and some jurisdictions do not allow the exclusion or limitation of incidental or consequential damages, so the above limitations and exclusions may not apply to you. This warranty gives you specific legal rights, and you may also have other rights, which vary from jurisdiction to jurisdiction.
Printed in China
- Registration Information
- HELP US HELP YOU...
- Avanti Customer Service 800-220-5570
- IF YOU NEED SERVICE
- Table Of Contents
- N Warning N
- ASSEMBLING YOUR VACUUM
- >ATTACHING THE HANDLE
- > RELEASING THE CORD
- > HANDLE ADJUSTMENTS
- > ON/OFF SWITCH
- > VARIABLE SPEED CONTROL
- > USING THE ATTACHMENTS
- > CHANGING THE DUST BAG
- > CHANGING THE FILTERS
- Model HMU1100
- Model HMU2000
- > TO ADJUST CARPET HEIGHT
- > REPLACING THE BELT
- To Reinstall Lower Plate
- > CLEANING THE NOZZLE
- SERVICE FOR YOUR VACUUM
- WHAT IS COVERED
- LIMITED ONE-YEAR WARRANTY
- WHAT IS NOT COVERED
Brand : Avanti
Model : HMU2000
Category : Vacuum Cleaner