
SR-HD1500US - Blu-ray player JVC - Free user manual and instructions
Find the device manual for free SR-HD1500US JVC in PDF.


| Product Type | Blu-ray Disc Player |
| Model Number | SR-HD1500US |
| Brand | JVC |
| Disc Playback | BD-ROM, BD-R/RE, DVD-Video, DVD±R/RW, CD-DA, CD-R/RW |
| Video Output | HDMI 1.4, Composite Video |
| Audio Output | HDMI, Digital Optical, Analog Stereo (RCA) |
| Supported Video Formats | MPEG-2, MPEG-4 AVC/H.264, VC-1 |
| Supported Audio Formats | Dolby Digital, DTS, LPCM, MP3, WMA |
| Dimensions (W x H x D) | 17.0 x 1.9 x 9.8 inches (430 x 49 x 249 mm) |
| Weight | 5.5 lbs (2.5 kg) |
| Power Supply | AC 120V, 60Hz |
| Power Consumption | 25 W (Standby: 0.5 W) |
| Remote Control | Included (with batteries) |
| Playback Features | BD-Live, BonusView, 1080p upscaling |
| Connectivity | HDMI output, Digital optical audio output, Composite video output, Analog audio output |
| Cleaning Instructions | Wipe exterior with a soft, dry cloth. Clean lens with a blower or lens cleaning disc. |
| Safety Precautions | Do not expose to moisture or extreme temperatures. Use only specified power source. |
| Spare Parts Availability | Remote control, power cord, and batteries available from JVC service centers. |
| Repairability | Refer to manual for troubleshooting. Contact JVC support for repairs. |
| General Information | Designed for home entertainment. Compatible with BD and DVD discs. |
Frequently Asked Questions - SR-HD1500US JVC
User questions about SR-HD1500US JVC
0 question about this device. Answer the ones you know or ask your own.
Ask a new question about this device
Download the instructions for your Blu-ray player in PDF format for free! Find your manual SR-HD1500US - JVC and take your electronic device back in hand. On this page are published all the documents necessary for the use of your device. SR-HD1500US by JVC.
USER MANUAL SR-HD1500US JVC
dts-hD Master Audio | Essential
RW COMPATIBLE

i
For Customer Use:
Enter below the Model No. and Serial No. which are located on the rear of cabinet. Retain this information for future reference.
Model No.
Serial No.
Dear Customer,
Thank you for purchasing the JVC BLU-RAY DISC & HDD recorder. Before use, please read the safety information and precautions to ensure safe use of your new unit.
Cautions

This Class B digital apparatus complies with
Canadian ICES-003.
The lightning flash with arrowhead symbol, within an equilateral triangle, is intended to alert the user to the presence of uninsulated “dangerous voltage” within the product’s enclosure that may be of sufficient magnitude to constitute a risk of electric shock to persons.

The exclamation point within an equilateral triangle is intended to alert the user to the presence of important operating and maintenance (servicing) instructions in the literature accompanying the appliance.
CAUTION:
A UNIT IS A CLASS 1 LASER PRODUCT. HOWEVER THIS UNIT USES A VISIBLE LASER BEAM WHICH COULD CAUSE HAZARDOUS RADIATION EXPOSURE IF DIRECTED. BE SURE TO OPERATE THE UNIT CORRECTLY AS INSTRUCTED.
WHEN THIS UNIT IS PLUGGED INTO THE WALL OUTLET, DO NOT PLACE YOUR EYES CLOSE TO THE OPENING OF THE DISC TRAY AND OTHER OPENINGS TO LOOK INTO THE INSIDE OF THIS UNIT.
USE OF CONTROLS OR ADJUSTMENTS OR PERFORMANCE OF PROCEDURES OTHER THAN THOSE SPECIFIED HEREIN MAY RESULT IN HAZARDOUS RADIATION EXPOSURE.
DO NOT OPEN COVERS AND DO NOT REPAIR YOURSELF. REFER SERVICING TO QUALIFIED PERSONNEL.
CLASS 1 LASER PRODUCT
REPRODUCTION OF LABELS
WARNING LABEL INSIDE OF THE UNIT
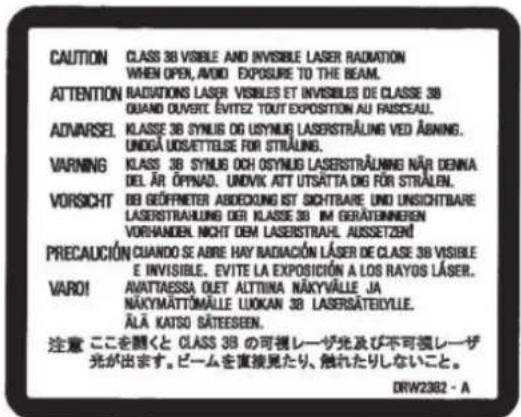
This unit apply to the standard "IEC60825-1:2001" for laser products.
WARNING:
TO PREVENT FIRE OR SHOCK HAZARD, DO NOT EXPOSE THIS UNIT TO RAIN OR MOISTURE.
CAUTION:
This unit should be used with AC 120V\~, 60Hz only. To prevent electric shocks and fire hazards, DO NOT use any other power source.
CAUTION:
TO PREVENT ELECTRIC SHOCK, MATCH WIDE BLADE OF PLUG TO WIDE SLOT, FULLY INSERT.
ATTENTION:
POUR ÉVITER LES CHOCS ÉLECTRIQUES, INTRODUIRE LA LAME LA PLUS LARGE DE LA FICHE DANS LA BORNE CORRESPONDANTE DE LA PRISE ET POUSSER JUSQU'AU FOND.
Note to CATV system installer:
This reminder is provided to call the CATV system installer's attention to Article 820-40 of the NEC that provides guidelines for proper grounding and, in particular, specifies that the cable ground shall be connected to the grounding system of the building, as close to the point of cable entry as practical.
"WARNING" and the following or equivalent. "To reduce the risk of fore or electric shock, do not expose this apparatus to rain or moisture."
A warning that an apparatus with CLASS I construction shall be connected to a MAINS socket outlet with protective earthing connection.
WARNING
Batteries shall not be exposed to excessive heat such as sunshine, fire or the like.
Main Plug
The Main Plug is used as the disconnect device, the disconnect device shall remain readily operable
IMPORTANT SAFETY INSTRUCTIONS
1) Read these instructions.
2) Keep these instructions.
3) Heed all warnings.
4) Follow all instructions.
5) Do not use this apparatus near water.
6) Clean only with dry cloth.
7) Do not block any ventilation openings. Install in accordance with the manufacturer's instructions.
8) Do not install near any heat sources such as radiators, heat registers, stoves, or other apparatus (including amplifiers) that produce heat.
9) Do not defeat the safety purpose of the polarized or grounding-type plug. A polarized plug has two blades with one wider than the other. A grounding type plug has two blades and a third grounding prong. The wide blade or the third prong are provided for your safety. If the provided plug does not fit into your outlet, consult an electrician for replacement of the obsolete outlet.
10) Protect the power cord from being walked on or pinched particularly at plugs, convenience receptacles, and the point where they exit from the apparatus.
11) Only use attachments/accessories specified by the manufacturer.
12) Use only with the cart, stand, tripod, bracket, or table specified by the manufacturer, or sold with the apparatus. When a cart is used, use caution when moving the cart/apparatus combination to avoid injury from tip-over.
13) Unplug this apparatus during lightning storms or when unused for long periods of time.
14) Refer all servicing to qualified service personnel. Servicing is required when the apparatus has been damaged in any way, such as power-supply cord or plug is damaged, liquid has been spilled or objects have fallen into the apparatus, the apparatus has been exposed to rain or moisture, does not operate normally, or has been dropped.

Failure to heed the following precautions may result in damage to the unit, remote control or disc/cassette.
1. DO NOT place the unit —
— in an environment prone to extreme temperatures or humidity.
— in direct sunlight.
— in a dusty environment.
— in an environment where strong magnetic fields are generated.
— on a surface that is unstable or subject to vibration.
-
DO NOT block the unit's ventilation openings or holes. (If the ventilation openings or holes are blocked by a newspaper or cloth, etc., the heat may not be able to get out.)
-
DO NOT place heavy objects on the unit or remote control.
-
DO NOT place anything which might spill on top of the unit or remote control. (If water or liquid is allowed to enter this equipment, fire or electric shock may be caused.)
-
DO NOT expose the apparatus to dripping or splashing.
-
DO NOT use this equipment in a bathroom or places with water. Also DO NOT place any containers filled with water or liquids (such as cosmetics or medicines, flower vases, potted plants, cups, etc.) on top of this unit.
-
DO NOT place any naked flame sources, such as lighted candles, on the apparatus.
-
AVOID violent shocks to the unit during transport.
CAUTION:
Changes or modifications not approved by JVC could void user's authority to operate the equipment.
Declaration of Conformity
Model Number: SR-HD1500US
Trade Name: JVC
Responsible Party: JVC Americas Corp.
Address: 1700 Valley Road Wayne, N.J. 07470
Telephone Number: 973-317-5000
This device complies with Part 15 of FCC Rules.
Operation is subject to the following two conditions:
(1) This device may not cause harmful interference, and (2) this device must accept any interference received, including interference that may cause undesired operation.
This equipment has been tested and found to comply with the limits for a Class B digital device, pursuant to Part 15 of the FCC Rules. These limits are designed to provide reasonable protection against harmful interference in a residential installation. This equipment generates, uses, and can radiate radio frequency energy and, if not installed and used in accordance with the instructions, may cause harmful interference to radio communications. However, there is no guarantee that interference will not occur in a particular installation. If this equipment does cause harmful interference to radio or television reception, which can be determined by turning the equipment off and on, the user is encouraged to try to correct the interference by one or more of the following measures:
Reorient or relocate the receiving antenna.
Increase the separation between the equipment and receiver.
Connect the equipment into an outlet on a circuit different from that to which the receiver is connected.
Consult the dealer or an experienced radio/TV technician for help.
When the equipment is installed in a cabinet or a shelf, make sure that it has sufficient space on all sides to allow for ventilation (10 cm or more on both sides, on top and at the rear).
When discarding batteries, environmental problems must be considered and the local rules or laws governing the disposal of these batteries must be followed strictly.
Use the supplied power cord.
(If not, fire or electric shock may be caused.)
DON'T continue to operate the equipment if you are in any doubt about it working normally, or if it is damaged in any way -- switch off, withdraw the mains plug and consult your dealer.
DO be careful with glass panels or doors on equipment.
DO consult you dealer if you are ever in doubt about the installation, operation or safety of your equipment.
NEVER let anyone especially children push anything into holes, slots or any other opening in the case -- this could result in a fatal electrical shock.
MOISTURE CONDENSATION
Moisture in the air will condense on the unit when you move it from a cold place to a warm place, or under extremely humid conditions—just as water droplets form on the surface of a glass filled with cold liquid. In conditions where condensation may occur, disconnect the unit's power plug from the wall and keep it disconnected for a few hours to let the moisture dry, then turn on the unit.
DOLBY.
TRUEHD
DIGITAL PLUS

dts-HD
Master Audio | Essential
- Manufactured under license from Dolby Laboratories. Dolby and the double-D symbol are trademarks of Dolby Laboratories.
- Manufactured under license under U.S. Patent #'s: 5,451,942; 5,956,674; 5,974,380; 5,978,762; 6,226,616; 6,487,535; 7,392,195; 7,272,567; 7,333,929; 7,212,872 & other U.S. and worldwide patents issued & pending. DTS is a registered trademark and the DTS logos, Symbol, DTS-HD and DTS-HD Master Audio I Essential are trademarks of DTS, Inc. © 1996-2008 DTS, Inc. All Rights Reserved.
- This product incorporates copyright protection technology that is protected by U.S. patents and other intellectual property rights. Use of this copyright protection technology must be authorized by Macrovision, and is intended for home and other limited viewing uses only unless otherwise authorized by Macrovision. Reverse engineering or disassembly is prohibited.
- DVD logo is a registered trademark of DVD Format/Logo Licensing Corporation.
- HDMI, the HDMI logo and High-Definition Multimedia Interface are trademarks or registered trademarks of HDMI Licensing LLC.
- "Blu-ray Disc" and the "Blu-ray" logo are trademarks.
- "x.v.Color" and the "x.v.Color" logo are trademarks of Sony Corporation Co., Ltd.
- Java and all Java-based trademarks and logos are trademarks or registered trademarks of Sun Microsystems, Inc. in the United States and other countries.
• SDHC logo is trademark. - "AVCHD" and the "AVCHD" logo are trademarks of Panasonic Corporation and Sony Corporation.
- Other product and company names included in this instruction manual are trademarks and/or registered trademarks of their respective holders.
- This product is licensed under the AVC patent portfolio license and VC-1 patent portfolio license for the personal and non-commercial use of a consumer to (i) encode video in compliance with the AVC Standard and VC-1 Standard ("AVC/VC-1 Video") and/or (ii) decode AVC/VC-1 Video that was encoded by a consumer engaged in a personal and non-commercial activity and/or was obtained from a video provider licensed to provide AVC/VC-1 Video. No license is granted or shall be implied for any other use. Additional information may be obtained from MPEG LA, LLC. See http://www.mpegla.com.
- The open source software is embedded in this product. For more information, please go to: http://www.jvc-victor.co.jp/download/lnx/09jvc_bd/
Batteries -- Incorrect use of batteries may cause the batteries to burst or ignite. A leaky battery may corrode the equipment, dirty your hands or spoil your clothing. In order to avoid these problems, make sure to observe the precautions below: - Use the specified batteries only.
- Install the batteries with due attention to the plus (+) and minus (-) sides of the batteries according to the instructions in the compartment.
- Do not mix old and new batteries.
- Do not mix batteries of different types. Voltage specifications of batteries of the same shape may vary.
- Replace an exhausted battery with a new one promptly.
- If you will not use the remote control for a long time, remove the batteries.
- If leaked battery fluid gets on your skin or clothing, rinse immediately and thoroughly. If it gets into you eye, bathe your eye well rather than rubbing and seek medical treatment immediately. Leaked battery fluid that gets into your eye or your clothing may cause a skin irritation or damage your eye.
- Do not put the batteries in a place where young children can reach.
DISCLAIMER OF LIABILITY
JVC shall not be liable for any loss relating to the unit's failure to properly record, store or playback any content (video, audio or otherwise) for any reason whatsoever. Any applicable warranties shall only cover replacement or repair of the effected unit, and shall not apply to recovery or replacement of lost content.
ATTENTION:
■ Using a mobile phone in the vicinity of the unit may cause picture vibration on the TV screen or change the screen to a black back display.
Some TVs or other appliances generate strong magnetic fields. Do not place such appliances on top of the unit as it may cause picture disturbance.
When moving the product, press ⏻/l to turn off the power, and wait at least 30 seconds before unplugging the power cord. Then, wait at least 2 minutes before moving the product.
If there is a power outage when using the unit, the recorded data may be erased.
It is recommended to back up discs which contain important recordings periodically (every few years). As digital signals do not deteriorate, failure to play back or record might arise due to the effects of the disc aging through the years depending on the storage environment.
■ Recorded programs and data cannot be restored once the disc or tape is damaged.
- This unit can play back and record only NTSC signals.
The hard disk is a consumable item. Replacement is recommended after 10000 hours of use (if use in a 25°C environment). For information on maintenance planning and costs, consult your nearest JVC dealer.
The fan motor is a consumable item. Replacement is recommended after 30000 hours of use (if use in a 25°C environment). For information on maintenance planning and costs, consult your nearest JVC dealer.

If this symbol is shown, it is only valid in the European Union.
HOW TO USE THIS INSTRUCTION MANUAL
- All major sections and subsections are listed in the Table Of Contents on page 5. Use this when searching for information on a specific procedure or feature.
- The mark signals a reference to another page for instructions or related information.
- Operation buttons necessary for the various procedures are clearly indicated through the use of illustrations at the beginning of each major section.
BEFORE YOU INSTALL YOUR NEW UNIT...
... please read the sections/literature listed below.
- "Cautions" on page 2
"IMPORTANT SAFETY INSTRUCTIONS" on page 3 to 4
Contents
Safety Precaution
Contents
Getting Started
Key Features 6
How to Read this Manual 6
Other Precautionary Notes 7
Hard Disk Drive (HDD) 8
SD Cards 8
Discs 9
Precautions on the Use of Discs 11
On-screen Displays 12
Name and Function of Parts 13
Front panel 13
Display window 14
Rear panel 14
Remote control 15
Preparation
Connecting a Monitor 17
Connecting a Video Deck or Other Equipment 18
Connecting an Amplifier 18
Connecting External Devices 19
Connecting the Power Supply 19
Setting and Displaying Date/Time 20
Dubbing/Importing
Dubbing/Importing 23
Dubbing chart 24
Formatting 25
Recording Modes 28
Importing Data to the HDD Using the ONE TOUCH DUBBING Button 29
Importing Data from a BD/DVD to the HDD 30
Importing Data from a USB-compatible Device to the HDD 33
Importing Data from an SD Card to the HDD 35
Importing Data from an i.LINK-compatible Device to the HDD 37
Dubbing a Title from the HDD to a BD/DVD 39
Dubbing Still Images from the HDD 42
Enabling Playback on Other Devices (Finalizing) ...... 44
Copying the Entire Disc 46
Recording Using External Inputs 47
Playing Back
About Playing Back 48
Using Playback Navigation .... 48 Option menu list .... 50
Video Playback Operation 51
Playing Videos on a BD/DVD 53
Playing Videos on the HDD 54
Playing Videos on a SD Card 54
Playing Still Images (JPEG) 55
Changing Playback Settings 56
Playback Settings Menu 56
Audio/subtitle settings 56
Playback settings 56
Video settings 57
Editing
Editing 58
Entering Characters 59
Character List 59
Grouping 60
Changing the Title/Group Name 62
Deleting a Title/Group 62
Turning On Title/Group Protection 63
Turning Off Title/Group Protection 64
Creating a Playlist 65
Editing a Thumbnail 66
Editing a Chapter 67
Dividing 69
Delete Scenes 70
Changing the Disc Name 72
Changing the Shooting Date/Time 72
Mode conversion 73
Settings Menu
Changing Settings of this Unit 74
Setting Menu List 74
Setup 75
Playback Setting 76
Record 77
Audio 78
Display 79
Connection 80
Others
Locking the Disc Tray 82
Turning on the Mode Lock 82
RS-232C Interface (only for SR-HD1500) 83
Command Table 83
Specifications 83
Command 84
Language Code List 94
Country Code List 96
Using the HDMI Consumer Electronics Control (HDMI CEC) 98
Creating a Seamless BD 98
Troubleshooting 99
Specifications 101
Index 102
Key Features
Professional Blu-ray Disc recorder of the high-definition era
Copy videos to a Blu-ray Disc in high-definition from a high-definition camcorder, or down convert the videos and record them onto DVDs, all without the need for a PC. The internal hard disk drive enables for easy editing and dubbing multiple discs.
Compatible with ProHD Camcorder GY-HM700/100 (only for SR-HD1500)
MOV files that are taken in SP mode (*1) using the JVC ProHD Camcorder GY-HM700/100 are compatible with the SR-HD1500, and can be imported into the HDD or dubbed onto discs.
(*1) SP mode : 1280x720/60p, 30p, 24p, 1440x1080/60i
Compatibility with other consumer camcorders
In addition to AVCHD, HDV and DV, JVC Everio file formats are also compatible, and digital dubbing can be done.
Digital interface that allows for camcorder compatibility
This unit is equipped with USB, SD slots and i.Link input terminals for connecting the camcorder.
Create menu-supported Blu-ray discs
Blu-ray discs can be created using the BDMV (with menu) format. BDAV discs can also be created and dubbed according to the intended use. The SR-HD1500 also enable users to use an original image as the background.
Compatible with dual layer 50 GB Blu-ray discs, and records up to 24 hours of full high-definition images in a single disc
This unit is also compatible with high capacity dual layer 50 GB Blu-ray discs, and up to 24 hours (AE mode) of full high-definition images can be recorded in a single disc. Writing to inexpensive LTH discs is also supported.
Authoring menu enables discs to be created and used industrially such as for demonstrations
Disc authoring can be used to create discs for industrial use, such as discs that repeat playback automatically.
Equipped with external control RS-232C terminal (only for SR-HD1500)
This unit is equipped with a RS-232C terminal that allows for external control using a PC.
How to Read this Manual
About this manual
This manual mainly describes operation procedures using the remote control unit buttons.
- The buttons on the remote control unit are indicated as [Button Name].
- The menu items are indicated as "Menu Item".
■ Supplementary remarks in the main text
Memo : States restrictions on the functions or use of this unit.
Note : States precautions to be taken during operation.
: Indicates the page numbers or items to refer to.
Memo:
The displays of operable media are highlighted.
HDD : Hard disk
DVD : DVD
BD : Blu-ray disc
SD : SD card
SDHC : SDHC Card
CD : Music compact disc
JPEG : JPEG (still picture) file disc
The unit illustrations used in this manual are from the SR-HD1500.
Refer to the supplied CD-ROM for the Spain and French GUIDEBOOK.
In order to view the GUIDEBOOK, Adobe® Acrobat® Reader™ or Adobe® Reader® must be installed.
Adobe® Reader® can be loaded from Adobe's web site:http://www.adobe.com/
Menu operation
Pressing the remote control buttons below calls up the respective menu screens.
- [SET UP], [NAVIGATION], [EDIT], [INFORMATION CORRECT], [DUBBING], [MEDIA MANAGE]
- Press any of the [ ▲ / ▼ / ◀ / ▶ ] buttons to move to a specific menu item (yellow item indicated by a small arrow).
- Press the [OK] button to confirm the selection.
- Press the [RETURN] button to return to the previous screen.
- Simple instructions on the operation procedure may be displayed at the bottom of the screen.
Other Precautionary Notes
Copyright protection
This unit supports copyright protection technologies.
Copyrights
- According to the copyright law, video or music data that you store must not be used for purposes other than personal enjoyment without the authorization of the copyright holder.
- This product employs the CPRM technology, and is protected by the proprietary technologies as well as intellectual property rights of the United States and Japan.
Use of the CPRM technology is subject to the approval of Macrovision Solutions Corporation. Unless special authorization is obtained from Macrovision Solutions Corporation, the CPRM is restricted to household and some pay-per-view uses. Do not dismantle or remodel this product. The copyright protection function prevents copyrighted video images from being saved to equipment such as a video recorder. This function may also cause deterioration in the playback picture quality when the data is output to a monitor through a video recorder. This is not a hardware malfunction. To play back copyrighted videos, connect this product directly to the monitor. - Read and understand fully the terms and conditions of all copyright works before using this unit in the correct manner. Under no circumstances shall JVC take any responsibility for any infringements of copyright caused by the customer when using this unit. The customer shall be responsible for resolving all legal issues regarding to any copyright infringements.
Stored video content and compensation
- For discs containing important video content, backup on a periodic basis (once every few years) is recommended. Although digital signals do not deteriorate, playback or dubbing may fail due to aging of the disc resulting from the storage conditions.
- Recorded data may be lost if power outage occurs while this unit is being used. It is therefore recommended that videos stored on the HDD be dubbed to a BD or DVD as soon as possible in case the HDD breaks down.
- Videos or data stored on a BD/DVD, HDD, or SD card cannot be recovered if the media is damaged.
Disclaimer of compensation for loss or damage of stored video content
- Please note that our company will not be liable for compensation of the content or any incidental damages in the event that dubbing or playback cannot be performed properly for some reasons. The same applies during repair of this unit.
Handling precautions
■ Do not use the plug or power point with dust or metallic objects attached to it
- Failure to do so may cause short circuit or heating, and result in fire or electric shock.
- Remove the plug once every half a year, and clean it with a dry cloth.
■ Make use of a power point that allows the power plug to be inserted or removed easily
- Make sure that the plug can be removed immediately in case an abnormality is found in the unit.
■ Insert the plug firmly into the power point
- Failure to do so may cause short circuit or heating, and result in fire or electric shock.
■ Do not make use of a power voltage other than that specified
- Doing so may result in fire or electric shock.
■ Do not insert or remove the plug with wet hands
- Doing so may result in electric shock.
■ Do not touch the plug when there is thunder or lightning
- Doing so may cause electric shock.
■ Do not insert any foreign object into this unit
- Doing so may result in fire or electric shock.
■ Do not dismantle or remodel this unit
- This unit consists of high-voltage components. Dismantling or remodeling the unit may cause fire or electric shock.
■ Request the authorized dealer to inspect the interior part of the unit once a year
• Using this unit with dust accumulated inside may result in fire.
- It is particularly effective to perform servicing before the humid rainy season.
■ Do not connect any video cameras that are not made by JVC to the USB terminal
- Doing so may result in malfunction.
Hard Disk Drive (HDD)
Hard disk drive (HDD)
The HDD rotates at a high speed whenever the power is turned "On".
Pay particular attention to the following precautions when using this unit.
Warning
- Do not subject it to vibration or strong impact
Subjecting this unit to excessive impact may result in loss of recorded data and even damage of the HDD. - Do not remove the power plug when this unit is running Shutting down the power when the HDD is running may result in data loss and even damage of the HDD. Make sure that the power plug is removed only after turning off the power.
(Wait for the "GOODBYE" message on the display window to disappear first)
SD Cards
Precautions for handling SD and SDHC cards
Note:
- The disc operation display icon appears blinking and "READING" is displayed on the display window when the SD card is being accessed (such as during dubbing, playback, or formatting). When access to the SD card is in progress, do not remove the card or the power plug. Doing so may cause the SD card to become unusable.
If the SD card is not usable, reformat the card. If the problem persists even after reformatting, use a new SD card. - Do not use or store the card at a place that is subject to static or electrical noise.
- Inserting the SD card incorrectly may cause this unit or the card to malfunction.
- Our company will not be liable for any damage or loss of the stored data due to accidents. (Be sure to back up the data.)
- Use the card according to the prescribed conditions. Do not use it at the following locations.
- Places that are exposed to direct sunlight
- Places near heat-generating equipment
- Inside a car that is under the sun with the windows tightly shut
- Places that are subject to high humidity and corrosion
- Do not bend or drop the card, or subject it to strong impact or vibration.
- Do not expose the card to water.
- Do not place near devices that emit strong magnetic or radio waves.
- Do not touch the metal part of the card.
Memo:
To dispose a card after erasing all data inside, it is recommended that this be done using a commercially available data deletion software, or by destroying the card physically, such as with a hammer. Formatting or deletion of data using this unit only changes the file administration information, and does not erase the data completely.
BD video data
You can erase BD Video data from the SD card as follows.
1 Insert the SD card which has BD video data stored on it, into the [SD SLOT].
Memo:
- The BD video data cannot be erased if the SD card is write-protected. In this case, turn off the write-protect lock before inserting the SD card.
2Press the [MEDIA MANAGE] button on the remote control unit
3Select "BD-VIDEO DATA ERASE" from "SD CARD"
- The confirmation screen for erasing the BD video data is displayed.
4Select "ERASE", and press the [OK] button
- The BD video data will be erased.
Discs
BD recording formats
■ BDAV mode
- Videos can be edited (chapter edit etc) and new videos can be added to the disk. This format is suitable for recording videos.
- MPEG2 with HD quality will be recorded as it is onto the disc. This format has low playback compatibility, but performs well when used for backups.
■ BDMV mode
- Compatible and playable on other BD players. Menu functions similar to those of DVD video mode are also included.
This format performs well for distribution purposes.
DVD recording formats
■ VR MODE
- Format the disc using "VR MODE" if you want to add new videos to the disc.
- Deleting currently saved videos increases the remaining space on the disc. (except for the case of DVD-R discs.)
■ VIDEO MODE
- Format the disc in this mode if you want to play the disc on a different DVD player.
Formatting of discs
Formatting is required for some disc types. Perform formatting if this is necessary.
■ When using BD-RE or BD-R discs
Formatting is required. Format the disc using this unit.
■ When using DVD-R discs
Formatting is required depending on the disc mode to be used.
- Formatting is required when the disc is used in "VR MODE". Format the disc using this unit.
- Formatting is not required when using the disc in "VIDEO MODE".
Note:
- BD-R and DVD-R discs cannot be reformatted. Check the disc mode before formatting the disc.
■ When using DVD-RW discs
Formatting is required. Format the disc using this unit.
- Format using "VR MODE" or "VIDEO MODE".
Discs\_(Continued)
Discs that enable both dubbing and playback
| Disc Type Recording Format Format Finalize Repeated Use | (Reformat) | |||
| BD-RE BDAV mode ○- ○ | ||||
| BDMV mode ○- ○ | ||||
| BD-R BDAV mode ○○- | ||||
| BDMV mode ○- - | ||||
| DVD-RW Video mode ○○○ | ||||
| VR mode ○○○ | ||||
| DVD-R Video mode - ○- | ||||
| VR mode ○○- | ||||
Discs that enable playback only
| Disc Type Description | |
| DVD-RAM (4.7 GB) | Supports specific forms of playback, but no recording can be done. |
| BD-ROM | Commercially available Blu-ray discs (movies, music, etc.)The region code that can be played back on this unit is "A". |
| DVD video | Commercially available DVD-Video discs (movies, music, etc.)The region code that can be played back on this unit is "1". The video format used is NTSC. |
| Music CD | CD-DADTS music CDs are also playable. |
Memo:
- If 8 cm discs are used, only playback can be performed. The disc cannot be used for recording or editing.
- 8 cm discs can be used without adapters.
- DVD-RAM cartridges and BD-RE are not supported. Take the DVD-RAM out of the cartridge before using it.
Discs that are not supported
• DVD-RAM (2.6 GB/5.2 GB)
• DVD-R (for authoring)
• CD-ROM/R/RW (PhotoCD, CD-G, VCD etc.)
• DDCD (1.3 GB, Double Density CD)
• HDCD (High Density CD)
Memo:
- To playback a BD or DVD that was created using this unit on another player, finalize the disc.
- There is no need for finalizing if the BD-RE disc is recorded using BDAV mode.
- If a DVD that was recorded using VR mode has been finalized, the disc can only be played back on VR mode compatible devices.
- To perform high-speed dubbing, make use of a disc that supports high-speed recording.
- This unit can play back and record only NTSC signals.
Note:
- Do not use disc if the sticker or label is peeled off from the disc surface, if the disc is not round in shape, or if it is significantly warped or cracked.
Precautions on the Use of Discs
Maintenance of discs
- Dirt attached to the disc, such as fingerprints and dust, may cause distortion in the video image or sound.
Keep the disc clean at all times such as by using a soft cloth. - Wipe the disc lightly from the center outward using the cloth.
- If dirt is stubborn, wipe it off using a slightly wet cloth, followed by a dry cloth.
- Do not use thinner, benzine, alcohol, conventional record cleaners, or antistatic sprays.
Doing so may damage the disc surface.
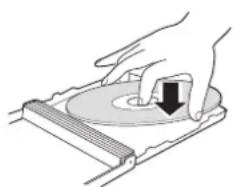
Handling discs
■ Removing a disc
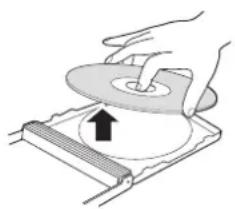
natural_image
Illustration of a hand using a tool to press a circular component on a base, with an arrow indicating upward motion (no text or symbols present)- Keeping a disc
natural_image
Illustration of a hand pressing down on a circular object with a downward arrow (no text or symbols)■ Correct way to hold a disc
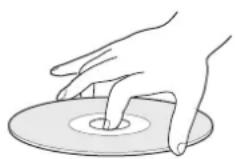
- Make sure that your hands do not touch the recording/ playback side of the disc.
Disc storage
- Avoid storing the disc at the following locations.
- Places that are subject to high humidity, dust, or mold growth
- Places that are exposed to direct sunlight or near a heater
• Inside a car during summer - Do not drop the disc or subject it to strong impact.
- Place the disc in a case and store it vertically.
- Stacking the discs without using a case, placing the discs against one another or dropping them may result in deformation or cracking.
When the recording/playback lens is dirty
Dust or dirt may be attached to the recording/playback lens after using this unit for a prolonged period of time, and recording or playback may not be properly performed as a result.
Although the performance of this unit varies according to the frequency of use and installation environment, it is recommended that cleaning of the lens be performed once every half a year using commercially available DVD lens cleaners.
For cleaning procedures, refer to the instruction manual of the lens cleaner.
Precautions when playing a dual disc
The side of the dual disc that is not used for DVD recording does not comply with the standard specifications of music CDs.
It is recommended that playback on this unit be limited to the DVD recording side of the dual disc.
Use genuine JVC discs
The best performance may not be obtained for some discs. It is recommended that genuine JVC discs be used to ensure the best results.
Power Cable
Do not unplug the cable during recording or playback. Doing so may cause the disc to become unusable. If the disc becomes unusable, refer to the following.
BD-R or : Use a new disc.
DVD-R
BD-RE or : Reformat the disc after erasing the data. If the DVD-RW disc is still not usable, use a new disc.
Do not turn off the [☐/I] button or unplug the power cable immediately after closing the disc tray.
On-screen Displays
Status display
Displays the current settings and operating status (such as playback, pause) of this unit.
Pressing the [ON SCREEN] button on the remote control displays the status. To cancel the display, press the [ON SCREEN] button again.
You can select whether to display the statuses by changing the settings in the settings menu.
For more details, refer to "Display" (page 79).
Memo:
- To display the statuses, set the ON SCREEN GUIDE item on the DISPLAY menu screen to "AUTO".
- Setting the DISPLAY item to "OFF" hides display of all status information.
Event display
An on-screen event display appears on the display window as well as the monitor when there is a misoperation.
- The event display appears for an interval of about three seconds.
Memo:
- The same event display may appear several times.
Alarm display
When an operation is not accepted by this unit, an on-screen alarm display appears on the display of the main unit as well as the monitor.
Name and Function of Parts
Front panel
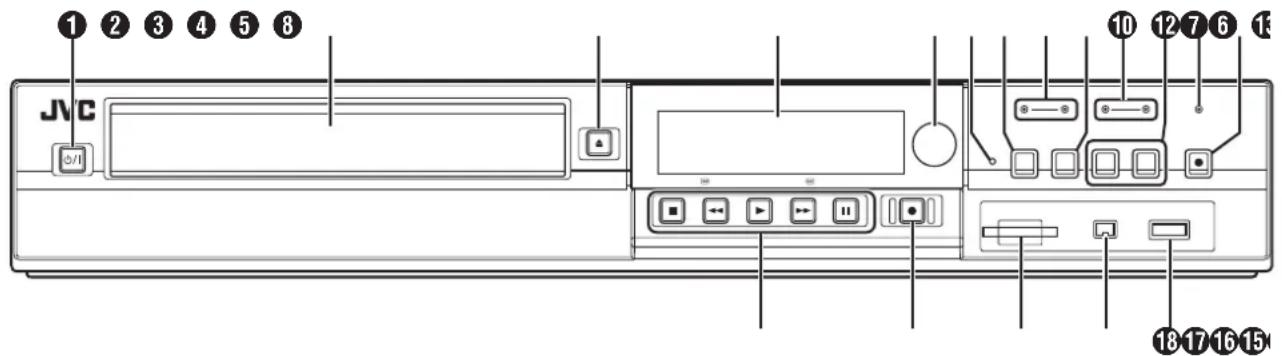
① [ ⏻/l ] button
Turn On/Off the power.
② Disc tray
③ [ △ ] button
Opens/closes the disc tray.
4 Display window
⑤ Remote control sensor
⑥ [RESET] switch
Reset the unit.
⑦ [REC MODE] button
Switches the recording mode.
⑧ [HDD] lamp
Lights up when in HDD mode.
The [REC] lamp lights up while recording/importing.
⑨ [INPUT SELECT] button
Switches the external input signals (HDV/DV, L1).
10 [BD] lamp
Lights up when in BD/DVD mode.
The [REC] lamp lights up while recording/dubbing.
⑪ [MEDIA SELECT] button
Switches between HDD and BD/SD.
⑫ [SD] lamp
Lights up when in SD mode.
⑬ [ONE TOUCH DUBBING] button
Starts dubbing at a single touch.
14 Playback control buttons
• [▶] button
Plays back the data.
- [■] button
Stops playback/recording.
• [◀◀] button
Fast reverses playback.
• [▶▶] button
Fast forwards playback.
• [ ] button
Pauses playback.
15 [ ● ] button
Starts recording of a title.
16 [SD SLOT]
Used for inserting SD cards.
⑰ [i.LINK(HDV/DV IN)] terminal
Connect a video camera using i.LINK (HDV/DV. IN).
⑱ [USB] terminal
Connect a video camera using USB.
Name and Function of Parts \_ (Continued)
Display window
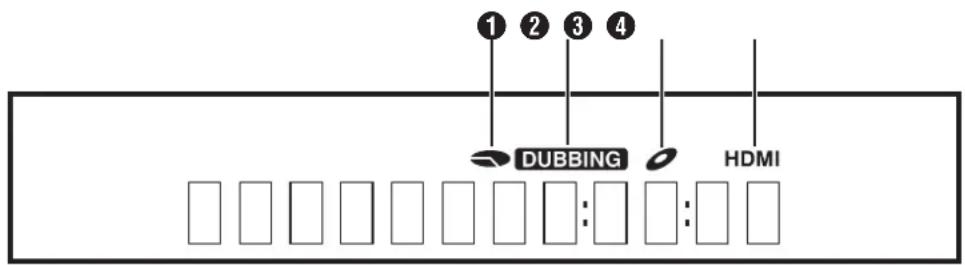
① HDD/DISC remaining level display
② Dubbing display
3 Disc status display
4 HDMI output display
Memo:
- The brightness of the display window can be adjusted. For more details, refer to "PANEL DISPLAY BRIGHTNESS" ( page 75 ).
English messages appear for a number of operations. (Examples)
HELLO : When the power plug is inserted
READING : When reading the disc
ONSCREEN : Upon moving to the playback navigation screen
Rear panel
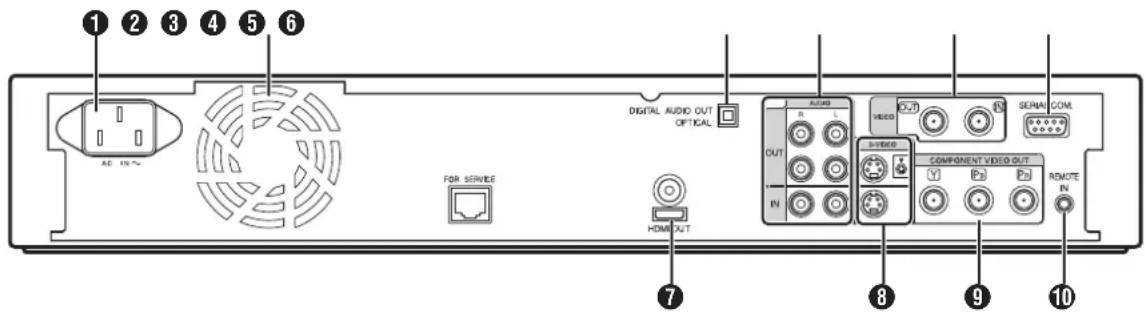
① AC inlet
For connecting the power supply.
② Cooling fan
③ [DIGITAL AUDIO OUT (OPTICAL)] terminal
For connecting to the amplifier using an optical audio cable.
④ [AUDIO OUT/IN] terminals
For connecting using an audio cable.
⑤ [VIDEO OUT/IN] terminals
For connecting using a video cable.
6 [SERIAL COM.(RS-232C)] terminal (only for SR-HD1500)
For connecting to a computer using a serial cable.
⑦ [HDMI] terminal
For connecting using an HDMI cable.
⑧ [S-VIDEO OUT/IN] terminals
For connecting using an S-video cable.
⑨ [COMPONENT VIDEO OUT] terminals
For connecting using a component video cable.
⑩ [REMOTE IN] terminal
For connecting a wired remote control.
Remote control
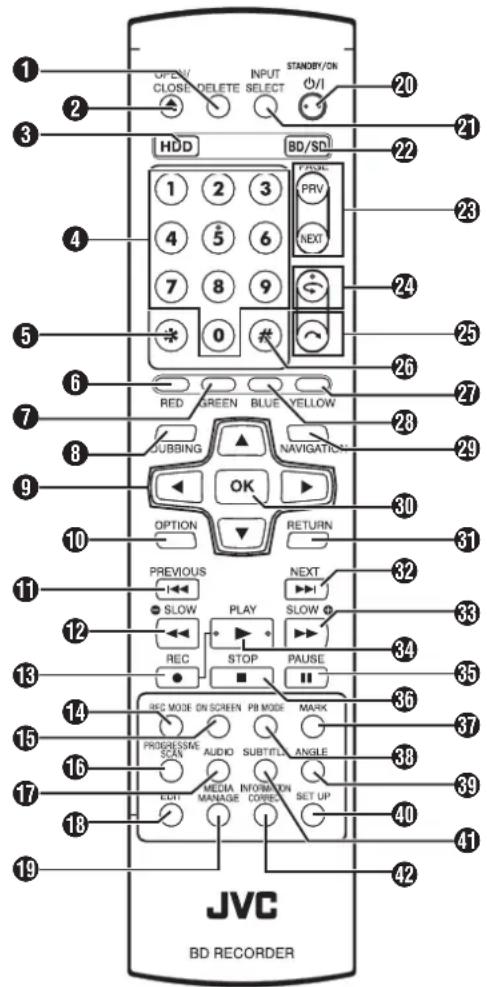
① [DELETE]
Deletes a title or characters.
② [△]
Opens/closes the disc tray.
③ [HDD]
For operating the HDD.
④ [1]-[9]
For entering characters.
5[*]
For entering characters.
6 [RED]
Enabled when the color button (red) is displayed.
⑦ [GREEN]
Enabled when the color button (green) is displayed.
⑧ [DUBBING]
Displays the dubbing menu screen.
⑨ [ ▲ / ▼ / ◀ / ▶ ]
The cursor can be moved to select an item.
⑩ [OPTION]
Displays the option screen.
11 [ ◀◀◀ ]
Move to the chapter just before the current chapter.
12 [ ◀◀ ]
Fast reverses the video and starts slow playback.
13 [ ● ]
Press the [●] and [▶] buttons together to start recording.
⑭ [REC MODE]
For checking the recording mode settings and amount of time remaining.
⑮ [ON SCREEN]
Displays information on the screen.
16 [PROGRESSIVE SCAN]
Switches the resolution of the image output.
17 [AUDIO]
Switches the playback audio.
18 [EDIT]
Displays the editing menu screen.
19 [MEDIA MANAGE]
Displays the media management menu screen.
20 [ ⏻/l ]
For turning On/Off the power.
②1 [INPUT SELECT]
Switches the external input signals (HDV/DV, L1).
22 [BD/SD]
For operating BD/DVD or SD.
23 [PAGE PRV][PAGE NEXT]
Returns to the previous page. Or advances to the next page.
24 [ ]
Move the playback position slightly backwards.
25 [ ↘ ]
Advance the playback position slightly.
26 [#]
For entering characters.
27 [YELLOW]
Enabled when the color button (yellow) is displayed.
28 [BLUE]
Enabled when the color button (blue) is displayed.
29 [NAVIGATION]
Displays the playback navigation screen.
30 [OK]
Confirms a selection or entry.
31 [RETURN]
Returns to the previous screen without applying the selection or entry.
32 [▶▶]
Move to the next chapter.
Name and Function of Parts \_ (Continued)
33 [▶▶]
Fast forwards the video and starts slow playback.
34 [▶]
Plays the video.
35 [ II ]
Pauses the video that is currently playing.
36 [ ■ ]
Stops playback/recording.
37 [MARK]
Adds a chapter mark during playback or recording. Select multiple titles from the playback navigation screen or other screens.
38 [PB MODE]
Display the playback settings screen.
39 [ANGLE]
Switches the camera angle for playback.
40 [SET UP]
Displays the settings menu screen.
41 [SUB TITLE]
Switches the playback subtitle.
42 [INFORMATION CORRECT]
Displays the information editing screen.
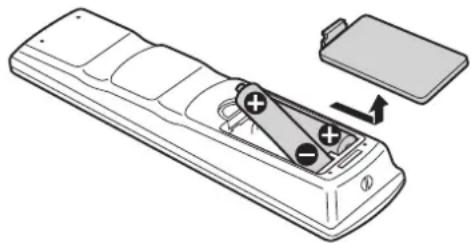
Change batteries for the remote control
- If the operable distance of the remote control unit becomes shorter, this means that the batteries are running out. When this occurs, replace the batteries with new ones.
natural_image
Diagram of a remote control device with labeled buttons and an arrow indicating rotation (no text or symbols present)Batteries
- Insert the batteries correctly according to the + and - signs. Insert the - side of the battery first.
- If an error occurs while using the remote control unit, remove the batteries, wait for about five minutes, and operate the remote control unit again after re-inserting the batteries.
Battery life : Approximately 6 months (depending on the frequency of use)
Remote control codes
By setting a remote control code for the unit and remote control, you can prevent two recorders from operating simultaneously using the remote control for this unit. (the setting for the unit and remote control at time of purchase is "REMOTE CONTROL 3".)
Memo:
- Changing the remote control code for the remote control before the unit's remote control code is changed will cause the unit to be inoperable.
Change the unit's remote control code first when changing remote control codes.
■ Changing the remote control code for the unit
1Press the [SET UP] button on the remote control to display the "SETUP" menu.
2Change the "REMOTE CONTROL CODE" option in the "SETUP" menu.
Memo:
For more details, refer to "REMOTE CONTROL CODE" (v3 page 75).
■ Changing the remote control code for the remote control
1Press the [OPTION] button on the remote control and either of the [1], [2], [3] or [4] buttons at the same time
- Press the number button that is equivalent to the remote control code you desire.
2Press the [OK] button
- Press the [OK] button to change the remote control code.
Memo:
If the remote control code is different from the unit, the remote control code for the unit will be displayed on the display window.
Examples: REMOTE CONTROL 3
Connecting a Monitor
To display video images from this unit, connect it to a monitor.
- This unit supports connections using "HDMI cable", "component video cable", "S-video cable", or "video cable".
Memo:
- Switch to the appropriate monitor input according to the type of connection cable used. For details, refer to the instruction manual of the monitor.
Connecting using a HDMI cable
Connecting using a HDMI cable (sold separately) enables signals to be maintained in the digital format, and thus playback of clear video images.
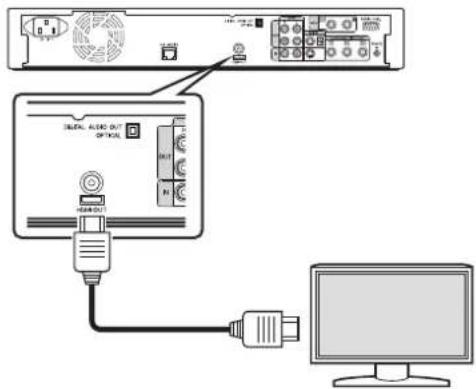
Memo:
- Videos cannot be displayed on a monitor that does not support the copyright protection system (HDCP).
• Use a High Speed HDMI Cable. - After connecting using a HDMI cable, change the unit setting to "HDMI CONNECTION".
For more details, refer to "HDMI VIDEO MODE" (page 80).
Connecting using a component video cable
Connecting using a component video cable (sold separately) delivers playback images that are clearer than those by an S-video cable.
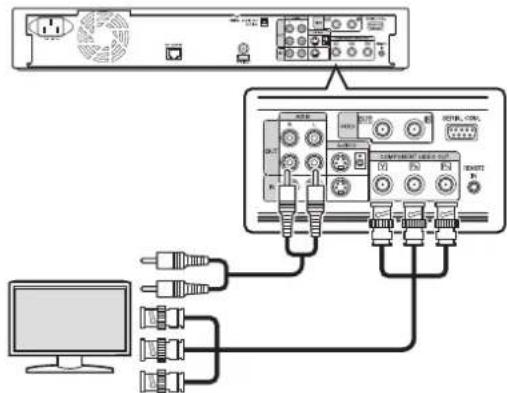
Memo:
- After connecting a component video cable, change the unit setting to "COMPONENT OUTPUT".
For more details, refer to "COMPONENT OUTPUT" (page 81).
Connecting using an S-video cable
Connecting using an S-video cable (sold separately) delivers video images that are clearer than those by a video cable.
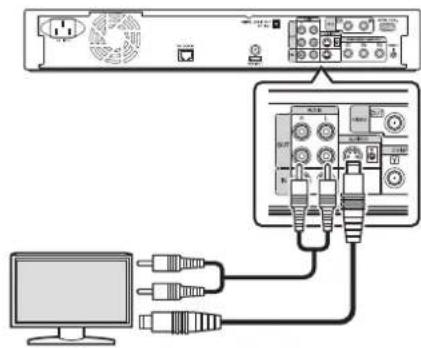
Connecting using a video cable
Connect the output terminal of this unit to the input terminal of a TV using the supplied video/audio cable. (Use the supplied BNC adapter)
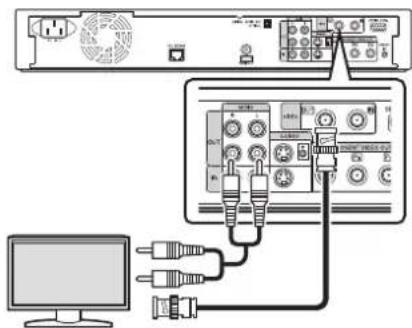
Note:
- Connect the S-video/video output of this unit directly to the TV (or monitor). Connecting this unit to the TV or monitor via a video deck triggers the copy protection function, and may cause distortion in the video images during playback.
Connecting a Video Deck or Other Equipment
Connecting a video camera
■ Connecting via the i.LINK terminal
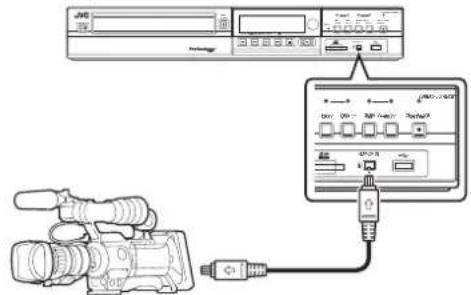
■ Connecting via the USB terminal
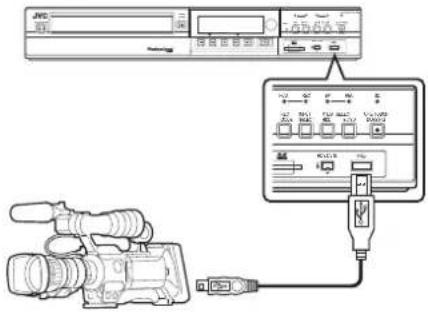
Memo:
- Some video camera models may require an AC adapter instead of batteries to run. For details, refer to the video camera's instruction manual.
Connecting a video deck or other equipment (recording using this unit)
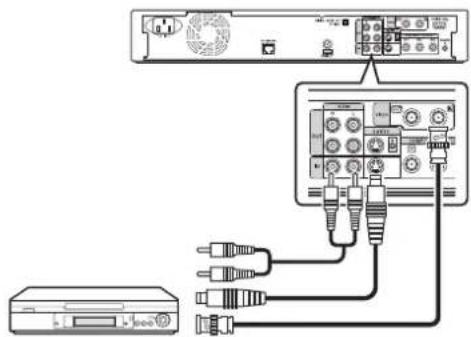
Memo:
- When connecting using an S-video cable, change the setting of "VIDEO INPUT SETTING" to "S-VIDEO".
For more details, refer to
"VIDEO INPUT SETTING" ( page 81 ).
- To record video images played back on this unit to an external device (video deck, etc.), connect the output terminal of this unit to the input terminal of the external device.
Connecting an Amplifier
Connecting an audio amplifier
■ Connecting using an optical digital cable
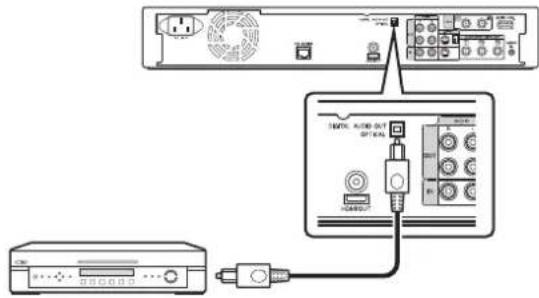
Memo:
- Remove the protection cap of the cable before connecting. Store the protection cap properly to prevent it from being misplaced.
■ Connecting using an audio cable
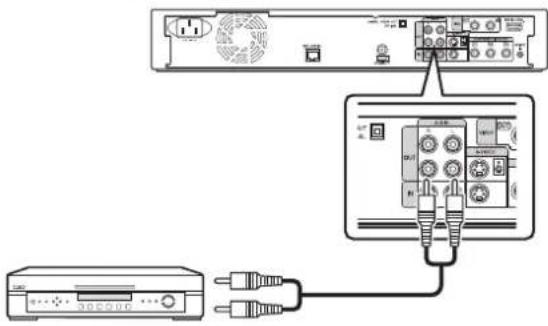
Connecting External Devices
Connecting a wired remote control
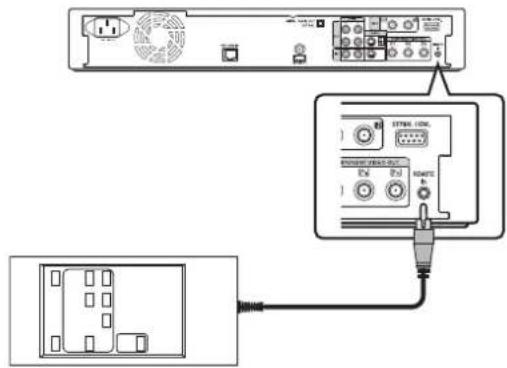
Using a wired connection enables stable control of this unit from an external device.
Operation is possible using any code (1 to 4) regardless of the remote control code settings of this unit.
Memo:
- There is currently no compatible remote control unit available.
To create a wired remote controller, refer to "RS-232C Interface" (page 83).
Connecting using a RS-232C cable (only for SR-HD1500)
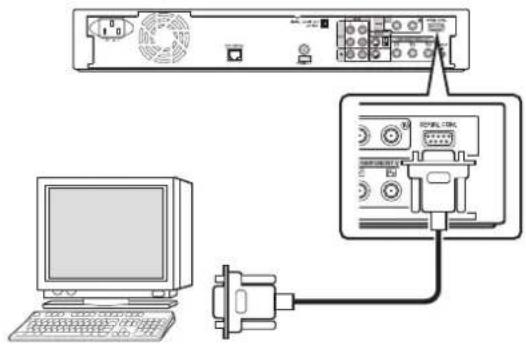
External operation is enabled by connecting a RS-232C cable to a PC or similar device.
For details on external operation, refer to "RS-232C Interface" (page 83).
Connecting the Power Supply
Connect the supplied power cable to this unit as follows.
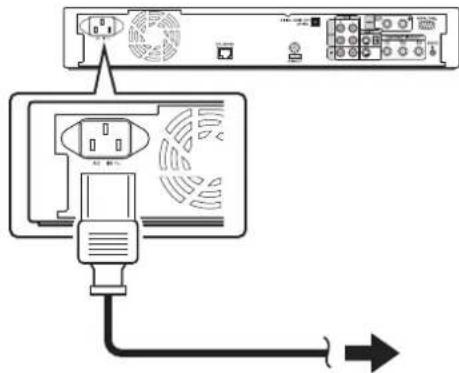
1Connect the supplied power cable to the AC IN terminal of this unit
2Connect the other end of the power cable to a power point
3Press the [∅/l] button on the remote control or this unit to switch on the unit.
- The power of this unit turns on, and a "HELLO" message appears on the display window.
Note:
- Do not use power cables other than that supplied with this unit. Doing so may cause this unit to malfunction.
Setting and Displaying Date/Time
Set the date/time of the built-in clock as follows. The recording date/time is stored on the disc.
Setting the date/time
Set the date/time of the built-in clock as follows.
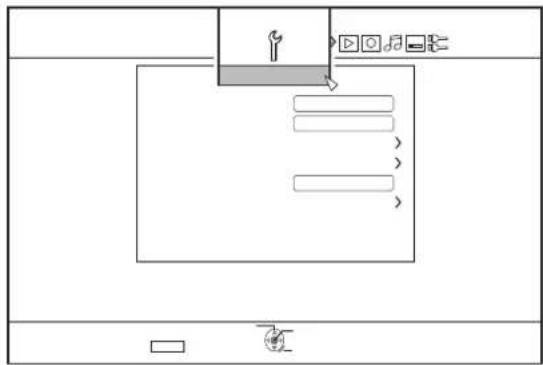
1 Press the [SET UP] button on the remote control unit
• The Settings menu screen appears.
flowchart
graph TD
    A["Input"] --> B["Process Step"]
    B --> C["Output"]
    style A fill:#f9f,stroke:#333
    style B fill:#ccf,stroke:#333
    style C fill:#cfc,stroke:#333
2Select "SETUP", and press the [OK] button
3Select "CLOCK SET/DISPLAY", and press the [OK] button
- "CLOCK SET/DISPLAY" menu screen appears.
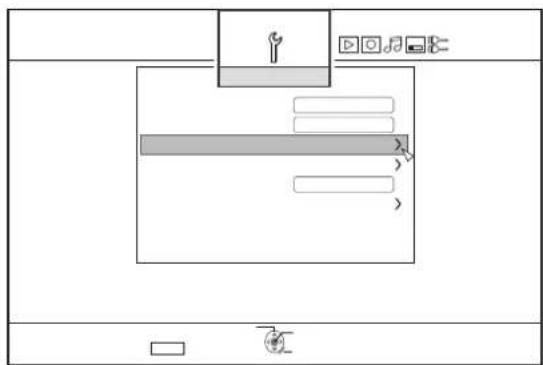
4Select "CLOCK SET", and press the [OK] button
• The Clock Set menu screen appears.
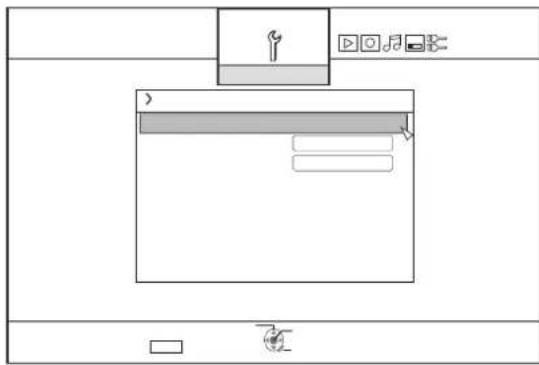
5Set the time and date
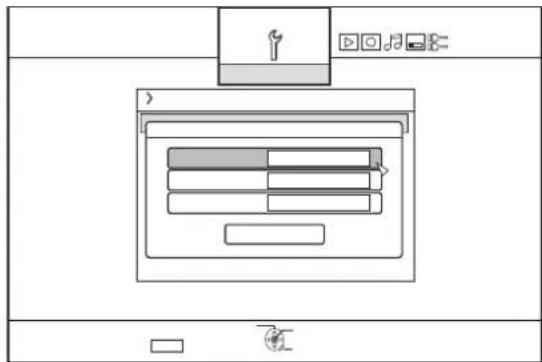
- Repeat the steps below to specify the time and date.
① Press the [▲] or [▼] button, select the Clock Set item, and press the [OK] button.
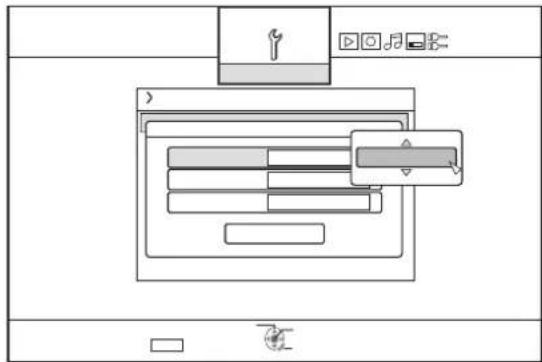
② Press the [▲] or [▼] button, change the setting value, and press the [OK] button.
flowchart
graph TD
    A["Input"] --> B["Process Step"]
    B --> C{Feedback Loop}
    C -->|Yes| D["Action按钮"]
    C -->|No| E["End"]
6After setting is complete, select "ENTER", and press the [OK] button
- Doing so exits date/time setting, and returns to the initial screen.
Memo:
- The value for seconds cannot be set. After setting the minute, press the [SET UP] button according to the time signal.
- To cancel date/time setting, press the [RETURN] button. Doing so cancels date/time setting and returns to the initial screen.
- The year can be set from 2009 to 2037. If "2037.12.31 PM11:59" is set, the time will change to "2009.1.1 AM00:00" after one minute.
Changing the date display style
You can specify the display style of the date as follows.
1Press the [SET UP] button on the remote control unit
2Select "SETUP", and press the [OK] button
• The Settings menu screen appears.
![JVC SR-HD1500US - 2Select "SETUP", and press the [OK] button - 1](/content/2026/05/1066765/images/dd2949d91dfc227bcd04c90a8e0e1056b284797b21a68dbb2752c8c3fe779293.jpg)
flowchart
graph TD
    A["User"] --> B{Next Step}
    B --> C["Process Step"]
    C --> D["Output Step"]
3 Select "CLOCK SET/DISPLAY", and press the [OK] button
• The Clock Set/Display menu screen appears.
![JVC SR-HD1500US - Select "CLOCK SET/DISPLAY", and press the [OK] button - 1](/content/2026/05/1066765/images/b4fefa42c71f492d00708b99867c321aa72a5ca2a46d5eef8f10085e218a3771.jpg)
flowchart
graph TD
    A["Input"] --> B["Process Step"]
    B --> C{Output}
    C -->|Yes| D["Action/Action按钮"]
    C -->|No| E["Feedback/Feedback按钮"]
    D --> F["End"]
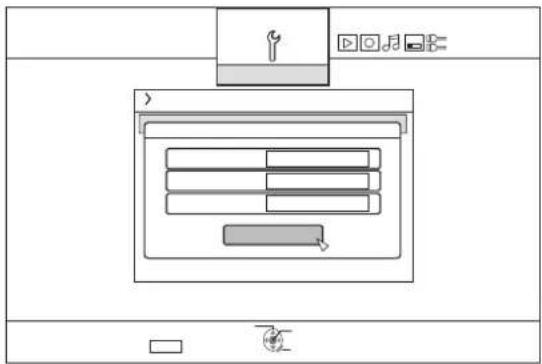
4Select "DATE DISPLAY", and press the [OK] button
• The Date Display menu screen appears.
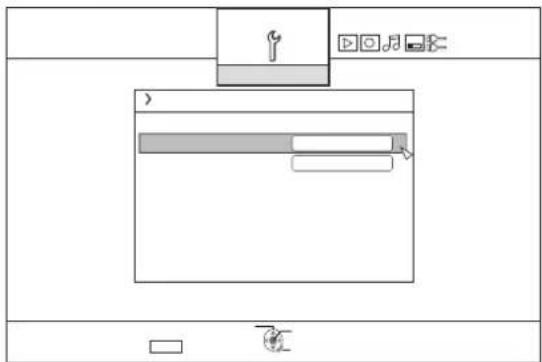
5Select the date display style.
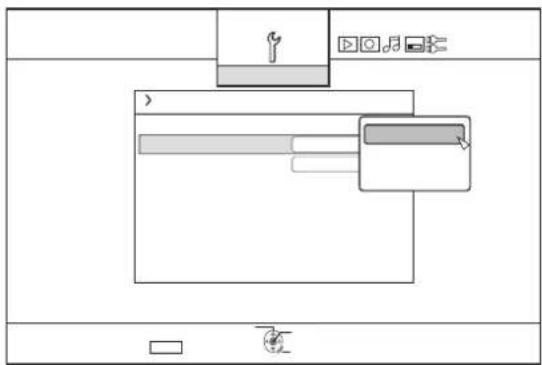
flowchart
graph TD
    A["Input"] --> B["Process Step"]
    B --> C{Feedback Loop}
    C -->|Yes| D["Action按钮"]
    C -->|No| E["End"]
- Select a date display style from the following items.
YEAR.MONTH.DAY : Displays the date in the year/month/day order.
MONTH.DAY.YEAR : Displays the date in the month/day/year order.
DAY.MONTH.YEAR : Displays the date in the day/month/year order.
6After selecting, press the [OK] button
- The date display style will be saved.
Setting and Displaying Date/Time\_(Continued)
Memo:
The date display style will be applied in the following information displays.
- Recording date of the title that is shown in the playback navigation screen (The recording date will be shown in place of the title if the title has not been input).
- Shooting date and time that is shown when AVCHD is played back
- Date that is displayed in the title information display screen
Changing the time display style
You can specify the display style of the time as follows.
1Press the [SET UP] button on the remote control unit
2Select "SETUP", and press the [OK] button
- The Settings menu screen appears.
![JVC SR-HD1500US - 2Select "SETUP", and press the [OK] button - 1](/content/2026/05/1066765/images/141fa6336083f214e68bf2a93d382621a0f7e064e8cb765696e3faf8f683644b.jpg)
flowchart
graph TD
    A["User Icon"] --> B["Process Box"]
    B --> C["Output 1"]
    B --> D["Output 2"]
    B --> E["Output 3"]
3Select "CLOCK SET/DISPLAY", and press the [OK] button
- The Clock Set/Display menu screen appears.
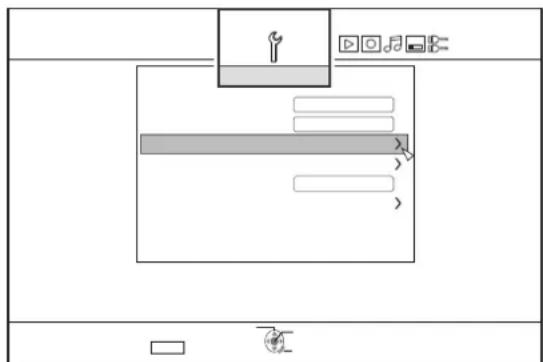
4 Select "TIME DISPLAY CHOICE", and press the [OK] button
5The Time Display menu screen appears
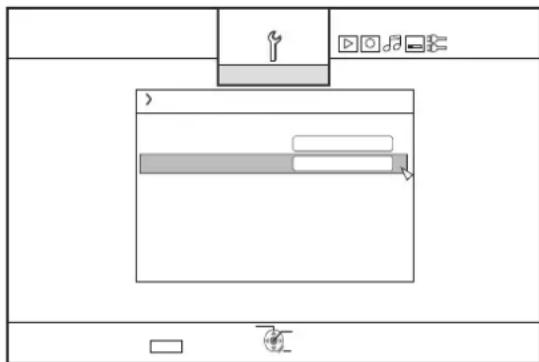
6Select the time display style
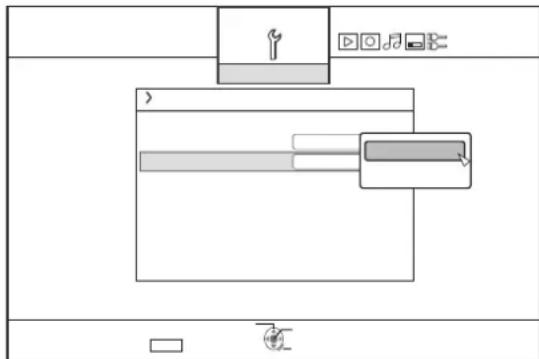
flowchart
graph TD
    A["Input"] --> B["Process Step"]
    B --> C{Feedback Loop}
    C -->|Yes| D["Output"]
    C -->|No| E["Feedback Signals"]
Select from "12H" or "24H".
12H : Displays the time in AM/PM format.
24H : Displays the time in 24-hour format.
7After selecting, press the [OK] button
- The time display style will be saved.
Memo:
The time display style applies to the following.
- Current time
• Date/time registered on the disc - Recording time of the title that is shown in the playback navigation screen (The recording time will be shown in place of the title if the title has not been input.)
- Shooting date and time that is displayed when AVCHD is played back
- Time of recording that is displayed in the title information display screen
Dubbing/Importing
Bi-directional dubbing between the HDD and a BD/DVD is possible using this unit alone. Also, data can be imported to the HDD from a video camera by connecting it via i.LINK or USB.
Dubbing from the HDD to a BD/DVD
■ High-speed dubbing
Select this option if you want to significantly shorten the time required for dubbing. Make use of a BD/DVD disc that supports high-speed recording.
■ Dubbing in a specific recording mode
Select this option when you want to specify the recording mode for dubbing. Dubbing can be performed in the recording mode of your preference, such as whether to "maintain a high picture quality" or "save as many titles as possible".
For more details, refer to "Recording Modes" ( page 28).
Memo:
- The image quality will not improve even when a recording mode with image quality higher than that of the original recording mode is chosen.
- Dubbing using a specific recording mode will cause the disc to be re-encoded.
Other options for importing data into the HDD
■ Importing data from a BD/DVD to the HDD
You can import titles from a BD/DVD.
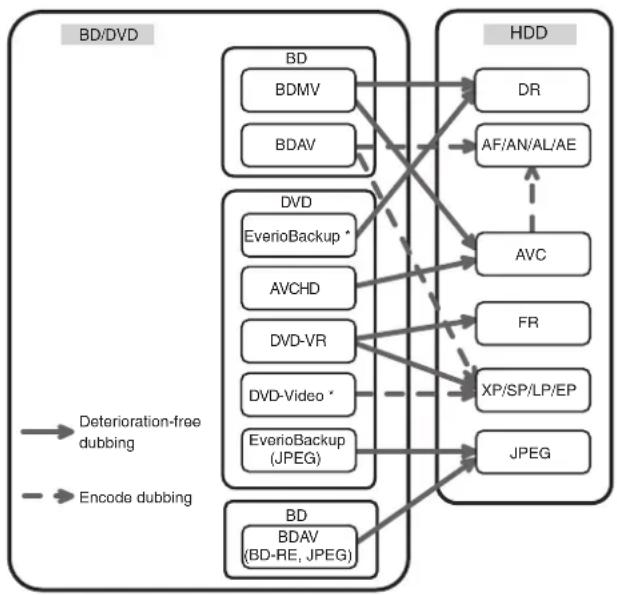
flowchart
graph TD
    subgraph BD/DVD
        A["BD"] --> B["BDMV"]
        A --> C["BDAV"]
        D["DVD"] --> E["EverioBackup *"]
        D --> F["AVCHD"]
        D --> G["DVD-VR"]
        D --> H["DVD-Video *"]
        D --> I["EverioBackup (JPEG)"]
        J["BD"] --> K["BDAV (BD-RE, JPEG)"]
    end

    subgraph HDD
        L["DR"] --> M["AF/AN/AL/AE"]
        M --> N["AVC"]
        O["FR"] --> P["XP/SP/LP/EP"]
        P --> Q["JPEG"]
    end

    A -.-> R["Deterioration-free dubbing"]
    J -.-> S["Encode dubbing"]
    L -.-> T["DVD"]
    M -.-> U["AVC"]
    N -.-> V["FR"]
    P -.-> W["XP/SP/LP/EP"]
DVD-video*: Discs that are not finalized cannot be imported.
EverioBackup*: Data disc containing high-definition videos that are recorded in the MPEG2 format using a DVD writer for Everio.
■ Importing data from a SDHC/SD to the HDD
Videos captured using a video camera can be imported to the HDD by inserting the SDHC/SD card that the videos are saved on.
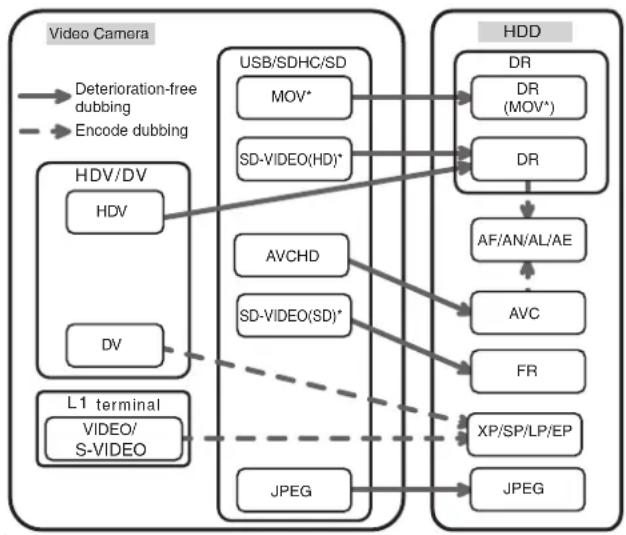
■ Importing data from a video camera to the HDD
Videos captured using a video camera can be imported to the HDD.
This unit supports video camera connections via i.LINK and USB.
Memo:
- For MOV* format videos, only videos in MOV format (SP mode) taken using JVC ProHD camcorder GY-HM700/100 are compatible. There is no guarantee for importing videos taken on devices by other company. In addition, MOV* videos cannot be imported using the SR-HD1250.
flowchart
graph TD
    A["Video Camera"] -->|Deterioration-free dubbing| B["HDV/DV"]
    A -->|Encode dubbing| C["L1 terminal"]
    B --> D["HDV"]
    B --> E["DV"]
    C --> F["VIDEO/S-VIDEO"]
    G["USB/SDHC/SD"] --> H["MOV*"]
    G --> I["SD-VIDEO(HD)*"]
    J["AVCHD"] --> K["SD-VIDEO(SD)*"]
    L["JPEG"] --> M["AP/AN/AL/AE"]
    N["HDD"] --> O["DR (MOV*)"]
    N --> P["DR"]
    O --> Q["AF/AN/AL/AE"]
    P --> Q
    Q --> R["AVC"]
    Q --> S["FR"]
    R --> T["XP/SP/LP/EP"]
    S --> T
    T --> U["JPEG"]
MOV*: MOV files that are taken in SP mode using the JVC ProHD Camcorder GY-HM700/100
SD-VIDEO(HD)* : SD-VIDEO(JVC Everio MPEG2 TS)
■ Importing data from a video deck
You can import data to the HDD from an external video deck by connecting it to a composite video or S input terminal. For more details, refer to "Recording Using ExternalInputs" ( page 47 ).
Memo:
- Videos that are copy-controlled cannot be imported.
- Motion JPEG is not supported
Dubbing chart
■ Dubbing the video data from the HDD
| Content Quality\Dubbing Quality | Format (BD) Format (DVD) | ||||
| BDMV(HD Quality) | BDAV(HD Quality) | DAV(SD Quality) DVD-VR | VR | DVD-VIDEO | |
| DR (MOV*) | High-speed dubbing | High-speed dubbing / Re-encoding | Re-encoding Re-encoding | Re-encoding | |
| DR (Other) - | High-speed dubbing / Re-encoding | Re-encoding Re-encoding | Re-encoding | ||
| AF/AN/AL/AE | High-speed dubbing | High-speed dubbing / Re-encoding | Re-encoding Re-encoding | Re-encoding | |
| AVC | High-speed dubbing | High-speed dubbing / Re-encoding | Re-encoding Re-encoding | Re-encoding | |
| FR -- Re-encoding | High-speed dubbing / Re-encoding | Re-encoding | |||
| XP/SP/LP/EP -- Re-encoding | High-speed dubbing / Re-encoding | High-speed dubbing / Re-encoding | |||
Memo:
MOV*: MOV files that are taken in SP mode using the JVC ProHD Camcorder GY-HM700/100
■ Dubbing the picture data from the HDD
| Importing file (HDD) | Media | |
| BDAV(BD-RE) | SDHC/SD | |
| JPEG ○○ | ||
Memo:
Video images may be distorted in the following situations during reencoding/dubbing when the monitor (TV) is connected to this unit using a HDMI cable, or when the screen resolution is set to 1080p.
• Proceeding with dubbing from the menu screen
- Returning to the normal screen after dubbing has finished
This is not a malfunction. Change the screen resolution to a setting other than 1080p if you feel that this is annoying.
Formatting
Unused discs or SD cards may require formatting in some cases.
When the need arises, format the disc or SD card accordingly.
Memo:
- Formatting a disc or SD card erases all existing data from the media.
Double-check carefully before formatting so as not to erase important titles. - When using a DVD-R disc in the Video mode, formatting is not required.
Format chart
Refer to the following chart for the disc types and format when formatting a disc.
Note:
- If a disc is formatted using an equipment not manufactured by JVC, the disc may not be read correctly even though it corresponds to the chart below.
In this case, reformat the disc using this unit, or make use of another blank disc.
Memo:
- BD-R and DVD-R discs can only be formatted once.
- When a disc is re-formatted into another format, remove the disc and load it again.
■ DVD format chart
| Format | VR Format | Video Format | |
| DVD-RW Single-sided, single layer (4.7 GB) | ○ | ○ | |
| DVD-R Single-sided, single layer (4.7 GB) | ○○(*) | ||
| Single-sided, dual layer (8.5 GB) | ○○(*) | ||
○: Format supported.
* : Formatting not required.
■ BD format chart
| Format | ||
| BD-RE | Single-sided, single layer (25 GB) ○ | |
| Single-sided, dual layer (50 GB) ○ | ||
| BD-R | Single-sided, single layer (25 GB) ○ | |
| Single-sided, dual layer (50 GB) ○ |
○: Format supported.
Formatting a disc
1Set the DVD or BD to be formatted on the disc tray
2Press the [MEDIA MANAGE] button on the remote control unit
- The Media Management menu screen appears.
3Select "FORMAT" from "BD/DVD"
DVD : A format selection screen appears.
BD : A confirmation screen to execute formatting appears.
4Select a format mode from the format selection screen
natural_image
Simple line drawing of a rectangular interface with two gray buttons and a horizontal bar (no text or symbols)DVD-RW : Select a "Format mode" from "VR MODE" or "VIDEO MODE".
DVD-R : Select "VR MODE".
Memo:
- This screen does not appear when a BD disc is used.
Formatting\_(Continued)
5Select "YES", and press the [OK] button in the format confirmation screen
natural_image
Simple line drawing of a rectangular interface with two buttons and a blank space (no text or symbols)- Formatting starts.
- After formatting is complete, a “THE DISC HAS BEEN FORMATTED” message appears on the monitor, and the normal screen is displayed.
natural_image
Simple diagram with a rectangular box containing an empty rectangle and a gray rectangle inside, no text or symbols present.Memo:
- To return to the initial screen without formatting the disc, select "DO NOT FORMAT" and press the [OK] button. Alternatively, you can press the [RETURN] button to return to the initial screen without formatting.
Note:
- Do not turn off the power or unplug the power cable when the "FORMATTING DISC..." message is displayed.
- Note that formatting a disc with copyright-protected titles erases all the titles from the disc.
■ Cancel formatting
Memo:
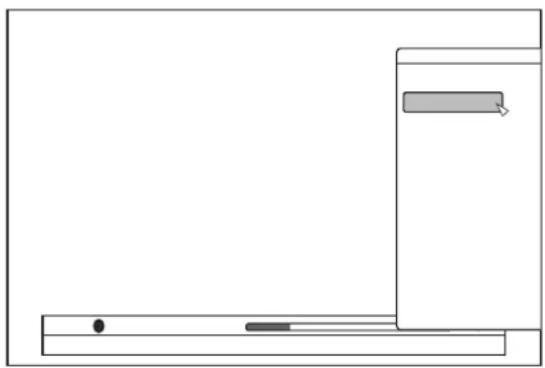
1Press the [OPTION] button while formatting
natural_image
Pure diagram of a mechanical or architectural layout with no text, numbers, or symbols2Select "STOP" and press the [OK] button
- A confirmation screen to stop formatting appears.
3Select "YES" on the confirmation screen and press the [OK] button
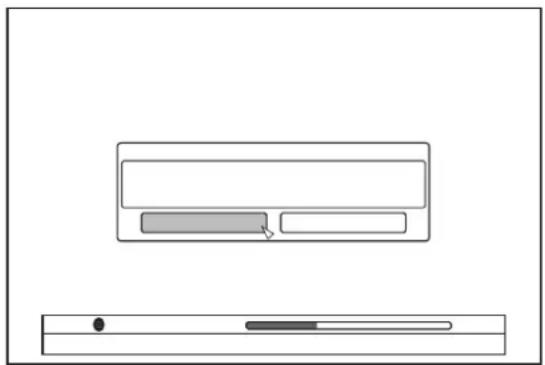
natural_image
Simple line drawing of a device interface with a button and scroll (no text or symbols)- Formatting is stopped.
Note:
- Formatting can be stopped if it seems to take a long time (more than two minutes).
- If for any reason formatting cannot be stopped, the confirmation screen for stopping formatting will not appear even if the [OPTION] button is pressed.
Formatting an SD Card
1 Insert the SD card to be formatted into the [SD SLOT]
- With the terminal side facing down, insert the SD card until a "click" sound is heard.
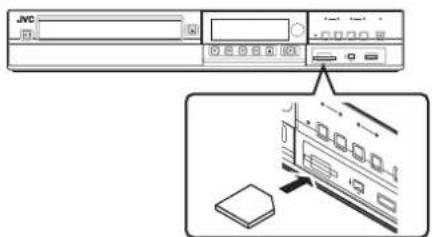
Note:
- Formatting cannot be performed if the SD card is write-protected. In this case, turn off the write-protect lock before inserting the SD card.
2Press the [MEDIA MANAGE] button on the remote control unit
• The Media Management menu screen appears.
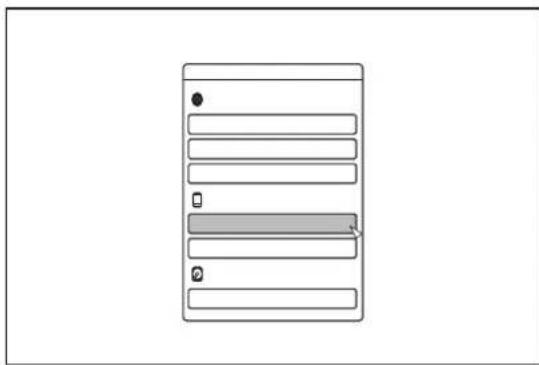
3Select "FORMAT" from "SD CARD"
- A confirmation screen to execute formatting appears.
4Select "YES", and press the [OK] button
natural_image
Simple line drawing of a rectangular interface with two gray buttons and a horizontal bar (no text or symbols)- Formatting starts.
- After formatting is complete, a "THE SD CARD HAS BEEN FORMATTED" message appears on the monitor, and the normal screen is displayed.
Memo:
- To return to the initial screen without formatting the disc, select "NO" and press the [OK] button. Alternatively, you can press the [RETURN] button to return to the initial screen without formatting.
Note:
- Do not turn off the power or unplug the power cable when the "FORMATTING SD CARD..." message is displayed. Do not remove the SD card as well. Doing so may damage the SD card.
- Note that formatting a disc with copyright-protected titles erases all the titles from the disc.
- Once the formatting of the SD card begins, it cannot be stopped.
Recording Modes
Maximum recording time for each recording mode
You can specify a recording mode according to the intended use. Setting the video to a high picture quality shortens the maximum recording time, while setting to a lower picture quality lengthens the recording time.
Refer to the following table for the maximum recording time in the respective modes. All figures shown in the table are approximate values.
| Recording Mode | Quality BD | (Single-sided, Single Layer) | BD (Single-sided, Dual Layer) | DVD (Single-sided, Single Layer) | DVD (Single-sided, Dual Layer) | HDD (500 GB) (*1) |
| DR HD --- | -40 hours (*2) | |||||
| AF 4 hours | 8 hours -- 80 hours | |||||
| AN 6 hours | 12 hours -- 126 hours | |||||
| AL 9 hours | 18 hours -- 189 hours | |||||
| AE 12 hours | 24 hours -- 252 hours | |||||
| XP | SD | 5.25 hours | 10.5 hours | 1 hours | 1.7 hours | 110 hours |
| SP | 10.5 hours | 21 hours | 2 hours | 3.5 hours | 222 hours | |
| LP | 21 hours | 42 hours | 4 hours | 7.1 hours | 442 hours | |
| EP 42 hours | 84 hours 8 hours | 14.3 hours | 887 hours |
*1 : If the HDD capacity is 250 GB (SR-HD1250US model) the time will be approximately half of what is stated here.
*2 : An estimated figure when HDV is imported.
Memo:
- DR mode Abbreviation for Direct Recording. Videos are recorded in the original picture quality.
- AF/AN/XP/SP mode Recommended for recording images with fast motion, such as sports videos.
- The AF/AN mode record images at the high-quality HD level.
- The XP/SP modes record images at the high-quality SD level.
- AL/AE/LP mode Recommended for recording images with slow motion and little contrast, such as dramas.
- AL/AE mode records images at the low-quality HD level.
- LP mode records images at the low-quality SD level.
- EP mode Recommended for recording images with sharp outlines, such as animation videos, and when the recordable time (remaining time) is limited.
HD picture quality
- Using BD enables dubbing to be done with HD picture quality. To dub HD picture quality titles that are imported in the HDD, use BD.
Note:
- Dubbing to a DVD cannot be done in HD picture quality.
DR mode
- HDV, MOV* and SD-VIDEO(JVC Everio MPEG2 TS) titles are imported using DR mode.
MOV* : MOV files that are taken in SP mode using the JVC ProHD Camcorder GY-HM700/100
FR mode
FR mode is displayed as the recording mode in the following cases.
- FR mode during import into HDD During import of SD-VIDEO (JVC Everio MPEG2 PS) titles via high-speed dubbing. During import of data via high-speed dubbing from DVD-VR discs recorded using other units.
- FR mode during dubbing from HDD When selecting the most appropriate mode automatically between XP and EP according to the remaining memory on the disc.
Importing Data to the HDD Using the ONE TOUCH DUBBING Button
Titles can be imported to the HDD from an SD card or device connected to the USB or i.LINK terminal simply by pressing the [ONE TOUCH DUBBING] button.
- File formats that can be imported
① USB connection device, SD card
AVCHD, SD-VIDEO(JVC Everio MPEG2 TS, PS), MOV*, and JPEG
MOV*: MOV files that are taken in SP mode using the JVC ProHD Camcorder GY-HM700/100
② i.LINK-connected device
DV and HDV content
Memo:
- Data is searched according to the order of priority listed below when multiple devices are connected to this unit. USB SD card i.LINK
Data is retrieved only from the first device and imported to the HDD. Connect only the device that contains data you want to import to the HDD.
The i.LINK connected device can only be used to import from tape media. - All video files (scenes) imported using "ONE TOUCH DUBBING" are combined into one title.
This unit does not support combining of titles during the editing operation after import is complete. To combine and import data, select "ONE TOUCH DUBBING". - Titles of two or more scenes cannot be combined if the recording criteria, such as video size, are different.
- Import of MOV* files recorded using JVC GY-HM700/100 SP mode 1080i (25 Mbps) requires a duration that is about 1.3 times longer than the usual time.
Note:
- Do not unplug the cable while importing to the HDD is in progress. Doing so may result in loss or damage of the titles.
- For MOV format videos, only videos in MOV format (SP mode) taken using JVC ProHD camcorder GY-HM700/100 are compatible. There is no guarantee for importing videos taken on devices by other company. In addition, MOV videos cannot be imported using the SR-HD1250.
- Only titles that are not copyright-protected can be imported.
- Recognizing the device and importing the files may take a long time depending on the amount of files in the device or media.
■ Procedure for one-touch importing
1Connect the device to be used. Alternatively, insert an SD card.
- Once preparations for importing have been done, the message below will be shown on this unit's display window.
i.LINK device : "HDV/DV RDY"
USB device : "USB RDY"
SD card : "SD RDY"
2 Press the [ONE TOUCH DUBBING] button on the unit
• One-touch importing starts.
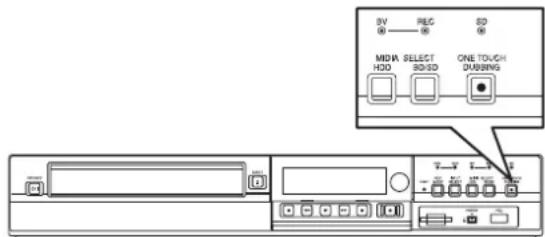
Memo:
Refer to the following for the flow of operations by the system of this unit.
3System checks the device connection
- The system of this unit detects the connected device. Search for devices is performed in the sequence of USB, SD card, followed by i.LINK.
4System detects the titles to import
- All titles that can be imported will be detected and imported.
5Importing of titles by this unit starts
6After titles are successfully imported, a "DUBBING IS COMPLETED" message appears on the monitor
natural_image
Simple diagram with a rectangular box containing an empty rectangle and a gray rectangle inside, no text or symbols present.Memo:
- The following buttons are enabled when importing is in progress.
[⏻/l]: Continues importing while switching this unit to the Standby mode.
[ONE TOUCH : Press this button for three seconds or DUBBING] longer to cancel importing.
[OPTION] : Displays a pop-up menu for canceling importing.
[ON SCREEN] : Pressing this button each time displays or hides the importing information.
Note:
- Importing stops and a message appears on the monitor if an error occurs during the importing process.
Importing Data from a BD/DVD to the HDD
Data can be imported from a BD/DVD to the HDD as follows.
- File formats that can be imported BD-MV, BD-AV, AVCHD, DVD-VR, DVD-VIDEO, EverioBackup, and JPEG
Memo:
- Titles that are imported using "FULL IMPORT" combined into one title.
This unit does not support combining of titles during the editing operation after import is complete. To combine and import data, select "FULL IMPORT". - For data that is selected for import via "SEL. TITLE(VIDEO)", titles with the same date are combined.
- Titles of two or more scenes cannot be combined if the recording criteria, such as video size, are different.
Note:
- Only titles that are not copyright-protected can be imported.
- Recognizing the device and importing the files may take a long time depending on the amount of files in the device.
■ Preparations
1Set a BD or DVD on the disc tray
2Press the [DUBBING] button on the remote control unit
• The importing screen appears.
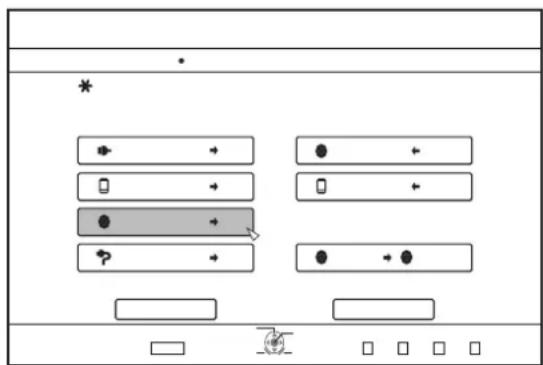
3Select "DISC⇒HDD" in the importing screen, and press the [OK] button
- A check mark is added to the "DISC⇒HDD" item.
4Select "NEXT", and press the [OK] button
- The import selection screen appears.
Memo:
- A recording mode selection appears instead of the import selection screen when DVD-VIDEO is detected. For more details, refer to "Importing DVD-VIDEO" (18 page 32).
Full import
1Select "FULL IMPORT" in the import selection screen, and press the [OK] button
- A check mark is added to the "FULL IMPORT" item.
2Select "NEXT", and press the [OK] button
![JVC SR-HD1500US - 2Select "NEXT", and press the [OK] button - 1](/content/2026/05/1066765/images/560dc460f708eec0e04bca64d50429b820c34a040c4cf4fd2a5fa7cbb08d9a23.jpg)
flowchart
graph TD
    A["Start"] --> B{Wait}
    B -->|Yes| C["Process Step"]
    B -->|No| D["End"]
- "START" will appear instead of "NEXT" in the menu if the disc is of a format other than "BD-AV". In this case, go to Step 5.
3Select "RECORDING MODE", and press the [OK] button
- A pop-up menu appears.
4Select the "RECORDING MODE" option
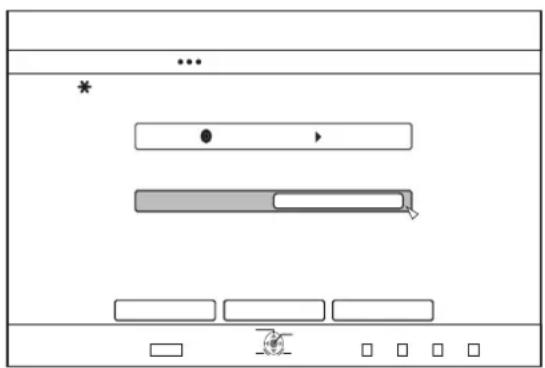
For more details, refer to "Recording Modes" (page 28).
5Select "START", and press the [OK] button
- Importing of the titles starts.
- After titles are successfully imported, a "DUBBING IS COMPLETED" message appears on the monitor.
![JVC SR-HD1500US - 5Select "START", and press the [OK] button - 1](/content/2026/05/1066765/images/aa679a5f5a7e5657dac8258f74a4003f364e806ad6707d838b30fc08ccecc3ed.jpg)
natural_image
Simple diagram with a rectangular box containing an empty rectangle and a gray rectangle inside, no text or symbols present.Specify a title
1Select "SEL. TITLE(VIDEO)" in the import selection screen, and press the [OK] button
- A check mark is added to the "SEL. TITLE(VIDEO)" item.
2Select "NEXT", and press the [OK] button
![JVC SR-HD1500US - 1Select "SEL. TITLE(VIDEO)" in the import selection screen, and press the [OK] button - 1](/content/2026/05/1066765/images/f8e75bae12c011d7e44ac04f5ef4d54a4e498159eec7784cb5e5023ace9852dd.jpg)
flowchart
graph TD
    A[" "] --> B[" "]
    B --> C[" "]
    C --> D[" "]
    D --> E[" "]
    E --> F[" "]
    F --> G[" "]
    G --> H[" "]
    H --> I[" "]
    I --> J[" "]
    J --> K[" "]
    K --> L[" "]
    L --> M[" "]
    M --> N[" "]
    N --> O[" "]
    O --> P[" "]
    P --> Q[" "]
    Q --> R[" "]
    R --> S[" "]
    S --> T[" "]
    T --> U[" "]
    U --> V[" "]
    V --> W[" "]
    W --> X[" "]
    X --> Y[" "]
    Y --> Z[" "]
- If a "BD-AV" disc is set, a recording mode selection screen will appear.
- If the disc is of a format other than "BD-AV", a screen for creating an import title list will appear. Go to step 5.
3Select "RECORDING MODE", and press the [OK] button
- A pop-up menu appears.
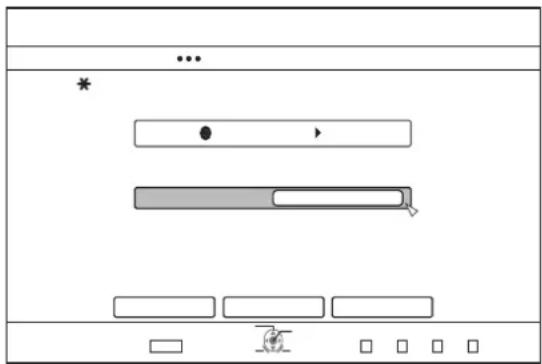
4Select the "RECORDING MODE" option.
For more details, refer to "Recording Modes" ( page 28).
5Select "NEXT", and press the [OK] button
- A screen for creating the import title list appears.
6Create an import title list
- Follow the steps below to create an import title list.
① Select "ADD TITLE LIST FOR DUBBING", and press the [OK] button
The Title List screen is displayed.
② Select the titles to import, and press the [OK] button Titles selected are added to the list.
Memo:-
- Press the [MARK] button. A check mark will appear beside the title.
All titles with a check mark can be added to the list at the same time. - Select a title from the dubbing title list, and press the [OK] button to perform the following changes.
- Delete the selected title from the list
- Thumbnails may not be displayed during title selection depending on the discs used.
Importing Data from a BD/DVD to the HDD\_(Continued)
7Select "START", and press the [OK] button
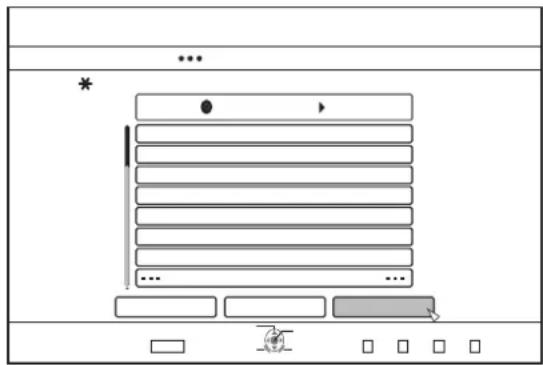
- Importing of titles starts according to the sequence in the created title list.
- After titles are successfully imported, a "DUBBING IS COMPLETED" message appears on the monitor.
natural_image
Simple line drawing of a rectangular box with a gray rectangle inside, no text or symbols present.Note:
- "START" cannot be selected for the following cases.
• A title that cannot be dubbed has been selected
• HDD memory is insufficient - The amount of titles in the HDD has reached the maximum amount
• A dubbing title list has not been created
Importing DVD-VIDEO
When DVD-VIDEO is detected, a recording mode selection screen appears.
Follow the steps below to import DVD-VIDEO to the HDD.
1 Select "RECORDING MODE", press the [OK] button, and select "RECORDING MODE" from the recording mode selection screen
- Select the "RECORDING MODE" option.
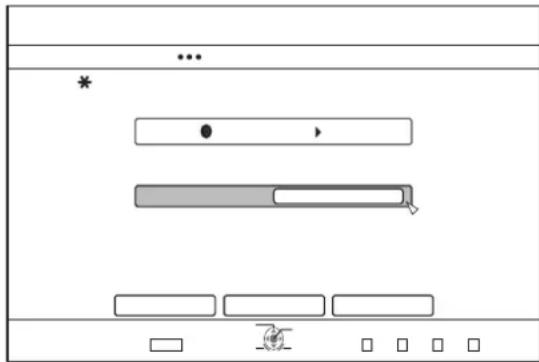
flowchart
graph TD
    A["..."] --> B["*"]
    B --> C["●"]
    C --> D["→"]
    D --> E["Bar"]
    E --> F["←"]
    F --> G["Button"]
    G --> H["Button"]
    H --> I["Button"]
For more details, refer to "Recording Modes" (vss page 28).
2Select "START", and press the [OK] button
- Importing of the titles starts.
- After titles are successfully imported, a "DUBBING IS COMPLETED" message appears on the monitor.
![JVC SR-HD1500US - 2Select "START", and press the [OK] button - 1](/content/2026/05/1066765/images/7534c9a57894b62e0186542256c452a1fab827f23083793b67922a84ab03f3f0.jpg)
natural_image
Simple diagram with a rectangular box containing an empty rectangle and a gray rectangle inside, no text or symbols present.Memo:
- If the first play setting of the DVD-video has been set to top menu or other settings, the title will not playback.
If playback does not start, press the play button or playback the DVD-Video.
Canceling importing
■ To cancel importing before it starts
- Select "CANCEL" from the menu, and press the [OK] button to cancel importing of a title.
- Alternatively, you can press the [RETURN] button to cancel importing and return to the initial screen.
■ To cancel importing while it is in progress
- Press the [OPTION] button to display the pop-up menu. Select "CANCEL" from the pop-up menu and press the [OK] button. Data will be written onto the disc up to the point where import is cancelled.
- Importing will also be stopped when the [■] button is pressed to stop playback.
Importing Data from a USB-compatible Device to the HDD
Data on devices connected to the USB terminal can be imported to the HDD as follows.
- File formats that can be imported
AVCHD, SD-VIDEO(JVC Everio MPEG2 TS, PS), MOV*, and JPEG
MOV*: MOV files that are taken in SP mode using the JVC ProHD Camcorder GY-HM700/100
Memo:
- Titles that are imported using "FULL IMPORT" combined into one title. This unit does not support combining of titles during the editing operation after import is complete. To combine and import data, select "FULL IMPORT".
- For data that is selected for import via "SEL.
TITLE(VIDEO)", titles with the same date are combined. - Titles of two or more scenes cannot be combined if the recording criteria, such as video size, are different.
- Import of MOV* files recorded using JVC GY-HM700/100 SP mode 1080i (25 Mbps) requires a duration that is about 1.3 times longer than the usual time.
Note:-
- Turn off the power for this unit and the connecting device if an USB compatible device is to be connected to this unit.
- Do not unplug the USB cable while importing a title. Doing so may result in loss or damage of the titles.
- Only titles that are not copyright-protected can be imported.
- For MOV* format videos, only videos in MOV format (SP mode) taken using JVC ProHD camcorder GY-HM700/100 are compatible. There is no guarantee for importing videos taken on devices by other company. In addition, MOV* videos cannot be imported using the SR-HD1250.
- Recognizing the device and importing the files may take a long time depending on the amount of files in the USB device.
- If a USB connection is used, this unit will only recognize one device out of all the recording devices. Depending on the video camera, the memory card slot will be recognized but the internal device will not be recognized. Use the following methods to solve this.
- If the internal device is not recognized: Copy the data from the camera's internal memory or HDD onto the SD card.
- If using a JVC camcorder that has two memory card slots: Put the memory card that has the required data in slot A.
- If the target device is not recognized using the USB connection, use the camcorder's burner or a similar device to dub the disc before proceeding with dubbing on this unit. For more details, refer to "Importing Data from a BD/DVD to the HDD" ( page 30 ).
- When importing videos from a USB-connected camcorder, data reading from the internal memory of the camcorder may fail. If both the camcorder's internal memory and SD card are available, the SD card may be detected first. To prevent this from occurring, remove the SD card before reading data from the internal memory.
■ Preparations
1Connect the USB device (Everio, etc.) to this unit using a USB cable
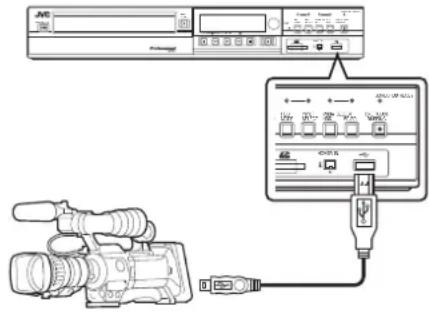
Memo:
- After connecting the USB cable, turn on the camera and switch the mode of the camera. (Choose "Connect to a computer" or a similar option. For details refer to the camera's instruction manual.)
2Press the [DUBBING] button on the remote control unit
• The importing screen appears.
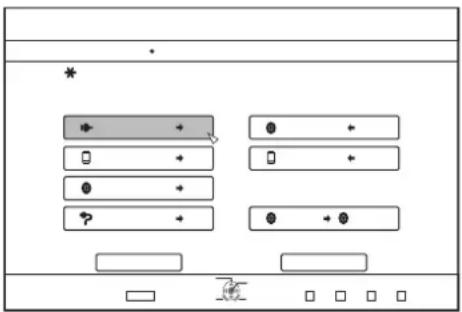
3Select "USB⇒HDD" in the importing screen, and press the [OK] button
- A check mark is added to the "USB⇒HDD" item.
4Select "NEXT", and press the [OK] button
- The import selection screen appears.
Full import
1Select "FULL IMPORT" in the import selection screen, and press the [OK] button
- A check mark is added to the "FULL IMPORT" item.
2Select "START", and press the [OK] button
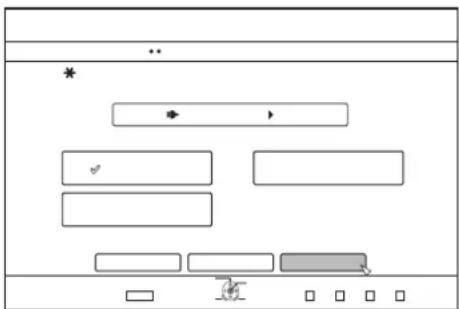
flowchart
graph TD
    A["Input"] --> B{Processing}
    B -->|Yes| C["Action"]
    B -->|No| D["Feedback Loop"]
    C --> E["Output"]
    D --> F["Action"]
    F --> G["Output"]
- Importing of the titles starts.
Importing Data from a USB-compatible Device to the HDD\_(Continued)
- After titles are successfully imported, a "DUBBING IS COMPLETED" message appears on the monitor.
natural_image
Simple diagram with a rectangular box containing an empty rectangle and a gray rectangle inside, no text or symbols present.Specify a title
1Select "SEL. TITLE(VIDEO)" in the import selection screen, and press the [OK] button
- A check mark is added to the "SEL. TITLE(VIDEO)" item.
2Select "NEXT", and press the [OK] button
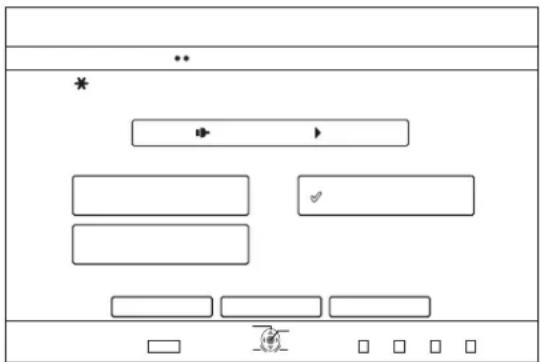
flowchart
graph TD
    A[" "] --> B[" "]
    B --> C[" "]
    C --> D[" "]
    D --> E[" "]
    E --> F[" "]
    F --> G[" "]
    G --> H[" "]
    H --> I[" "]
    I --> J[" "]
    J --> K[" "]
    K --> L[" "]
    L --> M[" "]
    M --> N[" "]
    N --> O[" "]
    O --> P[" "]
    P --> Q[" "]
    Q --> R[" "]
    R --> S[" "]
    S --> T[" "]
    T --> U[" "]
    U --> V[" "]
    V --> W[" "]
    W --> X[" "]
    X --> Y[" "]
    Y --> Z[" "]
- A screen for creating the import title list appears.
3Create an import title list
- Follow the steps below to create an import title list.
① Select "ADD TITLE LIST FOR DUBBING", and press the [OK] button
The Title List screen is displayed.
② Select the titles to import, and press the [OK] button Titles selected are added to the list.
Memo:
- Press the [MARK] button. A check mark will appear beside the title.
All titles with a check mark can be added to the list at the same time. - You can perform the following editing operations by selecting a title from the dubbing title list and pressing the [OK] button.
- Delete the selected title from the list
- Thumbnails will not be displayed when a title is selected.
4 Select "START", and press the [OK] button
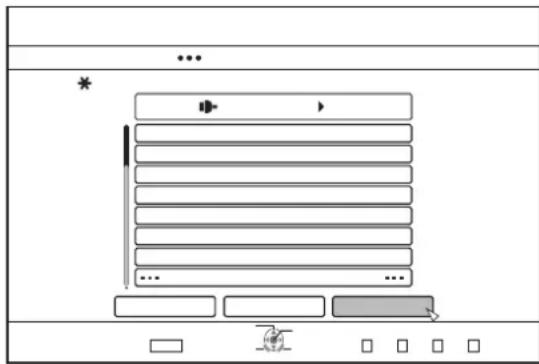
- Importing of titles starts according to the sequence in the created title list.
- After titles are successfully imported, a "DUBBING IS COMPLETED" message appears on the monitor.
natural_image
Simple diagram with a rectangular box containing an empty rectangle and a gray rectangle inside, no text or symbols present.Note:
- "START" cannot be selected for the following cases.
- A title that cannot be dubbed has been selected
• HDD memory is insufficient - The amount of titles in the HDD has reached the maximum amount
• A dubbing title list has not been created
Canceling importing
■ To cancel importing before it starts
- Select "CANCEL" from the menu, and press the [OK] button to cancel importing of a title.
- Alternatively, you can press the [RETURN] button to cancel importing and return to the initial screen.
■ To cancel importing while it is in progress
- Press the [OPTION] button. Select "CANCEL" from the Cancel Importing menu, and press the [OK] button. Doing so imports data to the HDD up to the position where you have chosen to stop.
Importing Data from an SD Card to the HDD
Data can be imported from a SD (SDHC) card to the HDD as follows.
- File formats that can be imported AVCHD, SD-VIDEO(JVC Everio MPEG2 TS, PS), MOV*, and JPEG
MOV*: MOV files that are taken in SP mode using the JVC ProHD Camcorder GY-HM700/100
Memo:
- Titles that are imported using "FULL IMPORT" combined into one title. This unit does not support combining of titles during the editing operation after import is complete. To combine and import data, select "FULL IMPORT".
- For data that is selected for import via "SEL. TITLE(VIDEO)", titles with the same date are combined.
- Titles of two or more scenes cannot be combined if the recording criteria, such as video size, are different.
- Import of MOV* files recorded using JVC GY-HM700/100 SP mode 1080i (25 Mbps) requires a duration that is about 1.3 times longer than the usual time.
Note:
- Do not remove the SD card when importing of the titles is in progress or when the importing screen is displayed. Doing so may result in loss or damage of the titles.
- For MOV format videos, only videos in MOV format (SP mode) taken using JVC ProHD camcorder GY-HM700/100 are compatible. There is no guarantee for importing videos taken on devices by other company. In addition, MOV videos cannot be imported using the SR-HD1250.
- Only titles that are not copyright-protected can be imported.
■ Preparations
1 Insert the SD (SDHC) card into the [SD SLOT]
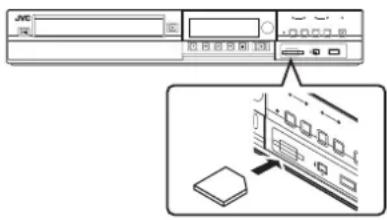
2Press the [DUBBING] button on the remote control unit
• The importing screen appears.
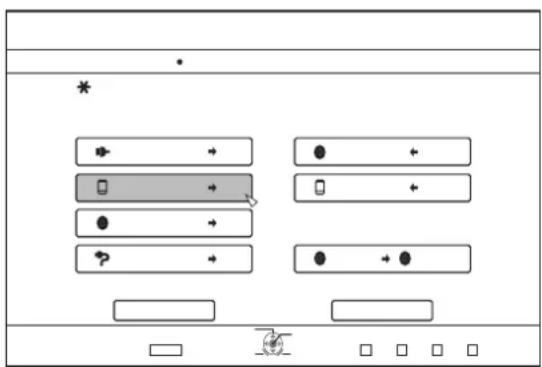
3 Select "SD⇒HDD" in the importing screen, and press the [OK] button
- A check mark is added to the "SD⇒HDD" item.
4Select "NEXT", and press the [OK] button
- The import selection screen appears.
Full import
1Select "FULL IMPORT" in the import selection screen, and press the [OK] button
- A check mark is added to the "FULL IMPORT" item.
2Select "START", and press the [OK] button
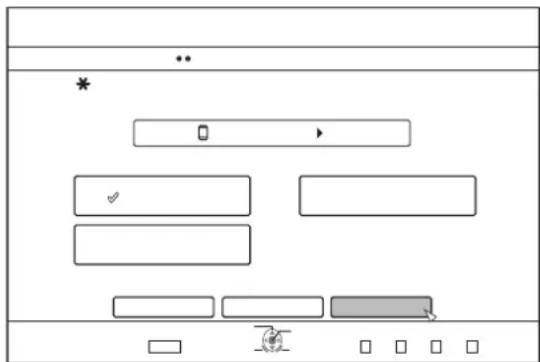
- Importing of the titles starts.
- After titles are successfully imported, a "DUBBING IS COMPLETED" message appears on the monitor.
![JVC SR-HD1500US - 1Select "FULL IMPORT" in the import selection screen, and press the [OK] button - 2](/content/2026/05/1066765/images/3c354284cfd668cd03b2d0cb60e74a98e9e48dc5fedb6880adc27c7c42702040.jpg)
natural_image
Simple line drawing of a rectangular box with a gray button inside, no text or symbols present.Memo:
- Choose "BACK" from the menu and press the [OK] button to return to the previous screen.
Importing Data from an SD Card to the HDD\_(Continued)
Specify a title
1Select "SEL. TITLE(VIDEO)" in the import selection screen, and press the [OK] button
- A check mark is added to the "SEL. TITLE(VIDEO)" item.
2Select "NEXT", and press the [OK] button
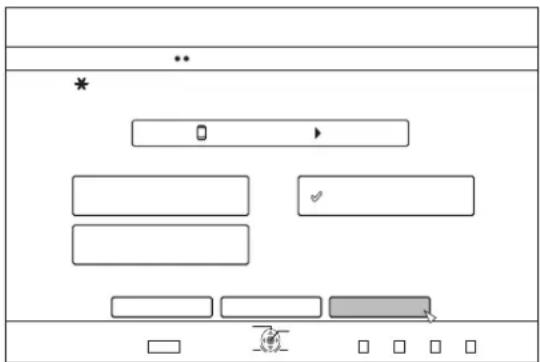
flowchart
graph TD
    A[" "] --> B[" "]
    B --> C[" "]
    C --> D[" "]
    D --> E[" "]
    E --> F[" "]
    F --> G[" "]
    G --> H[" "]
    H --> I[" "]
    I --> J[" "]
    J --> K[" "]
    K --> L[" "]
    L --> M[" "]
    M --> N[" "]
    N --> O[" "]
    O --> P[" "]
    P --> Q[" "]
    Q --> R[" "]
    R --> S[" "]
    S --> T[" "]
    T --> U[" "]
    U --> V[" "]
    V --> W[" "]
    W --> X[" "]
    X --> Y[" "]
    Y --> Z[" "]
- A screen for creating the import title list appears.
3Create an import title list
- Follow the steps below to create an import title list.
① Select "ADD TITLE LIST FOR DUBBING", and press the [OK] button
The Title List screen is displayed.
② Select the titles to import, and press the [OK] button Titles selected are added to the list.
Memo:
- Press the [MARK] button. A check mark will appear beside the title. All titles with a check mark can be added to the list at the same time.
- You can perform the following editing operations by selecting a title from the dubbing title list and pressing the [OK] button.
- Delete the selected title from the list
4Select "START", and press the [OK] button
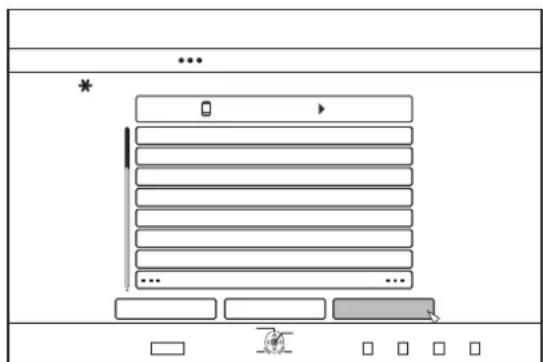
flowchart
graph TD
    A["Start"] --> B{Process}
    B --> C["Input 1"]
    B --> D["Input 2"]
    B --> E["Input 3"]
    B --> F["Input 4"]
    B --> G["Input 5"]
    B --> H["Input 6"]
    B --> I["Input 7"]
    B --> J["Input 8"]
    B --> K["End"]
    style A fill:#f9f,stroke:#333
    style B fill:#ccf,stroke:#333
    style C fill:#cfc,stroke:#333
    style D fill:#cfc,stroke:#333
    style E fill:#cfc,stroke:#333
    style F fill:#cfc,stroke:#333
    style G fill:#cfc,stroke:#333
    style H fill:#cfc,stroke:#333
    style I fill:#cfc,stroke:#333
    style J fill:#cfc,stroke:#333
    style K fill:#cfc,stroke:#333
- Importing of titles starts according to the sequence in the created title list.
- After titles are successfully imported, a "DUBBING IS COMPLETED" message appears on the monitor.
natural_image
Simple diagram with a rectangular box containing an empty rectangle and a gray rectangle inside, no text or symbols present.Memo:
- Choose "BACK" from the menu and press the [OK] button to return to the previous screen.
Note:
- "START" cannot be selected for the following cases.
• A title that cannot be dubbed has been selected
• HDD memory is insufficient
- The amount of titles in the HDD has reached the maximum amount
• A dubbing title list has not been created
- Thumbnails will not be displayed when a title is selected.
Canceling importing
■ To cancel importing before it starts
- Select "CANCEL" from the menu, and press the [OK] button to cancel importing of a title.
- Alternatively, you can press the [RETURN] button to cancel importing and return to the initial screen.
■ To cancel importing while it is in progress
- Press the [OPTION] button. Select "CANCEL" from the Cancel Importing menu, and press the [OK] button. Doing so imports data to the HDD up to the position where you have chosen to stop.
Importing Data from an i.LINK-compatible Device to the HDD
Data on devices connected to the i.LINK terminal can be imported to the HDD as follows.
• Video formats that can be imported: DV and HDV content
Memo:
- Only titles that are not copyright-protected can be imported.
- Devices that have in-built copyright protection such as D-VHS and digital tuners cannot be connected. This unit only allows import from tape media.
- Importing will not be performed if no tape has been inserted into the HDV/DV camera.
- Importing will be cancelled when the mode is changed from HDV to DV or vice versa.
- For camcorders that support both HDV and DV recording, use only one of the modes for recording and playback.
- There is no support for editing using a connected PC.
- Only one i.LINK device can be connected to this unit at a time.
Note:-
- Turn off the power for this unit and the connecting device when connecting using an i.LINK compatible device.
- Do not unplug the i.LINK cable while importing to the HDD is in progress.
Doing so may result in loss or damage of the titles.
- For example, during full import of HDV content from JVC GY-HD100 via i.LINK connection, the beginning of the image may not be captured if GY-HD100 is not set as follows.
(1) Set the [IEEE1394] switch at the rear of the GY-HD100 unit to [HDV] or [DV] according to the recorded content.
(2) Set [MENU]/[VIDEO FORMAT]/[PB TAPE] on the GY-HD100 unit to [HDV] or [DV].
(As with (1), set according to the recorded content. Setting to [AUTO] is not allowed.)
(3) Check to ensure that the [HDV] or [DV] lamp on the side of the GY-HD100 unit is lit.
(Check to ensure that the lamp that is lit corresponds to the setting in (1) and (2).)
When importing from a tape that contains data captured in the HDV recording and DV recording modes, change the video camera setting according to each recording mode, check to ensure that the corresponding lamp in (3) is lit, and choose to start import from the current position.
■ Preparations
1Connect the device (camera, etc.) to this unit using an i.LINK cable
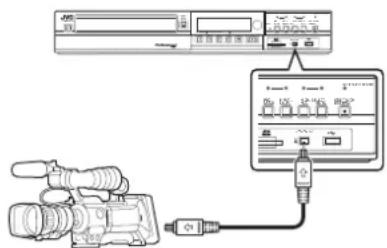
Memo:
- After the device (camera, etc.) has been connected using an i.Link cable, turn on the power of the device and switch it to playback mode. (refer to the device's (camera, etc.) instruction manual for more details.)
2Press the [DUBBING] button on the remote control unit
• The importing screen appears.
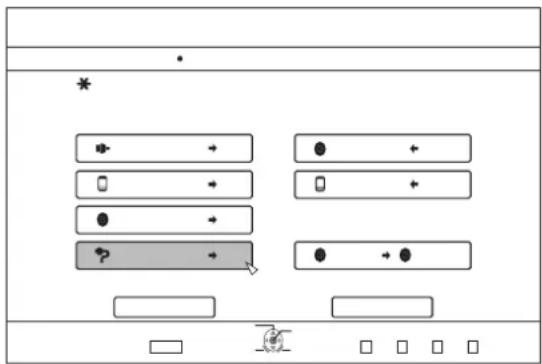
3Select "HDV/DV⇒HDD" in the importing screen, and press the [OK] button
- A check mark is added to the "HDV/DV↔HDD" item.
4Select "NEXT", and press the [OK] button
- The import selection screen appears.
Imports data from the beginning
You can import videos from the beginning till the end as follows. If the current position is halfway through the tape, import after rewinding the tape to the beginning.
1Select "IMPORT FROM BEGINNING", and press the [OK] button
- A check mark is added to the "IMPORT FROM BEGINNING" item.
2Select "NEXT", and press the [OK] button
![JVC SR-HD1500US - 1Select "IMPORT FROM BEGINNING", and press the [OK] button - 1](/content/2026/05/1066765/images/f1c576f21454a724dd404a3dce22a68c3c69e08faed0da0ef53540753f998e0e.jpg)
flowchart
graph TD
    A["Input"] --> B{Decision}
    B -->|Yes| C["Process Step"]
    B -->|No| D["Output"]
    C --> E["Final Output"]
    D --> F["End"]
- A recording mode selection screen appears.
3Select "RECORDING MODE", press the [OK] button, and select from the pop-up menu
Importing Data from an i.LINK-compatible Device to the HDD\_(Continued)
- Select "XP", "SP", "LP", or "EP" from the "RECORDING MODE" option.
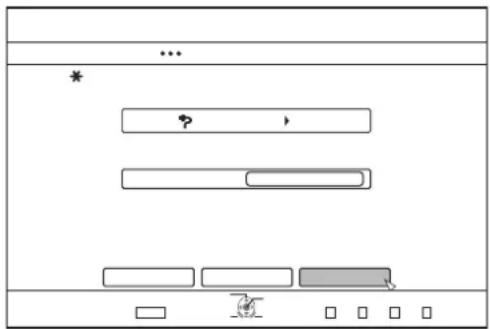
flowchart
graph TD
    A["..."] --> B["?"]
    B --> C["..."]
    C --> D["..."]
    D --> E["..."]
    E --> F["..."]
    F --> G["..."]
    G --> H["..."]
    H --> I["..."]
    I --> J["..."]
    J --> K["..."]
    K --> L["..."]
    L --> M["..."]
    M --> N["..."]
    N --> O["..."]
    O --> P["..."]
    P --> Q["..."]
    Q --> R["..."]
    R --> S["..."]
    S --> T["..."]
    T --> U["..."]
    U --> V["..."]
    V --> W["..."]
    W --> X["..."]
    X --> Y["..."]
    Y --> Z["..."]
Memo:
• HDV contents will be imported in DR mode.
For more details, refer to "Recording Modes" ( page 28).
4Select "START", and press the [OK] button
- Importing of the titles starts.
- After titles are successfully imported, a "DUBBING IS COMPLETED" message appears on the monitor.
![JVC SR-HD1500US - 4Select "START", and press the [OK] button - 1](/content/2026/05/1066765/images/bd12022fe67674893c93e72f20f9fdd079aabad13d2df20c436f61393da64b65.jpg)
natural_image
Simple diagram with a rectangular box containing an arrow pointing to the bottom-right corner (no text or symbols)Imports data from current position
You can import videos from the current tape position till the end as follows.
1Select "IMPORT FROM CURRENT POSITION", and press the [OK] button
- A check mark is added to the "IMPORT FROM CURRENT POSITION" item.
2Select "NEXT", and press the [OK] button
![JVC SR-HD1500US - 2Select "NEXT", and press the [OK] button - 1](/content/2026/05/1066765/images/536027a95f62c5af22fef8c91bdbb2ac9abced3523ee96ec5dfad8de6bf23305.jpg)
flowchart
graph TD
    A["Input"] --> B{?}
    B --> C["Process Step"]
    C --> D["Output"]
    style A fill:#f9f,stroke:#333
    style D fill:#bbf,stroke:#333
- A recording mode selection screen appears.
3 Select "RECORDING MODE" and press the [OK] button to display the pop-up menu
- Select "XP", "SP", "LP", or "EP" from the "RECORDING MODE" option.
![JVC SR-HD1500US - Select "RECORDING MODE" and press the [OK] button to display the pop-up menu - 1](/content/2026/05/1066765/images/ef2e284ca678cbff4cc0ab39b296cec4f7bdf83a4da3a2e7c2718c9e7a6b0711.jpg)
flowchart
graph TD
    A["..."] --> B["?"]
    B --> C["..."]
    C --> D["..."]
    D --> E["..."]
    E --> F["..."]
    F --> G["..."]
    G --> H["..."]
    H --> I["..."]
    I --> J["..."]
    J --> K["..."]
    K --> L["..."]
    L --> M["..."]
    M --> N["..."]
    N --> O["..."]
    O --> P["..."]
    P --> Q["..."]
    Q --> R["..."]
    R --> S["..."]
    S --> T["..."]
    T --> U["..."]
    U --> V["..."]
    V --> W["..."]
    W --> X["..."]
    X --> Y["..."]
    Y --> Z["..."]
Memo:
• HDV contents will be imported in DR mode.
For more details, refer to "Recording Modes" ( page 28).
4Select "START", and press the [OK] button
- Importing of the titles starts.
- After titles are successfully imported, a "DUBBING IS COMPLETED" message appears on the monitor.
![JVC SR-HD1500US - 4Select "START", and press the [OK] button - 1](/content/2026/05/1066765/images/89558999f498c8ea37c1a1eb8e039b2bae9828b9080294ac8e5a16d19c7bc243.jpg)
natural_image
Simple line drawing of a rectangular box with a gray rectangle inside, no text or symbols present.Cancel dubbing
■ To cancel importing before it starts
- Select "CANCEL" from the menu, and press the [OK] button to cancel importing of a title.
- Alternatively, you can press the [RETURN] button to cancel importing and return to the initial screen.
■ To cancel importing while it is in progress
- Press the [OPTION] button. Select "CANCEL" from the Cancel Importing menu, and press the [OK] button. Doing so imports data to the HDD up to the position where you have chosen to stop.
Dubbing a Title from the HDD to a BD/DVD
Titles stored in the internal HDD can be dubbed to a BD/DVD as follows.
Memo:
- Disc types that can be used for dubbing with this unit are: BD-RE, BD-R, DVD-RW, and DVD-R.
For more details, refer to "Discs that enable both dubbing and playback" ( page 10 ).
- HD content for which the delete scene operation has been applied cannot be dubbed to BDMV. Perform seamless conversion before starting a dubbing operation.
For details, refer to "Mode Conversion" (page 73).
- When dubbing 720p content to a BDAV/BDMV disc, the data may be converted to 480i in some cases. This occurs when recording mode conversion other than seamless conversion is performed, or when dubbing is performed via recording mode selection.
For 720p HDV content imported via i.LINK, a disc can be created at 720p during high-speed dubbing to BDAV. For 720p content imported from JVC GY-HM700/100 via an SD card, a high-definition disc can be created by selecting high-speed dubbing to BDMV/BDAV.
Note:
- The following high bit-rate files may not meet the Blu-ray Disc standards when they are dubbed to a BD.
- When a BDAV/BDMV disc is created (high-speed dubbing) by importing content captured in the JVC GY-HM700/100 SP mode.
- When a BDAV disc is created (high-speed dubbing) by importing content captured in the JVC GZ-HD7/6 etc FHD mode.
- When a BDAV/BDMV disc is created by importing content that is captured using another video camera at a peak bit-rate that exceeds 28.8 Mbps.
If the Blu-ray Disc standards are not met, playback on another player may fail. To ensure that the standards are satisfied, perform high-speed dubbing after converting the recording mode, or perform dubbing by specifying a recording mode.
Dubbing from the HDD to a BD/DVD
■ Preparation
1Set a BD or DVD on the disc tray
Memo:
- A message appears on the monitor in the following cases where a disc cannot be written to. Take the necessary actions according to the message.
- When an incompatible disc type is set
- When there is insufficient space on the set disc
- When a finalized disc is set
2Press the [DUBBING] button on the remote control unit
• The Dubbing menu screen appears.
3 On this screen, select "DISC↔VIDEO"
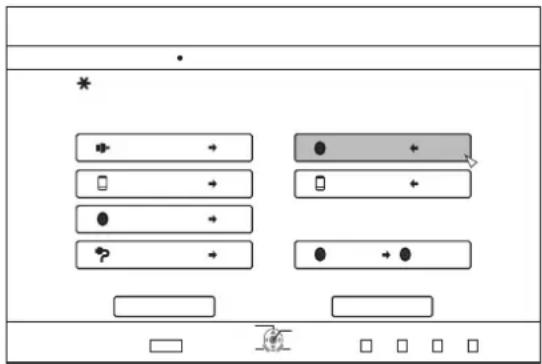
- A check mark is added to the "DISC⇔VIDEO" item.
4Select "NEXT", and press the [OK] button
Memo:
Dubbing can also be performed from the Playback Navigation screen.
① Select the titles to dub, and press the [OPTION] button
② Select "DUB", and press the [OK] button
③ Follow Steps 3 to 4 of "Preparation"
■ Dubbing titles
1Select "RECORDING FORMAT", and press the [OK] button
- Choose a format.
For more details, refer to "Format chart" ( page 25).
2Select "RECORDING MODE", and press the [OK] button
- Select "HIGH-SPEED DUBBING" or a recording mode of your preference.
Dubbing a Title from the HDD to a BD/ DVD\_(Continued)
Memo:
• High-speed dubbing
Select this option if you want to significantly shorten the time required for dubbing.
Make use of a disc that supports high-speed recording.
- AF/AN/AL/AE
Can be selected for BD-R and BD-RE. Dubbing is done with HD picture quality.
- XP/SP/LP/EP
Dubbing is done with SD picture quality.
• FR
An appropriate mode will be chosen automatically between XP to EP according to the remaining memory on the disc. For more details, refer to "Dubbing the video data from the HDD" ( page 24) and "Recording Modes" ( page 28).
3Select "NEXT", and press the [OK] button
• A screen for creating a dubbing title list appears.
4Create a dubbing title list
flowchart
graph TD
    A["Input"] --> B["Process Block"]
    B --> C{Feedback Loop?}
    C -->|Yes| D["Output 1"]
    C -->|No| E["Output 2"]
    D --> F["Output 3"]
    E --> G["Output 4"]
- Follow the steps below to create a dubbing title list.
① Select "ADD TITLE LIST FOR DUBBING", and press the [OK] button
② Select the titles to dub, and press the [OK] button
Memo:
- Press the [MARK] button. A check mark will appear beside the title.
All titles with a check mark can be added to the list at the same time. - You can perform the following editing operations by selecting a title from the dubbing title list and pressing the [OK] button.
- Delete the selected title from the list
- Change the list arrangement
- Change the name of the selected title
- Delete the selected title from the list
- Change the list arrangement
- Change the name of the selected title
Select "RENAME TITLE", and press the [OK] button to change the title of the dubbing source. Dubbing of the new title is performed.
5Select "NEXT", and press the [OK] button
flowchart
graph TD
    A["Input"] --> B["Process Block"]
    B --> C{Feedback}
    C -->|Yes| D["Output 1"]
    C -->|No| E["Output 2"]
    D --> F["Output 3"]
    E --> G["Output 4"]
Note:
- "NEXT" cannot be selected for the following cases.
• A title that cannot be dubbed has been selected
• Disc memory is insufficient
• A dubbing title list has not been created
Memo:
- Steps 6 and 7 are not applicable for "BDAV" and "DVD-VR" disc formats. Go to step 8.
6Select a background image for the disc menu
- Select a background image for the disc menu from "Background" or "Still Picture".
- "SELECT FROM DEFAULT BACKGROUND" A default background set is used for the disc menu.
- "SELECT FROM STILL PICTURES"(only for SR-HD1500)
Use a still image on the HDD for the disc menu. The largest size allowed for a still image that is used as the background is 5120 x 3840.
Memo:
- The background image of the disc menu can be selected (only for DVD-Video and BD-MV).
- The following sizes are recommended for still images.
BD : 1920 x 1080
DVD : 720 x 480
- When a still image is used, the two vertical or horizontal edges are trimmed based on the side that is smaller than the aspect ratio of the video to be dubbed.
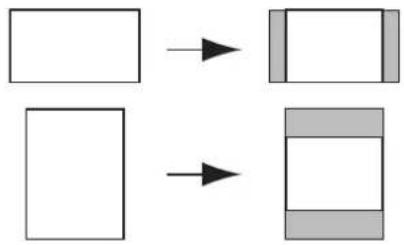
flowchart
graph TD
    A[" "] --> B[" "]
    C[" "] --> D[" "]
Example of Side-cut Still Image
7Set the operations for finalize
- Finalize will be performed after dubbing if "ON" has been set for "FINALIZE".
If a BD-MV disc is being dubbed, "OFF" cannot be set for "FINALIZE". And once the BD-MV disc is dubbed the disc cannot be rewritten.
- If a DVD-Video or BD-MV disc is being dubbed, the settings for "FIRST PLAY", "REPEAT" and "RENAME DISC" can be changed.
① Select "FIRST PLAY", and select either "NONE", "TOP MENU" or "TITLE 1"
- "NONE"
A finalized disc will not be automatically played back when it is inserted into another device.
- "TOP MENU"
The disc menu will be displayed automatically when a finalized disc is inserted into another device.
• "TITLE 1"
The first title on a finalized disc will be played back automatically when it is inserted into another device.
Memo:
"NONE" cannot be selected for "FIRST PLAY" for BD-MV.
② Select "REPEAT", and choose either "OFF" or "ON" • "OFF"
The disc will stop and the menu will be displayed after all the titles are played back.
• "ON"
Repeat playback from the first title will start automatically after all the titles are played back.
③ Select "RENAME DISC", and press the [OK] button
- Change the disc name when finalizing is performed.
8Select "START", and press the [OK] button
- Dubbing starts. A progress bar is displayed during the dubbing process.
- After dubbing is complete, a "DUBBING IS COMPLETED" message appears on the monitor.
Memo:
- Choose "BACK" from the menu and press the [OK] button to return to the previous screen.
■ Cancel dubbing
To cancel dubbing before it starts
- Select "CANCEL" from the menu, and press the [OK] button to cancel dubbing.
- Alternatively, you can press the [RETURN] button to cancel dubbing and return to the initial screen.
To discontinue dubbing while it is in progress
- Press the [OPTION] button. Select "CANCEL" from the Cancel Dubbing menu, and press the [OK] button.
Memo:
- When dubbing to a BD-R or DVD-R, the disc memory will be reduced as data will still be written onto the disc up to the point where dubbing is discontinued.
Dubbing Still Images from the HDD
Still images stored in the internal HDD can be dubbed to a BD-RE or an SD card as follows.
Memo:
- Only "JPEG" still image format is supported.
For more details, refer to "Dubbing the picture data from the HDD" (page 24).
■ Before dubbing
- Dubbing to a disc
Set the BD-RE for dubbing on the disc tray - Dubbing to an SD card
Insert the SD card to be dubbed into the [SD SLOT]
■ Dubbing still images
1Press the [DUBBING] button on the remote control unit
• The Dubbing menu screen appears.
2On this screen, select "DISC/SD↔PICTURE"
3Select the media to dub to from the media selection screen
- A checkmark will be added to the selected media.
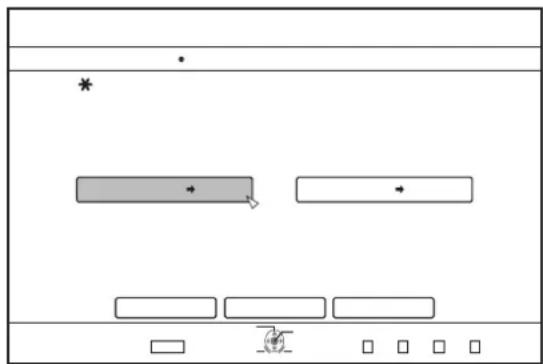
flowchart
graph TD
    A["Start"] --> B{Progress}
    B -->|Yes| C["Return"]
    B -->|No| D["End"]
4 Select "NEXT", and press the [OK] button
Memo:
- A message appears on the monitor when dubbing cannot be performed in the following cases. When this occurs, replace the disc or SD card with one that is usable.
- When an incompatible disc or SD card is set
- When there is insufficient space on the set disc or SD card
- When an unformatted disc or SD card is set
For details, refer to "Formatting a disc" ( page 25) or "Formatting an SD Card" ( page 27).
5Select the still images to dub, and press the [MARK] button
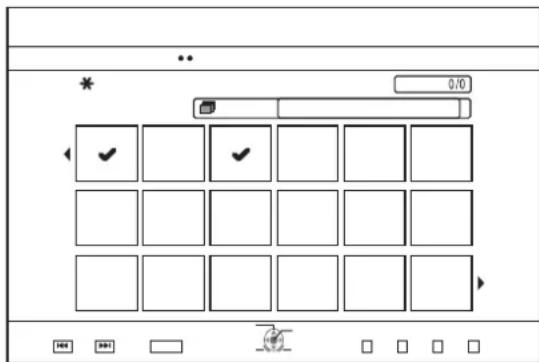
- Pressing the [MARK] button adds a check mark to the selected image.
All still images with a check mark are dubbed.
Memo:
- To clear the check mark, select the corresponding still image, and press the [MARK] button.
- Pressing the [OPTION] button displays a pop-up menu. The pop-up menu enables you to perform the following operations.
BACK : Exits the pop-menu and returns to the initial screen.
SELECT ALL : Selects all still images within the same group.
DESELECT ALL : Clears the selection of all still images within the same group.
Note:
- A message appears if the selected still images do not fit into the disc. Check mark cannot be added to a still image if there is insufficient space on the disc.
6Select "START", and press the [OK] button
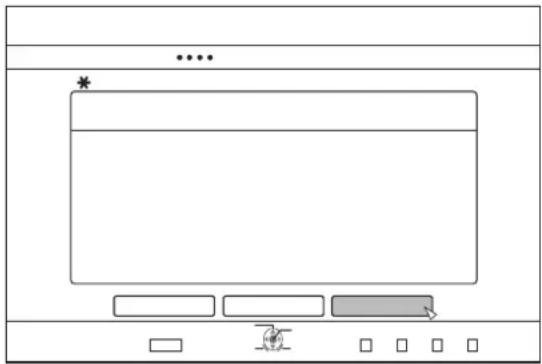
- Dubbing starts. A progress bar is displayed during the dubbing process.
- After dubbing is complete, a "DUBBING IS COMPLETED" message appears on the monitor.
Memo:
- A directory of the following configuration is created in the media, and still images are written with file names ranging from "PIC_0001.jpg" to "PIC_9999.jpg".
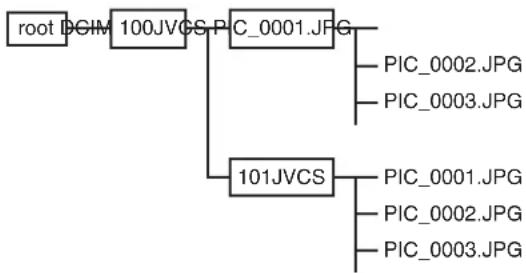
flowchart
graph TD
    A["root DCIM"] --> B["100JVCS"]
    B --> C["101JVCS"]
    C --> D["PIC_0001.JPG"]
    C --> E["PIC_0002.JPG"]
    C --> F["PIC_0003.JPG"]
■ Dubbing from the Playback Navigation screen
Dubbing can also be performed from the Playback Navigation screen.
1Select the still images to dub, and press the [OPTION] button
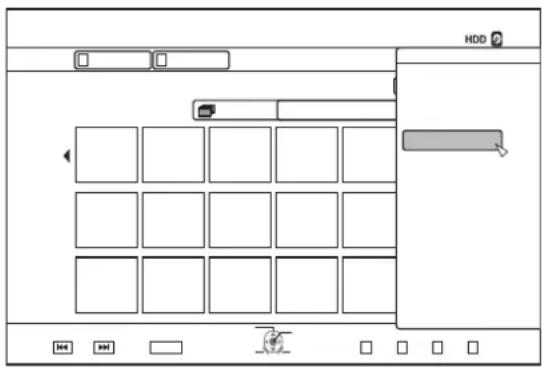
2Select "DUB", and press the [OK] button
3Follow steps 3 to 5 of "Dubbing still images"
Memo:
- Check marks of still images that appear on the Playback navigation screen will remain added to the image on the still image selection screen.
■ Cancel dubbing
To cancel dubbing before it starts
- Select "CANCEL" from the menu, and press the [OK] button to cancel dubbing.
- Alternatively, you can press the [RETURN] button to cancel dubbing and return to the initial screen.
To discontinue dubbing while it is in progress
- Press the [OPTION] button. Select "CANCEL" from the Cancel Dubbing menu, and press the [OK] button.
Enabling Playback on Other Devices (Finalizing)
DVD-R and DVD-RW discs may need to be finalized before they can be played on other DVD players.
Memo:
- Discs in the Video mode becomes a DVD-Video format with a title menu after finalizing.
- Discs containing DVD-Video data can be finalized by setting the disc operation settings according when the disc is inserted into this unit.
- Recording or editing of the disc will not be possible after it is finalized.
- If a DVD that was recorded using VR mode has been finalized, the disc can only be played back on VR mode compatible devices.
Finalizing
1Set the BD or DVD to be finalized on the disc tray
2Press the [MEDIA MANAGE] button on the remote control unit
- The Media Management menu screen appears.
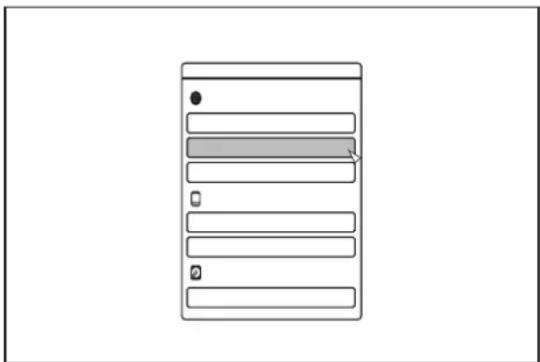
3Select "FINALIZE" from "BD/DVD"
4Select "YES" and press the [OK] button
- The top menu setting screen appears.
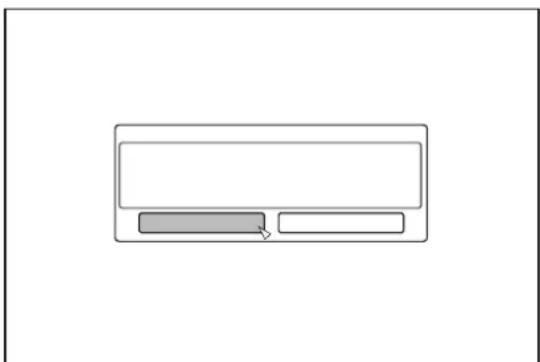
natural_image
Simple line drawing of a rectangular interface with two gray buttons, no text or symbols present.Memo:
- To cancel the finalizing operation, select "NO" and press the [OK] button.
5Setting the top menu items
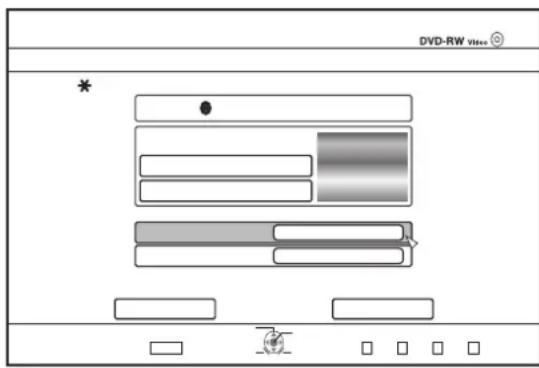
- Before finalizing, set "FIRST PLAY", "REPEAT", and "CHANGE DISC MENU BACKGROUND" accordingly. Set according to the steps below.
① Select "FIRST PLAY", and select an appropriate first play setting item
- This item is used for setting the disc operation when a finalized disc is inserted into another device.
NONE : A finalized disc will not be automatically played back when it is inserted into another device.
TOP MENU : The disc menu will be displayed automatically when a finalized disc is inserted into another device.
TITLE 1 : The first title on a finalized disc will be played back automatically when it is inserted into another device.
② Select "REPEAT", and select an appropriate repeat setting item
- Set the disc action to be taken after all titles have been played back.
OFF : The disc will stop and the menu will be displayed after all the titles are played back.
ON : Repeat playback from the first title will start automatically after all the titles are played back.
③ Select "CHANGE DISC MENU BACKGROUND" to select a background image for the top menu
- You can register and use a background image of your preference.
Memo:
- The items in "FIRST PLAY", "REPEAT" and "CHANGE DISC MENU BACKGROUND" can also be set in "Dubbing a Title from the HDD to a BD/DVD" (page 39).
6Select "FINALIZE", and press the [OK] button
- Finalizing starts.
- After finalization is complete, a "THE DISC HAS BEEN FINALIZED" message appears on the monitor.
natural_image
Simple diagram with a rectangular box containing an empty rectangle and a gray button inside, no text or symbols present.Unfinalizing a disc
Only DVD-RW discs that are finalized on this unit can be unfinalized.
After a disc is unfinalized, addition of new titles and editing are possible.
Note:
- All discs except DVD-RW (VR mode) cannot be unfinalized.
■ To unfinalize a disc
1Set a DVD-RW disc that is finalized by this unit on the disc tray
2Press the [MEDIA MANAGE] button on the remote control unit
- The media management menu screen appears.
3Select "FINALIZE" from "BD/DVD"
4Select "YES" and press the [OK] button
natural_image
Simple line drawing of a rectangular interface with two buttons, no text or symbols present- Unfinalizing starts.
- After unfinalizing is complete, a "THE DISC HAS BEEN UNFINALIZED" message appears on the monitor.
Copying the Entire Disc
Copying the entire disc allows all content on a BD (BDMV) or DVD (AVCHD, DVD-Video) to be copied onto another disc.
Note:
- Content cannot be copied to a formatted BD-R or DVD-R disc. Make use of an unformatted disc.
- Use a DVD-R/-RW instead of a BD-R/-RE or DVD when the source disc is a BD disc.
- The disc to be copied onto will be formatted when copy is performed. Check that the disc has not been used before or if it is ok to delete data on the disc when using a BD-RE or a DVD-RW.
- In the case of BD, volume labels are not copied.
- If an unsupported disc is set, "UNABLE TO IMPORT FROM DISC" or "UNABLE TO DUB ONTO DISC INSERT ANOTHER DISC" will be displayed on the monitor. Use a disc that is supported by this unit.
For details on discs that are supported by this unit, refer to "Discs that enable both dubbing and playback" ( page 10) and "Discs that enable playback only" ( page 10).
1Press the [DUBBING] button on the remote control unit
• The Dubbing screen appears.
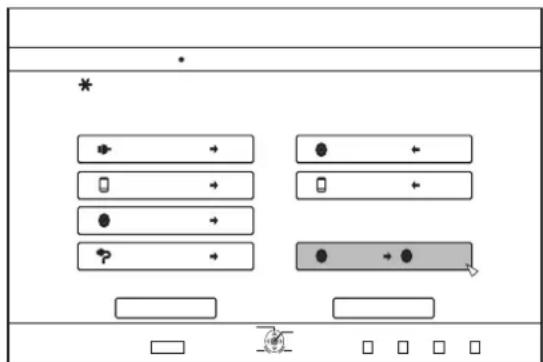
2Select "DISC⇒DISC", and press the [OK] button
- A menu screen for copying the entire disc appears.
Memo:
- During copy of the entire disc, data is temporarily copied to the internal HDD.
- Only discs that are not copyright-protected can be copied.
3 Set the number of discs to copy using the [▲/▼] buttons
- You can specify up to a maximum of 10 discs.
4 Select "NEXT", and press the [OK] button
- The disc tray will open automatically.
5Set the source BD or DVD on the disc tray 6Select "START", and press the [OK] button
- The disc tray will close automatically. The source BD or DVD will be recognized, and copying to the internal HDD will proceed.
- The disc tray will open automatically after copying has finished and "READY TO COPY NOW. INSERT THE DISC FOR COPYING" will be displayed on the monitor.
Memo:
- Confirm the insufficient space on the internal HDD when the copy interrupts.
7Set a BD or DVD to copy on the disc tray
8Select "START", and press the [OK] button
- The disc tray will close automatically. BD or DVD will be recognized, and the contents that were copied to the HDD will be copied to the disc.
Memo:
- The copy operation will not be performed when the remaining disc memory is not sufficient.
9Complete the entire disc copying
- After copy is complete the tray will open automatically, and copy of the entire disc ends.
natural_image
Simple diagram with a rectangular box containing an empty rectangle and a gray rectangle inside, no text or symbols present.Memo:
- The screen prompting you to insert a new disc appears repeatedly until this unit has finished copying the number of discs specified in Step 3. When the message appears, set a new BD or DVD on the disc tray, select "START", and press the [OK] button.
- After copy is complete, the data copied onto the HDD will be deleted.
- Select "CANCEL" from the menu, and press the [OK] button to cancel disc copying.
flowchart
graph TD
    A["Input"] --> B{Processing Step}
    B --> C["Output"]
    style A fill:#f9f,stroke:#333
    style B fill:#ccf,stroke:#333
    style C fill:#cfc,stroke:#333
Recording Using External Inputs
Videos on an external device that is connected to i.LINK (HDV/DV) or video / S-video input can be recorded to the HDD.
Memo:
- Only titles that are not copyright-protected can be imported.
1Select the location of the playback file
2Press the [INPUT SELECT] button on the remote control, and choose external input (HDV/DV or L-1)
3Press the [REC MODE] button and select a recording mode
4 Press the [●] and [▶] remote control buttons together to start the recording process
- Recording can also be start by pressing the [●] button on this unit.
5Operate the external device using i.LINK(HDV/DV) or the video/S-video input to output the videos to be recorded
6Press the [■] button on either this unit or the remote control to display the pop-up screen, choose "STOP" and press the [OK] button
• End the recording.
Memo:
- Recording will continue even if the external device is stopped.
- Recording will be stopped if the maximum recording time has been reached, or if there is insufficient memory in the media.
- For HDV contents, "DR" will be used to record instead of the selected recording mode.
• RECORDABLE MEDIA
| RECORDING MODE | RECORDABLE MEDIA | ||
| HDD DVD | RW (VR format) | BD-RE (BD-AV format) | |
| DR HDV - | |||
| AF (HD) - - | |||
| AN (HD) - - | |||
| AL (HD) - - | |||
| AE (HD) - - | |||
| XP (SD) DV/L | 1 L1 L1 | ||
| SP (SD) DV/L | 1 L1 L1 | ||
| LP (SD) DV/L | 1 L1 L1 | ||
| EP (SD) DV/L | 1 L1 L1 | ||
• MAXIMUM CONTINUOUS RECORDING TIME
HDD : 24 hours (*1)
DVD-RW : 8 hours
BD-RE : 8 hours
*1: Title will automatically be split into time separated by 8 hours. The dividing point will not be recorded.
For the recording modes and maximum recording time for each disc, refer to (v8 page 28).
About Playing Back
Videos or edited videos stored on the internal HDD, as well as videos stored on a disc or SD card can be played back on this unit.
The types of media that are playable on this unit are as follows.
• Videos and still images stored on the internal HDD
• Videos stored on different disc types
- Videos and still images stored on backup discs created using the "Everio Writer"
• Videos and still images stored on SD cards
These videos can be easily played back for viewing using the "Playback Navigation" software that comes with this unit. For details on the "Playback Navigation" software, refer to "Using Playback Navigation" ( page 48 ).
Memo:
- This unit does not support DivX videos.
- If AVCHD files are displayed in thumbnails, black bars may appear on the left and right borders depending on the video resolution.
- To display MOV* files stored on an SD card using Playback Navigation, make use of list display. Thumbnail display is not supported. Files on the SD card cannot be played back directly. To do so, import them into a HDD.
For details on importing MOV* files from an SD card, refer to "Importing Data from an SD Card to the HDD" (page 35).
MOV*: MOV files that are taken in SP mode using the JVC ProHD Camcorder GY-HM700/100
| Icon | Mark name Explanation | |
| Protect Mark | Indicates protected titles. | |
| Mode Conversion Preset Mark | Indicates titles for which mode conversion has been preset. | |
| Not Viewed Mark | Indicates titles that have not been viewed or groups containing titles that have not been viewed. | |
| Scene Delete Mark | Indicates titles for which scene delete or chapter delete has been applied. | |
| Group Mark | Indicates a group. | |
| Playlist Mark | Indicates a playlist. | |
| Not Playable Mark | Indicates titles that cannot be played. | |
Using Playback Navigation
Videos can be easily played back for viewing using the "Playback Navigation" function available on this unit.
Displaying the Playback Navigation screen
1Select the location of the playback file
- Press the [HDD] button on the remote control unit Play back videos or still images stored on the HDD.
- Press the [BD/SD] button on the remote control unit. Play back videos or still images stored on a BD/DVD or a SD.
2Press the [NAVIGATION] button on the remote control unit
- The Playback Navigation screen appears.
Memo:
- Pressing the [BD/SD] button each time switches the media to play back between BD/DVD and SD.
- You can also switch the media to play back by pressing the [HDD] or [BD/SD] button when the Playback Navigation screen is displayed.
Operating Playback Navigation
■ Playing a video/still image
Plays the selected video/still image.
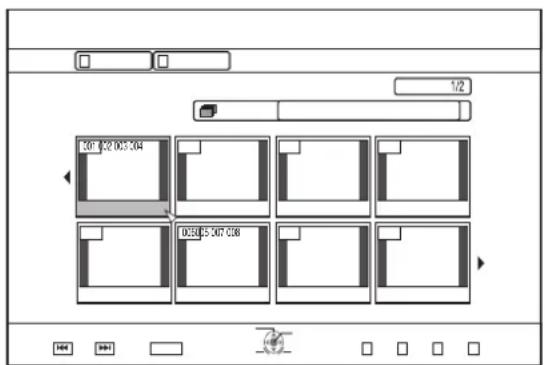
- Select a title to play back, followed by pressing the [OK] or [▶] button to play the selected video/still image.
Memo:
- Select a group and press the [OK] button to display all titles in the group.
■ Switching between thumbnail and list displays
You can switch between the thumbnail display and list display of a video.
- When the video thumbnail list screen is displayed
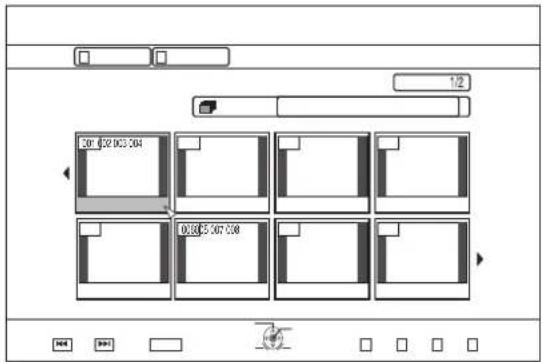
Press the [RED] button to display the title list screen.
- When the title list screen is displayed
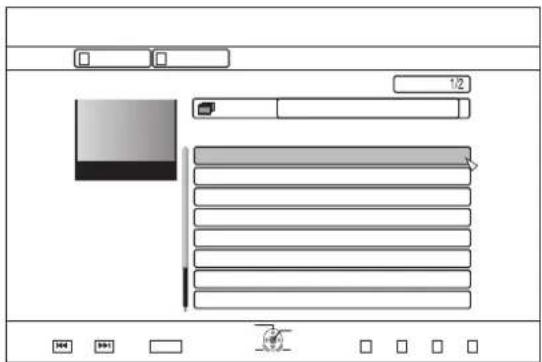
Press the [RED] button to display the video thumbnail list screen.
■ Displaying a group/folder
A group/folder screen can be displayed.
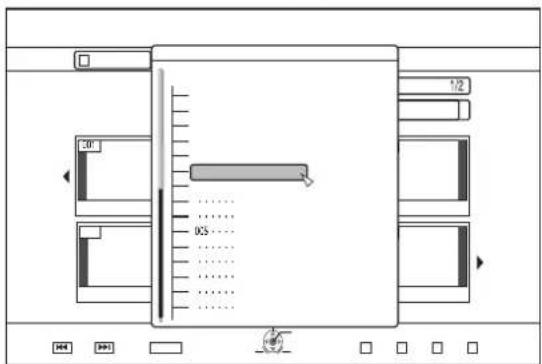
Press the [YELLOW] button to display the group/folder screen.
■ Switching between video and still image displays
You can switch the display between the video thumbnail list screen and still image thumbnail screen.
- When the video thumbnail list screen is displayed
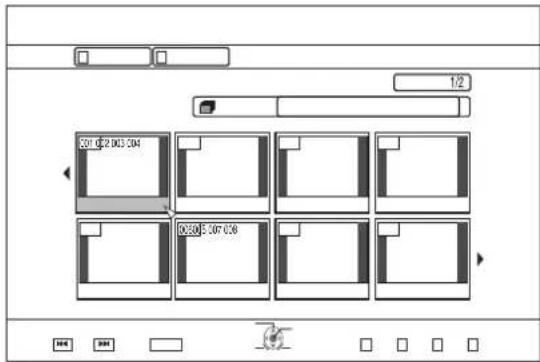
Press the [GREEN] button to display the still image thumbnail list screen.
- When the still image thumbnail list screen is displayed
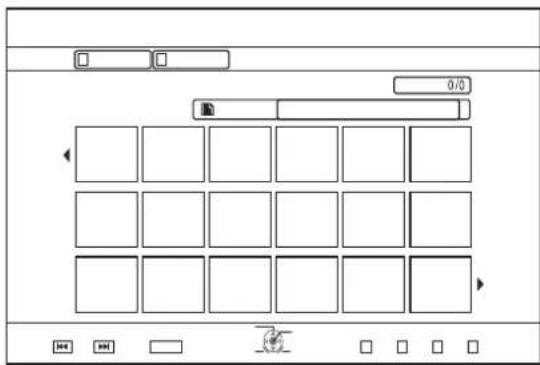
Press the [RED] button to display the video thumbnail list screen.
■ Displaying the Option menu
Displaying the Option menu enables you to perform different operations on a selected title/group, including "BACK", "PLAY", "DELETE", "DUB", "GROUP", "UNGROUP", "DO NOT GROUP", "MODE CHANGE", "EDIT", "EDIT INFO" and "OTHERS".
1Select a title/group, and press the [OPTION] button
- An Option menu appears.
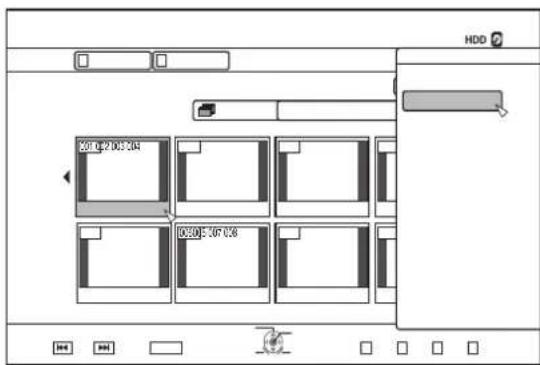
Using Playback Navigation \_(Continued)
2Select an operation option, and press the [OK] button
- Options that cannot be operated are displayed in gray and cannot be selected.
For details on the Option menu items, refer to "Option menu list" (page 50).
Option menu list
- BACK
Returns to the previous screen. -
PLAY
Plays back the selected title/group.
For details on the button operations during playback, refer to "Video Playback Operation" ( page 51 ). -
DELETE
Deletes a selected title/group.
For details, refer to "Deleting a Title/Group" ( page 62).
• DUB
Performs dubbing of a selected title/group.
For details, refer to "Dubbing/Importing" (page 23).
- GROUP
Groups the selected titles/groups.
For details, refer to "Grouping" ( page 60).
- UNGROUP
Ungroups a selected group.
For details, refer to "Ungrouping" ( page 60).
• DO NOT GROUP
Removes the selected titles from a group.
For details, refer to "Excluding from a group" ( page 61).
- MODE CHANGE
Changes the mode of the selected title/group.
For details, refer to "Mode conversion" ( page 73).
- CHAPTER LIST
Displays the chapters of a selected title.
• EDIT
Switches to the menu screen of the sub-items.
- CHAPTER EDIT
Switches to the chapter edit screen of the selected title. For details, refer to "Editing a Chapter" ( page 67 ).
- PLAYLIST EDIT
Switches to the playlist edit screen of the selected title. For details, refer to "Creating a playlist" ( page 65 ).
- DELETE SCENE
Switches to the delete scene screen of the selected title. For details, refer to "Delete Scene" ( page 70 ).
• DIVIDE
Switches to the dividing screen of the selected title. For details, refer to "Dividing" ( page 69).
• EDIT INFO
Switches to the menu screen of the sub-items.
- MODIFY TITLE NAME/MODIFY GROUP NAME
Switches to the rename screen for the selected title/group name.
For details, refer to "Changing the Title/Group Name" (page 62).
- MODIFY THUMBNAIL
Switches to the thumbnail modification screen of the selected title. For details, refer to "Editing a Thumbnail" ( page 66 ).
- MODIFY DATE
Switches to the recording date modification screen of the selected title. For details, refer to "Changing the Shooting Date/Time" ( page 72 ).
- PROTECT
Switches to the protection screen of the selected title/group. For details, refer to "Turning On Title/Group Protection" ( page 63 ).
- UNPROTECT
Switches to the screen for turning off protection of the selected title/group.
For details, refer to "Turning Off Title/Group Protection" ( page 64 ).
- OTHERS
Switches to the menu screen of the other-items.
- CHAPTER LIST
- DETAILS
- THUMBNAIL
- LIST
• VIDEO
- PICTURE
- GROUP
- FOLDER SELECT
- CONTENT
Video Playback Operation
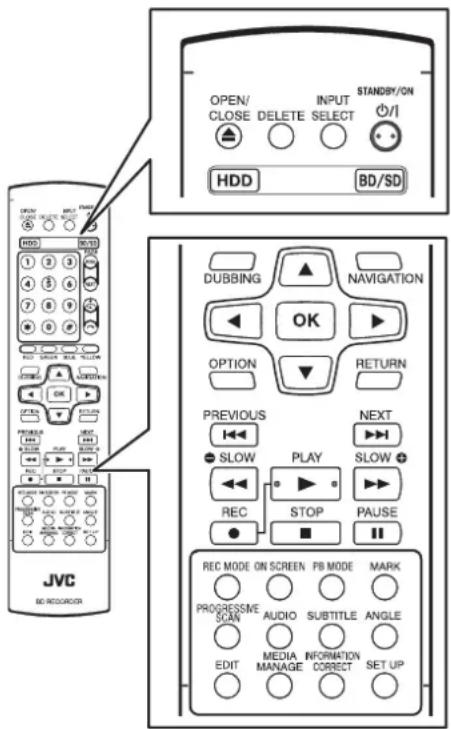
Frequently used button operations
■ [▶] button
- If the stop position (resume point) is memorized in the selected video, pressing the button plays back the video from this position. The video may not resume playback depending on the media and settings used. Refer to "RESUME" ( page 77 ).
- If playback is paused (Still mode), pressing the button resumes playback.
■ [ ■ ] button
- Pressing the button stops playback after memorizing the stop position (resume point).
- Pressing the button again after playback stops clears the memory of the stop position (resume point).
■ [Ⅱ] button
- Pressing the button stops playback temporarily.
■ [▶▶] button
- Pressing the button once during playback switches to a playback speed of 1.3 times (with audio sound).
- Pressing the button in the 1.3x playback or fast forward mode fast forwards the video. Pressing the button each time switches the search speed. (5x⇒10x⇒30x⇒60x)
Memo:
The listed speed for searching and slow motion is an approximate amount.
- Pressing the button in the Still mode forwards the video frame by frame.
- Pressing and holding down the button in the Still mode starts playback in slow motion.
Pressing the button during playback in slow motion switches the playback speed. The speed changes each time the button is pressed. (1/24x⇒1/16x⇒1/8x⇒1/2x)
■ [◀◀] button
- During normal playback, 1.3x playback, fast forward, or fast reverse, pressing the button fast reverses playback.
Pressing the button each time switches the search speed. (1x⇒5x⇒10x⇒30x) - Pressing the button in the Still mode reverses the video frame by frame.
- Pressing and holding down the button in the Still mode starts reverse playback of the video in slow motion. Pressing the button during playback in slow motion switches the playback speed. The speed changes each time the button is pressed. (1/24x⇒1/16x⇒1/8x⇒1/2x)
Memo:
The listed speed for searching and slow motion is an approximate amount.
■ [▶▶] / [◀◀] button
- Pressing any of the buttons moves the chapter position.
■ [MARK] button
- Pressing the button enables you to add a chapter mark to a title.
Video Playback Operation\_(Continued)
■ [ ↻ ] button
- During normal playback, 1.3x playback, slow motion playback, fast forward, or fast reverse, pressing the button moves the playback position forward by about 30 seconds. Pressing the button multiple times moves playback to the position equivalent to the number of times pressed multiplied by 30 seconds.
- Normal playback will resume after the position has been moved. If pressed during 1.3x playback, 1.3x playback will continue after the position has been moved. Contents may be played back in the normal mode depending on the type of disc or content.
- Pressing the button in the Still mode moves the current paused position forward by about 30 seconds while maintaining the Still mode.
■ [ ] button
- During normal playback, 1.3x playback, slow motion playback, fast forward, or fast reverse, pressing the button moves the playback position back by about seven seconds. Pressing the button multiple times moves playback to the position equivalent to the number of times pressed multiplied by seven seconds.
- Normal playback will resume after the position has been moved. If pressed during 1.3x playback, 1.3x playback will continue after the position has been moved. Contents may be played back in the normal mode depending on the type of disc or content.
- Pressing the button in the Still mode moves the current paused position back by about seven seconds while maintaining the Still mode.
■ [HDD] button
- During playback of videos on a "BD/DVD" or "SD", pressing the button stops the current playback and switches to the "HDD" mode.
Pressing the button during display of the Playback Navigation screen switches to the Playback Navigation screen for the "HDD" mode.
■ [BD/SD] button
- During playback of videos on a "BD/DVD" or "SD", pressing the button stops the current playback and switches from "BD/DVD" to "SD" or vice versa.
Pressing the button during display of the Playback Navigation screen switches to the Playback Navigation screen for the other media. During playback of videos on the "HDD", pressing the button stops the current playback and switches to "BD/DVD" mode.
Memo:
- The display switches automatically to the SD mode only if the inserted SD card contains playable videos or still images.
Useful button operations
■ [PB MODE] button
- Displays the Playback Settings screen, which enables you to modify the settings.
For details, refer to "Changing Playback Settings".
■ [AUDIO] button
- Switches the audio channel.
■ [SUB TITLE] button
- Switches the subtitle display.
■ [ANGLE] button
- Switches the angle.
Memo:
Pressing the [AUDIO], [SUB TITLE], or [ANGLE] button has no effect if their selection is not available in the playback video.
Playing Videos on a BD/DVD
Playback starts automatically after a BD/DVD is set. If the Auto Play feature is disabled, play the title using Playback Navigation.
Memo:
For details on the button operations during playback, refer to "Video Playback Operation" ( page 51 ).
Playing a disc when Auto Play is enabled 1Set a BD or DVD on the disc tray
- Auto Play starts.
Playing a disc when Auto Play is disabled 1Set a BD or DVD on the disc tray
2Press the [NAVIGATION] button
- The Playback Navigation screen appears.
3Select a title, and press the [OK] button
- Playback of the selected title starts.
Memo:
- If the current playback location is HDD or SD, press the [BD/SD] button on the remote control unit to switch it to BD/DVD.
- Videos can also be played back without starting up Playback Navigation. Pressing the [▶] button starts playback from the stop position (resume point) of the disc. If the stop position (resume point) is not memorized or if the setting for resume has been set to off, playback starts from the beginning of the disc.
Playing an EverioBackup Disc\*
EverioBackup*: Data disc containing high-definition videos that are recorded in the MPEG2 format using a DVD writer for Everio.
1Set the disc on the disc tray
2Press the [NAVIGATION] button
- The Playback Navigation screen appears.
3Select a title, and press the [OK] button
- Playback of the selected title starts.
Memo:
- If the current playback location is HDD or SD, press the [BD/SD] button on the remote control unit to switch it to BD/DVD.
- Videos can also be played back without starting up Playback Navigation. Pressing the [▶] button plays back titles starting from that with the oldest recording date.
Playing Video Discs Created Using a PC
Videos that are created using a PC can be played back using Playback Navigation.
1Set the disc on the disc tray
2Press the [NAVIGATION] button
- The Playback Navigation screen appears.
3Select a title, and press the [OK] button
- Playback of the selected title starts.
Memo:
- The formats that can be played back are BDAV, BDMV, DVD-Video and DVD-VR (CPRM-compatible).
- If the current playback location is HDD or SD CARD, press the [BD/SD] button on the remote control unit to switch it to BD/DVD.
- Videos can also be played back without starting up Playback Navigation.
Pressing the [▶] button starts playback from the stop position (resume point) of the disc.
If the stop position (resume point) is not memorized or if the setting for resume has been set to off, playback starts from the beginning of the disc. - Playback may not be possible due to compatibility problems.
Playing Videos on the HDD
Titles stored on the HDD can be played back using Playback Navigation.
You can select a video to play from "Title", "Group", or "Playlist".
Memo:
For details on the button operations during playback, refer to "Video Playback Operation" ( page 51 ).
Playing titles stored on the HDD
1Press the [NAVIGATION] button
- The Playback Navigation screen appears.
2Select the titles to playback, and press the [▶] button
- Playback of the selected title starts.
Memo:
- If the current playback location is "BD/DVD" or "SD CARD", press the [HDD] button on the remote control unit to switch it to "HDD".
- To play back specific titles within a group, select the group, press the [OK] button, and select the titles accordingly.
- Videos can also be played back without starting up Playback Navigation.
Pressing the [▶] button starts playback of the most recently played title.
If there are no recently played titles, playback starts from the title with the most recent recording date.
Playing Videos on a SD Card
Titles stored on an SD card can be played back using Playback Navigation.
You can select a video to play from "Title".
1 Insert the SD card into the [SD SLOT]
- Switch the playback location to "SD CARD" after the SD card is detected by the unit.
2Press the [NAVIGATION] button
- The Playback Navigation screen appears.
3Select a title, and press the [OK] button
- Playback of the selected title starts.
Memo:
- Playback navigation displays AVCHD files stored on the SD card in titles, not in scenes (chapters). Titles are grouped such as according to the date, recording mode, or number of scenes. Make use of thumbnail display to display titles. List display is not supported.
- The formats that can be played back are AVCHD and SD-VIDEO. If AVCHD files are displayed in thumbnails, black bars may appear on the left and right borders depending on the video resolution.
- Videos can also be played back without starting up Playback Navigation. Pressing the [▶] button starts playback from the stop position (resume point). If the stop position (resume point) is not memorized, playback starts from the beginning of the playable content. If the setting for “QUICK STARTUP” is set to “OFF”, the resume point will not be memorized when the power is turned OFF.
For details on the button operations during playback, refer to "Video Playback Operation" ( page 51).
Playing Still Images (JPEG)
Still images stored on the HDD/BD/DVD/SD card can be played back using Playback Navigation.
Playing still images
1Select the playback location
HDD : If the current playback location is "BD/DVD" or "SD CARD", press the [HDD] button on the remote control unit to switch it to "HDD".
BD/DVD : If the current playback location is "HDD" or "SD CARD", press the [BD/SD] button on the remote control unit to switch it to "BD/DVD".
SD card : If the current playback location is "HDD" or "BD/DVD", press the [BD/SD] button on the remote control unit to switch it to "SD CARD".
2Set the media
- To play a media other than "HDD", set the media on which the still images are stored.
BD/DVD : Set a BD or DVD on the disc tray
SD card : Insert the SD card into the [SD SLOT]
3Select the still images to play, and press the [▶] button
- Images selected are played back in a slideshow.
Memo:
- The slide show plays back images according to the date of the files.
- If folders exist, files inside the selected folder will be played.
- You can specify the "REPEAT", "SLIDESHOW INTERVAL" and "SLIDESHOW EFFECTS" settings in the Playback Settings menu.
For details, refer to the "REPEAT" (page 56),
"SLIDESHOW INTERVAL" ( page 56), and
"SLIDESHOW EFFECTS" ( page 56) items under
"Playback Settings".
Enabled button operations during still image playback
■ [▶] button
- Pressing the button when a title/group is selected starts playback of the still images in the title/group in a slideshow.
■ [ ■ ] button
- Pressing the button stops the slideshow and displays the Playback Navigation screen.
■ [Ⅱ] button
- Pressing the button stops the slideshow temporarily.
■ [◀◀] / [▶▶] button
- Pressing the button displays the previous or next still image.
■ [ ⏻/l ] button
- Pressing the button ends playback of the still images and turns the power of the unit to "Off".
Memo:
- The display of still images can be zoomed in/out or rotated using the following buttons when the slideshow is paused.
• [ ↗ ] / [BLUE] button
Rotates the still image by 90^ in the anti-clockwise direction.
• [←] / [YELLOW] button
Rotates the still image by 90^ in the clockwise direction.
- [OK] / [RED] button
Enlarges the still image.
- [RETURN] / [GREEN] button
Reduces the still image.
• [▲/▼/◄/►] button
Moves the display position toward the direction indicated by the button.
- This unit does not have a still image edit feature. Still images cannot be saved when they are zoomed in or rotated.
- Priority of display is given to the media ("BD/DVD" or "SD CARD") that contains playable still images.
If both “BD/DVD” and “SD CARD” contain playable videos, priority of display will be given to the most recently used media.
Changing Playback Settings
Displaying the playback settings menu
1Press the [PB MODE] button on the remote control unit during the playback of a title
• The Settings Menu screen appears.
- The playback settings menu can only be displayed during the playback of a title.
- Only settings that are supported by the current title being played back can be changed in the playback settings menu.
Items displayed in gray cannot be set.
Playback Settings Menu
Audio/subtitle settings
Memo:
- "AUDIO/SUBTITLE" will be displayed only if they are available in the video content. The setting value differs depending on the content. Items that are not available in the content cannot be set.
■ AUDIO LANGUAGE
■ CHANGE AUDIO OUTPUT
■ SIGNAL TYPE (BD-ROM)
- PRIMARY VIDEO
• PRIMARY AUDIO - SECONDARY VIDEO
- CHANGE SECONDARY VIDEO
• SECONDARY AUDIO
• SECONDARY AUDIO LANGUAGE
■ SUBTITLE LANGUAGE
■ SUBTITLE STYLE
■ CHANGE ANGLE
Playback settings
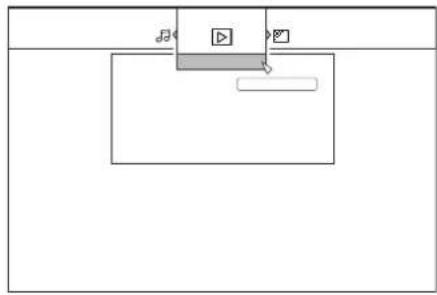
flowchart
graph TD
    A["Music"] --> B["Play Button"]
    B --> C["Video Output"]
■ REPEAT
The following items can be set. Items are not displayed if they cannot be set.
| Setting Values Description | |
| OFF Turns off repeat. | |
| TITLE | Repeats playback of the currently played title. |
| CHAPTER | Repeats playback of the currently played chapter. |
| TRACK | Repeats playback of the currently played track. |
| FOLDER | Repeats playback within the currently played folder. |
| ALL | Repeats playback of the entire disc. |
| A-B | Repeats playback of the section between the specified starting and ending points.Pressing the [OK] button specifies the displayed scene as the starting point (Point A). Pressing the [OK] button after forwarding playback specifies the displayed scene as the ending point (Point B). |
■ CHANGE TITLE
You can change to a different title by entering the corresponding numeric value. Any value that is larger than the number of titles cannot be entered.
■ CHANGE CHAPTER
You can change to a different chapter by entering the corresponding numeric value. Any value that is larger than the number of chapters cannot be entered.
■ TIME JUMP
You can move to a specific playback position by entering a time. This is not possible if the specified time is not valid.
■ SLIDESHOW INTERVAL
The following items can be set. 3SEC/5SEC/10SEC/20SEC/30SEC modes
■ SLIDESHOW EFFECTS
The following items can be set.
| Setting Values | Description |
| OFF Turns off slideshow effect. | |
| ON | Turns on slideshow effect. "Fade out" and "Fade in" effects can be applied when switching from one slide to another. |
Video settings
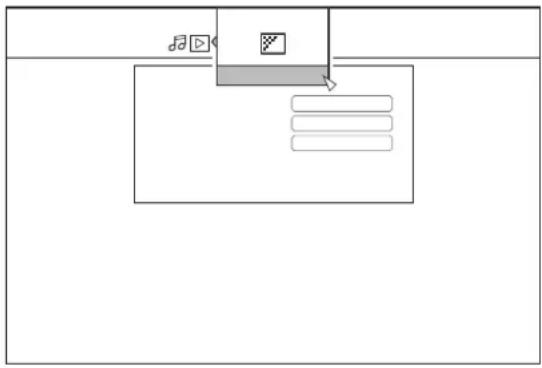
flowchart
graph TD
    A["Start"] --> B["Play Button"]
    B --> C{Next Step}
    C --> D["End"]
■ PICTURE QUALITY
The following items can be set.
| Setting Values | Description |
| NORMAL Standard picture quality. | |
| CINEMA Effective when playing movies. | |
| FINE Produces sharp images with enhanced outlines. | |
| SOFT Reduces noise that is prominent in the video image. | |
| USER SETTING | Enables the Details setting. For more details, refer to “DETAIL SETTING”. |
■ DETAIL SETTING
The following items can be set.
Choose an option and press [OK] to set the respective values.
| Setting Values | Description |
| CONTRAST | A value between "-7" and "+7" can be set. |
| BRIGHTNESS | A value between "0" and "15" can be set. |
| SHARPNESS | A value between "-6" and "+6" can be set. |
| COLOR | A value between "-7" and "+7" can be set. |
| GAMMA | A value between "0" and "5" can be set. |
■ DIGITAL NOISE REDUCTION
The following items can be set.
| Setting Values | Description |
| OFF Turns off DNR (Digital Noise Reduction). | |
| ON Reduces noise that is prominent in images of lengthy videos. | |
■ PROGRESSIVE OUTPUT
The following items can be set.
| Setting Values | Description |
| AUTO1 Displays video images after they are converted according to the film material. | |
| AUTO2 In addition to the “AUTO1” option, support is also provided for progressive videos recorded at 30 frames per second. | |
| VIDEO Most suitable for video images (TV broadcast, etc.). Select this option when playing videos with significant movements or animated videos. | |
Editing
Before editing
This unit mainly edits video images stored on the HDD. To edit video images stored in a disc or SD card, do so after importing them to the HDD.
Data on a finalized disc cannot be edited. To edit a finalized disc, you have to either unfinalize the disc, or do so after importing the data to the HDD.
Memo:
- Only discs that are finalized using this unit can be unfinalized.
Editable items for different media
Items that are editable vary according to the type of media on which the video data is stored. For details, refer to the media chart below.
■ Media chart
| Editing option HDD BD-R | (BDAV) | BD-RE (BDAV) | DVD-RW/ DVD-R | SD HDD/BD- RE/SD (picture) | |
| Grouping ○- - - - - | |||||
| Changing the Title/Group Name ○○○○- - | |||||
| Deleting a Title/Group ○○○○- ○ | |||||
| Turning On Title/Group Protection ○○○*1 - ○ | |||||
| Turning Off Title/Group Protection ○○○*1 - - | |||||
| Creating a Playlist ○- - - - - | |||||
| Editing a Thumbnail ○○○○- - | |||||
| Editing a Chapter ○*2 *2 | *1,*2 | -- | |||
| Delete Scene | ○- - - - - | ||||
| Dividing | ○- - - - - | ||||
| Changing the Disc Name | - ○○○- - | ||||
| Changing the Shooting Date/Time | ○- - - - - |
Memo:
*1 : Supports only the "VR MODE".
*2 : Supports only dividing and combining of chapters.
Entering Characters
Names can be changed or given to stored videos or groups. You can enter characters while referring to the input on the monitor.
Character input screen
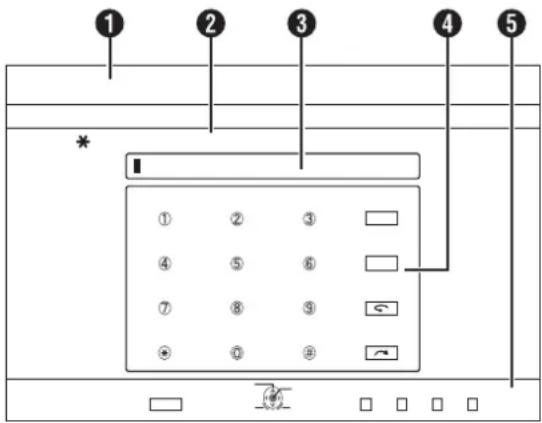
① Function name field
② Screen description
③ Input window
Characters entered appear on the input window.
④ Operation guide 1
The [0]-[9], [*], [#], [PAGE PRV], [←] and [→] buttons are displayed.
⑤ Operation guide 2
[▲/▼/◄/►], [OK], [RETURN], [OPTION], [BLUE], [RED], [GREEN] and [YELLOW] buttons are displayed.
⑥ Character input keyboard
A character input keyboard appears during input of symbol. You can enter characters by selecting them accordingly from the keyboard.
Entering characters
1Enter characters using the [0]-[9], [\*] or [#] buttons
2After character input is complete, press the [YELLOW] button
Memo:
- Switch between alphanumeric and symbol input by pressing the [ ↩ ] button.
- For details on the correspondence between each button and the input characters, refer to the "Character List".
- Press the [ ] button to delete an input character. Press and hold down the [ ] button to delete all input characters.
- Pressing the [RETURN] button calls up the confirmation screen to cancel character input.
To cancel character input and return to the initial screen, select "YES" and press the [OK] button.
To return to the character input screen, select "NO" and press the [OK] button.
Note:
-
If you switch the screen display before confirming the input characters, a message will appear on the screen. To cancel character input and proceed to switch the screen display, select "YES" and press the [OK] button.
To return to the character input screen, select "NO" and press the [OK] button. -
If the converted characters exceed the maximum number of input characters, a message will appear on the screen.
Select "OK" and press the [OK] button to delete the excess characters and to input the remaining ones.
Select "RETURN" and press the [OK] button to restore the unconfirmed characters.
- No more characters can be input if the maximum character limit has been reached.
Character List
| [1] | . | , | ! | ? | 1 | - | ( | ) | @ | / | : | _ | ||||||||||||||||||||
| [2] | a | b | c | A | B | C | ä | æ | å | à | á | å | ä | ç | Ä | Æ | Å | À | Á | Â | Ä | Ç | 2 | |||||||||
| [3] | d | e | f | D | E | F | è | é | ê | ë | ð | È | É | Ê | Ë | Đ | 3 | |||||||||||||||
| [4] | g | h | i | T | G | H | I | i | í | î | ï | ì | í | î | ï | 4 | ||||||||||||||||
| [5] | j | k | l | J | K | L | £ | 5 | ||||||||||||||||||||||||
| [6] | m | n | o | M | N | O | ö | ø | ò | ó | ô | õ | ñ | Ö | ∅ | Ò | Ó | Ô | Ö | Ñ | 6 | |||||||||||
| [7] | p | q | r | s | P | Q | R | S | ÿ | ß | 7 | |||||||||||||||||||||
| [8] | t | u | v | T | U | V | ù | ú | û | ü | Ù | Ú | Û | Ü | 8 | |||||||||||||||||
| [9] | w | x | y | z | W | X | Y | Z | ý | þ | Ý | þ | 9 | |||||||||||||||||||
| [0] | 0 | . | @ | - | _ | / | : | ! | ? | ~ | ( | ) | * | # | + | , | ^ | ; | < | = | > | \ | % | & | [ | ] | ' | ` | { | |} | *1 | |
| [*] | , | . | - | ~ | ! | ? | *1 |
*1: Single-byte space
*2: Press the [#] button to return to the previous input character.
Grouping
Multiple titles stored on the HDD can be combined into a group.
Memo:
- Only video data stored on the HDD can be grouped.
Grouping
1Press the [NAVIGATION] button on the remote control unit
- The Playback Navigation screen appears.
2Select the titles or groups to be grouped, and press the [MARK] button
- Pressing the [MARK] button adds a check mark to the selected titles/groups. All titles and groups with the check mark will be grouped together.
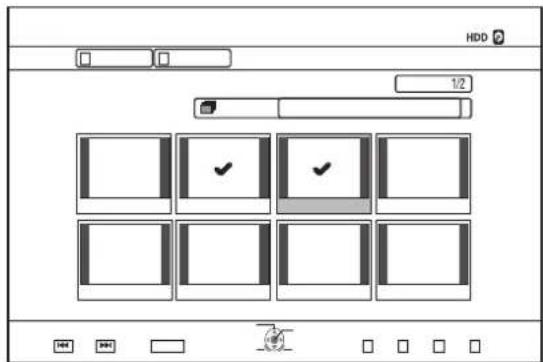
3Press the [OPTION] button on the remote control unit
• A pop-up option list appears.
4Select "GROUP", and press the [OK] button
- A grouping confirmation screen appears.
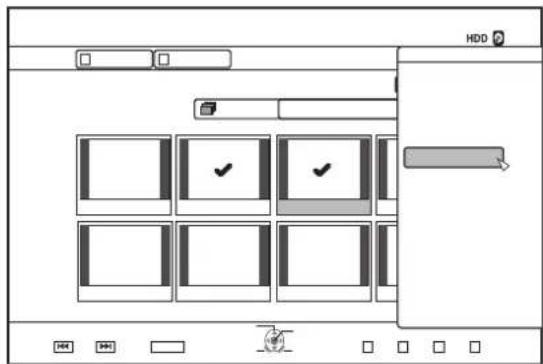
5 Select "GROUP", and press the [OK] button
- The selected titles and groups are now grouped together.
Memo:
- To cancel grouping, select "BACK" and press the [OK] button.
- Alternatively, you can press the [RETURN] button to cancel grouping and return to the initial screen.
Ungrouping
1Press the [NAVIGATION] button on the remote control unit
• The Playback Navigation screen appears.
2Select the group to ungroup, and press the [OPTION] button
• A pop-up option list appears.
3Select "UNGROUP", and press the [OK] button
- An ungroup confirmation screen appears.
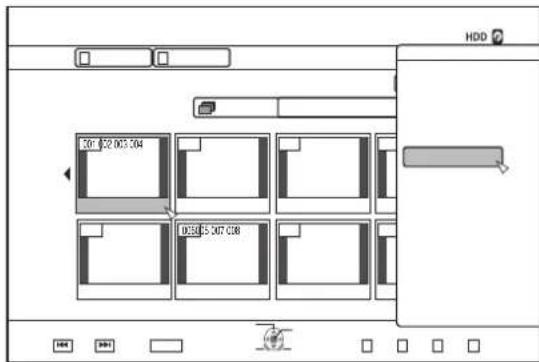
Memo:
- You cannot ungroup multiple groups at the same time. When multiple groups are selected, the "UNGROUP" item does not appear in the option list.
4Select "YES", and press the [OK] button
- All titles within the selected group are ungrouped.
Memo:
- To cancel ungrouping, select "NO" and press the [OK] button.
• Alternatively, you can press the [RETURN] button to cancel ungrouping and return to the initial screen.
Excluding from a group
You can select titles and exclude them from a group.
1Press the [NAVIGATION] button on the remote control unit
• The Playback Navigation screen appears.
2Select the titles to exclude from the group, and press the [MARK] button
- Pressing the [MARK] button adds a check mark to the selected titles/groups. All titles with the check mark will be excluded from the group.
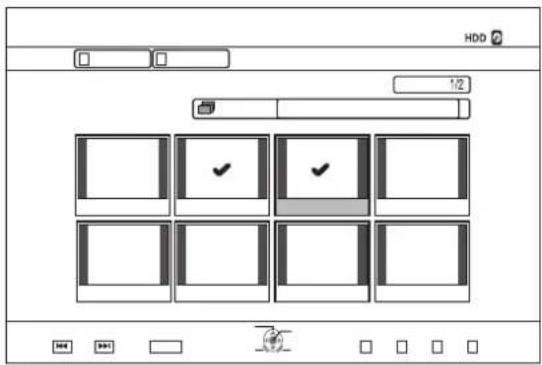
3 Press the [OPTION] button on the remote control unit
• A pop-up option list appears.
4Select "DO NOT GROUP", and press the [OK] button
• A confirmation screen for group exclusion appears.
5Select "YES", and press the [OK] button
- The selected titles are now excluded from the group.
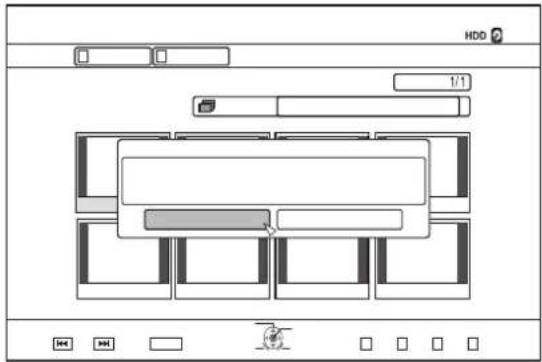
Memo:
- To cancel, select "NO" and press the [OK] button.
- Alternatively, you can press the [RETURN] button to cancel group exclusion and return to the initial screen.
Changing the Title/Group Name
The saved title/group name can be changed as follows.
Memo:-
- A title/group name can be added to video data stored on the HDD, BD-RE, BD-R, DVD-RW, or DVD-R, and the name can be changed.
- Video data stored on a DVD-RW or DVD-R in the Video mode cannot be changed.
1Press the [NAVIGATION] button on the remote control unit
- The Playback Navigation screen appears.
2Select the title/group for which the name is to be changed, and press the [OPTION] button
• A pop-up option list appears.
3Select "EDIT INFO", and press the [OK] button
- An information editing screen appears.
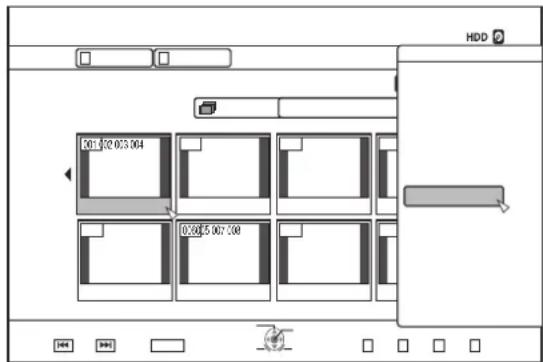
4Select "MODIFY TITLE NAME" or "MODIFY GROUP NAME", and press the [OK] button
- A title/group name modifying screen appears.
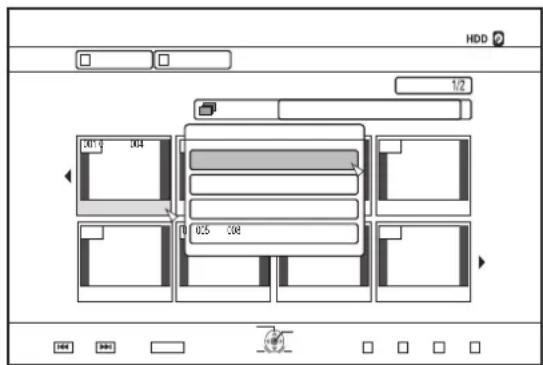
5Modify the title/group name
- The modified title/group name is now saved.
Memo:-
- For details on the method of character input, refer to "Entering Characters" ( page 59).
Deleting a Title/Group
Titles/groups can be deleted. When you delete a group, all titles contained within the group are deleted.
Memo:
- When a title/group is deleted from the HDD, BD-RE, or DVD-RW, the remaining space on the media increases according to the size of the deleted title/group. Deleting a title/group from a BD-R or DVD-R does not increase the amount of available space on the disc.
1Press the [NAVIGATION] button on the remote control unit
- The Playback Navigation screen appears.
2Select the titles/groups to delete, and press the [OPTION] button
- A pop-up option list appears.
3Select "DELETE", and press the [OK] button
- A confirmation screen for title/group deletion appears.
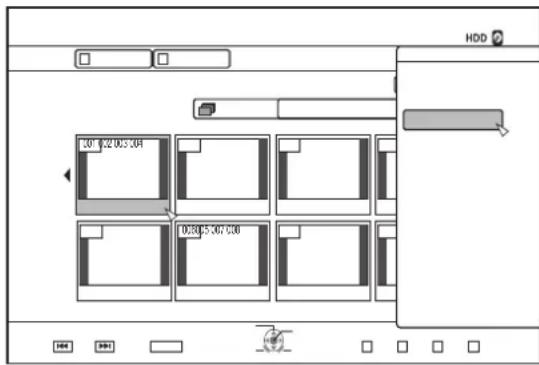
4Select "DELETE", and press the [OK] button
• The selected titles/groups are deleted.
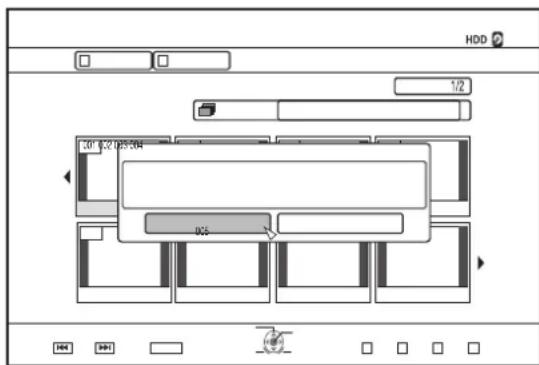
Memo:
- To cancel the title/group deletion operation, select "BACK" and press the [OK] button.
- Alternatively, you can press the [RETURN] button to cancel the deletion operation and return to the initial screen.
Turning On Title/Group Protection
Titles/groups can be protected.
Editing and deletion cannot be performed on protected titles/groups.
- Title/group protection can be turned on for video data stored on the HDD, BD-RE (BDAV), BD-R (BDAV), and DVD-RW (VR).
1Press the [NAVIGATION] button on the remote control unit
• The Playback Navigation screen appears.
2Select the titles/groups to be protected, and press the [OPTION] button
• A pop-up option list appears.
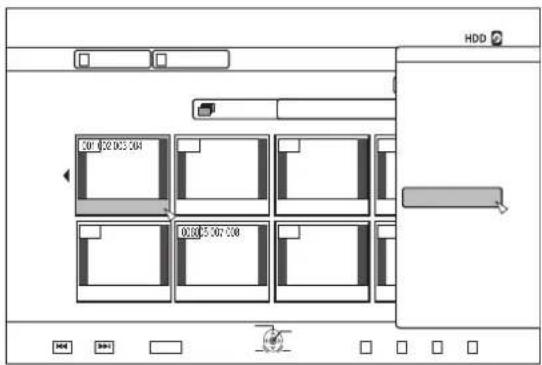
3Select "EDIT INFO", and press the [OK] button
• An information editing screen appears.
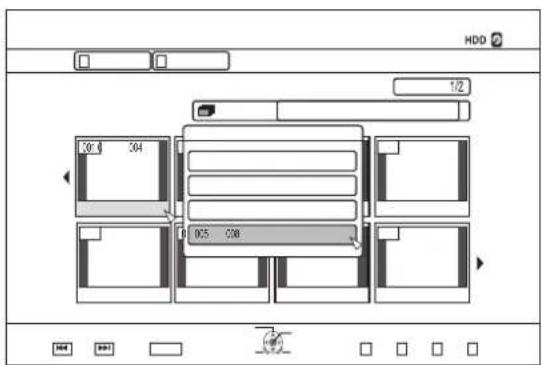
4Select "PROTECT", and press the [OK] button
- If only a single title was selected in step 2, a confirmation screen for title protection will appear.
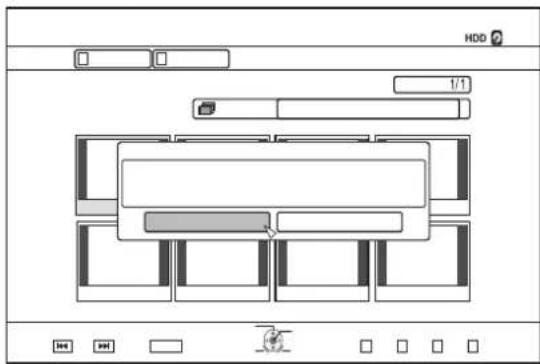
- If multiple titles or groups were selected in step 2, "PROTECT" and "UNPROTECT" items will be displayed.
5Select "YES" or "PROTECT", and press the [OK] button
- The selected titles/groups are now protected.
Memo:
- All selected titles and groups will be protected when multiple titles or groups are selected.
- To turn off the title/group protection, select "NO" and press the [OK] button.
• Alternatively, you can press the [RETURN] button to turn off the protection and return to the initial screen.
Turning Off Title/Group Protection
Protection of a title/group can be turned off.
Titles/groups can be edited and deleted after their protection is turned off.
- Title/group protection can be turned off for video data stored on the HDD, BD-RE (BDAV), BD-R (BDAV), and DVD-RW (VR).
1Press the [NAVIGATION] button on the remote control unit
- The Playback Navigation screen appears.
2Select the titles/groups to turn off protection for, and press the [OPTION] button
• A pop-up option list appears.
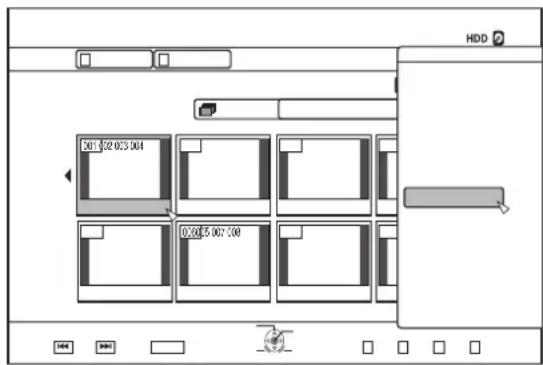
3Select "EDIT INFO", and press the [OK] button
- An information editing screen appears.
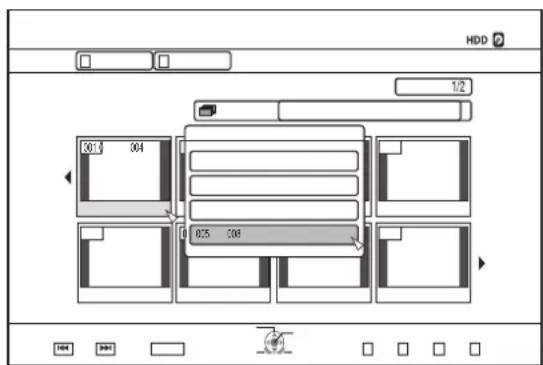
4Select "UNPROTECT", and press the [OK] button
- If only a single title was selected in step 2, a confirmation screen for turning off protection will appear.
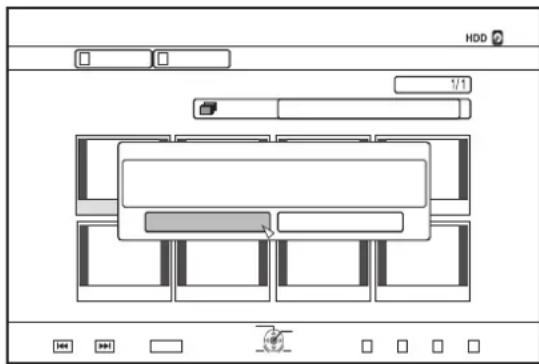
- If multiple titles or groups were selected in step 2, "UNPROTECT" and "PROTECT" items will be displayed.
5Select "YES", and press the [OK] button
- Protection of the selected titles/groups is now turned off.
Memo:
- Protection will be turned off from all selected titles and groups when multiple titles or groups are selected.
- If you do not want to turn off the title/group protection, select "NO" and press the [OK] button.
- Alternatively, you can press the [RETURN] button to cancel protection removal and return to the initial screen.
Creating a Playlist
A playlist can be created from the video titles on the HDD.
- Playlists can only be created for titles that are stored on the HDD.
Playlist : Enables you to create a program by selecting chapters from a specific title and editing their playback sequence.
Memo:
- The playlist created comes in handy during playback and dubbing to a disc.
Creating a Playlist
1Press the [NAVIGATION] button on the remote control unit
- The Playback Navigation screen appears.
2Select the title for which a playlist is to be created, and press the [OPTION] button
3Select "EDIT", and press the [OK] button
• The Edit menu screen appears.
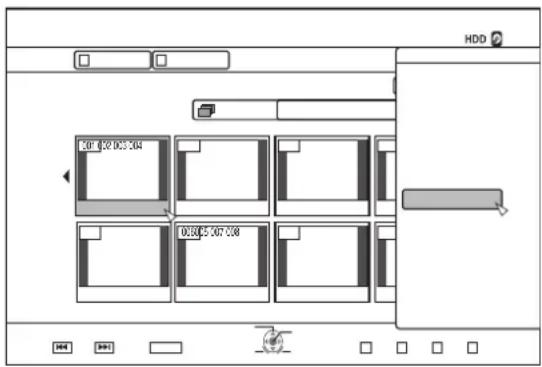
4Select "PLAYLIST EDIT", and press the [OK] button
• The playlist edit screen appears.
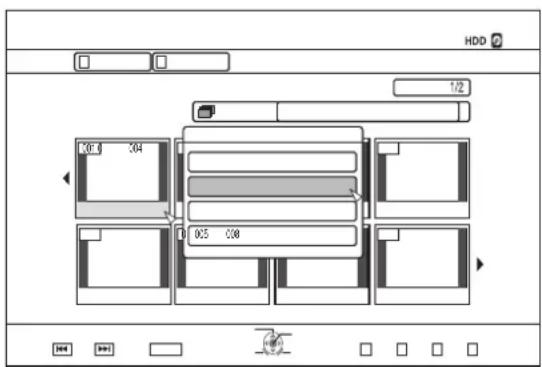
5 Edit the playlist accordingly by selecting chapters from the source title according to your preference
- Edit the playlist.
For details, refer to "Editing the playlist".
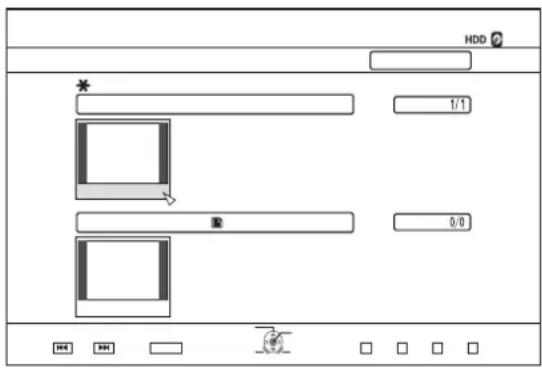
6Press the [YELLOW] button on the remote control unit
- A playlist is created.
Editing the playlist
■ Chapter insertion
① Select the chapter to insert from the thumbnails of the "SOURCE TITLE", and press the [OK] button
② Select the position to insert the chapter from the "TARGET PLAYLIST", and press the [OK] button
■ Chapter deletion
① Select the chapter to delete from the thumbnails of the "TARGET PLAYLIST", and press the [OK] button
② Select "DELETE", and press the [OK] button
■ Entering the playlist name
① Select "TARGET PLAYLIST", and press the [OK] button.
② Enter a playlist name, and press the [OK] button
Memo:
- For details on the method of character input, refer to "Entering Characters".
Note:
- Deleting the original title list will cause the playlist to be deleted as well. Editing the original title list, or changing the recording mode may cause the playlist to be deleted.
Editing a Thumbnail
Thumbnails (index images) can be changed to a still image according to your preference.
Memo:
- Thumbnails of titles stored on the HDD, BD-RE, BD-R, DVD-RW, and DVD-R can be edited.
- However, thumbnails of titles that are stored on an SD card or finalized disc cannot be edited.
1Press the [INFORMATION CORRECT] button on the remote control unit
- An information editing screen appears.
![JVC SR-HD1500US - 1Press the [INFORMATION CORRECT] button on the remote control unit - 1](/content/2026/05/1066765/images/80f14eb741320c57573352d0be27f9b6f942927a8cd35eccdfbb5c151f6e43f2.jpg)
flowchart
graph TD
    A[" "] --> B[" "]
    B --> C[" "]
    C --> D[" "]
    D --> E[" "]
    E --> F[" "]
    F --> G[" "]
    G --> H[" "]
    H --> I[" "]
    I --> J[" "]
    J --> K[" "]
    K --> L[" "]
    L --> M[" "]
    M --> N[" "]
    N --> O[" "]
    O --> P[" "]
    P --> Q[" "]
    Q --> R[" "]
    R --> S[" "]
    S --> T[" "]
    T --> U[" "]
    U --> V[" "]
    V --> W[" "]
    W --> X[" "]
2Select "MODIFY THUMBNAIL", and press the [OK] button
- A thumbnail modification screen appears.
3Play the video, and press the [■] button to stop at the scene you want to use as thumbnail display
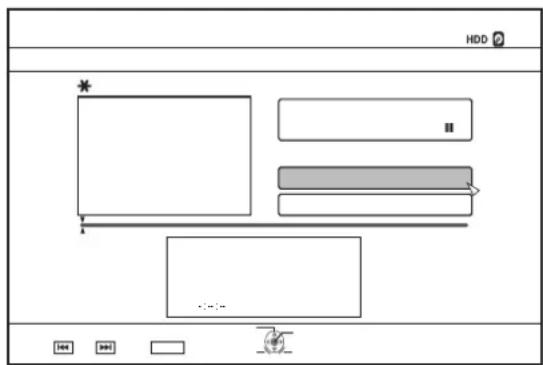
Memo:
- For details on how to play videos, refer to "Video Playback Operation" ( page 51 ).
4 Select "CHANGE", and press the [OK] button
- The displayed still image now becomes the thumbnail image.
5Select "CONFIRM", and press the [OK] button
- Doing so ends the editing of thumbnails.
Memo:
You can also display the thumbnail modification screen from the Playback Navigation screen.
① Select the title for which the thumbnail is to be changed, and press the [OPTION] button
② Select "EDIT INFO", and press the [OK] button
- An information editing screen appears.
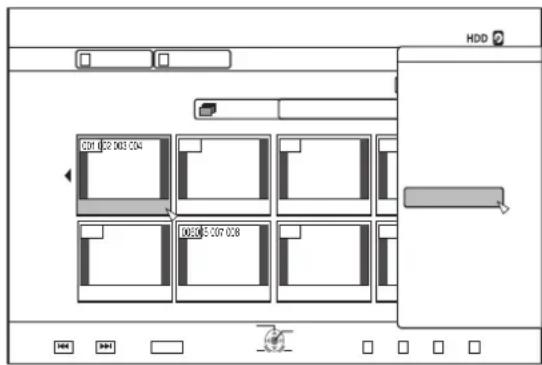
③ Select "MODIFY THUMBNAIL", and press the [OK] button
- A thumbnail modification screen appears.
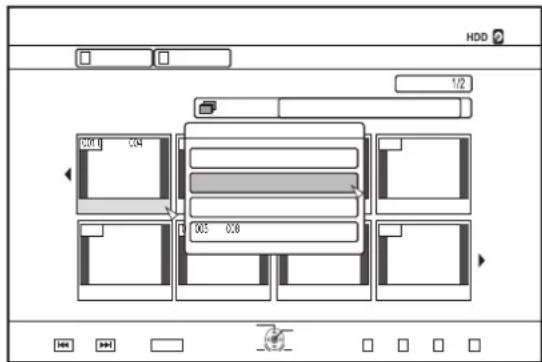
Editing a Chapter
Creating a chapter mark for a saved title enables you to find a specific scene within the title.
Memo:
- All chapter editing functions can be performed on titles stored on the HDD.
Titles stored on a BD-RE (BDAV), BD-R (BDAV), DVD-R (VR), or DVD-RW (VR) only allow chapters to be divided or combined. - The chapters of titles that are stored on an SD card or finalized disc cannot be edited.
- Also, protected titles cannot be edited. To perform chapter edit of a title, turn off the protection.
For details on turning off protection of a title, refer to "Turning Off Title/Group Protection" ( page 64).
Chapter edit functions
• Chapter mark insertion (divide chapter)
Divides a chapter by inserting a chapter mark.
• Chapter mark deletion (combine chapters)
Combine chapters by deleting the chapter mark.
- Chapter deletion
Deletes a specified chapter.
Editing a chapter
1Press the [EDIT] button on the remote control unit
• The Edit menu screen appears.
2Select "CHAPTER EDIT", and press the [OK] button
• The title screen appears.
flowchart
graph TD
    A[" "] --> B[" "]
    B --> C[" "]
    C --> D[" "]
3Select a title, and press the [OK] button
Memo:
- The chapter edit screen can also be called up from the Playback Navigation screen.
① Select the title to perform chapter edit, and press the [OPTION] button
② Select "EDIT", and press the [OK] button
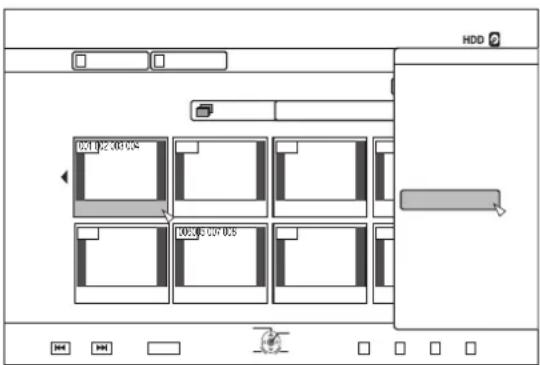
③ Select "CHAPTER EDIT", and press the [OK] button
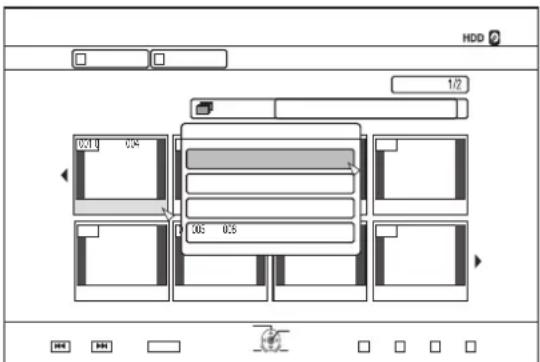
- For details on how to play videos, refer to "Video Playback Operation" ( page 51 ).
- Frame movement on the Chapter Edit screen can only be performed one frame at a time regardless of the "STILL MODE" ( page 77) setting.
Editing a Chapter\_(Continued)
■ Chapter mark insertion (divide chapter)
1Play the video, and press the [III] button to stop at the scene you want to add a chapter mark
2Press the [MARK] button on the remote control unit
- A chapter mark is inserted into the paused scene.
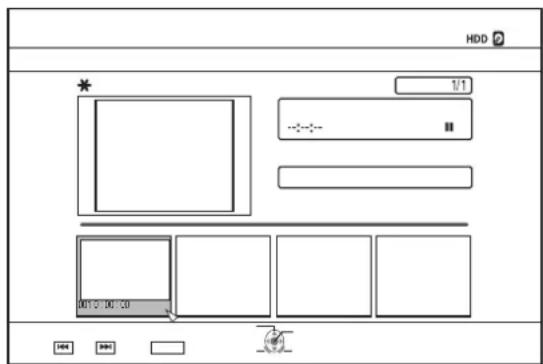
Memo:
- The chapter is now divided into two parts at the position of the chapter mark.
■ Chapter mark deletion (combine chapters)
1 Play the video, and press the [■] and [◀/▶] buttons to display the scene for which you want to delete the chapter mark
2Press the [MARK] button on the remote control unit
- A confirmation screen for deleting the chapter mark appears.
3Select "YES", and press the [OK] button
- The chapter mark is deleted from the selected scene.
Memo:
- The chapters before and after the position of the chapter mark are now combined.
- Pressing the [▶▶/▶◀] button displays the next/previous page.
■ Deleting a video chapter
1Select the chapter for which you want to delete the video from the chapter edit screen
2Press the [DELETE] button on the remote control unit
- A confirmation screen for deleting the chapter appears.
3Select "DELETE", and press the [OK] button
- The selected video chapter is deleted.
Note:
- Videos cannot be restored once they are deleted.
- Deletion of the video may fail if the length of the chapter is too short.
Chapter options
Pressing the [OPTION] button on the remote control when the Chapter Edit screen is displayed enables you to perform the following editing operations.
■ Combining with previous chapter
- Combines the selected chapter with the previous chapter.
① Select a chapter, followed by "COMB. W/PREV CH", and press the [OK] button
• Combines chapters.
■ Combining with next chapter
• Combines the selected chapter with the next chapter.
① Select a chapter, followed by "COMB. W/NEXT CH", and press the [OK] button
• Combines chapters.
■ Combining all chapters
• Combines all chapters.
① Select "COMB. ALL CHAP.", and press the [OK] button
- A confirmation screen for combining all the chapters is displayed.
② Select "YES", and press the [OK] button
• Combines all the chapters.
Dividing
You can select a saved title and divide it into two titles.
Memo:-
- Dividing can only be applied to titles stored on the HDD.
- Titles that are protected cannot be divided. To divide a title, turn off the protection.
For details on turning off the title protection, refer to "Turning Off Title/Group Protection" ( page 64).
Dividing
1Press the [EDIT] button on the remote control unit
• The Edit menu screen appears.
2Select "DIVIDE", and press the [OK] button
• The title screen appears.
![JVC SR-HD1500US - 2Select "DIVIDE", and press the [OK] button - 1](/content/2026/05/1066765/images/b43d1f75995b95917d21b37500025033b9b3dbc71e7e5a3f2edea8655c58d092.jpg)
natural_image
Simple line drawing of a rectangular container with horizontal lines and a shaded bottom section (no text or symbols)3Select a title, and press the [OK] button
4Play the video, and press the [III] button at the scene where you want to perform dividing
5Select "DIVIDING POINT", and press the [OK] button
![JVC SR-HD1500US - 5Select "DIVIDING POINT", and press the [OK] button - 1](/content/2026/05/1066765/images/4d86f0aefa524a07a72ed579523d6cbe63eb99b7d725921dc1d4848f37e4c82b.jpg)
- For details on how to play videos, refer to "Video Playback Operation" ( page 51 ).
- Frame movement on the Chapter Edit screen can only be performed one frame at a time regardless of the "STILL MODE" (res page 77) setting.
6 Select "EXECUTE", and press the [OK] button
- A confirmation screen for performing dividing appears.
![JVC SR-HD1500US - Select "EXECUTE", and press the [OK] button - 1](/content/2026/05/1066765/images/0a95ac792bf11ff2e3598a6f2f0c82618c72d2ca22e1c93186556536212be925.jpg)
- To cancel the dividing operation, select "CANCEL" and press the [OK] button.
- Alternatively, you can press the [RETURN] button to cancel the divide operation and return to the initial screen.
- The dividing edit screen can also be called up from the Playback Navigation screen.
① Select the titles to divide, and press the [OPTION] button
② Select "EDIT", and press the [OK] button
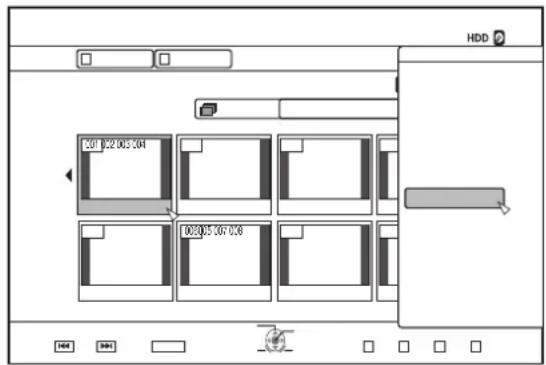
③ Select "DIVIDE", and press the [OK] button
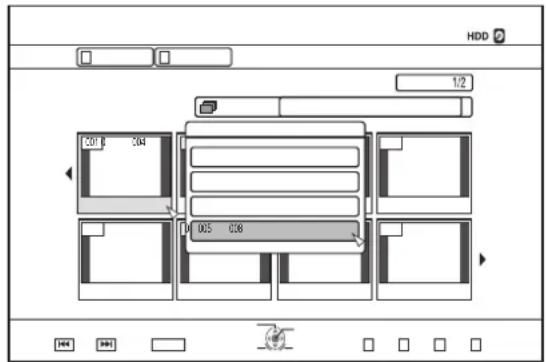
Delete Scenes
Unwanted scenes of a saved title can be deleted. Doing so helps to increase the free space on the disc.
Memo:
- Deleting scenes can only be applied to titles stored on the HDD.
- Titles that are protected cannot be deleted. To enable scene delete of a title, turn off the protection.
For details on turning off the title protection, refer to "Turning Off Title/Group Protection" ( page 64).
- HD content for which the delete scene operation has been applied cannot be dubbed to BDMV. Perform seamless conversion before starting a dubbing operation.
For details, refer to "Mode conversion" ( page 73).
Delete Scenes
1Press the [EDIT] button on the remote control unit
• The Edit menu screen appears.
2Select "DELETE SCENE", and press the [OK] button
- Displays the Title Display screen.
flowchart
graph TD
    A["Step 1"] --> B["Step 2"]
    B --> C["Step 3"]
    C --> D["Step 4"]
3Select a title, and press the [OK] button
4Edit the delete scene section
Follow the steps below to edit the section for which delete scene is to be applied.
① Play the video, and press the [■] button at the point where you want to start the delete operation
② Select "START", and press the [OK] button
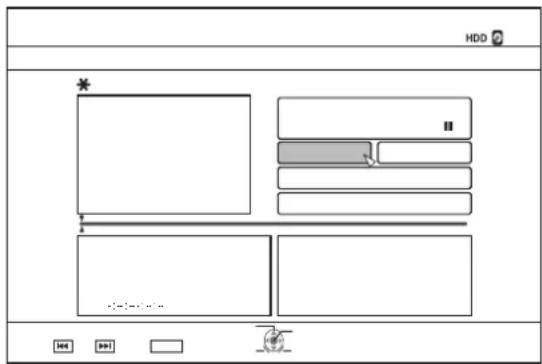
③ Play the video, and press the [■] button at the point where you want to end the delete operation
④ Select "END", and press the [OK] button
⑤ To continue specifying other sections to delete, select "NEXT", and press the [OK] button
⑥ Repeat Steps 1 to 4 to specify the sections to delete demo:
- For details on how to play videos, refer to "Video Playback Operation" ( page 51 ).
- Frame movement on the Chapter Edit screen can only be performed one frame at a time regardless of the "STILL MODE" ( page 77) setting.
5 Select "EXECUTE", and press the [OK] button
- A confirmation screen for performing scene delete appears. 6Select "EXECUTE", and press the [OK] button
- Scene deletion starts.
Memo:
- To cancel the delete scene operation, select "CANCEL" and press the [OK] button.
- Alternatively, you can press the [RETURN] button to cancel delete scene and return to the initial screen.
Changing the Disc Name
The name of a BD or DVD disc can be changed as follows.
1Set the BD or DVD for which the disc name is to be changed on the disc tray
2Press the [MEDIA MANAGE] button on the remote control unit
• The Media Management menu screen appears.
3Select "RENAME DISC" under "BD/DVD", and press the [OK] button
- A disc name modification screen appears.
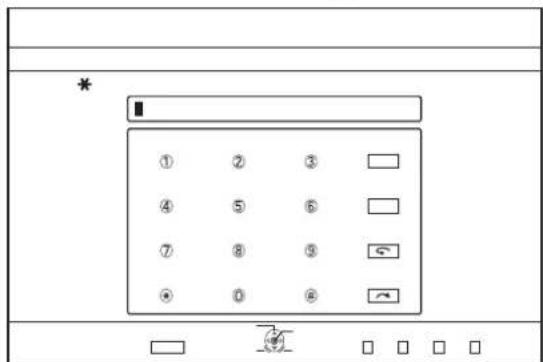
4Modifying the Disc Name
• The new disc name is now saved.
Memo:
- For details on the method of character input, refer to "Entering Characters" (page 59).
Changing the Shooting Date/Time
The date/time of the stored video can be changed as follows.
- The shooting date/time of videos stored on the HDD can be changed.
1Press the [INFORMATION CORRECT] button on the remote control unit
- An information correct screen appears.
flowchart
graph TD
    A[" "] --> B[" "]
    B --> C[" "]
    C --> D[" "]
    D --> E[" "]
2Select "CHANGE SHOOTING DATE/TIME", and press the [OK] button
• A thumbnail screen appears.
3Select the title for which the shooting date/time is to be changed, and press the [OK] button
- The screen for changing the shooting date/time appears.
4Change the shooting date/time
- Perform the following steps to change the shooting date/time.
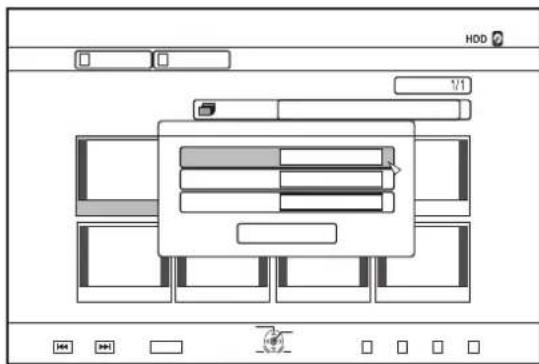
① Use the [▲] and [▼] buttons to move the cursor to the item you want to change
② Press the [OK] button to display the pop-up screen
③ Use the [▲] and [▼] buttons to select a desired value
④ Press the [OK] button to choose the value
⑤ Repeat Steps 1 to 4 to change settings for any desired items
5Select "ENTER", and press the [OK] button
- The modified shooting date/time is saved.
Memo:
- Alternatively, you can press the [RETURN] button to cancel the shooting date/time modification and return to the initial screen.
- The shooting date/time modification will not be reflected on a title that was dubbed.
- Pressing the [OPTION] button in the playback navigation screen instead of the [INFORMATION CORRECT] button will also display the shooting date/time edit screen.
① Select the title for which the shooting date/time is to be changed, and press the [OPTION] button
② Select "EDIT INFO", and press the [OK] button
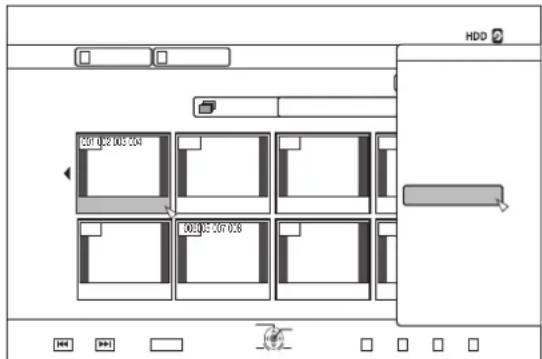
③ Select "CHANGE SHOOTING DATE/TIME", and press the [OK] button
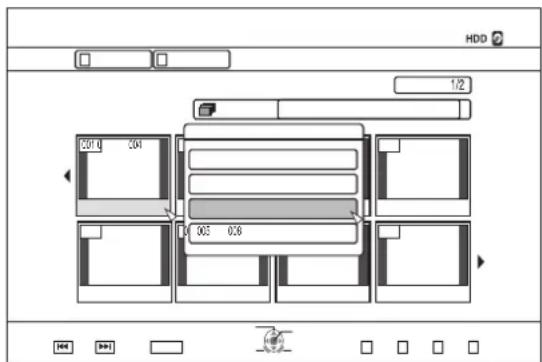
Mode conversion
You can convert HD quality video titles saved on the HDD if they are recorded in the DR, AVC, AF, AN, AL, or AE mode.
Seamless conversion
: Seamless conversion can be performed to enable smooth playback of joined scenes after dubbing to a BD. (Titles recorded in the DR recording mode seamless)
Recording mode conversion
: Enables conversion of recording mode. (Titles recorded in the DR, AVC, AF, AN, AL, or AE mode AF/AN/AL/AE/XP/SP/LP/EP)
Memo:
- As seamless conversion does not re-encode video and audio, there is no deterioration in the image quality.
- Re-encoding is performed during recording mode conversion.
- Only titles that are recorded in the DR mode enable conversion to the XP/SP/LP/EP mode.
- To apply "MODE CHANGE" after turning off the power, select "AFTER POWER OFF" for "START METHOD" under the "MODE CHANGE".
1Press the [NAVIGATION] button on the remote control
2Select a title/group, and press the [OPTION] button
3Select "MODE CHANGE" from the Option menu, and press the [OK] button
- The "MODE CHANGE" screen appears.
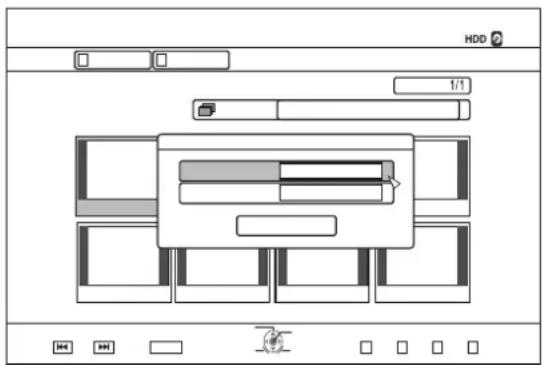
4Select a recording mode from "MODE CHANGE", and press the [OK] button
5Select "CONFIRM", and press the [OK] button
Changing Settings of this Unit
Settings changed in the Settings Menu screen are stored on this unit even when its power is turned off.
Displaying the Settings Menu
1Press the [SET UP] button on the remote control unit
- The Settings Menu screen appears.
Memo:
- When playback is in progress, pressing the button stops it and displays the Settings Menu screen.
- The cursor position appears at the position when the screen was last closed.
Setting Menu List
The following items can be set. Items that cannot be set cannot be selected.
SETUP ...... ( page 75)
AUTO POWER (OFF) ...... ( page 75)
REMOTE CONTROL CODE ...... ( page 75)
CLOCK SET/DISPLAY ...... ( page 75)
CLOCK SET ...... ( page 75)
DATE DISPLAY ...... ( page 75)
TIME DISPLAY CHOICE ...... ( page 75)
PANEL DISPLAY BRIGHTNESS ...... ( page 75)
DIMMER (POWER ON) ...... ( page 75)
DIMMER (POWER OFF) ...... ( page 76)
QUICK STARTUP ...... ( page 76)
BUZZER OUTPUT ...... ( page 76)
REMOTE CONTROL SENSOR TONE ...... ( page 76)
ALERT/WARNING TONE ...... ( page 76)
DEFAULT SETTING ...... ( page 76)
PLAYBACK SETTING ...... ( page 76)
BD-/DVD-VIDEO PB SETTING ...... ( page 76)
BD-VIDEO RATINGS ...... ( page 76)
COUNTRY CODE ...... ( page 76)
AUDIO LANGUAGE ...... ( page 76)
SUBTITLE LANGUAGE ...... ( page 76)
MENU LANGUAGE ...... ( page 76)
RESUME ...... ( page 77)
STILL MODE ...... ( page 77)
SEAMLESS PLAYBACK ...... ( page 77)
RECORD ...... ( page 77)
XP MODE RECORDING AUDIO ...... ( page 77)
HIGH-SPEED DUBBING ...... ( page 77)
VIDEO MODE RECORDING ASPECT ...... ( page 77)
DISC RECORDING AUDIO ...... ( page 78)
AUDIO ...... ( page 78)
DYNAMIC RANGE CONTROL ...... ( page 78)
DOWN MIX ...... ( page 78)
DIGITAL OUT ...... ( page 78)
PCM DOWN SAMPLING ...... ( page 78)
Dolby Digital ...... ( page 78)
Dolby Digital Plus/TrueHD ...... ( page 78)
DTS ...... ( page 78)
DTS-HD ...... ( page 79)
AAC ( page 79)
DV IN AUDIO SETTING ...... ( page 79)
BD MIX SOUND ...... ( page 79)
DISPLAY ...... ( page 79)
ON SCREEN GUIDE ...... ( page 79)
BLUE BACK ...... ( page 79)
SCREEN SAVER ...... ( page 79)
OSD LANGUAGE ...... ( page 79)
CONNECTION ...... ( page 80)
MONITOR TYPE ...... ( page 80)
HDMI CONNECTION ...... ( page 80)
HDMI VIDEO MODE ...... ( page 80)
HDMI OUTPUT RESOLUTION ...... ( page 80)
BD-VIDEO 24p OUT ...... ( page 80)
x.v.Color ...... ( page 81)
Deep Color ...... ( page 81)
HDMI RGB OUTPUT RANGE ...... ( page 81)
HDMI --> DVI COLOR ...... ( page 81)
HDMI AUDIO OUTPUT ...... ( page 81)
HDMI-CEC ...... ( page 81)
COMPONENT OUTPUT ...... ( page 81)
VIDEO INPUT SETTING ...... ( page 81)
Memo:
- The highlighted value is the default setting.
Setup
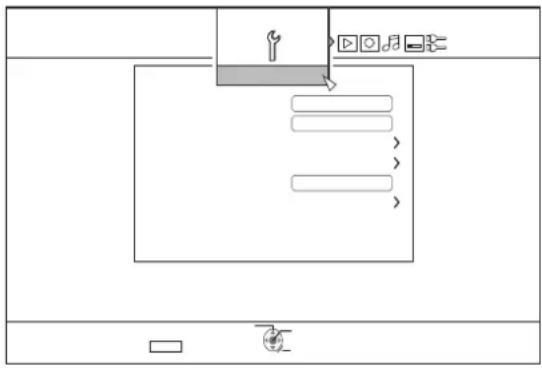
flowchart
graph TD
    A["Input"] --> B["Process Step"]
    B --> C["Output"]
    style A fill:#f9f,stroke:#333
    style B fill:#ccf,stroke:#333
    style C fill:#cfc,stroke:#333
■ AUTO POWER (OFF)
You can specify a time for the power of the unit to turn off automatically when it is not being operated.
| Setting Values | Description |
| OFF Power does | not turn off automatically. |
| 2 HOURS Turns | off power after two hours. |
| 6 HOURS Turns | off power after six hours. |
■ REMOTE CONTROL CODE
For remote control units compliant with JVC's products, different remote control codes can be specified for those that are used with this unit.
| Setting Values | Description |
| REMOTE CONTROL 1 | Sets remote control code to 1. |
| REMOTE CONTROL 2 | Sets remote control code to 2. |
| REMOTE CONTROL 3 | Sets remote control code to 3. |
| REMOTE CONTROL 4 | Sets remote control code to 4. |
■ CLOCK SET/DISPLAY
The current date/time and the display format on the screen can be specified using the "CLOCK SET", "DATE DISPLAY", and "TIME DISPLAY CHOICE" items.
- CLOCK SET
Sets the current date and time.
Memo:
- For details on the setting procedures, refer to "Setting and Displaying Date/Time" ( page 20 ).
- DATE DISPLAY
For setting the date (year, month, and day) display format.
| Setting Values Description | |
| YEAR.MONTH.DAY | Displays the date in the year/month/day order. |
| MONTH.DAY.YEAR | Displays the date in the month/day/year order. |
| DAY.MONTH.YEAR | Displays the date in the day/month/year order. |
• TIME DISPLAY CHOICE
For setting the time display format.
| Setting Values | Description |
| 12H Displays the | time in AM/PM format. |
| 24H Displays the | time in 24-hour format. |
The brightness of the display window can be specified using the "DIMMER (POWER ON)", and "DIMMER (POWER OFF)" control items.
• DIMMER (POWER ON)
For setting the brightness of the display window when the power is turned "On".
| Setting Values | Description |
| BRIGHT Bright | |
| DIMMED1 Slightly dim | |
| DIMMED2 Dim | |
| DIMMED3 Dimmer | |
| OFF Off | |
• DIMMER (POWER OFF)
For turning on/off the light of the display window when the power is turned "Off".
| Setting Values | Description |
| OFF Turns off the light. | |
| ON Turns on the light. | |
■ QUICK STARTUP
The quick startup setting can be specified as follows.
| Setting Values | Description |
| OFF Starts up in the normal way. | |
| ON Operation is speedily enabled after turning on the power. (Quick start) | |
Memo:
- Setting to "ON" increases power consumption while the unit is in the standby mode.
■ BUZZER OUTPUT
The buzzer setting can be specified as follows.
• REMOTE CONTROL SENSOR TONE
For setting whether to sound the buzzer when the remote control sensor receives signals.
| Setting Values | Description |
| OFF Buzzer does not sound when the remote control sensor receives signals. | |
| ON Sounds the buzzer when the remote control sensor receives signals. | |
- ALERT/WARNING TONE
For setting whether to sound the buzzer when an operation is completed or when a warning message appears.
| Setting Values | Description |
| OFF Buzzer does not sound. | |
| ON Sounds the buzzer. | |
■ DEFAULT SETTING
Restores the setting values on the setting screen to their factory default values.
| Setting Values | Description |
| YES Restores the factory default values. | |
| NO Returns to the initial screen without resetting the values. | |
Memo:
- "BD-VIDEO RATINGS" and "COUNTRY CODE" settings cannot be reset once they have been specified.
Playback Setting
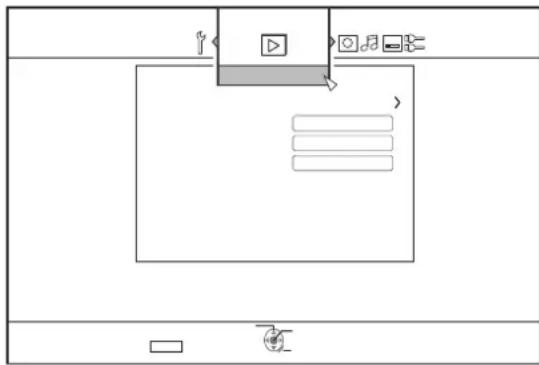
flowchart
graph TD
    A["Input"] --> B["Process Box"]
    B --> C["Output"]
    style B fill:#f9f,stroke:#333
■ BD-/DVD-VIDEO PB SETTING
BD-Video and DVD-Video playback settings can be specified using the "BD-VIDEO RATINGS", "COUNTRY CODE", "AUDIO LANGUAGE", "SUBTITLE LANGUAGE", and "MENU LANGUAGE" items.
• BD-VIDEO RATINGS
For setting the lower age limit for BD-Video ratings.
| Setting Values Description | |
| NO LIMIT All BD | -Videos can be viewed. |
| 254YEAR(S)-0YEAR(S) | BD-Videos that are subject to the age limit cannot be viewed. |
Memo:
- In order to set the restrictions, password (four-digit number) registration is required.
- The password status becomes unregistered if the restriction setting is disabled. A new password can be registered after setting the age limit again.
- It is recommended that you note down the password in case it is lost or forgotten.
- COUNTRY CODE
For setting the country code.
For details on the country codes, refer to the "Country
Code List" ( page 96) .
Memo:
- If the "BD-VIDEO RATINGS" setting is specified, you will be required to enter the password registered for the "BD-VIDEO RATINGS" in order to change the "COUNTRY CODE".
• AUDIO LANGUAGE
For setting the audio sound when playing back BD-Videos or DVD-Videos.
For details on the language codes, refer to the "Language Code List" ( page 94).
- SUBTITLE LANGUAGE
For setting the subtitle language when playing back BD-Videos or DVD-Videos.
For details on the language codes, refer to the "Language Code List" ( page 94).
- MENU LANGUAGE
For setting the menu language when playing back BD-Videos or DVD-Videos.
For details on the language codes, refer to the "Language Code List" ( page 94).
■ RESUME
The stop position can be stored when playback of a BD-Video, DVD-Video, BDMV, AVCHD, finalized discs, or SD card is stopped halfway.
| Setting Values | Description |
| OFF Resume information is not stored. | |
| ON Stores resume information. | |
Memo:
- Resume information is stored at all times for other discs as well as the HDD regardless of this setting.
- When a HDD title is selected using Playback Navigation, it is played back from the beginning.
- Some discs do not allow playback from the resume point.
■ STILL MODE
For setting the method for displaying paused images during playback of the HDD or a disc.
| Setting Values | Description |
| AUTO Automatic control. | |
| FIELD Use this setting for moving images or when there is blurring in the “AUTO” mode. | |
| FRAME Use this setting when detailed patterns or designs are not clear in the “AUTO” mode. | |
Memo:
- This setting is disabled for programs in the DR mode and during playback of AVCHD videos.
■ SEAMLESS PLAYBACK
For setting the method for playing back partially erased scenes.
| Setting Values | Description |
| OFF Plays back | with high accuracy. |
| ON Plays back | smoothly. |
Memo:
- SD picture quality is retained during re-encode dubbing.
- For joints of scenes that are 15 seconds or shorter, seamless playback may fail even when it is set to "ON". The same applies during re-encode dubbing in the SD picture quality.
Record
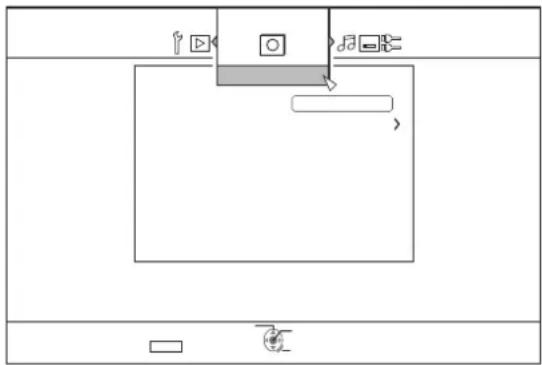
flowchart
graph TD
    A["Input"] --> B["Process Step"]
    B --> C["Output"]
    style A fill:#f9f,stroke:#333
    style C fill:#ccf,stroke:#333
For changing the settings of audio mode during recording in the XP mode.
| Setting Values | Description |
| Dolby Digital Records in “Dolby Digital”. | |
| LPCM Records in “LPCM”. | |
■ HIGH-SPEED DUBBING
Items under "VIDEO MODE RECORDING ASPECT" and "DISC RECORDING AUDIO" can be set to support high-speed dubbing.
For setting the aspect ratio during recording.
| Setting Values | Description |
| AUTO Performs | recording in the aspect ratio setting when recording starts. |
| 4:3 Records at | the fixed aspect ratio of 4:3. |
| 16:9 Records | at the fixed aspect ratio of 16:9. |
Memo:
- High-speed dubbing to a DVD-Video disc cannot be performed when there are different aspect ratios in a title. In this case, fix the aspect ratio to 4:3 or 16:9. This setting remains valid during re-encode dubbing.
For details on high-speed dubbing and re-encode dubbing, refer to the "Dubbing chart" ( page 24).
For changing the settings of audio to be recorded to the disc when in the AF, AN, AE or AL mode.
| Setting Values | Description |
| AUTO Records | "Stereo", "Surround" or "Dual broadcast" audio sounds as they are. |
| FIXED Records | "Stereo" and "Surround" sounds in "Stereo". "Dual broadcast" audio sounds are recorded as they are. |
Memo:
- Surround sounds of a title become stereo sounds when re-encode dubbing is performed.
Audio
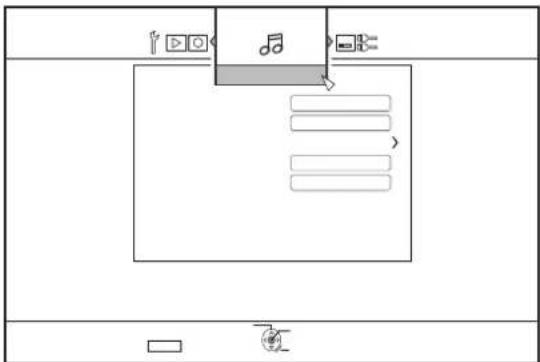
■ DYNAMIC RANGE CONTROL
For setting the dynamic range compression ratio (ratio between the maximum and minimum volume) during Dolby Digital playback.
| Setting Values | Description |
| AUTO Perform compression only for Dolby TrueHD. | |
| OFF Not compressed. | |
| ON Perform maximum compression. | |
Memo:
- Setting to "OFF" may produce the same effects as the "ON" mode for some discs.
- Performing compression allows even the slightest sound to be heard clearly.
- There may be differences in the effect depending on the disc used.
■ DOWN MIX
For setting whether to output analog audio.
| Setting Values | Description |
| STEREO Use this setting when connecting an audio amplifier or TV. | |
| DOLBY SURROUND | Use this setting when connecting an amplifier that supports Dolby Surround. |
■ DIGITAL OUT
Set this item according to the device connected to the digital audio output terminal (optical digital).
- PCM DOWN SAMPLING
For specifying settings on sampling frequency conversion.
| Setting Values | Description |
| OFF Sampling frequency is not converted. | |
| ON Audio recorded at a sampling frequency of 96 kHz or 88.2 kHz is converted to 48 kHz and 44.1 kHz respectively. | |
Memo:
- Setting to "OFF" may produce the same effects as the "ON" mode for some discs.
- Dolby Digital
For setting audio output to "BITSTREAM" or "PCM".
| Setting Values | Description |
| BITSTREAM Use | this setting when connecting a device that is able to decode “Dolby Digital”. |
| PCM Audio input | will be changed and output as “PCM”.Use this setting when connecting a device that is unable to decode “Dolby Digital”. |
• Dolby Digital Plus/TrueHD
For setting audio output to "BITSTREAM" or "PCM".
| Setting Values | Description |
| BITSTREAM Use | this setting when connecting a device that is able to decode “Dolby Digital Plus/TrueHD”. |
| PCM Audio input | will be changed and output as “PCM”.Use this setting when connecting a device that is unable to decode “Dolby Digital Plus/TrueHD”. |
• DTS
For setting audio output to "BITSTREAM" or "PCM".
| Setting Values | Description |
| BITSTREAM Use | this setting when connecting a device that is able to decode “DTS”. |
| PCM Audio input | will be changed and output as “PCM”.Use this setting when connecting a device that is unable to decode “DTS”. |
- DTS-HD
For setting audio output to "BITSTREAM" or "PCM".
| Setting Values | Description |
| BITSTREAM Use | this setting when connecting a device that is able to decode “DTS-HD”. |
| PCM Audio input | will be changed and output as “PCM”.Use this setting when connecting a device that is unable to decode “DTS-HD”. |
- AAC
For setting audio output to "BITSTREAM" or "PCM".
| Setting Values | Description |
| BITSTREAM Use | this setting when connecting a device that is able to decode “AAC”. |
| PCM Audio input | will be changed and output as “PCM”.Use this setting when connecting a device that is unable to decode “AAC”. |
Memo:
- Audio sound may not be properly played back if the audio equipment in use does not support "BITSTREAM" output. In this case, set to "PCM".
■ DV IN AUDIO SETTING
For changing the audio recording settings during DV input.
| Setting Values | Description |
| STEREO 1 Records the audio sound during video recording (L1, R1). | |
| STEREO 2 Records audio sound that is added later (L2, R2), such as during editing. | |
| MIX Records “STEREO 1” and “STEREO 2” sounds. | |
■ BD MIX SOUND
For setting a mixture of BD video secondary audio and operation sounds output.
| Setting Values | Description |
| OFF Outputs | main audio only. |
| ON Outputs | a mixture of BD video secondary audio and operation sounds during playback of BD-Videos that contain BD video secondary audio and menu operation sounds. |
Memo:
- Output is converted to Dolby Digital or DTS according to the main audio when the "DIGITAL OUT" item is set to "BITSTREAM".
Display
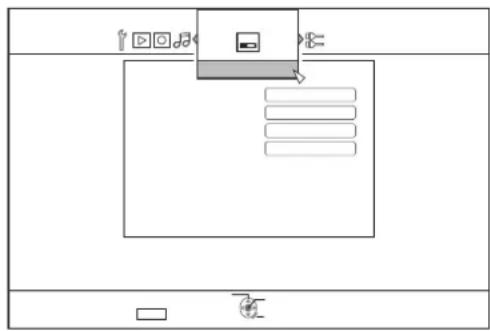
flowchart
graph TD
    A["Input"] --> B["Process Box"]
    B --> C["Output"]
    style B fill:#f9f,stroke:#333
■ ON SCREEN GUIDE
For displaying operation details.
| Setting Values | Description |
| AUTO Appears for five seconds when an operation is performed. | |
| OFF Not displayed. | |
BLUE BACK
For setting the screen display when there is no signal input.
| Setting Values | Description |
| OFF Displays screen as it is. | |
| ON Switches display to a blue screen. | |
■ SCREEN SAVER
For setting whether to use a screensaver.
| Setting Values | Description |
| OFF Screen saver is not used. | |
| ON Screen saver is used. Switches to the burn-in prevention screen when the unit is not operated for more than five minutes. | |
■ OSD LANGUAGE
For setting the language for messages displayed on-screen.
Settings Menu
Connection
■ MONITOR TYPE
For setting the aspect ratio according to the connected monitor.
Setting Values Description
16:9 Set to this value when connected to monitors with 16:9 aspect ratio.
16:9FULL Choose this setting when a 16:9 monitor is connected to display images without the black borders.
4:3 PAN&SCAN Set to this value when connecting to monitors with an aspect ratio of 4:3. Plays back videos with the left and right edges trimmed off.
4:3 LETTERBOX Set to this value when connecting to monitors with an aspect ratio of 4:3. Plays back videos with a black band at the upper and lower ends.
■ HDMI CONNECTION
- HDMI VIDEO MODE
Setting Values
Description
OFF Set to this value for output at a resolution of "480p" or higher from the [COMPONENT VIDEO OUT] terminal.
ON Set to this value when priority is to be given to the "HDMI OUTPUT RESOLUTION" setting.
Memo:
- During data output from the [HDMI] terminal, setting to "OFF" automatically outputs data in the "COMPONENT OUTPUT" setting. Setting to "ON" outputs data in the "HDMI OUTPUT RESOLUTION" setting.
- During data output from the [HDMI] and [COMPONENT VIDEO OUT] terminals, setting to "OFF" automatically outputs data in the "COMPONENT OUTPUT" setting. Setting to "ON" outputs data at the "480i" resolution from the [COMPONENT VIDEO OUT] terminal.
- When there is no output from the [HDMI] terminal, data is automatically output in the "COMPONENT OUTPUT" setting from the [COMPONENT VIDEO OUT] terminal.
• HDMI OUTPUT RESOLUTION
Setting Values
Description
AUTO Automatically selects an appropriate resolution according to the connected device.
480p Fixes the resolution at 480p.
1080i Fixes the resolution at 1080i.
720p Fixes the resolution at 720p.
1080p Fixes the resolution at 1080p.
Memo:
- When the resolution is set to "720p", videos are output at "1080i" other than those recorded at "720p" even though "720p" is shown on the display.
- Depending on the conditions (monitor type 16:9, resolution "720p" and above, aspect 4:3), some of the OSD display of the component output may be cut off. In this case, set "HDMI VIDEO MODE" to "OFF".
OSD of the [VIDEO OUT]/[S-VIDEO OUT] terminals may be cut off with the above conditions even when "OFF" is selected. In this case, set the component resolution to "480p" or below, or set the monitor type to other settings except 16:9.
- BD-VIDEO 24p OUT
Setting Values
Description
OFF Outputs in the resolution set by "HDMI OUTPUT RESOLUTION".
ON Outputs 24p elements at 24p.
Memo:
- 24p playback is possible for commercially available BD-Videos or BDMVs that are recorded in 24p. Content other than BDMVs that is dubbed or recorded on this unit at 24p, as well as 24p content on SD cards are played back at 60p or 60i.
- This is applicable for BD-ROM and DVD-Video titles. This is available when connected to a 24p compatible monitor.
- Elements other than 24p ones are output at 60p.
-
No video images will be output from the video, S-video and component outputs when the HDMI output resolution is at 1080/24p.
-
x.v.Color
| Setting Values | Description |
| AUTO Outputs | x.v.Color information with HDMI when video images that include x.v.Color information are played back. |
| OFF This is applicable when an x.v.Color compatible monitor is connected. | |
Memo:
- This is applicable when an x.v.Color compatible monitor is connected.
- Deep Color
| Setting Values | Description |
| AUTO Set to this value when a “Deep Color” device is connected. | |
| OFF Set to this value when the video image is distorted, or colors are unnatural. | |
• HDMI RGB OUTPUT RANGE
| Setting Values | Description |
| STANDARD Set | to this value for standard uses. |
| ENHANCED Set | to this value when the black and white parts of the video image are not distinct. |
Memo:
- This is available when connected to a DVI device that only supports RGB input.
- HDMI --> DVI COLOR
| Setting Values | Description |
| AUTO Value is | set automatically according to the monitor. |
| RGB FIX Use th | this setting when video images are not correctly displayed on the monitor. |
Memo:
- This is available when the "x.v.Color" setting is set to "OFF". When the "x.v.Color" setting is set to "AUTO", this setting will be set to "AUTO" automatically.
- Change this setting when no video image appears while connected to a DVI device.
• HDMI AUDIO OUTPUT
| Setting Values | Description |
| OFF Use this | setting if you do not want to send audio output from the HDMI cable. |
| ON Use this | setting to send audio output from the HDMI cable. |
■ HDMI-CEC
For setting the HDMI-CEC operation from the connected device.
| Setting Values | Description |
| OFF Disables HDMI-CEC. | |
| ON Enables HDMI-CEC. | |
■ COMPONENT OUTPUT
For setting the resolution of video output from the [COMPONENT VIDEO OUT] terminals.
| Setting Values | Description |
| 480i Sets output | to “480i”. |
| 480p Sets output | to “480p”. |
| 720p Sets output | to “720p”. |
| 1080i Sets output | to “1080i”. |
Memo:
- When the resolution is set to "720p", videos are output at "1080i" other than those recorded at "720p" even though "720p" is shown on the display.
- This unit does not support component output at "1080p". To output at "1080p", do so via HDMI connection.
- If "HDMI VIDEO MODE" is set to "ON", the unit will output at "480i" regardless of the current setting.
- If "HDMI VIDEO MODE" is set to "OFF", or when a HDMI connection is used, DVD videos will be output at "480p" even if "720p" or "1080i" has been set.
- The aspect ratio of video/S-video output changes according to the component output setting. As such, there may be cases where the aspect ratio of the video/S-video output is different from the predefined setting of the content.
■ VIDEO INPUT SETTING
Choose a setting according to the video terminal to be connected when an external analog input terminal is used.
| Setting Values | Description |
| VIDEO Use this | setting when connecting via the video (BNC) terminal. |
| S-VIDEO | Use this setting when connecting via the S-video (black) terminal. |
Locking the Disc Tray
By turning on the lock for the disc tray, the tray cannot be opened or closed using the [▲] button.
Memo:
- When the [▲] button is pressed while the disc tray lock is turned on, a "LOCKED" message will appear on the display window of the unit for about three seconds.
Locking the disc tray
1Press the [⏻/l] button on the unit to turn "Off" the power
2Press and hold the [■] button on this unit, then press the [▲] button
- A "LOCKED" message appears on the display window of the unit, indicating that the disc tray is locked.
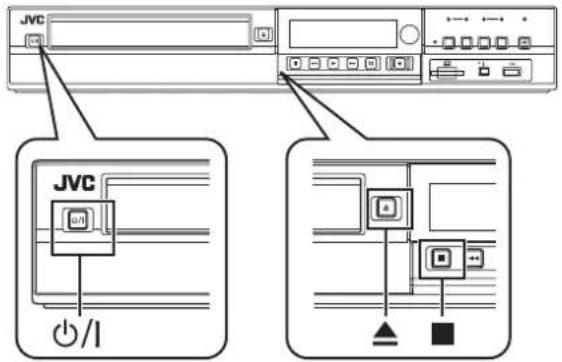
Unlocking the disc tray
1Press the [⏻/l] button on the unit to turn "Off" the power
2Press and hold the [■] button on this unit, then press the [▲] button
- An "UNLOCK" message appears on the display window of the unit, indicating that the disc tray is unlocked.
Turning on the Mode Lock
Turning on the mode lock disables all operations using the buttons on the unit and remote control, except for "Play" and "Record".
Memo:
- When a button that is disabled is pressed, a "LOCKED" message will appear on the display window of the unit for three seconds.
Turning on the mode lock
1Press the [*] button on the remote control for five seconds or longer when in the "Normal Recording", "Stop", or "Normal Playback" mode
- A "LOCKED" message appears on the display window of the unit, indicating that the mode lock is turned on.
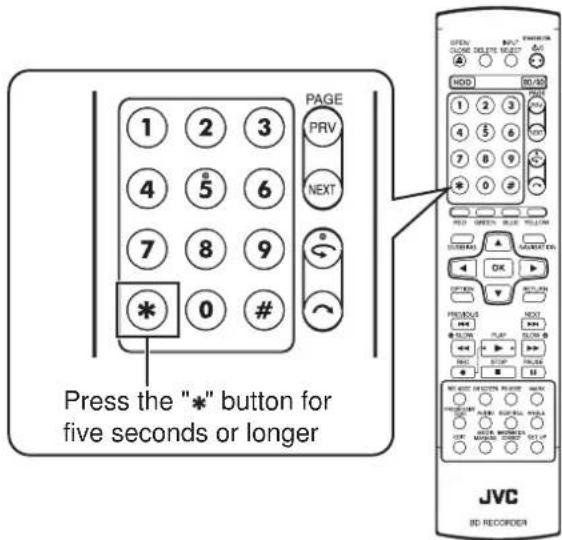
Turning off the mode lock
1Press the [*] button on the remote control for five seconds or longer when the mode lock is turned on
- An "UNLOCK" message appears on the display window of the unit, indicating that the mode lock is turned off.
RS-232C Interface (only for SR-HD1500)
Command Table
only for SR-HD1500
| Lower Order → Higher Order ↓ | 0 1 2 3 | 4 5 6 7 8 9 A | B C D E F | |||||||||||||
| 0 Complete Error Cassette | Out | Not Target | ACK NAK | |||||||||||||
| 1 | ||||||||||||||||
| 2 | ||||||||||||||||
| 3 Play Stop | ||||||||||||||||
| 4 Still | ||||||||||||||||
| 5 Clear | ||||||||||||||||
| 6 Sense | Chapter | Title Sense | ||||||||||||||
| 7 | ||||||||||||||||
| 8 Chapter | Search | Title Search | Date Preset | Clock Preset | ||||||||||||
| 9 Finalize | Cancel-Disc Finalization | Disc Erase | TOP MENU | MENU NEXT CHAPTER | PREV CHAPTER | Setup | SET | UP | DOWN | RIGHT | LEFT | Next Title | Prev Title | Remote Data | ||
| A | Standby On | Standby Off | Eject | FF | REW | Fwd Field Step | Rev Field Step | |||||||||
| B | Fwd Shtl | Rev Shtl | Select Presel | Select Sense | Date Data Sense | Clock Data Sense | ||||||||||
| C | Rec | |||||||||||||||
| D | Status Sense | To Data Sense | CTL Data Sense | JVC Status Sense | ||||||||||||
| E | ||||||||||||||||
| F | Command Target | Rec/Dub Request | ||||||||||||||
Specifications
- Pin layout
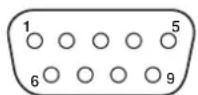
| PIN No. | Signal | Operation | Direction of signal |
| 2 | RxD | Receive data HDD/DVD ⇔ PC | |
| 3 TxD | Transmit data | HDD/DVD ⇔ PC | |
| 5 | GND | Signal grounding | |
Mode : Non-synchronous
Character length : 8 bits
Parity check : Odd
Start bit : 1
Stop bit : 1
Data rate : 9600 bps
- Bit configuration
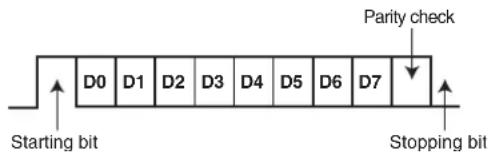
Memo:
- When using the Serial Command Connector, the cable to be used should be a RS-232C interface cable (straight type, 3 m or shorter).
- It takes about 10 seconds for the communication to be established after turning on the unit.
- During command transmission, a minimum interval of 50~mm /second is required between each command.
Command
■ Operation Commands
Commands for operating functions such as PLAY and REC on the BLU-RAY DISC & HDD RECORDER
| Command Description | |
| 3A Plays the selected deck. | |
| 3F Stops the selected deck. Resume will be cleared when this is pressed while in the Stop mode. Rec Request will be cleared. | |
| 4F Switches the selected deck to the Still mode. | |
| 80 Searches the specified chapter and starts playback from the beginning. | |
| 81 Searches the specified title under "ORIGINAL" or in the "PLAY LIST" by its number and starts playback from the beginning. | |
| 8E For setting the date. | |
| 8F For setting the time. | |
| 90 Finalizes the disc. (BD Deck) | |
| 91 Cancels disc finalization. (BD Deck) | |
| 92 For erasing rewritable discs. | |
| 93 Displays/Closes the top menu of a disc. (BD Deck) | |
| 94 Displays/Closes the disc menu. (BD Deck) | |
| 95 Advances to the next chapter. Functions like the ▶▶| button on the remote control. | |
| 96 Returns to the previous chapter. Functions like the ◀◀ button on the remote control. | |
| 97 Displays/Closes the Main Menu, Editing, Library Database Navigation or Dubbing screen.97 ⇒ 30: Closes the screen.97 ⇒ 31: Displays the Main Menu screen.97 ⇒ 32: Displays the Library Database Navigation screen.97 ⇒ 35: Displays the Editing screen.97 ⇒ 37: Displays the Dubbing screen. | |
| 98 Functions as a confirmation key. | |
| 99 Functions as an up key. | |
| 9A Functions as a down key. | |
| 9B Functions as a right key. | |
| 9C Functions as a left key. | |
| 9D Advances to the next title. Functions like the ▶▶| button on the remote control. | |
| 9E Returns to the previous title. Functions like the ◀◀ button on the remote control. | |
| 9F Issues the same codes as the wired remote control via RS-232C. | |
| A0 Power On | |
| A1 Power Off |
| A3 Eject: Opens/Closes tray. (BD Deck only) | |
| AB FF: Functions only during playback. Activates forward search. | |
| AC REW: Functions only during playback.Activates reverse search. | |
| AD Functions as a key for advancing (FWD) a frame. When this command is received during still mode, the unit advances the still picture by one frame (or field) in the FWD direction. | |
| AE Functions as a key for reversing (REV) a frame. When this command is received during still mode, the unit reverses the still picture by one frame (or field) in the REV direction. | |
| B5 Fwd Shtl: Functions only during playback.Activates forward search.B5 ⇒ 30: STILLB5 ⇒ 31: FWD SLOW at a slow speed.B5 ⇒ 33: FWD SLOW at a fast speed.B5 ⇒ 35: 1xB5 ⇒ 36: FWD SEARCH at a fast speed.B5 ⇒ 37: FWD SEARCH at a faster speed.B5 ⇒ 38: FWD SEARCH at the fastest speed. | |
| B6 Rev Shtl: Functions only during playback.Activates reverse search.B6 ⇒ 30: STILLB6 ⇒ 31: REV SLOW at a slow speed.B6 ⇒ 33: REV SLOW at a fast speed.B6 ⇒ 36: REV SEARCH at a fast speed.B6 ⇒ 37: REV SEARCH at a faster speed.B6 ⇒ 38: REV SEARCH at the fastest speed. | |
| B8 For setting the input/output, recording mode, audio language selection and subtitle selection. | |
| CA Rec: Starts recording at the selected deck when a Rec Request is received. | |
| F0 Command Target:F0 ⇒ 34: For selecting HDD deck.F0 ⇒ 38: For selecting BD deck.F0 ⇒ 3C: For selecting SD deck. | |
| FA Rec Request: For issuing approval for recording. This can be cleared using STOP. |
80-8F
80 : Chapter Search
| 1st Byte 2 | nd Byte 3rd | Byte | |
| Chapter Search Hundreds | Tens Ones | ||
| ASCII codes (30 - 39) | 3^* 3^* 3^* | ||
| E.g. (012) 30 31 32 | |||
E.g.: When searching the 12th chapter.
81 : Title Search under "ORIGINAL"
| 1st Byte | 2nd Byte 3rd | Byte 4th | Byte | |
| Title Search (ORIGINAL) | 30 Hundreds | Tens Ones | ||
| ASCII codes (30 - 39) | 3* 3* | 3* | ||
| E.g. (345) | 30 33 34 | 35 |
E.g.: When searching the 345th title, as indicated by the title number on the top right corner of the index, under "ORIGINAL".
81 : Title Search in "PLAY LIST"
| 1st Byte | 2nd Byte | 3rd Byte | 4th Byte | |
| Title Search (PLAY LIST) | 38 Hundred | s Tens Ones | ||
| ASCII codes (30 - 39) | 38 3* 3* | 3* | ||
| E.g. (028) | 38 30 32 | 38 | ||
E.g.: When searching the 28th play list, as indicated by the play list number on the top right corner of the index, in the "PLAY LIST".
8E : Date Preset
| 1st Byte | 2nd Byte | 3rd Byte | 4th Byte | 5th Byte | 6th Byte | |
| Date Preset | Mth (Tens) | Mth (Ones) Day (Tens) Day | (Ones) Yr (Tens) Yr (Ones) | |||
| ASCII code (30 - 39) | 3* | 3* | 3* | 3* | 3* | 3* |
| E.g. (09.14.2009) | 30 | 39 | 31 | 34 | 30 | 39 |
E.g.: When setting the date to September 14 2009.
8F : Clock Preset
| 1st Byte | 2nd Byte | 3rd Byte | 4th Byte | 5th Byte | 6th Byte | |
| Clock Preset | Hr (Tens) | Hr (Ones) Min | In (Tens) Min | (Ones) Sec | (Tens) Sec (Ones) | |
| ASCII code (30 - 39) | 3^* | 3^* | 3^* | 3^* | 3^* | 3^* |
| E.g. (12:34:56) | 31 | 32 | 33 | 34 | 35 | 36 |
E.g.: When setting the time to 12 hrs 34 min and 56 sec.
9F
9F : Remote Data
The remote control codes for controlling the wired remote controller via RS-232C is as shown in the following table. The codes apply to all three HDD, BD and SD deck unless otherwise stated.
| CodeItemsRemarks | |
| 01 INPUT SELECT | |
| 03 STOP | |
| 06 F.F/SPEED+ | |
| 07 REW/SPEED- | |
| 0B POWER ON/OFF | |
| 0C PLAY | |
| 0D PAUSE/STILL | |
| 14 FWD SKIP | |
| 15 REV SKIP | |
| 17 AUDIO | |
| 1A Power Off | |
| 1D Power On Use with “QUICK | STARTUP” set to “OFF”.Refer to "QUICK STARTUP" (page 76). |
| 21 TEN KEY 1 | |
| 22 TEN KEY 2 | |
| 23 TEN KEY 3 | |
| 24 TEN KEY 4 | |
| 25 TEN KEY 5 | |
| 26 TEN KEY 6 | |
| 27 TEN KEY 7 | |
| 28 TEN KEY 8 | |
| 29 TEN KEY 9 | |
| 2A KEY * | |
| 2B TEN KEY 0 | |
| 2C KEY # | |
| 31 REC MODE (XP/SP/LP/EP...) | |
| 32 BD/DVD DECK | |
| 34 DUBBING | |
| 37 SET UP | |
| 3C OK/ENTER | |
| 3E ON SCREEN | |
| 44 HDD DECK | |
| 48 MEDIA MANAGEMENT | |
| 80 CUSOR 0° Moves the arrow in the index list to the right. (▶) | |
| 81 MENU BD/DVD Deck only | |
| 82 CUSOR 90° Moves the arrow in the index list to the up. (▲) | |
| 84 CUSOR 180° Moves the arrow in the index list to the left. (◄) | |
| 86 CUSOR 270° Moves the arrow in the index list to the down. (▼) | |
| 87 OPEN/CLOSE BD/DVD Deck only | |
| 8E PROGRESSIVE HDD/BD Deck only | |
| 8F TOP MENU DVD Deck only | |
| 90 MARK HDD/DVD Deck only | |
| 96 CM SKIP | |
| AF REV FRAME | |
| B0 -SLOW D | |
| B1 SHUTTLE-C | |
| B2 SHUTTLE-B | |
| B3 SHUTTLE-A | |
| B4 SHUTTLE-2 | |
| B5 SHUTTLE-1 | |
| B6 -SLOW B | |
| B7 -SLOW C | |
| B8 +SLOW C | |
| B9 +SLOW B | |
| BA SHUTTLE +1 | |
| BB SHUTTLE +2 | |
| BC SHUTTLE +A | |
| BD SHUTTLE +B | |
| BE SHUTTLE +C | |
| BF +SLOW D | |
| C0 ANGLE/LIVE CHECK ANGLE (BD/DVD Deck only)LIVE CHECK (HDD/BD Deck only) | |
| C4 SUBTITLE DVD Deck only | |
| CC REC | |
| D4 RETURN | |
| D5 COLOR KEY BLUE | |
| D7 COLOR KEY RED | |
| D9 JOG-1/6 | |
| DA JOG +1/6 | |
| DB JOG +1 | |
| DC INSTANT REPLAY | |
| DD EDIT | |
| DE COLOR KEY GREEN | |
| DF COLOR KEY YELLOW | |
| E0 NAVIGATION | |
| E1 L1 Y/C INPUT SELECT HDD | Deck only |
| E2 L1 | COMPOSITE INPUT SELECT | HDD Deck only |
| E3 | PLAYBACK SETTING | |
| E4 | DELETE | |
| E5 | INFORMATION CORRECT | |
| ED | FWD FRAME | |
| F2 | MODE LOCK |
B8
B8 : Input/Output Selection
| 1st Byte | 2nd Byte | ||
| External input selection | L-1 VIDEO 30 31 | ||
| External input selection | L-1 S-VIDEO 30 | 39 | |
| External input selection | DV 30 34 |
B8 : Recording Mode Selection
| 1st Byte | 2nd Byte | |
| XP 34 30 | ||
| SP 34 31 | ||
| LP 34 32 | ||
| EP 34 33 | ||
| DR 34 3A | ||
| AF 34 3B | ||
| AN 34 3C | ||
| AL 34 3D | ||
| AE 34 3E |
Subtitle Selection
B8 : Subtitle Selection
| 1st Byte | 2nd Byte | 1st Byte | 2nd Byte | 1st Byte | 2nd Byte | 1st Byte | 2nd Byte | ||||
| OFF 3C 10 EL 3C 31 LO 3C | 56 SL 3C | 78 | |||||||||
| JAPANESE 3C 11 EO 3C 32 | LT 3C 57 | SM 3C 79 | |||||||||
| ENGLISH 3C 12 ET 3C 33 LV | 3C 58 SN | 3C 7A | |||||||||
| GERMAN 3C 13 EU 3C 34 M | G 3C 59 | SO 3C 7B | |||||||||
| FRENCH 3C 14 FA 3C 35 MI | 3C 5A | SQ 3C 7C | |||||||||
| ITALIAN | 3C | 15 | FJ | 3C | 36 | MK | 3C | 5B | SR | 3C | 7D |
| SPANISH 3C 16 FO 3C 37 M | L 3C 5C | SS 3C | 7E | ||||||||
| DUTCH | 3C 17 | FY 3C 38 | MN | 3C 5D | ST 3C | 7F | |||||
| SWEDISH | 3C 18 | GA 3C 39 | MO 3C 5E | SU | 3C 80 | ||||||
| NORWEGIAN | 3C | 19 | GD | 3C | 3A | MR | 3C | 5F | SW | 3C | 81 |
| FINNISH | 3C | 1A | GL | 3C | 3B | MS | 3C | 60 | TA | 3C | 82 |
| DANISH | 3C 1B | GN 3C 3C | MT 3C 61 | TE 3C 83 | |||||||
| AA | 3C 1C | GU 3C 3D | MY 3C 62 | TG 3C 84 | |||||||
| AB | 3C 1D | HA 3C 3E | NA 3C 63 | TH 3C 85 | |||||||
| AF | 3C | 1E | HI | 3C | 3F | NE | 3C | 64 | TI | 3C | 86 |
| AM | 3C 1F | HR 3C 40 OC | 3C 65 TK | 3C 87 | |||||||
| AR | 3C 20 | HU 3C 41 | OM 3C 66 TL | 3C 88 | |||||||
| AS | 3C 21 | HY 3C 42 | OR 3C 67 TN | 3C 89 | |||||||
| AY | 3C 22 | IA | 3C 43 PA | 3C 68 | TO 3C 8A | ||||||
| AZ | 3C 23 | IE | 3C 44 PL | 3C 69 | TR 3C 8B | ||||||
| BA | 3C 24 | IK | 3C 45 PS | 3C 6A | TS 3C | 8C | |||||
| BE | 3C 25 | IS | 3C 47 PT | 3C 6B | TT 3C | 8D | |||||
| BG | 3C | 26 | KA | 3C | 4B | QU | 3C | 6C | TW | 3C | 8E |
| BH | 3C | 27 | KK | 3C | 4C | RM | 3C | 6D | UK | 3C | 8F |
| BI | 3C 28 | KL 3C 4D | RN 3C | 6E | UR 3C | 90 | |||||
| BN | 3C 29 | KM 3C 4E | RO 3C | 6F | UZ 3C | 91 | |||||
| BO | 3C | 2A | KN | 3C | 4F | RU | 3C | 70 | VI | 3C | 92 |
| BR | 3C 2B | KO 3C 50 RW | 3C | 71 VO | 3C 93 | ||||||
| CA | 3C 2C | KS 3C 51 SA | 3C 72 WO | 3C 94 | |||||||
| CO | 3C 2D | KU 3C 52 SD | 3C 73 XH | 3C 95 | |||||||
| CS | 3C 2E | KY 3C 53 SG | 3C 74 YO | 3C 96 | |||||||
| CY | 3C 2F | LA 3C 54 SI | 3C | 76 ZH | 3C 97 | ||||||
| DZ | 3C 30 | LN 3C 55 | SK 3C 77 | ZU 3C 98 | |||||||
"Language Code List" (page 94)
Audio Language Selection
B8 : Audio Language Selection
| 1st Byte | 2nd Byte | 1st Byte | 2nd Byte | 1st Byte | 2nd Byte | 1st Byte | 2nd Byte | ||||
| JAPANESE 39 11 EO 39 32 | - T 39 57 | SM 39 79 | |||||||||
| ENGLISH 39 12 ET 39 33 LV | 39 58 SN | 39 7A | |||||||||
| GERMAN 39 13 EU 39 34 MG | 39 59 SO | 39 7B | |||||||||
| FRENCH 39 14 FA 39 35 MI | 39 5A SQ | 39 7C | |||||||||
| ITALIAN 39 15 | FJ 39 36 | MK 39 5B | SR 39 7D | ||||||||
| SPANISH 39 16 FO 39 37 ML | 39 5C | SS | 39 7E | ||||||||
| DUTCH 39 17 | FY 39 38 | MN | 39 5D | ST 39 | 7F | ||||||
| SWEDISH 39 18 | GA 39 39 | MO 39 5E | SU 39 80 | ||||||||
| NORWEGIAN 39 19 | GD 39 3A | MR | 39 5F | SW 39 81 | |||||||
| FINNISH 39 1A | GL | 39 3B | MS 39 60 | TA 39 82 | |||||||
| DANISH 39 1B | GN 39 3C | MT 39 61 | TE 39 83 | ||||||||
| AA 39 1C | GU 39 3D | MY 39 62 | TG 39 84 | ||||||||
| AB 39 1D | HA 39 | 3E NA 39 | 63 TH | 39 | 85 | ||||||
| AF 39 1E | HI | 39 3F | NE 39 64 | TI | 39 86 | ||||||
| AM 39 1F | HR 39 40 | OC 39 65 | TK 39 87 | ||||||||
| AR 39 20 | HU 39 41 | OM 39 66 | TL 39 88 | ||||||||
| AS 39 21 | HY 39 42 | OR 39 67 | TN | 39 89 | |||||||
| AY 39 22 | IA | 39 43 PA | 39 68 TO | 39 8A | |||||||
| AZ 39 23 | IE | 39 44 PL | 39 69 TR | 39 8B | |||||||
| BA 39 24 | IK | 39 45 PS | 39 6A TS | 39 8C | |||||||
| BE 39 25 | IS | 39 47 PT | 39 6B TT | 39 8D | |||||||
| BG 39 | 26 | KA | 39 | 4B | QU | 39 | 6C | TW | 39 | 8E | |
| BH 39 | 27 | KK | 39 | 4C | RM | 39 | 6D | UK | 39 | 8F | |
| BI 39 28 | KL 39 4D | RN 39 | 6E UR 39 | 90 | |||||||
| BN 39 29 | KM 39 4E | RO 39 6F | UZ | 39 91 | |||||||
| BO 39 2A | KN 39 4F | RU 39 70 | VI | 39 92 | |||||||
| BR 39 2B | KO 39 50 | RW | 39 71 | VO 39 93 | |||||||
| CA 39 | 2C | KS | 39 | 51 | SA | 39 | 72 | WO | 39 | 94 | |
| CO 39 2D | KU 39 | 52 SD 39 | 73 XH 39 | 95 | |||||||
| CS 39 2E | KY | 39 53 SG | 39 74 YO | 39 96 | |||||||
| CY 39 2F | LA 39 54 | SI | 39 76 ZH | 39 97 | |||||||
| DZ 39 30 | LN 39 55 | SK | 39 77 ZU | 39 98 | |||||||
| EL 39 31 | LO | 39 56 SL | 39 78 | ||||||||
"Language Code List" (page 94)
System Commands
Commands relating to RS-232C control system.
| Command Description | |
| 01 Complete: Issued by the external recorder upon completing all specified operations by commands. | |
| 02 Error: Issued by the external recorder when receiving invalid commands in the context. In such cases, commands that are sent will not be accepted. However, a return command will be issued but only to the Status Sense. To clear the Error status, perform command 56 (Clear). | |
| 05 Not Target: Issued by the external recorder when specified operations by commands cannot be completed properly. | |
| 0A ACK: A return command issued when a defined command is received. | |
| 0B NAK: A return command issued when an undefined or possibly nonexistent command is received. | |
| 56 Clear: Clears the Error status. | |
| FB VTR Ind: A command for checking whether the connected device is the external recorder. |
Response Commands
Commands for acquiring information such as deck status.
| Command Description | |
| 60 Chapter Sense: For acquiring the current chapter number. (*) | |
| 61 | Title/Track Sense: For acquiring the current title number under "ORIGINAL" or in the "PLAY LIST". (*) |
| B9 Select Sense: For acquiring the status of the inputs, outputs, recording mode, audio language selection and subtitle selection. (*) | |
| BE Date Sense: For acquiring the currently configured year, month and day. (*) | |
| BF Time Sense: For acquiring the currently configured hour, minute and second. (*) | |
| D7 Status Sense: For acquiring the deck information. (*) | |
| D8 TC Data Sense: For acquiring the total remaining time in the current recording mode when there is a media in the selected deck. (*) | |
| D9 CTL Data Sense: For acquiring the lapse counter when there is a media in the selected deck. (*) | |
| DD JVC Status Sense: Returns data from the unit. (*) | |
(*) : See ➕ pages 90-93 for data format.
Sense
- Chapter Sense
| 1st Byte | 2nd Byte | 3rd Byte | |
| Chapter Sense | Hundreds | Tens | Ones |
| 60 3* 3* 3* | |||
| E.g. (012) 30 31 | 32 |
E.g.: When the current chapter is the 12th chapter.
• Title/Track Sense under "ORIGINAL"
| 1st Byte | 2nd Byte | 3rd Byte | 4th Byte | |
| Title/Track Sense (ORIGINAL) | 30 Hundreds | Tens Ones | ||
| 61 30 3* 3* 3* | ||||
| E.g. (345) 30 33 34 35 | ||||
E.g.: When the current title under "ORIGINAL" is the 345th title.
• Title/Track Sense in "PLAY LIST"
| 1st Byte | 2nd Byte | 3rd Byte | 4th Byte | |
| Title/Track Sense (PLAY LIST) | 38 Hundred | s Tens | Ones | |
| 61 38 3* 3* 3* | ||||
| E.g. (028) 38 30 32 38 |
E.g.: When the current title under "PLAY LIST" is the 28th title.
- Select Sense
| 1st Byte 2nd Byte | 3rd Byte | 4th Byte | 5th Byte | ||
| Select Sense | External input selection | Output selection | Recording mode selection | Audio language selection | Subtitle selection |
| B9 | 3* | 3* | ** | ** | ** |
| E.g. (3930311213) | 39 | 30 | 31 | 12 | 13 |
E.g.: When the selection status of the video deck is as follows:
External input selection L-1 S-VIDEO
Output selection Common output (Frame is fixed at 0.)
Recording mode selection SP
Audio language selection ENGLISH
Subtitle selection GERMAN
For response data for B9, see data format for "B8 (Select Preset)" ( page 87-89).
- Date Data Sense
For acquiring the currently configured year, month and day in ASCII codes.
| 1st Byte | 2nd Byte | 3rd Byte | 4th Byte | 5th Byte | 6th Byte | |
| Date Sense | Mth (Tens) | Mth (Ones) Day | (Tens) Day | (Ones) Yr (Tens) | (Yrs) Yr (Ones) | |
| BE | 3^* | 3^* | 3^* | 3^* | 3^* | 3^* |
| E.g. (09.14.2009) | 30 | 39 | 31 | 34 | 30 | 39 |
When the current date is not set, the value is fixed as "-" (0x2D).
- Time Data Sense
For acquiring the currently configured hour, minute and second in ASCII codes.
| 1st Byte | 2nd Byte | 3rd Byte | 4th Byte | 5th Byte | 6th Byte | |
| Time Sense | Hr (Tens) | Hr (Ones) Min | In (Tens) Min | (Ones) Sec | (Tens) Sec (Ones) | |
| BF | 3* | 3* | 3* | 3* | 3* | 3* |
| E.g. (12:34:56) | 31 | 32 | 33 | 34 | 35 | 36 |
When the current time is not set, the value is fixed as "-" (0x2D).
- Status Data Sense
For acquiring the remaining time in the current recording mode in hours, minutes and seconds for HDD/DVD.
| D7 STATUS SENSE | 1byte 1byte | 1byte 2byte | 3byte 4byte 5byte | |||
| HDD BD SD H | DD/BD/SD HD | D/BD/SD HDD/ | BD/SD HDD/BD/SD | |||
| bit7 1 (Fixed) | 1 (Fixed) 1 (Fixed) | Video EE | 0 (Fixed) During | PLAY During | PAUSE (Set | |
| bit6 0 (Fixed) | 1 (Fixed) 1 (Fixed) | Audio EE | 0 (Fixed) 0 (Fixed) | 0 (Fixed) | ||
| bit5 0 (Fixed) | 0 (Fixed) 1 (Fixed) | 0 (Fixed) | 0 (Fixed) | 0 (Fixed) During | Reverse | |
| bit4 Record | Forbidden | Record Forbidden | Record Forbidden | 0 (Fixed) | 0 (Fixed) During STOP | During Forward Shuttle Search (Excluding STILL) |
| bit3 Disc Not Inserted | Disc Not Inserted | Disc Not Inserted | Occurrence of abnormality in VTR | 0 (Fixed) During STANDBY (Unit Power Off) | Refer to the SEARCH SPEED table. | |
| bit2 0 (Fixed) | 0 (Fixed) 0 (Fixed) | 0 (Fixed) | During | Repeat Playback (Including PAUSE) | 0 (Fixed) Refer to the SEARCH SPEED table. | |
| bit1 | 0 (Fixed) | 0 (Fixed) | 0 (Fixed) | 0 (Fixed) | 0 (Fixed) | During REC |
| bit0 RS-232C command error status. Clear using 56 (Clear). | RS-232C command error status. Clear using 56 (Clear). | RS-232C command error status. Clear using 56 (Clear). | 0 (Fixed) | 0 (Fixed) 0 (Fixed) | Refer to the SEARCH SPEED table. | |
- TC Data Sense
| 1st Byte | 2nd Byte | 3rd Byte | 4th Byte | 5th Byte | 6th Byte | 7th Byte | 8th Byte | |
| TC Data Sense | Hr (Tens) | Hr (Ones) | Min (Tens) | Min (Ones) | Sec (Tens) | Sec (Ones) | Frame (Tens) | Frame (Ones) |
| D8 | 3* | 3* | 3* | 3* | 3* | 3* | 3* | 3* |
| E.g. (01:23:45) | 30 | 31 | 32 | 33 | 34 | 35 | 30 | 30 |
E.g.: When remaining time is 1 hr 23 min 45 sec.
Frame is fixed as 0.
- SEARCH SPEED
| bit3 bit2 bit1 bit0 | |||
| STILL 0 0 0 0 | |||
| x1 0 0 0 1 | |||
| SEARCH1 0 1 0 0 | |||
| SEARCH2 0 1 0 1 | |||
| SEARCH3 0 1 1 0 | |||
| SEARCH4 0 1 1 1 | |||
| SEARCH5 1 0 0 0 |
- CTL Data Sense
For acquiring lapse counter of selected deck in hours, minutes and seconds.
| 1st Byte 2 | 2nd Byte 3rd | Byte 4th Byte | 5th Byte | 6th Byte 7th | 8th Byte | |||
| CTL Data Sense | Hr (Tens) Hr | (Ones) Min | (Tens) Min | (Ones) Sec (Tens) | Sec (Ones) | Frame (Tens) | Frame (Ones) | |
| D9 | 3* | 3* | 3* | 3* | 3* | 3* | 3* | 3* |
| E.g. (01:23:45) | 30 | 31 | 32 | 33 | 34 | 35 | 30 | 30 |
E.g.: When time lapse counter is 1 hr 23 min 45 sec.
Frame is fixed as 0.
- JVC Status Sense
| 1byte | 2byte | 3byte | 4byte | |
| HDD/BD/SD | HDD/BD/SD | HDD/BD/SD | HDD/BD/SD | |
| bit7 | 1 (Fixed) | 0 (Fixed) | 1 (Fixed) | 1 (Fixed) |
| bit6 | 0 (Fixed) | 0 (Fixed) | 0 (Fixed) | 1 (Fixed) |
| bit5 | 0 (Fixed) | 1 (Fixed) | 0 (Fixed) | 0 (Fixed) |
| bit4 | 0 (Fixed) | 0 (Fixed) | 0 (Fixed) | 0 (Fixed) |
| bit3 | 0 (Fixed) | Refer to the DISC TYPE table below. | 0 (Fixed) | During dubbing (Including PAUSE) |
| bit2 | 0 (Fixed) | Refer to the DISC TYPE table below. | 0 (Fixed) | 0 (Fixed) |
| bit1 | 0 (Fixed) | Refer to the DISC TYPE table below. | 0 (Fixed) | 0 (Fixed) |
| bit0 | 1 (Fixed) | Refer to the DISC TYPE table below. | During dubbing (Including PAUSE) | 0 (Fixed) |
- DISC TYPE
| bit3 | bit2 | bit1 | bit0 | bit3 | bit2 | bit1 | bit0 | ||
| DVD | 0 | 0 | 0 | 0 | CD | 0 | 1 | 1 | 1 |
| DVD-RAM | 0 | 0 | 0 | 1 | BD-ROM | 1 | 0 | 0 | 0 |
| DVD-R | 0 | 0 | 1 | 0 | BD-R | 1 | 0 | 0 | 1 |
| DVD-RW | 0 | 0 | 1 | 1 | BD-RE | 1 | 0 | 1 | 0 |
| DVD+R | 0 | 0 | 0 | 0 | No disc | 1 | 1 | 1 | 1 |
| DVD+RW | 0 | 0 | 0 | 0 | Unknown | 1 | 1 | 1 | 0 |
Language Code List
| Code | Language Code Language Code | Language | |||
| AA Afar HI Hindi OS Ossetian | |||||
| AB Abkhazian HO Hiri Motu PA Panjab | |||||
| AF Afrikaans HU Hungarian FA Persian | |||||
| AK Akan IG Igbo PI Pali | |||||
| SQ Albanian IS Icelandic | PL Polish | ||||
| AM Amharic | IO Ido | PT | Portuguese | ||
| AR Arabic | II Sichuan Yi PS Pashto | ||||
| AN Aragonese | IU Inuktitut | QU | Quechua | ||
| HY | Armenian | IE | Interlingue | RM | Rhaeto-Romance |
| AS Assamese | IA Interlingua (International Auxiliary language Association) | RO | Romanian | ||
| AV Avar | ID Indonesian | RN | Kirundi | ||
| AE Avestan | IK Inupiak | RU | Russian | ||
| AY Aymara | IT Italian SG Sango | ||||
| AZ Azerbaijani | JV Javanese SA Sanskrit | ||||
| BA Bashkir | JA Japanese | SR Serbia | |||
| BM | Bambara | KL Kalaallisut HR Croatian | |||
| EU Basque KN Kannada | SI Sinhala | ||||
| BE Belarusian | KS Kashmiri | SK | Slovak | ||
| BN Bengali | KR Kanuri | SL | Slovenian | ||
| BH Bihari | KK Kazakh | SE | Northern | Sami | |
| BI | Bislama | KM | Khmer | SM | Samoan |
| BS Bosnian | KI Kikuyu | SN | Shona | ||
| BR Breton | RW Kinyarwanda | SD Sindhi | |||
| BG Bulgarian KY Kirghiz | SO Somali | ||||
| MY | Burmese | KV Komi ST Southern Sotho | |||
| CA Catalan, Valencian | KG Kongo | ES | Spanish | ||
| CH Chamorro | KO Korean | SC | Sardinian | ||
| CE Chechen | KJ Kwanyama | SS Swati | |||
| ZH Chinese KU Kurukh | SU Sundanese | ||||
| CU Church Slavic | LO Lao | SW | Swahili | ||
| CV Chuvash | LA Latin | SV | Swedish | ||
| KW | Cornish | LV Latvian | TY Tahitian | ||
| CO | Corsican | LI | Limburgish | TA | Tamil |
| CR Cree LN Lingala | TT Tatar | ||||
| CS Czech | LT Lithuanian TE Telugu | ||||
| DA Danish | LB Luxembourgish | TG Tajik | |||
| DV Divehi LU Luba-Katanga TL Tagalog | |||||
| NL Dutch LG Ganda TH Thai | |||||
| DZ Dzongkha MK Macedonian BO Tibetan | |||||
| EN English MH Marshallese TI Tigrinya | |||||
| EO Esperanto ML Malayalam TO Tongan | |||||
| ET Estonian MI Māori | TN Tswana | ||||
| EE Ewe | MR Marathi TS Tsonga | ||||
| FO Faroese | MS Malay | TK Turkmen | |||
| FJ Fijian | MG Malagasy | TR Turkish | |||
| FI Finnish | MT Maltese | TW Twi | |||
| FR French | MO Moldavian | UG Uighur | |||
| FY Western Frisian | MN Mongolian | UK | Ukrainian | ||
| FF Fulah | NA Nauruan | UR Urdu | |||
| KA Georgian | NV Navajo | UZ Uzbek | |||
| DE German | NR South Ndebele | VE Venda | |||
| GD Scottish Gaelic | ND North Ndebele | VI Vietnamese | |||
| GA Irish | NG Ndonga | VO Volapük | |||
| GL Galician | NE Nepali | CY Welsh | |||
| GV Manx | NN Norwegian Nynorsk | WA Walloon | |||
| EL Greek NB Norwegian Bokmål | WO Wolof | ||||
| GN Guaraní | NO Norwegian | XH Xhosa | |||
| GU Gujarati | NY Chichewa | YI Yiddish | |||
| HT Haitian | OC Occitan | YO Yoruba | |||
| HA Hausa | OJ Ojibwa | ZA Zhuang | |||
| HE Hebrew | OR Oriya | ZU Zulu | |||
| HZ Herero | OM Oromo | ||||
Country Code List
| Code | Country Name | Code | Country | Name | ||
| AD | Andorra | GM Gambia NU Niue | ||||
| AE | United Arab Emirates | GN Guinea NZ New Zealand | ||||
| AF | Afghanistan | GP Guadeloupe OM Oman | ||||
| AG | Antigua and Barbuda | GQ Equatorial Guinea | PA Panama | |||
| AI | Anguilla | GR Greece | PE Peru | |||
| AL | Albania | GS South Georgia and South Sandwich Islands | PF Polynesia | |||
| AM | Armenia | GT | Guatemala | PG Papua New | Guinea | |
| AN | Netherlands Antilles | GU | Guam | PH Philippines | ||
| AO | Angola | GW | Guinea-Bissau | PK | Pakistan | |
| AQ | Antarctica | GY | Guyana PL Poland | |||
| AR | Argentina | HK | Hong Kong | PM Saint Pierre | and Miquelon | |
| AS | American Samoa | HM | Heard and McDonald Islands | PN | Pitcairn Islands | |
| AT | Austria | HN | Honduras | PR Puerto Rico | ||
| AU | Australia | HR | Croatia | PT Portugal | ||
| AW | Aruba | HT | Haiti | PW Palau | ||
| AZ | Azerbaijan | HU | Hungary | PY Paraguay | ||
| BA | Bosnia and Herzegovina | ID | Indonesia | QA | Qatar | |
| BB | Barbados | IE | Ireland | RE | Reunor | Island |
| BD | Bangladesh IL | Israel | RO Romania | |||
| BE | Belgium | IN | India | RU | Russian Federation | |
| BF | Burkina Faso | IO | British Indian Ocean Territory | RW | Rwanda | |
| BG | Bulgaria | IQ | Iraq | SA | Saudi Arabia | |
| BH | Bahrain | IR | Iran | SB | Solomon Islands | |
| BI | Burundi | IS | Iceland SC Seychelles | |||
| BJ | Benin | IT | Italy | SD | Sudan | |
| BM | Bermuda | JM | Jamaica | SE Sweden | ||
| BN | Brunei | JO | Jordan | SG Singapore | ||
| BO | Bolivia | JP | Japan | SH | Saint Helena | |
| BR | Brazil | KE | Kenya | SI | Slovenia | |
| BS | Bahamas | KG | Kyrgyzstan | SJ | Svalbard and Jan Mayen Islands | |
| BT | Bhutan | KH | Cambodia | SK Slovakia | ||
| BV | Bouvet Island | KI | Kiribati | SL | Sierra Leone | |
| BW | Botswana | KM | Comoros | SM San Marino | ||
| BY | Belarus | KN | Saint Kitts and Nevis | SN Senegal | ||
| BZ | Belize | KP | Korea, Democratic People's Republic of | SO Somalia | ||
| CA | Canada | KR | Korea, Republic of | SR Suriname | ||
| CC | Cocos Islands | KW | Kuwait | ST Sao Tome and Principe | ||
| CF | Central African Republic | KY | Cayman Islands | SV El Salvador | ||
| CG | Congo, Republic of | KZ | Kazakhstan | SY Syria | ||
| CH | Switzerland | LA | Laos | SZ Swaziland | ||
| CI | Cote d'Ivoire | LB | Lebanon | TC | Turks and Caicos Islands | |
| CK Cook Islands LC Saint Lucia TD Chad | ||||
| CL Chile LI Liechtenstein TF French Southern Territories | ||||
| CM Cameroon LK Sri Lanka TG Togo | ||||
| CN China LR Liberia TH Thailand | ||||
| CO Colombia | LS | Lesotho | TJ | Tajikistan |
| CR Costa Rica LT Lithuania | TK Tokelau | |||
| CU Cuba | LU | Luxembourg | TM Turkmenistan | |
| CV Cape Verde | LV | Latvia | TN Tunisia | |
| CX Christmas Island | LY | Libya | TO Tonga | |
| CY Cyprus | MA | Morocco | TP East Timor | |
| CZ Czech Republic | MC | Monaco | TR Turkey | |
| DE Germany | MD | Moldova | TT Trinidad and Tobago | |
| DJ Djibouti | MG | Madagascar | TV Tuvalu | |
| DK Denmark | MH | Marshall Islands | TW Taiwan | |
| DM Dominica, Commonwealth of | ML | Mali | TZ Tanzania | |
| DO Dominican Republic | MM | Myanmar | UA Ukraine | |
| DZ Algeria | MN | Mongolia | UG Uganda | |
| EC Ecuador | MO | Macau UM Minor Outlying Islands | ||
| EE Estonia | MP | Northern Mariana Islands | US United States | |
| EG Egypt | MQ | Martinique | UY Uruguay | |
| EH Western Sahara | MP | Mauritania | UZ Uzbekistan | |
| ER Eritrea | MS | Montserrat | VA Vatican | |
| ES Spain | MT | Malta | VC Saint Vincent and the Grenadine | |
| ET Ethiopia | MU | Mauritius | VE Venezuela | |
| FI Finland | MV Maldives | VG British Virgin Islands | ||
| FJ Fiji | MW Malawi | VI Virgin Islands of the United States | ||
| FK Falkland Islands (Malvinas) | MX | Mexico | VN Vietnam | |
| FM Micronesia (Federated States of) | MY | Malaysia | VU Vanuatu | |
| FO Faroe Islands | MZ | Mozambique | WF Wallis and Futuna | |
| FR France | NA | Namibia | WS Samoa | |
| FX France, Metropolitan | NC | New Caledonia | YE Yemen | |
| GA Gabon | NE | Niger | YT Mayotte | |
| GB United Kingdom of Great Britain and Northern Ireland | NF Norfolk Island | YU Yugoslavia | ||
| GD Grenada | NG | Nigeria | ZA South Africa | |
| GE Georgia | NI | Nicaragua | ZM Zambia | |
| GF French Guiana | NL | Netherlands | ZR Zaire | |
| GH Ghana | NO | Norway | ZW Zimbabwe | |
| GI Gibraltar | NP Nepal | |||
| GL Greenland NR Nauru |
Using the HDMI Consumer Electronics Control (HDMI CEC)
HDMI Consumer Electronics Control
- By using a HDMI cable to connect this unit with a TV that supports the HDMI CEC standard, this unit and the TV can be linked and operated together.
- HDMI CEC (Consumer Electronics Control) is an industrial standard that allows HDMI devices to be linked and operated among each other by connecting them with a HDMI cable.
HDMI Consumer Electronics Control operations
- Perform the following operations when this unit is turned on, and the TV will switch automatically to the HDMI input that this unit is connected to.
- Playback from HDD, BD/DVD or SD CARD
- Press the [NAVIGATION] or [SETUP] button
- Turning off the power for the TV will also turn the power off for this unit automatically. If HDD, BD/DVD or SD CARD is being used for dubbing, the power will be turned off after dubbing finishes.
Using HDMI Consumer Electronics Control (activating the function)
1Connect this unit to a TV that is HDMI CEC compatible using a HDMI cable
2Change the setting of "HDMI-CEC" to "ON".
- Check the monitor (TV) setting if the HDMI CEC function does not work.
Memo:
- If you are not using the HDMI CEC function (deactivating), change the setting of "HDMI-CEC" to "OFF".
Note:
- The HDMI CEC function cannot be used if a TV that is not compatible with HDMI CEC has been connected.
- If a HDMI cable is not used for connecting, the HDMI CEC function will not be usable.
Creating a Seamless BD
When titles are imported into the HDD in the HD quality from a video camera, or when edited titles (e.g., after applying scene delete) are dubbed to a disc, seamless playback may not be possible at the joints of scenes. In this case, perform dubbing after executing “SEAMLESS” under the “MODE CHANGE” setting menu.
For details, refer to "Mode conversion" ( page 73).
Creating a seamless BD that uses "MODE CONVERSION" (seamless conversion, recording mode conversion)
■ Procedures to create a seamless BDMV
| File to import | If you do not want to perform scene delete/chapter delete | If you want to perform scene delete/chapter delete |
| AVCHD Recording mode conversion | not required Seamless | - |
| MOV* Conversion | conversion | |
| SD-VIDEO(HD)* HDV | Recording mode conversion after seamless conversion | Recording mode conversion after seamless conversion |
SD-VIDEO(HD)*: SD-VIDEO(JVC Everio MPEG2 TS)
MOV*: MOV files that are taken in SP mode using the JVC ProHD Camcorder GY-HM700/100
■ Procedures to create a seamless BDAV
| File to import | If you do not want to perform scene delete/chapter delete | If you want to perform scene delete/chapter delete |
| AVCHD Conversion not required - | ||
| MOV* Conversion | not required Seamless | conversion |
| SD-VIDEO(HD)* HDV | Seamless conversion Seamless | conversion |
SD-VIDEO(HD)*: SD-VIDEO(JVC Everio MPEG2 TS)
MOV*: MOV files that are taken in SP mode using the JVC ProHD Camcorder GY-HM700/100
Memo:
- During dubbing to BDMV, the recording mode cannot be specified.
- Do not perform recording mode conversion before seamless conversion. Otherwise, seamless conversion cannot be performed.
- If scene delete or chapter delete is applied to a title, it cannot be dubbed to a BDMV disc without performing seamless conversion.
- For titles that are imported into the HDD in the SD picture quality, you can create a seamless DVD by setting "SEAMLESS PLAYBACK" under the "Setting Menu List" to "ON", followed by performing re-encode dubbing.
Refer to "Playback seamless" ( page 77).
Troubleshooting
| ProblemSymptom | ActionReference | Page | |
| Power does not turn on The "HELLO" message remains displayed, and the unit does not start up. | Press the [RESET] button on the front panel.If it does not start up, stop using this unit, unplug the plug from the power point, and bring it to the dealer or "Service Center". | ( page 13) | |
| "FAN LOCKED" is displayed on the display window of this unit | The cooling fan motor is not working. | The cooling fan motor is spoiled. Remove the power plug from the power point, and consult the dealer from which this product is purchased, or any nearby JVC Servicing Center. | - |
| Power turns off automatically | The "AUTO POWER (OFF)" setting is set to "2 HOURS" or "6 HOURS". | Change the "AUTO POWER (OFF)" setting of "SETUP" to "OFF". | ( page 75) |
| The temperature of this unit has rose, and operation has ceased for safety purposes. | Place this unit in an area with ventilation if possible, and wait approximately 30 minutes for it to cool down. | - | |
| The power turns on automatically | The "HDMI-CEC" setting is set to "ON". | Change the "HDMI-CEC" setting of "CONNECTION" to "OFF". | ( page 81) |
| Input cannot be switched | i.LINK connection is currently being established. | Cancel importing, or wait until the connection ends. | ( page 37) |
| There are no video images on the monitor | Monitor only supports RGB input. Set "HDMI --> DVI COLOR" in the setting menu to "RGB FIX". | ( page 81) | |
| "HDCP ERROR" is displayed. Use a monitor that supports HDCP. - | |||
| Video images may be distorted during reencoding/dubbing when the monitor (TV) is connected to this unit using a HDMI cable, or when the screen resolution is set to "1080p". | This is not a malfunction. Change the "HDMI OUTPUT RESOLUTION" to a value other than "1080p" (e.g., 1080i) if you find it annoying. | ( page 80) | |
| Screen is distorted Video | Images may be distorted during reencoding/dubbing when the monitor (TV) is connected to this unit using a HDMI cable, or when the screen resolution is set to "1080p". | This is not a malfunction. Change the "HDMI OUTPUT RESOLUTION" to a value other than "1080p" (e.g., 1080i) if you find it annoying. | ( page 24) |
| There is no audio sound | The "HDMI AUDIO OUTPUT" setting is set to "OFF". | Change the "HDMI AUDIO OUTPUT" setting of "CONNECTION" to "ON". | ( page 81) |
| The amplifier does not support "BITSTREAM" output. | Use an amplifier that supports bitstream output. | ( page 78) | |
| Dubbing cannot be performed | The title to be dubbed is copyright protected. | Titles that are copyright-protected cannot be dubbed. Select a title that is not copyright-protected. | ( page 23) |
| A finalized disc has been inserted. Insert a disc that has not been finalized. - | |||
| The disc is not formatted. Format the disc. ( page 25) | |||
| The SD card is write-protected. Remove the SD card and remove the write protect lock. | ( page 27) | ||
| ProblemSymptom | mActionReference | Page | |
| Data cannot be imported | The title to be dubbed is copyright protected. | Titles that are copyright-protected cannot be dubbed. Select a title that is not copyright-protected. | ( page 23) |
| The number of titles stored in the HDD has reached the maximum amount. | Delete or combine the titles in the HDD to reduce the amount of titles to less than 500. | ( page 62) | |
| The remaining space on the HDD is running out. | Delete the titles in the HDD to increase the remaining space. | ( page 62) | |
| The title/group name cannot be changed | Protection of the title/group name is turned on. | Turn protection off for the title/group name. ( page 64) | |
| The remote control unit does not work | The battery of the remote control unit has run out. | Change new batteries for the remote control. | ( page 16) |
| The remote control code of this unit and the remote control unit are different from each other. | Change the “REMOTE CONTROL CODE” for the remote control to the same number used by this unit. | ( page 16) | |
| A "LOCKED" message appears on the display window of the unit. | Disable the "mode lock" setting. ( page 82) | ||
| The disc cannot be ejected | A "LOCKED" message appears on the display window of the unit. | Disable the "tray lock" setting. ( page 82) | |
| The “READING” message does not disappear from the unit's display window, and the disc tray does not open when the [ ▲ ] button is pressed. | Pressing the [ ▲ ] button at the front of the unit for five seconds or longer opens the disc tray. To close the disc tray after removing the disc, press the [ ○/I ] button, and wait until the tray is closed and power is turned off.(If the disc tray does not open after pressing the [ ▲ ] button for five seconds or longer, consult ou rauthorized dealer.) | - | |
| The disc cannot be played | A disc that cannot be played on this unit is inserted. | Confirm that the disc is playable on this unit. | ( page 10) |
| The region code of the BD or DVD is different from that of this unit. | Confirm that the region number is playable on this unit. | ( page 10) | |
| An unfinalized DVD disc that is recorded using another device is inserted. | Use that device to finalize the disc. - | ||
| Output is at 480i regardless of the component output resolution setting | The component output setting may be changed to 480i after viewing at a setting of 1080/24p using a HDMI connection. | Turn the power off, and turn it on again. - | |
| The aspect ratios of the HDMI output and component output are different | When two monitors are connected respectively to the HDMI output and component output terminals of this unit, the screen aspect ratio of the component output may not be appropriate if the HDMI priority mode is enabled. | When two monitors are connected simultaneously, users are recommended to set “HDMI VIDEO MODE” to “OFF”. | ( page 80) |
Specifications
■ General
Power requirement
AC 120 V \~, 60 Hz
Power consumption
Power on : 34 W
Power off : 3.0 W
Laser specification
For CD
Wavelength : 779 to 789 nm
Output : 13.1 mW (Operating condition)
For DVD
Wavelength : 656 to 663 nm
Output : 9.02 mW (Operating condition)
For BD
Wavelength : 400 to 410 nm
Output : 17.3 mW (Operating condition)
Temperature
Operating : 5°C to 35°C (41°F to 95°F)
Storage: -20°C to 60°C (-4°F to 140°F)
Operating position
Horizontal only
Dimensions (W x H x D)
435 mm x 70 mm x 351 mm
(17-1/10" x 2-6/8" x 13-13/16")
Weight
SR-HD1500US : 5.1 kg (11.2 lbs)
SR-HD1250US : 5.0 kg (11.0 lbs)
■ Input/Output
Video input : 1.0 Vp-p, 75 Ω (BNC)
Video output : 1.0 Vp-p, 75 Ω (BNC)
Audio input : Max 2 Vrms / 10kΩ (pin jack)
Audio output : 2 Vrms / 10kΩ terminated (pin jack)
S-video input
Y : 1.0 Vp-p, 75 Ω
C : 0.286 Vp-p, 75 Ω
S-video output
Y : 1.0 Vp-p, 75 Ω
C : 0.286 Vp-p, 75 Ω
DV : 4-pin for HDV/DV IN
Remote Input : 3.5 mm Jack
Serial Command: D-SUB 9-PIN
Component video output:
Y : 1.0 Vp-p, 75 Ω
CB/CR, PB/PR : 0.7 Vp-p, 75 Ω
Memo:
Corresponding to copy protection
Digital audio output:
Optical : PCM, AAC, Dolby Digital and DTS
HDMI output
19-pin type A
(Deep Color, x.v.Color, Ver1.3)
USB terminal
USB2.0
■ SD memory card
SD, SDHC
■ HDD Deck
SR-HD1500US : 500 GB
SR-HD1250US : 250 GB
Recording compression system
Video
MPEG2 (VBR)
H.264/AVC
Audio
Dolby Digital (2 ch)
Linear PCM (2ch, XP mode only)
■ BD/DVD Deck
Recording compression system
Video
MPEG2 (CBR/VBR)
H.264/AVC
Audio
Dolby Digital (2 ch)
Linear PCM (2ch, XP mode only)
Region code
BD : Region A
DVD : #1
■ ACCESSORIES
Provided accessories
- AC power cord
- Audio/Video cable
• BNC male to RCA female adapter
• Infrared remote control unit
- "AA" battery x 2
- CD-ROM
Index
A
AUDIO CABLE 14, 18, 17
AUDIO LANGUAGE 56, 76, 89
AUDIO/SUBTITLE SETTINGS 56
B
BD (BD-R/BD-RE) 9, 10, 25, 39, 58, 93
BD MIX SOUND 79
BD VIDEO DATA 8
BDAV 9,10,24
BDMV 9,10,24
BD-ROM 10,56,93
BD-VIDEO RATINGS 76
BLUE BACK 79
C
CHANGE ANGLE 56
CHANGE AUDIO OUTPUT 56
CHANGE CHAPTER 56
CHAPTER EDIT 50,67
CHAPTER MARK 16, 51, 67, 68
COMPONENT OUTPUT 81
COMPONENT VIDEO CABLE 14, 17
CONNECTION 17, 18, 19, 80
COUNTRY CODE LIST 76,96
D
DATE DISPLAY STYLE 21,75
DETAIL SETTING 57
DIGITAL NOISE REDUCTION 57
DIMMER (POWER ON) 75
DISPLAY WINDOW 13, 14, 75, 82
Dolby Digital 77,78
Dolby Digital Plus/TrueHD 78
DTS 10,78
DTS-HD 79
DUAL DISC 11
DVD (DVD-R/DVD-RW)
9, 10, 23, 25, 30, 39, 46, 53, 58, 72, 93
DVD VIDEO 10, 24, 30, 32, 76
F
FINALIZE 10, 41, 44, 58
H
HDMI 14,80,81
HDMI AUDIO OUTPUT 81
HDMI CABLE 14, 17, 98
HDMI OUTPUT RESOLUTION 80
HDMI-CEC 81.98
HIGH-SPEED DUBBING 10, 23, 24, 39, 77
1
i.LINK 13, 18, 23, 29, 37
J
JPEG 24, 29, 30, 33, 35, 42, 55
L
LANGUAGE CODE 76,94
PICTURE QUALITY 23, 28, 40, 57
PLAYBACK NAVIGATION 15,43,48
PLAYBACK SETTINGS 16, 52, 56, 76
PROGRESSIVE OUTPUT 57
R
RECORDING MODE ..... 13, 15, 23, 24, 28, 47, 50, 87
REGION CODE 10
REMOTE CONTROL 13, 14, 15, 16, 82
REMOTE CONTROL CODE 16.75
RESUME POINT 51, 53, 54, 77
RS-232C 14, 19, 83
S
SCREEN SAVER 79
SEAMLESS PLAYBACK 77
SETTING THE DATE/TIME 20
SUBTITLE LANGUAGE 56,76
S-VIDEO 14, 17, 18, 81
T
TIME DISPLAY STYLE 22,75
U
USB 13, 18, 23, 29, 33
V
VIDEO CABLE 14.17
VIDEO MODE 9,10,77
VIDEO INPUT SETTING 81
VIDEO SETTINGS 57
VR MODE 9,10
JVC
- Dear Customer,
- Cautions
- This Class B digital apparatus complies with
- Canadian ICES-003.
- CAUTION:
- WARNING:
- TO PREVENT FIRE OR SHOCK HAZARD, DO NOT EXPOSE THIS UNIT TO RAIN OR MOISTURE.
- ATTENTION:
- Note to CATV system installer:
- WARNING
- Main Plug
- IMPORTANT SAFETY INSTRUCTIONS
- Failure to heed the following precautions may result in damage to the unit, remote control or disc/cassette.
- DO NOT place the unit —
- Declaration of Conformity
- MOISTURE CONDENSATION
- DOLBY.
- TRUEHD
- DIGITAL PLUS
- dts-HD
- Master Audio | Essential
- DISCLAIMER OF LIABILITY
- HOW TO USE THIS INSTRUCTION MANUAL
- BEFORE YOU INSTALL YOUR NEW UNIT...
- Contents
- Safety Precaution
- Getting Started
- Preparation
- Dubbing/Importing
- Playing Back
- Editing
- Settings Menu
- Others
- Key Features
- Professional Blu-ray Disc recorder of the high-definition era
- Compatible with ProHD Camcorder GY-HM700/100 (only for SR-HD1500)
- Compatibility with other consumer camcorders
- Digital interface that allows for camcorder compatibility
- Create menu-supported Blu-ray discs
- Compatible with dual layer 50 GB Blu-ray discs, and records up to 24 hours of full high-definition images in a single disc
- Authoring menu enables discs to be created and used industrially such as for demonstrations
- Equipped with external control RS-232C terminal (only for SR-HD1500)
- How to Read this Manual
- About this manual
- ■ Supplementary remarks in the main text
- Memo:
- Menu operation
- Other Precautionary Notes
- Copyright protection
- Copyrights
- Stored video content and compensation
- Disclaimer of compensation for loss or damage of stored video content
- Handling precautions
- Hard Disk Drive (HDD)
- SD Cards
- Precautions for handling SD and SDHC cards
- Note:
- BD video data
- Insert the SD card which has BD video data stored on it, into the [SD SLOT].
- 2Press the [MEDIA MANAGE] button on the remote control unit
- 3Select "BD-VIDEO DATA ERASE" from "SD CARD"
- 4Select "ERASE", and press the [OK] button
- Discs
- BD recording formats
- ■ BDAV mode
- ■ BDMV mode
- DVD recording formats
- ■ VR MODE
- ■ VIDEO MODE
- Formatting of discs
- ■ When using BD-RE or BD-R discs
- ■ When using DVD-R discs
- ■ When using DVD-RW discs
- Discs\_(Continued)
- Discs that are not supported
- Precautions on the Use of Discs
- Maintenance of discs
- Handling discs
- ■ Removing a disc
- - Keeping a disc
- ■ Correct way to hold a disc
- Disc storage
- When the recording/playback lens is dirty
- Precautions when playing a dual disc
- Use genuine JVC discs
- Power Cable
- On-screen Displays
- Status display
- Event display
- Alarm display
- Name and Function of Parts
- Name and Function of Parts \_ (Continued)
- Change batteries for the remote control
- Batteries
- Remote control codes
- Connecting a Monitor
- Connecting using a HDMI cable
- Connecting using a component video cable
- Connecting using an S-video cable
- Connecting using a video cable
- Connecting a Video Deck or Other Equipment
- Connecting a video camera
- Connecting an Amplifier
- Connecting an audio amplifier
- Connecting External Devices
- Connecting the Power Supply
- Setting and Displaying Date/Time
- Setting the date/time
- 5Set the time and date
- 6After setting is complete, select "ENTER", and press the [OK] button
- Changing the date display style
- 1Press the [SET UP] button on the remote control unit
- 2Select "SETUP", and press the [OK] button
- Select "CLOCK SET/DISPLAY", and press the [OK] button
- 4Select "DATE DISPLAY", and press the [OK] button
- 5Select the date display style.
- 6After selecting, press the [OK] button
- Setting and Displaying Date/Time\_(Continued)
- Changing the time display style
- 3Select "CLOCK SET/DISPLAY", and press the [OK] button
- Select "TIME DISPLAY CHOICE", and press the [OK] button
- 5The Time Display menu screen appears
- 6Select the time display style
- 7After selecting, press the [OK] button
- Dubbing from the HDD to a BD/DVD
- ■ High-speed dubbing
- ■ Dubbing in a specific recording mode
- Other options for importing data into the HDD
- ■ Importing data from a BD/DVD to the HDD
- ■ Importing data from a SDHC/SD to the HDD
- ■ Importing data from a video camera to the HDD
- ■ Importing data from a video deck
- Dubbing chart
- ■ Dubbing the video data from the HDD
- ■ Dubbing the picture data from the HDD
- Formatting
- Format chart
- Formatting a disc
- Formatting\_(Continued)
- Formatting an SD Card
- Insert the SD card to be formatted into the [SD SLOT]
- 3Select "FORMAT" from "SD CARD"
- Recording Modes
- Maximum recording time for each recording mode
- HD picture quality
- DR mode
- FR mode
- Importing Data to the HDD Using the ONE TOUCH DUBBING Button
- ■ Procedure for one-touch importing
- 1Connect the device to be used. Alternatively, insert an SD card.
- Press the [ONE TOUCH DUBBING] button on the unit
- 3System checks the device connection
- 4System detects the titles to import
- 5Importing of titles by this unit starts
- 6After titles are successfully imported, a "DUBBING IS COMPLETED" message appears on the monitor
- Importing Data from a BD/DVD to the HDD
- ■ Preparations
- 1Set a BD or DVD on the disc tray
- 2Press the [DUBBING] button on the remote control unit
- 3Select "DISC⇒HDD" in the importing screen, and press the [OK] button
- 4Select "NEXT", and press the [OK] button
- Full import
- 1Select "FULL IMPORT" in the import selection screen, and press the [OK] button
- 2Select "NEXT", and press the [OK] button
- 3Select "RECORDING MODE", and press the [OK] button
- 4Select the "RECORDING MODE" option
- 5Select "START", and press the [OK] button
- Specify a title
- 1Select "SEL. TITLE(VIDEO)" in the import selection screen, and press the [OK] button
- 4Select the "RECORDING MODE" option.
- 5Select "NEXT", and press the [OK] button
- 6Create an import title list
- Memo:-
- Importing Data from a BD/DVD to the HDD\_(Continued)
- Importing DVD-VIDEO
- 2Select "START", and press the [OK] button
- Canceling importing
- ■ To cancel importing before it starts
- ■ To cancel importing while it is in progress
- Importing Data from a USB-compatible Device to the HDD
- Note:-
- Importing Data from a USB-compatible Device to the HDD\_(Continued)
- 3Create an import title list
- Importing Data from an SD Card to the HDD
- Importing Data from an SD Card to the HDD\_(Continued)
- Importing Data from an i.LINK-compatible Device to the HDD
- 3Select "HDV/DV⇒HDD" in the importing screen, and press the [OK] button
- Imports data from the beginning
- 1Select "IMPORT FROM BEGINNING", and press the [OK] button
- Importing Data from an i.LINK-compatible Device to the HDD\_(Continued)
- 4Select "START", and press the [OK] button
- Imports data from current position
- 1Select "IMPORT FROM CURRENT POSITION", and press the [OK] button
- Select "RECORDING MODE" and press the [OK] button to display the pop-up menu
- Cancel dubbing
- Dubbing a Title from the HDD to a BD/DVD
- ■ Preparation
- On this screen, select "DISC↔VIDEO"
- ■ Dubbing titles
- 1Select "RECORDING FORMAT", and press the [OK] button
- 2Select "RECORDING MODE", and press the [OK] button
- Dubbing a Title from the HDD to a BD/ DVD\_(Continued)
- ■ Cancel dubbing
- Dubbing Still Images from the HDD
- ■ Before dubbing
- ■ Dubbing still images
- 1Press the [DUBBING] button on the remote control unit
- 3Select the media to dub to from the media selection screen
- Select "NEXT", and press the [OK] button
- ■ Dubbing from the Playback Navigation screen
- 2Select "DUB", and press the [OK] button
- 3Follow steps 3 to 5 of "Dubbing still images"
- Enabling Playback on Other Devices (Finalizing)
- Finalizing
- Unfinalizing a disc
- ■ To unfinalize a disc
- Copying the Entire Disc
- 2Select "DISC⇒DISC", and press the [OK] button
- Set the number of discs to copy using the [▲/▼] buttons
- 9Complete the entire disc copying
- Recording Using External Inputs
- 1Select the location of the playback file
- 2Press the [INPUT SELECT] button on the remote control, and choose external input (HDV/DV or L-1)
- 3Press the [REC MODE] button and select a recording mode
- Press the [●] and [▶] remote control buttons together to start the recording process
- 5Operate the external device using i.LINK(HDV/DV) or the video/S-video input to output the videos to be recorded
- 6Press the [■] button on either this unit or the remote control to display the pop-up screen, choose "STOP" and press the [OK] button
- About Playing Back
- Using Playback Navigation
- Displaying the Playback Navigation screen
- 2Press the [NAVIGATION] button on the remote control unit
- Operating Playback Navigation
- ■ Playing a video/still image
- ■ Switching between thumbnail and list displays
- ■ Displaying a group/folder
- ■ Switching between video and still image displays
- ■ Displaying the Option menu
- 1Select a title/group, and press the [OPTION] button
- Using Playback Navigation \_(Continued)
- 2Select an operation option, and press the [OK] button
- Option menu list
- Video Playback Operation
- Frequently used button operations
- ■ [▶] button
- ■ [ ■ ] button
- ■ [Ⅱ] button
- ■ [▶▶] button
- ■ [◀◀] button
- ■ [▶▶] / [◀◀] button
- ■ [MARK] button
- Video Playback Operation\_(Continued)
- ■ [ ↻ ] button
- ■ [ ] button
- ■ [HDD] button
- ■ [BD/SD] button
- Useful button operations
- ■ [PB MODE] button
- ■ [AUDIO] button
- ■ [SUB TITLE] button
- ■ [ANGLE] button
- Playing Videos on a BD/DVD
- Playing a disc when Auto Play is enabled 1Set a BD or DVD on the disc tray
- Playing a disc when Auto Play is disabled 1Set a BD or DVD on the disc tray
- 2Press the [NAVIGATION] button
- 3Select a title, and press the [OK] button
- Playing an EverioBackup Disc\*
- 1Set the disc on the disc tray
- Playing Video Discs Created Using a PC
- Playing Videos on the HDD
- Playing titles stored on the HDD
- 1Press the [NAVIGATION] button
- 2Select the titles to playback, and press the [▶] button
- Playing Videos on a SD Card
- Insert the SD card into the [SD SLOT]
- Playing Still Images (JPEG)
- Playing still images
- 1Select the playback location
- 2Set the media
- 3Select the still images to play, and press the [▶] button
- Enabled button operations during still image playback
- ■ [◀◀] / [▶▶] button
- ■ [ ⏻/l ] button
- Changing Playback Settings
- Displaying the playback settings menu
- 1Press the [PB MODE] button on the remote control unit during the playback of a title
- Playback Settings Menu
- ■ AUDIO LANGUAGE
- ■ CHANGE AUDIO OUTPUT
- ■ SIGNAL TYPE (BD-ROM)
- ■ SUBTITLE LANGUAGE
- ■ SUBTITLE STYLE
- ■ CHANGE ANGLE
- ■ REPEAT
- ■ CHANGE TITLE
- ■ CHANGE CHAPTER
- ■ TIME JUMP
- ■ SLIDESHOW INTERVAL
- ■ SLIDESHOW EFFECTS
- ■ PICTURE QUALITY
- ■ DETAIL SETTING
- ■ DIGITAL NOISE REDUCTION
- ■ PROGRESSIVE OUTPUT
- Before editing
- Editable items for different media
- Entering Characters
- 1Enter characters using the [0]-[9], [\*] or [#] buttons
- 2After character input is complete, press the [YELLOW] button
- Grouping
- 1Press the [NAVIGATION] button on the remote control unit
- 2Select the titles or groups to be grouped, and press the [MARK] button
- 3Press the [OPTION] button on the remote control unit
- 4Select "GROUP", and press the [OK] button
- Select "GROUP", and press the [OK] button
- Ungrouping
- 2Select the group to ungroup, and press the [OPTION] button
- 3Select "UNGROUP", and press the [OK] button
- 4Select "YES", and press the [OK] button
- Excluding from a group
- 2Select the titles to exclude from the group, and press the [MARK] button
- Press the [OPTION] button on the remote control unit
- 4Select "DO NOT GROUP", and press the [OK] button
- 5Select "YES", and press the [OK] button
- Changing the Title/Group Name
- 2Select the title/group for which the name is to be changed, and press the [OPTION] button
- 3Select "EDIT INFO", and press the [OK] button
- 4Select "MODIFY TITLE NAME" or "MODIFY GROUP NAME", and press the [OK] button
- 5Modify the title/group name
- Deleting a Title/Group
- 2Select the titles/groups to delete, and press the [OPTION] button
- 3Select "DELETE", and press the [OK] button
- 4Select "DELETE", and press the [OK] button
- Turning On Title/Group Protection
- 2Select the titles/groups to be protected, and press the [OPTION] button
- 4Select "PROTECT", and press the [OK] button
- 5Select "YES" or "PROTECT", and press the [OK] button
- Turning Off Title/Group Protection
- 2Select the titles/groups to turn off protection for, and press the [OPTION] button
- 4Select "UNPROTECT", and press the [OK] button
- Creating a Playlist
- 2Select the title for which a playlist is to be created, and press the [OPTION] button
- 3Select "EDIT", and press the [OK] button
- 4Select "PLAYLIST EDIT", and press the [OK] button
- Edit the playlist accordingly by selecting chapters from the source title according to your preference
- 6Press the [YELLOW] button on the remote control unit
- Editing the playlist
- ■ Chapter insertion
- ■ Chapter deletion
- ■ Entering the playlist name
- Editing a Thumbnail
- 1Press the [INFORMATION CORRECT] button on the remote control unit
- 2Select "MODIFY THUMBNAIL", and press the [OK] button
- 3Play the video, and press the [■] button to stop at the scene you want to use as thumbnail display
- Select "CHANGE", and press the [OK] button
- 5Select "CONFIRM", and press the [OK] button
- Editing a Chapter
- Chapter edit functions
- Editing a Chapter\_(Continued)
- ■ Chapter mark insertion (divide chapter)
- ■ Chapter mark deletion (combine chapters)
- 3Select "YES", and press the [OK] button
- ■ Deleting a video chapter
- Chapter options
- ■ Combining with previous chapter
- ■ Combining with next chapter
- ■ Combining all chapters
- Dividing
- 1Press the [EDIT] button on the remote control unit
- 2Select "DIVIDE", and press the [OK] button
- 4Play the video, and press the [III] button at the scene where you want to perform dividing
- 5Select "DIVIDING POINT", and press the [OK] button
- Select "EXECUTE", and press the [OK] button
- Delete Scenes
- Select "EXECUTE", and press the [OK] button
- ##
- Changing the Disc Name
- Changing the Shooting Date/Time
- 5Select "ENTER", and press the [OK] button
- Mode conversion
- 1Press the [NAVIGATION] button on the remote control
- 2Select a title/group, and press the [OPTION] button
- 3Select "MODE CHANGE" from the Option menu, and press the [OK] button
- Changing Settings of this Unit
- Displaying the Settings Menu
- Setting Menu List
- Setup
- ■ AUTO POWER (OFF)
- ■ REMOTE CONTROL CODE
- ■ CLOCK SET/DISPLAY
- ■ QUICK STARTUP
- ■ BUZZER OUTPUT
- ■ DEFAULT SETTING
- Playback Setting
- ■ BD-/DVD-VIDEO PB SETTING
- ■ RESUME
- ■ STILL MODE
- ■ SEAMLESS PLAYBACK
- Audio
- ■ DYNAMIC RANGE CONTROL
- ■ DOWN MIX
- ■ DIGITAL OUT
- ■ DV IN AUDIO SETTING
- ■ BD MIX SOUND
- Display
- ■ ON SCREEN GUIDE
- BLUE BACK
- ■ SCREEN SAVER
- ■ OSD LANGUAGE
- Connection
- ■ MONITOR TYPE
- Setting Values Description
- ■ HDMI CONNECTION
- Setting Values
- Description
- ■ HDMI-CEC
- ■ COMPONENT OUTPUT
- ■ VIDEO INPUT SETTING
- Locking the Disc Tray
- Unlocking the disc tray
- Turning on the Mode Lock
- Turning off the mode lock
- RS-232C Interface (only for SR-HD1500)
- Command Table
- Specifications
- Command
- ■ Operation Commands
- 80-8F
- B8
- System Commands
- Response Commands
- Sense
- - CTL Data Sense
- Using the HDMI Consumer Electronics Control (HDMI CEC)
- HDMI Consumer Electronics Control
- HDMI Consumer Electronics Control operations
- Using HDMI Consumer Electronics Control (activating the function)
- 1Connect this unit to a TV that is HDMI CEC compatible using a HDMI cable
- Creating a Seamless BD
- Creating a seamless BD that uses "MODE CONVERSION" (seamless conversion, recording mode conversion)
- ■ General
- ■ Input/Output
- ■ SD memory card
- ■ HDD Deck
- ■ BD/DVD Deck
- ■ ACCESSORIES
- Index
- A
- B
- C
- D
- F
- H
- 1
- J
- L
- R
- S
- T
- U
- V
- JVC
Brand : JVC
Model : SR-HD1500US
Category : Blu-ray player