
GV-N95TOC-512I - Video card GIGABYTE - Free user manual and instructions
Find the device manual for free GV-N95TOC-512I GIGABYTE in PDF.


| Product Type | Graphics Card (VGA Card) |
| Brand | GIGABYTE |
| Model | GV-N95TOC-512I |
| GPU | NVIDIA GeForce 9500 GT |
| Memory | 512 MB GDDR2 |
| Interface | PCI Express 2.0 x16 |
| DirectX Support | DirectX 10 |
| SLI Support | Yes (requires same model cards and SLI bridge connector) |
| Output Connectors | 1x HDMI, 1x D-Sub (VGA), 1x DVI-I |
| HDCP Support | Yes |
| Maximum Resolution | 2560x1600 (via Dual-Link DVI) |
| Power Supply Requirement | 350W (400W for SLI configuration) |
| Operating System Support | Windows XP (SP2), Windows Vista, Windows XP Professional x64 |
| Dimensions | Approx. 17.5 x 12 x 2 cm (single slot) |
| Weight | Approx. 0.3 kg |
| Certifications | FCC Class B, CE, RoHS, WEEE |
| Warranty | Limited warranty (check GIGABYTE support for details) |
| Care & Cleaning | Handle with anti-static precautions; clean with dry cloth; avoid liquids. |
| Spare Parts & Repairability | No user-serviceable parts; contact GIGABYTE for support. |
| Safety Information | Do not remove labels; follow static discharge precautions; use only official BIOS. |
Frequently Asked Questions - GV-N95TOC-512I GIGABYTE
User questions about GV-N95TOC-512I GIGABYTE
0 question about this device. Answer the ones you know or ask your own.
Ask a new question about this device
Download the instructions for your Video card in PDF format for free! Find your manual GV-N95TOC-512I - GIGABYTE and take your electronic device back in hand. On this page are published all the documents necessary for the use of your device. GV-N95TOC-512I by GIGABYTE.
USER MANUAL GV-N95TOC-512I GIGABYTE
Copyright by GIGA-BYTE TECHNOLOGY CO., LTD. ("GBT"). No part of this manual may be reproduced or transmitted in any form without the expressed, written permission of GBT.
Trademarks
Third-party brands and names are the properties of their respective owners.
Notice
Please do not remove any labels on this graphics card. Doing so may void the warranty of this card.
Due to rapid change in technology, some of the specifications might be out of date before publication of this this manual.
The author assumes no responsibility for any errors or omissions that may appear in this document nor does the author make a commitment to update the information contained herein.
Macrovision corporation product notice:
This product incorporates copyright protection technology that is protected by U.S. patents and other intellectual property rights. Use of this copyright protection technology must be authorized by Macrovision, and is intended for home and other limited viewing uses only unless otherwise authorized by Macrovision. Reverse engineering or disassembly is prohibited.
| (Stamp) Date: Oct. 3, 2008 Name: Temporary Flange | ||||
| Manufacturer/Proportor | ||||
| Manufaculty/Improper | ||||
| ☐ DN 60335 Safety of Household and owner electrical suppliers | ☐ EN 5001-1 | General and Safety requirements for unternally power systems (Jus) | ||
| ☐ DN 60365 Safety requirement to manage operations from household and other agents used | ☐ EN 60910 | General and Safety requirements for maintenance and/or distribution equipment underlying electrical purchases equipment | ||
| ☐ DN VDE 9855 Closed distribution services: Equipment for recurring audio distribution fans and television stands | ☐ EC (Eccomity marking) | |||
| ☐ Part 17 Part 18 Part 19 Part 19 Part 19 Part 19 Part 19 Part 19 Part 19 Part 19 Part 19 Part 19 Part 19 Part 19 Part 19 Part 19 Part 19 Part 19 Part 19 Part 19 Part 19 Part 19 Part 19 Part 19 Part 19 Part 19 Part 19 Part 18 Part 18 Part 18 Part 18 Part 18 Part 18 Part 18 Part 18 Part 18 Part 18 Part 18 Part 18 Part 18 Part 18 Part 18 Part 18 Part 18 Part 18 Part 18 Part 18 Part 18 Part 18 Part 18 Part 18 Part 18 Part 17 Part 17 Part 17 Part 17 Part 17 Part 17 Part 17 Part 17 Part 17 Part 17 Part 17 Part 17 Part 17 Part 17 Part 17 Part 17 Part 17 Part 17 Part 17 Part 17 Part 17 Part 17 Part 17 Part 17 Part 17 Part 16 Part 16 Part 16 Part 16 Part 16 Part 16 Part 16 Part 16 Part 16 Part 16 Part 16 Part 16 Part 16 Part 16 Part 16 Part 16 Part 16 Part 16 Part 16 Part 16 Part 16 Part 16 Part 16 Part 16 Part 16 Part 15 Part 15 Part 15 Part 15 Part 15 Part 15 Part 15 Part 15 Part 15 Part 15 Part 15 Part 15 Part 15 Part 15 Part 15 Part 15 Part 15 Part 15 Part 15 Part 15 Part 15 Part 15 Part 15 Part 15 Part 15 Part 14 Part 14 Part 14 Part 14 Part 14 Part 14 Part 14 Part 14 Part 14 Part 14 Part 14 Part 14 Part 14 Part 14 Part 14 Part 14 Part 14 Part 14 Part 14 Part 14 Part 14 Part 14 Part 14 Part 14 Part 14 Part 13 Part 13 Part 13 Part 13 Part 13 Part 13 Part 13 Part 13 Part 13 Part 13 Part 13 Part 13 Part 13 Part 13 Part 13 Part 13 Part 13 Part 13 Part 13 Part 13 Part 13 Part 13 Part 13 Part 13 Part 13 Part 12 Part 12 Part 12 Part 12 Part 12 Part 12 Part 12 Part 12 Part 12 Part 12 Part 12 Part 12 Part 12 Part 12 Part 12 Part 12 Part 12 Part 12 Part 12 Part 12 Part 12 Part 12 Part 12 Part 12 Part 12 Part 11 Part 11 Part 11 Part 11 Part 11 Part 11 Part 11 Part 11 Part 11 Part 11 Part 11 Part 11 Part 11 Part 11 Part 11 Part 11 Part 11 Part 11 Part 11 Part 11 Part 11 Part 11 Part 11 Part 11 Part 11 Part 10 Part 10 Part 10 Part 10 Part 10 Part 10 Part 10 Part 10 Part 10 Part 10 Part 10 Part 10 Part 10 Part 10 Part 10 Part 10 Part 10 Part 10 Part 10 Part 10 Part 10 Part 10 Part 10 Part 10 Part 10 Part 15 Part 15 Part 15 Part 15 Part 15 Part 15 Part 15 Part 15 Part 15 Part 15 Part 15 Part 15 Part 15 Part 15 Part 15 Part 15 Part 15 Part 15 Part 15 Part 15 Part 15 Part 15 Part 15 Part 15 Part 12 Part 12 Part 12 Part 12 Part 12 Part 12 Part 12 Part 12 Part 12 Part 12 Part 12 Part 12 Part 12 Part 12 Part 12 Part 12 Part 12 Part 12 Part 12 Part 12 Part 12 Part 12 Part 12 Part 12 Part 15 Part 15 Part 15 Part 15 Part 15 Part 15 Part 15 Part 15 Part 15 Part 15 Part 15 Part 15 Part 15 Part 15 Part 15 Part 15 Part 15 Part 15 Part 15 Part 15 Part 15 Part 15 Part 15 Part 15 Part 16 Part 16 Part 16 Part 16 Part 16 Part 16 Part 16 Part 16 Part 16 Part 16 Part 16 Part 16 Part 16 Part 16 Part 16 Part 16 Part 16 Part 16 Part 16 Part 16 Part 16 Part 16 Part 16 Part 16 Part 17 Part 17 Part 17 Part 17 Part 17 Part 17 Part 17 Part 17 Part 17 Part 17 Part 17 Part 17 Part 17 Part 17 Part 17 Part 17 Part 17 Part 17 Part 17 Part 17 Part 17 Part 17 Part 17 Part 17 Part 18 Part 18 Part 18 Part 18 Part 18 Part 18 Part 18 Part 18 Part 18 Part 18 Part 18 Part 18 Part 18 Part 18 Part 18 Part 18 Part 18 Part 18 Part 18 Part 18 Part 18 Part 18 Part 18 Part 18 Part 19 Part 19 Part 19 Part 19 Part 19 Part 19 Part 19 Part 19 Part 19 Part 19 Part 19 Part 19 Part 19 Part 19 Part 19 Part 19 Part 19 Part 19 Part 19 Part 19 Part 19 Part 19 Part 19 Part 18 Part 19 Part 19 Part 19 Part 19 Part 19 Part 19 Part 19 Part 19 Part 19 Part 19 Part 19 Part 19 Part 19 Part 19 Part 19 Part 19 Part 19 Part 19 Part 19 Part 19 Part 19 Part 19 Part 19 Part 17 Part 17 Part 17 Part 17 Part 17 Part 17 Part 17 Part 17 Part 17 Part 17 Part 17 Part 17 Part 17 Part 17 Part 17 Part 17 Part 17 Part 17 Part 17 Part 17 Part 17 Part 17 Part 17 Part 17 Part 15 Part 15 Part 15 Part 15 Part 15 Part 15 Part 15 Part 15 Part 15 Part 15 Part 15 Part 15 Part 15 Part 15 Part 15 Part 15 Part 15 Part 15 Part 15 Part 15 Part 15 Part 15 Part 15 Part 15 Part 17 Part 17 Part 17 Part 17 Part 17 Part 17 Part 17 Part 17 Part 17 Part 17 Part 17 Part 17 Part 17 Part 17 Part 17 Part 17 Part 17 Part 17 Part 17 Part 17 Part 17 Part 17 Part 17 Part 17 Part 19 Part 19 Part 19 Part 19 Part 19 Part 19 Part 19 Part 19 Part 19 Part 19 Part 19 Part 19 Part 19 Part 19 Part 19 Part 19 Part 19 Part 19 Part 19 Part 19 Part 19 Part 19 Part 19 Part 19 Part 17 Part 16 Part 16 Part 16 Part 16 Part 16 Part 16 Part 16 Part 16 Part 16 Part 16 Part 16 Part 16 Part 16 Part 16 Part 16 Part 16 Part 16 Part 16 Part 16 Part 16 Part 16 Part 16 Part 16 Part 17 Part 16 Part 16 Part 16 Part 16 Part 16 Part 16 Part 16 Part 16 Part 16 Part 16 Part 16 Part 16 Part 16 Part 16 Part 16 Part 16 Part 16 Part 16 Part 16 Part 16 Part 16 Part 16 Part 16 Part 18 Part 18 Part 18 Part 18 Part 18 Part 18 Part 18 Part 18 Part 18 Part 18 Part 18 Part 18 Part 18 Part 18 Part 18 Part 18 Part 18 Part 18 Part 18 Part 18 Part 18 Part 18 Part 18 Part 18 Part 16 Part 16 Part 16 Part 16 Part 16 Part 16 Part 16 Part 16 Part 16 Part 16 Part 16 Part 16 Part 16 Part 16 Part 16 Part 16 Part 16 Part 16 Part 16 Part 16 Part 16 Part 16 Part 16 Part 16 Part 18 Part 19 Part 19 Part 19 Part 19 Part 19 Part 19 Part 19 Part 19 Part 19 Part 19 Part 19 Part 19 Part 19 Part 19 Part 19 Part 19 Part 19 Part 19 Part 19 Part 19 Part 19 Part 19 Part 19 Part 16 Part 16 Part 16 Part 16 Part 16 Part 16 Part 16 Part 16 Part 16 Part 16 Part 16 Part 16 Part 16 Part 16 Part 16 Part 16 Part 16 Part 16 Part 16 Part 16 Part 16 Part 16 Part 16 Part 16 Part 19 Part 19 Part 19 Part 19 Part 19 Part 19 Part 19 Part 19 Part 19 Part 19 Part 19 Part 19 Part 19 Part 19 Part 19 Part 19 Part 19 Part 19 Part 19 Part 19 Part 19 Part 19 Part 19 Part 19 Part 16 Part 15 Part 15 Part 15 Part 15 Part 15 Part 15 Part 15 Part 15 Part 15 Part 15 Part 15 Part 15 Part 15 Part 15 Part 15 Part 15 Part 15 Part 15 Part 15 Part 15 Part 15 Part 15 Part 15 Part 16 Part 15 Part 15 Part 15 Part 15 Part 15 Part 15 Part 15 Part 15 Part 15 Part 15 Part 15 Part 15 Part 15 Part 15 Part 15 Part 15 Part 15 Part 15 Part 15 Part 15 Part 15 Part 15 Part 15 Part 17 Part 16 Part 16 Part 16 Part 16 Part 16 Part 16 Part 16 Part 16 Part 16 Part 16 Part 16 Part 16 Part 16 Part 16 Part 16 Part 16 Part 16 Part 16 Part 16 Part 16 Part 16 Part 16 Part 16 Part 15 Part 16 Part 16 Part 16 Part 16 Part 16 Part 16 Part 16 Part 16 Part 16 Part 16 Part 16 Part 16 Part 16 Part 16 Part 16 Part 16 Part 16 Part 16 Part 16 Part 16 Part 16 Part 16 Part 16 Part 17 Part 18 Part 18 Part 18 Part 18 Part 18 Part 18 Part 18 Part 18 Part 18 Part 18 Part 18 Part 18 Part 18 Part 18 Part 18 Part 18 Part 18 Part 18 Part 18 Part 18 Part 18 Part 18 Part 18 Part 17 Part 18 Part 18 Part 18 Part 18 Part 18 Part 18 Part 18 Part 18 Part 18 Part 18 Part 18 Part 18 Part 18 Part 18 Part 18 Part 18 Part 18 Part 18 Part 18 Part 18 Part 18 Part 18 Part 18 Part 19 Part 18 Part 18 Part 18 Part 18 Part 18 Part 18 Part 18 Part 18 Part 18 Part 18 Part 18 Part 18 Part 18 Part 18 Part 18 Part 18 Part 18 Part 18 Part 18 Part 18 Part 18 Part 18 Part 18 Part 19 Part 17 Part 17 Part 17 Part 17 Part 17 Part 17 Part 17 Part 17 Part 17 Part 17 Part 17 Part 17 Part 17 Part 17 Part 17 Part 17 Part 17 Part 17 Part 17 Part 17 Part 17 Part 17 Part 17 Part 18 Part 17 Part 17 Part 17 Part 17 Part 17 Part 17 Part 17 Part 17 Part 17 Part 17 Part 17 Part 17 Part 17 Part 17 Part 17 Part 17 Part 17 Part 17 Part 17 Part 17 Part 17 Part 17 Part 17 Part 18 Part 16 Part 16 Part 16 Part 16 Part 16 Part 16 Part 16 Part 16 Part 16 Part 16 Part 16 Part 16 Part 16 Part 16 Part 16 Part 16 Part 16 Part 16 Part 16 Part 16 Part 17 Part 17 Part 17 Part 17 Part 18 Part 17 Part 17 Part 17 Part 17 Part 17 Part 17 Part 17 Part 17 Part 17 Part 17 Part 17 Part 17 Part 17 Part 17 Part 17 Part 17 Part 17 Part 17 Part 18 Part 17 Part 17 Part 17 Part 17 Part 17 Part 18 Part 17 Part 17 Part 17 Part 17 Part 17 Part 17 Part 17 Part 17 Part 17 Part 17 Part 17 Part 17 Part 17 Part 17 Part 17 Part 17 Part 18 Part 17 Part 17 Part 17 Part 17 Part 17 Part 17 Part 17 Part 18 Part 17 Part 17 Part 17 Part 17 Part 17 Part 17 Part 17 Part 17 Part 17 Part 17 Part 17 Part 17 Part 17 Part 17 Part 17 Part 17 Part 18 Part 17 Part 18 Part 18 Part 18 Part 18 Part 18 Part 18 Part 18 Part 18 Part 18 Part 18 Part 18 Part 18 Part 18 Part 18 Part 18 Part 18 Part 18 Part 18 Part 18 Part 18 Part 18 Part 18 Part 19 Part 17 Part 18 Part 18 Part 18 Part 18 Part 18 Part 18 Part 18 Part 18 Part 18 Part 18 Part 18 Part 18 Part 18 Part 18 Part 18 Part 18 Part 18 Part 18 Part 18 Part 18 Part 18 Part 18 Part 18 Part 16 Part 17 Part 17 Part 17 Part 17 Part 17 Part 17 Part 17 Part 17 Part 17 Part 17 Part 17 Part 17 Part 17 Part 17 Part 17 Part 17 Part 17 Part 17 Part 17 Part 17 Part 17 Part 17 Part 17 Part 18 Part 15 Part 15 Part 15 Part 15 Part 15 Part 15 Part 15 Part 15 Part 15 Part 15 Part 15 Part 15 Part 15 Part 15 Part 15 Part 15 Part 15 Part 15 Part 15 Part 15 Part 15 Part 15 Part 15 Part 15 Part 18 Part 17 Part 17 Part 17 Part 17 Part 17 Part 17 Part 17 Part 17 Part 17 Part 17 Part 17 Part 17 Part 17 Part 17 Part 17 Part 17 Part 17 Part 17 Part 17 Part 17 Part 17 Part 17 Part 17 Part 19 Part 17 Part 17 Part 17 Part 17 Part 17 Part 17 Part 17 Part 17 Part 17 Part 17 Part 17 Part 17 Part 17 Part 17 Part 17 Part 17 Part 17 Part 17 Part 17 Part 17 Part 17 Part 17 Part 17 Part 19 Part 18 Part 18 Part 18 Part 18 Part 18 Part 18 Part 18 Part 18 Part 18 Part 18 Part 18 Part 18 Part 18 Part 18 Part 18 Part 18 Part 18 Part 18 Part 18 Part 18 Part 18 Part 18 Part 18 Part 17 Part 16 Part 16 Part 16 Part 16 Part 16 Part 16 Part 16 Part 16 Part 16 Part 16 Part 16 Part 16 Part 16 Part 16 Part 16 Part 16 Part 16 Part 16 Part 16 Part 16 Part 16 Part 16 Part 16 Part 19 Part 20Part 20Part 20Part 20Part 20Part 20Part 20Part 20Part 20Part 20Part 20Part 20Part 20Part 20Part 20Part 20Part 20Part 20Part 20Part 20Part 20Part 20Part 20Part 20Part 20Part 20PSCGV-N9STD3-SI-2I/GV-N9STOC-I/GVI/HSV-TOG-VGA-VG-N9STOC-5I-2I/GV-N9STOC-I/GVI/HSV-TOG-VGA-VGA-VGA-VGA-VGA-VGA-VGA-VGA-VGA-VGA-VGA-VGA-VGA-VGA-VGA-VGA-VGA-VGA-VGA-VGA-VGA-VGA-VGA-VGA-VGA-VGA-VGA-VGA-VGA-VGA-VGA-VGA-VGA-VGA-VGA-VGA-VGA-VGA-VGA-VGA-VGA-VGA-VGA-VGA-VGA-VGA-VGA-VGA-VGA-VGA-VNA-VGA-VGA-VGA-VGA-VGA-VGA-VGA-VGA-VGA-VGA-VGA-VGA-VGA-VGA-VGA-VGA-VGA-VGA-VGA-VGA-VGA-VGA-VGA-VGA-VGA-VGA-VGA-VGA-VGA-VGA-VGA-VGA-VGA-VGA-VGA-VGA-VGA-VGA-VGA-VGA-VGA-VGA-VGA-VGA-VGA-VGA-VGA-VGA-VGA-VCA-VGA-VGA-VGA-VGA-VGA-VGA-VGA-VGA-VGA-VGA-VGA-VGA-VGA-VGA-VGA-VGA-VGA-VGA-VGA-VGA-VGA-VGA-VGA-VGA-VGA-VGA-VGA-VGA-VGA-VGA-VGA-VGA-VGA-VGA-VGA-VGA-VGA-VGA-VGA-VGA-VGA-VGA-VGA-VGA-VGA-VGA-VGA-VGA-VGA-VAG-VGA-VGA-VGA-VGA-VGA-VGA-VGA-VGA-VGA-VGA-VGA-VGA-VGA-VGA-VGA-VGA-VGA-VGA-VGA-VGA-VGA-VGA-VGA-VGA-VGA-VGA-VGA-VGA-VGA-VGA-VGA-VGA-VGA-VGA-VGA-VGA-VGA-VGA-VGA-VGA-VGA-VGA-VGA-VGA-VGA-VGA-VGA-VGA-VGA-VGGV-VGA-VGA-VGA-VGA-VGA-VGA-VGA-VGA-VGA-VGA-VGA-VGA-VGA-VGA-VGA-VGA-VGA-VGA-VGA-VGA-VGA-VGA-VGA-VGA-VGA-VGA-VGA-VGA-VGA-VGA-VGA-VGA-VGA-VGA-VGA-VGA-VGA-VGA-VGA-VGA-VGA-VGA-VGA-VGA-VGA-VGA-VGA-VGA-VGA-VGCV-GV-NG-TDB-5I-2I/GV-N9STOC-I/GVI/HSV-HSV-TOG-VGA-VGA-VGA-VGA-VGA-VGA-VGA-VGA-VGA-VGA-VGA-VGA-VGA-VGA-VGA-VGA-VGA-VGA-VGA-VGA-VGA-VGA-VGA-VGA-VGA-VGA-VGA-VGA-VGA-VGA-VGA-VGA-VGA-VGA-VGA-VGA-VGA-VGA-VGA-VGA-VGA-VGA-VGA-VGA-VGA-VGA-VGA-VGVC-GV-NG-TDB-5I-2I/GV-N9STOC-I/GVI/HSV-HSV-TOG-VGA-VGA-VGA-VGA-VGA-VGA-VGA-VGA-VGA-VGA-VGA-VGA-VGA-VGA-VGA-VGA-VGA-VGA-VGA-VGA-VGA-VGA-VGA-VGA-VGA-VGA-VGA-VGA-VGA-VGA-VGA-VGA-VGA-VGA-VGA-VGVC-GV-NG-TDB-5I-2I/GV-N9STOC-I/GVI/HSV-HSV-NOG-VGA-VGA-VGA-VGA-VGA-VGA-VGA-VGA-VGA-VGA-VGA-VGA-VGA-VGA-VGA-VGA-VGA-VGA-VGA-VGA-VGA-VGA-VGA-VGA-VGA-VGA-VGA-VGA-VGA-VGA-VGA-VGA-VGA-VGA-VGA-VGA-VGA-VGA-VGA-VGA-VGA-VGA-VGA-VGA-VGA-VGA-VGA-VGA-VGA-NG-TDB-5I-2I/GV-N9STOC-I/GVI/HSV-HSV-NOG-VGA-VGA-VGA-VGA-VGA-VGA-VGA-VGA-VGA-VGA-VGA-VGA-VGA-VGA-VGA-VGA-VGA-VGA-VGA-VGA-VGA-VGA-VGA-VGA-VGA-VGA-VGA-VGA-VGA-VGA-VGA-VGA-VGA-VGA-VGA-VGA-VGVC-GV-NG-TDB-5I-2I/GV-N9STOC-I/GVI/HSV-HCV-NOG-VGA-VGA-VGA-VGA-VGA-VGA-VGA-VGA-VGA-VGA-VGA-VGA-VGA-VGA-VGA-VGA-VGA-VGA-VGA-VGA-VGA-VGA-VGA-VGA-VGA-VGA-VGA-VGA-VGA-VGA-VGA-VGA-VGA-VGA-VGA-VGA-VGA-VGA-VGA-VGA-VGA-VGA-VGA-VGA-VGA-VGA-VGA-VGA-NG-TDE-5I-2I/GV-N9STOC-I/GVI/HSV-NOG-VGA-VGA-VGA-VGA-VGA-VGA-VGA-VGA-VGA-VGA-VGA-VGA-VGA-VGA-VGA-VGA-VGA-VGA-VGA-VGA-VGA-VGA-VGA-VGA-VGA-VGA-VGA-VGA-VGA-VGA-VGA-VGA-VGA-VGA-VGA-VGA-VGA-VGA-VGA-VGA-VGA-VGA-VGA-VGA-VGA-VGA-VGA-VGVC-GVV-NG-TDB-5I-2I/GV-N9STOC-I/GVI/HSV-NOG-VGA-VGA-VGA-VGA-VGA-VGA-VGA-VGA-VGA-VGA-VGA-VGA-VGA-VGA-VGA-VGA-VGA-VGA-VGA-VGA-VGA-VGA-VGA-VGA-VGA-VGA-VGA-VGA-VGA-VGA-VGA-VGA-VGA-VGA-VGA-VGA-VGA-VGA-VGA-VGVC-GVV-NG-TDB-5I-2I/GV-N9STOC-II/GVI/HSV-NOG-VGA-VGA-VGA-VGA-VGA-VGA-VGA-VGA-VGA-VGA-VGA-VGA-VGA-VGA-VGA-VGA-VGA-VGA-VGA-VGA-VGA-VGA-VGA-VGA-VGA-VGA-VGA-VGA-VGA-VGA-VGA-VGA-VGA-VGA-VGA-VGA-VGA-VGA-VGA-VGA-VGA-VGA-VGA-VGA-VGA-VGA-NG-TDE-5I -NG-TDE-5I -NG-TDE-5I -NG-TDE-5I -NG-TDE-5I -NG-TDE-5I -NG-TDE-5I -NG-TDE-5I -NG-TDE-5I -NG-TDE-5I -NG-TDE-5I -NG-TDE-5I -NG-TDE-5I -NG-TDE-5I -NG-TDE-5I -NG -NG-TDE-5I -NG-TDE-5I -NG-TDE-5I -NG-TDE-5I -NG-TDE-5I -NG-TDE-5I -NG-TDE-5I -NG-TDE-5I -NG-TDE-5I -NG-TDE-5I -NG-TDE-5I -NG-TDE-5I -NG-TDE-5I -NG-TDE-5I -MG-TDE-5I -NG-TDE-5I -NG-TDE-5I -NG-TDE-5I -NG-TDE-5I -NG-TDE-5I -NG-TDE-5I -NG-TDE-5I -NG-TDE-5I -NG-TDE-5I -NG-TDE-5I -NG-TDE-5I -NG-TDE-5I -NG-TDE-5I -NG-TDe-5I -NG-TDE-5I -NG-TDE-5I -NG-TDE-5I | ||||
Date: Oct. 3, 2008
Signature: Eric Lu
Representative Person's Name: ERIC LU
including that may cause undesired operation.
cause harmful and (2) this device must accept any interference received,
subject to the following two conditions: (1) This device may not
This device complies with part 15 of the FCC Rules. Operation is
Supplementary Information:
(a),Class B Digital Device
FCC Part 15, Subpart B, Section 15.107(a) and Section 15.109
Confirms to the following specifications:
Product Name: VGA Card
herchy declares that the product
Phone/Fax No:(818) 854-9338/ (818) 854-9339
City of Industry, CA 91748
Address: 17358 Railroad Street
Responsible Party Name: G.B.T.INC (U.S.A.)

Per FCC Part 2 Section 2.1077(a)
DECILLATION OF CONFORMITY
| (Stamp) | Date: May, 11, 2009 | Name : | Trinity Haas | |
| Manufacture/Improper | Signature : | Thanksgiving | ||
| (DN 60035)Safety of household and similar electrical appliances | DEN 5009-1 | General and Safety requirements for unmetallable power systems (Jus) | ||
| (DN 60036)Safety requirements for main operation electric and radar applications household and teacher general use | DEN 5009-1 | General and Safety requirements for unmetallable power systems (Jus) | ||
| (DN 60035)Safety of household and similar electrical appliances | DEN 5009-1 | General and Safety requirements for unmetallable power systems (Jus) | ||
| (DN 60065)Safety requirements for main operation electric and radar applications household and teacher general use | DEN 5009-1 | General and Safety requirements for unmetallable power systems (Jus) | ||
| (DN 60066)Safety requirements for main operation electric and radar applications household and teacher general use | DEN 5009-1 | General and Safety requirements for unmetallable power systems (Jus) | ||
| (DN 60065)Safety requirements for main operation electric and radar applications household and teacher general use | DEN 5009-1 | General and Safety requirements for unmetallable power systems (Jus) | ||
| (DN 60064)Safety requirements for main operation electric and radar applications household and teacher general use | DEN 5009-1 | General and Safety requirements for unmetallable power systems (Jus) | ||
| (DN 60063)Safety requirements for main operation electric and radar applications household and teacher general use | DEN 5009-1 | General and Safety requirements for unmetallable power systems (Jus) | ||
| (DN 60062)Safety requirements for main operation electric and radar applications household and teacher general use | DEN 5009-1 | General and Safety requirements for unmetallable power systems (Jus) | ||
| (DN 60061)Safety requirements for main operation electric and radar applications household and teacher general use | DEN 5009-1 | General and Safety requirements for unmetallable power systems (Jus) | ||
| (DN 60060)Safety requirements for main operation electric and radar applications household and teacher general use | DEN 5009-1 | General and Safety requirements for unmetallable power systems (Jus) | ||
| (DN 60058)Safety requirements for main operation electric and radar applications household and teacher general use | DEN 5009-1 | General and Safety requirements for unmetallable power systems (Jus) | ||
| (DN 60057)Safety requirements for main operation electric and radar applications household and teacher general use | DEN 5009-1 | General and Safety requirements for unmetallable power systems (Jus) | ||
| (DN 60056)Safety requirements for main operation electric and radar applications household and teacher general use | DEN 5009-1 | General and Safety requirements for unmetallable power systems (Jus) | ||
| (DN 60055)Safety requirements for main operation electric and radar applications household and teacher general use | DEN 5009-1 | General and Safety requirements for unmetallable power systems (Jus) | ||
| (DN 60054)Safety requirements for main operation electric and radar applications household and teacher general use | DEN 5009-1 | General and Safety requirements for unmetallable power systems (Jus) | ||
| (DN 60053)Safety requirements for main operation electric and radar applications household and teacher general use | DEN 5009-1 | General and Safety requirements for unmetallable power systems (Jus) | ||
| (DN 60052)Safety requirements for main operation electric and radar applications household and teacher general use | DEN 5009-1 | General and Safety requirements for unmetallable power systems (Jus) | ||
| (DN 60051)Safety requirements for main operation electric and radar applications household and teacher general use | DEN 5009-1 | General and Safety requirements for unmetallable power systems (Jus) | ||
| (DN 60050)Safety requirements for main operation electric and radar applications household and teacher general use | DEN 5009-1 | General and Safety requirements for unmetallable power systems (Jus) | ||
| (DN 60049-1)Safety requirements for main operation electric and radar applications household and teacher general use | DEN 5009-1 | General and Safety requirements for unmetallable power systems (Jus) | ||
| (DN 60048-1)Safety requirements for main operation electric and radar applications household and teacher general use | DEN 5009-1 | General and Safety requirements for unmetallable power systems (Jus) | ||
| (DN 60047-1)Safety requirements for main operation electric and radar applications household and teacher general use | DEN 5009-1 | General and Safety requirements for unmetallable power systems (Jus) | ||
| (DN 60046-1)Safety requirements for main operation electric and radar applications household and teacher general use | DEN 5009-1 | General and Safety requirements for unmetallable power systems (Jus) | ||
| (DN 60045-1)Safety requirements for main operation electric and radar applications household and teacher general use | DEN 5009-1 | General and Safety requirements for unmetallable power systems (Jus) | ||
| (DN 60044-1)Safety requirements for main operation electric and radar applications household and teacher general use | DEN 5009-1 | General and Safety requirements for unmetallable power systems (Jus) | ||
| (DN 60043-1)Safety requirements for main operation electric and radar applications household and teacher general use | DEN 5009-1 | General and Safety requirements for unmetallable power systems (Jus) | ||
| (DN 60042-1)Safety requirements for main operation electric and radar applications household and teacher general use | DEN 5009-1 | General and Safety requirements for unmetallable power systems (Jus) | ||
| (DN 60041-1)Safety requirements for main operation electric and radar applications household and teacher general use | DEN 5009-1 | General and Safety requirements for unmetallable power systems (Jus) | ||
| (DN 60040-1)Safety requirements for main operation electric and radar applications household and teacher general use | DEN 5009-1 | General and Safety requirements for unmetallable power systems (Jus) | ||
| (DN 60039-1)Safety requirements for main operation electric and radar applications household and teacher general use | DEN 5009-1 | General and Safety requirements for unmetallable power systems (Jus) | ||
| (DN 60038-1)Safety requirements for main operation electric and radar applications household and teacher general use | DEN 5009-1 | General and Safety requirements for unmetallable power systems (Jus) | ||
| (DN 60037-1)Safety requirements for main operation electric and radar applications household and teacher general use | DEN 5009-1 | General and Safety requirements for unmetallable power systems (Jus) | ||
| (DN 60036-1)Safety requirements for main operation electric and radar applications household and teacher general use | DEN 5009-1 | General and Safety requirements for unmetallable power systems (Jus) | ||
| (DN 60035-1)Safety requirements for main operation electric and radar applications household and teacher general use | DEN 5009-1 | General and Safety requirements for unmetallable power systems (Jus) | ||
| (DN 60034-1)Safety requirements for main operation electric and radar applications household and teacher general use | DEN 5009-1 | General and Safety requirements for unmetallable power systems (Jus) | ||
| (DN 60033-1)Safety requirements for main operation electric and radar applications household and teacher general use | DEN 5009-1 | General and Safety requirements for unmetallable power systems (Jus) | ||
| (DN 60032-1)Safety requirements for main operation electric and radar applications household and teacher general use | DEN 5009-1 | General and Safety requirements for unmetallable power systems (Jus) | ||
| (DN 60031-1)Safety requirements for main operation electric and radar applications household and teacher general use | DEN 5009-1 | General and Safety requirements for unmetallable power systems (Jus) | ||
| (DN 60030-1)Safety requirements for main operation electric and radar applications household and teacher general use | DEN 5009-1 | General and Safety requirements for unmetallable power systems (Jus) | ||
| (DN 60029-1)Safety requirements for main operation electric and radar applications household and teacher general use | DEN 5009-1 | General and Safety requirements for unmetallable power systems (Jus) | ||
| (DN 60028-1)Safety requirements for main operation electric and radar applications household and teacher general use | DEN 5009-1 | General and Safety requirements for unmetallable power systems (Jus) | ||
| (DN 60027-1)Safety requirements for main operation electric and radar applications household and teacher general use | DEN 5009-1 | General and Safety requirements for unmetallable power systems (Jus) | ||
| (DN 60026-1)Safety requirements for main operation electric and radar applications household and teacher general use | DEN 5009-1 | General and Safety requirements for unmetallable power systems (Jus) | ||
| (DN 60025-1)Safety requirements for main operation electric and radar applications household and teacher general use | DEN 5009-1 | General and Safety requirements for unmetallable power systems (Jus) | ||
| (DN 60024-1)Safety requirements for main operation electric and radar applications household and teacher general use | DEN 5009-1 | General and Safety requirements for unmetallable power systems (Jus) | ||
| (DN 60023-1)Safety requirements for main operation electric and radar applications household and teacher general use | DEN 5009-1 | General and Safety requirements for unmetallable power systems (Jus) | ||
| (DN 60022-1)Safety requirements for main operation electric and radar applications household and teacher general use | DEN 5009-1 | General and Safety requirements for unmetallable power systems (Jus) | ||
| (DN 60021-1)Safety requirements for main operation electric and radar applications household and teacher general use | DEN 5009-1 | General and Safety requirements for unmetallable power systems (Jus) | ||
| (DN 60020-1)Safety requirements for main operation electric and radar applications household and teacher general use | DEN 5009-1 | General and Safety requirements for unmetallable power systems (Jus) | ||
| (DN 60019-1)Safety requirements for main operation electric and radar applications household and teacher general use | DEN 5009-1 | General and Safety requirements for unmetallable power systems (Jus) | ||
| (DN 60018-1)Safety requirements for main operation electric and radar applications household and teacher general use | DEN 5009-1 | General and Safety requirements for unmetallable power systems (Jus) | ||
| (DN 60017-1)Safety requirements for main operation electric and radar applications household and teacher general use | DEN 5009-1 | General and Safety requirements for unmetallable power systems (Jus) | ||
| (DN 60016-1)Safety requirements for main operation electric and radar applications household and teacher general use | DEN 5009-1 | General and Safety requirements for unmetallable power systems (Jus) | ||
| (DN 60015-1)Safety requirements for main operation electric and radar applications household and teacher general use | DEN 5009-1 | General and Safety requirements for unmetallable power systems (Jus) | ||
| (DN 60014-1)Safety requirements for main operation electric and radar applications household and teacher general use | DEN 5009-1 | General and Safety requirements for unmetallable power systems (Jus) | ||
| (DN 60013-1)Safety requirements for main operation electric and radar applications household and teacher general use | DEN 5009-1 | General and Safety requirements for unmetallable power systems (Jus) | ||
| (DN 60012-1)Safety requirements for main operation electric and radar applications household and teacher general use | DEN 5009-1 | General and Safety requirements for unmetallable power systems (Jus) | ||
| (DN 60011-1)Safety requirements for main operation electric and radar applications household and teacher general use | DEN 5009-1 | General and Safety requirements for unmetallable power systems (Jus) | ||
| (DN 60010-1)Safety requirements for main operation electric and radar applications household and teacher general use | DEN 5009-1 | General and Safety requirements for unmetallable power systems (Jus) | ||
| (DN 60009-1)Safety requirements for main operation electric and radar applications household and teacher general use | DEN 5009-1 | General and Safety requirements for unmetallable power systems (Jus) | ||
| (DN 60008-1)Safety requirements for main operation electric and radar applications household and teacher general use | DEN 5009-1 | General and Safety requirements for unmetallable power systems (Jus) | ||
| (DN 60007-1)Safety requirements for main operation electric and radar applications household and teacher general use | DEN 5009-1 | General and Safety requirements for unmetallable power systems (Jus) | ||
| (DN 60006-1)Safety requirements for main operation electric and radar applications household and teacher general use | DEN 5009-1 | General and Safety requirements for unmetallable power systems (Jus) | ||
| (DN 60005-1)Safety requirements for main operation electric and radar applications household and teacher general use | DEN 5009-1 | General and Safety requirements for unmetallable power systems (Jus) | ||
| (DN 60004-1)Safety requirements for main operation electric and radar applications household and teacher general use | DEN 5009-1 | General and Safety requirements for unmetallable power systems (Jus) | ||
| (DN 60003-1)Safety requirements for main operation electric and radar applications household and teacher general use | DEN 5009-1 | General and Safety requirements for unmetallable power systems (Jus) | ||
| (DN 60002-1)Safety requirements for main operation electric and radar applications household and teacher general use | DEN 5009-1 | General and Safety requirements for unmetallable power systems (Jus) | ||
| (DN 60001-1)Safety requirements for main operation electric and radar applications household and teacher general use | DEN 5009-1 | General and Safety requirements for unmetallable power systems (Jus) | ||
| (DN 60000-1)Safety requirements for main operation electric and radar applications household and teacher general use | DEN 5009-1 | General and Safety requirements for unmetallable power systems (Jus) | ||
| (DN 60009-1)Safety requirements for main operation electric and radar applications household and teacher general use | DEN 5009-1 | General and Safety requirements for unmetallable power systems (Jus) | EC (contemporary marketing) | |
Date: May.11,2009
Reperseinatieve Person's Name: ERIC LU Signature: ERIC LU
This device complies with part 15 of the FCC Rules. Operation is subject to the following two conditions: (1) This device may not cause harmful and (2) this device must accept any reference received, including that may cause undesired operation.
FCC Part 15, Subpart B, Section 15.107(a) and Section 15.109 (a), Class B Digital Device Supplementary Information:
Product Name: VGA Card Model Number: GV-N9STD3-1G1 Confirms to the following specifications:
City of Industry, CA 91748 Phone/Fax No: (818) 854-9338/ (818) 854-9339 hercy declares that the product
Address: 17358 Railroad Street Responsible Party Name: G.B.T. INC. (U.S.A.)

Per FCC Part 2 Section 2.1077(a)
DECILLATION OF CONTROLITY
Table of Contents
1. Introduction .... 5
1.1. Features 5
1.2. Minimum System Requirements .... 5
2. Hardware Installation....6
2.1. Board Layout 6
2.2. Hardware Installation 10
3. Software Installation 12
3.1. Windows XP Driver and Utilities Installation 12
3.1.1. Operating System Requirements 12
3.1.2. DirectX Installation 13
3.1.3.Driver Installation 14
3.1.4. GIGABYTE Gamer HUD Lite on Driver CD 16
3.1.5. Taskbar Icon 18
3.1.6. Display Properties Pages 19
3.1.7. nView Properties Pages (Note) 28
4. Troubleshooting Tips 33
5. Appendix 34
5.1. How to Reflash the BIOS in MS-DOS Mode 34
5.2. Resolutions and Color Depth Tables (In Windows XP) 35
5.3. Regulatory Statements ...... 37
(Note) This item will show up when you connect two monitors.
1. Introduction
1.1. Features
- Powered by NVIDIA ^ GeForce ^TM 9500 GT Graphics Processing Unit (GPU)
• Supports PCI Express 2.0
• Integrated with 1 GB GDDR3 memory (ForGV-N95TD3-1GI only) - Integrated with 512 MB GDDR3 memory (For GV-N95TD3-512I only)
- Integrated with 1 GB GDDR2 memory (For GV-N95TOC-1GI only)
- Integrated with 512 MB GDDR2 memory (For GV-N95TOC-512I only)
- Supports DirectX 10
• Supports NVIDIA ^ SLI ^TM (Scalable Link Interface) technology (Note)
• Supports 1 HDMI connectors
• Supports 1 D-Sub connector
• Supports 1 DVI-I connector
• Supports HDCP (High-Bandwidth Digital Content Protection) technology
1.2. Minimum System Requirements
• Hardware
- Intel ^® Pentium ^® /Core ^TM 2 or AMD Athlon ^TM /Phenom ^TM
- 128 MB of system memory; 2 GB or more for best performance
- Optical drive for software installation (CD-ROM or DVD-ROM drive)
- A power supply with 350-watt is recommended
- Operating System
- Windows ® Vista
- Windows ^ XP with Service Pack 2 (SP2)
- Windows ® XP Professional x64 Edition
•SLI ^TM Configuration
If you are planning on using this graphics card as part of an SLI system, the following are required:
- An SLI certified motherboard with two PCI Express x16 slots and correct chipset driver
- Two GV-N95TD3-1GI/GV-N95TD3-512I/GV-N95TOC-1GI/GV-N95TOC-512I
- A power supply with 400-watt or above is recommended
- An SLI bridge connector
(Note) SLI technology requires a PCI Express motherboard with two x16 physical connectors. Graphics cards working in an SLI configuration must be with the same model name (e.g. GV-N95TD3-1GI/GV-N95TD3-512I/GV-N95TOC-1GI/GV-N95TOC-512I) and from the same vendor (e.g. GIGABYTE TECHNOLOGY).
2. Hardware Installation
2.1. Board Layout
- GV-N95TD3-1GI

flowchart
graph TD
    A["HDMI TV"] --> B["DVI Output"]
    C["Analog LCD Monitor Analog Monitor"] --> B
    D["Digital LCD Monitor"] --> B
    E["Analog LCD Monitor Analog Monitor"] --> F["D-Sub Output"]
    G["HDMI TV"] --> H["DVI-I to HDMI Adapter (optional)"]
    I["D-Sub monitor Connector (15-pin)"] --> J["DVI-I to D-Sub Adapter (optional)"]
    K["HDMI Connector"] --> J
    L["DVI-I Connector"] --> J
- GV-N95TD3-512I
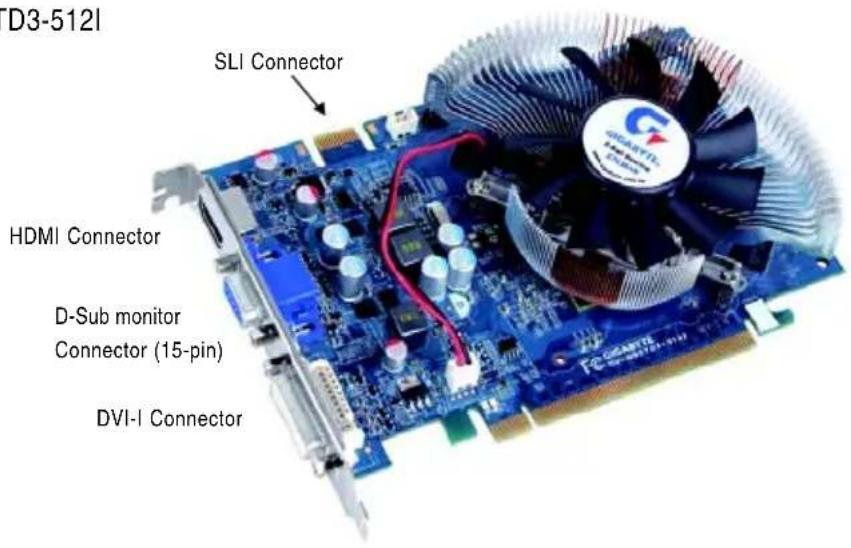

flowchart
graph TD
    A["HDMI TV"] --> B["DVI Output"]
    C["Analog LCD Monitor Analog Monitor"] --> B
    D["Digital LCD Monitor"] --> B
    E["Analog LCD Monitor Analog Monitor"] --> F["D-Sub Output"]
    G["HDMI TV"] --> H["DVI-I to HDMI Adapter (optional)"]
    I["D-Sub monitor Connector (15-pin)"] --> J["DVI-I to D-Sub Adapter (optional)"]
    K["HDMI Connector"] --> J
    L["DVI-I Connector"] --> J
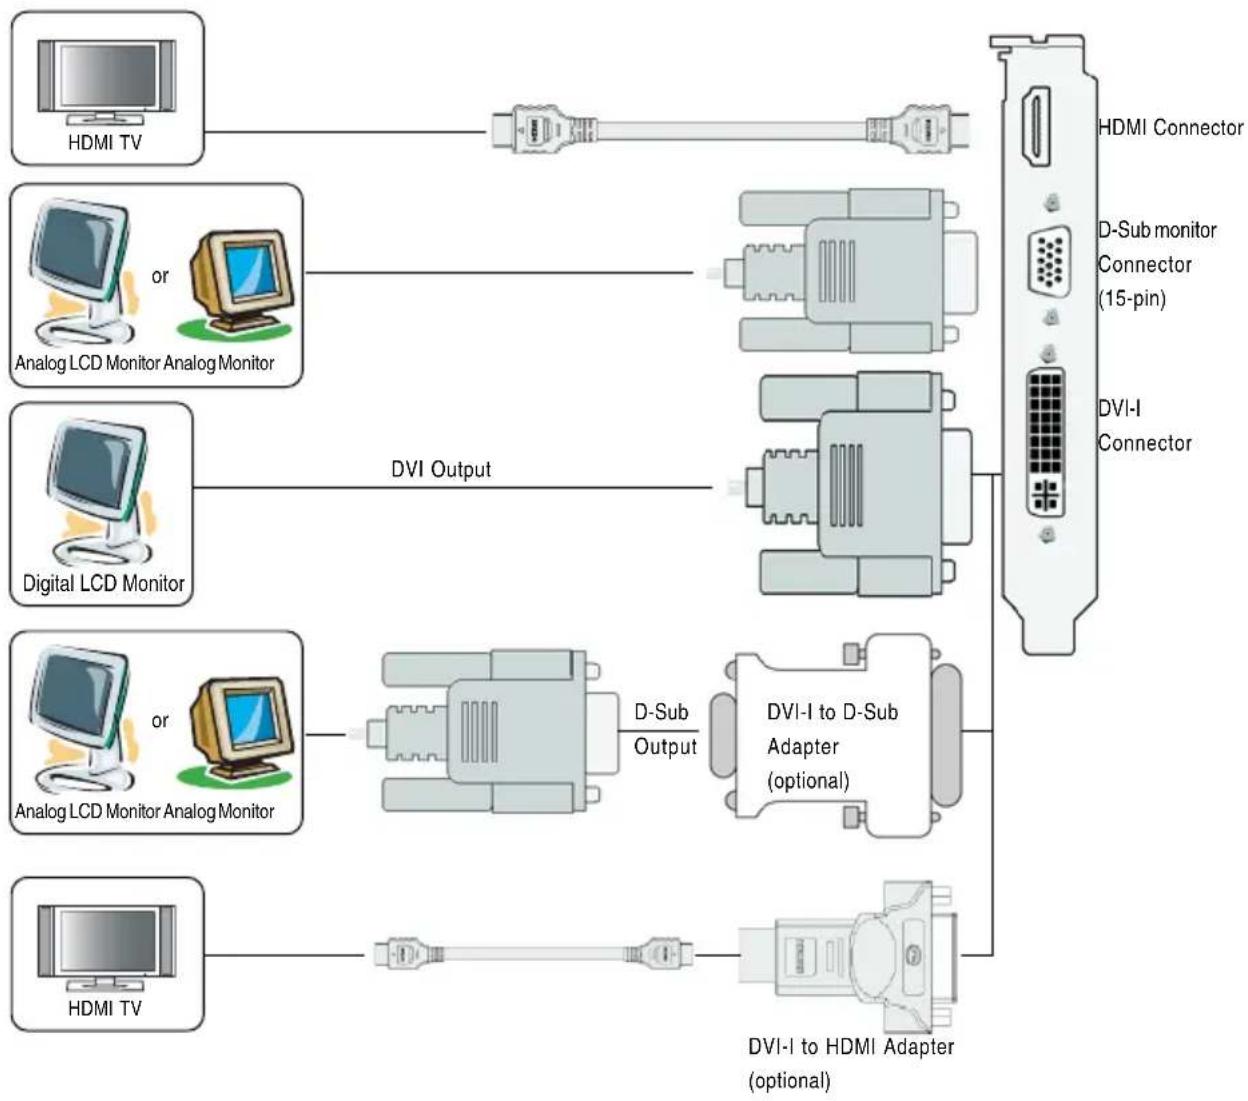
3. GV-N95TOC-1GI/GV-N95TOC-512I


flowchart
graph LR
    A["HDMI TV"] --> B["DVI Output"]
    C["Analog LCD Monitor Analog Monitor"] --> B
    D["Digital LCD Monitor"] --> B
    E["Analog LCD Monitor Analog Monitor"] --> F["D-Sub Output"]
    G["HDMI TV"] --> H["DVI-I to HDMI Adapter (optional)"]
    I["DVI-I to D-Sub Adapter (optional)"] --> H
    J["HDMI Connector"] --> K["D-Sub monitor Connector (15-pin)"]
    L["DVI-I Connector"] --> M["DVI-I to HDMI Adapter (optional)"]

Expansion cards contain very delicate Integrated Circuit (IC) chips. To protect them against damage from static electricity, you should follow some precautions whenever you work on your computer.
- Turn off your computer and unplug power supply.
- Use a grounded wrist strap before handling computer components. If you do not have one, touch both of your hands to a safely grounded object or to a metal object, such as the power supply case.
- Place components on a grounded antistatic pad or on the bag that came with the components whenever the components are separated from the system.
The card contains sensitive electric components, which can be easily damaged by static electricity, so the card should be left in its original packing until it is installed.
Unpacking and installation should be done on a grounded anti-static mat. The operator should be wearing an anti-static wristband, grounded at the same point as the anti-static mat.
Inspect the card carton for obvious damage. Shipping and handling may cause damage to your card. Be sure there are no shipping and handling damages on the card before proceeding.

DO NOT APPLY POWER TO YOUR SYSTEM IF THE GRAPHICS CARD IS DAMAGED.

In order to ensure that your graphics card can work correctly, please use official GIGABYTE BIOS only. Using non-official GIGABYTE BIOS might cause problem(s) on the graphics card.
2.2. Hardware Installation
Now that you have prepared your computer, you are ready to install your graphics card.
Step 1.
Locate the PCI Express x16 slot. If necessary, remove the metal cover from this slot; then align your graphics card with the PCI Express x16 slot, and press it in firmly until the card is fully seated.

Make sure that the gold edge connector of the graphics card is securely inserted.

natural_image
Close-up of hands installing a computer motherboard with visible circuit board and components (no text or symbols)Step 2.
Replace the screw to fasten the card in place, and replace the computer cover.

natural_image
Close-up of a computer motherboard with a red circle highlighting a component (no visible text or symbols)Step 3.
Plug the display cable into your card; then turn on the computer and monitor. To connect a D-Sub monitor to your graphics card, use the D-Sub connector. To connect a flat panel display to your graphics card, use the DVI-I connector. To connect an HDMI monitor to your graphics card, use the HDMI connector.

natural_image
Close-up of a finger pressing a button on a computer motherboard (no visible text or symbols)Connect an HDMI monitor


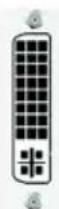
To Flat Panel Display To D-Sub Monitor To HDMI Monitor

natural_image
Close-up of a finger inserting a blue plastic component into a server rack (no visible text or symbols)Connect a D-Sub monitor Monitor to HDMI Monitor

natural_image
Close-up of a hand holding a white plastic component with a button, next to a metallic panel (no visible text or symbols)Connect a flat panel display
Step 4.
To connect an HDMI TV, follow the steps below to enable the S/PDIF in function for the graphics card.

natural_image
Close-up of a finger pressing a white plastic component on a black electronic circuit board (no visible text or symbols)1.
Connect the provided S/PDIF cable to the graphics card.
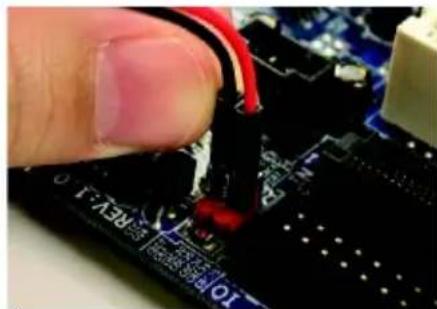
2.
Connect the S/PDIF cable to the motherboard. (the red wire connects to the S/PDIF out pin and the black to the Ground pin)
You are now ready to proceed with the installation of the graphics card driver. Please refer to next chapter for detailed instructions.
How NVIDIA® SLI™ technology works:
In an SLI configuration, two SLI-ready graphics cards of the same model and the same manufacturers are connected together via SLI bridge connector in a system that provides two x16 PCI Express slots to scale graphics performance. The picture below shows that two graphics cards are linked in parallel in an SLI configuration.

3. Software Installation
In this manual, we assume that your CD-ROM drive letter to be Drive D:
The installation of drivers is very simple. When you insert the driver CD into your CD-ROM drive, you can see the autorun window (if it does not show up, run "D:\setup.exe"). Then you can follow the instructions to setup your graphics card driver. (Please follow the subsection "3.1.3 Driver Installation" to install the driver for your graphics card.)
3.1. Windows XP Driver and Utilities Installation
3.1.1. Operating System Requirements
Notice the following guidelines before installing the drivers:
- First make sure your system has installed DirectX 9.0c or later version.
- Make sure your system has installed the appropriate motherboard drivers (for the motherboard drivers, please contact the motherboard manufacturer.)
3.1.2. DirectX Installation
Install Microsoft DirectX to enable 3D hardware acceleration support for Windows XP to achieve better 3D performance.

For software MPEG support in Windows XP, you must install DirectX first. Users who run Windows XP with Service Pack 2 or above do not need to install DirectX separately.

Step 1.
When the autorun window shows up, click the Install DirectX 9 item.

Step 2. Choose I accept the agreement and click the Next button.

Step 3. Click the Next button.

The system is installing the components.
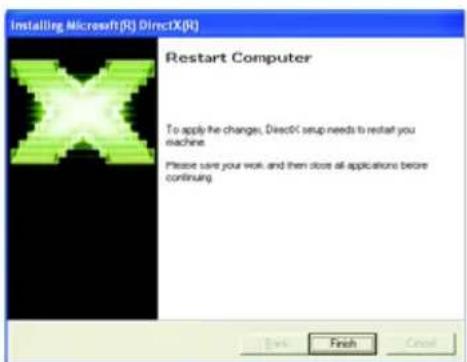
Step 4. Click Finish to restart computer. Then the DirectX 9 installation is completed.
3.1.3. Driver Installation
A. New Hardware Found
When the graphics card is inserted into your computer for the first time, the operating system will detect the graphics card automatically and display a New Hardware Found message. The following are step-by-step installation instructions.
Step 1: Found New Hardware Wizard: Video Controller (VGA Compatible)

Step 2: Found New Hardware Wizard: Searching and Installing
The wizard will search for the driver and install it automatically.
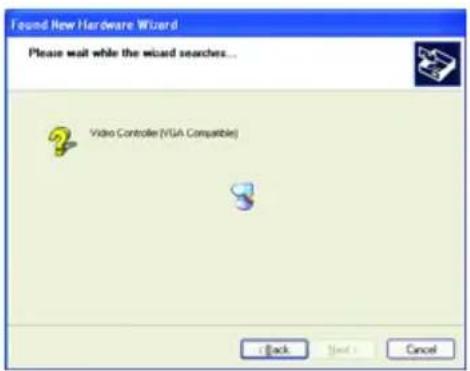

Step 3: Found New Hardware Wizard: Finish
Click the Finish button to finish the installation.

B. Driver Installation (Autorun Window)
Insert the driver CD-ROM into your CD-ROM drive. The autorun window will appear. If it does not show up, please run "D:\setup.exe".
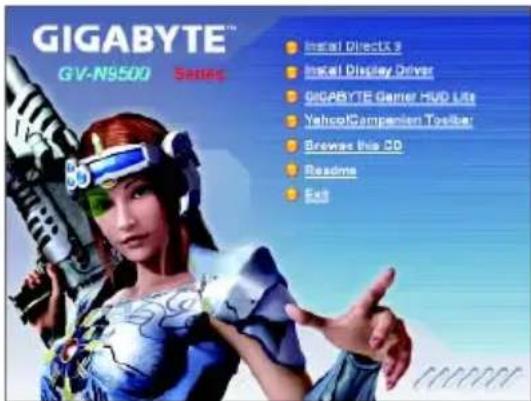
Step 1.
When the autorun window shows up, click the Install Display Driver item.

Step 2. Click the Next button.
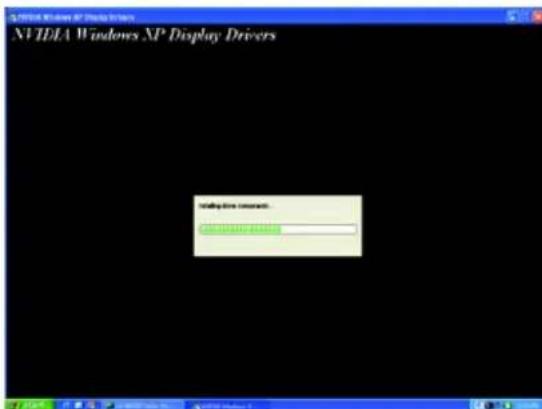
The system is installing the components.

Step 3. Click the Finish button to restart the computer. Then the driver installation is completed.
3.1.4. GIGABYTE Gamer HUD Lite on Driver CD
Insert the driver CD-ROM into your CD-ROM drive. The autorun window will appear. If it does not show up, please run "D:\setup.exe". (If D is not your CD-ROM drive, substitute D with the correct drive letter.)

Step 1. When autorun window shows up, click the GIGABYTE Gamer HUD Lite item.

Step 2. Choose the language for the installation and click the OK button.

Step 3. Click the Next button.

Step 4. Click the Install button.

The system is installing the components.

Step 5. Click the Finish button. Then the installation of the GIGABYTE Gamer HUD Lite is completed.
GIGABYTE Gamer HUD Lite
The GIGABYTE Gamer HUD Lite allows you to adjust the the working frequency of the GPU, Shader and video memory.

| Button Function | |
| Default (Note) | Allows you to load the default settings |
| Apply (Note) | Allows you to save the values you adjust |
| Enable Lets the utility optimize the GPU/Shader/memory frequency settings | |
| Disable Allows you to manually configure the GPU/Shader/Memory frequency settings | |
| Hardware Monitor | Displays the GPU usage and temperature, the GPU usage/thermal curve, and your graphics card information |
| ? Opens Help page | |

Incorrectly doing overclock/overvoltage may result in damage to your system and reduce the useful life of the system components.
(Note) This item is configurable only if 2D/3D Auto-Optimized is set to Disable.
3.1.5. Taskbar Icon
After installing the graphics card driver, you will find an NVIDIA icon in your system tray. Click this icon to open the control panel.

natural_image
Windows XP desktop wallpaper showing a green hill under a blue sky with clouds (no text or symbols on the main image)Right click the NVIDIA icon to enter the NVIDIA Control Center.

You can adjust the properties of the graphics card here.
3.1.6. Display Properties Pages
To access Display Properties pages, right-click on desktop and then select Properties. The Display Properties dialog box shows the information of display adapter, color, the range of display area, and the refresh rate.
Settings (Resolutions and Color Quality for Windows)
You may adjust the screen resolution and color quality settings in this dialog box.

NVIDIA Control Panel
After pressing the Advanced button in Settings, you'll see the Plug and Play Monitor and NVIDIA GeForce 9500 GT Properties dialog box. Click the GeForce 9500 GT tab. (You can also click the NVIDIA icon in your system tray and select NVIDIA Control Panel.)

Access the GeForce 9500 GT tab page to launch the NVIDIA Control Panel.
■ All of the NVIDIA control panels have been consolidated into a single application, the NVIDIA Control Panel. Click the Start the NVIDIA Control Panel button to open the NVIDIA Control Panel.

Select the view of the NVIDIA Control Panel that is most appropriate for you.
Standard Settings
■ Advanced Settings
The following pages provide details on configuring advanced settings.
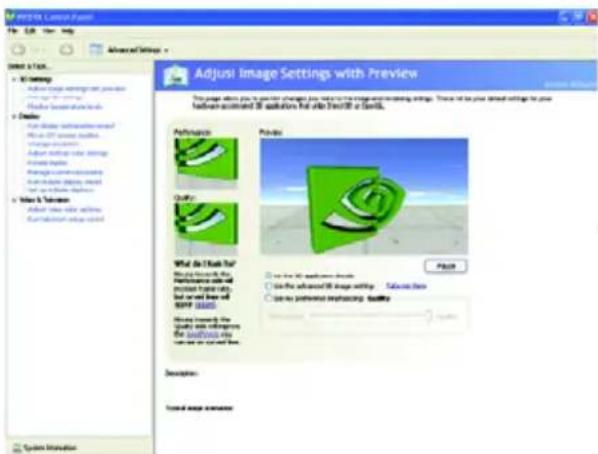
In the NVIDIA Control Panel, select a category to alter specific NVIDIA display settings.
The categories are:
■ 3D Settings
■ Display
■ Video & Television

In the NVIDIA Control Panel, change a view if you want.
The supported modes are:
Standard
■ Advanced
■ Custom
3D Settings
Tasks in the 3D Settings pages allow you to do the following:
- Change the image and rendering settings of your 3D applications and games that utilize Direct3D and OpenGL technology.
- Override the shipped clocked frequencies of your GPU and GPU memory to increase your GPU performance.
- Assign specific 3D settings to a game so that these settings automatically load when a game is launched.
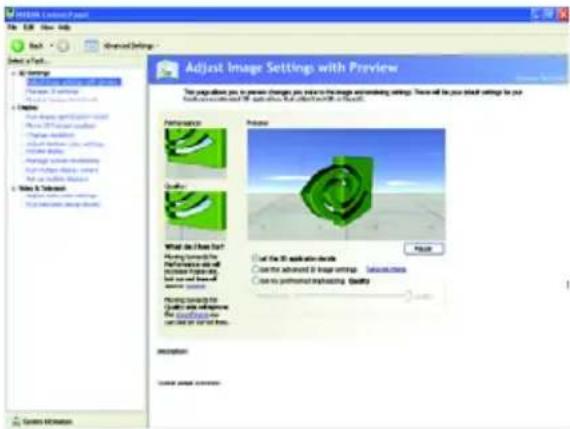
■ Adjust Image Settings with Preview If you are unfamiliar with 3D technology or not an advanced graphics user, use the Adjust Image Settings with Preview page to preview any changes you make for improved image quality and rendering.
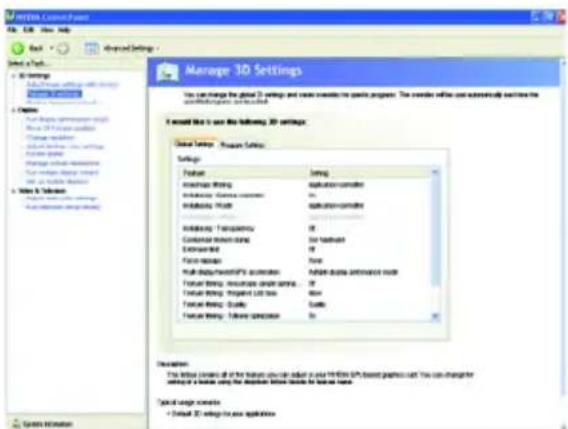
■ Manage 3D Settings ^(Note 1) The Manage 3D Settings page enables you to establish default 3D settings to use for all your Direct3D or OpenGL applications and to establish a unique set of 3D settings for a particular game or application.
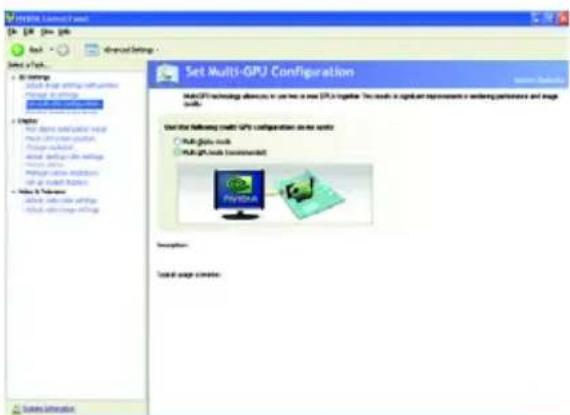
■ Set Multi-GPU Configuration ^(Note 2) Multi-GPU technology allows you to use two or more GPUs together. This results in significant improvements in rendering performance and image quality.
Note: It is recommended that you set to Multi-GPU mode to enhance the graphics card's performance.
(Note 1) This item is present only in Advanced view mode.
(Note 2) This item will show up when you install two graphics cards with the same model name and from the same vendor.
Display
A variety of display features enable you to further manipulate and configure your display settings to optimize the use of your displays. Tasks in the Display pages allow you to do the following:
- Run display optimization wizard
- Move CRT screen position
- Change resolution
- Adjust desktop color settings
- Rotate display
- Manage custom resolutions (Note 1)
- Run multiple display wizard (Note 2)
- Set up multiple displays

■ Run Display Optimization Wizard
This wizard helps you adjust your displays for optimal viewing and representation of colors.

■ Move CRT Screen Position
You can use your mouse (by clicking on the arrow keys on this page) or the arrow keys on your keyboard to adjust the position of your desktop to better fit your display. This is a useful alternative to using the controls (buttons) on your actual physical display.

■ Change Resolution
Using the Change Resolution controls, you can change the color setting, reduce screen flickering, or adjust the amount of information appearing on your display.
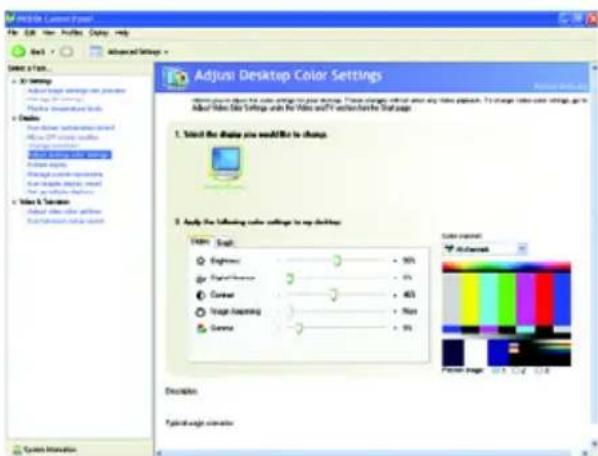
■ Adjust Desktop Color Settings
Use this page to set the contrast, sharpness, and color depth (Digital Vibrance) of the images on your desktop. These changes will not affect any video playback. To change video color settings, go to Adjust Video Color Settings under the Video and TV section from the Start page.

■ Rotate Display
The NVIDIA Rotate features enable you to change the orientation of your desktop to portrait, landscape, and inverted modes. This is useful if you have rotated your physical display and need to rotate the desktop to match the orientation of your display.

■ Manage Custom Resolutions ^(Note 1)
If you are an advanced user, you can create custom timing modes with the width, height, bit-color depth, and the refresh rate etc. The Advanced Timing page enables you to adjust timings for your graphics card in order to support a variety of different display timings for ultimate flexibility for analog CRT and DVI connections. You can use the advanced Change Resolution Attributes page to view custom display modes you have saved in the Create Custom Resolutions page.
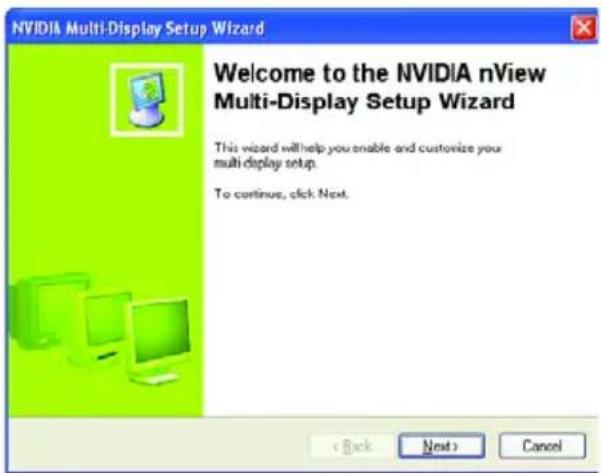
■ Run Multiple Display Wizard ^(Note 2)
This wizard will help you enable and customize your multi-display setup.
(Note 1) This item is present only in Advanced view mode.
(Note 2) This item will show up when you connect two monitors.
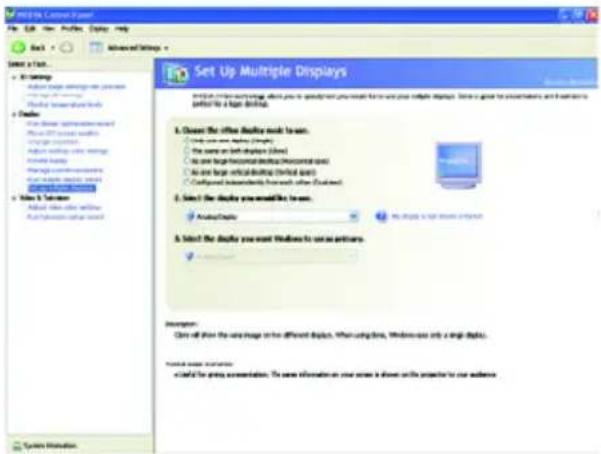
■ Set Up Multiple Displays
NVIDIA nView technology enables you to view your desktop in one of several multi-display modes to make the best use of the displays (monitors) that are connected to your computer.
Dual-Monitor Setup
You can set the display to output from two monitors on the Set Up Multiple Displays page.

Select your preferred nView display modes here.
- Only use one display (Single)
• The same on both display (Clone) - As one large horizontal desktop (Horizontal span)
- As one large vertical desktop (Vertical span)
- Configured independently from each other (Dualview)
(1) The same on both display (Clone)
Clone mode indicates that both displays in the display pair show images of the same desktop.

natural_image
Two computer monitors displaying a colorful abstract image, labeled 'Clone Mode' below (no other text or symbols visible)(2) As one large horizontal desktop
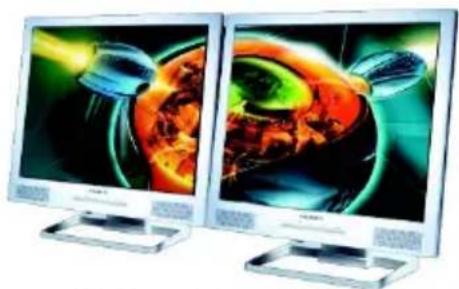
(Horizontal span)
Horizontal Span mode indicates that both displays in the display pair function as one wide virtual desktop. The width of each display is half the width of the total virtual desktop width.
natural_image
Two CRT computer monitors displaying abstract colorful graphics (no visible text or symbols)Horizontal Span Mode
(3) As one large vertical desktop (Vertical span)
Vertical Span mode indicates that both displays in the display pair function as one tall virtual desktop. The height of each display is half the height of the total virtual desktop height.

natural_image
Two computer monitors displaying a fantasy character image, one with a fantasy background and the other with ornate armor (no visible text or symbols)Vertical Span Mode
(4) Configured independently from each other (Dualview)
Dualview mode indicates that both displays in the display pair function as one virtual desktop. Unlike Horizontal Span or Vertical Span mode, Dualview treats each display as a separate device. This means that the taskbar will not be stretched across displays and 3D applications are not accelerated as efficiently as when the application spans displays.

Dualview Mode
| Display Matrix | Model GV-N95TD3-1GI GV-N95TD3-512I GV-N95TOC-1GI GV-N95TOC-512I | ||||
| CRT+HDMI Yes | Yes Yes Yes | ||||
| CRT+DVI Yes Yes Yes Yes | |||||
| DVI+HDMI Yes Yes Yes Yes | |||||
| DVI+HDMI+CRT No No No No | |||||
| DVI +DVI (Note 1) | Yes Yes Yes Yes | ||||
| CRT+CRT (Note 2) | Yes Yes Yes Yes | ||||
(Note 1) By an HDMI-to-DVI adapter.
(Note 2) By a DVI-to-D-Sub adapter.
Video & Television
Video and television features are similar to those for analog and digital displays and include features specific to television and HDTV (high definition television) technology for optimal viewing. Tasks in the Video & Television pages allow you to do the following:
- Adjust your television picture quality and video color settings for the best possible viewing in its environment.
- Change the position and size of the desktop video to best fit your television or HDTV (high definition television) screen.
- Change the signal format to use for your standard television or HDTV as well as change country-specific signal or the HDTV format.
- Enable full screen video mirroring.

■ Adjust Video Color Settings
Use the controls on this page to fine tune the color settings for video content on your display. Select one of the test images to monitor your changes. For best results, play a video while you make adjustment to view the changes as they happen.
3.1.7. nView Properties Pages (Note)
nView is a set of desktop tools designed to help you be more productive when using your graphics card. With nView you can set up multiple desktops to work with your applications. Multiple desktops give you extra desktop areas on which to run your applications so you won't have to crowd several open application windows on one desktop.
Enabling the nView Desktop Manager Features:
Click the NVIDIA icon 📁 in your system tray and select nView Properties under nView Desktop Manager. Click the Enable button to turn on all the nView Desktop Manager features.

Step 1: Click nView Properties.

Step 2: Click Enable.
Accessing the nView Properties Pages:
To access the nView properties page, you can click the NVIDIA icon in your system tray and select nView Properties under nView Desktop Manager.
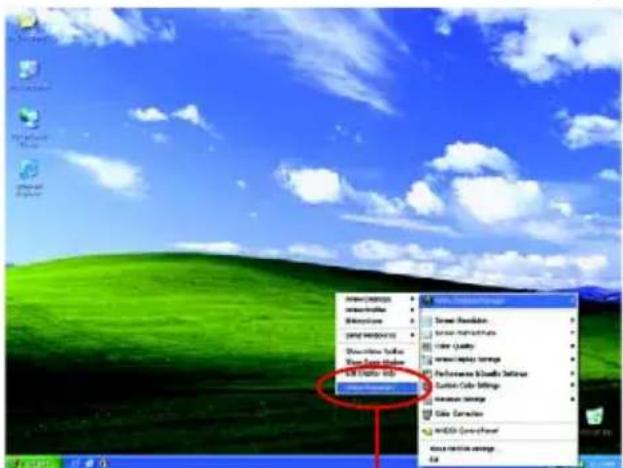
Click the item to start configuring nView features.
(Note) This item will show up when you connect two monitors.
nView Desktop Management properties

This tab contains information about the nView Desktop Manager. The Setup Wizard can also be accessed from this tab.
nView Profiles properties

This tab contains a record of all nView display settings for easy software setup.
nView Windows properties

This tab allows you to control window and dialog box placement when using multiple monitors.
nView Applications properties
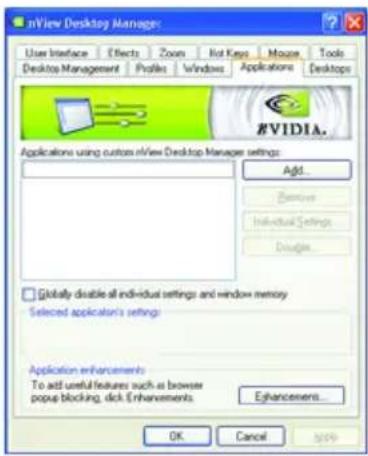
This tab allows you to control nView settings depending on different applications.
nView Desktops properties

■ This tab allows you to create up to 32 unique desktops.
nView User Interface properties
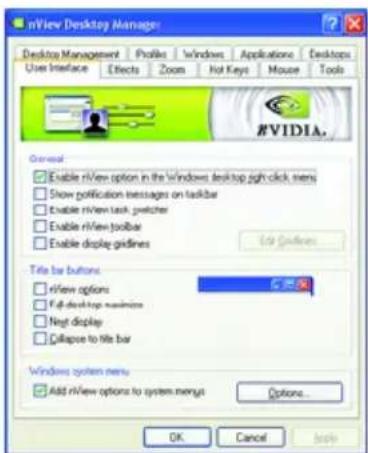
■ This tab allows for customization of the nView user interface.
nView Effects properties

This tab provides special windows effects that you can apply to your applications.
nView Zoom properties

This tab provides dynamic zoom functionality on the desktop. Also enable full screen video playback via the video mirroring control button.
nView Hot Keys properties

This tab lets you perform various actions with shortcut keys or key combinations.
nView Mouse properties

This tab can modify and extend mouse behavior with kinematic actions.
nView Tools properties

This tab can improve nView functionality for mobile and desktop users.
4. Troubleshooting Tips
The following troubleshooting tips may help if you experience problems. Contact your dealer or GIGABYTE for more advanced troubleshooting information.
- Check that the card is seated properly in the PCI Express x16 slot.
■ Ensure that the display cable is securely fastened to the card's display connector.
■ Make sure that the monitor and computer are plugged in and receiving power.
If necessary, disable any built-in graphics capabilities on your motherboard. For more information, consult your computer's manual or manufacturer.
(NOTE: Some manufacturers do not allow the built-in graphics to be disabled or to become the secondary display.)
■ Make sure you selected the appropriate display device and graphics card when you install the graphics driver.
■ Restart your computer.
Press
After getting into Safe Mode, in Device Manager check whether the driver for the graphics card is correct.
For more assistance, use the Troubleshooting Guide located in the Windows Help or contact your computer manufacturer.
■ If you are not able to find the desired monitor color/resolution settings:
The color and screen resolution options available for selection depend on the graphics card being installed.

If necessary, adjust your monitor's setting using monitor's adjust panel to make the screen look focused, crisp, and sharp. (Please refer to the monitor's manual.)
5. Appendix
5.1. How to Reflash the BIOS in MS-DOS Mode
- Extract the downloaded Zip file to your hard disk(s) or floppy disk. This procedure assumes drive A.
- Restart the computer in MS-DOS mode. (You may need a startup disk to restart the computer in MS-DOS mode.)
- Change the command prompt to A:>.
- To back up the current BIOS, at the A:> prompt, type [BIOS flash utility name] -s [BIOS file name] (example: gvf19 -s 95td35i.f1) and press Enter.
- To flash BIOS, at the A:> prompt, type [BIOS flash utility name] -p [BIOS file name] (example: gvf19 -p 95td35i.f2) and press Enter.
- Wait until it's done, then restart your computer.
5.2. Resolutions and Color Depth Tables (In Windows XP)
GeForce 9500 GT Single Display Standard Modes
| Display Refresh Color Depth (bpp)Screen Rate 8bpp(256 color) 16bpp(65K color) 32bpp(16.7M) | ||||
| Resolution | (Hz) | Standard mode | High mode | True mode |
| 320 x 200 60~75 √ | √ | √ | ||
| 320 x 240 60~75 √ | √ | √ | ||
| 400 x 300 60~75 √ | √ | √ | ||
| 480 x 360 60~75 √ | √ | √ | ||
| 512 x 384 60~75 √ | √ | √ | ||
| 640 x 400 (16:10) 60~75 √ | √ | √ | ||
| 640 x 480 60~240 √ | √ | √ | ||
| 720 x 480 60 | √ | √ | √ | |
| 720 x 576 50~60 √ | √ | √ | ||
| 800 x 600 60~240 √ | √ | √ | ||
| 848 x 480 60~240 √ | √ | √ | ||
| 960 x 600 (16:10) 60~240 √ | √ | √ | ||
| 1024 x 768 | 60~200 √ | √ | √ | |
| 240 √ | √ | X | ||
| 1088 x 612 (16:9) 60~200 √ | √ | √ | ||
| 240 √ | √ | X | ||
| 1152 x 864 | 60~170 √ | √ | √ | |
| 200 √ | √ | X | ||
| 1280 x 720 (16:9) 60~150 √ | √ | √ | ||
| 170 √ | √ | X | ||
| 1280 x 768 | 60~150 √ | √ | √ | |
| 170 √ | √ | X | ||
| 1280 x 800 | 60~150 √ | √ | √ | |
| 170 √ | √ | X | ||
| 1280 x 960 | 60~150 √ | √ | √ | |
| 170 √ | √ | X | ||
| 1280 x 1024 | 60~150 √ | √ | √ | |
| 170 √ | √ | X | ||
| 1360 x 768 | 60~150 √ | √ | √ | |
| 170 √ | √ | X | ||
| 1600 x 900 (16:9) 60~120 √ | √ | √ | ||
| 140~150 | √ | √ | X | |
| 1600 x 1024 | 60~100 √ | √ | √ | |
| 120 √ | √ | X | ||
To be continued...
| Display Refresh Color Depth (bpp)Screen Rate 8bpp(256 color) 16bpp(65K color) 32bpp(16.7M) | ||||
| Resolution | (Hz) | Standard mode | High mode | True mode |
| 1600 x 1200 60~100 √ | √ | √ | ||
| 120 √ | √ | X | ||
| 1920 x 1080 (16:9) 60~85 √ | √ | √ | ||
| 100 √ | √ | X | ||
| 1920 x 1200 (16:10) 60~85 √ | √ | √ | ||
| 100 √ | √ | X | ||
| 1920 x 1440 60~85 √ | √ | √ | ||
| 2048 x 1536 60~85 √ | √ | √ | ||
| 2560 x 1600 60 √ | √ | √ | ||
| (Dual-Link) | ||||
* This table is for reference only. The actual resolutions supported depend on the monitor you use.
5.3. Regulatory Statements
Regulatory Notices
This document must not be copied without our written permission, and the contents there of must not be imparted to a third party nor be used for any unauthorized purpose. Contravention will be prosecuted. We believe that the information contained herein was accurate in all respects at the time of printing. GIGABYTE cannot, however, assume any responsibility for errors or omissions in this text. Also note that the information in this document is subject to change without notice and should not be construed as a commitment by GIGABYTE.
Our Commitment to Preserving the Environment
In addition to high-efficiency performance, all GIGABYTE motherboards fulfill European Union regulations for RoHS (Restriction of Certain Hazardous Substances in Electrical and Electronic Equipment) and WEEE (Waste Electrical and Electronic Equipment) environmental directives, as well as most major worldwide safety requirements. To prevent releases of harmful substances into the environment and to maximize the use of our natural resources, GIGABYTE provides the following information on how you can responsibly recycle or reuse most of the materials in your "end of life" product.
Restriction of Hazardous Substances (RoHS) Directive Statement
GIGABYTE products have not intended to add and safe from hazardous substances (Cd, Pb, Hg, Cr+6, PBDE and PBB). The parts and components have been carefully selected to meet RoHS requirement. Moreover, we at GIGABYTE are continuing our efforts to develop products that do not use internationally banned toxic chemicals.
Waste Electrical & Electronic Equipment (WEEE) Directive Statement
GIGABYTE will fulfill the national laws as interpreted from the 2002/96/EC WEEE (Waste Electrical and Electronic Equipment) directive. The WEEE Directive specifies the treatment, collection, recycling and disposal of electric and electronic devices and their components. Under the Directive, used equipment must be marked, collected separately, and disposed of properly.
WEEE Symbol Statement

The symbol shown below is on the product or on its packaging, which indicates that this product must not be disposed of with other waste. Instead, the device should be taken to the waste collection centers for activation of the treatment, collection, recycling and disposal procedure. The separate collection and recycling of your waste equipment at the time of disposal will help to conserve natural resources and ensure that it is recycled in a manner that protects human health and the environment. For more information about where you can drop off your waste equipment for recycling, please contact your local government office, your household waste disposal service or where you purchased the product for details of environmentally safe recycling.
- When your electrical or electronic equipment is no longer useful to you, "take it back" to your local or regional waste collection administration for recycling.
- If you need further assistance in recycling, reusing in your "end of life" product, you may contact us at the Customer Care number listed in your product's user's manual and we will be glad to help you with your effort.
Finally, we suggest that you practice other environmentally friendly actions by understanding and using the energy-saving features of this product (where applicable), recycling the inner and outer packaging (including shipping containers) this product was delivered in, and by disposing of or recycling used batteries properly. With your help, we can reduce the amount of natural resources needed to produce electrical and electronic equipment, minimize the use of landfills for the disposal of "end of life" products, and generally improve our quality of life by ensuring that potentially hazardous substances are not released into the environment and are disposed of properly.
China Restriction of Hazardous Substances Table
The following table is supplied in compliance with China's Restriction of Hazardous Substances (China RoHS) requirements:

Management Methods on Control of Pollution from Electronic Information Products
(China RoHS Declaration)
- Trademarks
- Notice
- Macrovision corporation product notice:
- Date: Oct. 3, 2008
- Date: May.11,2009
- Table of Contents
- Introduction .... 5
- Hardware Installation....6
- Software Installation 12
- Troubleshooting Tips 33
- Appendix 34
- Introduction
- Features
- Minimum System Requirements
- • Hardware
- - Operating System
- •SLI TM Configuration
- Hardware Installation
- Board Layout
- GV-N95TOC-1GI/GV-N95TOC-512I
- Hardware Installation
- Step 1.
- Step 2.
- Step 3.
- Step 4.
- How NVIDIA® SLI™ technology works:
- Software Installation
- Windows XP Driver and Utilities Installation
- Operating System Requirements
- DirectX Installation
- Driver Installation
- New Hardware Found
- Step 2: Found New Hardware Wizard: Searching and Installing
- Step 3: Found New Hardware Wizard: Finish
- Driver Installation (Autorun Window)
- GIGABYTE Gamer HUD Lite on Driver CD
- GIGABYTE Gamer HUD Lite
- Taskbar Icon
- Display Properties Pages
- Settings (Resolutions and Color Quality for Windows)
- NVIDIA Control Panel
- 3D Settings
- Display
- ■ Run Display Optimization Wizard
- ■ Move CRT Screen Position
- ■ Change Resolution
- ■ Adjust Desktop Color Settings
- ■ Rotate Display
- ■ Manage Custom Resolutions (Note 1)
- ■ Run Multiple Display Wizard (Note 2)
- ■ Set Up Multiple Displays
- Dual-Monitor Setup
- The same on both display (Clone)
- As one large horizontal desktop
- (Horizontal span)
- As one large vertical desktop (Vertical span)
- Configured independently from each other (Dualview)
- Video & Television
- ■ Adjust Video Color Settings
- nView Properties Pages (Note)
- Enabling the nView Desktop Manager Features:
- Accessing the nView Properties Pages:
- nView Desktop Management properties
- nView Profiles properties
- nView Windows properties
- nView Applications properties
- nView Desktops properties
- nView User Interface properties
- nView Effects properties
- nView Zoom properties
- nView Hot Keys properties
- nView Mouse properties
- nView Tools properties
- Troubleshooting Tips
- Appendix
- How to Reflash the BIOS in MS-DOS Mode
- Resolutions and Color Depth Tables (In Windows XP)
- Regulatory Statements
- Regulatory Notices
- Our Commitment to Preserving the Environment
- Restriction of Hazardous Substances (RoHS) Directive Statement
- Waste Electrical & Electronic Equipment (WEEE) Directive Statement
- WEEE Symbol Statement
- China Restriction of Hazardous Substances Table
Brand : GIGABYTE
Model : GV-N95TOC-512I
Category : Video card