
DP356 - Digital photo frame COBY - Free user manual and instructions
Find the device manual for free DP356 COBY in PDF.


| Product Type | Digital Photo Frame |
| Brand | Coby |
| Model | DP356 |
| Screen Size (diagonal) | 10.2 inches |
| Display Resolution | 800 x 600 pixels |
| Aspect Ratio | 4:3 |
| Supported Memory Cards | SD, MMC, MS, xD |
| Internal Memory | 128 MB |
| Supported Image Formats | JPEG, BMP, GIF, PNG |
| Supported Video Formats | Motion JPEG, AVI (limited) |
| Audio Playback | MP3 |
| Power Supply | AC adapter (5V DC, 1A) |
| Power Consumption | 5 W (typical) |
| Dimensions (W x H x D) | 10.2 x 7.5 x 1.2 inches |
| Weight | 1.2 lbs |
| Features | Clock, Calendar, Slideshow with transitions, Auto-on/off |
| Connectivity | USB 2.0 (for PC transfer) |
| Accessories Included | Remote control, stand, AC adapter, user manual |
| Cleaning Instructions | Wipe with a soft, dry cloth. Avoid solvents. |
| Safety Precautions | Keep away from moisture and heat sources. Unplug during storms. |
| Spare Parts Availability | Remote control and AC adapter available from Coby support. |
| Reparability | Not user-serviceable. Contact authorized service center. |
Frequently Asked Questions - DP356 COBY
User questions about DP356 COBY
0 question about this device. Answer the ones you know or ask your own.
Ask a new question about this device
Download the instructions for your Digital photo frame in PDF format for free! Find your manual DP356 - COBY and take your electronic device back in hand. On this page are published all the documents necessary for the use of your device. DP356 by COBY.
USER MANUAL DP356 COBY
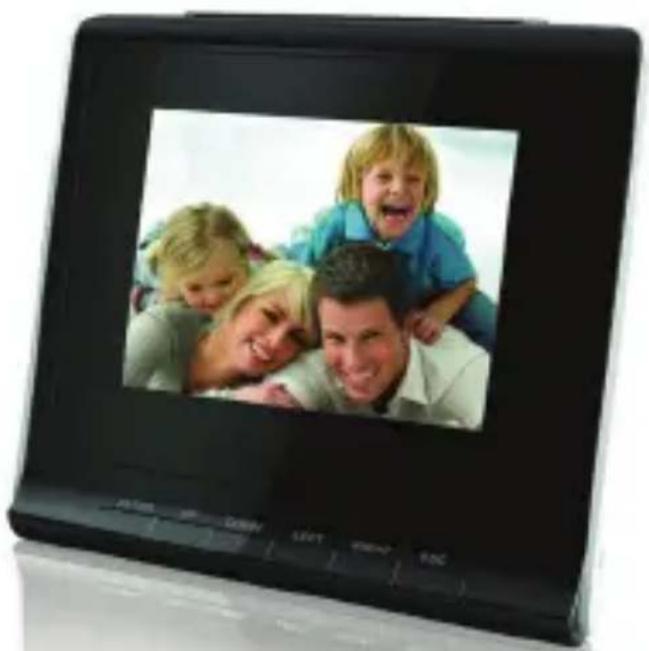
Portable 3.5" Digital Photo Album with MP3 Playback
DP356
natural_image
Black rectangular digital display showing a family photo with four smiling adults (no text or symbols visible)Instruction Manual
Please read this manual carefully before operation
Precautions
natural_image
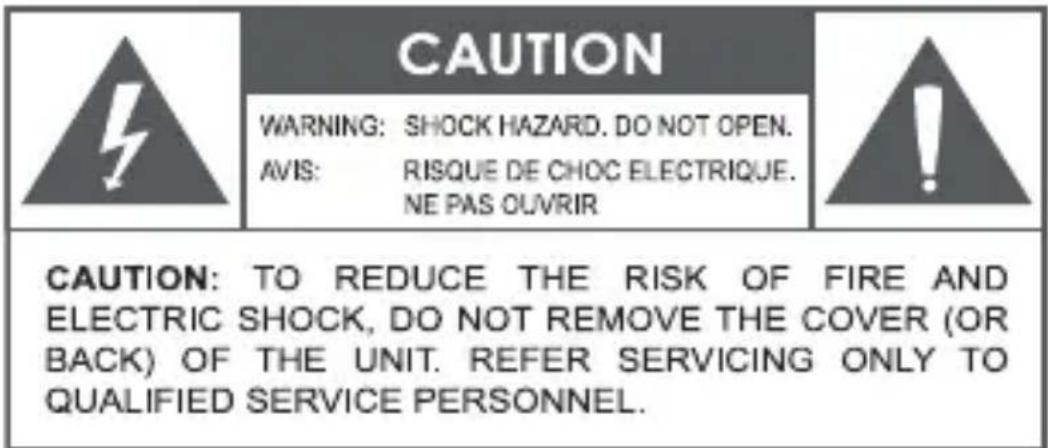
Warning symbol of a lightning bolt inside a triangle (no text or numbers)The lightning flash with arrowhead symbol within an equilateral triangle is intended to alert the user to the presence of uninsulated “dangerous voltage” within the product’s enclosure that may be of sufficient magnitude to constitute a risk of electric shock.

natural_image
Warning symbol: black triangle with white exclamation mark (no text or numbers)The exclamation point within an equilateral triangle is intended to alert the user to the presence of important operation and servicing instructions in the literature accompanying the appliance.
For Customer Use:
Enter below the serial number that is located on the rear of the unit. Retain this information for future reference.
Model No. DP356
Serial No. ____
Precautions
WARNING: To prevent fire or shock hazard, do not expose this device to rain or moisture. Dangerous high voltage is present inside the enclosure. Do not open the cabinet.
CAUTION: To prevent electric shock, match wide blade of plug to wide slot of outlet and fully insert.
WARNING: Handling the cords on this product will expose you to lead, a chemical known to the State of California to cause cancer, and birth defects or other reproductive harm. Wash hands after handling.
Protect your hearing: Hearing experts advise against the constant use of personal stereos played at high volume. Constant exposure to high volumes can lead to hearing loss. If you should experience ringing in the ears or hearing loss, discontinue use and seek medical advice.
Note: If the product suddenly has no response or powers off, an electrostatic discharge may be the cause. In this circumstance, please follow the procedures below for recovery:
- Use a paper clip to press the Reset button located on the rear of the unit.
- Turn the unit on again
Note:
SD is a trademark of the SD Card Association. SDHC Logo is a trademark of SD-3C, LLC.

For recycling or disposal information about this product, please contact your local authorities or the Electronics Industries Alliance: www.eiae.org.
FCC Statement:
Precautions
This device complies with Part 15 of the FCC Rules. Operation is subject to the following two conditions:
(1) This device may not cause harmful interference, and
(2) This device must accept any interference received, including interference that may cause undesired operation.
Note: This equipment has been tested and found to comply with the limits for Class B digital devices, pursuant to Part 15 of the FCC rules. These limits are designed to provide reasonable protection against harmful interference in a residential installation. This equipment generates, uses and can radiate radio frequency energy and, if not installed and used in accordance with the instructions, may cause harmful interference to radio communications. However, there is no guarantee that interference will not occur in a particular installation. If this equipment does cause harmful interference to radio or television reception, which can be determined by turning the equipment off and on, the user is encouraged to try to correct the interference by one or more of the following measures:
- Reorient or relocate the receiving antenna.
- Increase the separation between the equipment and receiver.
- Connect the equipment into an outlet on a circuit different from that to which the receiver is connected.
- Consult the dealer or an experienced radio/TV technician for help
Use of shielded cable is required to comply with Class B limits in Subpart B of Part 15 of the FCC rules.
Do not make any changes or modifications to the equipment unless otherwise specified in the manual. If such changes or modifications should be made, you could be required to stop operation of the equipment.
Important Safety Instructions
- Read Instructions: All the safety and operating instructions should be read before the product is operated.
- Retain Instructions: The safety and operating instructions should be retained for future reference.
- Heed Warnings: All warnings on the product and in the operating if should be adhered to.
- Follow Instructions: All operating and usage instructions should be followed.
- Cleaning: Unplug this product from the wall outlet before cleaning. Do not use liquid cleaners or aerosol cleaners. Use a damp cloth for cleaning.
- Attachments: Use only attachments recommended by the manufacturer. Us other attachments may be hazardous.
- Water and Moisture: Do not use this product near water (e.g., near washbowl, kitchen sink, laundry tub, in wet basements, or near a swimming pool and the like).
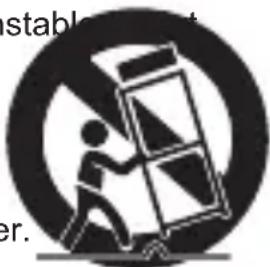
- Accessories: Do not place this product on an unstabl
stand, tripod, bracket, or table. Use only with carts, stands, tripods, brackets, or tables recommended by the manufacturer or sold with the product. Any mounting of the product should follow the manufacturer's instructions and should use a mounting accessory recommended by the manufacturer
natural_image
Symbolic illustration of a person pushing a large box under a circle with 'stable' text (no readable document content)A product and cart combination should be moved with care. Quick stops, excessive force, and uneven surfaces may cause the product and cart combination to overturn.
- Ventilation: Slots and openings in the cabinet are provided for ventilation to ensure reliable operation of the product and to protect it from overheating. These openings should never be blocked by placing the product on a bed, sofa, rug, or other similar surface. This product should not be placed in a built-in insta as a bookcase or rack unless proper ventilation is provided or the manufacturer instructions have been adhered to.
- Power Sources: This product should be operated only from the type source indicated on the rating label. If you are not sure of the type of power supply to your home, consult your product dealer or local power company. For products intended to operate from battery power or other sources, refer to tl instructions.
- Grounding or Polarization: This product may be equipped with a polarized alternat-
Important Safety Instructions
ing-current line plug that has one blade wider than the other. This plug will only fit into the power outlet in one direction. This is a safety feature. If you are unable to insert the plug fully into the outlet, try reversing the direction of the plug. If the plug should still fail to fit, contact an electrician to replace the obsolete outlet. Do not defeat the safety purpose of the polarized plug.
- Power-Cord Protection: Power supply cords should be routed so that they are not likely to be walked on or pinched by items placed upon or against them, particular attention to cords at plugs, convenience receptacles, and at the point which they exit from the product.
- Protective Attachment Plug: The product may be equipped with an attachment plug with overload protection. This is a safety feature. See the operating instructions for replacement or directions to reset the protective device. If replacement of the plug is required, be sure the service technician has used a replacement plug that has the same overload protection as the original plug as specified by the manufacturer.
- Outdoor Antenna Grounding: If an outside antenna is connected to the product, be sure the antenna system is grounded so as to provide some protection against voltage surges and built-up static charges. Article 810 of the National Electrical Code, ANS/NFPA 70 provides information with regard to proper grounding of the mast and supporting structure, grounding of the lead-in wire to an antenna-discharge unit, size of grounding conductors, location of antenna-discharge unit, connection to grounding electrodes, and requirements for the grounding electrode (see figure).
- Lightning: For added protection for this product, unplug it from the wall outlet and disconnect the antenna or cable system during a lightning storm or when it is left unattended and unused for long periods of time. This will prevent damage to the product due to lightning or power-line surges.
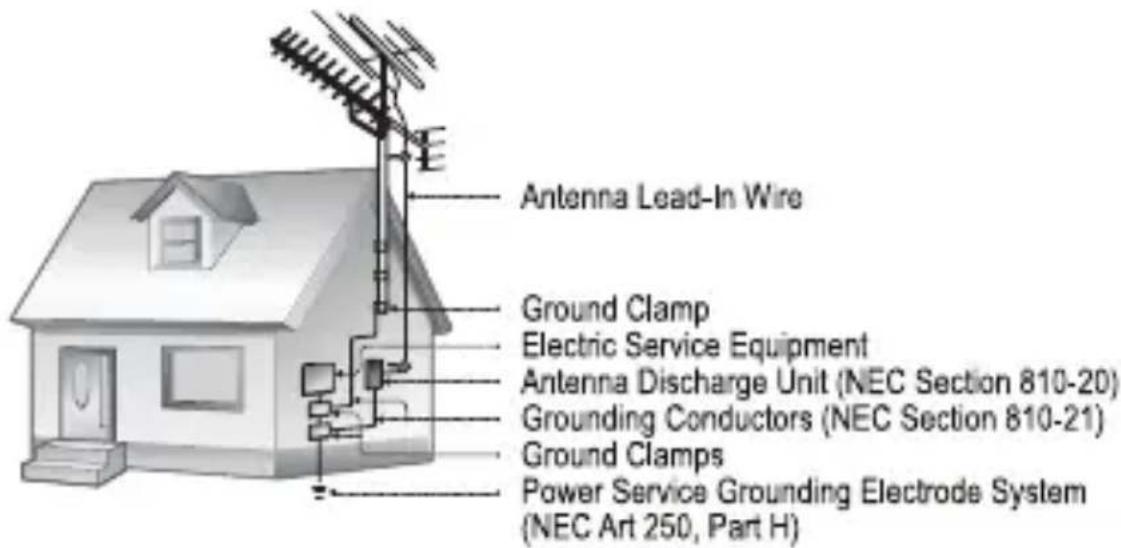
Page 6 Coby Electronics Corporation
Important Safety Instructions
- Power Lines: An outside antenna system should not be located in overhead power lines or other electric light or power circuits, or where it can fall into such power lines or circuits. When installing an outside antenna system, extreme care should be taken to keep from pressing such power lines or circuits, as contact with them might be fatal.
- Overloading: Do not overload wall outlets, extension cords, or integral convenience receptacles as this can result in a risk of fire or electric shock.
- Object and Liquid Entry: Never push objects of any kind into this product through openings as they may press dangerous voltage points or shout-out parts that could result in a fire or electric shock. Never spill liquid of any kind on the product.
- Servicing: Do not attempt to service this product yourself as opening or removing covers may expose you to dangerous voltage or other hazards. Refer all servicing to qualified service personnel.
- Damage Requiring Service: Unplug this product from the wall outlet servicing to qualified service personnel under the following conditions: the power-supply or plug is damaged; b) if liquid has been spilled or if objects have fallen into the product; c) if the product has been exposed to rain or water; d) if the product does not operate normally by following the operating instructions. Adjust only those controls that are covered by the operating instructions as adjustment of other controls may result in damage and will often require extensive work by a qualified technician to restore the product to its normal operation; e) if the product has been dropped or damaged in any way; f) when the product exhibits a distinct change in performance—this indicates a need for service.
- Replacement Parts: When replacement parts are required, be sure that your service technician has used replacement parts specified by the manufacturer or has same characteristics as the original part. Unauthorized substitutions may result in fire, electric shock, or other hazards.
- Safety Check: Upon completion of any service or repairs to this product, ask the service technician to perform safety checks to ensure that the product is in proper operating condition.
- Wall or Ceiling Mounting: The product should be mounted to a wall or ceiling only as recommended by the manufacturer.
- Heat: The product should be situated away from heat sources such as radiators, heat registers, stoves, or other products (including amplifiers) that produce heat.
Table of Contents
PRECAUTIONS 2
IMPORTANT SAFETY INSTRUCTIONS ....5
TABLE OF CONTENTS ......8
PACKAGE CONTENTS ......10
FEATURES 11
GETTING STARTED 12
Controls at a Glance 12
Installing a SD Memory Card (optional) 13
Connecting Power to YUou Photo Frame ....14
Power Your Photo Frame On or Off ....15
MAIN MENU 16
PHOTO MODE ....17
Photo Browser Controls ....17
Photo Viewer Controls ....18
Photo Viewer Options ....18
MUSIC MODE 21
Music Player Controls ....22
Music Player Options ......23
CALENDAR MODE....24
FILE MDOE ......27
SETUP MODE ....28
USB CONNECTIONS ......33
Table of Contents
Connecting to a Computer ....33
Transferring Files ....33
Microsoft Windows 34
Macintosh OS X 34
Disconnecting from a Computer ....35
FIRMWARE UPGRADES ....37
TROUBLESHOOTING.... 38
SPECIFICATIONS 41
Package Contents
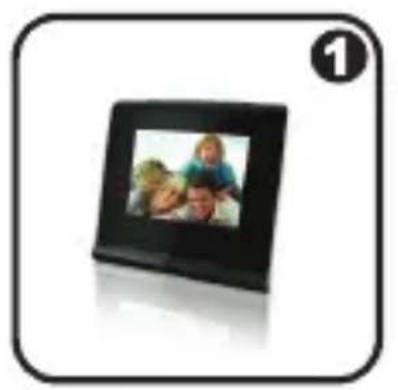
Please make sure that the items shown below are included in the package. Should an item be missing, please contact the local retailer from which you purchased this product.
natural_image
Black rectangular digital display frame with a photo of three people (no text or symbols visible)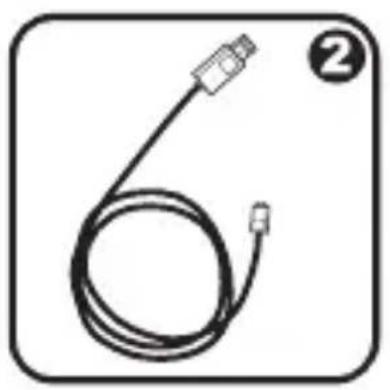
natural_image
Simple line drawing of a cable with connector (no text or symbols)
natural_image
Simple line drawing of a closed book with a bookmark, no text or symbols present.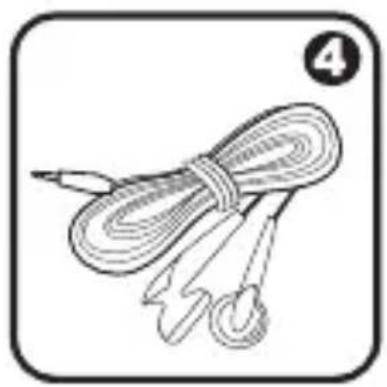
natural_image
Simple line drawing of a rope tied with two tools, no text or symbols present- COBY Photo Album
- USB Cable
- Instruction Manual
- Stereo Earphones
Features
3.5" TFT LCD Display (320 x 240)
◆ Display JPEG, BMP and GIF Image files
◆ Plays MP3 and WMA Audio Files
♦ Photo Slideshow Mode
♦ Digital Alarm Clock, Calendar, and Temperature display
✦ Snooze Function
♦ Integrated SD/MMC Card Slot (SDHC compatible)
USB 2.0 Hi-Speed for Fast File Transfers
♦ Integrated Rechargeable Battery
Getting Started
Controls at a Glance
- SNOOZE Button
- LCD Display
- Enter
Hold key for Power On/Off - Up Button
- Down Button
- Left Button
- Right Button
- ESC Button
- Speakers
- SD/MMC Card Slot
- USB Port
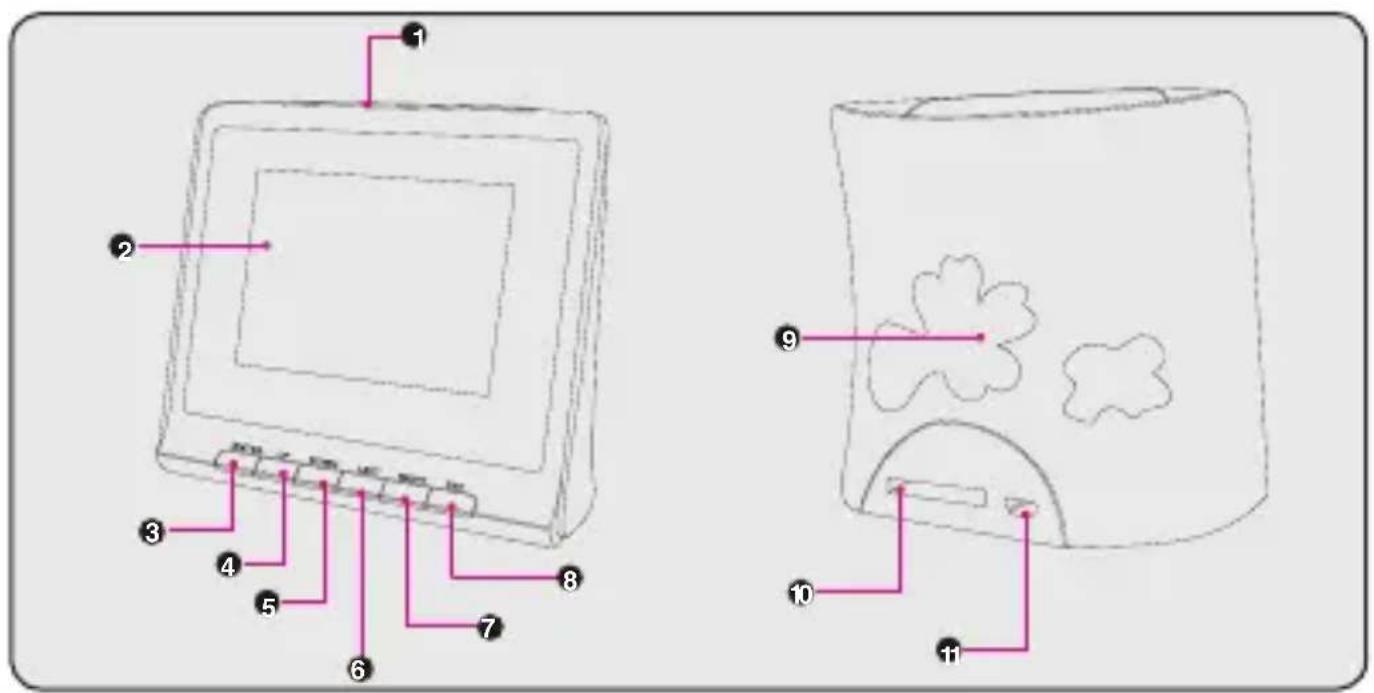
Page 12 Coby Electronics Corporation
Getting Started
To start playing photos and music on your digital photo frame, you will need to:
- Install a memory card with compatible photo and music files.
- Connect your photo frame to a power source.
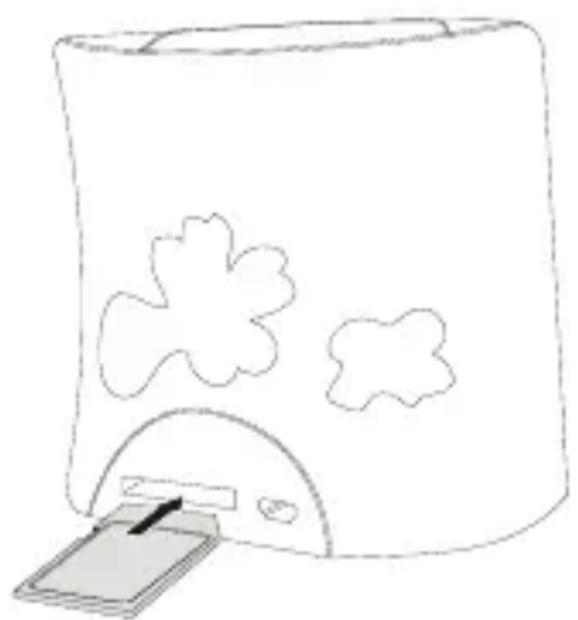
Installing a Memory Card
You can upgrade the memory capacity of your album by adding an SD, SDHC, or MMC memory card.
Insert the card into the slot with the metal contacts facing up (see the illustration below).
✨ This album supports SD and MMC cards up to 2GB in size.
This album supports SDHC cards up to 32GB in size.
natural_image
Simple line drawing of a rectangular device with a clover and three surrounding shapes, next to a small rectangular device (no text or symbols)Getting Started
Connecting Power to your Photo Frame
Your Photo Frame should be connected to an AC 100-240V wall outlet.
Using the supplied power adapter, plug one end of the adapter into your photo frame's USB Port and plug the other end into an AC 100-240V wall outlet.
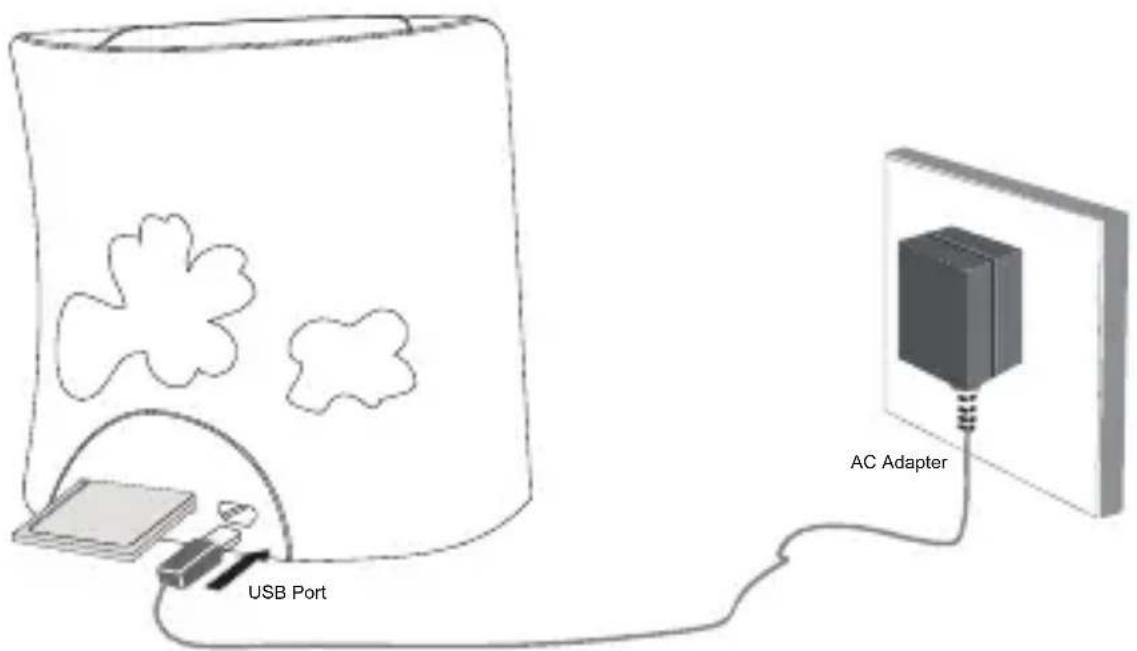

Do not connect the power plug to a power outlet other than that which is indicated here or on the label as this may result in the risk of fire or electric shock
Do not handle the power plug with wet hands. so may cause electric shock. Use only the AC adapter supplied with the photo frame. Failure to cause a fire or damage the playe.
Do
Getting Started
Turning Your Photo Frame On/Off
To turn the album on, press and hold
To turn the album off, press and hold
Main Menu
The Main Menu gives you access to the different function modes of your album. To access the Main Menu at any time, press
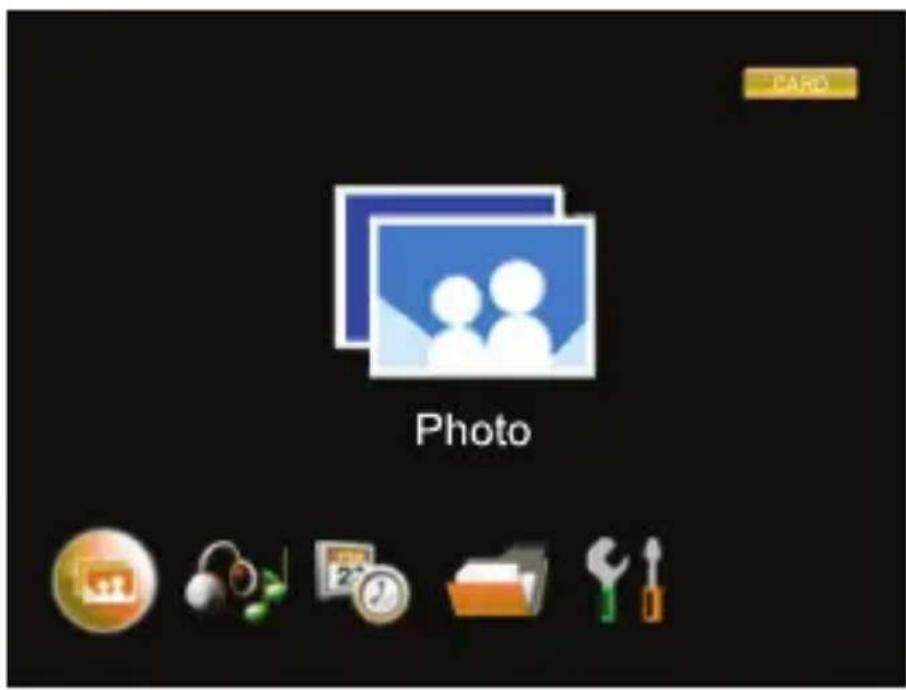
- Press
or to select a mode (Photo, Music, Clendar, File, Settings).
◆ Pressto confirm.
* Pressto back to the previous screen.
Photo Mode
Enter PHOTO mode from the Main Menu to find and display JPG, GIF, and BMP photo files loaded on your album.
To enter Photo mode, select and confirm PHOTO from the Main Menu.
The Photo Frame will display photos immediately. Press
Photo Browser Controls
Use the Photo Browser to navigate all folders and loaded on your album.
* Press
Select a folder to display its contents. Press
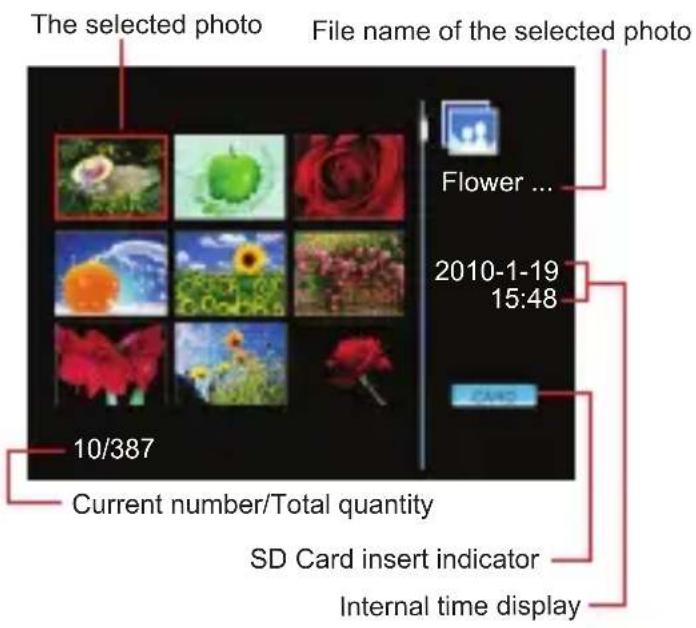
Photo Mode
Photo Viewer Controls
When you select a photo from the Photo Browser, the Photo Viewer will launch to display your photos.
- Press
or to view the previous or next photo, respectively. - Press
to toggle the display mode between "Browse Mode" and "Slideshow".
* Pressto access the Photo Viewer options.
◆ Pressto return to the Photo Browser.
Photo Viewer Options
Press
* Press
* Press

(Rotate)
To rotate the photo, press
Photo Mode

Zoom In
To zoom in the photo, press

Information
To view the file information of the photo.

(Background Music)
To turn the background music playing on or off.
You photo frame will play the music that located on the internal flash memory or SD/MMC Card as background music.
- Press and hold

(Copy)
Copy the current photo to the internal flash memory.
Your Photo Frame's memory can stores up to XX photos.

(Delete)
Delete the current photo.
Photo Mode


(Move)
To move the magnified photo down, up, right, or left.

(Slide Show)
To set the slideshow mode on or off.

(Exit)
To cancel the Viewer Options.
Music Mode
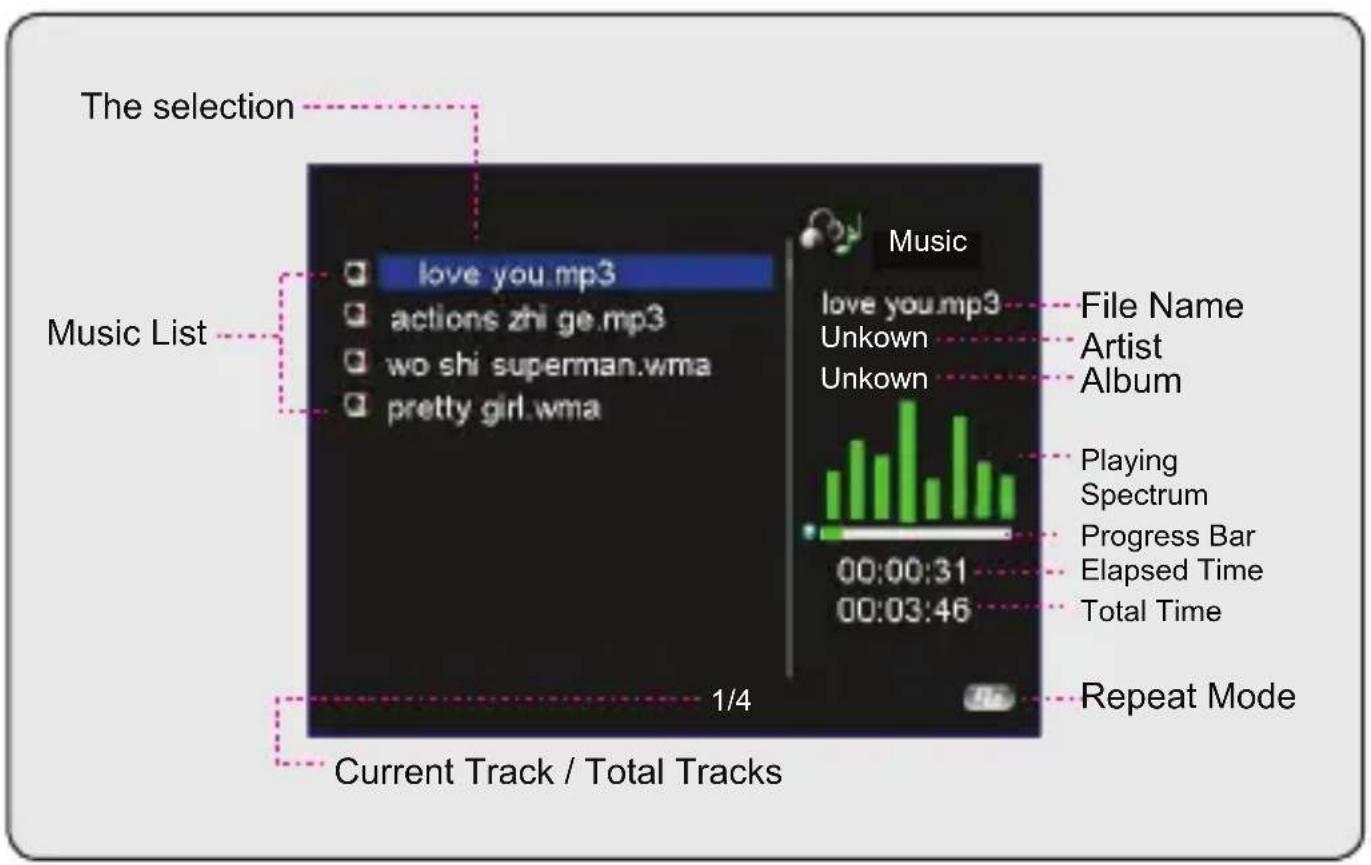
Enter Music mode from the Main menu to play your MP3 or WMA music files.
To enter MUSIC mode, select and confirm MUSIC from the Main Menu. The Music Browser will appear on screen.
- Press
or to move the selection up or down.
* Pressto play the selection.
Music Mode
Music Player Controls
The Music Player allows you to view and play all compatible music files loaded on the unit.
Use the following controls during music playback.
| Key Function | |
| Press | Start/Resume track playback. During playback, pressto pause playback. |
| Press | Fast-forward through the current track. Pressagain to resume the playback. |
| Press | Reverse through the current track. Pressagain to resume the playback. |
| HoldChange the repeat mode. | |
| HoldIncrease the volume level. | |
| HoldDecrease the volume level. | |
| Press | Stop the playback and back to the Music Browser screen. |
Music Mode
Music Player Options
Press and hold MODE to access the Music Player options.
* Press < or > to select an option and press POWER/ENTER to confirm.
★ Press MENU to cancel and return to the previous screen.
| Item Description | |
| EQ Set a digital equalizer | preset (Normal, Classic, Jazz, Rock, Pop, Bass). |
| Repeat Set the Repeat playback mode:Normal (Play all tracks once)Repeat One (Repeat the current track)Repeat All (Repeat all tracks)Random (Shuffle all tracks). | |
Calendar Mode
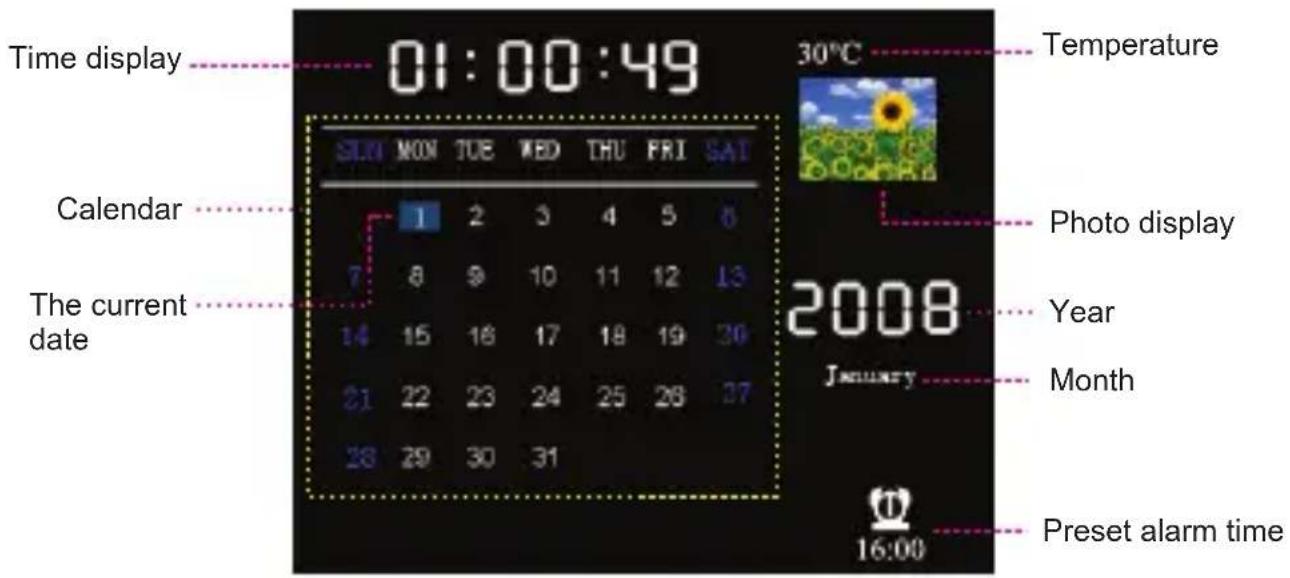
Enter Calendar mode from the Main menu to view a perpetual calendar, internal time, and the temperature.
To enter CALENDAR mode, select and confirm CALENDAR from the Main Menu. The Calendar will appear on screen.
* Press
Calendar
* Press
Calendar Mode
- Press
Monthly Calendar
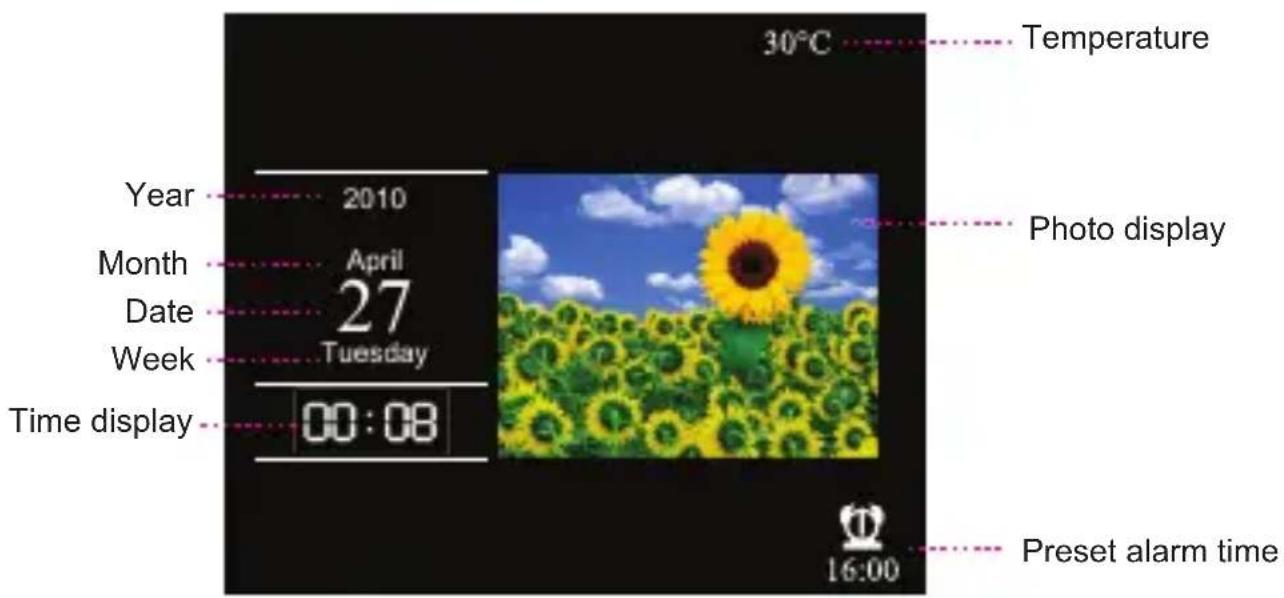
- Press
or to display the previous or next photo. - Press
or to display the previous or next month.
Calendar Mode
Clock
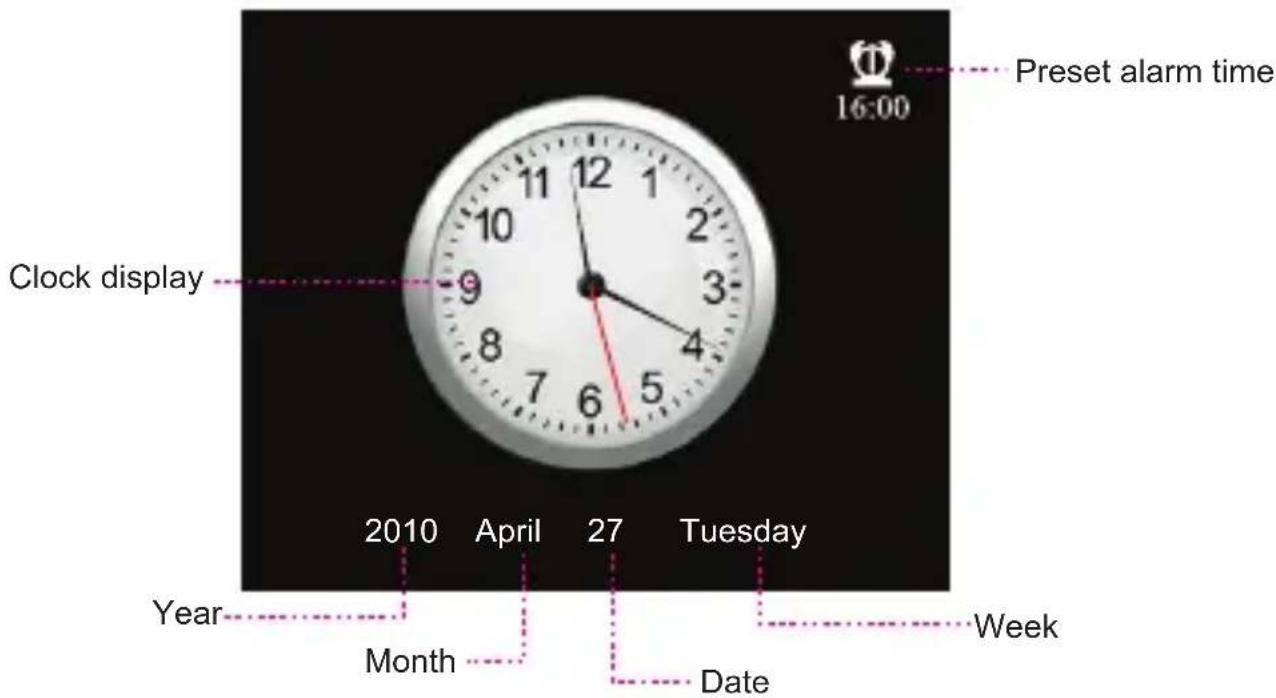
- Press

You can also set the appearance of the screen in the “Setting” mode: Setting > Setup > Display Mode.
Cal Cal
File Mode
Enter File mode to view and delete folders and files loaded on your player.
To enter Explorer mode, select and confirm FILE from the Main Menu.
Explorer Controls
When you choose FILE mode from the Main menu, you will see the File Explorer screen. You can find and delete files or folders from the player.
| Function Key Action | |
| To browse through the list of files & folders Press | or |
| To select a folder Press | |
| To mark or unmark a selection Press | |
| To delete the selected item | Press, then confirm “Delete files?” |
| To return to the previous screen Press |
Setting Mode
Enter the Setting mode to set your album's system options.
To enter Setting mode, select and confirm SETTING in the Main menu.
To select an option, press
To change the setting, press
- Press
The Setup menu contains the following options: Photo Setup, Calendar Setup, Music Setup, and System Setup.
Setting Mode
| Item Description | ||
| Photo Setup | Display Mode Set | the photo display mode once you confirm “Photo” in the Main Menu, the options are: Browse Mode, Thumbnail, and Slideshow. |
| Display Ratio Set | the photo display mode as Full Screen, Fit to Scree, or Crop to Fill. | |
| Slideshow Duration | Set the time interval between photos in slide-show mode(in seconds). | |
| Slideshow Repeat | Set the slideshow repeat mode as Once or Repeat. | |
| Slideshow Effect | Set the slide transition effects. | |
| Clock Set the clock | display on or off while photo display. | |
Setting Mode
| Item Description | ||
| Calendar Setup | Display Mode | Set the appearance of the Calendar screen as Calendar, Monthly Calendar, or Clock. |
| Date Set the internal date. | ||
| Clock Mode | Set the clock display mode as 24-hour or 12-hour. | |
| Clock Time Set the internal time. | ||
| Alarm Status Se the alarm on or off. | ||
| Alarm Time Set the preset alarm time. | ||
| Alarm Tone Set the alarm tone. | ||
| Alarm Frequency | Set the frequency that the alarm will effect. | |
| Music Setup | Play Mode | Set the repeat playbackmode.Once (Play all tracks once)Repeat One (Repeat the current track)Repeat (Repeat all tracks)Random (Shuffle all tracks). |
| Show Spectrum | Set the music playing spectrum display on or off. | |
Setting Mode
| Item Description | ||
| Auto Play | Set the Auto Play feature on or off. When Auto Play is set to ON, the player will automatically play music when you enter MUSIC in the Main Menu. | |
| System Setup | Language | Set the Language that the on-screen menus appear in. |
| Brightness | Adjust the brightness of the display. | |
| Contrast | Adjust the contrast of the display. | |
| Saturation | Adjust the saturation of the display. | |
| Hue | Adjust the hue of the display. | |
| Gamma | Set the display gamma. | |
| Power On | Set the Auto Power On feature on or off. | |
| Auto Boot Time | Set the internal time that the player will power on automatically at the set time. | |
| Power Off | Set the Auto Power Off feature on or off. | |
| Auto Shut Time | Set the internal time that the player will shut down automatically at the set time. | |
| Auto-Power Frequency | ||
Alarm Function
The player will alarm with tone sound at the time that you set in the Setting mode.
- Press the
USB Connections
Connect the Coby photo album to a computer with a USB cable to:
Transfer files to and from your album
◆ Perform basic file management functions.
Connecting to a Computer
Connect the album to your computer with a USB cable. Upon connection:
Your album will be detected as a “Removable Disk” when you open “My Computer”.
It may take your computer several minutes to find and set up the device the first time it is connected depending on your hardware configuration.
Transferring Files
The USB 2.0 Hi-Speed connection makes it easy to transfer music, photo, or any other data quickly between the album and your computer. Simply use the album as you would a floppy disk using basic operating system commands.
If you need further assistance with transferring files, please refer to your operating system's instruction manual or on-screen help.
USB Connections

Do not disconnect or otherwise interrupt the dev during transmission - this could damage or corrupt the album's firmware or your files. If the album is accidentally disconnected and is not working properly, I your device (press the Reset button located on the rear of the album).
Microsoft Windows
- Double-click the “My Computer” icon on your desktop and then double-click the album’s icon (Removable Disk).
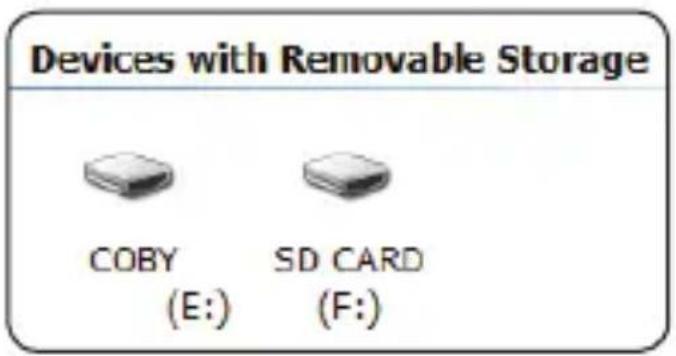
- Locate the files you would like to transfer from your computer. Use your mouse to select the files to transfer and then drag-and-drop them onto the “Removable Disk” icon that represents your album.
You may also transfer files from your album to the computer.
USB Connections
Macintosh OS X
- Open a finder window. Click on the Removable Disk icon located on the left side of the finder window. The computer will display all files and folders currently stored in the album.
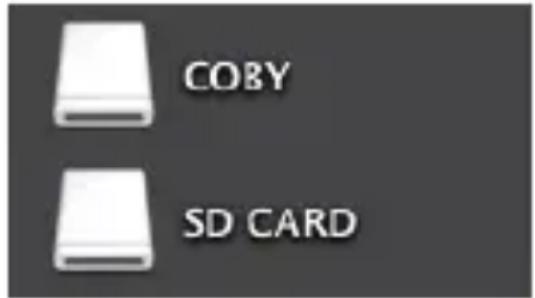
- Locate the files you would like to transfer from your computer. Use your mouse to select the files to transfer and then drag-and-drop them onto the Removable Disk icon that represents your album.
Disconnecting from a Computer
Disconnect your album as instructed below to prevent data loss or file/firmware corruption.
Microsoft Windows
- Double-click the green arrow in the taskbar located on the lower-right side of the computer screen (Safely Remove Hardware).
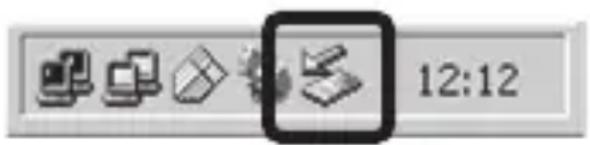
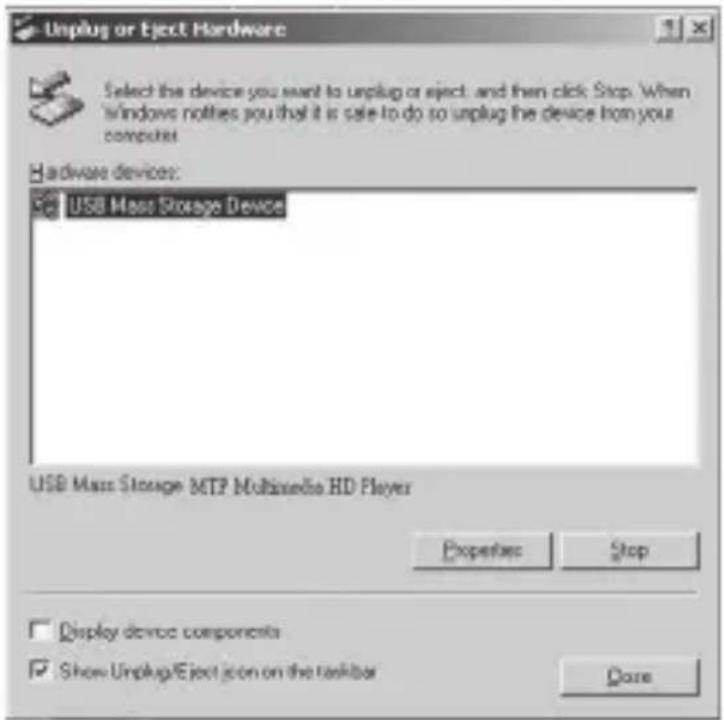
2. Safely Remove Hardware:
Select “USB Mass Storage Device” from the list that appears and then click on “Stop”.
Stop a Hardware Device: Select "USB Mass Storage
USB Connections
Device" from the list that appears and then click on "OK".
- When the "Safe to Remove Hardware" window appears, click the OK button and disconnect the USB cable from the album and your computer.
Macintosh OS X
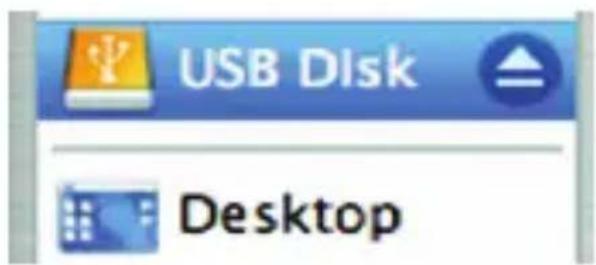
- On the left side of the Finder Window, identify the appropriate Removable Disk icon.
- Click on the "Eject" arrow on the right of the Removable Disk icon.
- Disconnect the USB cable from the album and your computer.
Firmware Upgrades
From time to time, COBY may release firmware upgrades to improve the performance of a device or to add additional features. Please check the COBY website periodically at www.cobyusa.com to see if new firmware has been released for your device. If you are experiencing abnormal behavior with your device, you may choose to restore (format) your device before updating its firmware.

Do not interrupt the firmware upgrade process—doing so could damage your device and render it inoperable.
See the documentation that is included with the firmware upgrade file for detailed instructions.
Troubleshooting
If you have a problem with this device, please read the trouble-shooting guide below and check our website at www.cobyusa.com for Frequently Asked Questions (FAQs) and firmware updates. If these resources do not resolve the problem, please contact Technical Support.
Address COBY Electronics Technical Support 150 Knowlton Way Savannah, GA 31407
Email techsupport@cobyusa.com
Web www.cobyusa.com
Phone 800-727-3592: Weekdays 8:30AM–9:00PM EST Weekends 9:00AM–5:30PM EST 718-416-3197: Weekdays 8:00AM–5:30PM EST
The player does not turn on.
◆ Ensure that the player is fully charged. Try charging the player overnight.
Reset the player (use a paper clip to press the Reset button on the rear of the player) and try again.
The buttons do not work.
◆ Ensure that the player is fully charged. Try charging the player overnight.
Troubleshooting
Reset the player (use a paper clip to press the Reset button on the rear of the player) and try again.
I cannot transfer files to the player.
◆ Ensure that your computer is running a supported operating system.
If you are using a USB extension cable, ensure that it is securely attached to the player and the PC, or try using another USB cable.
If you have connected the player through a USB hub, try connecting the player directly to your computer.
Ensure that the player's memory capacity is not full.
There is no sound during playback.
✦ Check the volume level.
- Ensure that the headphones are attached securely to the player.
The sound quality of the music is poor.
Try playing the file on your computer. If the sound quality is still poor, try downloading the file again or re-encoding the file yourself.
- Ensure that the bit rate of the file is not too low. The higher the bit rate of the file, the better it will sound. The minimum recommended bitrate is 128kbps for MP3s and 96kbps for WMAs.
Troubleshooting
♦ Try lowering the volume of the player.
- Ensure that the headphones are attached securely to the player.
The player will not play my music file.
◆ Ensure that the file is in a compatible format.
The file may be copy-protected and you no longer have authorization to play this file. If you feel this is in error, please contact the service from which you downloaded the file.
The LCD characters are corrupted or something is wrong with the display.
◆ Ensure that the correct menu language has been set.
Reset the player (use a paper clip to press the Reset button on the rear of the player) and try again.
The player has malfunctioned.
Reset the player (use a paper clip to press the Reset button on the rear of the player) and try again.
Try updating the player's firmware. Please refer to the Firmware Upgrades section of this manual for instructions.
Specifications
| Display Type 3.5” Full-Color | TFT @ 320x240 |
| Memory SD or MMC memory | cards (2GB max)SDHC memory cards (32GB max) |
| Audio Format Support MP3, | WMA |
| Photo Format Support JPEG(baseline) | |
| PC Interface USB 2.0 | |
| Plug and Play Support Windows | 2000/XP or newerMac OS X |
| Audio Output 3.5mm Stereo | (Headphone) |
| Power Supply Rechargeable | Lithium-Polymer BatteryUSB Charge |
| Unit Dimensions 4.33” x 3.82” x 2.28” (WHD) | |
Specifications and manual are subject to change without notice.
Notes
Notes
Notes
Coby Electronics Corporation
1991 Marcus Ave, Suite 301 Lake Success, NY 11042
www.cobyusa.com www.ecoby.com
Coby is a registered trademark of Coby Electronics Corporation.
Printed in China.
- Instruction Manual
- Precautions
- For Customer Use:
- Note:
- FCC Statement:
- Important Safety Instructions
- Table of Contents
- PRECAUTIONS 2
- IMPORTANT SAFETY INSTRUCTIONS ....5
- TABLE OF CONTENTS ......8
- PACKAGE CONTENTS ......10
- FEATURES 11
- GETTING STARTED 12
- MAIN MENU 16
- PHOTO MODE ....17
- MUSIC MODE 21
- CALENDAR MODE....24
- FILE MDOE ......27
- SETUP MODE ....28
- USB CONNECTIONS ......33
- Package Contents
- Features
- Getting Started
- Controls at a Glance
- Installing a Memory Card
- Connecting Power to your Photo Frame
- Turning Your Photo Frame On/Off
- Main Menu
- Photo Mode
- Photo Browser Controls
- Photo Viewer Controls
- Photo Viewer Options
- (Rotate)
- Zoom In
- Information
- (Background Music)
- (Copy)
- (Delete)
- (Move)
- (Slide Show)
- (Exit)
- Music Mode
- Enter Music mode from the Main menu to play your MP3 or WMA music files.
- Music Player Controls
- Music Player Options
- Calendar Mode
- Enter Calendar mode from the Main menu to view a perpetual calendar, internal time, and the temperature.
- Calendar
- Clock
- File Mode
- Explorer Controls
- Setting Mode
- Enter the Setting mode to set your album's system options.
- Alarm Function
- USB Connections
- Connecting to a Computer
- Transferring Files
- Microsoft Windows
- Macintosh OS X
- Disconnecting from a Computer
- Safely Remove Hardware:
- Firmware Upgrades
- Troubleshooting
- The player does not turn on.
- The buttons do not work.
- I cannot transfer files to the player.
- There is no sound during playback.
- The sound quality of the music is poor.
- The player will not play my music file.
- The LCD characters are corrupted or something is wrong with the display.
- The player has malfunctioned.
- Specifications
- Notes
- Coby Electronics Corporation
Brand : COBY
Model : DP356
Category : Digital photo frame