
HDOCKS300 - USB Docking Station Hamlet - Free user manual and instructions
Find the device manual for free HDOCKS300 Hamlet in PDF.


| Product Type | USB 3.0 Docking Station |
| Model | HDOCKS300 |
| Brand | Hamlet |
| Host Interface | USB 3.0 (backward compatible with USB 2.0) |
| Video Output | HDMI (female) and DVI-I (female) – supports dual display up to 2048x1152 each |
| Video Resolutions | Up to 2048x1152 (60Hz, 16/32 bit color) |
| Audio | 2.1 channel via 3.5mm stereo mini-jack (headphone/speaker out and microphone in) |
| Ethernet | Gigabit Ethernet (10/100/1000 Mbps) via RJ-45 |
| USB Ports | 2x USB 3.0 (front, one with BC 1.2 fast charging), 4x USB 2.0 (rear) |
| Additional Ports | USB 3.0 Type B upstream, DC power jack |
| Power Adapter | Input: AC 100-240V, Output: DC 5V/4A |
| Power Consumption | Operating: 14.43W, Suspend: 1.95W |
| Weight | Approx. 365 g |
| Dimensions (approx.) | Not specified; typical docking station size |
| Housing Material | ABS plastic |
| Operating Temperature | 0°C to 40°C |
| Storage Temperature | -20°C to 70°C |
| System Requirements | 2.0 GHz dual core CPU, 4GB RAM, USB port, 30MB free disk; Windows 7+, Mac OS 10.6+ |
| Package Contents | Docking station, USB 3.0 cable, DVI-VGA adapter, external power adapter, driver CD, quick guide, stand |
| Driver Installation | Install driver before connecting device; download latest from hamletcom.com or displaylink.com |
| Compliance | CE, RoHS, WEEE, EMC 2014/30/EU, LVD 2014/35/EU |
| Warranty | Refer to manufacturer or retailer |
Frequently Asked Questions - HDOCKS300 Hamlet
User questions about HDOCKS300 Hamlet
0 question about this device. Answer the ones you know or ask your own.
Ask a new question about this device
Download the instructions for your USB Docking Station in PDF format for free! Find your manual HDOCKS300 - Hamlet and take your electronic device back in hand. On this page are published all the documents necessary for the use of your device. HDOCKS300 by Hamlet.
USER MANUAL HDOCKS300 Hamlet
USB 3.0 Docking Station
Dual Display DVI+HDMI - 6 PORT USB HUB - LAN - AUDIO
User Manual
HDOCKS300
Index
- INTRODUCTION....5
- PRODUCT OVERVIEW 6
2.1 PORTS AND CONNECTORS 6
- DRIVER INSTALLATION .... 7
3.1 WINDOWS....7
3.2 MAC OS 8
- DOCKING STATION CONNECTION.... 10
- VERIFYING THE INSTALLATION.... 11
5.1 WINDOWS....11
5.2 MAC OS 12
- DISPLAY CONFIGURATION ON WINDOWS.... 13
6.1 MULTI-MONITOR CONFIGURATION....14 - DISPLAY CONFIGURATION ON MAC OS....17
- AUDIO CONFIGURATION ...... 19
8.1 WINDOWS....19
8.2 MAC OS 20
- UNINSTALL THE DRIVER 21
9.1 WINDOWS....21
9.2 MAC OS 22
- SPECIFICATIONS 23
10.1 SUPPORTED RESOLUTIONS....24
Dear Customer,
thanks for choosing a Hamlet product. Please carefully follow the instructions for its use and maintenance and, once this item has run its life span, we kindly ask You to dispose of it in an environmentally friendly way, by putting it in the separate bins for electrical/electronic waste, or to bring it back to your retailer who will collect it for free.

WEEE Information (For European Union member users)
According to the WEEE (Waste Electrical and Electronic Equipment) Directive, do not dispose of this product as household waste or commercial waste. Waste electrical and electronic equipment should be appropriately collected and recycled as required by practices established for your country. For information on recycling of this product, please contact your local authorities, your household waste disposal service or the shop where you purchased the product.
We inform You this product is manufactured with materials and components in compliance with RoHS Directives 2011/65/EU & 2015/863/EU, WEEE Directives 2002/96/CE, 2003/108/CE Italian Legislative Decree 2005/151, EMC Directive 2014/30/EU and LVD Directive 2014/35/EU for the following standards:
EN 55032: 2015
CISPR 32: 2012
EN 61000-3-2: 2019
EN 61000-3-3: 2013
EN 55035: 2017
CISPR 35: 2016
IEC 62368-1: 2014 (Second Edition)
CE
The complete CE declaration of conformity of the product can be obtained by contacting Hamlet at info@hamletcom.com.
Visit www.hamletcom.com for complete information on all Hamlet products and to access downloads and technical support.
Imported by: CARECA ITALIA SPA - Scandiano (RE) . Italy.
About this manual
This manual is provided for information purpose only. Contents, specifications and appearance of the product are indicative and may change without notice.
Trademarks
All trademarks and company names mentioned in this manual are used for description purpose only and remain property of their respective owners.
Safety Instructions
Always read the safety instructions carefully.
- Keep this User's Manual for future reference
- Keep this equipment away from humidity
If any of the following situations arises, get the equipment checked by a service technician.
- The equipment has been exposed to moisture.
- The equipment has been dropped and damaged.
- The equipment has obvious sign of breakage.
- The equipment has not been working well or you cannot get it to work according to the User's Manual.
1. Introduction
Hamlet USB 3.0 Dual Display Docking Station lets you expand the working area of the screen and the notebook's connectivity by connecting a single cable. HDMI and DVI video outputs with HD support allow you to connect two external displays to extend the computer's desktop.
The two additional USB 3.0 ports on the front provide high-performance connectivity to external hard drives and support fast charging for smartphones and tablets. The four USB 2.0 ports on the back of the device allow you to easily connect peripherals such as mice, keyboards, printers etc. To complete the connectivity of the docking station the Gigabit Ethernet port for connecting to a wired network and to the Internet and the audio connectors for external speakers, or headphones, and microphone. The package includes a DVI to VGA display adapter to connect even previous generation VGA monitors.
Features
- Compatible with USB 3.0/2.0 specification
• Supports USB 3.0 data transfer rate up to 5 Gbps - Dual display video output up to 2048x1152 pixel resolution
• Support DVI and HDMI output
• Support audio 2.1 channel
• Support Gigabit Ethernet
• Support Battery Charging specification revision 1.2
Package Contents
• USB 3.0 Docking Station
- USB 3.0 cable
- Stand for upright use
• DVI-VGA video adapter
- External power adapter
• Utility CD (Driver and User's Manual)
- Quick Installation Guide
System Requirements
• Processor: 2.0 GHz dual core or higher
• RAM: 4GB or greater
• One available USB 2.0 or USB 3.0 (recommended) port
• 30 MB of available disk space
- Operating Systems:
Windows 7 (SP1 or later), Windows 8, Windows 10
Mac OS 10.6 or later
2. Product Overview
2.1 Ports and Connectors
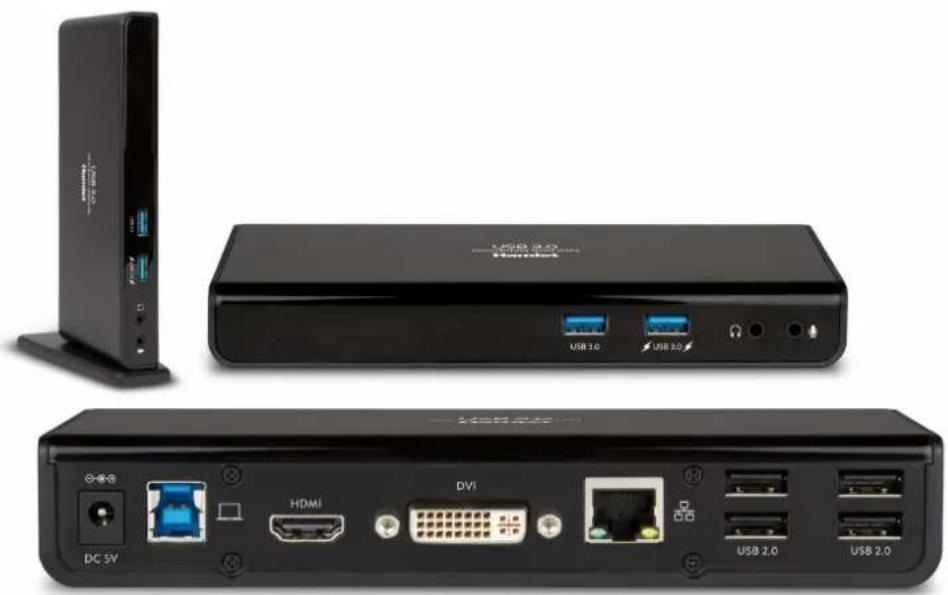
The following illustration shows the location and description of the ports and connectors on the front and rear panel of the Docking Station.

- Power LED indicator
- USB 3.0 port
- USB 3.0 port with Battery Charging 1.2 support
- Audio output jack for headphone or speaker
- Microphone input jack
- Power jack for power adapter connection
- USB 3.0 Type B upstream port for connection to computer
- HDMI connector
- DVI connector
- Gigabit Ethernet port (RJ-45)
- USB 2.0 ports (x4)
3. Driver Installation
Follow the instructions below to install the driver and connect the Docking Station to your system.
IMPORTANT: Do NOT connect the docking station to a computer before installing the driver.
Before installation, please download the latest drivers available at the following addresses.
www.hamletcom.com/products/hdocks300.aspx?t=download
www.displaylink.com/downloads
Please note that the information and screenshots shown on this user's manual may vary slightly depending on the operating system.
3.1 Windows
- Insert the provided CD into your CD-ROM drive. The AutoPlay dialog box will appear.
- Click Run Setup.exe to execute the installer program.
NOTE:
If the AutoPlay does not start automatically, locate and double-click on the Setup.exe file in the driver CD folder to launch the setup.
If User Account Control dialog box pops up, enter the administrator password and then click Yes to continue.

- Click Install to start the installation.

- Follow the onscreen instructions and click Finish to complete installation.
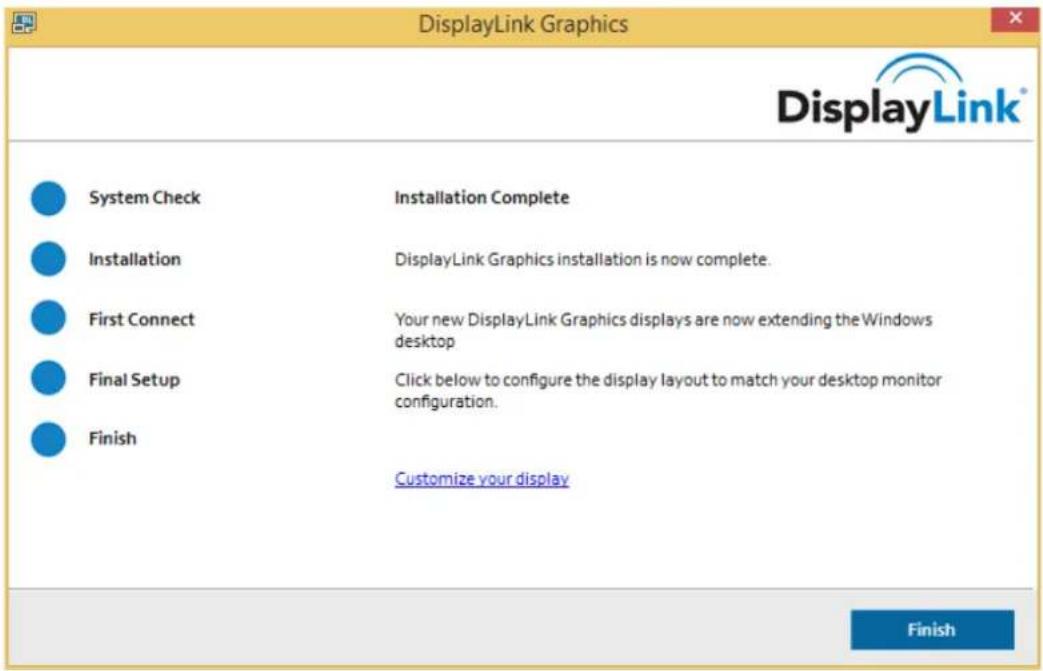
- If required, click Reboot to restart the computer.
- Once the installation is completed, you can connect the Docking Station to the computer. For connection details, refer to the Connection chapter.
- When the operating system detects the Docking Station, a notification message will appear in the system tray.
3.2 Mac OS
- Insert the provided CD into your CD-ROM drive.
- Open the Mac folder and double-click the dmg file to open it.
- Double-click the Installer.pkg file to start the driver installation.

- Click Continue and follow the onscreen instructions to install the driver.

- When the installation process is complete, click Restart to finish installing the software.

- After restarting the computer, you can connect the Docking Station.
For connection details, refer to the Connection chapter.
4. Docking Station Connection
Follow the instructions below to connect the Docking Station to the computer and external devices.
- Connect the Docking Station to the computer using the USB 3.0 cable included.
Plug the USB 3.0 Type B connector into the USB 3.0 upstream port on the back of the Docking Station and the USB 3.0 Type A connector to an available USB port of the computer.

Type A

Type B
-
Plug the power adapter into the power jack of the Docking Station.
-
Connecting HDMI/DVI monitor.
Use a HDMI cable (not included) to connect an HDMI monitor to the HDMI port.
Use a DVI cable (not included) to connect a DVI monitor to the DVI port.
NOTE: You can also use the included DVI-VGA adapter to connect a VGA monitor to the DVI port of the Docking Station.
DVI-VGA ADAPTER
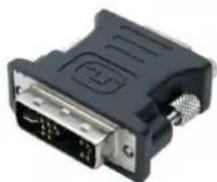
DVI Port

VGA Port
-
Plug an Ethernet cable to the RJ-45 port on the Docking Station to connect to your network hub, switch or router.
-
Connect your USB devices to the USB 3.0 ports on the front side or to the USB 2.0 ports on the back side of the Docking Station.
-
Connect speaker/headphone and microphone.
Insert the speaker/headphone jack into the headphone socket on the front of the Docking Station.
Insert the microphone jack into the microphone socket on the front of the Docking Station.
5. Verifying the Installation
To verify the driver installation, follow the instructions below.
5.1 Windows
In Windows operating system, you can check the driver in the Device Manager.
The USB 3.0 Dual Video Dock is listed under the USB Display Adapters item. The screenshot picture below is from Windows 8.

NOTE:
If you cannot find the driver in the list, the driver may not be properly installed.
In this case, we recommend to uninstall the driver, unplug the Docking Station and repeat the installation procedure.
5.2 Mac OS
To verify the correct driver installation in Mac operating system, follow the steps below.
- Click on the Apple menu in the upper-left corner of your screen and choose About This Mac.
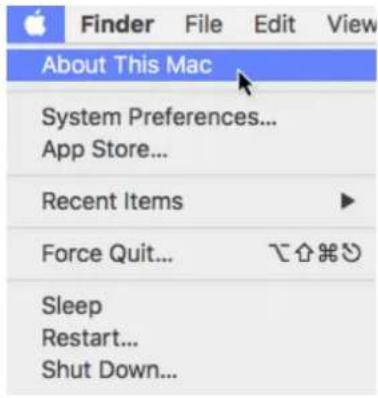
- In the screen that appears, click More info... or System Report... depending on the version of your operating system.

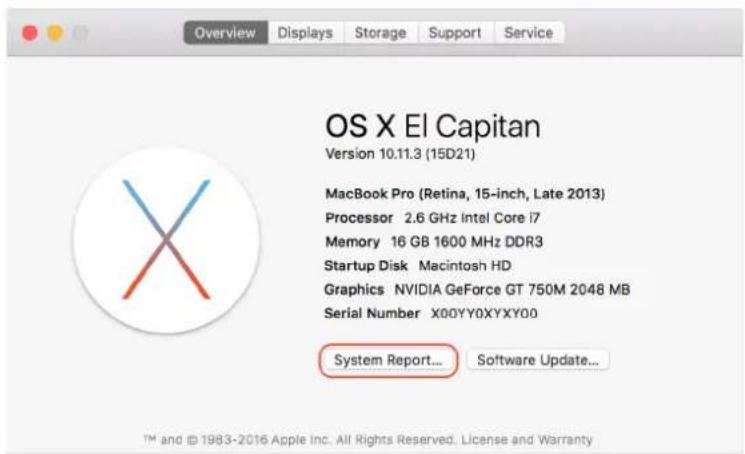
- In the Software Overview, the DisplayLinkDriver is listed under Extensions item.
| Printers SAS SATA/SATA Expr... SPI Storage Thunderbolt USB Network Firewall Locations Volumes WWAN Wi-Fi Software Accessibility Applications Components Developer Disabled Software Extensions Fonts Frameworks | Extension Name CoreStorage CoreStorageFsck CSRBluetoothHostControllerUSBTransport CSRHIDTransitionDriver DisplayLinkDriver Dont Steal Mac OS X DspFuncLib exfat FireWireStorageDeviceSpecifics | Version 517.50.1 517.50.1 4.4.6 4.4.6 3.0.0 (79478) 7.0.0 274.12 1.4 3.7.1 | Last Modified 11/12/15 04:40 11/12/15 04:40 11/12/15 05:01 11/12/15 05:01 09/02/17 10:00 11/12/15 04:41 11/12/15 05:00 11/12/15 04:23 11/12/15 05:29 | Loaded Yes No No Yes Yes No Yes No Yes No Yes Yes Yes Yes Yes Yes Yes Yes Yes Yes Yes Yes Yes Yes Yes Yes Yes Yes Yes Yes Yes Yes Yes Yes Yes Yes Yes Yes Yes Yes Yes Yes Yes Yes Yes Yes Yes Yes Yes Yes Yes Yes Yes Yes Yes Yes Yes Yes Yes Yes Yes Yes Yes Yes Yes Yes Yes Yes Yes Yes Yes Yes Yes Yes Yes Yes Yes Yes Yes Yes Yes Yes Yes Yes Yes Yes Yes Yes Yes Yes Yes Yes Yes Yes Yes Yes Yes Yes Yes Yes Yes Yes Yes Yes Yes Yes Yes Yes Yes YesYesYesYesYesYesYesYesYesYesYesYesYesYesYesYesYesYesYesYesYesYesYesYesYesYesYesYesYesYesYesYesYesYesYesYesYesYesYesYesYesYesYesYesYesYesYesYesYesYesYesYesYesYesYesYesYesYesYesYesYesYesYesYesYesYesYesYesYesYesYesYesYesYesYesYesYesYesYesYesYesYesYesYesYesYesYesYesYesYesYesYesYesYesYesYesYesYesYesYesYesyes |
6. Display Configuration on Windows
When the Docking Station is connected, an icon appears in the taskbar.
This is the icon of the DisplayLink Manager utility that allows configuring the display mode, screen rotation, screen resolution, and physical arrangement of your monitors.
- Click on the utility icon in the Windows System Tray to open the utility settings menu.

- The utility menu provides easy access to several options as described below.
| Screen Resolution | Click to select an available resolution. NOTE: This function is invalid in mirror mode, as the resolution is defined by the resolution of the primary monitor. |
| Screen Rotation | Rotate the screen according to the desired orientation. |
| Extend To | Extend the screen to the desired orientation. |
| Extend | This is the default setting. Extend the computer's desktop to the external display. |
| Set as Main Monitor | Set this screen to the main screen. |
| Notebook Monitor Off | Set the add-on monitor as the main display and turn off the screen of the laptop. NOTE: This function works only when one add-on monitor is connected. This option will also only appear on laptop. |
| Mirror | Duplicates the primary monitor to the add-on display connected to the Docking Station. |
| Off | Turn off the monitor. |
| Fit to TV | Adjust the size of the desktop on a TV display.NOTE: This function works only when one add-on monitor is connected. Besides, this option will also only work in extended mode.The add-on monitor will change to the extended mode if selecting this option while in mirror mode. |
| Audio Setup | Opens the Windows Sound panel to configure audio settings. |
| Video Setup | Opens the Windows Screen Resolution panel to configure display settings. |
6.1 Multi-monitor Configuration
The Docking Station can support up to two external monitors (HDMI and DVI) in addition to the notebook's display.
Once an external monitor is connected, it can be configured to use either Extend mode, Mirror mode or be the Primary display.
To open the Windows display setting, right-click with the mouse anywhere on the Windows Desktop, and select Screen Resolution from the menu.
Alternatively, you can click on the utility icon in the Windows System Tray and then select Video Setup.
Change the appearance of your displays

The arrangement of the displays can be changed by dragging the screens to the correct position, to reflect the physical positions of the displays on your desk.
Extended mode
- Open the Screen Resolution configuration window.
- In the Display drop-down menu, select the preferred monitor.
- In the Multiple displays menu, select Extend these displays.
- Click OK to confirm and exit.
Change the appearance of your displays

- Once the setting is completed, simply drag and drop the application icons or the opened windows to the add-on monitor. However, please note that some applications may not support to be displayed on the extended desktop.
Cursor disappeared
In extended mode operation, if the add-on display is disconnected, the desktop will still be extended to the add-on monitor. In this case, the cursor may not be visible on the main display. If it happens, reconnect the add-on monitor to the adapter and move the mouse cursor on the primary monitor.
Video playback in extended mode
If the quality of video or DVD playback is poor or slow in extended mode, please playback the video or DVD on the primary monitor instead of the external monitor.
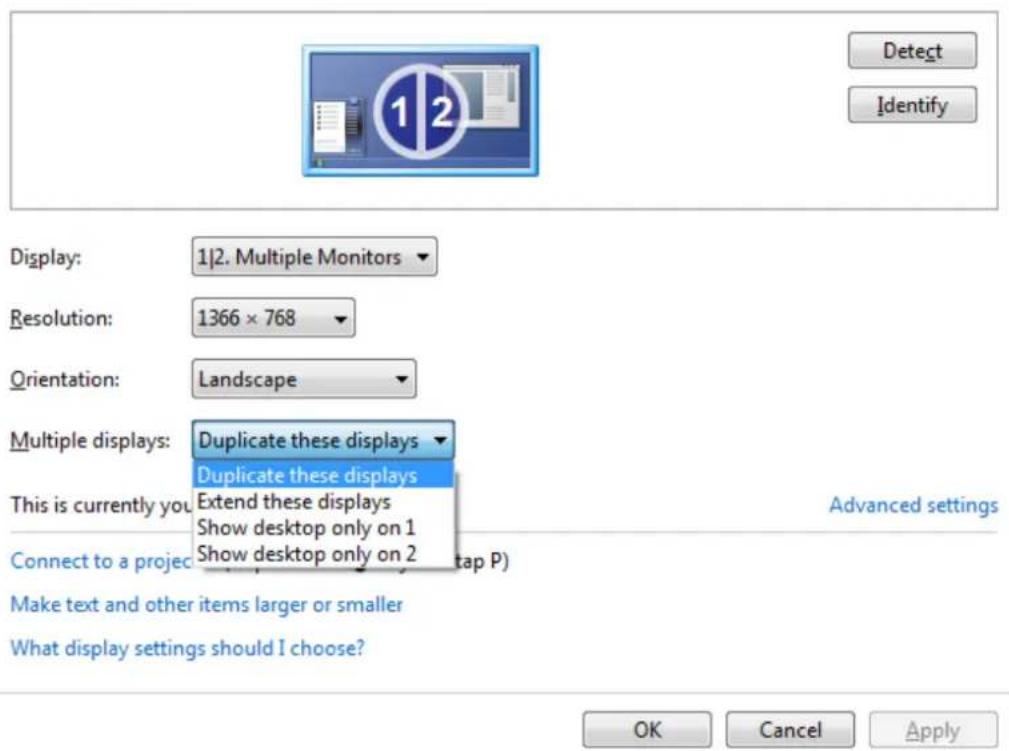
Mirror mode
- Open the Screen Resolution configuration window.
- In the Display drop-down menu, select the preferred monitor.
- In the Multiple displays menu, select Duplicate these displays.
- Click OK to confirm and exit.
Change the appearance of your display
Set the primary monitor
- Open the Screen Resolution configuration window.
- In the Display drop-down menu, select the preferred monitor.
- Check the box Make this my main display.
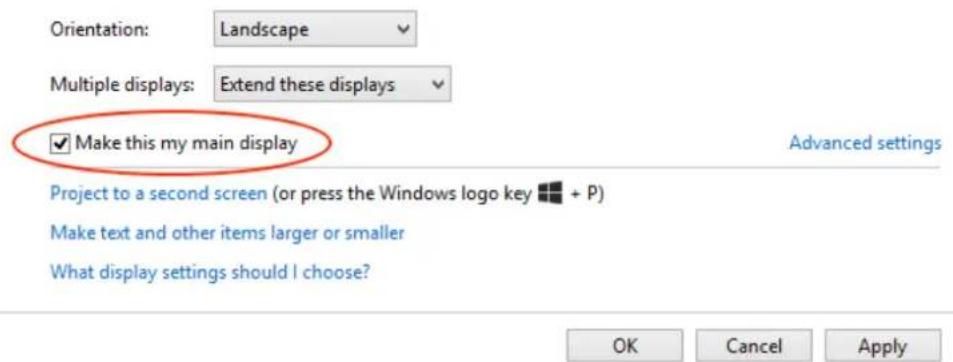
- Click OK to confirm and exit.
7. Display Configuration on Mac OS
To configure the settings of a display attached to the computer through the Docking Station, proceed as described in below steps.
Extended mode
- Click on the Apple menu and choose System Preferences.
- In the System Preferences panel, click on Displays icon.

- Click on the Arrangement tab to view and configure the displays connected to your Mac.

- To use the external monitor in extended mode simply make sure that the Mirror Displays checkbox isn't selected.
The blue boxes in the Arrangement panel represent all displays connected to your computer.
To change the location of a display, click and drag its blue box to where you want it.
For example, you might have an external display to the left of your laptop on your desktop. If its blue box is at the right side, you can drag it to the left to match the real location.
The white bar at the top of the blue box identifies your primary display. The primary display is where your desktop icons and open app windows first appear. To make a different display your primary display, drag the white bar to the box that represents that display.
Mirror mode
- Click on the Apple menu and choose System Preferences.
- In the System Preferences panel, click on Displays icon then click Arrangement tab.
- In the lower-left corner of the Arrangement panel, select Mirror Displays checkbox.

In video mirroring mode, both displays show the same information. The built-in display of the notebook is simply duplicated on the external monitor.
8. Audio Configuration
The following instructions describe how to configure the audio settings in order to setup the Docking Station as the default audio output.
8.1 Windows
- The audio settings can be opened from the utility icon menu by choosing the Audio Setup option.

- Click on the DisplayLink Audio device in the Sound panel.

- Click Set Default button to make this device the default audio output.
- Click OK to apply the changes and close the window.
It may be necessary to restart applications to force them to use the new default audio output.
8.2 Mac OS
- Click on the Apple menu in the upper-left of the screen and choose System Preferences.
- In the System Preferences panel, click on Sound icon.
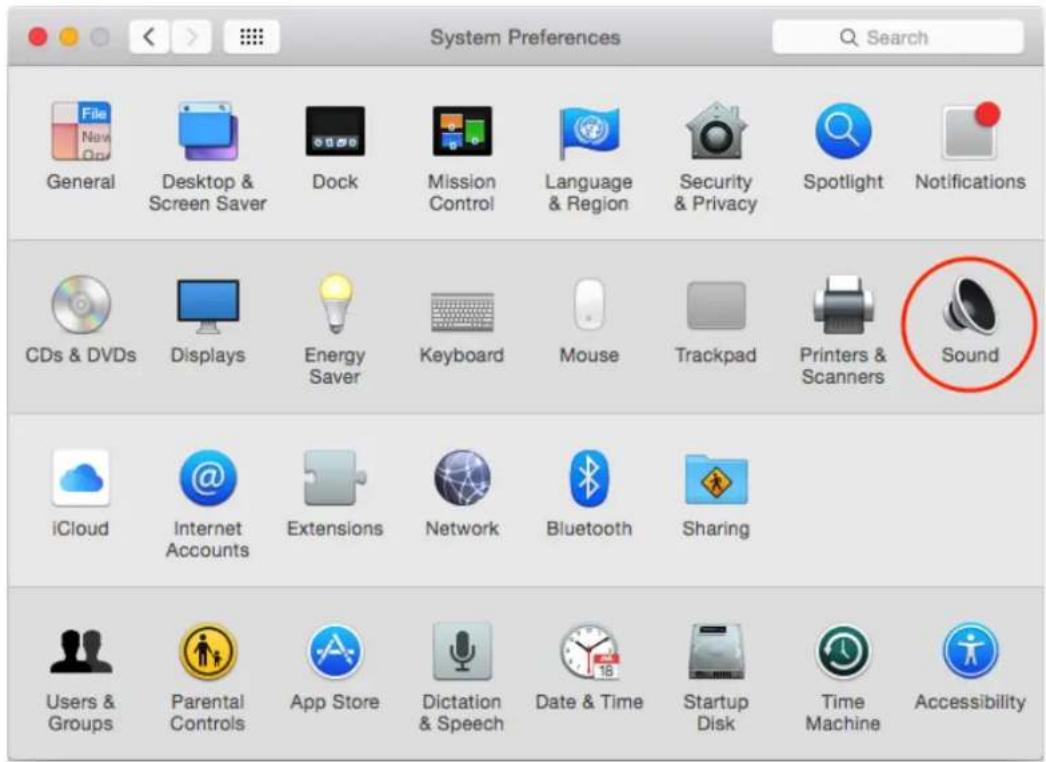
- Click on the Output tab and select DisplayLink Audio (USB) device for sound output.

9. Uninstall the Driver
Follow the instruction below to uninstall the driver from your computer.
9.1 Windows
- Open the Control Panel and click on Uninstall a program under the Programs category.
- Select the DisplayLink driver from the list and click Uninstall to remove the software.

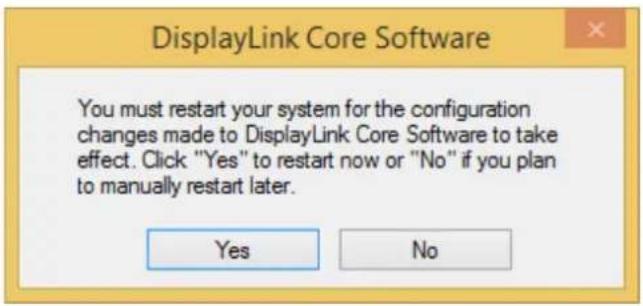
- Click Yes to confirm the uninstallation.

- Click Yes to restart your computer.
9.2 Mac OS
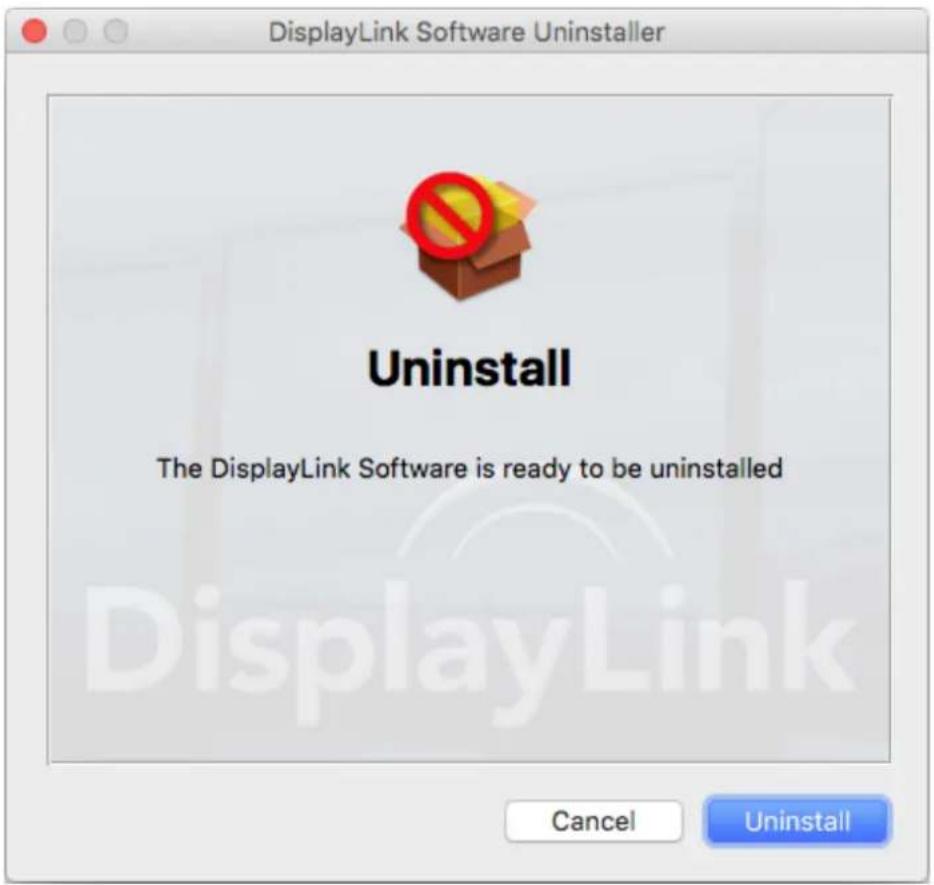
- Open Applications > DisplayLink folder and double-click on DisplayLink Software Uninstaller program icon.

DisplayLink
Software Uninstaller
- Click Uninstall to proceed with the uninstallation.
10. Specifications
| Host Interface | USB 3.0 | |
| Connectors | Video output | HDMI ConnectorDVI Female Connector |
| Host upstream link | USB B Type Female Connector | |
| HUB downstream link | USB A Type Female Connector | |
| Audio Port | 3.5 mm stereo mini-jack 2.1ch | |
| Ethernet Port | RJ-45 Connector | |
| Power | DC power jack | |
| Video Resolution | HDMI | 2048 x 1152 |
| DVI | 2048 x 1152 | |
| Supported Colors | 16 and 32 Bit | |
| Audio | 2.1 Channels | |
| Ethernet | 10/100/1000 Mbps | |
| Power | Power Adapter | Input: AC 100-240VOutput: DC 5V/4A |
| Power Consumption | Operating Power: 14.43WSuspend Mode Power: 1.95W | |
| Physical Properties | Housing Material | ABS (Plastic) |
| Weight | 365 g approx. | |
| Working Environment | Operation Temperature | 0 ~ 40 °C |
| Storage Temperature | -20 ~ 70 °C | |
Specifications and appearance are subject to change without notice.
10.1 Supported Resolutions
Before adjusting the display resolution, refer to the table below for the supported resolutions.
| Resolution (Pixels) | Refresh rate 16 bit (Hz) | Refresh Rate 32 bit (Hz) |
| 640x480 | 60 72 75 85 | 60 72 75 85 |
| 800x600 | 56 60 72 75 | 56 60 72 75 85 |
| 1024x768 | 60 70 75 85 | 60 70 75 85 |
| 1280x720 | 60 | 60 |
| 1280x768 | 60 70 75 85 | 60 70 75 85 |
| 1280x800 | 60 | 60 |
| 1280x1024 | 60 75 85 | 60 75 |
| 1366x768 | 60 | 60 |
| 1400x1050 | 60 75 85 | 60 75 85 |
| 1600x1200 | 60 | 60 |
| 1680x1050 | 60 | 60 |
| 1920x1080 | 60 | 60 |
| 1920x1200 | 60 | 60 |
| 2048x1152 | 60 | 60 |
Note that interlaced modes and reduced blanking modes are not supported.
MAN.rev.2020-12
- USB 3.0 DOCKING STATION
- INDEX
- WEEE INFORMATION (FOR EUROPEAN UNION MEMBER USERS)
- CE
- ABOUT THIS MANUAL
- TRADEMARKS
- SAFETY INSTRUCTIONS
- INTRODUCTION
- FEATURES
- PACKAGE CONTENTS
- SYSTEM REQUIREMENTS
- PRODUCT OVERVIEW
- 2.1 PORTS AND CONNECTORS
- DRIVER INSTALLATION
- 3.1 WINDOWS
- NOTE
- 3.2 MAC OS
- DOCKING STATION CONNECTION
- VERIFYING THE INSTALLATION
- 5.1 WINDOWS
- 5.2 MAC OS
- DISPLAY CONFIGURATION ON WINDOWS
- 6.1 MULTI-MONITOR CONFIGURATION
- EXTENDED MODE
- CURSOR DISAPPEARED
- VIDEO PLAYBACK IN EXTENDED MODE
- MIRROR MODE
- SET THE PRIMARY MONITOR
- DISPLAY CONFIGURATION ON MAC OS
- AUDIO CONFIGURATION
- 8.1 WINDOWS
- 8.2 MAC OS
- UNINSTALL THE DRIVER
- 9.1 WINDOWS
- 9.2 MAC OS
- SPECIFICATIONS
- 10.1 SUPPORTED RESOLUTIONS
Brand : Hamlet
Model : HDOCKS300
Category : USB Docking Station