Smart Compact Cold + Dry ACPAC205CB - Air conditioner Ausclimate - Free user manual and instructions
Find the device manual for free Smart Compact Cold + Dry ACPAC205CB Ausclimate in PDF.


| Brand | Ausclimate |
| Model | Smart Compact Cold + Dry ACPAC205CB |
| Product Type | Portable Air Conditioner |
| Power Supply | 220-240VAC 50Hz |
| Rated Input Cooling | 780W |
| Cooling Capacity | 2.05kW |
| Refrigerant | R290 / 130g |
| Air Flow | 300 m³/h |
| Modes | Cooling, Dehumidification, Fan, Heating |
| Temperature Range | 16-32°C |
| Timer | 1-24 hours (On/Off) |
| Fan Speeds | High, Low |
| Sleep Mode | Yes (via remote) |
| Child Safety Lock | Yes |
| WiFi Control | Yes (2.4GHz, Ausclimate app) |
| Drainage | Continuous or manual |
| Water Full Indicator | Yes (flashing indicator) |
| Filter | Washable, clean every 2 weeks |
| Minimum Room Area | 7 m² |
| Remote Control | Yes (2 x AAA batteries not included) |
| Warranty | 2 years (domestic use) |
| Accessories Included | Exhaust hose, window kit, remote control |
Frequently Asked Questions - Smart Compact Cold + Dry ACPAC205CB Ausclimate
User questions about Smart Compact Cold + Dry ACPAC205CB Ausclimate
0 question about this device. Answer the ones you know or ask your own.
Ask a new question about this device
Download the instructions for your Air conditioner in PDF format for free! Find your manual Smart Compact Cold + Dry ACPAC205CB - Ausclimate and take your electronic device back in hand. On this page are published all the documents necessary for the use of your device. Smart Compact Cold + Dry ACPAC205CB by Ausclimate.
USER MANUAL Smart Compact Cold + Dry ACPAC205CB Ausclimate
Smart Compact Cold + Dry Portable Air Conditioner User Manual
natural_image
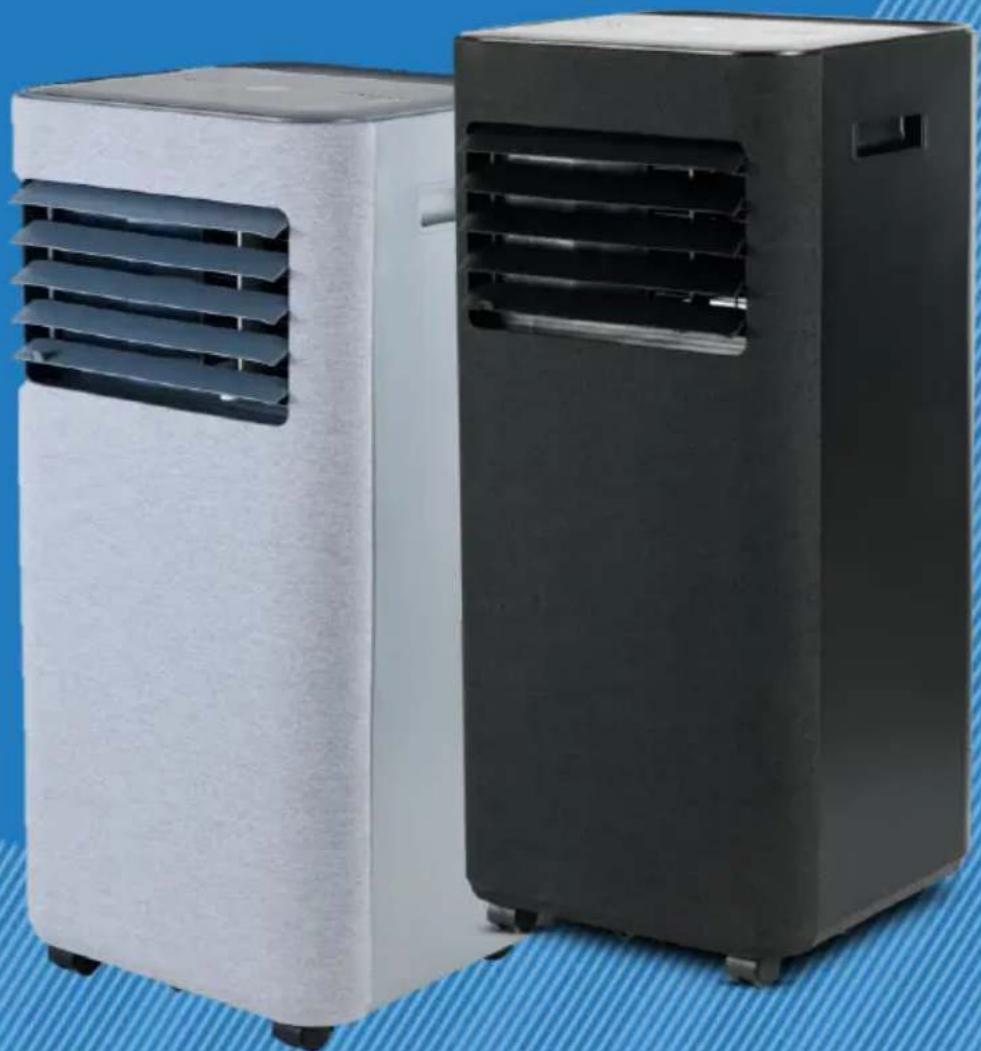
Two compact air conditioners, one white and one black, displayed against a blue striped background (no text or symbols visible)General Care and Safety Guide
Thank you for choosing this Ausclimate product. This Ausclimate appliance has been designed and manufactured to high standards of engineering and with proper use and care, as described in this leaflet, will give you years of useful service. Please read these instructions carefully and keep them for future reference.
- This appliance is not intended for use by persons (including children) with reduced physical, sensory or mental capabilities, or lack of experience and knowledge, unless they have been given supervision or instruction concerning use of the appliance by a person responsible for their safety.
- Children should be supervised to ensure that they do not play with the appliance.
- If the supply cord is damaged, it must be replaced by the manufacturer, its service agent or similarly qualified persons in order to avoid a hazard.
- Ensure that the fan is switched off from the supply mains before removing the guard.
- Use only the voltage specified on the rating plate of the appliance.
- Keep all objects at least 1 Metre from the front, sides and rear of the appliance
- This appliance is intended for household use only and not for commercial or industrial use.
- Use this appliance only as described in this manual. Any other use is not recommended by the manufacturer and may cause fire, electric shock or injury.
- The common cause of overheating is deposits of dust or fluff in the appliance. Ensure these deposits are removed regularly by unplugging the appliance and vacuum cleaning the air vents and grills.
- Always unplug appliance when not in use.
- When the appliance has been unpacked, check it for transport damage and ensure all parts have been delivered. If parts are missing or the appliance has been damaged, contact the Ausclimate Customer Services Team.
- If your appliance does not work, or is not working properly, contact the place of purchase. Repair work on the appliance by unqualified persons can cause serious risk to the user.
- Ensure hands are dry before handling the plug or the main unit.
- Carry out regular checks of the supply cord to ensure no damage is evident.
- Ensure that the cord is fully extended (not coiled) while in use.
- Avoid contact with the moving parts. Keep hands, hair, clothing, away from blade of the fan during operation to reduce the risk of injury to person and/or damage to the unit.
- Switch off and use handles provided when moving.
- It is recommended that this fan is plugged directly into the wall socket.
- A correctly specified, undamaged extension cord may be used with this fan provided it is used in a safe manner.
- Never place appliance close to radiant heat source.
- Never operate in areas where petrol, paint or other flammable liquids are used or stored.
General Care and Safety Guide
- Never use the appliance to dry clothes.
- Never insert or allow foreign objects to enter any ventilation or exhaust opening, as this may cause an electric shock, fire or damage to the appliance.
- Never use abrasive cleaning products on this appliance. Clean with a damp cloth (not wet) rinsed in hot soapy water only. Always remove plug from the mains supply before cleaning.
- Never connect the appliance to mains supply until completely assembled and adjusted.
- Never remove plug from power socket until the appliance has been switched off.
- Never remove plug from power socket by pulling cord – always grip plug.
- Never twist, kink or wrap the cord around the appliance, as this may cause the insulation to weaken and split. Always ensure that all cord has been removed from any cord storage area and is unrolled before use.
- Never use this appliance in the immediate surrounds of a bath, a shower, or a swimming pool or other liquids. The appliance must not be immersed in any liquids.
- Due to the risk of injury, never use this appliance for any purpose other than its intended use. This appliance is intended for use in household and similar applications such as staff kitchen areas in shops, offices and other working environments; farmhouses, by clients in hotels, motels, bed and breakfast type environments and other residential type environments
- Never use this appliance outdoors.
- Never operate the appliance with a damaged cord or plug, after it malfunctions, or if it has been damaged in any manner. Have the appliance checked and repaired by a qualified electrician if repair is necessary.
- Never place the unit in wardrobes or other enclosed spaces as this may cause fire hazards.
General Care and Safety Guide
ausclimate
PORTABLE AIR CONDITIONER
MODEL: ACPAC205SG
SUPPLY: 220-240VAC 50Hz
RATED INPUT COOLING: 780W
COOLING CAPACITY: 2.05kW
REFRIGERANT: R290 / 130g
PERMISSIBLE EXCESSIVE Discharge 3.2MPa
OPERATING PRESSURE: Suction 0.7MPa
MAX ALLOWABLE PRESSURE: 3.2MPa
AIR FLOW: 300m³/h
ausclimate
PORTABLE AIR CONDITIONER
MODEL: ACPAC205CB
SUPPLY: 220-240VAC 50Hz
RATED INPUT COOLING: 780W
COOLING CAPACITY: 2.05kW
REFRIGERANT: R290 / 130g
PERMISSIBLE EXCESSIVE Discharge 3.2MPa
OPERATING PRESSURE: Suction 0.7MPa
MAX ALLOWABLE PRESSURE: 3.2MPa
AIR FLOW: 300m³/h

Appliance is filled with flammable gas R290.

Before using the appliance, read the manual.

Before installing the appliance, read the installation manual.
Any repairs required, contact the nearest authorised Service Centre and strictly follow the manufacturer's instruction only.
WARNING: Appliance shall be installed, operated and stored in a room with a floor area larger than 7m^2 .
Do not use any means to accelerate the defrosting process or to clean, other than those recommended by the manufacturer.
The appliance shall be stored in a room without continuously operating ignition sources. (example: open flames, an operating gas appliance or an operating electric heater).
Do not pierce or burn.
Be aware that refrigerants do not have any odour.
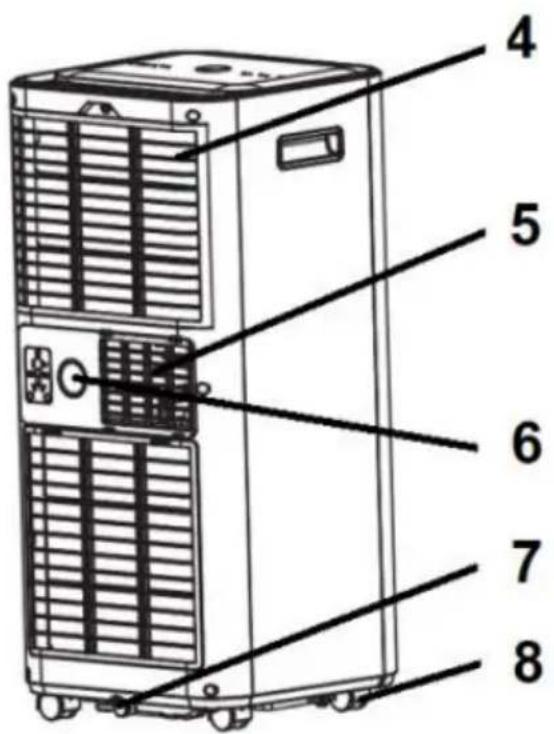
Components
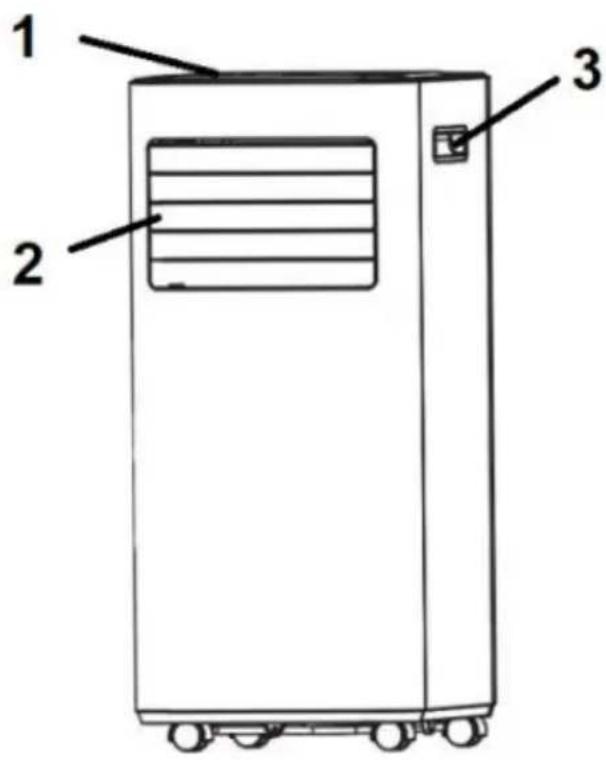
- Control Panel
- Air Outlet / Adjustable Louvre
- Handle
-
Air Inlet / Air Filter
-
Exhaust Outlet
- Continuous Drainage Outlet
- Drainage Hole
- Castor Wheels
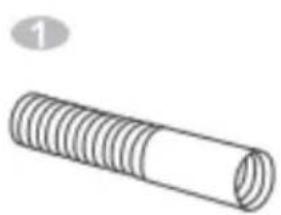
natural_image
Simple line drawing of a threaded bolt or pipe (no text or symbols)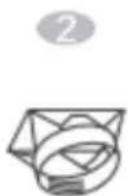
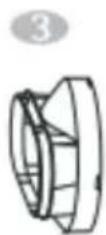


- Exhaust Hose
- Hose Connector
-
Flat Connector
-
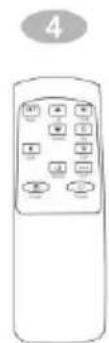
Remote Control
- Window Kit
Installation
NOTE: The air-conditioner should be installed on a flat surface with at least 300mm clearance all around, including from the top of the unit as it is important that the air outlet is not blocked. Power supply must be nearby.
WARNING: THIS APPLIANCE MUST BE INSTALLED, OPERATED AND STORED IN A ROOM WITH A FLOOR AREA LARGER THAN 7 ~m^2
Do not install and use the appliance in the bathroom or other humid environments.
Attach the Exhaust Hose
Step 1: Connect the hose connector to one end of the exhaust hose.
Step 2: Connect the windows kit adapter to the other end of the exhaust hose.
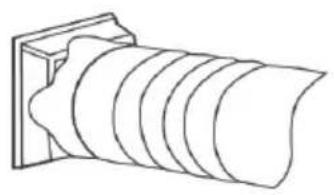
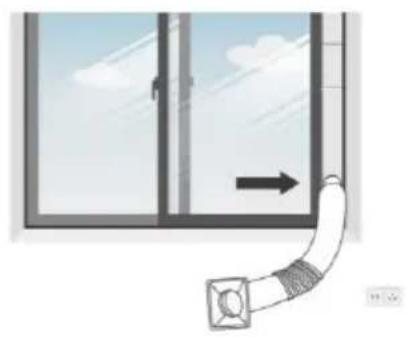
Step 3: Extend the adjustable window kit the length of your window. Connect the exhaust hose to the window kit.
natural_image
Line drawing of a cylindrical object with concentric grooves, mounted on a rectangular base (no text or symbols)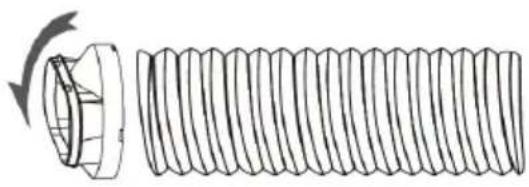
natural_image
Diagram of a threaded bolt with a flanged end and a circular head, showing internal threading (no text or symbols)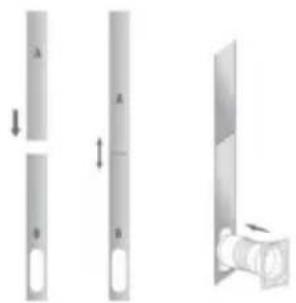
natural_image
Diagram showing three vertical cylindrical objects labeled A, B, and a connected cylindrical object with an arrow indicating direction (no text or symbols present)Step 4: Close your window to secure the kit in place. It needs to hold the windows kit firmly in place, secure the window kit with duct tape if required. It is recommended that the gap between the adapter and the sides of the window should be sealed off for maximum efficiency.
Step 5: Attach the hose connector to the exhaust air outlet of unit.
Step 6: Adjusting the length of the flexible exhaust hose, and avoid bends in the hose. Then place AC near an electrical outlet. Adjust the louver at the air outlet, and then switch on the unit.
natural_image
Diagram showing a pipe with a valve inserted into a window, with an arrow indicating direction (no text or symbols)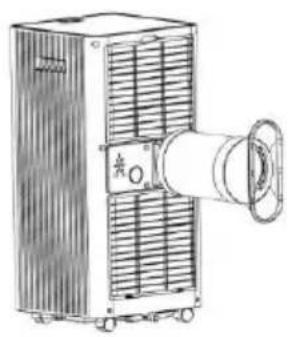
natural_image
Technical line drawing of a mechanical device with ventilation grilles and a cylindrical component (no text or symbols)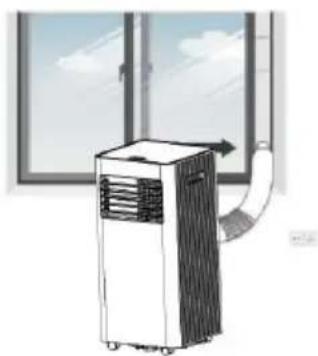
natural_image
Illustration of a portable air conditioner unit with airflow direction indicated by an arrow, next to a window (no text or symbols)Control Panel and Remote Control
This Portable Air Conditioner is designed to be operated in cooling mode, fan mode or dehumidifying mode. When switching between these functions keep an interval of at least 3 minutes between each ON/OFF.
Allow the refrigerant to settle by leaving the appliance to stand for two hours after transport or after the unit has been on its side.
Ensure the unit is in the OFF setting before connecting it to the mains supply.
When the appliance is powered on for the first time, it will beep, and then the unit will be in standby.

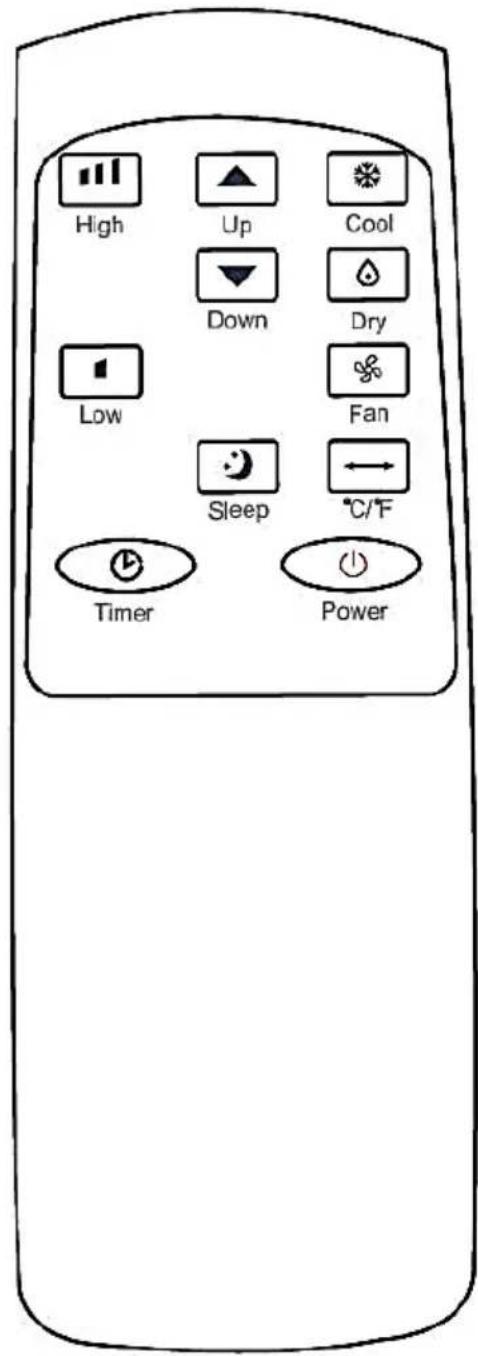
Power Button
Press the button to turn the unit ON and OFF.
Mode Button
Press the button to switch between Cooling → Dehumidification → Fan → Heating modes. The corresponding indicator lights up.
Fan Speed Button
In cooling, and fan mode, press this key to select high, or low speed.
This function is not available in SLEEP mode and DEHUMIDIFYING mode.
Temperature Setting
To set the desired temperature, press UP or DOWN button. The range is 16-32°C.
This function is not available in fan or dehumidification mode.
Simultaneously press both buttons to switch between Celsius (°C) and Fahrenheit (°F).
Timer Setting
The timer can be set to turn the unit ON or OFF from 1-24 hours.
To set the timer to turn the unit OFF, press the TIMER button then use the UP & DOWN buttons to set the desired number of hours before the unit turns OFF.
To set the timer to turn the unit ON, when the device is in standby, press the TIMER button then use the UP & DOWN buttons to set the desired number of hours before the unit turns ON.
Sleep Mode
This function can only be accessed from the remote control. In cooling mode, the fan speed is set to LOW and cannot be adjusted. The SLEEP mode can be cancelled by pressing the SLEEP button again. In Cooling sleep mode, the temperature will rise 1°C after one hour and rise 1°C after another one hour, and then stay the same.
Note: You cannot not use sleep mode in the Dehumidifying or Fan modes.
Child Safety Lock
Press and hold the lock button for 3 seconds to activate / deactivate the child safety lock.
Control Panel and Remote Control
Remote Control
The remote control has the same functions as the unit control panel.
The remote control works with 2 x AAA batteries, which are not included.
WiFi – Downloading and Setting Up APP
This APP is supported only on 2.4GHz Wi-Fi channels. Please ensure your phone is 2.4GHz capable
Note this device will only work within your home WIFI system. This does not operate on 3G or 4G internet connections. You will need a connection to your home Wi-Fi.

Download Ausclimate mobile APP
- Open the APP Store or Google Play on your mobile phone.
- Open 'Search' and enter 'Ausclimate'
- Click 'GET' and begin to download and install.
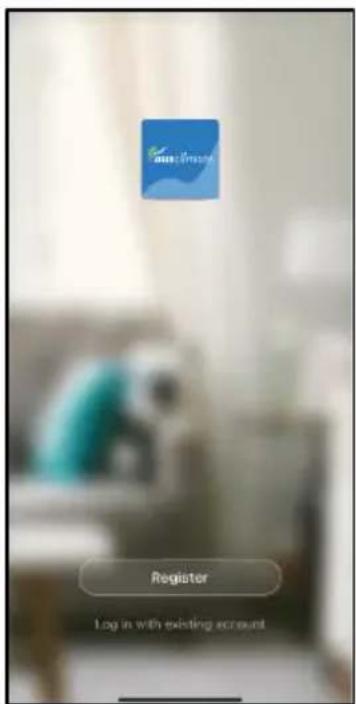
Once downloaded to your phone open the APP
- Tap REGISTER near the bottom of the screen.
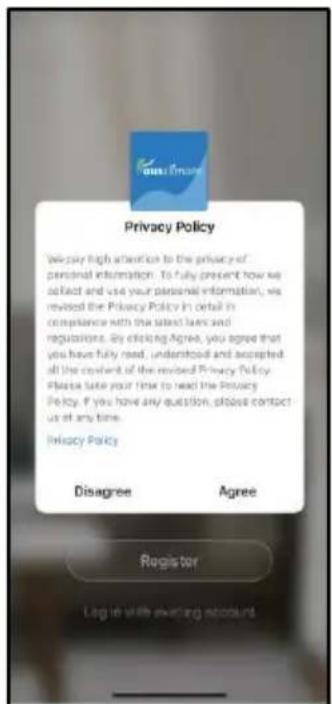
- Read and agree to the Privacy Policy.
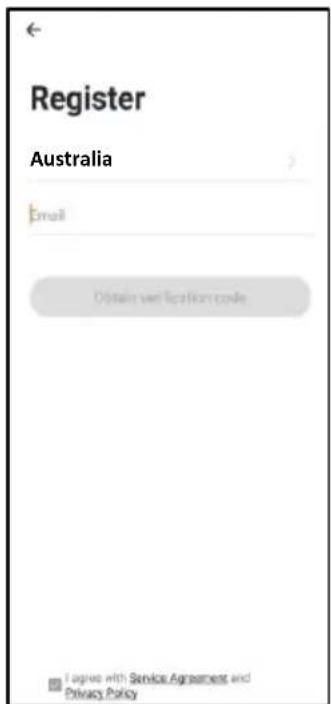
- Add your email address.
- Tap 'Obtain verification code'
You will then receive an email with a verification code.
- Enter the verification code from your email.
- Create a password.
- Then tap confirm.
If you haven't received a verification code via email, tap the resend button and when the verification code is received follow above steps.
Your APP is now registered and ready for pairing to your device.
Pairing APP to Device
The website link below provides details for pairing this appliance with the Ausclimate App. Either scan the QR code below or enter the website into your browser.

Need Help?
Pairing Mode
To connect to the Ausclimate app, you must ensure that your device is in pairing mode, which is when the Wi-Fi icon flashes.
If you want to enable Wi-Fi mode, then:
- Put the device on STAND-BY mode (ON at the wall, but the device is OFF)
- Hold the "Timer/Wi-Fi" button for around 3 seconds or until the Wi-Fi icon flashes.
Quick Connection
Turn your phone's Bluetooth ON.
■ Ensure your device is in Pairing Mode (see instructions above)
- Tap the + on the top right corner to navigate to the main device screen.
- Tap 'Auto Scan' – your device will appear. Tap the device and follow the instructions.
■ If Quick Connection does not work, follow the manual via the QR Code above.
Care and Maintenance
As part of the air conditioning process, water is extracted and builds up on the evaporator surface. The water will drop down from evaporator to the bottom of the unit.
For uninterrupted use of your unit, we recommend you attach a permanent drainage hose.
Continuous Drainage
The unit can be operated with permanent drainage, but you need to be able to allow the water to drain outside via gravity.
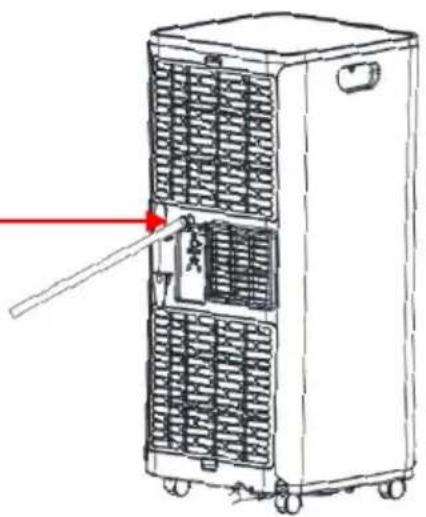
When the appliance is in Cooling or Dehumidify mode, the continuous drainage hose needs to be inserted into the top drain hole. Remove the water plug to allow the hose to be inserted.
natural_image
Line drawing of a multi-tiered industrial machine with ventilation grilles and a red laser pointer (no text or symbols)Water Full Indicator
If for some reason not all the water evaporates, some may stay in the bottom of the unit. It only holds about 0.5L and this can be emptied through the drain at the bottom of the unit.
Manual Drainage
Move the unit carefully, so as not to spill the water in the water pan at the bottom of the body.
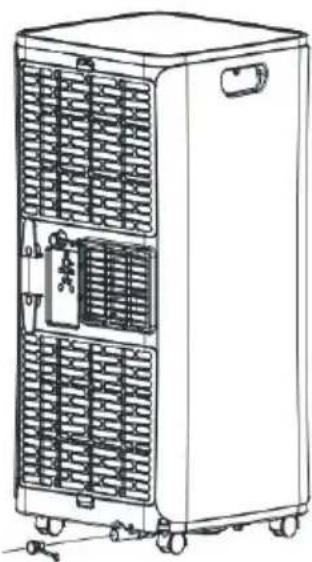
Find a place to drain the water or place a bucket below the water outlet on the back of the unit.
Unscrew the drainage cover and unplug the water plug, the water will automatically flow out. During drainage, the body can be tilted slightly backwards. When the water is discharged, replace the water plug, and retighten the drainage cover.
Allow unit to sit for at least 5 minutes before turning back on.
natural_image
Line drawing of a multi-tiered industrial air conditioner unit with cooling fans and wheels (no text or symbols)Care and Maintenance
CARE AND CLEANING
Cleaning the Air Filter (every 2 weeks)
Dust collects on the filter and restricts the airflow. The restricted airflow reduces the efficiency of the system and if it becomes blocked it can cause damage to the unit.
The air filter requires regular cleaning. The air filter is removable for easy cleaning. Do not operate the unit without an air filter, or the evaporator may be contaminated.
- Press POWER button to switch off the unit and unplug the power cord.
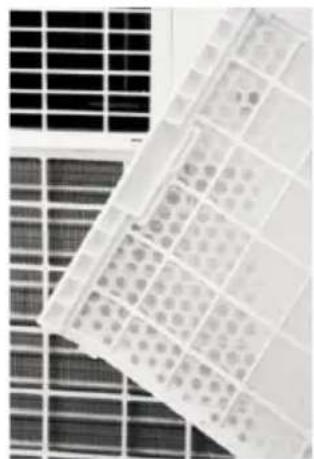
- Remove the filter mesh from the unit.
- Use a vacuum cleaner to suck dust from the filter.
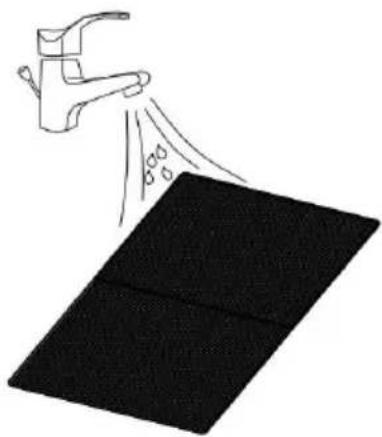
- Turn the filter over and rinse the air filter under running water. Let the water run through the filter in the opposite direction of air flow. Set aside and allow the filter to air dry completely before reinstalling.
natural_image
Close-up of a grid of solar panels with varying patterns and dot textures (no text or symbols visible)Switch off the unit and remove the two air filters.
natural_image
Illustration of a faucet spraying water onto a black rectangular surface (no text or symbols)Rinse the air filter under running water.
NEVER USE UNIT WITHOUT THE AIR FILTER.
The exterior may be cleaned with a soft, dry cloth. If the device is extremely dirty wipe the device with a slightly damp (not wet) cloth. Never spray the device with water.
DO NOT immerse the unit in water and never allow water to enter the motor housing.
DO NOT use harsh chemicals to clean the unit.
Do not attempt to dismantle the Air Conditioner. There are no user serviceable parts. For service or repair, contact an authorised electrical service technician.
STORAGE
To store the unit, remove the plug from the socket. Remove the rubber plug from the drainage hole at the bottom of unit, and connect a drain hose to the lower fixing clip. All the water in the water tank will drain out. Allow the Container and the Air Conditioner to dry completely. Clean the air filter. Refit the rubber plug. Store the device in a dust-free location, preferably covered with a sheet of plastic.
Troubleshooting
| Problems | Reasons | Solutions |
| The air conditioner does not work. | There is no electricity. | Turn it on after connecting it to a socket with electricity. |
| The water-full indicator will flash. | Discharge the water inside. | |
| The ambient temperature is too low or too high | Recommend to use the machine in at the temperature of 7-35 °C (44-95 °F). | |
| In cooling mode, the room temperature is lower than the set temperature. | Change the set temperature. | |
| In dehumidification mode, the ambient temperature is low. | The machine is placed in a room with an ambient temperature of greater than 17°C (62 °F). | |
| The cooling or heating effect is not good | There is direct sunlight. | Pull the Curtain. |
| Doors or windows are open; there are a lot of people; or in cooling mode, there are other sources of heat. | Close doors and windows. | |
| The filter screen is dirty. | Clean or replace the filter screen. | |
| The air inlet or outlet is blocked. | Clear obstructions. | |
| Loud Noise | The air conditioner is not placed on a flat surface. | Put the air conditioner on a flat and hard place (to reduce noise). |
| Compressor does not work. | Frost production starts. | Wait for 3 minutes until the temperature is lowered, and then restart the machine. |
| Overheat protection starts. | ||
| The remote control does not work. | The distance between the machine and the remote control is too far. | Move the remote control closer to the air conditioner, and make sure that the remote control directly faces to the direction of the remote control receiver. |
| The remote control is not aligned with the direction of the remote control receiver. | ||
| Batteries are dead. | Replace batteries. | |
| Displays 'E0'. | Communication faults between main PCB and display PCB. | Check connection or replace it. To clean or replace the temperature sensor. |
| Displays 'E1' | Ambient temperature sensor failure | Check connection or replace it. To clean or replace the temperature sensor. |
| Displays 'E2' | Coil temperature sensor failure. | Check connection or replace it. To clean or replace the temperature sensor. |
| Displays 'Ft' | High water level alarm. | Empty the drain pan by removal the rubber plug. |
PROOF OF PURCHASE
To receive warranty retain receipt as proof of purchase. (Refer to back of booklet).

healthy indoor climate solutions

SCAN HERE FOR HELP
www.ausclimate.com.au www.ausclimate.co.nz
Two Year Warranty
Thank you for purchasing this Ausclimate product. Your product is warranted against faults and manufacture when used in normal domestic use for a period of two years. In non-domestic use Ausclimate limits the voluntary warranty to three months.
Ausclimate undertake to repair or replace this product at no charge if found to be defective due to a manufacturing fault during the warranty period.
This warranty excludes damage caused by misuse, neglect, shipping accident, incorrect installation, or work carried out by anyone other than a qualified electrical service technician.
PLEASE KEEP YOUR RECEIPT AS THIS WILL HELP VERIFY YOUR WARRANTY.
The benefits given to you by this warranty are in addition to other rights and remedies available to you under law in relation to the goods or services to which this warranty relates.
In Australia, our goods come with guarantees that cannot be excluded under the Australian Consumer Law. You are entitled to a replacement or refund for a major failure and compensation for any other reasonably foreseeable loss or damage. You are also entitled to have the goods repaired or replaced if the goods fail to be of acceptable quality and the failure does not amount to a major failure.
In New Zealand this warranty is additional to the conditions and guarantees of the Consumers Guarantee Act (1993).
Ausclimate – New Zealand
CDB Media Ltd.
PO Box 100-707
N.S.M.C
Auckland
Phone 0800 232 633
www.ausclimate.co.nz
Ausclimate – Australia
CDB Goldair Australia Pty
PO Box 574
South Morang
Victoria, 3752
Phone 1800 122 100
www.ausclimate.com.au
Ausclimate Two Year Warranty (IMPORTANT: Please complete and retain this warranty card)
Name
Address
Place Of Purchase Date Of Purchase
Name Of Product Model Number
Attach a copy of the purchase receipt to this warranty card
CDB GROUP
Australia
PO Box 574,
South Morang,
Victoria, 3752
www.ausclimate.com.au
New Zealand
PO Box 100707,
North Shore Mail Centre,
Auckland, 0745
www.ausclimate.co.nz
- Smart Compact Cold + Dry Portable Air Conditioner User Manual
- General Care and Safety Guide
- PORTABLE AIR CONDITIONER
- WARNING: Appliance shall be installed, operated and stored in a room with a floor area larger than 7m2 .
- Components
- Installation
- WARNING: THIS APPLIANCE MUST BE INSTALLED, OPERATED AND STORED IN A ROOM WITH A FLOOR AREA LARGER THAN 7 ~m2
- Attach the Exhaust Hose
- Control Panel and Remote Control
- Power Button
- Mode Button
- Fan Speed Button
- Temperature Setting
- Timer Setting
- Sleep Mode
- Child Safety Lock
- Remote Control
- WiFi – Downloading and Setting Up APP
- Pairing APP to Device
- Pairing Mode
- Quick Connection
- Care and Maintenance
- Continuous Drainage
- Water Full Indicator
- Manual Drainage
- CARE AND CLEANING
- Cleaning the Air Filter (every 2 weeks)
- NEVER USE UNIT WITHOUT THE AIR FILTER.
- STORAGE
- Troubleshooting
- PROOF OF PURCHASE
- SCAN HERE FOR HELP
- Two Year Warranty
Brand : Ausclimate
Model : Smart Compact Cold + Dry ACPAC205CB
Category : Air conditioner