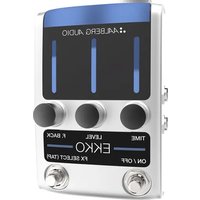
EKKO EK-1 - Audio Aalberg Audio - Free user manual and instructions
Find the device manual for free EKKO EK-1 Aalberg Audio in PDF.


| Product Type | Microphone |
| Brand | Aalberg Audio |
| Model | EKKO EK-1 |
| Connectivity | USB |
| Polar Pattern | Cardioid |
| Frequency Response | 20 Hz - 20 kHz |
| Impedance | 150 Ohms |
| Sensitivity | -40 dB |
| Power Requirement | USB powered 5V |
| Dimensions | 160 mm x 50 mm |
| Weight | 350 g |
| Material | Metal body |
| Features | Plug and play, mute button, volume control |
| Compatibility | Windows, Mac, iOS |
| Included Accessories | USB cable, tripod stand |
| Cleaning | Dry cloth |
| Safety | Avoid moisture |
| Spare Parts Availability | Screws and grille |
| Reparability | Moderate, replaceable parts |
Frequently Asked Questions - EKKO EK-1 Aalberg Audio
User questions about EKKO EK-1 Aalberg Audio
0 question about this device. Answer the ones you know or ask your own.
Ask a new question about this device
Download the instructions for your Audio in PDF format for free! Find your manual EKKO EK-1 - Aalberg Audio and take your electronic device back in hand. On this page are published all the documents necessary for the use of your device. EKKO EK-1 by Aalberg Audio.
USER MANUAL EKKO EK-1 Aalberg Audio
You are now the owner of the EKKO EK-1 Delay Pedal!
EKKO EK-1 is a high-quality, custom aluminum housing pedal with true bypass. It can be controlled like a stand-alone effects pedal or by using the AERO AE-1 Wireless Controller to unleash the pedal's full potential (optional).
Contents
GETTING STARTED 4
CONTROLS 4
OVERVIEW....5
TECHNICAL SPECIFICATIONS....6
SOFTWARE UPDATE....7
WIRELESS CONTROL - PAIRING. . . . . . . . . . . . . . . . . . . . 8
INPUT/OUTPUT SETUPS....9
REGISTER 10
DISCLAIMERS 10
WARRANTY....10
IPR-RELATED....10
COMPLIANCE & FCC and IC Statements ..... 11
About AALBERG AUDIO 12
HISTORY 12
GETTING STARTED
To get your pedal up and running you need a standard 9V DC, 2.1 mm plug, center negative power supply (minimum 250 mA). You will find the connector at the back of your pedal.
The pedal supports both mono and stereo connections. Combinations of these will lead to different properties in the output signal. See the Input/output setups section for further explanations.
NB! If you plan on using this pedal with other pedals, we advice you to either use a separate power supply for your Aalberg pedal, or a multi-output power supply with isolated outputs.
CONTROLS
| TIME Time between the echoes. | |
| LEVEL | Adjusts the output level of your echo signal relative to the level of the direct signal (0-100%) |
| FEEDBACK Controls the number of echoes | |
| FX SELECT/TAP TEMPO | Two modes:TAP – tap the desired delay time using footswitch (TAP)FX-SELECT – Choose active effect parameter (TIME, LEVEL or FEEDBACK) for wireless control with AERO controller (optional) |
| ON/OFF Set the pedal to ON (activated) or OFF (true bypass). | |
OVERVIEW

1 Set active parameter for AERO AE-1 Wireless Controller
TECHNICAL SPECIFICATIONS
| Power supply (not included) | 9V DC, 2.1 mm plug, center negative (not included) |
| Current draw 250 mA | |
| Input impedance@1kHz ~1M Ohm | |
| Output impedance@1kHz | < 1k Ohm |
| Maximum input signal 3.22 Vp-p (2.28 Vrms) | |
| Sound Quality (sample-/bit rate) | 48 kHz/24-bits |
| Connectors | - INPUT (mono/stereo)- OUTPUT (mono/stereo)- DC power jack |
| Controls | TIME, LEVEL, FEEDBACK, ON/OFF (true bypass), FX SELECT (TAP) |
| Parameter level indicators | LED bar indicators for TIME, LEVEL and FEEDBACK |
| Dimensions incl. knobs (W x H x D) | 93 x 57 x 142 mm / 3.7 x 2.2 x 5.6 inches |
| Weight (excl. packaging) | 0.372 kg / 13.0 oz |
| Weight (incl. packaging) | 0.442 kg / 15.6 oz |
SOFTWARE UPDATE
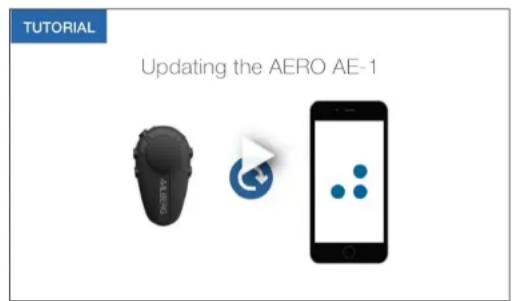
Some features, like the option of using one AERO to control several pedals, is available as a software update. Therefore we recommend that you update your Aalberg product to the latest version. Below you will find both a written explanation as well as a video tutorial (all of our tutorial videos can be viewed at www.aalbergaudio.com/tutorials).
A) Aalberg Effects Pedals
- Tablet/Iphone: Visit Apple App Store and download the app named "Aalberg Update"
- Pedal: Press and hold both ON/OFF and FX-SELECT footswitch while plugging in the power.
- Tablet/lphone: After your device has connected with the pedal choose "update".


B) AERO Wireless Controller
Tablet/lphone: Visit Apple App Store and download the app named "Aalberg Update" AERO: Press and hold the preset '3' button and knob button while simultaneously turning the unit on (slide switch set to '1'). Tablet/lphone: After your device has connected with the AERO choose "update".

WIRELESS CONTROL - PAIRING
Before you can control your AALBERG pedal(s) with the AERO Wireless Controller, you need to pair the devices.
NB! For availability of Option B, make sure you have the latest software update.
A) One AERO Wireless Controller to one Aalberg Effects Pedal
- AERO: Turn off (slide switch set to '0')
- Effects pedal: Unplug power adaptor
- Effects pedal: Press and hold FX-SELECT footswitch while plugging in the power (LEDs will start blinking)
- AERO: Press and hold left button and knob button while simultaneously turning the unit on (slide switch set to '1').
- AERO: Press and hold the AERO knob button for 2 seconds then release it. To confirm syncing turn the AERO off and on. Pairing complete!

B) One AERO to several Aalberg Effects Pedals\*
- AERO: Turn off (slide switch set to '0')
- Effects pedals: Unplug power adaptor for all pedals to be paired.
- AERO: Press and hold left button and knob button while simultaneously turning the unit on (slide switch set to '1')
-
Effects pedals: Leftmost pedal: Press and hold FX-SELECT footswitch while plugging in the power (LEDs will start blinking)
-
Effects pedals: repeat step 4) for the rest of the pedals from left to right
- AERO: Press and hold the AERO knob button for 2 seconds then release it. To confirm syncing turn the AERO off and on. Voilà: Pairing complete!

*Eight pedals maximum
INPUT/OUTPUT SETUPS
The EKKO EK-1 Delay Pedal offers the following mono/stereo configurations:
- Mono in/Mono out
- Ping-pong stereo
- Dry/wet split
-
Dual mono
-
Mono in/Mono out Connect your instrument to Mono in and the amplifier to Mono out.
- Ping-pong stereo Connect your instrument to Mono in then connect one amplifier to Mono out and another amplifier to Stereo out. The echoes of the direct signal will now alternate between the two outputs.
- Dry/wet split Connecting your instrument to Stereo in will split the dry wet signal as follows:
Mono out: 100% wet signal
Stereo out: 100% dry signal
- Dual mono This is useful if you want to maintain the stereo path for pedals in the signal chain. Connect the stereo outs from the previous pedal to both inputs on the EKKO (Mono in = left, Stereo in = right).
REGISTER
To register your warranty and receive important updates and news, please register your product at aalbergaudio.com/register.
DISCLAIMERS
All use of our products is undertaken at your own risk and expense, and Aalberg Audio cannot be held liable for any direct or indirect losses or cost incurred through use, default or malfunction of our products. Repair or replacement of defective units under our warranty provisions serve as the sole remedy in the unlikely event that our products does not comply with product specifications.
WARRANTY
ONLY SEND PRODUCTS THAT:
- YOU HAVE TESTED YOURSELF
- ARE FOLLOWED BY A COPY OF THE RECEIPT
- ARE FOLLOWED BY AN EXPLANATION OF THE FAILURE
We offer a 2-year warranty on all our products. In the unlikely event of a malfunction, please contact us at support@aalbergaudio.com before sending us the product for repair. When the product has been returned to us at the cost of the sender, we will repair or replace your product and send it back to you - free of charge and usually within 4 weeks (shipping not included). The product needs to be accompanied by a copy of your receipt, serial number, return address, phone number, e-mail address and a brief explanation of the problem. If the product is altered or repaired by someone unauthorized by Aalberg Audio the warranty is no longer valid. Stores and distributors must always check products before sending them to Aalberg Audio for repairs. Please note that we cannot replace a product before we have received it at the Aalberg Audio HQ in Trondheim, Norway.
IPR-RELATED
Design Protection pending in EU & USA
International Patent pending PCT/NO2014/050236
COMPLIANCE & FCC and IC Statements
Aalberg Audio accept and follow these regulations and directives.

FCC:
15.19 (a)(3):
This device complies with part 15 of the FCC Rules. Operation is subject to the following two conditions: (1) This device may not cause harmful interference, and (2) this device must accept any interference received, including interference that may cause undesired operation.
15.21:
Unauthorized changes or modifications not expressly approved by Aalberg Audio could void the user's authority to operate the equipment.
15.105(b):
Note:
This equipment has been tested and found to comply with the limits for a Class B digital device, pursuant to part 15 of the FCC Rules. These limits are designed to provide reasonable protection against harmful interference in a residential installation. This equipment generates, uses and can radiate radio frequency energy and, if not installed and used in accordance with the instructions, may cause harmful interference to radio communications. However, there is no guarantee that interference will not occur in a particular installation. If this equipment does cause harmful interference to radio or television reception, which can be determined by turning the equipment off and on, the user is encouraged to try to correct the interference by one or more of the following measures:
—Reorient or relocate the receiving antenna. —Increase the separation between the equipment and receiver. —Connect the equipment into an outlet on a circuit different from that to which the receiver is connected. —Consult the dealer or an experienced radio/TV technician for help.
IC:
This device complies with Industry Canada licence-exempt RSS standard(s). Operation is subject to the following two conditions: (1) this device may not cause interference, and (2) this device must accept any interference, including interference that may cause undesired operation of the device.
Aalberg Audio AS is located in Trondheim, Norway. We produce wireless guitar effects with accompanying hardware and software. Please don't hesitate to contact us at http://aalbergaudio.com/contact/ if you have any questions or inquiries!
HISTORY
The inspiration for the delay pedals with wireless controller came to guitar player and inventor Rune Aalberg Alstad back in 2009, when he was tired of having to run over to the pedals and bend down all the time to change the effect settings. In 2012 he met the engineer Torkild Indstøy and the entrepreneur Aleksander Torstensen, and five years later, after lots of testing and prototyping we are proud to introduce the world's first EKKO EK-1 Delay Pedal with the AERO AE-1 Wireless Controller. (Below you can see the different development stages (from left to right): “The Coffee Filter”, 2010 – “The Tank”, 2012 – “Prototype 3”, 2013, “Prototype 4, 2014” - The final product, 2015)

2010
2012
2013
2014
2015
AALBERG AUDIO®
www.aalbergaudio.com
TM and © 2016 Aalberg Audio AS. All rights reserved.
The information in this manual is subject to changes without further notice. Always visit aalbergaudio.com/support for updated user manuals.
- Contents
- GETTING STARTED
- SOFTWARE UPDATE
- A) Aalberg Effects Pedals
- B) AERO Wireless Controller
- WIRELESS CONTROL - PAIRING
- A) One AERO Wireless Controller to one Aalberg Effects Pedal
- B) One AERO to several Aalberg Effects Pedals\*
- INPUT/OUTPUT SETUPS
- REGISTER
- DISCLAIMERS
- WARRANTY
- IPR-RELATED
- COMPLIANCE & FCC and IC Statements
- FCC:
- (a)(3):
- 15.21:
- 15.105(b):
- Note:
- IC:
- HISTORY
- AALBERG AUDIO®
Brand : Aalberg Audio
Model : EKKO EK-1
Category : Audio