Z12 Pro - Vacuum Cleaner Kogan - Free user manual and instructions
Find the device manual for free Z12 Pro Kogan in PDF.


| Product Type | Cordless Stick Vacuum Cleaner |
| Brand | Kogan |
| Model | Z12 Pro (KAVACSTV12A) |
| Rated Power | 400W |
| Battery Type | Lithium-ion 29.6V, 2000mAh |
| Charging Time | 2-3 hours |
| Noise Level | 75dB |
| Dust Cup Capacity | 540ml |
| Weight (Net/Gross) | 3.3kg / 4.55kg |
| Dimensions | 1172 × 256 × 217 mm |
| Suction Power Adjustment | 3 levels: Low (blue), Medium (purple), High (red) |
| Floor Brush Features | Independent motor, rotating plush roller, 270° horizontal / 90° vertical rotation, front LED light |
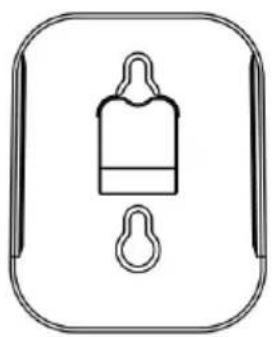
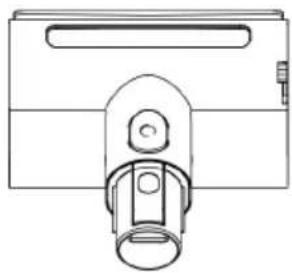
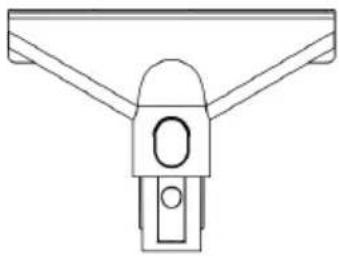
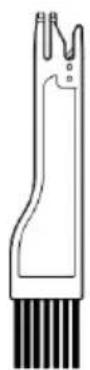
| Accessories Included | Fabric brush, Upholstery brush, Crevice nozzle, Cleaning brush, Charger, Wall bracket with screws and 3M adhesive |
| Filter Type | Washable top filter element |
| Safety Features | Overheat protection, motor blockage detection, liquid ingress short circuit protection |
| Usage | Indoor dry rooms only |
| Warranty/Support | Contact help.Kogan.com for support |
Frequently Asked Questions - Z12 Pro Kogan
User questions about Z12 Pro Kogan
0 question about this device. Answer the ones you know or ask your own.
Ask a new question about this device
Download the instructions for your Vacuum Cleaner in PDF format for free! Find your manual Z12 Pro - Kogan and take your electronic device back in hand. On this page are published all the documents necessary for the use of your device. Z12 Pro by Kogan.
USER MANUAL Z12 Pro Kogan
natural_image
Black and white photo of a vacuum cleaner with handle and orange cover (no text or symbols visible)Z12 PRO CORDLESS STICK VACUUM CLEANER
KAVACSTV12A
Safety & Warnings 3
Components 4
Overview 5
Installation 6
Assembly 7
Operation 9
Cleaning & Care 12
Specifications 15
Troubleshooting 16
Notes 18
SAFETY & WARNINGS
To ensure safe use of this product and to reduce the potential risk or fire, electric shock or injury, follow these basic safety precautions. Read all the safety instructions below carefully before operating the vacuum.
- This vacuum is powered by a 29.6V DC lithium battery. Only use the specified battery model; do not substitute with others.
- If the battery shows signs of abnormality, cease use immediately and contact help.Kogan.com for support.
- When plugging or unplugging the power cord, grip the power plug to avoid pulling or twisting the cord.
- Do not use this vacuum outdoors, in damp environments, or with wet hands.
- If the vacuum is damaged from a fall, collision, exposure to outdoor conditions, or immersion in water, cease use immediately and contact help.Kogan.com for support.
- To prevent blockages, avoid sucking up large objects, lint, hair, or other materials that could obstruct the suction nozzle.
- Keep hair, clothing, fingers, and other body parts away from the suction nozzle and moving parts to avoid injury.
- Do not vacuum burning or smouldering materials such as cigarette butts, matches, or ash.
- Do not use the vacuum to clean flammable substances or liquids like gasoline, kerosene, paint, alcohol, or detergent, and avoid areas where these substances are present.
- Ensure the filter is installed before using the vacuum.
- Turn off the vacuum before connecting or changing any accessories.
- Use the vacuum indoors in dry rooms only.
- Only use the recommended battery type. Unknown batteries may damage the motor or cause injury.
- Do not use the vacuum for purposes other than those described in this user guide.
- Keep the vacuum out of reach of children. This is not a toy. Supervise use carefully in environments with children.
• Exercise caution when vacuuming stairs. - If the vacuum is damaged, cease use immediately and contact help.Kogan.com for support.
- Follow the instructions in this user guide carefully. Only use accessories recommended by Kogan.com with this product.
- Keep the vacuum away from heat sources such as radiators or stoves.
COMPONENTS
natural_image
Simple line drawing of a bottle with a handle and bulb, enclosed in a rounded square frame (no text or symbols)Wall Bracket
natural_image
Technical line drawing of a mechanical component with a handle and mounting bracket (no text or symbols)Fabric Brush
natural_image
Simple line drawing of a mechanical component with no text or symbolsUpholstery Brush

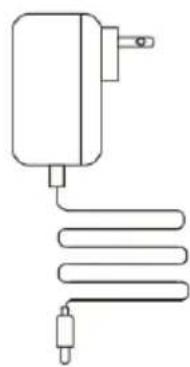
Crevice Nozzle Cleaning Brush Charger

Screw (x2)
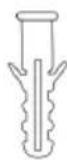
Wall Anchor (x2)
natural_image
Simple line drawing of a connected electrical plug with a coiled cable (no text or symbols)
3M Adhesive (x4)
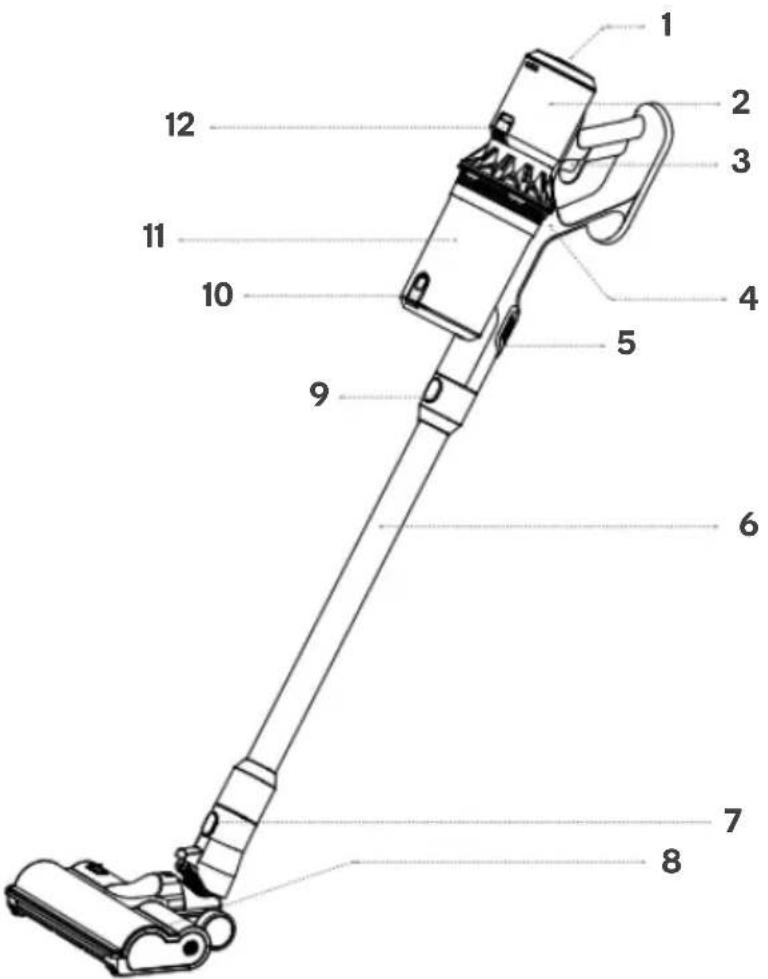
1 Suction Power Adjustment Button
2 Battery Pack
3 Power Button
4 Vacuum Cleaner Body
5 Dust Cup Release Button
6 Aluminium Tube
7 Floor Brush Lock
8 Floor Brush
9 Aluminium Tube Lock
10 Dust Cup Lock
11 Dust Cup
12 Battery Lock
INSTALLATION
Install the Bracket
The bracket offers two installation methods to accommodate different wall materials and user preferences. Select the method that best suits your situation.
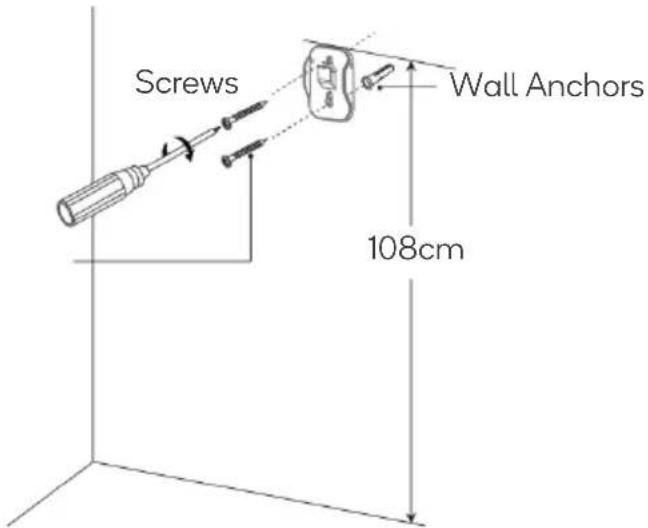
Using screws:
-
Drill holes at the marked positions, ensuring there are no wires, pipes, or other obstacles inside the wall.
-
Insert the wall anchors fully into the drilled holes.
-
Align the bracket with the holes and secure it using the screws.
Using 3M adhesive:
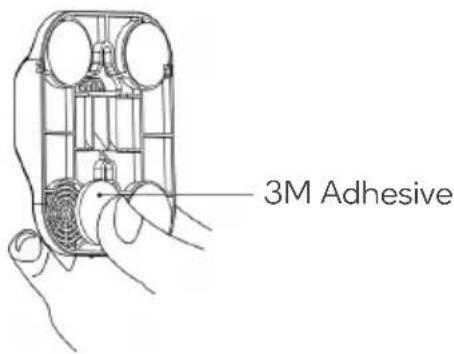
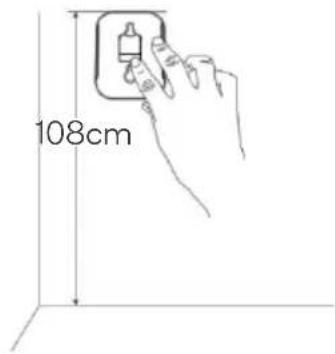
- Choose the area for adhesion, ensuring that the bracket's height allows the floor brush to rest on the ground for proper support.
- Clean the wall surface, removing any dust or grease.
- Peel off the backing from the 3M adhesive and apply it to the holes on the bracket.
- Press the bracket firmly and smoothly against the wall.
- Allow the adhesive to set for 24 hours before use.
Inspection:
Shake the bracket gently to check for stability. Adjust as needed.
ASSEMBLY
Attaching the Floor Brush
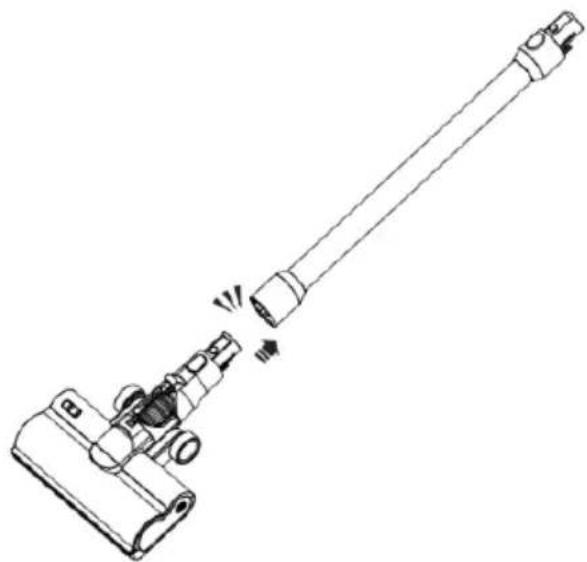
- Align the floor brush with the connector on the extension tube and gently push it into place. When you hear a 'click,' the connection is secure.
- To disassemble, press the floor brush lock as shown in the diagram and pull the brush downward.
natural_image
Technical line drawing of a mechanical device with a long rod and multiple ports, showing internal components and motion indicators (no text or symbols)Attaching the Extension Aluminium Tube
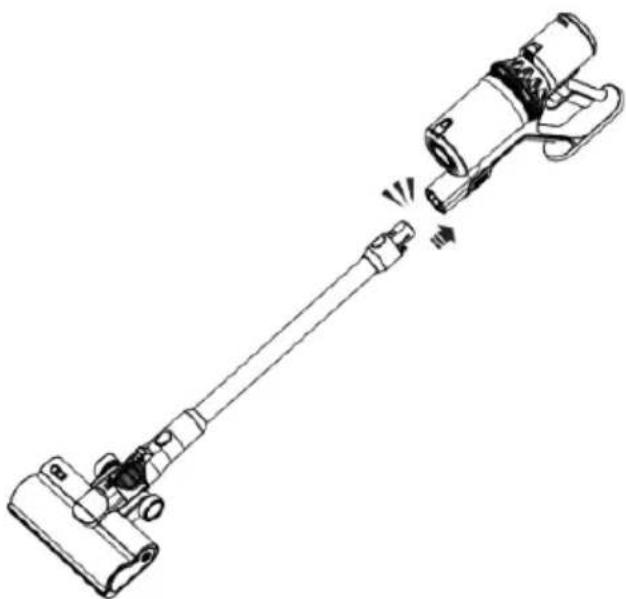
- To use the vacuum upright, attach one end of the extension tube to the vacuum body. When you hear a 'click,' the connection is secure. Attach the floor brush or other accessories to the other end.
- You can also connect the vacuum cleaner body directly to the floor brush for cleaning hard surfaces such as tile, flooring, or low-pile carpet.
- Alternatively, attach the crevice nozzle or floor brush to reach high areas like ceilings, curtains, or air conditioning vents. To disassemble, press the aluminium tube lock and pull it away.
natural_image
Technical line drawing of a mechanical device with a lever and adjustment mechanism (no text or symbols)Attaching the Crevice Nozzle
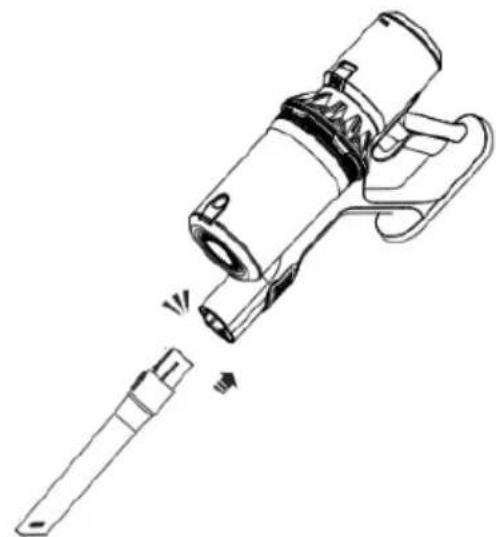
- Align the crevice nozzle with the connector on the vacuum body and gently push it into place. When you hear a 'click,' the connection is secure.
• To disassemble, press the crevice nozzle lock and pull it downward.
natural_image
Line drawing of a handheld device with a detached handle and internal components (no text or symbols)Removing and Attaching the Dust Cup
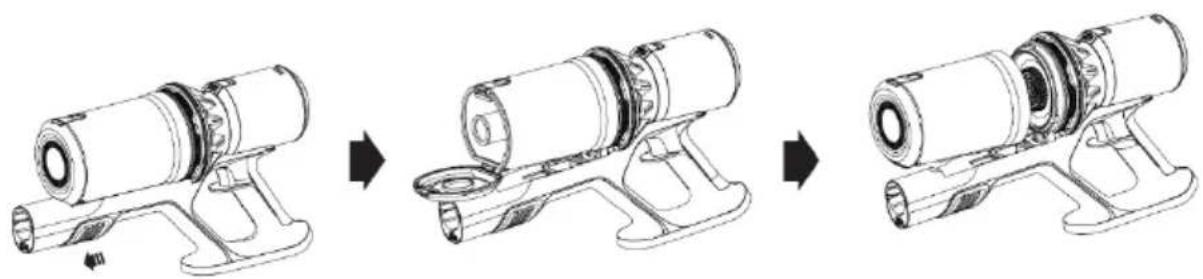
- To remove the dust cup, press the 'Dust Cup Release' button located beneath the vacuum body. The dust cup assembly will pop out.
- Rotate the assembly anticlockwise to remove the dust cup.
• To reattach, reverse the process.
natural_image
Three-step line drawing of a mechanical device with cylindrical components and mounting base (no text or symbols)OPERATION
Charging the Vacuum Cleaner
- To charge the vacuum, connect the charger to the charging port on the battery pack, then into an electrical outlet.
- While charging, the 3 indicators will flash. The vacuum is fully charged when all 3 indicators illuminate solidly.
natural_image
Technical line drawing of a device before and after transformation (no text or symbols)Powering the Vacuum Cleaner On/Off
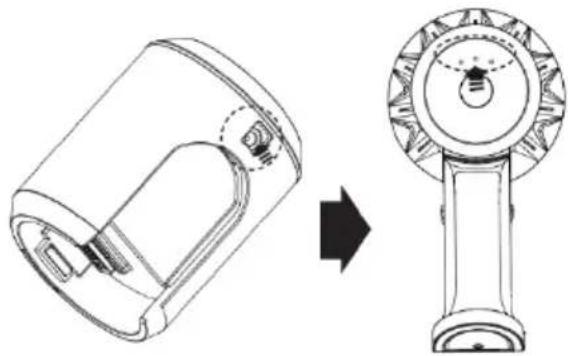
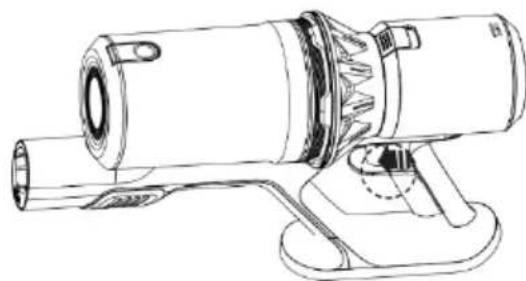
Once all components are attached, press the 'Power' button on the handle to turn the vacuum on/off (as shown in the diagram).
natural_image
Technical line drawing of a mechanical device with no visible text or symbolsAdjustment of Suction Power
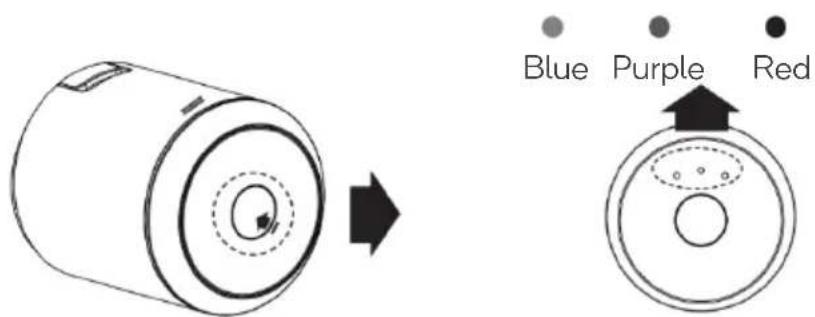
You can adjust the suction power by pressing the 'Suction Power Adjustment' button located on the top of the vacuum body. The suction levels are represented by the following indicators:
- Blue for low suction.
• Purple for medium suction.
• Red for high suction.
Using the Accessories
Floor Brush
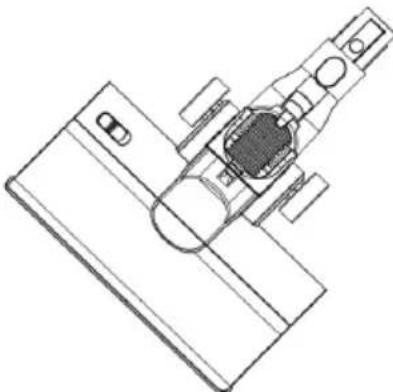
- Ideal for cleaning hard surfaces such as floors, ceramic tiles, and low-pile carpets.
- Equipped with an independent motor and a large plush roller brush that rotates at high speed for efficient dust removal.
- Provides flexible, thorough cleaning with a horizontal rotation of 270^ and a vertical rotation of 90^ .
- Features a front LED light for easy cleaning in dark or hard-to-reach areas, such as under furniture.
natural_image
Technical line drawing of a mechanical assembly or component (no visible text or symbols)Aluminium Tube
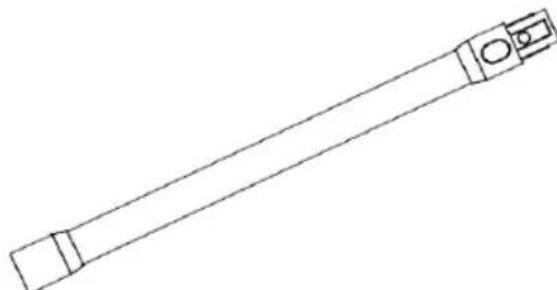
- Easy to install, making vertical cleaning convenient while reducing strain on your lower back.
- Perfect for cleaning high places like ceilings, air conditioners, and curtains when used with compatible brush heads.
natural_image
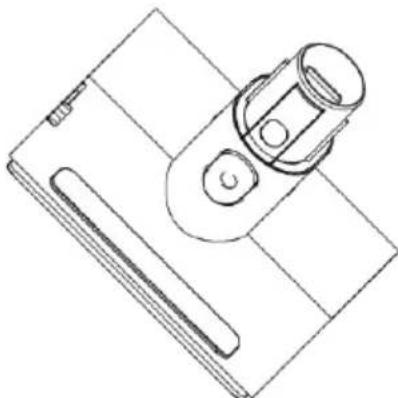
Simple line drawing of a long cylindrical object with two rectangular ends and a small circular opening (no text or symbols)Fabric Brush
- Suitable for cleaning fabrics like mattresses and sofas.
- Powered by an independent motor, the roller beats and rotates at high speed to remove pollen, dust mites, and hair from deep within bedding, promoting a healthier sleep environment for the whole family.
natural_image
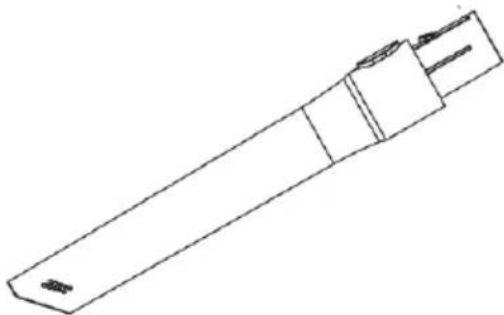
Technical line drawing of a mechanical component with a cylindrical housing and base plate (no text or symbols)Crevice Nozzle
- Designed for cleaning narrow spaces and crevices in both homes and cars.
- Effectively reaches tight areas such as gaps between sofas, shelves, window corners, and car interiors for a thorough clean.
natural_image
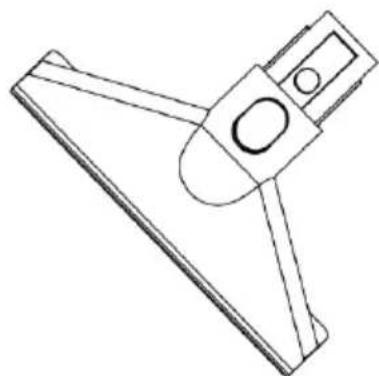
Line drawing of a mechanical component with no visible text or symbolsUpholstery Brush
- Ideal for cleaning delicate fabrics, sofa cushions, and other upholstered furniture.
- The wide suction mouth allows for fast, deep cleaning of large fabric surfaces, saving time and effort.
natural_image
Line drawing of a mechanical clamp or bracket component (no text or symbols)CLEANING & CARE
Storage
For long-term storage, store the vacuum cleaner in a cool, dry place away from direct sunlight and humidity.
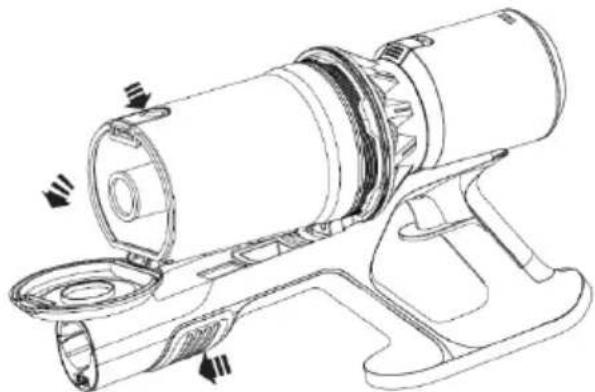
Emptying the Dust Cup
-
Press the 'Dust Cup Release' button under the vacuum body. The dust cup will pop out.
-
Rotate the dust cup anticlockwise to remove it.
-
Hold the dust cup over a rubbish bin and press the 'Dust Cup Lock' to open the dust cup and release the dust.
natural_image
Technical line drawing of a mechanical device with no visible text or symbolsCleaning or Replacing the Filter
- Detach the dust cup from the vacuum body (refer to the installation instructions).
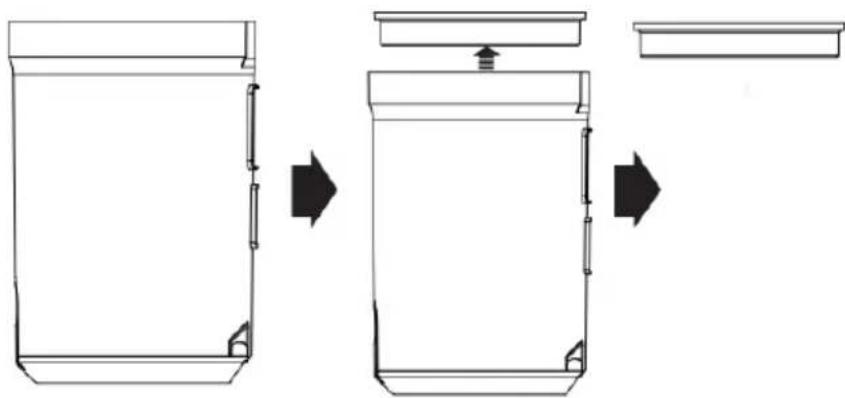
- Remove the top filter element from the dust cup, as shown in the diagram. Clean it using a soft brush or wash it with warm water.
- Ensure both the dust cup and filter are completely dry before reassembling. It's recommended to wash the filter if the suction power decreases.
natural_image
Diagram showing three stages of a container or storage unit with arrows indicating process flow (no text or symbols present)Note:
Before use, ensure all filters are installed in the correct position.
Cleaning the Floor Brush
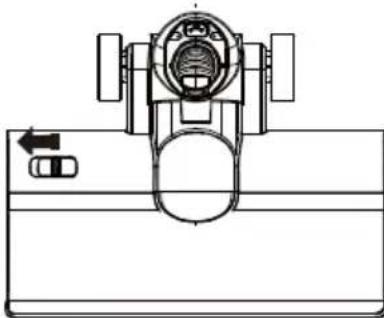
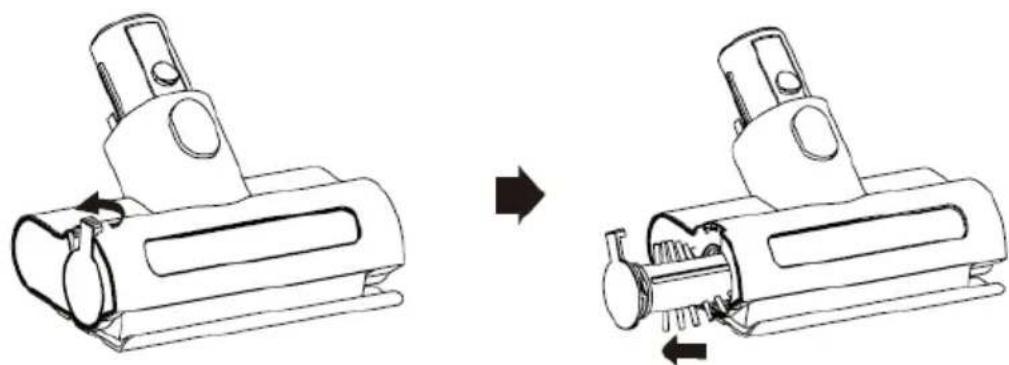
- To remove the roller brush cover, slide the switch to the left as illustrated in the image below.
natural_image
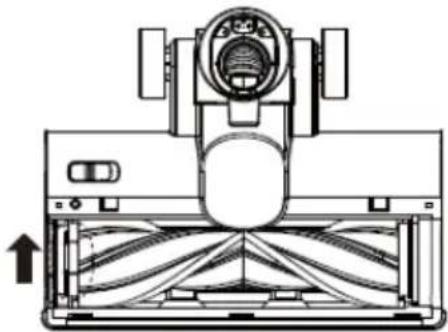
Technical line drawing of a mechanical assembly with no visible text or symbols- Lift the handle on the left end of the roller brush to remove it.
natural_image
Technical line drawing of a mechanical device with internal components and an arrow indicating direction (no text or symbols)-
Clean the roller brush.
-
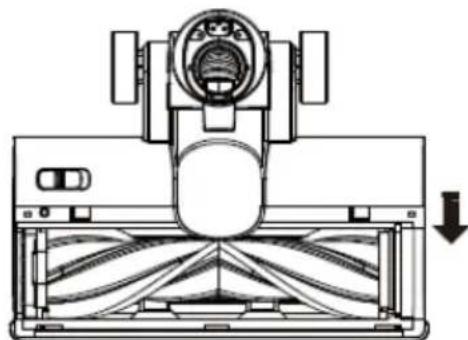
To reattach the roller brush, align the right end of the roller brush with the slot and then press the left end of the brush down into the groove.
natural_image
Technical line drawing of a mechanical device with internal components and a downward arrow indicating motion (no text or symbols)- Snap the roller brush cover back into place.
Cleaning the Fabric Brush
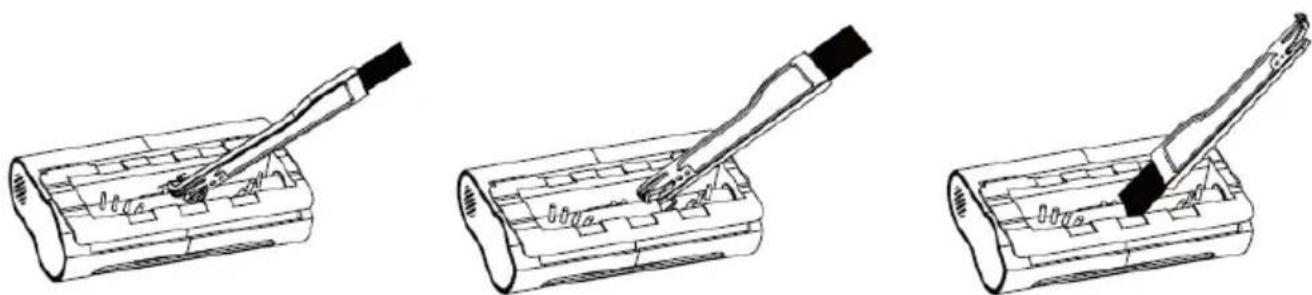
- Use the cleaning brush to dust the underside of the fabric brush and remove debris as needed.
natural_image
Three technical line drawings showing a tool interacting with a battery pack, no text or symbols present- To remove the roller brush, place the switch into the 'on' position and then remove the roller brush rod.
- Remove any hair, pet fur or other debris stuck to the roller brush before replacing it.
natural_image
Technical line drawing of a mechanical device before and after assembly, showing internal components and motion arrows (no text or symbols)SPECIFICATIONS
Rated power 400W
Battery configuration
Charging time 2\~3H
Noise level 75dB
Outline dimension 1172 × 256 × 217
Weight (net/gross weight) 3.3kg/4.55kg
Capacity of dust cup 540ml
Li-ion 2000mAh 29.6V
TROUBLESHOOTING
| Problem | Possible Cause | Solution |
| Fails to operate. | The battery is out of power. | Check if the battery has power or needs recharging. |
| The battery needs to be replaced. | Contact help.Kogan.com for support. | |
| Fails to suck dust or weak suction power. | The dust cup is full. | Empty and clean the dust cup. |
| The battery power is low. | Connect the power adapter and charge the battery. | |
| Dust leakage. | The dust cup is not installed correctly or is full. | Clean the dust cup and ensure it is installed properly. |
| The battery power is low. | Connect the power adapter and charge the battery. | |
| Fails to pick up dust after attaching the floor brush. | The dust cup is full. | Empty and clean the dust cup. |
Common Fault Indications on the Battery Pack
If the 3 indicators on the battery pack flash red, the following issues may have occurred:
| Problem Solution | |
| If the ‘Power’ button is held down for more than 6 seconds, the vacuum will automatically shut down, and the 3 indicators will flash red. | To resolve this, press the ‘Power’ button again to restart the vacuum. |
| If the floor brush is blocked by foreign objects, the vacuum will not automatically shut down, but the 3 indicators will flash red. | Turn off the vacuum, clear the obstruction from the floor brush, and press the ‘Power’ button again to restart. |
| If the internal temperature of the vacuum becomes too high, the vacuum will activate its overheating protection function and shut down automatically. The 3 indicators will flash red. | Allow the vacuum to cool down before restarting. |
| If the vacuum sucks up liquid, it may cause a short circuit, leading to an automatic shutdown and rapid flashing of the 3 indicators. | Do not attempt to repeatedly start or stop the vacuum. Remove the battery, recharge it, and restart the vacuum. |
| If the main motor is blocked by foreign objects, the vacuum pulse intermittently before shutting down. | Remove the blockage from the motor and restart the vacuum. |
NOTES
Need more information?
We hope that this user guide has given you the assistance needed for a simple set-up.
For the most up-to-date guide for your product, as well as any additional assistance you may require, head online to help.kogan.com
kogan.com
- Z12 PRO CORDLESS STICK VACUUM CLEANER
- SAFETY & WARNINGS
- COMPONENTS
- INSTALLATION
- Install the Bracket
- Using screws:
- Using 3M adhesive:
- Inspection:
- ASSEMBLY
- Attaching the Floor Brush
- Attaching the Extension Aluminium Tube
- Attaching the Crevice Nozzle
- Removing and Attaching the Dust Cup
- OPERATION
- Charging the Vacuum Cleaner
- Powering the Vacuum Cleaner On/Off
- Adjustment of Suction Power
- Using the Accessories
- Floor Brush
- Aluminium Tube
- Fabric Brush
- Crevice Nozzle
- Upholstery Brush
- CLEANING & CARE
- Storage
- Emptying the Dust Cup
- Cleaning or Replacing the Filter
- Note:
- Cleaning the Floor Brush
- Cleaning the Fabric Brush
- SPECIFICATIONS
- TROUBLESHOOTING
- Common Fault Indications on the Battery Pack
- NOTES
- Need more information?
Brand : Kogan
Model : Z12 Pro
Category : Vacuum Cleaner