
ECM90 - Coffee maker Healthy Choice - Free user manual and instructions
Find the device manual for free ECM90 Healthy Choice in PDF.


| Product Type | Espresso Coffee Maker |
| Model | ECM90 |
| Brand | Healthy Choice |
| Dimensions (W x D x H) | 293 mm x 125 mm x 295 mm |
| Weight | 3.2 kg |
| Power Rating | 1150-1360 W |
| Rated Voltage | 220-240 V ~ |
| Frequency | 50 Hz |
| Pump Pressure | 20 bar |
| Water Tank Capacity | 0.9 L |
| Filters Included | Single-shot (1-cup) and double-shot (2-cup) filters |
| Functions | Espresso, cappuccino, hot water, steam frothing |
| Control Panel | On/off, 1-cup, 2-cup, steam, hot water buttons with indicator lights |
| Programmable Coffee Quantities | Yes (1-cup: 12-22 sec, 2-cup: 20-51 sec) |
| Safety Features | Auto shut-off, overheat protection, anti-scald tube |
| Material | Stainless steel, plastic components |
| Warming Plate | Top cup warmer plate |
| Steam Wand | With froth nozzle, anti-scald tube |
| Cleaning | Descaling every 2-3 months; clean drip tray, filters, steam wand regularly |
| Dishwasher Safe Parts | None (hand wash only) |
| Intended Use | Household use only |
| Included Accessories | Measuring spoon/tamper, filter holder, drip tray, drip tray cover, water tank |
Frequently Asked Questions - ECM90 Healthy Choice
User questions about ECM90 Healthy Choice
0 question about this device. Answer the ones you know or ask your own.
Ask a new question about this device
Download the instructions for your Coffee maker in PDF format for free! Find your manual ECM90 - Healthy Choice and take your electronic device back in hand. On this page are published all the documents necessary for the use of your device. ECM90 by Healthy Choice.
USER MANUAL ECM90 Healthy Choice
natural_image
Modern espresso machine with black handle and control panel (no visible text or symbols)Model: ECM90 | Batch: PR4955
HOUSEHOLD USE ONLY Carefully read all instructions before use and save for future reference.
1. SAFETY WARNINGS
Danger! Failure to observe the warnings may result in life-threatening injury by electric shock.
This is an electrical appliance and may cause electrical shocks.
You should therefore follow these safety warnings:
- Never touch the appliance with damp hands or feet.
- Never touch the plug with damp hands.
- Make sure the socket used is freely accessible at all times, enabling the appliance to be unplugged when necessary.
- Unplug directly from the plug only. Never pull the cord as you could damage it.
- To disconnect the appliance completely you must unplug it from the mains socket.
- If the appliance is faulty, do not attempt to repair it. Turn it off, unplug it from the mains socket and contact our Customer Service.
- Before cleaning the appliance, turn it off, unplug it from the mains socket and allow it to cool.
- The appliance is not to be used by persons (including children) with reduced physical, sensory or mental capabilities, or lack of experience and knowledge, unless they have been given supervision or instruction concerning the use of the appliance in a safe way and understand the hazards involved.
- Children must not play with the appliance.
Important: Failure to observe the warning could result in injury or damage to the appliance.
Keep all packaging (plastic bags, polystyrene foam) away from children.
Danger of burns! Failure to observe the warning could result in scalds or burns.
This appliance produces hot water and steam may form while it is in operation. Avoid contact with splashes of water or hot steam.
1.1 Designated use and restrictions
This appliance is designed and made to prepare coffee or hot water and to heat milk using steam.
To fill the tank, use only drinking water as described in the Instructions for Use.
Never use the hot water/steam wand with beverages other than milk.
Any other use is considered improper and thus dangerous. The manufacturer is not liable for damage deriving from improper use of the appliance.
1.2 Instructions for Use
Read the Instructions for Use carefully before using the appliance. Failure to follow the Instructions for Use may result in injuries or damage to the appliance.
The manufacturer is not liable for damage deriving from failure to respect the Instructions for Use.
Please note:
Keep this manual for future reference. If the appliance is passed to other persons, they must also be provided with this manual.
1.3 Checking the appliance
After removing the packaging, make sure the product is complete and undamaged and that all accessories are present. Do not use the appliance if it is visibly damaged.
2. DISPOSING OF THE APPLIANCE

The appliance must not be disposed of with household waste, but taken to an authorised waste separation and recycling centre.
3. TECHNICAL PARAMETERS
| Model No. | ECM90 |
| Rated Voltage 220-240V~ | |
| Rated Frequency 50Hz | |
| Total Power | 1150-1360W |
| Pressure 20 Bar | |
| Water Tank Capacity 0.9L | |
| Size 293mm * 125mm * 295mm | |
| Weight 3.2kg |

None of the components or accessories are dishwasher-safe.
4. PRODUCT OVERVIEW

- Removable water tank
- Holding plate/cup warmer
- Measuring spoon/tamper
- 1-cup filter
- 2-cup filter
- Filter holder/ portafilter
- Drip tray cover
- Drip tray
-
Steam nozzle
-
Steam wand
- Anti-scald tube
- Steam/Water knob
- On/off button
- 1-cup button
- 2-cup button
- Steam button
- Hot water button
5. INSTALLING THE APPLIANCE
Important! When you install the appliance, you should respect the following safety warnings:
• Water penetrating the coffee maker could cause damage. Do not place the appliance near taps or sinks.
- The appliance could be damaged if the water it contains freezes. Do not install the appliance in a room where the temperature could drop below freezing point.
- Arrange the cord in such a way that it cannot be damaged by sharp edges or contact with hot surfaces (e.g. electric hot plates).
- The appliance gives off heat. After positioning the appliance on the worktop, leave a space of at least 3 cm between the appliance's surfaces and the side and rear walls and at least 15cm above the machine.
- Clean all the removable parts with tap water.
5.1 Connecting the Appliance
Danger!
Check that the mains power supply voltage corresponds to that indicated on the rating plate on the appliance. Connect the appliance to an earthed and correctly installed socket.
6. FILLING THE WATER TANK
Please note:
Before first use, wash the water tank and all accessories with warm water.
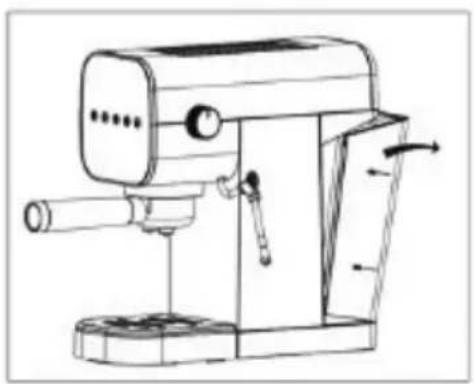
- Remove the tank by pulling it back.
- Fill the tank with fresh, clean water, taking care not to exceed the MAX level. Put the tank back in the appliance.
natural_image
Line drawing of a coffee machine with no text or symbols
natural_image
Simple line drawing of a rectangular box with a label pointing to its side (no text or symbols present)
natural_image
Line drawing of a coffee maker with handle and spout (no text or symbols)Important:
Never operate the appliance without water in the tank or without the tank attached.
Please fill it with drinking water or filtered water. Hard water will cause to shorten the service life of the machine. Do not add any chemical cleaners to the tank.
Please note:
It is normal for there to be water in the space under the tank. This should therefore be dried regularly with a clean sponge.
7. FIRST USE
Before first use, rinse the internal circuit as follows:
- Fill the water tank according to chapter 6 and attach the filter holder to the machine.
- Plug in. All lights flash 3 times and all lights off for standby mode.
- Press the ON/OFF button, the 1-CUP and 2-CUP lights flash to indicate the appliance is heating up.
- Press the STEAM button and turn on the steam knob to release the residual air. Keep this operation last for 30 seconds until the steam comes out.
Important: The residual air inside may cause the machine to not work properly!
- Turn off the STEAM button and press the ON/OFF button to turn off the machine.
- Attach the filter holder to the appliance.
- Press the ON/OFF button, place a container with a minimum capacity of 500 ml under the boiler outlet and press the 2-CUP button when the lights are steady. Repeat this operation 5 times.

8.1 How to make a hotter coffee
- Warm the cups before making coffee by rinsing them with a little hot water.
- Attach the filter holder to the appliance with the filter in place but without adding ground coffee. Using the same cup as will later be used to make the coffee, press the 1-CUP button. Discard the water after a few seconds, when the hot water had a chance to heat the cup.
- Rest the cups you will be using on the cup warmer which becomes hot during operation.
8.2 How to prepare espresso coffee using pre-ground coffee
- Place the ground coffee filter in the filter holder.
- For single-shot coffee, use the filter with the 1-CUP symbol on the bottom. To make a double-shot coffee or two coffees, use the filter with the 2-CUP symbol on the bottom.
- Place pre-ground coffee in the filter. Fill the filter a little at a time to prevent the pre-ground coffee from overflowing.

natural_image
Technical line drawing of a mechanical component with a cylindrical housing and a downward arrow indicating assembly (no text or symbols)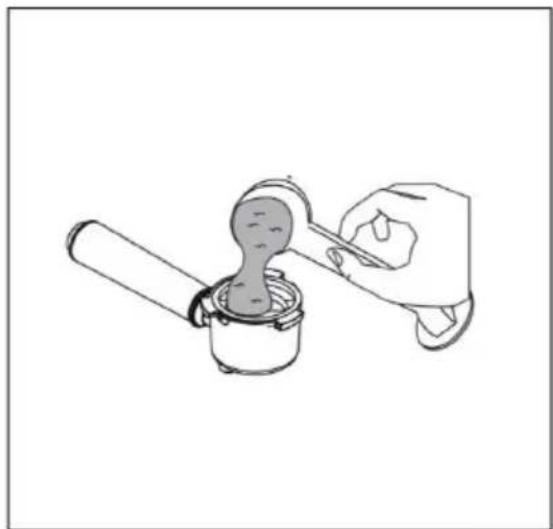
natural_image
Line drawing of a hand using a tool to press a small object into a container (no text or symbols)
natural_image
Diagram showing a mechanical assembly with a pin-like component and a lever mechanism (no text or symbols)To remove/insert the filter, align the circular marking inside the filter to the notch on the handle-side of the portafilter.
Important: For correct operation, before filling with pre-ground coffee, make sure there are no coffee residues left in the filter from the last time you made coffee.
- Distribute the pre-ground coffee evenly and press lightly with the tamper.
- Correct pressing of the pre-ground coffee is essential to obtain a good espresso. If you press too firmly, the coffee will be delivered too slowly and will be over-extracted. If you press too lightly, the coffee will be delivered too quickly and will become sour.
- Remove any excess coffee from the rim of the filter holder and attach the filter holder to the appliance. To attach correctly, align the filter holder handle with the UNLOCK symbol, attach the filter holder and rotate the handle towards the right until aligned with the LOCK symbol.
- Place the cup or cups under the filter holder spouts.
• Make sure the lights corresponding to the coffee buttons are on, then press the 1-CUP or 2-CUP coffee button. The appliance proceeds to make the coffee and delivery is stopped automatically.
• To remove the filter holder, turn the handle from right (LOCK) to left (UNLOCK).


natural_image
Line drawing of a coffee maker with a cup and stand (no text or symbols)Danger of burns!
To avoid splashes, never remove the filter holder while the appliance is delivering coffee. Always wait for a few seconds after delivery.
8.3 Programming the quantities of coffee in the cup
The appliance is set to automatically deliver standard quantities of coffee.
To change these quantities, proceed as follows:
- Prepare the espresso coffee as described in section 8.2
- Place the cup or cups under the filter holder spouts.
- Press and hold the button you want to programme 1-CUP or 2-CUP. The coffee maker starts delivering coffee.
- Once the required quantity of coffee has been delivered into the cup, release the button. Delivery stops and the beep sound indicates that the quantity has been saved correctly.
- When the two coffee lights turn on steadily, the appliance is ready for use.
Please note: For 1-CUP, the shortest delivery time is 12 seconds, and the longest delivery time is 22 seconds. For 2-CUP, the shortest delivery time is 20 seconds, and the longest delivery time is 51 seconds.
8.4 Resetting the quantity of coffee
If you want to reset the programmed quantity of coffee, please proceed as follows:
- Connect the machine to the power supply but do not press the ON/OFF button.
- Press 1-CUP and 2-CUP simultaneously (do not release) for 3 seconds, then the machine will beep and all lights will flash 3 times indicating that the quantity of coffee has been reset.
9. HOW TO MAKE CAPPUCCINO
-
Prepare the espresso coffees as described in the previous sections, using sufficiently large cups.
-
Press the STEAM button.
-
In the meantime, fill the milk jug with about 100 grams of milk for each cappuccino to be prepared. Put an empty container under the steam wand and turn the steam knob to release some steam. Turn back to the OFF position and remove the empty container.
-
Place the jug containing the milk under the wand.
-
Immerse the wand in the milk. Never immerse the black ring. Turn the knob to the STEAM position. To obtain a creamier froth, immerse the wand in the milk and rotate the container with slow upward movements.
-
When the required temperature (the ideal is 60^ C) and froth density is reached, turn the steam dial to the OFF position.
-
Pour the frothed milk into the cups containing the espresso coffee prepared previously, the cappuccino is ready. Sweeten to taste and if desired, sprinkle the froth with a little cocoa powder.

natural_image
Line drawing of a coffee machine with lever and stand (no text or symbols)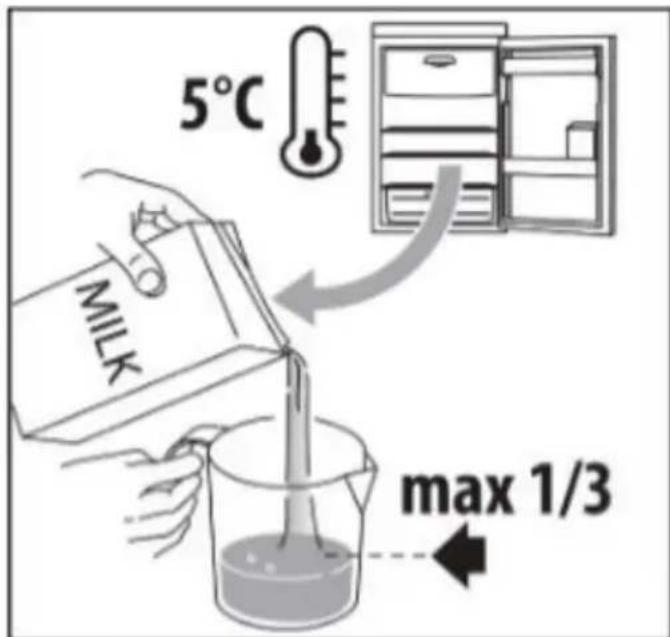

natural_image
Line drawing of a coffee maker with handle, spout, and cup (no text or symbols)
natural_image
Line drawing of a coffee machine with a 'TURN' label and side arm (no text or symbols on the device itself)Please note:
• To prepare more than one cappuccino, first make all the coffees then at the end prepare the frothed milk for all the cappuccinos;
- To make coffee again immediately after frothing milk, the boiler must first be cooled or the coffee will be burnt, so we suggest pressing the 1-CUP or 2-CUP button and releasing high-temperature water before making another cup of coffee.
- Be careful about the splashing hot water and steam released from the steam wand.
- When the steam button is lit up, you can not choose the 1-CUP or 2-CUP function - press the steam button again to cancel the steam mode.
- Do not steam for more than 60 seconds.
10. HOW TO MAKE HOT WATER
- Turn the appliance on by pressing the ON/OFF button.
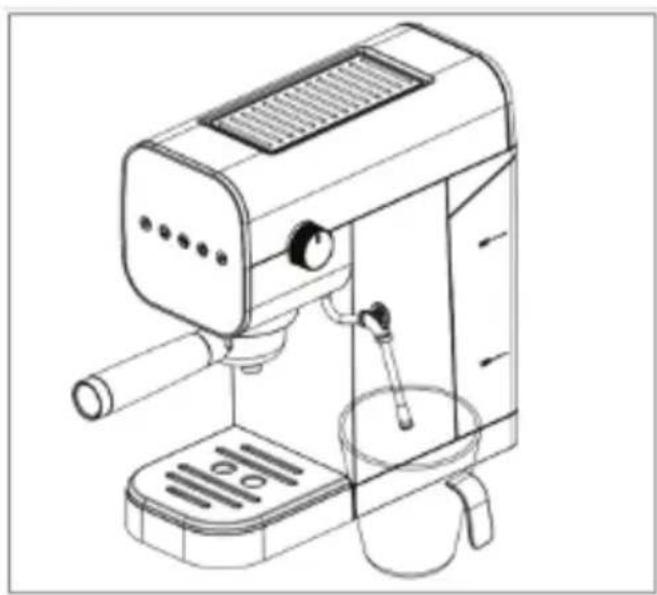
- Put a cup under the steam wand.
- Press the 'HOT WATER' button and open the steam knob to dispense water.
- You can stop the water by pressing the 'HOT WATER' button again.
natural_image
Line drawing of a coffee machine with handle and cup (no text or symbols)
Please note:
Water will be hot. If using a metal jug, the jug will get hot. Risk of scalding and burns.
Press the ON/OFF button to turn off the appliance and unplug when the appliance is not in use.
11. CLEANING
Important!
- Do not use solvents, abrasive detergents or alcohol to clean the coffee machine.
- Do not use metal objects to remove encrustations or coffee deposits as they could scratch metal or plastic surfaces.
- If the appliance is not used for more than one week, before using it again, we strongly recommend you perform a rinse cycle as described in section "7. First Use".
Danger!
- While cleaning, never immerse the coffee maker in water or any other liquid. It is an electrical appliance.
11.1 Descale
Important: To ensure the pure taste of coffee, please descale the coffee machine every 2-3 months of use.
- Ensure that the descaling product is suitable for coffee machines.
- Fill the water tank with the descaling solution.
- Place a large container on the drip tray. Operate as if making coffee and steaming until the tank is empty.
- Rinse the water tank and fill it with fresh water.
- Operate as if making coffee and flush water through the machine. This will remove any traces of the descaling solution.
- Store the cleaned coffee machine unplugged with no coffee in the filter and with the water tank empty.
11.2 Cleaning the drip tray
Important! Please pay attention to the amount of water in the drip tray. The drip tray must be emptied and cleaned otherwise the water may overflow and damage the appliance, the surface it rests on or the surrounding area. We suggest cleaning it after each use. When cleaning the drip tray, please proceed as follows:
- Remove the drip tray and cup tray.
- Separate the cup tray and drip tray, clean them with a soft damp cloth,
then reassemble them.
• Dry it and put it back in the machine.
11.3 Cleaning the coffee filters
Clean the coffee filters regularly:
- Rinse the filters under running water;
• Make sure the holes are not blocked. If necessary, clean with a pin.
11.4 Other cleaning operations
- Do not use solvents or abrasive detergents to clean the coffee maker.
Use a soft damp cloth only.
- Clean the filter holder cup.
11.7 Cleaning the water tank
Clean the water tank regularly (about once a month) with a damp cloth and a little mild washing-up liquid.
11.8 Cleaning the steam wand.
Important:
For hygiene reasons, the steam wand should always be cleaned after use. Turn the steam dial to deliver a little steam for a few seconds. This causes the steam wand to discharge any milk left inside.
- Press the ON/OFF button to turn the appliance off.
- Ensure that the steam wand is cool before cleaning. Pull the Froth Nozzle off the Steam Wand and wash under running water to remove any milk residue.
Danger!
While cleaning, never immerse the coffee maker in water.
It is an electrical appliance.
12. TROUBLESHOOTING
| Problem | Cause | Solution |
| No espresso coffee is delivered | Residual air inside | Open the steam knob after heating up as described in section ‘7.FIRST USE’ |
| No water in the tank Fill the tank | ||
| The holes in the filter holder are blocked | Clean the filter holder spout holes | |
| The filter is blocked | Clean as described in section “11.3 Cleaning the coffee filters” | |
| The tank has been inserted incorrectly and the valves on the bottom are not open | Press the tank down lightly to open the valves on the bottom | |
| Limescale in the water circuit | Descale as described in section “11.1 Descale” | |
| The espresso coffee drips from the edges of the filter holder rather than the holes | The filter holder has been inserted incorrectly or is dirty | Attach the filter holder correctly and rotate firmly as far as it will go |
| The holes in the filter holder spouts are blocked | Clean the filter holder spout holes | |
| The filter is blocked | Clean as described in section “11.3 Cleaning the coffee filters” | |
| The filter holder cannot be attached to the appliance | Too much coffee has been placed in the filter | Use the measure supplied and make sure you are using the correct filter for the type of preparation |
| The filter holder cannot be attached to the appliance | Too much coffee has been placed in the filter | Use the measure supplied and make sure you are using the correct filter for the type of preparation |
| The appliance will not make any coffee and the function button lights flash for a few seconds. | No water in the tank | Fill the tank with water |
| The tank has been inserted incorrectly and the valves on the bottom are not open | Press the tank down lightly to open the valves on the bottom | |
| The filter is blocked | Clean as described in section “11.3 Cleaning the coffee filters” | |
| Limescale in the water circuit | Descale as described in section “11.1 Descale” | |
| The coffee is too light (delivered from the spout too fast) | The pre-ground coffee is not pressed down firmly enough | Press the pre-ground coffee more firmly |
| There is not enough pre-ground coffee | Increase the quantity of pre-ground coffee | |
| The pre-ground coffee is too coarse | Use only pre-ground coffee for espresso coffee makers | |
| The wrong type of pre-ground coffee is being used | Change the type of pre-ground coffee |
| The coffee is too dark (delivered from the spout too slowly) | The pre-ground coffee is pressed down too firmly | Press the coffee down less firmly |
| There is not enough pre-ground coffee | Reduce the quantity of pre-ground coffee | |
| The filter is blocked | Clean as described in section “11.3 Cleaning the coffee filters” | |
| The pre-ground coffee is too fine | Use only pre-ground coffee for espresso coffee makers | |
| The pre-ground coffee is too fine or damp | Use pre-ground coffee for espresso coffee makers only and make sure it is not too damp | |
| Limescale in the water circuit | Descale as described in section “11.1 Descale” | |
| No milk froth is formed when making cappuccino | Milk not cold enough Always use | milk at refrigerator temperature (5°C) |
| Cappuccino maker dirty | Clean as described in section “11.6 Cleaning the steam wand after using” | |
| Limescale in the water circuit | Descale as described in section “11.1 Descale” | |
| The appliance does not function and all function button lights flash | Disconnect the appliance | immediately and contact Customer Service |
LENOXX
www.lenoxx.com.au

1300 666 848

LenoxxElectronics LenoxxElectronics


- SAFETY WARNINGS
- Designated use and restrictions
- Instructions for Use
- Checking the appliance
- DISPOSING OF THE APPLIANCE
- TECHNICAL PARAMETERS
- PRODUCT OVERVIEW
- INSTALLING THE APPLIANCE
- Connecting the Appliance
- Danger!
- FILLING THE WATER TANK
- Please note:
- Important:
- FIRST USE
- How to make a hotter coffee
- How to prepare espresso coffee using pre-ground coffee
- Danger of burns!
- Programming the quantities of coffee in the cup
- Resetting the quantity of coffee
- HOW TO MAKE CAPPUCCINO
- HOW TO MAKE HOT WATER
- CLEANING
- Important!
- Descale
- Cleaning the drip tray
- Cleaning the coffee filters
- Other cleaning operations
- Cleaning the water tank
- Cleaning the steam wand.
- TROUBLESHOOTING
- LENOXX
Brand : Healthy Choice
Model : ECM90
Category : Coffee maker