KAVACPOR9LT - Vacuum Cleaner Kogan - Free user manual and instructions
Find the device manual for free KAVACPOR9LT Kogan in PDF.


| Product Type | Handheld Cordless Vacuum |
| Brand | Kogan |
| Model | KAVACPOR9LT |
| Voltage | 7.4V |
| Charging Input | 220-240V~50/60Hz (adapter not included) |
| Charging Output | USB-C 5V |
| Charging Time | 3.5 to 4.5 hours |
| Battery Type | Rechargeable lithium-ion |
| Suction Modes | Normal and Turbo |
| Components Included | Vacuum body, 2-in-1 brush, brush, 2 extension tubes, USB-C charging cable, user guide |
| Filter Type | Washable (rinse with clean water) |
| Filter Drying Time | 24 hours before reassembly |
| Dust Cup | Removable, empty after each use |
| Indicator Lights | Blue solid in normal mode, flashing during charging, solid blue when fully charged |
| Safety Features | Charging lock-out, automatic shut-off on low battery, overheat protection |
| Operating Temperature | 0°C to 40°C |
| Recommended Use | Dry indoor areas only |
| Do Not Use For | Cement, plaster, glass, needles, cigarettes, wet dust, sewage, matches, etc. |
| Cleaning Instructions | Empty dust cup after each use, clean filter regularly |
| Support | Online at help.kogan.com |
Frequently Asked Questions - KAVACPOR9LT Kogan
User questions about KAVACPOR9LT Kogan
0 question about this device. Answer the ones you know or ask your own.
Ask a new question about this device
Download the instructions for your Vacuum Cleaner in PDF format for free! Find your manual KAVACPOR9LT - Kogan and take your electronic device back in hand. On this page are published all the documents necessary for the use of your device. KAVACPOR9LT by Kogan.
USER MANUAL KAVACPOR9LT Kogan
natural_image
Line drawing of a vacuum cleaner with a handle and base mount (no text or symbols)Z9 PRO HANDHELD CORDLESS VACUUM
KAVACPOR9LT
SAFETY & WARNINGS
- Do not suck up detergent, kerosene, broken glass, needle, cigarettes, wet dust, sewage, match, etc.
- Do not pick up small particles or large objects like cement, land plaster, calcimine. It may cause the model to be blocked; motor burned, etc.
- Do not operate the vacuum cleaner too close to heaters, radiators, and other hot surfaces.
- Never use the appliance without filters or the brush in place.
- Never operate with a blocked air inlet or blocked floor brush roller when using, or it may cause the motor to burn.
- Do not immerse the body of the vacuum cleaner into water as this could increase the risk of short circuit and burning the model.
- Always disconnect the charger when fully charged or during cleaning or maintaining. Do not stretch or pull the cable.
- Use a dry cloth to clean the appliance. Do not use alcohol or solvents as the surface of the appliance may be damaged.
- Do not use and store the appliance in a hot or cold environment. Only operate in a dry indoor area where the temperature is more than 0^ C but less than 40^ C. Avoid direct prolonged exposure to sun light.
- This appliance can be used by children aged from 8 years and above and persons with reduced physical, sensory, or mental capabilities or lack of experience and knowledge if they have been given supervision or instruction concerning the use of the vacuum cleaner in a safe way and understand the hazards involved.
• Children should not play with the vacuum cleaner. - Cleaning and user maintenance should not be performed by children without supervision.
- If the appliance is not operational after being fully charged. Cease use and contact help.Kogan.com for support.
- Do not disassemble the appliance as incorrect reassembly may result in an electric shock or fire.
- Depleted batteries should be safely recycled. Do not throw away with household rubbish.
- Do not use with damaged cable or plug. If the power cord is damaged, it must be replaced by Kogan.com, a service agent or similarly qualified person to avoid a hazard.
- Never submerge the body of the vacuum cleaner in water as this increases the risk of electrical short circuits and motor damage.
- Charge new or long-stored batteries before use and maintain the battery with regular charging every 3 months if not in use.
- Always keep hair, loose clothing, fingers, and all body parts away from openings and moving parts to avoid injuries.
COMPONENTS
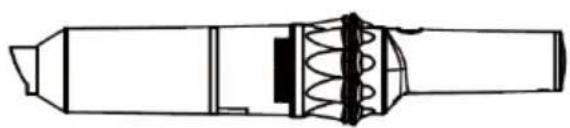
natural_image
Technical line drawing of a mechanical component with spring and housing (no text or symbols)Vacuum Body (x1)

2-in-1 Brush (x1)
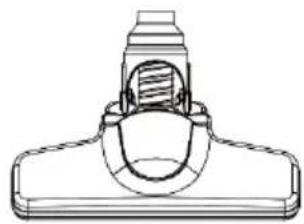
natural_image
Technical line drawing of a mechanical clamp or bracket component (no text or symbols)Brush (x1)

Extension Tube (x2)
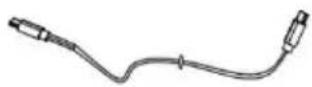
USB-A to USB-C
Charging Cable (x1)
User Guide (x1)
OVERVIEW
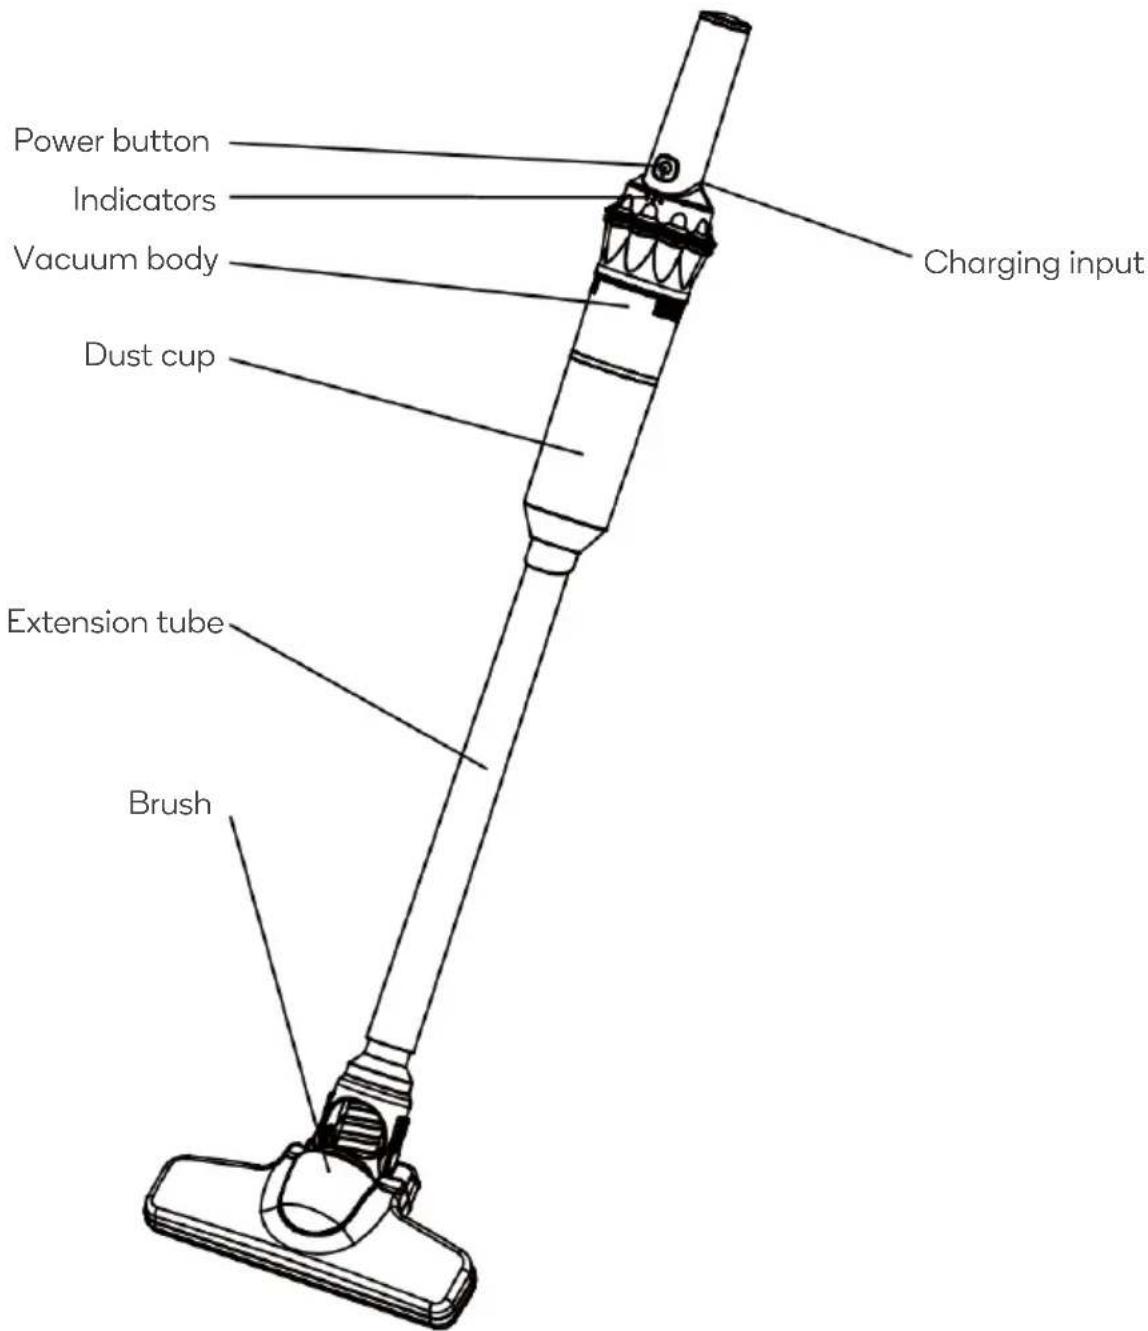
ASSEMBLY
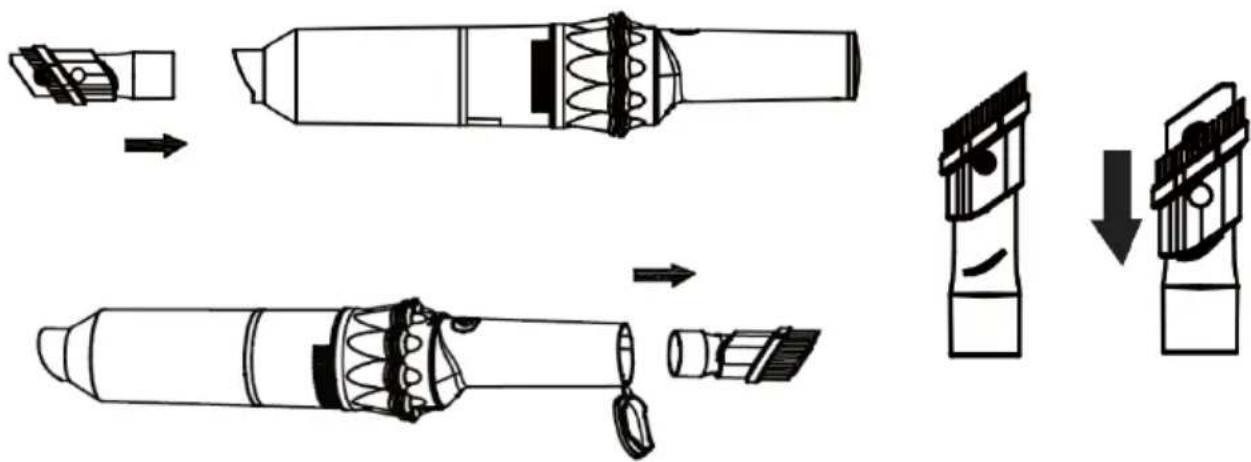
2-in-1 Brush
- Align the 2-in-1 brush with the end of the vacuum body and push it gently.
- The 2-in-1 brush, can be stored in the vacuum body when it is not in use.
- The 2-in-1 brush is versatile and can be used in both extended and retracted configurations to suit different cleaning needs.
flowchart
graph TD
    A["Initial Component"] --> B["Assembly Step 1"]
    B --> C["Assembly Step 2"]
    C --> D["Final Product with Arrow Down"]
    style A fill:#f9f,stroke:#333
    style D fill:#bbf,stroke:#333
Extension Tube
Align the extension tube with the vacuum cleaner body and push it gently.

natural_image
Diagram showing a mechanical component before and after assembly, with no visible text or symbolsConnecting the brush
Align the brush with the end of the extension tube and and push it gently.

natural_image
Technical line drawing of a mechanical component with no visible text or symbolsOPERATION
Turning the Vacuum On/Off
- Starting the Vacuum: Once assembly is complete, press the power button to power on the vacuum cleaner. The vacuum will start in normal mode, suitable for regular flooring cleaning. The indicator light will remain blue during this mode.
- Adjusting Suction Power: In normal mode, press the power button again to switch to turbo mode. This mode provides stronger suction power, ideal for cleaning deeper gaps in carpets and other tough areas.
- Turning Off the Vacuum: Press the power button once more to turn off the vacuum. The indicator light will also turn off, signalling that the vacuum is no longer in operation.
Charging the Vacuum Cleaner
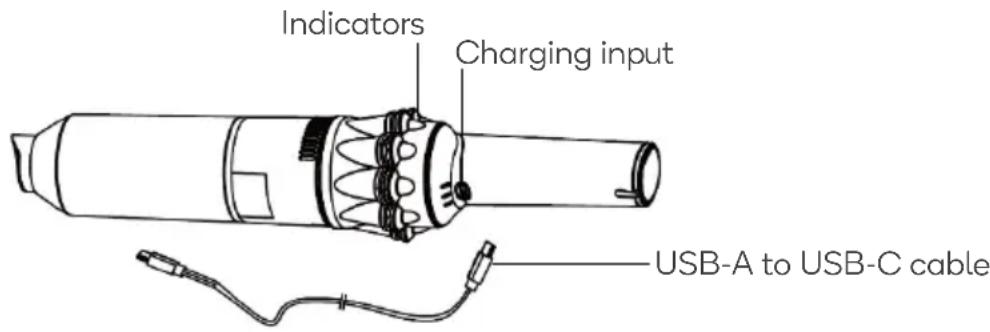
Connecting the Charger: Plug the USB-C end of the provided USB-C cable into the vacuums' charging input. Then, plug the USB-A end into a power adapter (not provided). The indicator light will flash, signalling that charging has begun. Note: Use only the provided charging cable to avoid damage.
Monitoring Charge Levels:
- Fully Charged: After approximately 4.5 hours, when the 3 the indicators turn solid blue, the battery is fully charged. Disconnect the charger immediately to preserve battery health.
- Low Power: When only 1 indicator is flashing, the vacuum has low power. The vacuum will automatically shut off to protect the battery. Charge the vacuum as soon as possible.
Charging Safeguards:
- Charging Lock-out: The vacuum features a safety mechanism that prevents operation while it is charging. If you attempt to turn on the vacuum during this time, the indicator light will flash, but the vacuum will not start.
- After Use: Always disconnect the charger once the battery is fully charged to maintain battery longevity and safety.
CLEANING & CARE
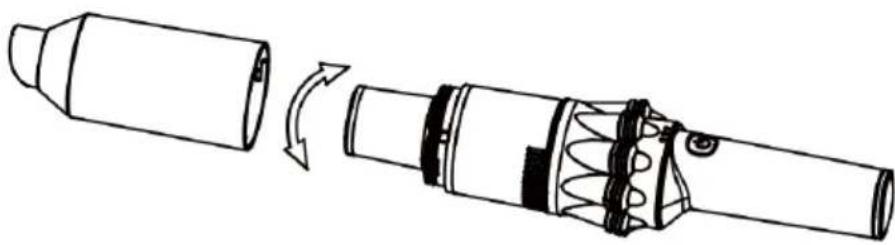
Dust Cup Assembly and Disassembly
Hold the vacuum body and rotate the dust cup assembly to the left and right until the dust cup is free from the vacuum body. Note: To maintain proper suction and operation, ensure the dust cup is emptied after each use and cleaned regularly.
natural_image
Diagram of a mechanical device with internal components and directional arrows indicating motion (no text or symbols)Cleaning the Filters
-
Disassembly: Grasp the air inlet assembly and turn the filter assembly counterclockwise until the buckle completely releases.
-
Use a soft brush to clean the dust from components.
-
Wipe the dust cup with a damp cloth.
-
Rinse the filter with clean water.
-
Allow the filters and filter housing to thoroughly air dry for 24 hours before reassembly.
Note: Do not use the vacuum filters without the filter installed.
- Installation: Replace the filter assembly onto the vacuum and turn it clockwise until it is securely back in place.
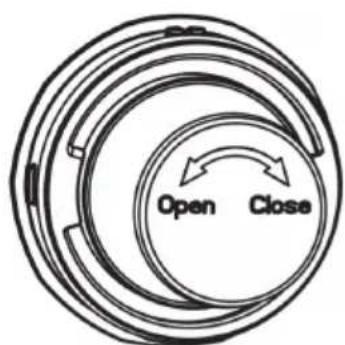
flowchart
graph TD
    A["Start"] --> B{Open}
    B --> C["Process"]
    C --> D["Close"]
    D --> E["End"]

natural_image
Simple line drawing of a cylindrical object with vertical lines, resembling a washer or container (no text or symbols)Filter
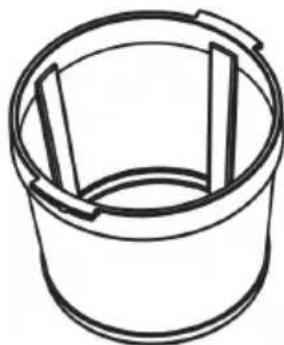
natural_image
Line drawing of a bucket with a handle and side panel (no text or symbols)Filter housing
SPECIFICATIONS
Voltage 7.4V
Charging input voltage
220-240V\~50/60Hz
Charging output voltage
USB-C 5V
Charging time 3.5h\~4.5h
Some minor issues can be resolved following the table below. If your problem persists, contact help.Kogan.com for support.
| Fault Cause | Solution | |
| Appliance doesn’t start | Flat battery Charge the vacuum cleaner. | |
| Reduced suction | The dust cup is full of dust.Filter is blocked.The air way is blocked | Empty the dust canister.Clean or replace the filter.Clear the air way |
| Insufficient application time after charging | Insufficient charging timeNormal discharge reduction in battery | Fully charge the battery. |
Need more information?
We hope that this user guide has given you the assistance needed for a simple set-up.
For the most up-to-date guide for your product, as well as any additional assistance you may require, head online to help.kogan.com
kogan.com
- Z9 PRO HANDHELD CORDLESS VACUUM
- SAFETY & WARNINGS
- COMPONENTS
- OVERVIEW
- ASSEMBLY
- 2-in-1 Brush
- Extension Tube
- Connecting the brush
- OPERATION
- Turning the Vacuum On/Off
- Charging the Vacuum Cleaner
- Monitoring Charge Levels:
- Charging Safeguards:
- CLEANING & CARE
- Dust Cup Assembly and Disassembly
- Cleaning the Filters
- SPECIFICATIONS
- Need more information?
Brand : Kogan
Model : KAVACPOR9LT
Category : Vacuum Cleaner