
PTED09 - Musical instrument Pyle - Free user manual and instructions
Find the device manual for free PTED09 Pyle in PDF.

| Product Type | Tabletop Digital Drum Machine Kit |
| Brand | Pyle |
| Model | PTED09 |
| Dimensions (L x W x H) | 23.22 x 15.35 x 5.19 inches (590 x 390 x 132 mm) |
| Weight | Approx. 5.5 lbs (2.5 kg) |
| Power Supply | AC 100-240V, 50/60Hz, 1.0A (12V DC 2A adapter) or USB-C 5V/2A |
| Drum Pads | 8 touch-sensitive rubber pads (4 x 5" drums, 4 x 3.5" cymbals) |
| Drum Kits | 80 preset + 10 user kits |
| Built-in Sounds | 600 drum sounds |
| Preloaded Songs | 110 songs + 1 demo + 5 user song storage |
| Connectivity | USB-C (MIDI In/Out), 1/8" AUX In, 1/4" Phones Out, Kick/Hi-Hat pedal jacks |
| Display | 3-digit LED |
| Tempo Range | 30 – 280 BPM |
| Recording Capacity | Up to 8000 strikes per user song |
| Hand Percussion Mode | Yes (touch-responsive pads with adjusted sensitivity) |
| Click | Adjustable beat, rhythm type, volume, and sound |
| EQ Effects | 3-band EQ (low, mid, high) with -6dB to +6dB adjustment |
| Included Accessories | 2 drum sticks, 2 foot pedals, wall power adapter, US plug |
| Maintenance | Clean with soft dry cloth; do not use solvents |
| Safety Certifications | FCC Part 15, IC RSS-102, California Prop 65 compliant |
| Spare Parts / Reparability | No user-serviceable parts; contact Pyle support for assistance |
| Warranty | Register at PyleUSA.com for warranty and support |
Frequently Asked Questions - PTED09 Pyle
User questions about PTED09 Pyle
0 question about this device. Answer the ones you know or ask your own.
Ask a new question about this device
Download the instructions for your Musical instrument in PDF format for free! Find your manual PTED09 - Pyle and take your electronic device back in hand. On this page are published all the documents necessary for the use of your device. PTED09 by Pyle.
USER MANUAL PTED09 Pyle
natural_image
Black PYLE 800 digital timer with four circular buttons and a digital display (no readable text or symbols beyond branding)PTED09
Tabletop Digital Drum Machine Kit
USER GUIDE
Contents
Main Features and Technical Specs 5
Panel & Display Description 6
Drum Pad Description (default setting) 6
Front Panel 7
Rear Panel 7
Getting Ready to Play 8
Setting Up Power Supply 8
Turning On the Power 8
Turning Off the Power 8
Auto Power Off 8
Playing the Rubber Head Pad 8
Drum Kits and Sounds 9
Selecting a Drum Kit 9
Selecting a Sound 9
Saving a User Kit 9
Song 11
Selecting a Song 11
Playing a Song 11
Muting the Drums in a Song 11
Click 12
Turning the Click On or Off 12
Setting the Click Parameters 12
Adjusting the Tempo 12
Recording 13
Prepare Recording 13
Start / Stop Recording 13
Utility Settings 14
Hand Percussion 15
Connecting to Computer 15
Factory Reset 16
Troubleshooting 16
Prompt Messages 16
Drum Sound List 17
Drum Kit List 19
Song List 20
GM Backing Sound List 21
GM Drum Kit List 22
MIDI Implementation Chart 24
Register Product 25
IC WARNING
- English:
This device complies with Industry Canada licence-exempt RSS standard(s).
Operation is subject to the following two conditions:
(1) This device may not cause interference, and (2) This device must accept any interference, including interference that may cause undesired operation of the device.
- French:
This equipment complies with IC RSS-102 radiation exposure limits set forth for an uncontrolled environment. This equipment should be installed and operated with minimum distance 20cm between the radiator and your body.
natural_image
Black PYLE DDA timer with four circular buttons and two audio jack devices, accompanied by wooden sticks (no text or symbols visible on main components)INFORMATION FOR YOUR SAFETY!
FCC REGULATION WARNING (for USA)
This equipment has been tested and found to comply with the limits for a Class B digital device, pursuant to Part 15 of the FCC Rules.
These limits are designed to provide reasonable protection against harmful interference in a residential installation. This equipment generates, uses, and can radiate radio frequency energy and, if not installed and used in accordance with the instructions, may cause harmful interference to radio communications. However, there is no guarantee that interference will not occur in a particular installation.
If this equipment does cause harmful interference to radio or television reception, which can be determined by turning the equipment off and on, the user is encouraged to try to correct the interference by one or more of the following measures:
- Reorient or relocate the receiving antenna.
- Increase the separation between the equipment and receiver.
- Connect the equipment into an outlet on a circuit different from that to which the receiver is connected.
- Consult the dealer or an experienced radio/TV technician for help.
Unauthorized changes or modifications to this system can void the user's authority to operate this equipment.
CAUTION:
The normal function of the product may be disturbed by Strong Electro Magnetic Interference. If so, simply reset the product to resume normal operation by following the owner's manual. In case the function could not resume, please use the product in another location.
PRECAUTIONS
PLEASE READ CAREFULLY BEFORE PROCEEDING
Please keep this manual in a safe place for future reference.
Power Supply
- Please connect the designated AC adaptor to an AC outlet of the correct voltage.
- Do not connect it to an AC outlet of voltage other than that for which your instrument is intended.
- Unplug the AC power adaptor when not using the instrument, or during electrical storms.
Connections
Before connecting the instrument to other devices, turn off the power to all units. This will help prevent malfunction and/or damage to other devices.
Location
Do not expose the instrument to the following conditions to avoid deformation, discoloration, or more serious damage:
- Direct sunlight
• Extreme temperature or humidity
• Excessive dusty or dirty location
• Strong vibrations or shocks - Close to magnetic fields
Interference with other electrical devices
Radios and televisions placed nearby may experience reception interference. Operate this unit at a suitable distance from radios and televisions.
Cleaning
Clean only with a soft, dry cloth. Do not use paint thinners, solvents, cleaning fluids, or chemical-impregnated wiping cloths.
Handling
Do not apply excessive force to the switches or controls. Do not let paper, metallic, or other objects into the instrument. If this happens, remove the electric plug from the outlet. Then have the instrument inspected by qualified service personnel.
Disconnect all cables before moving the instrument.
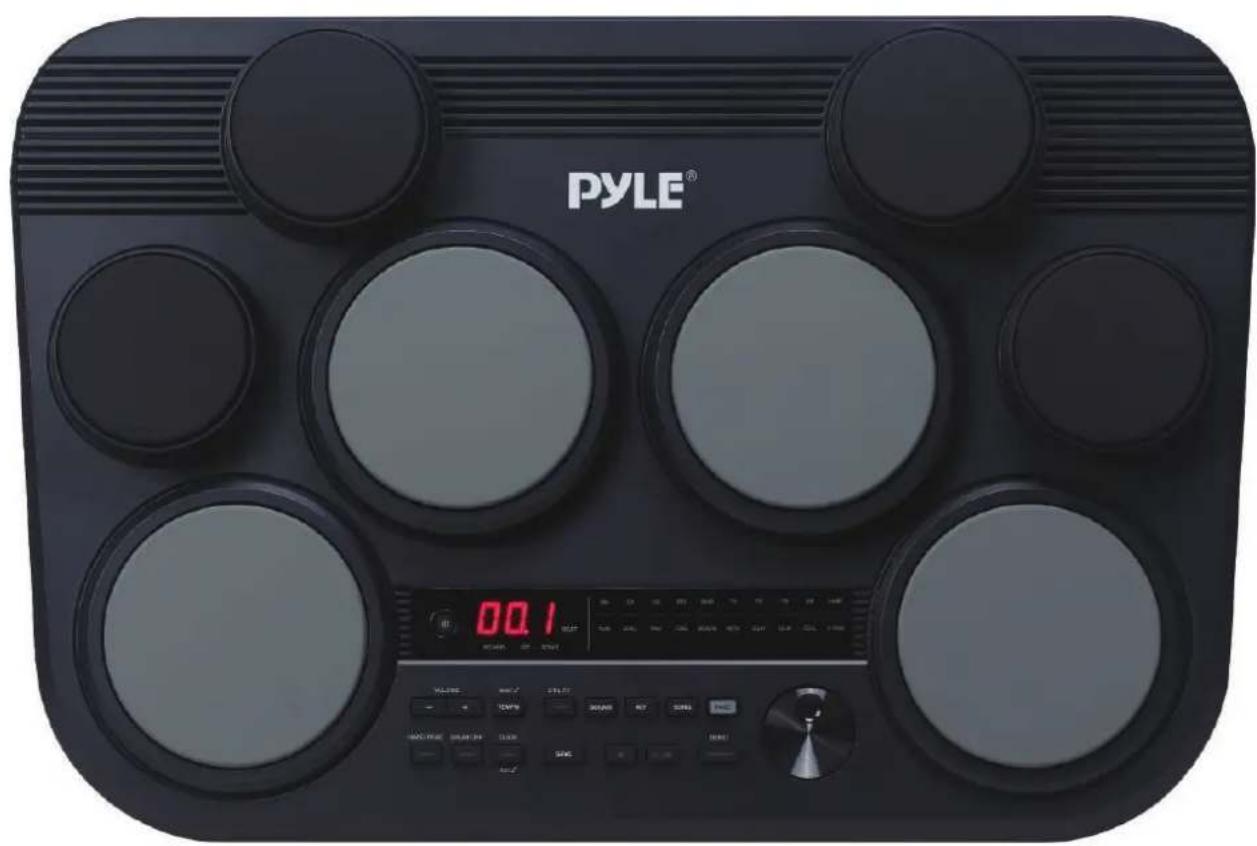
Main Features and Technical Specs
Features:
• 8 Drum Pads with Touch Sensitivity
- Compact and Portable Tabletop Design
• Preloaded with 80 Drum Kits
• 10 Custom User Kits Storage
• Headphone & USB Outputs
• 3-Digit LED Control Display
• 110 Preloaded Songs with 600 Different Sound Options
• 1 Demo Song
- 4 x 5" Rubber Drums
- 4 x 3.5" Rubber Cymbals
- Connect & Stream Audio from External Devices
- 5 User-Defined Songs Storage
• USB-C Port Doubles as MIDI In/Out
• 1/8" Auxiliary Input
• (1) Kick, (1) Hi-Hat & DC Power Inputs
- Drum Off Practice Feature
• MIDI Recording Capability
- Adjustable Tempo Range from 30-280 BPM
- EQ Effects
- Hand Percussion Mode: Touch-Responsive Pads
What's in the Box:
• Tabletop Digital Sound Module
• (2) Digital Foot Pedals
• (2) Drum Sticks
• Wall Power Adapter
• US Adapter Plug
Technical Specs:
• Cymbal & Drum Sounds: 600 [A1]
• Audio Drum Kits: 80
• Musical Songs: 110
- Demo Songs : 1
- USB Input: Type C
• External Device Connection: Aux (1/8") Input
• Power Supply: (IN)100-240V AC 50/60HZ 1.0A
• Max; (OUT)12V DC 2A, 2000mAh
• Product Dimensions (L x W x H): 23.22" x 15.35" x 5.19"-inches
California Prop 65 Warning
! WARNING:
This product can expose you to chemicals, which is known to the state of California to cause cancer birth defects and other reproductive harm. Do not ingest.
For more info go to: www.P65warnings.ca.gov
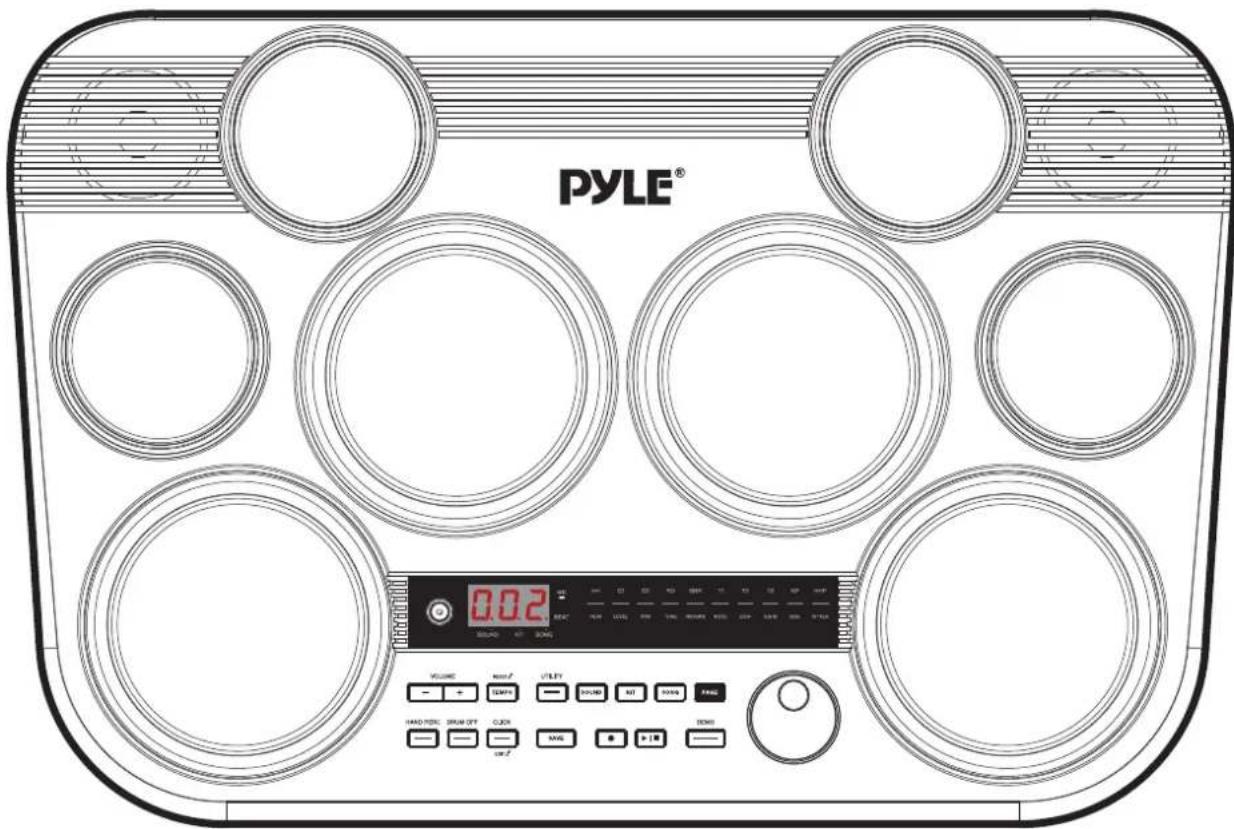
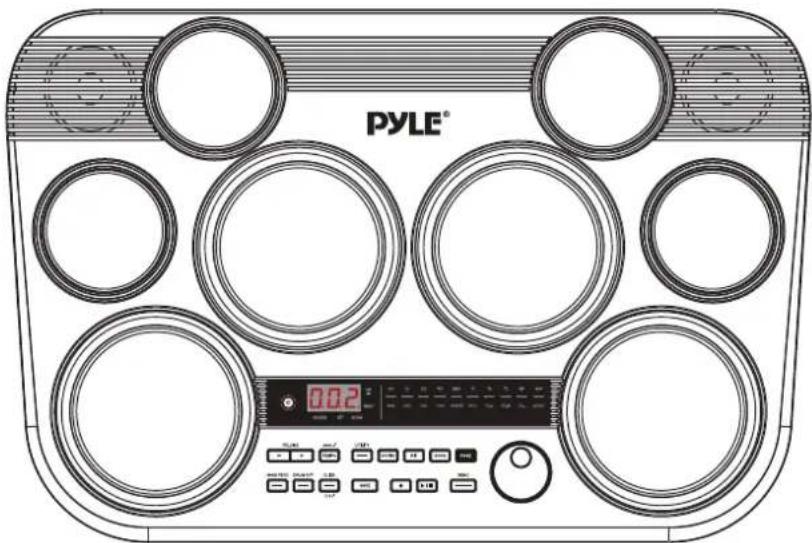
Panel & Display Description
Drum Pad Description (default setting)
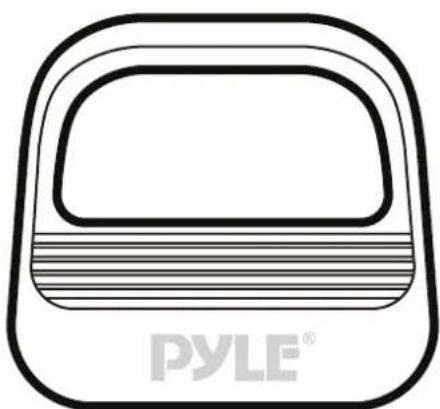
natural_image
Line drawing of a rounded rectangular object with horizontal stripes, labeled 'PYLE®' at the bottom (no other text or symbols)HI-HAT PEDAL KICK PEDAL
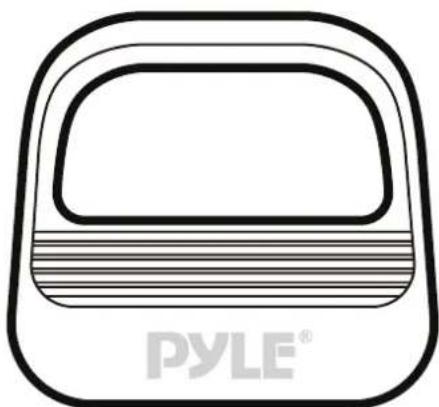
natural_image
Line drawing of a rounded rectangular object with horizontal stripes, labeled 'PYLE®' at the bottom (no other text or symbols)Front Panel
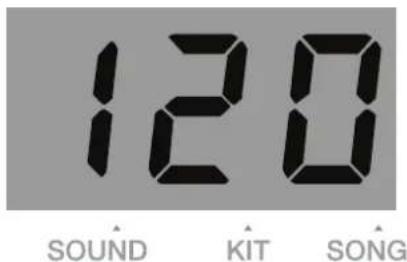
- [POWER] Button: Turn the power on or off.
- 3-Digit LED: Display the current mode and parameters.
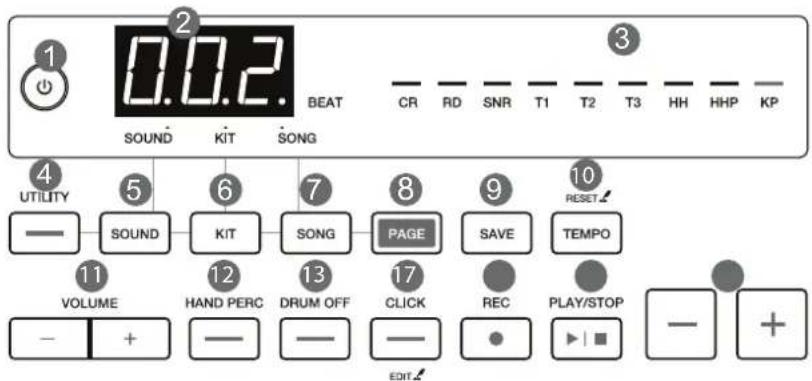
- Drum Pad Indicator / Page Indicator:
Drum pad indicator: _blinks.
Page (sub-menu) indicator: stays lit.
- [UTILITY] Button: Enter the Utility menu, then use the [PAGE] button to change the sub-menu.
- [SOUND] Button: Enter the Sound menu, then use the [PAGE] button to change the sub-menu.
- [KIT] Button: Enter the Kit menu, then use the [PAGE] button to change the sub-menu.
- [SONG] Button: Enter the Song menu, then use the [PAGE] button to change the sub-menu.
-
[PAGE] Button: Change the sub-menu of the current main menu.
-
[SAVE] Button: Save the current kit settings to a user kit.
- [TEMPO] Button: Press to enter the Tempo menu. Press and hold to reset to the default tempo of the current song.
- [VOLUME +/-] Buttons: Adjust the master volume.
- [DRUM OFF] button: Mute or unmute the drum part in a song.
- [CLICK] Button: Press to turn the click on or off. Press and hold to enter the Click menu, then use the [PAGE] button to change the sub-menu.
- [RECORD] Button: Enter or exit Record mode.
- [PLAY/STOP] Button: Play or stop playing a song.
- Data Button: Adjust the parameters.
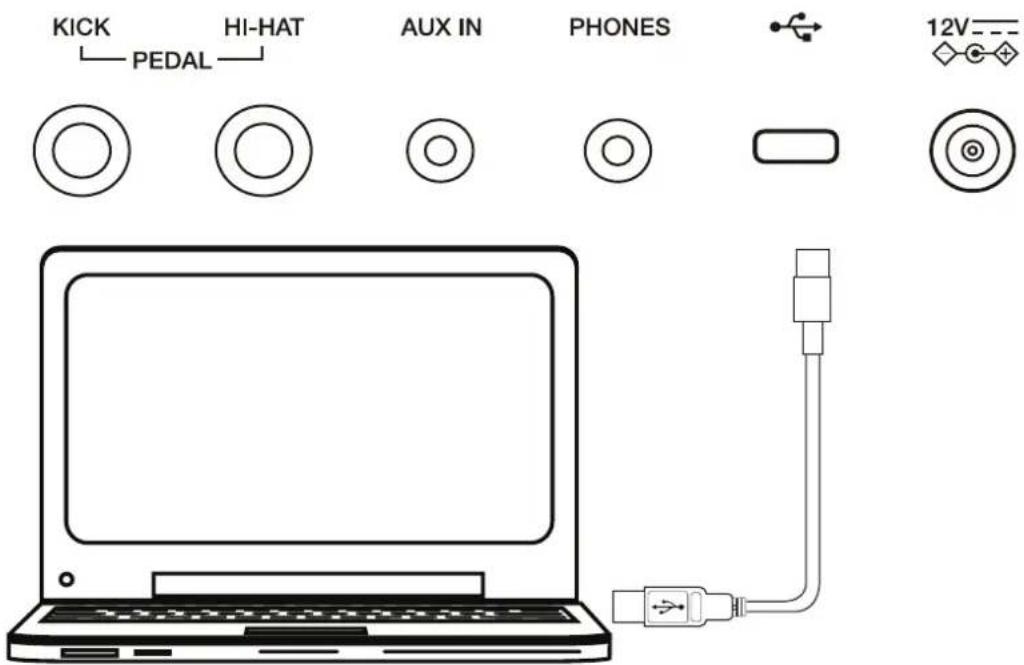
Rear Panel
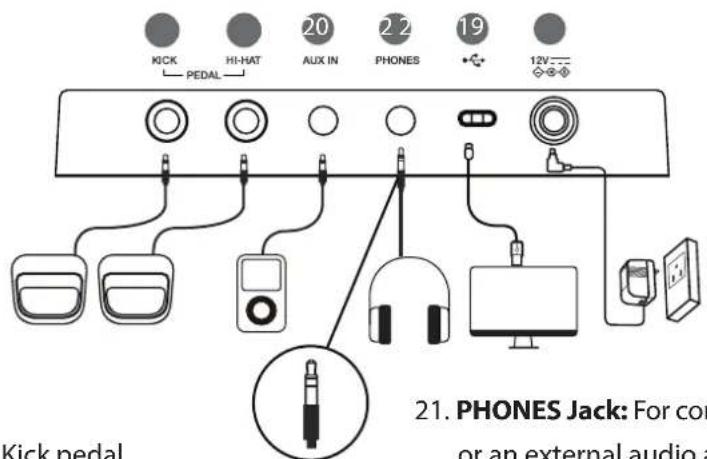
- KICK PEDAL Jack:
For connecting the Kick pedal.
- HI-HAT PEDAL Jack:
For connecting the Hi-Hat pedal.
Note: If connecting a kick pad or Hi-Hat pedal, please use a MONO cable.
-
AUX IN Jack: For connecting an external audio player, such as an MP3.
-
PHONES Jack: For connecting a pair of headphones or an external audio amplifier. Please use headphones without a mic. Using headphones with a mic may cause abnormal sound.
- USB Jack: For connecting to a computer or a portable power bank.
- Power Jack: For connecting the specified power adapter.
Getting Ready to Play
Setting Up Power Supply
- Connect the power adapter to the power jack on the rear panel.
- Connect the other end of the power cord to an appropriate AC outlet.
Notes:
- Use the specified power adapter.
- Even when the module is turned off, electricity is still flowing to the module at a minimum level. Please unplug the module when it is not in use for an extended period.
-
The module supports using USB power. Ensure the use of a high-quality USB-C cable and USB power adapter.
-
It supports a USB power adapter of 5V/2A.
- It supports a portable power bank of 5V/2A. It may not support all power bank brands.
- When using the module to communicate with a computer/mobile device, make sure to use the DC12V power adapter to power the module; otherwise, it may not function normally.
- When using USB power, the module will automatically reduce the output volume. In such a case, we suggest using headphones or external speakers.

Turning On the Power
- Press the [POWER] button to turn on the module. The display shows the current mode and parameter.
- Use the [MASTER VOLUME +/-] buttons to adjust the volume. Strike the pads and listen with headphones until you reach an appropriate volume level.
Notes:
- Before turning on or off the power, make sure you have turned down the volume of all connected equipment.
- When using the power adapter, the maximum volume level can reach 16. When using USB power, the maximum volume level will be limited to 12.
Turning Off the Power
Press the [POWER] button to turn off the module. The display turns off.
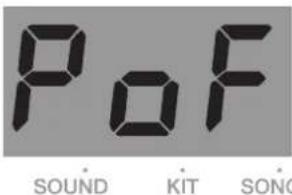
Auto Power Off
In order to save energy, the module will automatically turn off after 30 minutes if it is not in use (playing, striking, pressing buttons, etc.). To disable this function, hold the [PLAY/STOP] button and then turn on the power.
The display will temporarily show "PoF."
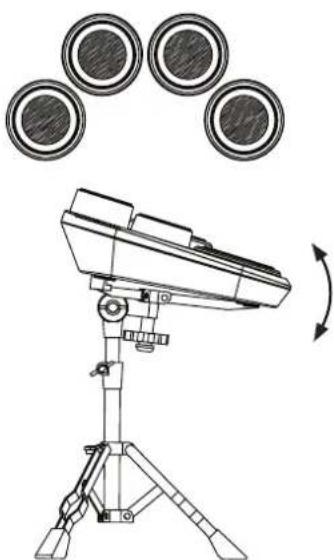
Playing the Rubber Head Pad
- When playing the rubber head pads, make sure not to strike the rim of the pads. If you strike the edge area of the pad, it may cause noise and crosstalk.
- When mounting the module to a snare drum stand, ensure that the drum pads are tilted properly towards the player. Doing this will help reduce the chance of striking the edge area of the rubber head pads. We suggest using a 14-inch snare drum stand.
natural_image
Technical line drawing of a surveying instrument with three circular components above it, showing rotational motion (no text or symbols)Drum Kits and Sounds
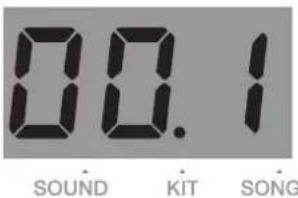
Selecting a Drum Kit
-
Press the [KIT] button to enter the Kit menu. The kit indicator lights up on the display.
-
The display shows the current kit number. Use the data button to select a desired drum kit.
You can press the [PAGE] button to change the sub-menu.

| Sub-menu | Display Range Description | ||
| Kit Number | 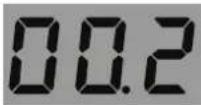 SOUND KIT SONG SOUND KIT SONG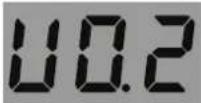 SOUND KIT SONG SOUND KIT SONG | 1~45,U01~U10 | Select a kit number. |
| Kit Volume | 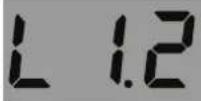 SOUND KIT SONG SOUND KIT SONG | 0~32 Adjust | the kit volume. |
Selecting a Sound
You can change the sound for each drum pad.
-
Press the [SOUND] button to enter the Sound menu. The sound indicator lights up on the display.
-
Strike the pad that you want to edit. The corresponding pad indicator blinks.
-
Use the data button to select a sound including a USER sound. You can press the [PAGE] button to change the sub-menu.


Saving a User Kit
-
Press the [SAVE] button. The current user kit number (such as "U01") blinks on the display.
-
Use the data button to select a user kit slot to save the setting (U01-U10).
-
Press the [SAVE] button again to confirm saving. The kit number on the display stops blinking.

Note:
Unsaved kit settings will be lost when you enter other menus or change the kit number.
| Sub-menu Display Range Description | |||
Num 1~273 Select a sound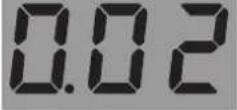 SOUND KIT SONG SOUND KIT SONG | number. | ||
Level 0~32 Ad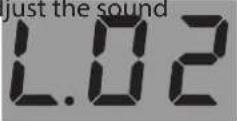 SOUND KIT SONG SOUND KIT SONG | volume. | ||
Pan -8~0~8 Adjust the page of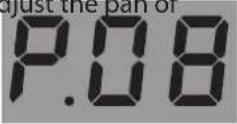 SOUND KIT SONG SOUND KIT SONG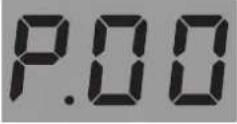 SOUND KIT SONG SOUND KIT SONG SOUND KIT SONG SOUND KIT SONG | the sound. | ||
Tune -8~0~8 Adjust the pitch of SOUND KIT SONG SOUND KIT SONG SOUND KIT SONG SOUND KIT SONG SOUND KIT SONG SOUND KIT SONG | the sound. | ||
Reverb 0~16 Adjust the reverse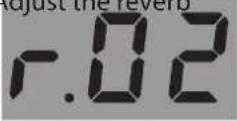 SOUND KIT SONG SOUND KIT SONG | level of the sound. | ||
MIDI Note 0~99 The MIDI note will SOUND KIT SONG SOUND KIT SONG | be sent via MIDI OUT. | ||
Song
Selecting a Song
-
Press the [SONG] button to enter the Song menu. The song indicator lights up on the display.
-
The display shows the current song number. You can use the data button to select a song. If you select song No.1\~100, it will loop playing this song. If you select song No.101\~110 or a user song, it will play this song once and then stop.
| Sub-menu Display Range Description | |||
| Song Num 1~ |  SOUND KIT SONG SOUND KIT SONG | U01~U05 | Select a song number |
| Song Vol 0~32 |  SOUND KIT SONG SOUND KIT SONG | song volume | |
| PAD LED ON/OFF | 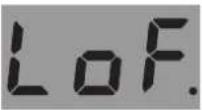 SOUND KIT SONG SOUND KIT SONG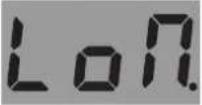 SOUND KIT SONG SOUND KIT SONG | On, Off | Turn the pad indicator on/off for song playback.LoF: light off.Lon: light on. |
Playing a Song
- Press the [PLAY/STOP] button to play or stop the current song. When the song is playing, you can use the data button to select a song. The selected song will start playing when the current measure is finished.
- While the song is playing, you can press the [CLICK] button to turn the click on or off.
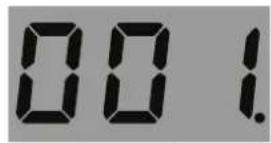
- While the song is playing, the dots on the display blink with the song tempo. The three dots will blink at the same time at the first beat of each measure.
- Press the [TEMPO] button to enter the Tempo menu. The display shows the current tempo. You can use the data button to change the tempo. If you press and hold the [TEMPO] button, it will reset to the default tempo of the current song. You can press other menu buttons to exit the Tempo menu. Or if there's no operation within 3 seconds, it will automatically exit and go back to the previous menu.
Muting the Drums in a Song
- Press the [DRUM OFF] button to mute the drum part of the current song. The button indicator turns on.
- When the drum part is muted, the corresponding drum pad indicators will turn on according to the drum rhythm.
- Press the [DRUM OFF] button again to unmute the drum part.
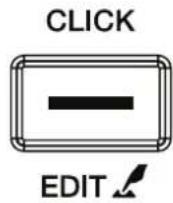
CLICK
EDIT

SOUND
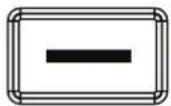
The First Beat
BEAT
SOUND
Other Beats
BEAT
DRUM OFF
Click
Turning the Click On or Off
- Press the [CLICK] button to start the click.
The button indicator blinks in sync with the tempo. - Press the [CLICK] button again to turn off the click.
Setting the Click Parameters
- Press and hold the [CLICK] button to enter the Click menu. The display shows the corresponding click parameter.
- Use the data button to adjust the parameters. You can press the [PAGE] button to change the sub-menu.
| Sub-menu | Display Range Description | ||
| Beat 0~9 Set | the beat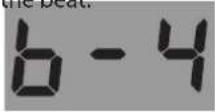 SOUND KIT SONG SOUND KIT SONG | ||
| Rhythm Type | 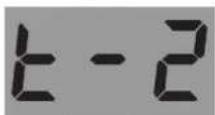 SOUND KIT SONG SOUND KIT SONG | 2 (half note)4 (quarter note)8 (eighth note)3 (eighth note triplet)16 (sixteenth note) | Set the rhythm of the click. |
| Volume 0~16 | 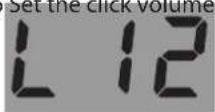 SOUND KIT SONG SOUND KIT SONG | ||
| Sound 1~6 Set | 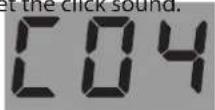 SOUND KIT SONG SOUND KIT SONG |
Adjusting the Tempo
-
Press the [TEMPO] button to enter the Tempo menu. The display will show the current tempo.
-
Use the data button to adjust the tempo within the range of 30 to 280. If you long-press the [TEMPO] button, it will reset to the default tempo of the current song.
-
To exit the Tempo menu, press other menu buttons. If there's no operation within 3 seconds, it will automatically exit and return to the previous menu.
Note:
The click tempo will change in sync with the current song tempo. When you change the song, the tempo will adjust accordingly.

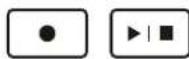
Recording
Prepare Recording
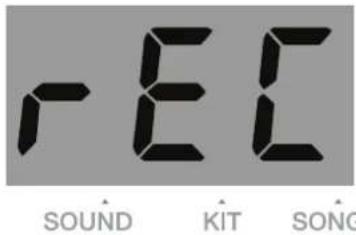
- Press the [RECORD] button to enter Record mode.
The display will show "REC". The [RECORD] button indicator lights up, and the [PLAY/STOP] button indicator blinks.
- Press the [PAGE] button to navigate to the sub-menu, then use the data button to adjust the parameters.
| Sub-menu | Display Range Description | |
| UserSong |  SOUND KIT SONG SOUND KIT SONG | U01~U05 Select a user song number. |
| Kit 1~45, |  SOUND KIT SONG SOUND KIT SONG | U01~U10Select a kit for recording. |
| Song --- ,1~1( |  SOUND KIT SONG SOUND KIT SONG | |
| Beat 0~9 |  SOUND KIT SONG SOUND KIT SONG | |
| Tempo 30~2{ |  SOUND KIT SONG SOUND KIT SONG |

Start/Stop Recording
-
In Record mode, press the [PLAY/STOP] button or strike a pad to start recording. The display shows the measure counts of recording. The dots on the display blink according to the selected tempo and beat. During recording, the [RECORD] and the [PLAY/STOP] button indicators stay lit.
-
Press the [PLAY/STOP] button to stop recording. The [RECORD] and the [PLAY/STOP] button indicators turn off.
Notes:
-
It can record up to 8000 strikes. When the recording is full, the display will show "FUL" and return to the Song menu.
-
When editing kit settings, save the edited kit as a user kit before entering Record mode. If you use unsaved kit settings for recording, when you play back this user song, it will sound different from the recording.
Utility Settings
In Utility Settings, you can set the global EQ and trigger parameters.
Global EQ: The 3-band EQ can adjust separately the bass (100Hz), the mid-range (500\~3KHz), and the treble (12KHz) within the adjustable range of -6dB to +6dB.
Trigger parameters: Adjust the crosstalk, gain, and threshold for a pad.
- Press the [UTILITY] button to enter the Utility menu. The display shows the parameter of the current sub-menu.
- Use the data button to adjust the parameter. Press the [PAGE] button to navigate to different sub-menus.
Detailed parameters and their ranges:
| Sub-menu | Display Range Description | |
| Reverb |  SOUND KIT SONG SOUND KIT SONG | 0~4 Set the reverb level. |
| EQ High |  SOUND KIT SONG SOUND KIT SONG | 1~9Set the high-band gain, range is:1=-3dB, 2=-2dB, 3=-1.5dB, 4=-1dB, 5=0dB, 6=1dB, 7=1.5dB, 8=2dB, 9=3dB |
| EQ Middle |  SOUND KIT SONG SOUND KIT SONG | 1~9Set the mid-band gain.Same range as the high-band gain. |
| EQ Low |  SOUND KIT SONG SOUND KIT SONG | 1~9Set the Low-band gain.Same range as the high-band gain. |
| Pad X-Talk |  SOUND KIT SONG SOUND KIT SONG | 0~32This setting helps prevent "crosstalk". Crosstalk means when you strike a pad, the adjacent pad also produces sound. For example: when you hit the snare, tom1 also produces sound. In this case, you can gradually increase the "X-talk" value for tom1.Note:If the X-talk value is set too high, when two pads are being played at the same time, the one being struck less forcefully may not produce sound. |
| Pad Gain |  SOUND KIT SONG SOUND KIT SONG | 0~32Adjust the sensitivity of pads.Higher sensitivity allows the pad to produce a loud volume even when playing softly.Lower sensitivity makes the pad produce a low volume even when playing forcefully. |
| Pad Threshold |  SOUND KIT SONG SOUND KIT SONG | 0~32Setting the threshold of the pads. It will produce sound only when the trigger signal is above the threshold level. This setting can prevent unwanted sounding, such as crosstalk. If setting this value too high, it may not produce sound when striking softly.You can adjust the threshold in this way:1. Set the value to a low level.2. Raise the value gradually, and strike the pad 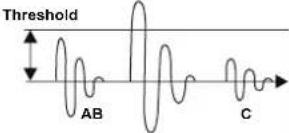 to check, until you get an appropriate level. to check, until you get an appropriate level. |
Notes:
- These settings will be saved automatically when you turn off the power: utility settings, master volume, the number/volume/pad LED setting of the current song, and the beat/volume/sound setting of the click.

- Hold [UTILITY] + [SAVE] buttons and turn on the power to reset the utility settings, song number, and master volume to the default settings.
Hand Percussion
The module provides easy access to hand percussion practice.
-
Press the [HAND PERC] button to enter Hand Percussion mode. The current drum kit will change to use the hand percussion kit. The pad sensitivity will automatically be readjusted to a higher level suitable for hand practice.
-
Press the [HAND PERC] button again to exit this mode.
HAND PERC
natural_image
Simple geometric diagram with a black rectangle inside a rounded rectangle (no text or symbols)Note:
When entering Hand Percussion mode, the current song will change to use a song that has a hand percussion kit. Upon exiting this mode, it will revert to the previous song and adjust the current drum kit accordingly.
Connecting to Computer
The module has a USB jack that can be connected to a computer for MIDI input or MIDI output.
The module can work without installing a driver in the Windows operating system and macOS, and it will be recognized under the name "e-drum."
Note:
The module is compatible with these USB ports: USB 3.0, USB 2.0 full speed, and USB high speed.
Factory Reset
- Push the [POWER] button to turn the power off.
- Hold the [+] and [-] buttons and push [POWER] to perform a factory reset.
Note: This operation will reset all data.
Troubleshooting
| Problem Possible Cause and Solution | |
| No sound. Use the [VOLUME +/-] buttons to set an appropriate volume level. | |
| No sound from the pads. Make sure the pad volume is not set to “0”. | |
| No click sound. | 1. Make sure the click is turned on.2. Make sure the click volume is not set to “0”. |
| The pad volume doesn’t match the song playback volume. | Adjust the pad volume to match the song playback volume. |
| Cannot connect to computer. | 1. Make sure the USB cable is connected correctly.2. Make the connection again (keep the computer on, then turn the module on, then connect the USB cable).3. The module should work without installing a driver. |
Prompt Messages
| Message on display Meaning | |
| Pof | Auto Power Off function is disabled. |
| --- No data in the user sound. | |
| NUL No data in the user song. | |
| FUL The memory of the user song is full. | |
Drum Sound List
No. Name
KICK
1 Rock Kick
2 Fusion Kick
3 1970's Kick
4 Reggae Kick
5 Old School Kick
6 Magic Kick
7 Noise Kick
8 Lo-Fi Kick
9 Junkyard Kick
10 24"Acoustic Kick
11 24"Standard Kick
12 Brush Kick
13 Jazz Kick
14 Room Kick
15 Vintage Kick
16 HipHop Kick
17 Drum & Bass Kick
18 Electronic Kick 1
19 Dance Kick
20 FX Mix Kick
21 Techno Kick
22 808 Kick
23 909 Kick
24 Electronic Kick 2
SNARE
25 14"Acoustic Snare
26 14"Standard Snare
27 14" Funk Snare
28 Brush Snare
29 14" Jazz Snare
30 14" Rock Snare
31 13"|Damped Snare
32 Orchestra Snare
33 Orchestra Snare Rim
34 Room Snare
35 Fusion Snare
36 Big|Band Snare
37 Vintage Snare
38 Live Snare
39 Reggae Snare
40 R&B Snare 1
41 808 Snare
42 909 Snare
43 R&B Snare 2
44 Electronic Snare
45 Power Snare
46 Dance Snare
47 Old School Snare
48 House Snare
49 Lo-Fi Snare
50 Junkyard Snare
51 Noise Snare
52 Drum & Bass Snare
53 Techno Snare
54 Techno Snare Rim
55 Magic Snare
56 Acoustic Snare Stick
57 Standard Snare Stick
58 Brush Snare Stick
59 Rock Snare Stick
60 Live Snare Stick
61 Room Snare Stick
62 Fusion Snare Stick
63 Brush Swirl
Tom
64 Acoustic Tom 1
65 Acoustic Tom 2
66 Acoustic Tom 3
67 Acoustic Tom 4
68 Acoustic Tom 5
69 Acoustic Tom 6
70 Brush Tom 1
71 Brush Tom 2
72 Brush Tom 3
73 Brush Tom 4
74 Brush Tom 5
75 Brush Tom 6
76 Jazz Tom 1
77 Jazz Tom 2
78 Jazz Tom 3
79 Jazz Tom 4
80 Jazz Tom 5
81 Jazz Tom 6
82 808 Tom 1
83 808 Tom 2
84 808 Tom 3
85 808 Tom 4
86 808 Tom 5
87 808 Tom 6
88 909 Tom 1
89 909 Tom 2
90 909 Tom 3
91 909 Tom 4
92 909 Tom 5
93 909 Tom 6
94 Electronic Tom 1
95 Electronic Tom 2
96 Electronic Tom 3
97 Electronic Tom 4
98 Electronic Tom 5
99 Electronic Tom 6
100 Power Tom 1
101 Power Tom 2
102 Power Tom 3
103 Power Tom 4
104 Power Tom 5
105 Power Tom 6
106 Lo-Fi Tom 1
107 Lo-Fi Tom 2
108 Lo-Fi Tom 3
109 Lo-Fi Tom 4
110 Lo-Fi Tom 5
111 Lo-Fi Tom 6
112 Junkyard Tom 1
113 Junkyard Tom 2
114 Junkyard Tom 3
115 Junkyard Tom 4
116 Junkyard Tom 5
117 Junkyard Tom 6
118 Noise Tom 1
119 Noise Tom 2
120 Noise Tom 3
121 Noise Tom 4
122 Noise Tom 5
123 Noise Tom 6
124 Techno Tom 1
125 Techno Tom 2
126 Techno Tom 3
127 Techno Tom 4
128 Techno Tom 5
129 Techno Tom 6
130 Magic Tom 1
131 Magic Tom 2
132 Magic Tom 3
133 Magic Tom 4
Ride
134 20" Funk Ride
135 808 Ride
136 909 Ride
137 Ride
138 House Ride
139 Lo-Fi Ride
140 Junkyard Ride
141 Noise Ride
Crash
142 16" Acoustic Crash 1
143 16" Acoustic Crash 2
144 16" Acoustic Crash Edge
145 16" Rock Crash
146 16" Rock Crash Edge
147 808 Crash
Drum Sound List
| 148 909 Crash |
| 149 Electronic Crash |
| 150 EDM Crash 1 |
| 151 EDM Crash 2 |
| 152 Brush Crash |
| 153 Lo-Fi Crash |
| 154 China |
| 155 Splash |
| Hihat |
| 156 14" Acoustic Hi-hat Close |
| 157 14" Acoustic Hi-hat Open |
| 158 14" Acoustic Hi-hat Edge Close |
| 159 14" Acoustic Hi-hat Edge Open |
| 160 14" Acoustic Hi-hat Pedal |
| 161 14" Acoustic Hi-hat Splash |
| 162 Rock Hi-hat Close |
| 163 Rock Hi-hat Open |
| 164 Fusion Hi-hat Close |
| 165 Fusion Hi-hat Open |
| 166 Lo-Fi Hi-hat Close |
| 167 Lo-Fi Hi-hat Open |
| 168 Lo-Fi Hi-hat Edge |
| 169 Lo-Fi Hi-hat Pedal |
| 170 Lo-Fi Hi-hat Splash |
| 171 808 Hi-hat Close |
| 172 808 Hi-hat Open |
| 173 808 Hi-hat Pedal |
| 174 808 Hi-hat Splash |
| 175 909 Hi-hat Close |
| 176 909 Hi-hat Open |
| 177 909 Hi-hat Pedal |
| 178 909 Hi-hat Splash |
| 179 Dance Hi-hat Close |
| 180 Dance Hi-hat Open |
| 181 Dance Hi-hat Pedal |
| 182 Dance Hi-hat Splash |
| 183 EDM_Hi-hat Close |
| 184 EDM_Hi-hat Open |
| 185 EDM_Hi-hat Pedal |
| PERCUSSION 1 |
| 186 Vibra-slap |
| 187 Vibraphone G3 |
| 188 Vibraphone A3 |
| 189 Vibraphone B3 |
| 190 Vibraphone C4 |
| 191 Vibraphone D4 |
| 192 Vibraphone E4 |
| 193 Vibraphone F4 |
| 194 Vibraphone G4 |
| 195 Vibraphone A4 |
| 196 Vibraphone B4 |
| 197 Vibraphone C5 |
| 198 Vibraphone D5 |
| 199 Vibraphone E5 |
| 200 Vibraphone F5 |
| 201 Vibraphone G5 |
| 202 Orchestra Timp C2 |
| 203 Orchestra Timp D2 |
| 204 Orchestra Timp E2 |
| 205 Orchestra Timp F2 |
| 206 Orchestra Timp G2 |
| 207 Orchestra Timp A2 |
| 208 Orchestra Timp B2 |
| 209 Orchestra Timp C3 |
| 210 Orchestra Timp D3 |
| 211 Orchestra Timp E3 |
| 212 Orchestra Timp F3 |
| 213 Orchestra Timp G3 |
| 214 Orchestra Timp A3 |
| 215 Orchestra Timp B3 |
| 216 Orchestra Timp C4 |
PERCUSSION 2
| 217 Tajko Drum |
| 218 Maracas |
| 219 Sticks |
| 220 Metronome Bell |
| 221 Synthesis Percussion |
| 222 High Q |
| 223 Low Q |
| 224 Mute Hi Conga |
| 225 Open Hi Conga |
| 226 Low Conga |
| 227 High Bongo |
| 228 Low Bongo |
| 229 High Timbale 1 |
| 230 High Timbale 2 |
| 231 Low Timbale 1 |
| 232 Low Timbale 2 |
| 233 High Agogo |
| 234 Low Agogo |
| 235 Claves |
| 236 Jingle Bell |
| 237 Cowbell |
| 238 Bell Tree |
| 239 Tambourine |
| 240 Cabasa |
| 241 Long Guiro |
| 242 Short Guiro |
| 243 Wood Hi |
| 244 Wood Low |
| 245 Cuica Mute |
| 246 Cuica Open |
| 247 Triangle Mute |
| 248 Triangle Open |
| Chinese |
| 249 Dagu 1 |
| 250 Dagu 2 |
| 251 Zhu ban |
| 252 Nan Bang |
| 253 Damuyu |
| 254 Xiaomuyu 1 |
| 255 Xiaomuyu 2 |
| 256 Xiaomuyu 3 |
| 257 Xiaomuyu 4 |
| 258 Paigu 1 |
| 259 Paigu 2 |
| 260 Paigu 3 |
| 261 Mangluo 1 |
| 262 Mangluo 2 |
| 263 Mangluo 3 |
| 264 Daluo 1 |
| 265 Daluo 2 |
| 266 Dabo 1 |
| 267 Dabo 2 |
| 268 Xiaobo |
| 269 Xiaoluo |
| 270 Tenluo |
| 271 Penglin 1 |
| 272 Dogluo |
| Animal |
| 273 Mute |
Drum Kit List
| No. Preset Kit Name |
| 1 Standard 1 |
| 2 Hard Rock |
| 3 Ballad |
| 4 Acoustic |
| 5 Latin Perc |
| 6 Standard 2 |
| 7 Jazz Brush |
| 8 Dacne |
| 9 Rock |
| 10 Jazz 1 |
| 11 808 1 |
| 12 909 1 |
| 13 Latin |
| 14 Room |
| 15 Jazz 2 |
| 16 Metal |
| 17 Vibraphone |
| 18 Electronic |
| 19 Reggae |
| 20 Fusion |
| 21 Drum & Bass |
| 22 Pop |
| 23 Brush |
| 24 World |
| 25 Ska |
| 26 Chinese Perc |
| 27 Orchestra |
| 28 Lo_Fi |
| 29 1970's |
| 30 Hip Hop |
| 31 Big Band |
| 32 Old School |
| 33 Rock Ballad |
| 34 808 2 |
| 35 909 2 |
| 36 Magic |
| 37 Live |
| 38 House |
| 39 Percussion |
| 40 Teckno |
| 41 Vintage |
| 42 Junkyard |
| 43 Noise |
| 44 Studio 1 |
| 45 Studio 2 |
| User Kit | |
| 46 Standard 1 | |
| 47 Hard Rock | |
| 48 Ballad | |
| 49 Acoustic | |
| 50 Funk Band | |
| 51 Standard 2 | |
| 52 Jazz Brush | |
| 53 Dacne | |
| 54 Rock | |
| 55 Jazz 1 |
Song List
| No. | Name |
| 1 Gospel1 | |
| 2 Gospel2 | |
| 3 Pop Latin1 | |
| 4 Pop Latin2 | |
| 5 City Pop | |
| 6 Pop Fusion | |
| 7 Jazz Fusion | |
| 8 Hardcore | |
| 9 Slow R&B | |
| 10 City Funk | |
| 11 R&B1 | |
| 12 Funk1 | |
| 13 Medium Swing | |
| 14 Ele Dance | |
| 15 Disco1 | |
| 16 Trance1 | |
| 17 Hiphop1 | |
| 18 Punk1 | |
| 19 Punk2 | |
| 20 Hardcore Rock | |
| 21 Pop Rock | |
| 22 Bossa Nova1 | |
| 23 Salsa1 | |
| 24 Reggae1 | |
| 25 Mambo1 | |
| 26 R&B Pop | |
| 27 Dance Pop1 | |
| 28 Dance Pop2 | |
| 29 Ele Pop | |
| 30 Blues Funk | |
| 31 Nu Jazz Funk | |
| 32 Funk2 | |
| 33 Funk3 | |
| 34 Pop Funk1 | |
| 35 Pop Funk2 | |
| 36 Retro Funk | |
| 37 Fuslon1 | |
| 38 Fuslon2 | |
| 39 Fuslon3 | |
| 40 Fuslon4 | |
| 41 Cool Jazz | |
| 42 Big Band 1 | |
| 43 Big Band 2 | |
| 44 Swing | |
| 45 3/4 Jazz | |
| 46 Jazz | |
| 47 Latin Jazz1 | |
| 48 Latin Jazz2 | |
| 49 Dance1 | |
| 50 Disco House | |
| 51 Trance2 |
| 52 TripHop |
| 53 Break Beat1 |
| 54 DanceFunk |
| 55 HipHop |
| 56 Dance2 |
| 57 Drum N'Bass2 |
| 58 Break Beat2 |
| 59 Classic Rock |
| 60 Heavy Rock |
| 61 Rock Ballad |
| 62 Rock N'Roll |
| 63 Rock |
| 64 80's Metal |
| 65 Shuffle |
| 66 60's Rock |
| 67 Samba1 |
| 68 Bossa Nova2 |
| 69 Salsa2 |
| 70 Ska |
| 71 Raggae 2 |
| 72 Latin Rock1 |
| 73 Latin Rock2 |
| 74 Mambo2 |
| 75 Samba2 |
| 76 Latin Pop |
| 77 Gtr Bossa |
| 78 Latin Dance1 |
| 79 Latin Dance2 |
| 80 R&B2 |
| 81 Jazzy Funk |
| 82 Blues |
| 83 Country Pop |
| 84 Country Blues |
| 85 Ballad |
| 86 Brit Pop |
| 87 8Beat Pop |
| 88 60's Pop |
| 89 8Beat 1 |
| 90 8Beat 2 |
| 91 8BeatBallad1 |
| 92 8BeatBallad2 |
| 93 16BeatBallad1 |
| 94 16BeatBallad2 |
| 95 World |
| 96 Latin |
| 97 Disco2 |
| 98 Metal |
| 99 Hard Rock |
| 100 8Beat3 |
GM Backing Sound List
PIANO
| 1 Acoustic Grand Piano |
| 2 Bright Acoustic Piano |
| 3 Electric Grand Piano |
| 4 Honky-Tonk Piano |
| 5 E.Piano 1 |
| 6 E.Piano 2 |
| 7 Harpsichord |
| 8 Clavi |
Mallet
| 9 Celesta |
| 10 Glockenspiel |
| 11 Music Box |
| 12 Vibraphone |
| 13 Marimba |
| 14 Xylophone |
| 15 Tubular Bells |
| 16 Dulcimer |
ORGAN
| 17 Drawbar Organ |
| 18 Percussive Organ |
| 19 Rock Organ |
| 20 Church Organ |
| 21 Reed Organ |
| 22 Accordion |
| 23 Harmonica |
| 24 Tango Accordion |
GUITAR
| 25 Nylon Guitar |
| 26 Steel Guitar |
| 27 Jazz Guitar |
| 28 Clean Guitar |
| 29 Muted Guitar |
| 30 Overdriven Guitar |
| 31 Distortion Guitar |
| 32 Guitar Harmonics |
BASS
| 33 Acoustic Bass |
| 34 Finger Bass |
| 35 Pick Bass |
| 36 Fretless Bass |
| 37 Slap Bass 1 |
| 38 Slap Bass 2 |
| 39 Synth Bass 1 |
| 40 Synth Bass 2 |
STRINGS
| 41 Violin |
| 42 Viola |
| 43 Cello |
| 44 Contrabass |
| 45 Tremolo Strings |
| 46 Pizzicato Strings |
| 47 Orchestral Harp |
| 48 Timpani |
| STRINGS ENSEMBLE |
| 49 Strings Ensemble 1 |
| 50 Strings Ensemble 2 |
| 51 Synth Strings 1 |
| 52 Synth Strings 2 |
| 53 Choir Aahs |
| 54 Voice Oohs |
| 55 Synth Voice |
| 56 Orchestra Hit |
BRASS
| 57 Trumpet |
| 58 Trombone |
| 59 Tuba |
| 60 Muted Trumpet |
| 61 French Horn |
| 62 Brass Section |
| 63 Synth Brass 1 |
| 64 Synth Brass 2 |
REED
| 65 Soprano Sax |
| 66 Alto Sax |
| 67 Tenor Sax |
| 68 Baritone Sax |
| 69 Obpe |
| 70 English Horn |
| 71 Bassoon |
| 72 Clarinet |
PIPE
| 73 Piccolo |
| 74 Flute |
| 75 Recorder |
| 76 Pan Flute |
| 77 Blown Bottle |
| 78 Shakuhachi |
| 79 Whistle |
| 80 Ocarina |
LEAD
| 81 Lead1 (Square) | |
| 82 Lead2 (Sawtooth) | |
| 83 Lead3 (Calliope) | |
| 84 | Lead4 (Chiff) |
| 85 Lead5 (Charang) | |
| 86 Lead6 (Voice) | |
| 87 Lead7 (Fifths) | |
| 88 Lead8 (Bass & Lead) | |
PAD
| 89 Pad1 (Newage) |
| 90 Pad2 (Warm) |
| 91 Pad3 (Polysynth) | |
| 92 Pad4 (Choir) | |
| 93 Pad5 (Bowed) | |
| 94 Pad6 (Metallic) | |
| 95 Pad7 (Halo) | |
| 96 Pad8 (Sweep) | |
| EFFECTS | |
| 97 FX1 (Rain) | |
| 98 FX2 (Soundtrack) | |
| 99 FX3 (Crystal) | |
| 100 FX4 (Atmosphere) | |
| 101 FX5 (Brightness) | |
| 102 FX6 (Goblins) | |
| 103 FX7 (Echoes) | |
| 104 | FX8 (Sci-fi) |
| ETHNIC | |
| 105 Sitar | |
| 106 Banjo | |
| 107 Shamisen | |
| 108 Koto | |
| 109 Kalimba | |
| 110 Bagpipe | |
| 111 Fiddle | |
| 112 Shanai | |
| PERCUSSIVE | |
| 113 Tinkle Bell | |
| 114 Agogo | |
| 115 Steel Drums | |
| 116 Wood Block | |
| 117 Taiko Drum | |
| 118 Melodic Tom | |
| 119 Synth Drum | |
| 120 Reverse Cymbal | |
| SOUND EFFECTS | |
| 121 Guitar Fret Noise | |
| 122 Breath Noise | |
| 123 Seashore | |
| 124 Bird Tweet | |
| 125 Telephone Ring | |
| 126 Helicopter | |
| 127 Applause | |
| 128 Gunshot | |
GM Drum Kit List
| Standard Set Room Set Jazz Set Rock Set | ||||
| Note# PC# 00 | PC# 04 PC# 08 PC# 16 | |||
| Eb1[27] High Q <- <- <- | ||||
| E 1[28] Slap <- <- <- | ||||
| F 1[29] Scratch Push <- <- <- | ||||
| F#1[30] Scratch Pull <- <- <- | ||||
| G 1[31] | Sticks | <- <- <- | ||
| G#1[32] | Square Click | <- <- <- | ||
| A 1[33] | Metronome Click | <- <- <- | ||
| Bb1[34] | Metronome Bell | <- <- <- | ||
| B 1[35] | Acoustic Bass Drum | <- <- <- | ||
| C 2[36] | Bass Drum | Room Kick | Jazz Kick | Rock Kick Drum |
| C#2[37] Side Stick <- <- <- | ||||
| D 2[38] | Acoustic Snare | Room Snare 1 | Jazz Snare 1 | Rock Snare Drum1 |
| Eb2[39] Hand Clap <- <- <- | ||||
| E 2[40] | Electric Snare | Room Snare 2 | Jazz Snare 2 | Rock Snare Drum2 |
| F 2[41] | Low Floor Tom | Room Low Floor | Jazz Low Floor | Rock Low Floor |
| F#2[42] Closed Hi-hat <- <- <- | ||||
| G 2[43] | High Floor Tom | Room High Floor Tom | Jazz High Floor Tom | Rock High Floor Tom |
| G#2[44] | Pedal Hi-hat | <- <- <- | ||
| A 2[45] | Low Tom | Room Low Tom | Jazz Low Tom | Rock Low Tom |
| Bb2[46] | Open Hi-hat <- <- <- | |||
| B 2[47] | Low-Mid Tom | Room Low-Mid Tom | Jazz Low-Mid Tom | Rock Low-Mid Tom |
| C 3[48] | High Mid Tom | Room High Mid Tom | Jazz High Mid Tom | Rock High Mid Tom |
| C#3[49] Crash Cymbal 1 <- <- <- | ||||
| D 3[50] | High Tom | Room High Tom | Jazz High Tom | Rock High Tom |
| Eb3[51] Ride Cymbal 1 <- <- <- | ||||
| E 3[52] China Cymbal <- <- <- | ||||
| F 3[53] Ride Bell <- <- <- | ||||
| F#3[54] Tambourine <- <- <- | ||||
| G 3[55] | Splash Cymbal | <- <- <- | ||
| G#3[56] | Cowbell | <- <- <- | ||
| A 3[57] | Crash Cymbal 2 | <- <- <- | ||
| Bb3[58] | Vibra-slap | <- <- <- | ||
| B 3[59] | Ride Cymbal 2 <- <- <- | |||
| C 4[60] | High Bongo | <- <- <- | ||
| C#4[61] Low Bongo <- <- <- | ||||
| D 4[62] | Mute Hi Conga | <- <- <- | ||
| Eb4[63] Open Hi Conga <- <- <- | ||||
| E 4[64] Low Conga <- <- <- | ||||
| F 4[65] High Tmbale <- <- <- | ||||
| F#4[66] Low Tmbale <- <- <- | ||||
| G 4[67] | High Agogo | <- <- <- | ||
| G#4[68] | Low Agogo | <- <- <- | ||
| A 4[69] | Cabasa | <- <- <- | ||
| Bb4[70] | Maracas | <- <- <- | ||
| B 4[71] | Short Whistle | <- <- <- | ||
| C 5[72] | Long Whistle | <- <- <- | ||
| C#5[73] Short Guiro <- <- <- | ||||
| D 5[74] | Long Guiro | <- <- <- | ||
| Eb5[75] Claves <- <- <- | ||||
| E 5[76] Hi Wood Block <- <- <- | ||||
| F 5[77] LowWood Block <- <- <- | ||||
| F#5[78] Mute Cuica <- <- <- | ||||
| G 5[79] | Open Cuica | <- <- <- | ||
| G#5[80] | Mute Triangle | <- <- <- | ||
| A 5[81] | Open Triangle | <- <- <- | ||
| Bb5[82] | Shaker <- <- <- | |||
| B 5[83] | Jingle Bell | <- <- <- | ||
| C 6[84] | Bell Tree | <- <- <- | ||
| C#6[85] Castanets <- <- <- | ||||
| D 6[86] | Mute Surdo | <- <- <- | ||
| Eb6[87] Open Surdo <- <- <- | ||||
GM Drum Kit List
| Electric Set Analog Set Brush Set | ||||
| Note# PC# 24 | PC# 25 PC# 40 | |||
| Eb1[27] <- <- | <- | |||
| E 1[28] <- <- | <- | |||
| F 1[29] <- <- | <- | |||
| F#1[30] <- <- | <- | |||
| G 1[31] <- <- | <- | |||
| G#1[32] <- <- | <- | |||
| A 1[33] <- <- | <- | |||
| Bb1[34] <- <- | <- | |||
| B 1[35] | <- <- | <- | ||
| C 2[36] | Electric Bass Drum | Analog Bass Drum | Brush Kick | |
| C#2[37] <- Analog Rim Shot | <- | |||
| D 2[38] | Electric Snare 1 | Analog Snare 1 | Brush Tap | |
| Eb2[39] <- Analog Clap | <- | |||
| E 2[40] | Electric Snare 2 | Analog Snare 2 | Brush Slap | |
| F 2[41] Electric Low Floor Analog Low Floor Brush Low Floor | ||||
| F#2[42] <- Analog Closed Hi-hat | <- | |||
| G 2[43] | Electric High Floor Tom | Analog High Floor Tom | Brush High Floor Tom | |
| G#2[44] <- Analog Pedal Hi-hat | <- | |||
| A 2[45] | Electric Low Tom | Analog Low Tom | Brush Low Tom | |
| Bb2[46] <- Analog Open Hi-hat | <- | |||
| B 2[47] | Electric Low-Mid Tom | Analog Low-Mid Tom | Brush Low-Mid Tom | |
| C 3[48] | Electric High Mid Tom | Analog High Mid Tom | Brush High Mid Tom | |
| C#3[49] <- Analog Cymbal | <- | |||
| D 3[50] | Electric High Tom | Analog High Tom | Brush High Tom | |
| Eb3[51] <- <- | <- | |||
| E 3[52] <- <- | <- | |||
| F 3[53] <- <- | <- | |||
| F#3[54] <- <- | <- | |||
| G 3[55] <- <- | <- | |||
| G#3[56] <- <- | <- | |||
| A 3[57] <- <- | <- | |||
| Bb3[58] <- <- | <- | |||
| B 3[59] | <- <- | <- | ||
| C 4[60] | <- <- | <- | ||
| C#4[61] <- <- | <- | |||
| D 4[62] <- <- | <- | |||
| Eb4[63] <- <- | <- | |||
| E 4[64] <- <- | <- | |||
| F 4[65] <- <- | <- | |||
| F#4[66] <- <- | <- | |||
| G 4[67] <- <- | <- | |||
| G#4[68] <- <- | <- | |||
| A 4[69] <- <- | <- | |||
| Bb4[70] <- <- | <- | |||
| B 4[71] | <- <- | <- | ||
| C 5[72] | <- <- | <- | ||
| C#5[73] <- <- | <- | |||
| D 5[74] <- <- | <- | |||
| Eb5[75] <- <- | <- | |||
| E 5[76] <- <- | <- | |||
| F 5[77] <- <- | <- | |||
| F#5[78] <- <- | <- | |||
| G 5[79] <- <- | <- | |||
| G#5[80] <- <- | <- | |||
| A 5[81] <- <- | <- | |||
| Bb5[82] <- <- | <- | |||
| B 5[83] | <- <- | <- | ||
| C 6[84] | <- <- | <- | ||
| C#6[85] <- <- | <- | |||
| D 6[86] <- <- | <- | |||
| Eb6[87] <- <- | <- | |||
MIDI Implementation Chart
| Function | Transmitted | Recognized | Remarks | |
| Basic Channel | Default | 10ch | 1-16ch | |
| Changed | x | x | ||
| Mode | Default | x | x | |
| Messages | x | x | ||
| Altered | ********** | ********** | ||
| Note Number | Note | 0-127 | 0-127 | |
| True Voice | ********** | 0-127 | ||
| Velocity | Note On | o 9nH, V=1-127 | 1-127 | |
| Note Off | o (9nH, V=0) | 0-127 | ||
| After Touch | key's | x | x | |
| Channel | x | x | ||
| Pitch Bend | x | o | ||
| Control Change | 0 | x | o | Bank Select |
| 1 | x | o | Modulation | |
| 5 | x | o | Portamento Time | |
| 6 | x | o | Data Entry | |
| 7 | x | o | Volume | |
| 10 | x | o | Pan | |
| 11 | x | o | Expression | |
| 64 | x | o | Sustain Pedal | |
| 65 | x | o | Portamento On/Off | |
| 66 | x | o | Sostenuto Pedal | |
| 67 | x | o | Soft Pedal | |
| 80 | x | o | Reverb Program | |
| 81 | x | o | Chorus Program | |
| 91 | x | o | Reverb Level | |
| 93 | x | o | Chorus Level | |
| 120 | x | o | All Sound Off | |
| 121 | x | o | Reset All Controllers | |
| 123 | x | o | All Notes Off | |
| Program Change | x | o | ||
| System Exclusive | x | o | ||
| System Common | Song Position | x | x | |
| Song Select | x | x | ||
| Tune Request | x | x | ||
| System Real Time | Clock | x | x | |
| Commands | o | x | Start/Stop | |
| Aux Messages | Local On/Off | x | x | |
| All Notes Off | x | x | ||
| Active Sensing | o | x | ||
| System Reset | x | x | ||
Notes:
o: Yes
x: No

natural_image
Black PYLE® digital instrument with multiple circular dials and a digital display (no readable text or symbols beyond branding)Register Product
Thank you for choosing PyleUSA. By registering your product, you ensure that you receive the full benefits of our exclusive warranty and personalized customer support.
Complete the form to access expert support and to keep your PyleUSA purchase in perfect condition.

PyleUSA.com/register
PYLE
PyleUSA.com

Questions or Comments?
We are here to help!
Phone: 1.718.535.1800
PyleUSA.com/ContactUs
- PTED09
- Tabletop Digital Drum Machine Kit
- Contents
- Main Features and Technical Specs 5
- Panel & Display Description 6
- Getting Ready to Play 8
- Drum Kits and Sounds 9
- Song 11
- Click 12
- Recording 13
- Utility Settings 14
- Drum Sound List 17
- IC WARNING
- - English:
- - French:
- INFORMATION FOR YOUR SAFETY!
- FCC REGULATION WARNING (for USA)
- CAUTION:
- PRECAUTIONS
- PLEASE READ CAREFULLY BEFORE PROCEEDING
- Power Supply
- Connections
- Location
- Interference with other electrical devices
- Cleaning
- Handling
- Main Features and Technical Specs
- Features:
- What's in the Box:
- Technical Specs:
- California Prop 65 Warning
- ! WARNING:
- Panel & Display Description
- Drum Pad Description (default setting)
- Front Panel
- Rear Panel
- Getting Ready to Play
- Setting Up Power Supply
- Notes:
- Turning On the Power
- Turning Off the Power
- Auto Power Off
- Playing the Rubber Head Pad
- Drum Kits and Sounds
- Selecting a Drum Kit
- Selecting a Sound
- Saving a User Kit
- Note:
- Song
- Selecting a Song
- Playing a Song
- Muting the Drums in a Song
- Click
- Turning the Click On or Off
- Setting the Click Parameters
- Adjusting the Tempo
- Recording
- Prepare Recording
- Start/Stop Recording
- Utility Settings
- Hand Percussion
- The module provides easy access to hand percussion practice.
- Connecting to Computer
- Factory Reset
- Drum Sound List
- KICK
- SNARE
- Tom
- Ride
- Crash
- GM Backing Sound List
- Register Product
- PYLE
- PyleUSA.com
Brand : Pyle
Model : PTED09
Category : Musical instrument