
GSmart Aku A1 - Mobile Phone GIGABYTE - Free user manual and instructions
Find the device manual for free GSmart Aku A1 GIGABYTE in PDF.


| Product Type | Smartphone |
| Brand | GIGABYTE |
| Model | GSmart Aku A1 |
| Dimensions (H x W x D) | 115.0 x 61.0 x 12.5 mm |
| Weight | 125 g |
| Display | 3.5-inch IPS LCD, 480 x 800 pixels |
| Processor | 1.0 GHz Cortex-A8 (single-core) |
| RAM | 512 MB |
| Internal Storage | 4 GB, expandable via microSD up to 32 GB |
| Operating System | Android 2.3 (Gingerbread) |
| Rear Camera | 5 MP with autofocus, LED flash |
| Front Camera | 0.3 MP VGA |
| Battery | Li-Ion 1400 mAh, removable |
| Power Input | 5V, 1A via micro-USB |
| Connectivity | Wi-Fi 802.11 b/g/n, Bluetooth 2.1, GPS, micro-USB 2.0, 3.5mm jack |
| SIM Card | Mini-SIM (standard) |
| Sensors | Accelerometer, proximity |
| Maintenance & Cleaning | Wipe with a soft, dry cloth. Avoid water and harsh chemicals. |
| Safety Warnings | Use only approved charger; avoid extreme temperatures; do not disassemble. |
| Spare Parts & Repairability | Battery and screen are user-replaceable; other repairs require professional service. |
| General Information | Smartphone by GIGABYTE released in 2012. Supports GSM/HSPA networks. |
Frequently Asked Questions - GSmart Aku A1 GIGABYTE
User questions about GSmart Aku A1 GIGABYTE
0 question about this device. Answer the ones you know or ask your own.
Ask a new question about this device
Download the instructions for your Mobile Phone in PDF format for free! Find your manual GSmart Aku A1 - GIGABYTE and take your electronic device back in hand. On this page are published all the documents necessary for the use of your device. GSmart Aku A1 by GIGABYTE.
USER MANUAL GSmart Aku A1 GIGABYTE
natural_image
Black Gsmart smartphone with 5MP audio focus lens and brand logo (no text-heavy elements)
All mobile products by GIGA-BYTE COMMUNICATIONS INC. mentioned in this document, including the device, accessories, software, text, music, and pictures, are owned by, or authorized by original manufacturers to GIGA-BYTE COMMUNICATIONS INC. Reproduction, transfer, distribution, or storage of part or all of the contents in this document in any form without the prior written permission of GIGA-BYTE COMMUNICATIONS INC. is prohibited.
GIGA-BYTE COMMUNICATIONS INC.
Safety Information
This section contains important information on safe and efficient operation. Please read this information before using the device.
- Use only the batteries and power adapter provided by the manufacturer. Use of unauthorized accessories may void your warranty.
- Do not remove the battery while the phone is charging.
- Avoid using the phone near electromagnetic sources such as TVs, radios, and microwave ovens.
- Unplug the power adapter from the wall outlet during lightning storms to avoid electric shock or fire.
- Do not expose the phone or the battery to direct sunlight.
- Do not store your phone in temperatures higher than 60^ or 140^ .
- Do not use harsh chemicals or detergents to clean your phone.
- Do not handle the phone with wet hands while it is being charged. This may cause an electric shock or serious damage to the phone.
SAFETY PRECAUTIONS FOR BATTERY USE
- Use only approved battery.
- Keep the battery dry and away from any liquid since this may cause a short circuit.
- Keep the battery away from metal objects since this may cause a short circuit.
- Do not use damaged or deformed batteries.
- If the battery emits a foul odor, discontinue use.
- Keep the battery away from babies and small children.
- If the battery leaks:
- Do not allow the leaking fluid to come in contact with your skin, eyes or clothing. If already in contact, rinse with clean water immediately and seek medical advice.
- Keep the battery away from fire since this may cause the battery to explode.
- Do not attempt to open or service the battery yourself.
- Do not dispose battery in fire or water.
- Recycle or dispose used batteries according to the local regulations.
- Prevent to place the battery in extreme temperature condition, it maybe influence the battery efficiency.
ROAD AND ENVIRONMENTAL SAFETY
- Turn off the phone in areas with a potentially explosive atmosphere or where flammable objects exist such as gas stations, fuel depots, and chemical plants among others. Sparks from these areas could cause explosion or fire and result in injury or even death.
- Do not use hand-held phones while driving a vehicle. Use hands-free devices as an alternative.
SAFETY IN AIRCRAFT
Do not use the phone on board an aircraft. The phone's network signals may cause interference to the navigation system. As a safety measurement, it is against the law in most countries to use the phone on board an aircraft.
Copyright © 2013 All Rights Reserved.
Android is a trademark of Google Inc. Use of this trademark is subject to Google Permissions.
Bluetooth and the Bluetooth logo are trademarks owned by Bluetooth SIG, Inc. Java, JME and all other Java-based marks are trademarks or registered trademarks of Sun Microsystems, Inc. in the United States and other countries.
CE SAR Compliance
This device meets the EU requirements (1999/519/EC) on the limitation of exposure of the general public to electromagnetic fields by way of health protection.
The limits are part of extensive recommendations for the protection of the general public. These recommendations have been developed and checked by independent scientific organizations through regular and thorough evaluations of scientific studies. The unit of measurement for the European Council's recommended limit for mobile devices is the "Specific Absorption Rate" (SAR), and the SAR limit is 2.0 W/kg averaged over 10 gram of body tissue. It meets the requirements of the International Commission on Non-Ionizing Radiation Protection (ICNIRP).
For body worn operation, this device has been tested and meets the ICNIRP exposure guidelines and the European Standard EN 62311 and EN 62209-2, for use with dedicated accessories. Use of other accessories which contain metals may not ensure compliance with ICNIRP exposure guidelines.
SAR is measured with the device at a separation of 1.5 cm to the body, while transmitting at the highest certified output power level in all frequency bands of the mobile device.
The maximum SAR value for each frequency band is listed below:
| Band Position | SAR10g(W/kg) | |
| GSM900 | Head | 0.338 |
| GSM1800 | Head | 0.246 |
| WCDMA Band VIII | Head | 0.337 |
| WCDMA Band I | Head | 0.452 |
WEEE Notice
The WEEE logo on the product or on its box indicates that this product must not be disposed of or dumped with your other household waste. You are liable to dispose of all your electronic or electrical waste equipment by relocating over to the specified collection point for recycling of such hazardous waste. Isolated collection and proper recovery of your electronic and electrical waste equipment at the time of disposal will allow us to help conserve natural resources. Moreover, proper recycling of the electronic and electrical waste equipment will ensure safety of human health and environment. For more information about electronic and electrical waste equipment disposal, recovery, and collection points, please contact your local city center, household waste disposal service, shop from where you purchased the equipment, or manufacturer of the equipment.
RoHS Compliance
This product is in compliance with Directive 2002/95/EC of the European Parliament and of the Council of 27 January 2003, on the restriction of the use of certain hazardous substances in electrical and electronic equipment (RoHS) and its amendments.
European Union Regulatory Conformance
The equipment complies with the RF Exposure Requirement 1999/519/EC, Council Recommendation of 12 July 1999 on the limitation of exposure of the general public to electromagnetic fields (0–300 GHz). This
equipment meets the following conformance standards: EN 300 328 V1.7.1, EN 301489-1 V1.9.2, EN 301489-3 V1.4.1, EN 301489-7 V1.3.1, EN 301489-17 V2.1.1, EN 301489-24 V1.5.1, EN 301 511 V9.0.2, EN 301 908-1 V5.2.1/-2 V5.2.1, EN50360:2001/AC:2006, EN62209-1:2006/-2:2010, EN62311:2008, EN 62479:2010, EN 300 440-1V1.6.1/-2 V1.4.1, EN 55022:2010/AC:2011 Class B, EN55024:2010, EN 55013:2001/A1:2003/A2:2006, EN 61000-3-2:2006/A2:2009, EN 61000-3-3:2008, EN 50332-1:2000/-2:2003
and EN 60950-1:2006/A11:2009. Changes or modifications to this product not authorized by the manufacturer could void the EMC compliance and negate your authority to operate the product. This product has demonstrated EMC compliance under conditions that included the use of compliant peripheral devices and shielded cables between system components. It is important that you use compliant peripheral devices and shielded cables between system components to reduce the possibility of causing interference to radios, televisions, and other electronic devices. We, hereby, declare that this cellular, Wi-Fi, & Bluetooth radio is in compliance with the essential requirements and other relevant provisions of Directive 1999/5/EC.
Intellectual Property Right Information
Right to all technologies and products that comprise this device are the property of their respective owners: This product has an Android platform based on Linux, which can be expanded by a variety of Java-Script-based application SW. Google, the Google logo, Android, the Android logo, Gmail, and YouTube are trademarks of Google Inc. Bluetooth and the Bluetooth logo are trademarks owned by Bluetooth SIG, Inc. Wi-Fi, the Wi-Fi CERTIFIED log, and the Wi-Fi logo are registered trademarks of the Wireless Fidelity Alliance.
Java, JME and all other Java-based marks are trademarks or registered trademarks of Sun Microsystems, Inc. in the United States and other countries. microSD is a trademark of SD Card Association.
Products with 2.4-GHz Wireless LAN Devices France
For 2.4–GHz wireless LAN operation of this product, certain restrictions apply. This equipment may use the entire–2400–MHz to 2483.5–MHz frequency band (channels 1 through 13) for indoor applications. For outdoor use, only 2400-2454 MHz frequency band may be used. For the latest requirements, see http://www.art-telecom.fr.
Sound Pressure Level requirement
This device have been tested to comply with the Sound Pressure Level requirement laid down in the applicable EN 50332-1 and/or EN 50332-2 standards. Permanent hearing loss may occur if earphones or headphones are used at high volume for prolonged periods of time.
Prevention of Hearing Loss
Warning statement requirement under EN 60950-1:A12.
To prevent possible hearing damage, do not listen at high volume levels for long periods.

Note:
For France, headphones/earphones for this device are compliant with the sound pressure level requirement laid down in the applicable EN 50332-1: 2000 and/or EN50332-2: 2003 standard as required by French Article L.5232-1.

This section contains important information on safe and efficient operation. Please read this information before using the device. Ignorance of the following notices may lead to violations of the law.
- Before using the device, please make sure you have fully charged the battery.
- Do NOT remove the battery from the device during charging.
- Before inserting SIM card into the device, make sure that the device is switched off.
- Do NOT attempt to dissemble the device on your own. This should be done by an authorized person.
- Use the device in accordance to instructions when in public facilities.
- In some countries, it is a violation against the law to record phone conversations. Always ask permission of the other party when you are going to record a conversation.
- To protect your ears, turn down the volume before you use stereo headsets or other audio devices.
- To avoid damaging the touch screen and the device, do NOT apply excessive pressure on them, and remove the device from your pants' pocket before you sit down. It is also recommended that you only use the stylus or your finger to interact with the touch screen. It is not covered by the warranty that you crack the touch screen because of the improper usage.
- When you use the device for a long time, such as talking on the phone, browsing online, or charging the battery, the device may become warm. In most cases, this condition is normal.
- Refer servicing to the provider, or an authorized technician under the following conditions: 1. The device has been damaged. 2. When you follow the instructions to use your device, it does not operate normally. 3. The device has been exposed to water. 4. Liquid has been spilled or an object has fallen onto the device.
- Do Not push unauthorized objects into slots and openings in your device.
- The device should be placed away from heat sources such as stoves, radiators, heat registers, or other products that produce heat.
- Condensation may form on or within your device, when you move your device between environments with very different temperature and/or humidity ranges. To avoid damaging your device, make the moisture to evaporate before you use the device.
- To avoid damaging your device, do Not put your device on an unstable table, stand, bracket, or other places.
- Before you clean your device, unplug it, please. Use a damp cloth for cleaning, but do Not use water, liquid cleaners, or aerosol cleaners to clean the touch screen.
CE0700 PC MFD4
Table of Contents
| Copyright | 0-1 |
| Safety Information | 0-2 |
| General Information | 0-5 |
| Chapter 1 Getting Started | 1-1 |
| 1.1 Your Phone | 1-1 |
| 1.2 Installing or uninstalling the SIM Card, Battery, and Memory Card | 1-2 |
| 1.3 Charging the Battery | 1-4 |
| 1.4 Turning the Phone On or Off | 1-4 |
| 1.5 Lock / Unlock | 1-4 |
| 1.6 Initial Settings | 1-4 |
| 1.7 Adjusting the Volume | 1-5 |
| 1.8 Contact | 1-5 |
| 1.9 The Home Screen | 1-7 |
| Chapter 2 Phone Functions & Input | 2-1 |
| 2.1 Voice Calls | 2-1 |
| 2.2 Using On-Screen Keyboard | 2-2 |
| Chapter 3 Email & Messages | 3-1 |
| 3.1 Creating and sending a text message | 3-1 |
| 3.2 Multimedia Message | 3-2 |
| 3.3 Voice Message | 3-2 |
| 3.4 E-mail Accounts | 3-3 |
| 3.5 Using E-mail | 3-4 |
| Chapter 4 Using the Internet | 4-1 |
| 4.1 Connecting to the Internet | 4-1 |
| 4.2 Bluetooth modes | 4-2 |
| Chapter 5 Multimedia Applications | 5-1 |
| 5.1 Photos and Videos | 5-1 |
| 5.2 Viewing Photos and Videos | 5-1 |
| 5.3 Music | 5-2 |
| Chapter 6 Programs | 6-1 |
| 6.1 Pre-installed programs introduction | 6-1 |
| 6.2 Browser | 6-1 |
| 6.3 Calculator | 6-3 |
| 6.4 Calendar | 6-3 |
| 6.5 Gmail | 6-4 |
| 6.6 Maps | 6-4 |
| 6.7 Local | 6-4 |
| 6.8 Navigation | 6-4 |
| 6.9 Google Search | 6-5 |
| 6.10 Talk | 6-5 |
| 6.11 YouTube | 6-5 |
| 6.12 Play Store | 6-5 |
| 6.13 News and Weather | 6-5 |
| 6.14 Best Choice | 6-6 |
| 6.15 FM Radio | 6-6 |
| 6.16 Sound Recorder | 6-6 |
| 6.17 Connecting your phone to a computer | 6-7 |
| 6.18 File Manager | 6-7 |
| 6.19 Downloads | 6-7 |
| 6.20 Screenshots | 6-7 |
| Chapter 7 Managing Your Phone | 7-1 |
| 7.1 Phone Settings | 7-1 |
| 7.2 Managing Basic Settings | 7-4 |
| 7.3 Protecting Your Phone | 7-5 |
| 7.4 Resetting Your Phone | 7-6 |
| 7.5 Specifications | 7-6 |
1. Getting Started
1.1 Your Phone
This section introduces you to the hardware of the device.

| No. | Items | Functions |
| 1 | Volume | Press upward or downward to turn louder or down volume. Press down key fully to enter vibration mode. |
| 2 | Front Camera | Use this front Camera to take pictures or record video. |
| 3 | P sensor/ Light sensor | • P Sensor: The screen will turn off automatically when the device is close to the face during a phone call.• Light Sensor: Adjust the brightness of the screen according to the environment. |
| 4 | Receiver | The source of voice. |
| 5 | Power | • Press and hold for several seconds to turn the phone on or off.• To set your phone to the sleep mode, press the power button briefly. Press again to turn the display back on. |
| 6 | Touch screen | Display screen. |
| 7 | Menu | Press to view the options of the menu. |
| 8 | Home | • Go back to Home Screen.• Press and hold to bring up recent activities. |
| 9 | Return | Return to the previous page. |
| 10 | MIC | Sound Receiver. |

Aku A1 | 1-1
| No. | Items | Functions |
| 11 | Micro-USB port | •Connect USB cable and the AC adapter to charge the battery mildly.• USB tethering: Share your phone's mobile data connection via USB cable. |
| 12 | 5MP Camera | The camera on the back of the device supports 5-mega-pixel photo and high-quality video. |
| 13 | Flash LED | Help photo shooting. |
| 14 | Back cover | You need to open the cover to install or uninstall the battery and the SIM card. |
| 15 | Speaker | The source of music and voice. |
| 16 | Earphone jack | Use a headset for hands-free conversation or listening to music. |
1.2 Installing or uninstalling the SIM Card, Battery, and Memory Card
To remove the back cover
- Please turn over your phone with the back cover facing up.
- Please move your fingertip into the slot.
- Pull the back cover with your fingertip and remove it.

natural_image
Illustration of hands holding a smartphone with an arrow indicating rotation (no text or symbols)SIM card
The SIM card contains your phone number, memory storage, and details of network service.
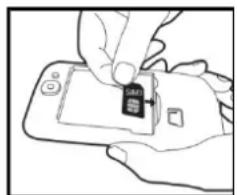
To install the SIM card
There are two slots for SIM cards. Upper slot is for SIM2, and SIM1 slot is on the underside. The gold contact of SIM1 is facing up and the cut-off corner is facing toward the SIM card slot. The gold contact of SIM2 is facing down and the cut-off corner is facing toward the SIM card slot.
natural_image
Illustration of hands inserting a small card into a smartphone (no text or symbols visible)To install the SIM1 card

natural_image
Hand holding a smartphone with a small USB flash drive (no text or symbols visible)To install the SIM2 card
To remove the SIM card
- First, remove the battery.
- Use your finger to slide the SIM card out of card slot.
Battery
Your phone comes with a rechargeable battery. Battery life varies depending on the network, used applications, and the type of connections attached to your phone.
To install the battery
Make sure the contact of the battery is close to connectors in the battery slot.

natural_image
Illustration of a hand holding a smartphone with a triangular screen and a downward arrow, no text or symbols present.To remove the battery
Use your fingertip to lift the battery, then remove it.
NOTE:
•To ensure battery performance and avoid risk from fire.
- Use only the original battery designated for the phone.
- Do not store the battery in temperature lower than -10°C or higher than 45°C.
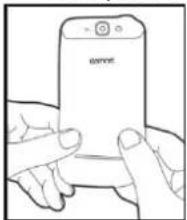
To replace the back cover
- Please insert the cover into the slot from the bottom.

natural_image
Illustration of a hand holding a smartphone with an arrow indicating the fold (no text or symbols present)- Then, press two point on the left and right of back cover fully until hearing clicks.
natural_image
Line drawing of two hands holding a smartphone (no text or symbols visible)Memory card
You may need a microSD card to store photos, music, videos and other data.
To install the memory card
-
Insert the memory card with the gold contact facing down.
-
Push the memory card until it clicks into slot.

natural_image
Line drawing of a hand holding a smartphone with a pen and eraser (no text or symbols)To remove the memory card
- For safe removal, tap Application Drawer > APPS tab > Settings > Storage > Unmount SD card.
- Push the memory card to eject it from the slot.
1.3 Charging the Battery
When you take your phone out of box for the first time, the battery isn't at full of power. Please charge the battery fully before using.
- Connect the USB cable to the AC adapter, and then, connect to the device via the USB cable.
- Plug the AC adapter to a socket to start the charge.

natural_image
Line drawing of hands holding a smartphone with a camera lens (no text or symbols visible)NOTE:
To ensure safety, do not remove the battery from the phone while the AC adapter is connected or while it is being charged.
1.4 Turning the Phone On or Off
After installing the SIM card and charging the battery, you are now ready to turn your phone on.
To turn on your phone
Press and hold the power button until the phone shortly vibrates.
To turn off your phone
- Press and hold the power button for several seconds.
- A pop-up window appears, then tap "Power off".
- Select "OK" to confirm.
To set your phone to the sleep mode
To set your phone to the sleep mode, press the power button briefly. It will turn the display off. To turn the display on, press the power button briefly again.
1.5 Lock/Unlock
Unlock the device
Drag lock icon on screen and slide to unlock icon for unlocking the device.

1.6 Initial Settings
Before initializing your device, please remember to insert your SIM card first. When turning on your phone for the first time or resetting your phone, you need to follow the steps as below:
- On the "Welcome" screen, you could change the default language, or tap "Start" to continue the setting.
-
In the screen of "Select Wi-Fi", you can connect to the Wi-Fi.
-
In the screen of "Got Google", you can tap "No" to create a new account, tap "Yes" to sign in the Google account, or tap "Not now" to do it later. Please follow the on-screen instruction to log in.
- In the screen of "Google & location", you can allow or disallow Google's location service to collect anonymous location data. You can also allow or disallow Google to use My Location for Google search results and other Google services. Then, tap "Next".
- Set up your name to personalize some apps. Then, tap "Next".
- In the screen of "Google services", you could get some information about Google Term of Service from here.
- Finally, tap "Finish" to complete the whole initial settings.
NOTE:
Some applications and functions needed to connect to the Internet such as location-based services and the automatic synchronization of your online accounts may incur the fees of the connection from your service provider. You may enable or disable the Internet later.
1.7 Adjusting the Volume
To adjust the volume of ringtone, media, and alarm
- Tap Application Drawer > APPS tab > Settings > Audio Profiles>General
- Slide the volume bar to adjust each volume. Do as the following:
Drag the slider towards the left to decrease the volume, or drag the slider towards the right to increase the volume. Tap "OK" to save your settings.
NOTE:
When the phone is set to the silent mode, all sounds are turned off except media and alarm.
1.8 Contacts
"Contacts" is your phonebook that lets you store friends' names, phone numbers, e-mail addresses and other information. "Contact" can connect to your Google, Corporate accounts, and integrate your contacts information.
Adding a Contact
- Tap Application Drawer > APPS tab > Contacts.
- Tap 📄 tab > tap 📋 to add a new contact.
- Choose where you want to synchronize the new contact with, Phone, SIM1 or SIM2.
- A new contact screen appears.
- Tap each field to fill out the contact information.
- Tap "DONE" to save it.
NOTE:
The SIM card contact can't add picture to contact information.
Searching for Contacts
On Contact Screen, do any of the following to easily search for contacts:
- Tap □ype the first few letters of the contact name to search. The list is filtered when typing. When finish searching, you could tap □ to go back to the contacts screen.

Contact groups
If you want to categorize the contacts, please follow the steps as below:
To add Contact groups in local groups
-
Tap Application Drawer > APPS tab > Contacts.
-
On 📄, tap 📋 to add a new group.
-
Enter the new group name, then tap "OK".
-
Tap one of groups.
-
Tap Menu>Edit and to select new members. Tap "Ok" to save your settings.
-
Members of the group are displayed below.
Manage Accounts
-
Tap Application Drawer > APPS tab > Contacts.
-
Tap Menu > Accounts.
-
You could turn on "Auto-sync app data". If so, Applications can sync, send, and receive data automatically.
Import / Export Contacts
Import Contacts from SIM card.
-
Tap Application Drawer > APPS tab > Contacts.
-
Tap Menu > Import/export.
-
You can select SIM1 or SIM2 (If SIM2 card inserted). Then tap "OK".
-
You can select an account to save the import contacts.
-
Select contacts you want, or check "All". Then tap "Ok".
-
You can check the import situation in the status bar.
Import Contacts from storage
-
Tap Application Drawer > APPS tab > Contacts.
-
Tap Menu > Import/export > Import from Phone storage.
-
You can select an account to save the import contacts.
-
Select the Card files. Please follow the steps in the submenu.
-
You can check the import situation in the status bar.
Back up Contacts
Export Contacts to SIM card
-
Tap Application Drawer > APPS > Contacts.
-
Tap Menu > Import/export > Export to SIM card.
-
You can select SIM1 or SIM2 (If SIM2 card inserted). Then tap "OK".
-
Select contacts you want, or check "All". Then tap "Ok".
Export Contacts to storage
-
Tap Application Drawer > APPS tab > Contacts.
-
Tap Menu > Import/export > Export to storage.
-
Tap "OK" to confirm.
Favorite Contacts
You can add the most frequently called contacts to the favorite contact list which helps you to find contacts quickly and easily.
Add to Favorites
-
Tap Application Drawer > APPS tab > Contacts.
-
On 📄 tab, tap the desired contact into the information screen.
-
Tap icon ★ to add to Favorites.
-
When you tap ★ tab on the Contacts screen, you will find the contact in the favorite list.
Remove from Favorites
-
Tap Application Drawer > APPS tab > Contacts.
-
Tap ★ tab, the favorite contacts are displayed.
-
Tap the desired contact into the information screen.
-
Tap icon ★ to remove it from Favorites.
1.9 The Home Screen
On Home Screen, you can quickly access common features and view notifications of missed calls, received messages, battery, and the status of the connection.
Default Home Screen: Main functions.

You can slide the Home Screen from the left side to the right side or from the right side to the left side to switch it. The icons located at the bottom of the home page have different functions:
| Icons | Descriptions |
| Favorites Tray can keep your most important shortcuts and folders. | |
| Tap to launch Application Drawer. |
Self-defined Home Screen: You can add the shortcuts and widgets.

| Icons | Functions |
| Tethering or hotspot active | |
| Tap to turn on/ off network. | |
| Enable/disable Wi-Fi. | |
| Enable/disable Bluetooth. | |
| Enable/disable GPS. | |
| Enable/disableData Synchronization. | |
| Tap to adjust the brightness. |
How to Navigate
- Tap: You can tap the icon on the screen to activate the application.
- Press and Hold: Press and hold the icon on the Home Screen to make it movable. Press and hold an icon in the Application Drawer to add it to the Home Screen you want.
- Slide: Slide the Home Screen from the left side to the right side or from the right side to the left side to change different pages.
- Drag: After pressing and holding the icon on the Home Screen, you can arrange it. Drag it to anywhere you like on the screen or to remove.
Status Icons
The icons of the status bar indicate different types of information. Tap the status bar and scroll down to view notifications or view system information.
| Types | Icons | Descriptions |
| Phone call | Call is in progress. | |
| Your call is on hold. | ||
| Mute the call. | ||
| Speaker is on. | ||
| Volume | Vibration is on. | |
| Wired headset connected. | ||
| Wired microphone headset connected. | ||
| Battery | Battery is full. | |
| Battery is low. | ||
| Battery is very low. | ||
| Battery is charging. | ||
| Network and Connection | Maximum signal strength. Fewer bars indicate lower signal strength. Left icon is SIM1 signal (WCDMA+GSM). Right icon is SIM2 signal (GSM). | |
| GPRS\EDGE\3G\HSDPA is in progress.SIM1 supports GPRS\EDGE\3G\HSDPA networks.SIM2 supports GPRS\EDGE networks. | ||
| Wi-Fi is connected. | ||
| Wi-Fi is in progress. | ||
| Wi-Fi Network is activated. | ||
| Airplane mode. | ||
| Portable Wi-Fi hotspot is activated. | ||
| Both USB tethering and Portable Wi-Fi hotspot are activated. | ||
| GPS is on. | ||
| Bluetooth is on. | ||
| The device is connected to PC via the USB cable. | ||
| Notification | New text message. | |
| New e-mail. | ||
| New Gmail. | ||
| Alarm. | ||
| Event notification. | ||
| Missed call. | ||
| 💡 | USB debugging is connected. | |
| ⚠️ | General notification. | |
| FM | FM radio is on. | |
| 💡 | Playing a song. | |
| ↓ | Downloading an application. |
Recent apps list
Recent apps list provides an efficient way of switching between recently used applications. Switch to an app by touching it.
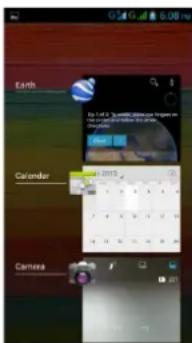
- Press and hold the Home key.
- A Recent app list screen will appear.
- Remove an item by swiping left or right.
- Or jump instantly from one task to another using the list.
Using Widgets
You may add and customize widgets on the Home Screen as you like.

To add widgets
- Tap Application Drawer > WIDGETS tab.
- Select a widget you want. Then, tap and hold the widget icon to any Home Screen thumbnail you want to add it.
- Tap and hold the widget icon, drag to move it among the Home Screens.

To delete widgets
- Tap and hold a widget icon which you want to delete on the screen. The widget will enlarge and "Remove" will appear on the top of Home Screen.
- Drag the widget icon to the "Remove" to delete it.
Folders
You can also add / delete folders to your Home Screen and Favorites Tray.
To create folders
- Tap and hold an app icon, then drag it over to another app icon, they will automatically create a new folder. You can also drag other apps to add into the same folder.
- Tap the folder to open it.
- Tap "Unnamed Folder" to name the folder.
To delete folders
- Tap and hold a folder of Home Screen. The folder will enlarge and "Remove" will appear on the top of Home Screen.
- Drag the folder to the "Remove" to delete it.

natural_image
Colorful horizontal striped background with a small circular logo at the center (no text or symbols)Setting the wallpaper
Customize the wallpaper of your Home Screen with default wallpapers or with pictures in your phone.

Set wallpaper from Live wallpapers or Wallpapers
-
Long press any place on the Home Screens. There is a menu that will pop up.
-
Tap "Wallpapers" or "Live Wallpapers".
-
All system wallpapers are displayed. You can tap to preview it.
-
Tap "Set wallpaper" to set up your selection.
Set wallpaper from Pictures
-
Long press anywhere on the Home Screens. There is a menu that will pop up.
-
Tap "Gallery", you can view all pictures on the album.
-
Tap to select a picture you want to use.
-
Use your finger to select the crop area.
-
Tap "CROP" and the cropped image will be your wallpaper on the Home Screen.
2. Phone Functions & Input
Phone Functions
Tap Application Drawer > APPS tab > Phone.
2.1 Voice Calls
Making a call
To make a call from the Phone screen
- Go to the Phone screen.
- Use the keypad to input phone number.
- Tap ☐ then choose SIM1 or SIM2 to make the phone call.


NOTE:
Tap ☐ to delete a number. Tap and hold ☐ to erase entire numbers.
To make a call from Contacts
- Tap Application Drawer > APPS tab > Phone.
- Tap
- Tap a contact you want to call.
- If SIM2 inserted, there is a menu will pop up. You may select "SIM1" or "SIM2" to make a phone call.
To make emergency calls
You have to unlock your device before making an emergency call. Enter the international emergency number 112, and tap SIM1 or SIM2 to make the emergency call.
To make international calls
- Go to the Phone screen.
- Tap and hold 0 until the “+” is displayed which is international prefix code.
- Enter the country code, area code, and phone number.
- Tap 📋 and SIM1 or SIM2 to make the international call.
Answering a call
When there is an incoming call:
- The phone will ring if the ring volume is turned on.
- A notification message will appear on the screen.
To accept or reject an incoming call
- To accept a call, slide to Talk icon on the screen.
- To reject a call, slide to End icon on the screen.
Quick response an incoming call
When there is an incoming call, you can quick response with message by sliding to Messaging icon on the screen.

To put a call on hold
If you are having a call conversation, you can tap ☐ to put the call on hold.
To manage other voice call features
When you are having a call conversation
- Tap 📄 to activate speakerphone, or tap 📄 again to cancel it.
- Tap 📁 to mute microphone, or tap 📁 again to un-mute it.
Ending a call
Tap End icon to end a call.
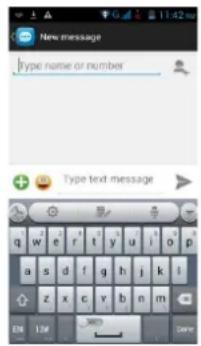
2.2 Using On-Screen Keyboard
On-screen keyboard appears in portrait mode when an application requires text input, such as messaging and writing e-mails. The keyboard input method is activated by the default settings.
Using on-screen keyboard
- Use the keys on the on-screen keyboard.
- Tap the keys to enter the characters.
Setting the Input Method
Your phone supports several text input methods, and you could select which one you prefer.
- Tap Application Drawer > APPS tab > Settings > Language & input.
- Tap "Default". There is a pop-up window will show.
- Select an input method you want to use.
Basic input settings
Tap Application Drawer > APPS tab > Settings > Language & input.
- Language settings:
- Select language
- Spell checker
- Personal dictionary
- Keyboard & input settings:
-
Android keyboard
• Google voice typing
• TouchPal keyboard -
Speech settings:
• Voice Search
• Text-to-speech output - Mouse/Trackpad
- Pointer speed
Personal dictionary
On the personal dictionary screen, tap ☐ to add the self-defined words in the personal dictionary. When you compose, you can use them. Tap the self-defined word in the personal dictionary to edit it or tap ☐ to delete it.
TouchPal Input Method

General settings
- Keypress sound:
You can adjust keypress sound here.
- Keypress vibration: You can adjust keypress vibration here.
- Resize keyboard height: You could adjust keyboard height here.
- Keypress popup: Enable or disable popup effect for keypress.
- Alternative symbols: Show alternative symbol on buttons. You could slide-down or long-press the keyboard to input these symbols.
- Skin: Customize your own skin.
Keyboard layout:
Set portrait or landscape layout and some other functions.
Smart input:
Keyboard intelligence for western languages.
Languages
Set up Multilanguage keyboard.
Chinese input
Keyboard intelligence for Chinese input.
Dictionary management:
You can choose backup or restore your dictionary.
Help & About
Check update, see what recommended application in the market, or about the version.
Using TouchPal Input Method
| Icons | Functions |
| Tap to go to quick settings. | |
| Tap to activate settings. | |
| Tap to copy, cut or paste words. | |
| Tap to activate voice input. | |
| Tap to close input keyboard. | |
| Tap to active Capital letter mode. | |
| Tap to delete words. | |
| Switch different language inputs and methods. | |
| Tap to activate the symbols and numerical keyboard. | |
| Tap to move to the next text zone. |
TouchPal Curve Input

Using Curve let you type faster than normal IME. Input a word by drawing through letters.
Put your finger on the first letter of the word and draw a path from letter to letter, then lifting up your finger after the last letter. And the predicted words will show on the screen.
Android keyboard
- Input languages:
You can change input language.
• Auto-capitalization:
The first letter of sentences to be capitalized.
• Vibrate on keypress:
Phone vibrates when user presses any key on the on-screen keyboard.
- Sound on keypress:
Phone sounds when user presses any key on the on-screen keyboard.
- Popup on keypress:
Checking this option will enable the letters to popup when the user presses them on the keyboard.
- Voice Input key:
Voice input on main keyboard, on symbols keyboard, and off.
- Add-on dictionaries:
You can install Multilanguage dictionaries.
- Auto-correction:
Spacebar and punctuation automatically correct mistyped words.
• Show correction suggestions:
Display suggested words while typing.
- Advanced settings:
Options for expert users.
Using Android keyboard
• To toggle between upper and lower case letter display, tap ↗.
- To display the numerical and symbols keyboard, tap ?123
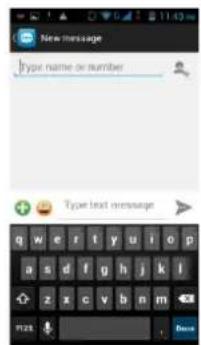
How to select input method
- When you are using any one of input methods.
- Slide down the status bar list.
- Tap "Select input method", to show all the input method.
- Then, tap one of them you want to use.
3. Email & Messages
Use Messaging to access text and MMS messages. Use Email to send and receive e-mail messages via your Internet e-mail accounts.
3.1 Creating and sending a text message
Your phone offers several ways to create and send a new text message.
From Message screen
- Tap Application Drawer > APPS tab > Messages.
- Tap ☐ to create a new message.
- In the "To" field, enter the recipient's phone number or tap to add from your contacts.
- Type your message in the "Type message" field.
- Tap ▶ to send your message. You may select SIM1 or SIM2 (If SIM2 inserted).
From Contact screen
- Tap Application Drawer > APPS tab > Contacts.
- Tap a contact to display the contact information.
- Tap the icon ≡ to send the message.
- Compose your message.
- Tap ▶ to send your message. You may select SIM1 or SIM2 (If SIM2 inserted).
From Phone screen
- Tap Application Drawer > APPS tab > Phone.
- Tap Gab to view all call history.
- Tap a call contact from the call log.
- Tap icon ☐ to send the message.
- Compose your message.
- Tap ▶ to send your message. You may select SIM1 or SIM2 (If SIM2 inserted).
NOTE:
If you exit Messages before sending, unsent message will be saved as a draft automatically.
Receiving and Managing Messages
When you send and receive messages from a contact, these messages are grouped as a message thread. A message thread looks like an exchanged conversation.
To reply to a text message
- Tap Application Drawer > APPS tab > Messages.
- Tap a message you want to reply.
- Enter your message in "Type message".
- Tap to send your message.
- Tap Application Drawer > APPS tab > Messages.
- Tap a message to view the whole thread.
- Tap and hold a message to show Message options list.
- Tap "Forward".
- Enter recipient's phone number in the "To" field.
- Tap ▶ to send your message. You can select SIM1 or SIM2 (If SIM2 inserted).
To forward a text message
To delete all messages
- Tap Application Drawer > APPS tab > Messages.
- Tap Menu > Delete all threads. Menu button is on the down intermediate of the screen.
- Tap "Delete" to delete all messages in this message box.
To delete a message thread
- Tap Application Drawer > APPS tab > Messages.
- Tap and hold a message thread you want to delete.
- Tap 📋 to delete the message thread.
To delete a message within a thread
- Tap Application Drawer > APPS tab > Messages.
- Choose a message you want to delete.
- Tap and hold it until a Message options list shows.
- Tap "Delete" to delete the message.
3.2 Multimedia Message
A Multimedia message or MMS can contain letters, an image, an audio, or a video file.
Creating and sending an MMS message
Your phone offers several ways to create and send a MMS message.
Send MMS from Message screen
- Tap Application Drawer > APPS tab > Messages.
- Tap ☐ to create a new message.
- Enter the recipient's phone number in the "Type name or number" field
- Tap + to attach capture picture, capture video, record audio, contact, pictures, videos, audio or calendar. The message converts to a MMS message automatically.
- Enter your message with the on-screen keyboard in "Type text message" filed.
- Tap ▶ to send your message.
Send MMS from Contact screen
- Tap Application Drawer > APPS tab > Contacts.
- Tap a contact.
- Tap icon ☐ to write a message back.
- In the "Type name or number" field, and enter the recipient's phone number.
- Tap + to attach capture picture, capture video, record audio, contact, pictures, videos, audio or calendar. The message converts to a MMS message automatically.
- Enter your message with the on-screen keyboard in "Type text message" filed.
- Tap ▶ to send your message.
From Phone screen
- Tap Application Drawer > APPS > Phone.
- Tap 📋 tab.
- Tap a call in the list of the tab.
- Tap icon.
- In the "Type name or number" field, and enter the recipient's phone number.
- Tap + to attach capture picture, capture video, record audio, contact, pictures, videos, audio or calendar. The message converts to a MMS message automatically.
- Tap "Type message", and then, enter your message with the on-screen keyboard.
- Tap ▶ to send your message.
3.3 Voice Message
Your phone can send voice message.
To create a voice message
- Tap Application Drawer > APPS tab > Messages.
- Tap ☐ to create a new message.
- Enter the recipient's phone number in the "Type name or number" field.
- Tap +> Record audio.
- Tap "Record audio" and ■ to record an audio file.
- Tap ■ to stop recording.
-
Tap "Play" to listen to your recording, Tap "Replace" to be replaced another attachment, or tap "Remove" to delete your recording from the MMS message.
-
Enter your message with the on-screen keyboard in "Type text message"
- Tap ▶ to send your message.
3.4 Email Accounts
All your received email messages are delivered to your phone.
Setting up an Internet e-mail account
- Tap Application Drawer > APPS tab > Email.
- Enter your e-mail address and Password. Tap "Next".
- Select the e-mail account of types.
-
The phone will retrieve the e-mail settings automatically.
-
If the e-mail settings are pre-configured, the e-mail setup wizard displays a successful message.
-
If the e-mail settings are not found, manual setup is in process automatically. You can follow the instructions to complete the settings.
-
Enter Account name and then, tap "Next" to finish the settings.
NOTE:
The Account name is the name shown on the Email screen.
To open Email
Tap Application Drawer > APPS tab > Email to open your e-mail.
To add the second e-mail account
- Tap Application Drawer > APPS tab > Email.
- Tap Menu > Settings > ADD ACCOUNT.
- Please follow the "Account setup" steps to finish the settings.
To delete an e-mail account
- Tap Application Drawer > APPS tab > Email.
- Tap Menu > Settings.
- Tap one of your accounts (If you have two more e-mail accounts).
- Tap "Remove account" which is on the bottom of the page.
- Tap "OK" to confirm.
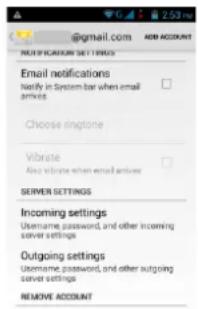
Remove account
Customizing Account settings
You can configure the account settings of your e-mail accounts such as Account name, Email check frequency, and Default account, etc.
To set up your name and account name
- Tap Application Drawer > APPS tab > Email.
- Tap Menu > Settings.
- Tap one of your accounts (If you have two more e-mail accounts).
- Tap "Account name" or "Your name" and enter a name you want.
- Tap "OK" to confirm.
To set up the e-mail check frequency
- Tap Application Drawer > APPS tab > Email.
- Tap Menu > Settings.
- Tap one of your accounts (If you have two more e-mail accounts).
- Tap "Inbox check frequency". You can set how often to check for new e-mail automatically.
To set up default account
- Tap Application Drawer > APPS tab > Email.
- Tap Menu > Settings.
- Tap one of your accounts. (If you have two more e-mail accounts)
- Check "Default account" to set this account as a default one.
To select an account
- Tap Application Drawer > APPS tab > Email to open your e-mail.
- Tap Account name arrow to view all e-mail accounts.
- Tap an e-mail account you want to access.

To configure Email settings
Tap Application Drawer > APPS tab > Email, then tap Menu > Settings > General to set up the application of your e-mail.
3.5 Using E-mail
Composing and sending an E-mail
- Tap Application Drawer > APPS tab > Email, and then, tap Account name arrow to select an account.
- Tap ☒ to compose a new email.
- Enter the recipient's e-mail address in the "To" field or tap done to add a new contact.
- Enter the Subject.
- Compose your e-mail.
- Tap ▶ to send your e-mail.
Sending an E-mail from Contact screen
You can send an e-mail to a contact with an e-mail address stored in Contacts.
- Tap Application Drawer > APPS tab > Contacts.
- Tap a contact whom you want to email to.
- Tap the contact's Email address. Tap "Email" in the submenu.
- Enter the Subject and compose your e-mail.
- Tap ▶ to send your e-mail.
Adding attachments to an e-mail message
Before sending your message, tap Menu > Attach file, and then, choose an attachment you want to attach.
Receiving e-mails
E-mails will be received automatically when your phone connects to wireless networks.
Reading e-mails
The Inbox displays the e-mail headers. When you open the e-mail, it shows the message of text, unless the attachments. Please download the e-mail attachments to view it.
To reply or forward an e-mail
- Open an e-mail.
- Do any of the following:
- Reply: Tap to reply the e-mail.
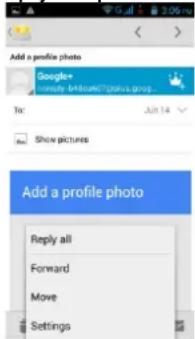
- Reply all: Tap Menu > to reply all recipients and sender.
-
Forward: Tap Menu > to forward the e-mail to other people.
-
Enter the recipient in the "To" field if need.
- Compose your message.
- Tap ▶ to send your e-mail.
To delete an e-mail
- Tap Application Drawer > APPS tab > Email.
- In your mailbox screen, you can view the e-mails.
- Check the e-mails, and then tap 🔒 to delete the e-mail.
4. Using the Internet
4.1 Connecting to the Internet
Your phone connects to the Internet via:
● Wi-Fi
● 3.5G / 3G/ EDGE / GPRS
NOTE:
If you connect to the Internet, you may be charged. If you want to stop the connection, you need to tap Application Drawer > APPS tab > Settings > WIRELESS & NETWORKS section > More > Mobile networks > to unmark Data enabled.
Wi-Fi
Your device can connect to the detected network through Wi-Fi.
- Tap Application Drawer > APPS tab > Settings > Wi-Fi.
- Switch to turn "Wi-Fi" on or off.
To connect to a Wi-Fi network
- Tap "WI-FI", check Wi-Fi function and turn it on. Begin to search the available Wi-Fi networks.
- Detected networks are displayed below. Tap one network then tap "Connect".
- If you select an open network, the connection is established automatically.
- To connect a secured connection, you will be prompted for the password. Enter the password then tap "Connect".
- When Wi-Fi is connected, the connection icon ⚙ will be displayed on the status bar.
To add Wi-Fi network
- Tap Application Drawer > APPS tab > Settings > Wi-Fi.
- In Wi-Fi screen, tap Menu >ADD NETWORK. An on-screen window will pop-up.
- Follow the on-screen instructions and enter the necessary information, then tap "Save" to save the settings.

To configure Wi-Fi settings
- Tap Application Drawer > APPS tab > Settings > Wi-Fi.
- Tap Menu > Advanced to check the Wi-Fi settings.
Tethering & portable hotspot
Share your phone's mobile data connection via USB, Bluetooth, or as a portable Wi-Fi hotspot.
- Tap Application Drawer > APPS tab > Settings > WIRELESS & NETWORKS section > More > Tethering & portable hotspot.
- You can turn on/off USB tethering, Portable Wi-Fi hotspot, USB tethering and configure the portable Wi-Fi hotspot settings.
VPN settings
Set up & manage Virtual Private Networks (VPNs.)
-
Tap Application Drawer > APPS tab > Settings > WIRELESS & NETWORKS section > More > VPN.
-
You must set lock screen PIN or password before using credential storage. Please tap OK go to Unlock selection, then choose which way you want to lock the screen.
- After you set it up. It will go back to VPN screen.
- Tap "Add VPN network" to edit VPN network.
- After filling in all necessary information, tap "Save" to finish the settings.
To start a data connection
If you set up multiple data connections, select the connection you want to use.
- Tap Application Drawer >APPS tab > Settings > WIRELESS & NETWORKS section > More > Mobile networks.
- Check "Data enabled" to enable data access over Mobile network.
4.2 Bluetooth modes
Bluetooth on your phone operates in three different modes:
- On: Bluetooth is turned on. Your phone detects other Bluetooth devices, but your phone is not visible to others.
- Discoverable: Bluetooth is turned on, but your phone is not visible to other Bluetooth devices.
- Off: Bluetooth is turned off.
To turn Bluetooth on or off
- Tap Application Drawer > APPS tab > Settings > Bluetooth.
- Switch or tap to turn it on.
- Tap "Bluetooth" to view the menu options.
- Tap the device's name to make your device visible to others.

Connecting to Bluetooth Devices
A connection to a Bluetooth device is called a partnership. You need to pair and create a partnership with a Bluetooth device to exchange information.
- Tap Application Drawer > APPS tab > Settings > Bluetooth.
- Tap "SEARCH FOR DEVICES" to search for a new device.
- Detected Bluetooth devices are displayed on the screen. Tap one device to connect.
- Start to pair, enter the password, and then tap "OK" to finish pairing.
NOTE:
- The password enter on your phone must be the same one be entered on the device which you want to pair with. The password is required at the first time, once a partnership has been created, the password will no longer require again.
- If you want to view the received files, you can tap Menu > Show received files.
5. Multimedia Applications
5.1 Photos and Videos
Your phone is equipped with a 5.0 megapixels camera to take photos and videos.
Taking a photo/ Recording Video
 | Icon | Function | Icon | Function |
| Switch to EV bracket shot mode | Switch to HDR mode | |||
| Switch to best shot mode | Switch to Normal mode | |||
| Switch to smile shot mode | Tap to configure camera settings | |||
| Switch to Auto scene detection mode | Tap to record a video | |||
| Switch to Multi angle view model | Tap to take a photo | |||
| Switch to Panorama mode | Display the flash mode | |||
| Switch to Face beauty mode | Tap to switch between rear and front camera |
-
Tap Application Drawer > APPS tab > Camera. The screen switches to landscape view automatically.
-
Tap 📄 to take a picture.
Reviewing a photo/ Video
After taking a picture or recording a video, you can review and share it by Messages, Bluetooth, Gmail, Email, Google+, Picasa, Dropbox, etc.
Configuring camera and camcorder settings
In the camera or camcorder screen, tap ☒ to view and set up your camera or camcorder.
| Mode | |||
| Setting | -GPS location info-Exposure-Color effect-Scene mode-White balance-Image Properties-Anti-flicker | -Face Detection-Self timer-Continuous shot-Picture size-Preview size-ISO-Face beauty | -EIS-Microphone-Audio model-Time lapse interval-Effects-Video quality |
5.2 Viewing Photos and Videos
To view photos in the album
- Tap Application Drawer > APPS tab > Gallery.
- Tap one of picture folders to view the images in thumbnails.
-
Tap an image to view.
-
Slide the screen from left side to right side or from right side to left side to view all the photos in this album.
To play slideshow
- While viewing an image, tap Menu > Slideshow.
- Tap screen to stop the slide show.
To set the image as Wallpaper
- While viewing the image, tap Menu > Set picture as > Wallpaper.
- Drag your finger to select the crop area.
- Tap "CROP" to set the image as the wallpaper.
To save a image as Contact photo
- While viewing the image, tap Menu > Set picture as > Contact photo.
- Choose a contact to add image.
-
Drag your finger to select the crop area.
-
Tap "CROP" to save the image as the contact photo.
To edit an image
While viewing the image, to edit an image:
● To crop, tap Menu > Crop.
- Drag your finger to select the area you want to keep.
- Tap "CROP" to save the image.
● To add effects, tap Menu > Edit.
-
Using effects on the bottom to apply to the image.
-
Tap "Save" to save the image.
To view file properties
-
While viewing the image, tap Menu > Details.
-
The file information is displayed.
-
Tap "Close" to return to the image.
Play video from the video file
-
Tap Application Drawer > APPS tab > Gallery > Camera > select a video file you want.
-
Tap ▶ to play it.
5.3 Music
You have to copy your audio files to the storage card before playing music, because the music player only plays audio files saved in the storage card of your phone. Tap Application Drawer > APPS tab > Music.
Music Screen
- Playback screen: Displays the playback area with the playback controls.

| Icon | Function |
| Album art picture or animation | |
 | The display area of audio information. |
| Tap to go to the previous song. | |
 | Tap to play or pause the song. |
| [89x8] | Tap to go to the next song. |
| [3447] | Slide to go forward or backward. |
 | Tap to go to Now playing list. Displays the list of currently playing songs and those on queue for playback. |
 | Tap to shuffle, when it's green means the shuffle is on. |
 | Tap to enable or disable the repeat function. You can choose to repeat all songs or repeat current song. |
- Library
Displays folder categories which could make searching for media files quickly and easily.

- Playlists
Tap ☐ to go to play list. You may see “Recently added” and “My recordings” files in this page.

- Now playing list
Tap ☐ when you are listening to music, you could tap and hold the icons on the left of each recording files to arrange its sequence.
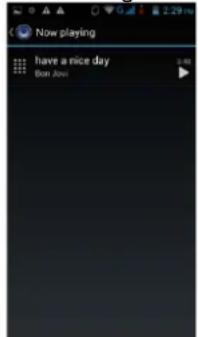
To play music
- Tap Application Drawer > APPS tab > Music.
- Tap Songs, and all songs on the phone will be displayed.
- Tap to select a song, and then it will play automatically.
Changing Playback options
While playing music, tap Menu button on the down right side of screen.
- Tap "Library" to see all playlists.
- Tap "Party shuffle" to play all songs in shuffle order.
- Tap "Add to playlist" to add the song to "Current playlist", "New" or "My recordings".
- Tap "Use as ringtone" to set up your personal ringtone.
- Tap "Delete" to delete the song which is playing.
- Tap "Search" to search music.

To edit your music
In player screen, you could set up effects, tap Menu > Sound effects.
- Drag or tap Equalizer to turn it on.
-
Tap arrow to show different effect list
-
Tap to select an effect you want .Items will be adjusted automatically.
- Tap arrow to show different preset reverb list.
- Tap to select an effect you want.

Creating a new playlist
Add songs to a specific playlist or create a playlist.
- Tap Application Drawer > APPS tab > Music.
- In Songs tab, tap and hold a song you want to add, then tap "Add to playlist" in the pop-up submenu.
- Tap "New" to create a new playlist. Input a name for the created playlist, and then tap "Save". The song will be added to the new playlist automatically.
- You may check this new playlist in Playlists tab.
To remove a music file from the playlist
- Tap Application Drawer > APPS tab > Music.
- In Songs tab, tap and hold the song you want to delete. Then, tap "Delete" in the pop-up submenu.
- Tap "OK", and then, the song will be deleted from the list.
6. Programs
6.1 Pre-installed programs introduction
| Icons | Programs | Description | Icons | Programs | Description |
| Best Choice | Allows you to use the phone easily, we recommend and provide you the best software and functionality. | Browser | Browses the web and download files from the Internet. | ||
 | Calculator | Performs arithmetic functions, such as addition, subtraction, multiplication, and division, etc. | Calendar | Creates and tracks schedule or appointments. | |
| Camera | Captures still images. | Chrome | Google's browser service. | ||
 | Clock | Sets up alarm clock. | Contacts | Stores names, numbers, e-mail, and other information. | |
| Downloads | To view files and items you've downloaded from mail or any other sources, like Play Store. | Drpobox | Bring and share your photos, docs, and videos anywhere. | ||
| [TGSC] | Earth | Let you fly anywhere on Earth to view satellite imagery, maps, terrain, 3D buildings, from galaxies in outer space to the canyons of the ocean. | Sends and receives e-mail messages. | ||
 | File Manager | Manages all files. | FM Radio | Listen to music/ news on the FM Radio. | |
| Gallery | Views and edits photos and videos. | Gmail | Google's web-based e-mail service. | ||
 | Google Search | Google's search service. | Google Settings | Shortcuts to your Google+ settings, Maps & Latitude, Location, Search, and Ads. | |
| Google+ | You can check friends' updates and post updates of your own. | Local | Search for places that you want near your location. | ||
 | Maps | Google's mapping service help you search for the places you want. | Messages | Sends and receives all types of messages, such as text message and MMS. | |
| [W7Z2] | Messenger | Google's instant messaging. | Music | Plays and manages the music and audio files on your phone. | |
| Navigation | Help you get the destination. | News & Weather | Google's news and weather services. | ||
| [TX20] | Phone | Makes and receives phone calls. | Play Music | Google Music Store. | |
| Play Store | Find applications and fun games which you can download and install on your phone. | Sound Recorder | Record a voice note. | ||
 | System update | Check the system update information. | talk | Talk | Google's instant messaging program. |
| TouchPal Keyboard | To set up your Touchpal Keyboard. | Video Player | Play videos. | ||
| [3XX5] | Voice Search | Google Voice Search. | YouTube | It is online video streaming service that allows you to view, search, and upload videos. |
6.2 Browser
Open the Browser to view web pages.
- Tap Application Drawer > APPS tab > Browser.
- An address bar appears at the upper side of screen, and you can type the URL there.
- You can open several web pages at the same time.
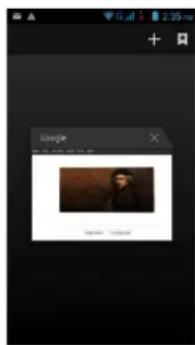
Tap ☐ to view all of web pages that are opening.
- Tap ■ to open a new web page.
- Tap ☒ to close a web page.
● Tap 📀 to view BOOKMARKS.
To set the Home page
- While viewing a web page, tap Menu > Settings > General > Set homepage.
- Tap "Other" to enter the URL of the page that you want to set as your home page.
- Tap "OK" to save your settings.
To add the Bookmarks
- While viewing a web page, tap Menu > Save to bookmarks.
- Edit the bookmark label and other information if needed.
- Tap "Add to" to save the bookmark to Home screen, Bookmarks, or Other Folder.
- Tap "OK" to save your settings.
Managing Bookmarks
- While viewing a web page, tap Menu > Bookmarks. You can view bookmarks, HISTORY and SAVED PAGES.
Managing a Web Page
The following table lists the Menu options. Depending on the function, some options may be unavailable.
On an open web page, tap Menu:
| Refresh | Tap to refresh web page. |
| Stop | Tap to stop opening another web page. |
| Home | Tap to go back homepage. |
| Save to bookmarks | Add the web page to Bookmarks. |
| Close | Tap to Minimize or Quit. |
| Save for offline reading | Tap to save the web page to view in offline mode. |
| Share page | Tap to share the web page. |
| Find on page | Tap to find the text on the web page. |
| Request desktop site | Tap to switch to desktop site. |
| Manage Permissions | Tap to configure a number of settings for individual websites that you visit. |
| Bookmarks/ History | Tap to select from the list of the saved favorite web pages/ history to visit. |
| Settings | Tap to set up some functions. |
| General | Set homepage: Enters the URL and sets as your home page.Form auto-fill: Fill out web forms with a single touch.Auto-fill text: Set up text to auto-fill in web forms. |
| Privacy & security | Tap to configure privacy settings:Clear cache: Clear locally cached content and databases.Clear history: Clear browser navigation history.Show security warnings: Show warning if there's a problem with a site's security.Accept cookies: Allow sites to save and read "cookie" data.Clear all cookie data: Clear all browser cookies.Remember form data: Remember data I type in forms for later use.Clear form data: Clear all the saved form data.Enable location: Allow sites to request access to your location.Clear location access: Clear location access for all websites.Remember passwords: Save usernames and passwords for websites.Clear passwords: Clear all saved passwords.Enable notificationsClear notification: Clear notification access for all websites. |
| Accessibility | Tap to configure browser settings:Force enable zoom: Override a website's request to control zoom behavior.TEXT SIZE: Adjusts the text size.INVERTED SCREEN RENDERING: Black become white and vice versa. |
| Advanced | Set search engine: Select a search engine.Open in background: Open new tabs behind the current tab.Enable JavaScript: Enables/disables JavaScript on web page.Allow multiple tabs per app : Allows you to use multiplenavigation tabs per application.● Enable plug-ins: Always on, On demand, and Off.● Website settings: Advanced settings for individual websites.● Default zoom: Set up zooming functions.● Open pages in overview: Show overview of newly-opened pages.● Auto-fit pages: Enable/disable the webpage to fit the screen.● Block pop-ups: Blocks the pop-up windows when browsing web page.● Text encoding: Sets up text encoding.● Rest to default: Restore default settings. |
| Bandwidth management | ● Search result preloading: Allow browser to preload high confidence search results in the background.● Web page preloading: allow browser to preload linked web pages in the background.● Load images: Display images on web pages. |
| Labs | ● Quick controls: Slide thumb from the left or right edge to open quick controls and hide app and URL bars.● Fullscreen: Use fullscreen mode to hide the status bar. |
6.3 Calculator
With Calculator, you can perform basic arithmetic functions on your phone.
- Tap Application Drawer > APPS tab > Calculator.
- In Calculator screen, tap "Menu" to select the advanced panel.
6.4 Calendar
Calendar helps you schedule and sound alarms for appointments, meetings, and events.
- Tap Application Drawer > APPS tab > Calendar.
- If you do not log in your Google Account, tap Menu > New to create an account, or tap "Existing" to sign in the Google account. Please follow the on-screen instruction to log in.
- Tap Calendar arrow > Day, Week, Month, or Agenda to change the displays of your events.
- Tap ☐ to go back to today.
- Tap Menu > Settings to see more settings.

To view a event
- Tap Application Drawer > APPS tab > Calendar.
- Tap Calendar arrow > Agenda to display the events.
To add and schedule an event
- Tap Application Drawer > APPS tab > Calendar.
- Tap Menu > New event.
- Enter the details of the event.
- Select the dates in the fields of "From" and "To". For an all-day event, check "ALL DAY".
- To set up the "repetition", select one of the options from the list.
- To set up a reminder, select the time from the list.
- When finished, tap "DONE" to return to the calendar.
NOTE:
The added and scheduled events will be showed in the status bar.
6.5 Gmail
Gmail is Google's web-based email service. Gmail can be configured when you set up your phone for the first time. Depending on your settings of the synchronization, Gmail on your phone may be synchronized with your Gmail account on the web automatically.
- Tap Application Drawer > APPS tab > Gmail.
- If you do not log in your Google Account, tap "NEW" to create an account, or tap "Existing" to sign in the Google account. Please follow the on-screen instruction to log in.
- Once logged in, you can begin reading and sending emails from your Gmail account.
6.6 Maps
Google's mapping service help you search for the places you want.
NOTE:
If you connect to the Internet and turn on the GPS, you may be charged.
To open Map
- Tap Application Drawer > APPS tab > Maps.
- Do any of the following:
● My location: Tap ◆ to go back to my location. - Search: Tap 🔒 to search for a place you want. You need type in a keyword to begin to search.
- To get the direction: Tap ✅ to input your start point and your destination, and then, Maps will direct you to attend the destination. You can select Car, Bus, or Walk mode.
● Find places: Tap 📋 to find restaurants, cafes, bars, attractions. - Check layers: Tap ☐, then you can select different layers and functions.
Tap Menu to set more options as below:
● To clear the map: Tap Menu > Clear Map.
- To view terms, privacy, and notices: Tap Menu > Settings > Terms, Privacy & Notices.
- To view information about Maps: Tap Menu > Settings > About.
6.7 Local
Use Google maps to search places that you want to find near your current location and the details about the location you select displays on the screen.
NOTE:
If you connect to the Internet and turn on the GPS, you may be charged.
- Tap Application Drawer > APPS tab > Local, or tap Local when using Google maps.
- To search: Tap 🔒, and enter the places you want, or tap the category in the list.
- The system will display the locations you want, tap one of them to check the detailed information. Tap the star on the top of the screen to add it to Maps. Helps you find the place quickly. Tap 📋 to go back to Maps. Tap ✉ to get the direction. Tap 🔔 to make a phone call to this place.
6.8 Navigation
Tap Application Drawer > APPS tab > Navigation.
Navigation is an Internet-connected GPS navigation system with voice guidance. Helps you get to the destination.
NOTE:
-
If you connect to the Internet and turn on the GPS, you may be charged.
-
In some locations and regions, Navigation may not be available.
6.9 Google Search
Search for the information in the Internet and on the phone. Tap Application Drawer > APPS tab > Search. You can also see the search bar on the Home screen.
6.10 Talk
Talk is Google's instant messaging program.
To sign in Talk
- Tap Application Drawer > APPS tab > Talk.
- If you do not log in your Google Account, tap "NEW" to create an account, or tap "Existing" to sign in the Google account. Please follow the on-screen instruction to log in.
- Once logged in, you can begin to use Talk and do any of the following:
- Select one of your accounts.(If you have two more accounts)
- Send chat invitation to friends: Tap 📷.
- To configure Talk settings: Tap Menu > Settings.
● To view the blocked friends: Tap Menu > Settings > your account > Blocked friends.
● To invite a person to your chat: In the chat screen, tap Menu > Add to chat.
● To end a chat: In the chat screen, tap Menu > End chat. - To view terms and privacy: Tap Menu > Settings > your account > Terms & privacy.
● To Sign out: Tap Menu > Sign out.
6.11 YouTube
YouTube is an online video streaming service that allows you to view, search, and upload videos.
To Play YouTube
- Tap Application Drawer > APPS tab > YouTube.
- Videos are grouped into categories, tap "BROWSE" tab. Tap a category to watch the available videos.
- Tap a video to play.
To upload your video
- Tap Application Drawer > APPS tab > YouTube.
- Tap "ACCOUNT" tab, and then sign in your account.
- Tap Uploads.
- Tap a video to upload.
6.12 Play Store
Play Store allows you to find and download applications and fun games to your phone.
- Tap Application Drawer > APPS tab > Play Store.
- If you do not log in your Google Account, tap "NEW" to create an account, or tap "Existing" to sign in the Google account. Please follow the on-screen instruction to log in.
- Once logged in, you can search and download programs from the market. Slide the screen to switch the pages of play store.
- You can also tap Menu > My apps to view the programs you have downloaded.
6.13 News and Weather
News and Weather will show the weather and news of your city automatically.
- Tap Application Drawer > APPS tab > News & Weather. Slide the screen to switch between the pages of weather and news.
- Tap Menu > Refresh to update the information.
- Tap Menu > Settings. You can adjust the settings of the weather and news.
NOTE:
If you connect to the Internet, you may be charged.

6.14 Best Choice
For easy to use, we recommend you the best software and functionality. With this function, you can find the web links to the services you need easily.
- Tap Application Drawer > APPS tab > Best Choice.
- Tap a desired function, and then, download it online.
6.15 FM Radio
You can listen to music/news on the FM Radio. Before use, please insert the headset.
- Tap Application Drawer > APPS tab > FM Radio.
- Tap ■ to switch voice source between your headset and speaker.
- Tap ★ to save to the new station.
- Tap ▪ or ▶ to go to the available station.
- Tap ⏻ to close and exit FM Radio.

6.16 Sound Recorder
To Record a voice note
- Tap Application Drawer > APPS tab > Sound Recorder.
- In the recording screen, tap ■ to record a voice note. Tap ■ to stop the recording. Tap to play the recording.
- Tap Save to save or tap Discard to exit.

To play a voice note
After recording, the file will be stored in the memory card. Please use Music to play it.
- Tap Application Drawer > APPS tab > Music > Playlists > My recordings.
- Displays the list of the voice note, and then, tap the voice note you want to play it.
6.17 Connecting your phone to a computer
If you want to copy files between your computer and your phone storage. Please have your device connect to PC with the USB cable first.

Tap and drag down Status Bar and tap "Media device" or "USB Storage" on your device.
- Media device(MTP):Lets you transfer media files on Windows, or using Android File Transfer on Mac(see www.android.com/filetransfer)
- USB storage:used as USB storage, copy file.
6.18 File Manager
File manager helps you manage the files in your phone and in your SD card.
- Tap Application Drawer > APPS tab > File Manager.
- Tap the folder you want to browse it.
6.19 Downloads
Files and other items you downloaded in Email or Browser are stored on your SD card. You can view, reopen or delete what you've downloaded.
- Tap Application Drawer > APPS tab > Downloads.
- Choose "Sort by size" or "Sort by date".
6.20 Screenshots
You could use this function to capture any screen from the device. Please press and hold Volume Key down and Power Key at the same time. The screenshots will be saved in /sdcard/Pictures/Screenshots and you may view screenshots in Gallery.
7. Managing Your Phone
7.1 Phone Settings
Tap Application Drawer > APPS tab > Settings to view and adjust the settings of your phone.
Wireless & networks settings
| Application | Description |
| SIM Management | Set SIM name, turn on/off SIM card, mobile network setting and call settings, etc. |
| Wi-Fi | Enable/disable Wi-Fi. And set up and manage wireless access points. |
| Bluetooth | Enable/disable Bluetooth. And manage connections, set up the name of the device and the discoverability of the device. |
| Data usage | Enable/disable mobile network data. Measure mobile network and Wi-Fi data by your phone and display on chart. |
| More...: | |
| Airplane mode | Enable/disable all wireless connections. |
| VPN | Set up & manage Virtual Private Networks (VPNs). |
| Tethering & potable hotspot | Share your phone's mobile data connection via USB or as portable Wi-Fi hotspot. |
| Wi-Fi direct settings | Set up peer-to-peer connectivity. |
| Mobile networks | Set options for roaming, networks, APNs. |
DEVICE
| Application | Description |
| Audio profiles | Set up your default ringtone of incoming calls and default notification. |
| Personalize: | |
| Lock screen notifications | Show notifications on lock screen. |
| Wallpaper | Set up the wallpaper from gallery, live wallpaper, and wallpapers. |
| Display: | |
| Auto-rotate screen | Enable/disable the screen direction automatically. |
| Brightness | Adjust the brightness of the screen. |
| Daydream | Enable/disable the screen protector program when the phone is docked or sleeping. |
| Font size | Select the font size from the list. |
| Screen time out | Set up the screen timeout time. |
| Storage | View the storage usage of phone. |
| Battery | View the battery usage of phone. |
| Apps | Manage and remove the installed applications. |
PERSONAL
| Application | Description |
| Location services: | |
| Access to my location | Let apps that have asked your permission use your location information. |
| GPS satellites | Let apps use GPS to pinpoint your location. |
| GPS EPO assistance | Use GPS assistance data (EPO) to speed up GPS positioning. |
| EPO settings | Click to modify EPO configurations. |
| A-GPS | GPS can speed up the fixed time of location with assistant data via wireless data connection. |
| A-GPS settings | Set up A-GPS settings. |
| Wi-Fi & mobile network location | Let apps use Google's location service to estimate your location faster. Anonymous location data will be collected and sent to Google. |
| Security: | |
| Screen lock | Lock screen with a slide, face unlock, voice unlock, Pattern, PIN, or password. |
| Improve face matching | Have your face captured in different conditions. |
| Liveness check | Require eye blink while unlocking. |
| Make pattern visible | Enable/disable to show the pattern you draw. |
| Automatically lock | Set up the time of automatically lock. |
| Power button instantly lock | Enable/disable power button instantly lock. |
| Owner info | Type text to display on the lock screen. |
| Encrypt phone | Require a numeric PIN or password to decrypt your phone each time you power it on. |
| Set up SIM card lock | Lock SIM card and change the PIN of your SIM card. |
| Make passwords visible | Enable/disable to show the password as you type. |
| Device administrators | View or deactivate device administrators. |
| Unknown sources | Allow installation of non-Market apps. |
| Verify apps. | Disallow or warn before installation of apps that may cause harm. |
| Trusted credentials | Display trusted CA certificates. |
| Install from SD card | Install certificates form SD card. |
| Clear credentials | Remove all certificates. |
| Language & input: | |
| Language | Select a language for your phone. |
| Spelling checker | Allow/disallow text to correct spelling automatically. |
| Personal dictionary | You can add, edit, and delete the self-defined words. |
| Default | Select an input method. |
| Android keyboard | Settings for Android keyboard. |
| Google voice typing | Settings for Google voice typing. |
| TouchPal keyboard | Settings for TouchPal keyboard. |
| Voice Search | Set up language, safe search, and black offensive words. |
| Text-to-speech output | Text-to-speech settings. |
| Pointer speed | Adjusts the pointer speed. |
| Backup & reset: | |
| Back up my data | Back up app data, Wi-Fi passwords, and other settings to Google services. |
| Backup | Backing up to debug-only private cache. |
| account | |
| Automatic restore | When reinstalling an app, restore backed up settings and data. |
| DRM reset | Deletes all DRM licenses. |
| Factory data reset | Erases all data on phone. |
SYSTEM
| Application | Description |
| Data & time: | |
| Automatic date & time | Check to use the provided values of the network. |
| Automatic time zone | Use network-provided time zone. |
| Set date | Set up the date for your phone. |
| Set time | Set up the time for your phone. |
| Select time zone | Set up the time zone for your phone. |
| Use 24-hour format | Set up the clock to 24-hour format. |
| Select date format | Set up the preferred date format. |
| Scheduled power on & off: Allow you to scheduled power on & off time. | |
| Accessibility: | |
| TalkBack | Provides spoken feedback to help blind and low-vision users. |
| Magnification gestures | You can zoom in and out by triple-tapping the screen. |
| Large text | Adjusts the text size. |
| Power button ends call | During a call, pressing Power ends the call instead of turning off the screen. |
| Auto-rotate screen | Set up the screen direction automatically. |
| Speak passwords | Allow/disallow speak password. |
| Text-to-speech output | The Text-to-speech output feature allows the phone to provide a verbal readout of onscreen data such as messages and incoming caller information (based on Caller ID). |
| Touch & hold delay | Select short, medium, and long time. |
| Enhance web accessibility | Install scripts from Google that make their web content more accessible. |
| Quick boot | Enable/ disable quick boot. |
| About phone | |
| Status | Battery status, battery level, etc. |
| Legal information | To view the legal information of phone. |
| Model number | Display your phone of model name. |
| Android version | Display your phone of Android version. |
| Baseband version | Display your phone of baseband version. |
| Kernel version | Display your phone of kernel version. |
| Build number | Display your phone of software version. |
7.2 Managing Basic Settings
Date and Time
You can set up the date and the time on your phone.
To set up the date and time
- Tap Application Drawer > APPS tab > Settings > Date & time.
- If you check "Automatic data & time", the system will get the information of the current date and time automatically. You can set up the date and the time manually also.
- If you check "Automatic time zone", the system will get the information of time zone automatically. You can tap "Select the time zone" to select a time zone from the list also.
- Tap "Set date". Please adjust the month, the day, and the year. Tap "Set" to save the settings.
- Tap "Set Time". Please adjust the hour and the minute. You can switch AM/PM. Tap "Set" to save the settings.
- Check "Use 24-hour format" if you want.
- Tap "Select date format" to select the date format you want.
Setting Alarms
You can set up many alarms on your phone.
To set the alarm
- Tap Application Drawer > APPS tab > Clock.
- Tap "Alarm set" to set up a new alarm.
- Tap "+" to Add alarm.
- Check "Turn alarm on".
- Tap "Time" to set up. Please adjust the hour and the minute. You can switch AM/PM. Tap "Set" to save the settings.
- Tap "Repeat" to select a day to sound the alarm. Tap "OK" to save the settings.
- Tap "Ringtone" to set up the preferred ringtone when your alarm sounds. Tap "OK" to save the settings.
- Check "Vibrate" to enable/disable the vibration when the alarm sounds.
- Tap "Label" to enter the description for the alarm.
- Tap "OK" to save the settings of the alarm.
Activate an alarm
Tap an alarm to activate it.
To adjust the brightness
- Tap Application Drawer > APPS tab > Settings > Display > Brightness.
- Drag the slider of brightness to the left to decrease the brightness, or to the right to increase the brightness. Tap "OK" to finish.
- Tap "Automatic brightness" to let device adjust brightness by itself.
To change the screen orientation
- Tap Application Drawer > APPS tab > Settings > Display
- Check "Auto-rotate screen" to adjust the screen automatically.
To change the ringtone of an incoming call
- Tap Application Drawer > APPS tab > Settings > Audio profiles.
- Tap "General". On "SIM1" or "SIM2" tab (If SIM2 inserted), tap "voice call ringtone".
- Select a ringtone from the list.
- Tap "OK" to finish.
To change ringtone of events
- Tap Application Drawer > APPS tab > Settings > Audio profiles.
- Tap "General"> "Default notification".
- Select a ringtone from the list.
- Tap "OK" to finish.
7.3 Protecting Your Phone
You can protect your phone from unauthorized users by requiring the PIN or entering a password.
Set up Password Protection
- Tap Application Drawer > APPS tab > Settings > Security > Screen lock > Password.
- Enter your password, and then, tap "Continue". Confirm your password, then, tap "OK".
- If you want to disable screen lock security, please tap Application Drawer > Settings > APPS tab > Security > Screen lock. Confirm your password, and then, tap "Continue". Tap "None" to disable it.
Set up unlock pattern
You can further secure your data by locking the screen and requiring a screen unlock pattern every time after your phone is turned on or it wakes up from the sleep mode every time (screen is off).
- Tap Application Drawer > APPS tab > Settings > Security > Screen lock > Pattern.
- Draw the unlock pattern by connecting at least four dots. Then tap "Continue".
- Draw the unlock pattern again, and then, tap "Confirm".
- If you want to disable the function, please tap Application Drawer > APPS tab > Settings > Security > Screen lock. Confirm the saved pattern, and then, tap "None" to disable it.
Set up face unlock
You can use front-facing shot to verify your identity to unlock your phone.
- Tap Application Drawer > APPS tab > Settings > Security > Screen lock > Face Unlock.
- Tap Set it up>Continue.
- Show your face in front of your phone until face captured. Then tap continue.
- Set up Pattern or PIN as the backup lock.
- If you want to disable the function, please tap Application Drawer > APPS tab > Settings > Security > Screen lock. Confirm the saved pattern, and then, tap "None" to disable it.
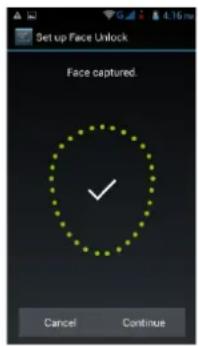
Set up Voice unlock
You can use voice command to unlock your phone.
- Tap Application Drawer > APPS tab > Settings > Security > Screen lock > Voice Unlock.
- Tap unlock command.
- Speak a command with 2-8 syllables, then repeat 3-6 times.
- Tap Record button and speak out your voice command.
- Set up Pattern as the backup lock.
- If you want to disable the function, please tap Application Drawer > APPS tab > Settings > Security > voice unlock. Confirm the saved pattern, and then, tap "None" to disable it.

7.4 Resetting Your Phone
With Clean Boot, you can reset your phone to its factory defaults. When you reset your phone, the data stored in your phone may be erased.
- Tap Application Drawer > APPS tab > Settings > Backup & reset.
- Tap Factory data reset > Reset phone > Erase everything to reset the phone.
NOTE:
Before reset your device, please remember to back up all your data and information.
7.5 Specifications
| System Information | |
| Platform | Android 4.2 |
| Processor | 1.2GHz Quad-core |
| Memory | ROM 4 GBRAM 1 GB |
| Display | |
| Size | 4.5" |
| Resolutions | 854 x 480 pixels |
| Size | |
| Dimensions(L x W x H) | 136 x 67 x 12.35 mm |
| Weight | 147.7 grams with battery |
| Power | |
| BatteryRechargeable | Li-ion pack 2000 mAh |
| Power Adapter ACinput | 100-240V, 50/60Hz,0.2A max. |
| DC output | 5V, 1A |
| Standby time | Up to 333 hours (It may vary depending on the availability of local networks and the individual usage.) |
| Talk time | Up to 5 hours (It may vary depending on the availability of local networks and the individual usage.) |
| Radio Band & Standard | |
| GSM/GPRS/EDGE | 850/ 900/ 1800/ 1900 MHz |
| WCDMA/HSDPA | 900/ 2100 MHz |
| Connectivity | |
| GPS | GPS, AGPS |
| Wi-Fi | IEEE 802.11 b/g/n |
| Bluetooth | Bluetooth 3.0 |
| USB | Micro USB |
| Audio Jack | 3.5 mm stereo audio jack |
| Digital Camera | |
| Rear Camera | 5.0MP Color Camera with AF and Video Recording |
| Front Camera | 0.3MP |
| External Memory | |
| Memory Card | microSD supports up to 32GB |
| Temperature | |
| Operating | -15°C to 55°C |
| SIM Card Slot | |
| Dual SIM card slot. | |
NOTE:
- Specifications are subject to change without the prior notice. They may vary in some regions also.
- Mobile data interruption, unexpected error in CPU and high power consumption could be caused by in-app AD in Android phone. We suggest you try to remove those apps with AD which had been installed in your device for preventing any abnormal situation happens and saving more power as well.
If this document is modified, please download the latest version on GSmart's official website.
GIGA-BYTE COMMUNICATIONS INC.
B2, No. 207, Sec. 3, Pai-Hsin Road,
Hsin-Tien Dist., New Taipei City 231, Taiwan

- Safety Information
- SAFETY PRECAUTIONS FOR BATTERY USE
- ROAD AND ENVIRONMENTAL SAFETY
- SAFETY IN AIRCRAFT
- Copyright © 2013 All Rights Reserved.
- CE SAR Compliance
- WEEE Notice
- RoHS Compliance
- European Union Regulatory Conformance
- Intellectual Property Right Information
- Products with 2.4-GHz Wireless LAN Devices France
- Sound Pressure Level requirement
- Getting Started
- Your Phone
- Installing or uninstalling the SIM Card, Battery, and Memory Card
- To remove the back cover
- SIM card
- To install the SIM card
- To install the SIM1 card
- To install the SIM2 card
- To remove the SIM card
- Battery
- To install the battery
- To remove the battery
- NOTE:
- To replace the back cover
- Memory card
- To install the memory card
- To remove the memory card
- Charging the Battery
- Turning the Phone On or Off
- To turn on your phone
- To turn off your phone
- To set your phone to the sleep mode
- Lock/Unlock
- Unlock the device
- Initial Settings
- Adjusting the Volume
- To adjust the volume of ringtone, media, and alarm
- Contacts
- Adding a Contact
- Searching for Contacts
- Contact groups
- To add Contact groups in local groups
- Manage Accounts
- Import / Export Contacts
- Import Contacts from SIM card.
- Import Contacts from storage
- Back up Contacts
- Export Contacts to SIM card
- Export Contacts to storage
- Favorite Contacts
- Add to Favorites
- Remove from Favorites
- The Home Screen
- How to Navigate
- Status Icons
- Recent apps list
- Using Widgets
- To add widgets
- To delete widgets
- Folders
- To create folders
- To delete folders
- Setting the wallpaper
- Set wallpaper from Live wallpapers or Wallpapers
- Set wallpaper from Pictures
- Phone Functions & Input
- Phone Functions
- Voice Calls
- Making a call
- To make a call from the Phone screen
- To make a call from Contacts
- To make emergency calls
- To make international calls
- Answering a call
- To accept or reject an incoming call
- Quick response an incoming call
- To put a call on hold
- To manage other voice call features
- Ending a call
- Using On-Screen Keyboard
- Using on-screen keyboard
- Setting the Input Method
- Basic input settings
- Personal dictionary
- TouchPal Input Method
- General settings
- Keyboard layout:
- Smart input:
- Languages
- Chinese input
- Dictionary management:
- Help & About
- Android keyboard
- Using Android keyboard
- How to select input method
- Email & Messages
- Creating and sending a text message
- From Message screen
- From Contact screen
- From Phone screen
- Receiving and Managing Messages
- To reply to a text message
- To forward a text message
- To delete all messages
- To delete a message thread
- To delete a message within a thread
- Multimedia Message
- Creating and sending an MMS message
- Send MMS from Message screen
- Send MMS from Contact screen
- Voice Message
- To create a voice message
- Email Accounts
- Setting up an Internet e-mail account
- To open Email
- To add the second e-mail account
- To delete an e-mail account
- Customizing Account settings
- To set up your name and account name
- To set up the e-mail check frequency
- To set up default account
- To select an account
- To configure Email settings
- Using E-mail
- Composing and sending an E-mail
- Sending an E-mail from Contact screen
- Adding attachments to an e-mail message
- Receiving e-mails
- Reading e-mails
- To reply or forward an e-mail
- To delete an e-mail
- Using the Internet
- Connecting to the Internet
- Wi-Fi
- To connect to a Wi-Fi network
- To add Wi-Fi network
- To configure Wi-Fi settings
- Tethering & portable hotspot
- VPN settings
- To start a data connection
- Bluetooth modes
- To turn Bluetooth on or off
- Connecting to Bluetooth Devices
- Multimedia Applications
- Photos and Videos
- Reviewing a photo/ Video
- Configuring camera and camcorder settings
- Viewing Photos and Videos
- To view photos in the album
- To play slideshow
- To set the image as Wallpaper
- To save a image as Contact photo
- To edit an image
- To view file properties
- Play video from the video file
- Music
- Music Screen
- - Playlists
- - Now playing list
- To play music
- Changing Playback options
- To edit your music
- Creating a new playlist
- To remove a music file from the playlist
- Programs
- Pre-installed programs introduction
- Browser
- To set the Home page
- To add the Bookmarks
- Managing Bookmarks
- Managing a Web Page
- Calculator
- Calendar
- To view a event
- To add and schedule an event
- Gmail
- Maps
- To open Map
- Local
- Navigation
- Google Search
- Talk
- To sign in Talk
- YouTube
- To Play YouTube
- To upload your video
- Play Store
- News and Weather
- Best Choice
- FM Radio
- Sound Recorder
- To Record a voice note
- To play a voice note
- Connecting your phone to a computer
- File Manager
- Downloads
- Screenshots
- Managing Your Phone
- Phone Settings
- Managing Basic Settings
- Date and Time
- To set up the date and time
- Setting Alarms
- To set the alarm
- Activate an alarm
- To adjust the brightness
- To change the screen orientation
- To change the ringtone of an incoming call
- To change ringtone of events
- Protecting Your Phone
- Set up Password Protection
- Set up unlock pattern
- Set up face unlock
- Set up Voice unlock
- Resetting Your Phone
Brand : GIGABYTE
Model : GSmart Aku A1
Category : Mobile Phone