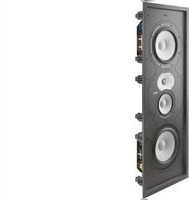
PerformaBe W228Be - Loudspeaker Revel - Free user manual and instructions
Find the device manual for free PerformaBe W228Be Revel in PDF.


| Product Type | Bookshelf speaker |
| Driver Complement | 1-inch beryllium dome tweeter, 8-inch deep ceramic composite cone woofer |
| Frequency Response | 40 Hz – 40 kHz (±3 dB) |
| Impedance | 8 ohms (nominal) |
| Sensitivity | 88 dB SPL (2.83V @ 1m) |
| Recommended Amplifier Power | 50 – 200 watts RMS |
| Dimensions (H × W × D) | 17.5 × 10.5 × 13.0 inches (445 × 267 × 330 mm) |
| Weight | 45 lbs (20.4 kg) each |
| Finish Options | Walnut, Black, High-Gloss Piano Black |
| Port Type | Rear-firing flared port |
| Binding Posts | Gold-plated, 5-way binding posts |
| Grille | Magnetically attached, removable |
| Warranty | 5 years (limited) |
| Cleaning Instructions | Wipe with a soft, dry or slightly damp cloth. Do not use solvents or abrasives. |
| Safety Precautions | Place on a stable surface, away from heat sources and moisture. Ensure ventilation around the port. |
| Spare Parts & Repairability | Contact Revel authorized service centers for replacement drivers or crossover components. |
| Recommended Placement | Position at ear level, at least 12 inches from walls for optimal bass response. |
Frequently Asked Questions - PerformaBe W228Be Revel
User questions about PerformaBe W228Be Revel
0 question about this device. Answer the ones you know or ask your own.
Ask a new question about this device
Download the instructions for your Loudspeaker in PDF format for free! Find your manual PerformaBe W228Be - Revel and take your electronic device back in hand. On this page are published all the documents necessary for the use of your device. PerformaBe W228Be by Revel.
USER MANUAL PerformaBe W228Be Revel
Since the first Revel® speakers in 1996, Revel products have stood at the forefront of loudspeaker design and performance. The PerformaBe Architectural Series was conceived to create high-end architectural loudspeakers that share the same caliber of components and acoustic signature as the award winning PerformaBe floor-standing and bookshelf loudspeakers. Utilizing Beryllium tweeters these architectural speakers bring unparalleled detail and accuracy along with a sense of air and spaciousness, and a cohesive soundstage that is hard to find in any architectural loudspeakers. The Revel Be Architectural series consists of three in-wall models and one in-ceiling model that can be used as a complete architectural system solution or combined in a mix and match solution with the floor-standing and bookshelf PerformaBe loudspeakers.
For more information on the set-up and operation of this product refer to the specific loudspeaker's product page on the revelspeakers.com website. Should further assistance be required feel free to contact customer support at the numbers below:
Inside the US and Canada: +1 888.691.4171
Outside the US and Canada: +44 1707 668 012
Box Contents
1x PerformaBe Architectural Loudspeaker
1x Zero Bezel Grille
1x White Replacement Grille Scrim
1x Black Replacement Grille Scrim
1x Cutout Template
1x Quick Start Guide (This Document)
Wire Gauge by Distance Guide
| Distance/Length | Min. Recommended Wire Gauge |
| < 50ft (15m) | 14-gauge |
| 50ft (15m) ~ 100ft (30m) 12-gauge | |
| >100ft (30m) | 10-gauge |
Note: • If you suspect that there has been shipping damage or if you are missing any of the referenced above Box Contents for your model, report it immediately to your dealer or contact our Customer Support at the telephone numbers referenced in the opening of this document.
- This document covers the installation of the speakers only. Refer to the Revel PerformaBe Backbox OR Pre-Construction Bracket Installation Guide for details on installing the backboxes.
IMPORTANT!! Safety Information

IMPORTANT!
HARMAN International assumes no responsibility for improper installation of hardware or for any personal injuries or product
damages resulting from improper installation or a fallen loudspeaker.
Read through this document and other documents associated with this product in their entirety and heed all warning before proceeding with the installation of these product(s).

IMPORTANT! Installation Precautions
- Allow sufficient clearance between the speaker and any insulation that may be in the wall cavity to avoid ignition should overheating occur.
1" (26mm) for Non-Flammable Materials
3" (78mm) for Flammable Materials
- Ensure that all wire used inside of walls and ceiling meets or exceeds local fire codes for hidden wiring.
- Determine wire lengths and select the proper gauge speaker wire to use based on the table above titled "Wire Guage by Distance Guide".
- Do NOT overtighten the mounting "Cat Claws" when securing the speaker to surfaces as this may cause the speaker to come loose. If using a power screwdriver set it to the lowest torque settings.
- Do NOT connect the speakers to an amplifier rated above the recommended amplifier power. Overdriving the speaker can cause an overheating condition increasing the risk of injury.
- Do NOT connect the amplifier end of the wire until all speakers are wired and installed.
- Determine and purchase any accessories such as pre-construction brackets or backboxes before beginning the installation process. Refer to the Specification Table at the end of this installation guide for a list of available accessories associated for each model.
- Ensure that wall and ceiling wallboard material is between 0.4-inch (10mm) and 1.0-inch (25mm) thick and capable of supporting the weight of the speaker.
Installation Considerations
Revel architectural speakers are extremely easy to install. However, if you are unable to understand and follow the instructions in this manual clearly and fully, or if you are unsure of your ability to install these loudspeakers properly, please contact your dealer or a qualified installer.
Your new Revel PerformaBe Architectural loudspeakers have been engineered to provide extremely accurate performance. However, any speaker's ultimate performance will be affected by the speaker's placement in the listening room and the acoustics of the room. Not all listening spaces can accommodate the ideal conditions of these two factors. Therefore, careful attention to the placement of your Revel PerformaBe Architectural loudspeakers will have a significant impact on the general performance of the loudspeakers.
Although the Revel PerformaBe Architectural W226Be and W228Be are designed for use primarily as front left, center and front right speakers in a home theater system, the high-order crossover networks employed in all Revel PerformaBe Architectural loudspeakers provide very smooth response over a wide listening area, allowing you to use any model in any application with excellent results.
Note: The Revel PerformaBe Architectural in-wall speakers W226Be and W228Be can be used in either horizontal or vertical orientation.
Loudspeaker placement for Two-Channel Stereo

flowchart
graph TD
    A["Left Speaker"] --> B["Equal Distance"]
    C["Right Speaker"] --> B
    B --> D["Top Box"]
    style A fill:#f9f,stroke:#333
    style C fill:#f9f,stroke:#333
    style B fill:#ccf,stroke:#333
    style D fill:#cfc,stroke:#333
Place the left and right loudspeakers the same distance from the primary listening area (or as close to the same distance as possible).
The distance from each speaker to its nearest side wall should also be as close to the same distance as possible.
Ideally, the distance between the left and right loudspeakers should be slightly less than their distance from the primary listening area.
Loudspeaker Placement for LCR Television Sound
The front left and front right loudspeakers should be located on either side of the video display, with their tweeters as close to ear level as possible.
The front left and front right loudspeakers should be relatively close to the sides of the video display. For example, front left and front right loudspeakers used with a 50-inch (1.3m) video display should generally not be more than 80-ichn (2m) apart.
The center loudspeaker should be aligned with the center of the video display. Its tweeter should be no more than 2 ft (0.6m) above or below the tweeters of the front left and front right speakers.

Loudspeaker Placement for 5.1.4 Channel Surround
In a 5.1.4-channel system, the surround left and surround right loudspeakers should be located to the sides of the main listening area, 5 ft - 7 ft (1.5m - 2.1m) from the floor.
The Front Left Height and Front Right Height loudspeakers should be located on the ceiling, to the outsides of, and in-front of the main listening area.
The Rear Left Height and Rear Right Height loudspeakers should be located on the ceiling, to the outside of, and behind the main listening area.

Installing the Speakers
Note: If using the optional backbox or pre-construction bracket for installation, refer to the Revel PerformaBe Backbox Installation Guide for details on installing the backboxes before continuing with the installation of the speaker.
Connecting to the Amplifier
CAUTION: REMOVE POWER
You must connect the speaker wires before the speaker is fully installed. To protect the audio system from damage and yourself from injury through accidental electrical shorting and surges during installation, turn all audio system power OFF before beginning the speaker installation.
Speaker Wire
Use high-quality speaker wire to obtain the best performance from your Revel PerformaBe Architectural loudspeakers. Determine wire lengths and select the proper gauge speaker wire to use based on the table under Wire Gauge by Distance Guide at the beginning of this guide.
Note: All speaker wires must comply with all local building and safety codes for use in in-wall / in-ceiling applications.
Making Connections
Connect each channel's positive (+) terminal on the back of the amplifier or receiver to the positive ("IN+" / Red) terminal on the corresponding speaker.
Connect each channel's negative (−) terminal on the back of the amplifier or receiver to the negative ("IN−" / Black) terminal on the corresponding speaker.
Do not reverse polarities (that is, do not connect + to -, or - to +) when making connections. Doing so will cause poor imaging and diminished bass response.
Press down on the top of the terminal to open the hole; insert the bare end of the wire into the hole; and release the terminal to secure the wire.
CAUTION: To avoid short circuits that may damage your equipment, be certain that positive and negative wire strands do not touch each other and do not touch metal parts such as the speaker frame.

Mounting the Speakers
For New Construction
If you wish to install a pre-construction bracket for the speakers before the drywall is installed in a new construction project, you will need to purchase the correct pre-construction bracket kit for your loudspeaker model from your authorized Revel dealer. Pre-construction bracket model numbers for these specific loudspeakers can be found at the end of this document in the Specification Table. Detailed mounting instructions are supplied with the pre-construction bracket kit. After the drywall is installed, follow the installation instructions in For Existing Construction, below.
For Existing Construction
Note: The installation procedure is the same for all models covered by this manual.
- Ensure that the wallboard, plywood, or other wall material is between 0.4-inch (10mm) minimum and 1.0-inch (25mm) maximum thickness and capable of withstanding the weight of the speaker being installed. NOTE: If using the Revel Backbox in the installation the wallboard maximum thickness is 0.6-inch (16mm),
-
Make sure to allow at least 3/4" (19mm) between the edge of the supplied installation template and any studs or other obstructions behind the wall, so the speaker's locking mechanism (Cat Claws) will have room to engage fully. Perform an obstruction survey to be sure that there are no studs, lengths of conduit, pipes, heating ducts or air returns in the stud bay that could interfere with the speaker.
-
Determine the correct speaker location and use the template included with the speaker to mark the wall / ceiling material


- Cut the wallboard along the mark you made in Step 3 to create the mounting opening.

natural_image
Simple line drawing of a rectangular object with a protruding rod (no text or symbols)- Connect the speaker wire from the amplifier to the speaker as explained in "Making Connects".

natural_image
Technical line drawing of a mechanical assembly with gears and a paper panel (no text or symbols)- Set "Cat Claw" clamps into "ready-to-mount" position depending on mounting application type:
A. Wallboard Mounting: "Cat Claw" clamps in EXTENDED (Default) position. When the speaker is inserted into wallboard opening, the Cat Claw clamps will compress and then spring back to extended position to ease installation. B. Backbox Mounting: "Cat Claw" clamps MUST be in RETRACTED position.
To RETRACT "Cat Claw" clamps, turn each mounting screw on speaker baffle counterclockwise until Cat Claw has been fully captured at top of mounting tower


- Insert the speaker straight into the mounting opening. Square up the speaker in the opening and begin tightening the Cat Claw screws on the front of the speaker baffle.
NOTE:
a. Turn screws clockwise to clamp / install
b. Turn screws counterclockwise to retract / remove.
i. Cat Claw must be fully retracted to top of mounting tower to remove speaker.
IMPORTANT: When using power screwdriver – Always use lowest torque setting to avoid over-tightening the Cat Claw screws.


- Attach the supplied grille. Powerful magnets in the speaker frame will securely hold the grille in place. Be sure that the grille is attached evenly and that the edges of the grille extend over the speaker baffle on all sides.
If needed, adjust the tension of the speaker's Cat Claw clamps so that the speaker frame is flat with the wallboard. This will help ensure that the grille contacts the wall all the way around the speaker for a proper finished fit.

Adjustments (Select Models)
HF (High-Frequency) Level Control (W126Be - W226Be - W228Be)
The High-Frequency Level control lets you fine-tune the speaker's high-frequency output to compensate for various acoustical environments.
The control has two settings:
: Normal high-frequency output.
Set the switch to this position for most installations.

: Decrease high-frequency output.
Set the switch to this position if the room has many features that reflect high-frequency sound energy, such as large, uncovered windows, bare tile / wood flooring, large expanses of bare walls, or if the speakers are used without grilles.

Rotatable Mid/High Frequency Module (W228Be)
If the installation requires the W228Be loudspeaker to be mounted horizontally, we recommend that the midrange / tweeter module be rotated to properly orient the tweeter above the midrange for proper imaging. The midrange and tweeter drivers are mounted in a separated sealed cabinet mounted to the front baffle.
To adjust the midrange / tweeter module position:
- Position the loudspeaker on flat level surface.
- Remove all screws surrounding the midrange / tweeter module.
- Rotate midrange / tweeter module to new position.
- Replace screws removed in step #2.

Painting the Grille (All Models)
Revel architectural loudspeaker grilles can be painted to match any décor. If you wish to change the grille's color, its satin original finish will function as a primer coat. For the best results follow the following procedure:
- Gently remove the scrim cloths from the back side of the grille before painting.
- Use high-quality spray paint and apply a thin coat of color. Ensure that the grille perforations remain free of paint. Filling them with paint will diminish the speaker's sound quality. If any perforations in the grille become plugged with paint, use compressed air to blow the paint out of the perforations while the paint is still wet.
Note: If you find any grille perforations that are plugged with paint after drying, carefully use a straight pin or sewing needle to remove the paint. We have included replacement scrim cloths in case of damage during removal. Additional scrim cloths and replacement grilles are available and sold separately directly through our Customer Support team. Contact information can be found in the introduction of this document.
After the painted grille has dried, apply a light coat of spray adhesive to the inside of the perforated grille and either re-attach original scrim cloths or replace with new scrim cloths included.
Excessive Output Levels
Your Revel loudspeakers feature custom-designed transducers and high-quality network components featuring high-order filters with steep cutoffs that reduce the potential of damage to individual speaker drivers and help the loudspeakers maintain their performance even under extreme operating conditions. However, all loudspeakers have limits when it comes to continuous playback. To extend these limits, avoid playback at volume levels that result in distorted or strained sound.
Beryllium Tweeter Caution
Beryllium dust is a hazardous material. The Revel PerformaBe Architectural Beryllium dome tweeter will not emit any dust under normal circumstances and is perfectly safe unless it is damaged. The tweeter dome is protected by the acoustic lens and waveguide. As long as the waveguide remains intact there is no cause for concern.
In the unlikely event that the dome is damaged in any way, cover the tweeter with adhesive plastic tape and contact Revel for further instructions.
Do not play the speaker if it has a damaged tweeter dome.
At the end of the speaker's life do not dispose of it in a landfill or incinerator. Bring the speaker to an appropriate recycling or hazardous waste disposal site.
Please contact Revel customer service for more information about proper disposal.
Specifications
| ATTRIBUTE SPEAKER | ||||
| Model | W126Be | W226Be | W228Be | C128Be |
| Description | 6.5" (165mm) 2-way In-wall Loudspeaker | Dual 6.5" (165mm) 2-way In-wall Loudspeaker | Dual 8" (200mm) 3-way In-wall Loudspeaker | 8" (200mm) 2-way In-ceiling Loudspeaker |
| High Frequency Transducer | 1" (25mm) Beryllium dome with dual ceramic-magnets and acoustic lens waveguide | 1" (25mm) Beryllium dome with dual ceramic-magnets and acoustic lens waveguide | 1" (25mm) Beryllium dome with dual ceramic-magnets and acoustic lens waveguide | 1" (25mm) Beryllium dome with dual neodymium-magnets and acoustic lens waveguide |
| Midrange Frequency Transducer N/A N/A | 5.25" (130mm) Deep Ceramic Composite (DCC) Aluminum Cone Mid-range | N/A | ||
| Low Frequency Transducer | 6.5" (165mm) Deep Ceramic Composite (DCC) Aluminum Cone Woofer | 2x 6.5" (165mm) Deep Ceramic Composite (DCC) Aluminum Cone Woofer | 2x 8" (200mm) Deep Ceramic Composite (DCC) Aluminum Cone Woofer | 8" (200mm) Deep Ceramic Composite (DCC) Aluminum Cone Woofer |
| Recommended Amplifier Power (RMS) | 50-150 Watts@ 4 ohms | 50-200 Watts @ 4 ohms | 50-400 Watts @ 4 ohms | 50-150 Watts @ 4 ohms |
| Frequency Response (-6dB on-axis) | 55-40 kHz | 43-40 kHz | 35-40 kHz | 46-40 kHz |
| Sensitivity (2.83V@1m) | 89 dB | 90 dB | 90 dB | 88 dB |
| Maximum SPL 105 dB 110 dB 115 dB 107 dB | ||||
| Impedance (Nominal / Minimum) | 6 Ohms / 4 ohms | 6 Ohms /4 Ohms | 6 Ohms / 4 Ohms | 6 Ohms / 4 ohms |
| Crossover Frequency | 2100 Hz | 2000 Hz | 220 Hz,2500 Hz | 2100 Hz |
| Crossover Type / Slope | 3rd order | 3rd order | 4th order and 3rd order | 3rd order |
| Controls | High Frequency Level - Flat / Attenuated | High Frequency Level - Flat / Attenuated | High Frequency Level - Flat / Attenuated N/A | |
| Input Type | Gold-plated Spring Loaded Binding Posts | Gold-plated Spring Loaded Binding Posts | Gold-plated Spring Loaded Binding Posts | Gold-plated Spring Loaded Binding Posts |
| Mounting Type | Revel Cat Claw Mounting System | Revel Cat Claw Mounting System | Revel Cat Claw Mounting System | Revel Cat Claw Mounting System |
| Compatible Wall Thickness Range | Min 0.4" (10mm) / Max 1.0" (25mm) | Min 0.4" (10mm) / Max 1.0" (25mm) | Min 0.4" (10mm) / Max 1.0" (25mm) | Min 0.4" (10mm) / Max 1.0" (25mm) |
| Cutout Dimension(s) | 14.1" x 8.9" (357mm x 226mm) | 21.6" x 8.9" (549mm x 226mm) | 35.3" x 12.2" (896mm x 309mm) | Ø 9.5" (242mm) |
| Mounting Depth | 3.5" (88.7mm) | 3.5" (87.9mm) | 3.8" (96.4mm) | 5.1" (129.6mm) |
| Enclosure Volume Range | 550 in ^2 (9L) to 1100 in ^2 (18L) | 1100 in ^2 (18L) to 2200 in ^2 (36L) | 1650 in ^2 (27L) to 3300 in ^2 (54L) | 672 in ^2 (11L) to 1345 in ^2 (22L) |
| Net Dimensions with grille (HxWxD) | 15.6" x 10.2" x 3.8" (395.2mm x 260.2mm x 96.7mm) | 22.9" x 10.2" x 3.8" (582.8mm x 259.4mm x 95.9mm) | 37.0" x 13.9" x 4.1" (938.6mm x 352.9mm x 104.5mm) | Ø 10.8" x 5.3" (Ø 274.5mm x 134.7mm) |
| Net Weight (Speaker + Grille) | 10.4 lb (4.7kg) | 15.7 lb (7.1kg) | 31.5 lb (14.3kg) | 8.6 lb (3.9kg) |
| Shipping Dimensions (HxWxD) | 22.4" x 14.1" x 9.7" (570mm x 357mm x 245mm) | 26.9" x 14.1" x 10.0" (684mm x 357mm x 255mm) | 45.0" x 17.3" x 10.0" (1142mm x 440mm x 255mm) | 15.2" x 15.2" x 9.3" (385mm x 385mm x 237mm) |
| Shipping Weight | 14.1 lb (6.4kg) | 19.7 lb (8.9kg) | 40.6 lb (18.4kg) | 12.1 lb (5.5kg) |
| Packed As (Each / Pair) | Each | Each | Each | |
| UPC Code | 050667380120 | 050667380137 | 050667380144 | 050667380151 |
| EAN Code | 1200130003585 | 1200130003592 | 1200130003608 | 1200130003615 |
| OPTIONAL ACCESSORIES(SOLD SEPARATELY) | ||||
| Model | W126BEBB | W226BEBB | W228BEBB | C128BEBB |
| Description | W126Be In-Wall Back-box | W226Be In-Wall Back-box | W228Be In-Wall Back-box | C128Be In-ceiling Back-box |
| Input Type | Gold-plated Spring-Loaded Binding Posts | Gold-plated Spring-Loaded Binding Posts | Gold-plated Spring-Loaded Binding Posts | Gold-plated Spring-Loaded Binding Posts |
| Compatible Wall Thickness Range | Min 0.4" {10mm} / Max 0.6" {16mm} | Min 0.4" {10mm} / Max 0.6" {16mm} | Min 0.4" {10mm} / Max 0.6" {16mm} | Min 0.4" (10mm) / Max 0.6" (16mm) |
| Enclosure Volume (Cubic Inch / Liters) | 556.6 in ^3 (9.1L) | 1113.6 in ^3 (18.2L) | 1664.1 in ^3 (27.3L) | 695.1 in ^3 (11.4L) |
| Net Dimensions (HxWxD) | 19.7" x 14.0" x 3.5" (500mm x 355mm x 87.9mm) | 37.8" x 14.0" x 3.5" (960mm x 355mm x 87.9mm) | 55.1" x 14.0" x 3.5" (1400mm x 355mm x 87.9mm) | 14.2" x 14.2" x 5.4" (360mm x 360mm x 138mm) |
| Net Weight | 9 lb (4.1kg) | 16.8 lb (7.6kg) | 20.9 lb (9.5kg) | 8.8 lb (4.0kg) |
| Shipping Dimensions (HxWxD) | 25.6" x 20.3" x 10.6" (650mm x 515mm x 270mm) | 44.0" x 20.3" x 10.6" (1117mm x 515mm x 270mm) | 61.4" x 20.3" x 10.6" (1560mm x 515mm x 270mm) | 19.7" x 19.6" x 11.6" (501mm x 497mm x 295mm) |
| Shipping Weight | 16.5 lb (7.5kg) | 27.3 lb (12.4kg) | 34.4 lb (15.6kg) | 15.1 lb (6.8kg) |
| Packed As (Each / Pair) | Each | Each | Each | Each |
| UPC Code | 050667380168 | 050667380175 | 050667380182 | 050667380199 |
| EAN Code | 1200130003622 | 1200130003639 | 1200130003646 | 1200130003653 |
| PRE-CONSTRUCTION BRACKET | ||||
| Model | WB81 | WB62 | WBB2 | CB8 |
| Description | W126Be Pre-Construction Bracket | W226Be Pre-Construction Bracket | W228Be Pre-Construction Bracket | C128Be Pre-Construction Bracket |
| Packed As (Each / Pair) | Each | Each | Each | Each |

Harman International Industries, Incorporated. 8500 Balboa Blvd, Northridge CA 91329 United States.

European Representative: Harman International Industries, Incorporated.
EMEA Liaison Office, Danzigerkade 16G, 1013 AP Amsterdam, The Netherlands.
UK Business Address: Ground Floor, Westside 2, London Road, Apsley, Hemel Hempstead, Hertfordshire, HP3 9TD, United Kingdom.
© 2023 Harman International Industries, Incorporated. All Rights Reserved.
Revel is a trademark of Haman International Industries, Incorporated registered in the United States and other countries.
- Box Contents
- IMPORTANT!! Safety Information
- IMPORTANT!
- IMPORTANT! Installation Precautions
- Installation Considerations
- Loudspeaker placement for Two-Channel Stereo
- Loudspeaker Placement for LCR Television Sound
- Loudspeaker Placement for 5.1.4 Channel Surround
- Installing the Speakers
- Connecting to the Amplifier
- CAUTION: REMOVE POWER
- Speaker Wire
- Making Connections
- Mounting the Speakers
- For New Construction
- For Existing Construction
- NOTE:
- Adjustments (Select Models)
- HF (High-Frequency) Level Control (W126Be - W226Be - W228Be)
- Rotatable Mid/High Frequency Module (W228Be)
- Painting the Grille (All Models)
- Excessive Output Levels
- Beryllium Tweeter Caution
Brand : Revel
Model : PerformaBe W228Be
Category : Loudspeaker