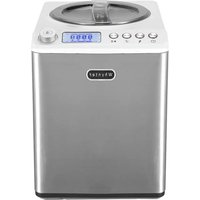
ICM-255SSY - Sorbet maker Whynter - Free user manual and instructions
Find the device manual for free ICM-255SSY Whynter in PDF.


| Product Type | Ice Cream Maker (Self-Cooling Compressor) |
| Model | ICM-255SSY |
| Brand | Whynter |
| Capacity | 1.5 Quarts (1.4 Liters) |
| Dimensions (W x D x H) | 13 x 9 x 9 inches (33 x 23 x 23 cm) |
| Weight | 17 lbs (7.7 kg) |
| Power Supply | 120V / 60Hz |
| Power Consumption | 180 Watts |
| Main Functions | Self-cooling compressor; no pre-freezing required; built-in timer; automatic shut-off; transparent lid with pour opening |
| Control Type | Electronic control panel with LED display |
| Cooling System | Compressor-based, R134a refrigerant |
| Mixing Paddle | Stainless steel mixing paddle with scraper |
| Processing Time | Approximately 30-60 minutes per batch |
| Housing Material | Stainless steel and high-impact ABS plastic |
| Cleaning and Maintenance | Wipe exterior with damp cloth; wash removable parts in warm soapy water; do not immerse base in water |
| Safety Features | Overload protection; auto shut-off when lid is opened; non-slip feet |
| Spare Parts and Repairability | Replacement paddles, lids, and gaskets available from Whynter; user-replaceable parts; service center for repairs |
| Included Accessories | Ice cream container, mixing paddle, instruction manual, recipe booklet |
| Warranty | 1 year limited warranty |
| Certifications | ETL listed |
Frequently Asked Questions - ICM-255SSY Whynter
User questions about ICM-255SSY Whynter
0 question about this device. Answer the ones you know or ask your own.
Ask a new question about this device
Download the instructions for your Sorbet maker in PDF format for free! Find your manual ICM-255SSY - Whynter and take your electronic device back in hand. On this page are published all the documents necessary for the use of your device. ICM-255SSY by Whynter.
USER MANUAL ICM-255SSY Whynter
Whynter Stainless Steel 2.6 Quart Upright Ice Cream Maker with Yogurt Incubator and Stainless Steel Bowl & Churn Blade
Model #: ICM-255SSY
INSTRUCTION MANUAL
natural_image
Line drawing of a microwave oven with control panel and ventilation slots (no text or symbols)Congratulations on your new Whynter product. To ensure proper operation, please read this Instruction Manual carefully before using this product. Keep this manual in a safe place for future reference.
| PAGE | |
| Technical Data / Safety Precautions | 3 - 5 |
| Parts | 5 |
| Features and Parts | 6 |
| Installation and Operation | 7 - 10 |
| Recipes | 11 - 12 |
| Troubleshooting and Tips | 13 |
| Cleaning and Sanitizing | 14 |
| Warranty Information | 15 |
Table of Contents
Are you ready to take your desserts to the next level? Homemade, customizable ice cream in the comfort of your own home is a breeze with the Whynter ICM-255SSY 2.6 Quart Upright Ice Cream Maker with Yogurt-Making feature. Incredibly easy to use, you can create delectable ice cream, rich and creamy gelato, as well as sorbet and slushy drinks... the possibilities are endless! Ideal for entertaining, this high-capacity unit makes over two and a half quarts of your favorite frozen dessert in a single batch.
Our top-of-the-line ice cream maker is rich with features including a stainless steel churn blade and mixing bowl not available in lower-end ice cream makers. A built-in powerful compressor freezes the mixture effortlessly from room temperature, no pre-freezing required. The Whynter ICM-255SSY features a user-customized consistency control which allows you to increase or decrease the firmness of your ice cream. The Extended Cooling function that prevents the mixture from melting and a Motor Protection function that pauses the motor from churning when the mixture becomes too solid to prevent any damage to ensure you'll be able to enjoy this unit for years to come.
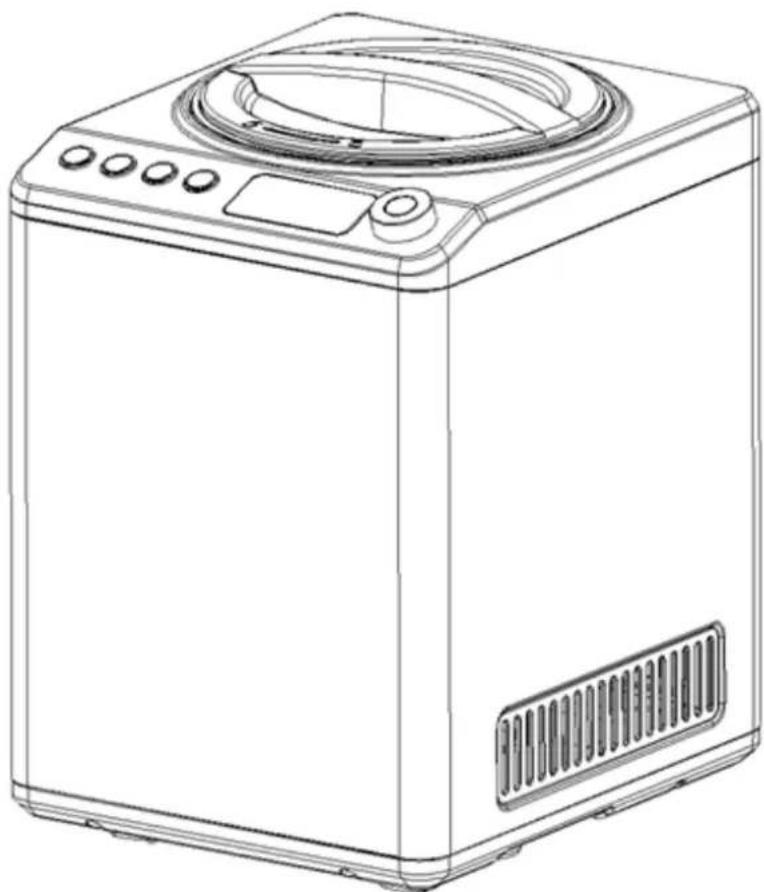
The sleek, stainless steel exterior, easy-to-operate knob, and digital control panel will accent any kitchen perfectly. This will quickly become your new best friend. Gone are the days of having to wait hours for your dessert, or make room in your freezer before being able to make your favorite frozen dessert. This unit includes an electronic timer, temperature display, ice cream scoop, and we'll even send you some secret recipes on request to help get you started!
• Stainless steel housing
- Self-contained frozen dessert maker that does not require pre-freezing
- Removable stainless steel mixing bowl for effortless cleaning
- Heavy-duty stainless steel churn blade incorporates just the right amount of air
- Multi-functional knob to control operation time and ice cream consistency
- Multiple Consistency Level Options (Soft, Medium, and Hard)
• Reliable built-in audible timer
- Motor Protection Function that shuts off to prevent damage if the mixture freezes solid
- LCD timer control
• High efficiency CFC-free compressor
ETL Certified
| MODEL ICM-255SSY | |
| Capacity 2.6 Quart | |
| Power Supply | 110-120 V / 60 Hz |
| Maximum power consumption | 300W |
| Cooling Temperature -0.4F | to -31F |
| Speed Selection (RPM) Low | @25rpm, Med @50rpm, High @70rpm |
| Refrigerant R134a | |
| Noise Level <60dB | |
| Net Weight 31.5 lbs | |
| Unit Dimensions | 12.4" W x 10.7" D x 15.82" H |
| Packaging Dimensions | 17.13" W x 14.96" D x 20.67" H |
APPLIANCE SAFETY
Your safety and the safety of others are very important to us.
To reduce the risk of fire, electrical shock, or injury when using your appliance, follow these basic precautions

This is the Safety Alert Symbol. This symbol alerts you to potential hazards that may result in serious injury. All safety messages will follow the Safety Alert Symbol and either the words" DANGER" or "WARNING".

Danger means that failure to heed this safety statement may result in severe injury or death.

Warning means that failure to heed this safety statement may result in extensive product damage, serious injury, or death.
CAUTION
Caution means that failure to heed this safety statement may result in minor or moderate injury, or property or equipment damage.
All safety messages will alert you to know what the potential hazard is, tell you how to reduce the chance of injury, and let you know what can happen if the instructions are not followed.
IMPORTANT SAFEGUIDES

Before the appliance is used, it must be properly positioned and installed as described in this manual, please read the manual carefully. To reduce the risk of fire, electrical shock or injury when using the appliance, follow basic precaution, including the following:

- Plug into a grounded 3-prong outlet, do not remove grounding prong, do not use an adapter, and do not use an extension cord.
- Do not use if the power supply cord is damaged. If damaged, it must be replaced by a qualified electrician.
- It is recommended that a separate circuit, serving only your appliance be provided. Use receptacles that cannot be turned off by a switch or pull chain.
- Never clean appliance parts with flammable fluids or harsh chemicals. These fumes can create a fire hazard or explosion.
- Do not store or use gasoline or other flammable vapors and liquids in the vicinity of the appliance or any other appliance.
- Before proceeding with cleaning and maintenance operations, make sure to unplug the appliance.
- Do not connect or disconnect the electric plug with wet hands.
- To protect against risk of electric shock, do not pour water on cord, plug and ventilation, immerse the appliance in water or any other liquid.
- Do not attempt to repair or replace any part of your appliance unless it is specifically recommended in this manual. All other servicing should be referred to a qualified technician.

WARNING

FOLLOW WARNING CALL OUTS BELOW ONLY WHEN APPLICABLE TO YOUR MODEL
- It is important for the appliance to be leveled in order to work properly. For a stable installation, make sure the appliance is placed on a flat, level and solid surface.
- When positioning or moving the appliance ensure that it is not turned upside down or greater than 45irc or more off level.
- To ensure proper ventilation for your appliance, the air vents of the appliance must be completely unobstructed. Choose a well-ventilated area with temperatures above 60irc F ( 16irc C) and below 90irc F ( 32irc C). This appliance must be installed in an area protected from the element, such as wind, rain, water spray or drips.
- This appliance is not intended for use by young children or physically-challenged persons without supervision/assistance. Young children must be supervised to ensure safety around this or any appliance.
- Never pull the cord to disconnect it from the outlet. Grasp the plug and pull it from the outlet.
- Never lift, carry or drag the appliance by the power cord.
- This appliance is designed for household, non-commercial use only. Any other use will void the warranty.
- Do not insert any foreign objects into the appliance.
- Do not power on the appliance before the removable mixing bowl and transparent lid are installed properly
- This is a self-contained ice cream maker and no pre-freezing is needed. Do not use pre-frozen ingredients as it can cause the mixture to freeze before ice cream is made.
- Do not remove the churn blade when the appliance is freezing.
- Avoid placing any objects on top of the appliance.
- This is an electrical appliance, to avoid injury from electrical shock do not operate the unit with wet hands, while standing on a wet surface or while standing in water. Do not use outdoors or in wet conditions.
- Do not plug into the power outlet before set up is completed.

BEFORE USING YOUR APPLIANCE
- Remove the exterior and interior packing.
- Before connecting the appliance to the power source, let it stand upright for approximately 2 hours. This will reduce the possibility of a malfunction in the cooling system from handling during transportation.
- Clean the interior surface with lukewarm water using a soft cloth.
- Wash all parts that will come into contact with the ice cream (including the removable mixing bowl, churn blade, transparent lid, measuring cup and scoop).
Note: Please note that the parts are not dishwasher safe.
PREPARE RECIPE INGREDIENTS
Prepare recipe ingredients from your own recipe or from ours, and pour the mixture into the removable mixing bowl.
Note: No pre-freezing is needed. This appliance has a built-in compressor which is designed to freeze the mixture in between 30:00 – 60:00 minutes.
Ice Cream Recipes can be downloaded from the ICM-255SSY product page on our website, www.whynter.com or just send us an email at support@whynter.com and we will send you a guide to introduce you to a variety of mixtures, ice creams, frozen yogurts, sherbets, and sorbets which will open up a world of possibilities to explore, and once you have mastered the basics, let your imagination run wild, as you try new flavors and fun combinations.
IMPORTANT SAFETY INSTRUCTIONS

WARNING
To reduce the risk of fire, electrical shock, or injury when using your appliance, follow these basic precautions:
- Read all instructions before using the appliance.
- DANGER or WARNING: An empty ice cream maker can be a hazardous for children or small pets. If disposing of the ice cream maker, remove mixing bowl, churn blade, or transparent lid from your unused appliance, or take other action to ensure the ice cream maker is harmless.
- Never allow children to operate or play with the appliance.
- Never clean appliance parts with flammable fluids or harsh chemicals. The fumes can create a fire hazard or explosion.
- Do not store or use gasoline or any other flammable vapors and liquids in the vicinity of this or any other appliance. The fumes can create a fire hazard or explosion.
INSTALLATION OF YOUR APPLIANCE
- WARNING: Do not store or install the appliance outdoors.
- CAUTION: This appliance is designed for making ice cream desserts.
- Place your appliance on a hard and level surface that is strong enough to support it when ingredients are added.
- Allowance of at least 5 inches (127mm) of space around the appliance is suggested, which allows the proper air circulation to cool the compressor and condenser.
- Do not install the appliance near an oven or other heating source.
- Plug in the appliance into an exclusive, grounded wall power outlet. Do not under any circumstances cut or remove the third (ground) prong from the power cord. Any questions concerning power and/or grounding should be directed toward a qualified electrician or an authorized service center.
FREESTANDING INSTALLATION
A freestanding installation will allow you to install the ice cream maker in any place you desire provided that the required clearance space around the appliance is respected. In every setting, there must be an adequate ventilation and access for service. Never install or operate the unit in an enclosed area. Allowance of at least 5 inches (127mm) of space around the appliance is suggested, which allows the proper air circulation to cool the compressor and condenser.
ELECTRICAL CONNECTION
WARNING: Improper use of the grounded plug can result in the risk of electrical shock. If the power cord is damaged, have it replaced by a qualified electrician or contact Whynter Service Department.
This appliance requires a standard 115/120 Volt AC \~/60Hz electrical ground outlet with three-prong. Have the wall outlet and circuit checked by a qualified electrician to make sure the outlet is properly grounded. The cord should be secured behind the appliance and not left exposed or dangling to prevent accidental injury. The appliance should always be plugged into its own individual electrical outlet which has a voltage rating that matches the rating label on the appliance. This provides the best performance and also prevent overloading house wiring circuits that could cause a fire hazard from overheated. Never unplug the appliance by pulling the power cord. Always grip the plug firmly and pull straight out from the receptacle. Repair or replace immediately all power cords that have become frayed or otherwise damaged. Do not use a cord that shows cracks or abrasion damage along its length or at either end. When moving the appliance, be careful not to damage the power cord.
EXTENSION CORD
Because of potential safety hazards, it is strongly recommended that you do not use an extension cord with this appliance. However, if you must use an extension cord, it is absolutely necessary that it be a UL/CUL-Listed, 3-wire grounding type appliance extension cord having a grounding type plug and outlet and that the electrical rating of the cord be 115 volts and at least 10 amperes.
INSTALLATION OF YOUR APPLIANCE
NOTE: Always place the Ice Cream Maker upright on a flat, level and solid surface.
- Install the removable mixing bowl into the motor axis. Make sure the outside of the removable mixing bowl is completely dry before inserting it to the appliance. (See 1.a)
- Insert the churn blade into the removable mixing bowl. (See 1.b).
- Install the transparent lid on top of the bowl and lock it by turning it counterclockwise.

natural_image
Two identical industrial kitchen machines, one with a bucket being placed into a basin, the other with a handle and control panel (no visible text or symbols)CONTROLS

- MENU/MODE Button
This unit can be operated in three convenient modes:
Ice Cream mode - In this mode, the ice cream maker will churn and freeze. The LCD will display 60 minutes as its default operating time. The desired time can be adjusted by turning the control knob before starting this mode. An ice cream icon will be displayed when Ice Cream mode (Cooling and Mixing) is in operation.
Cooling only mode - In this mode, the ice cream maker will freeze without churning for a defaulted time of 10 minutes. The desired time can be adjusted by by turning the control knob before starting this mode. A snowflake icon ✦ will be displayed when Cooling mode is in operation. This mode is ideal for preventing the frozen ice cream from melting.
Mixing only mode - In this mode, the churn blade will continue churning for a default time of 30 minutes without cooling. This mode is ideal for pre-mixing the prepared ingredients and adding extra ingredients to the finished mixture. The desired time can be adjusted by turning the control knob before starting this mode. A mixing icon ✦ will be displayed when Mixing mode is in operation.
Yogurt Mode - In this mode, the appliance will process the yogurt mixture between 104-110°F(40-43°C) for a default time of 8 hours. The desired time can be adjusted by turning the control knob before starting this mode. A yogurt icon 📁 will be displayed when Yogurt mode is in operation.
NOTE: Temperature settings can not be adjusted in Yogurt Mode.
NOTE: When the START/PAUSE button is pressed down for more than 3 seconds, the ice cream maker will return to setup screen and cancels the current operation.
• CONTROL KNOB
Ice Cream Mode
- When Ice Cream Mode operation is at a pause via the Consistency Level button, turn the control knob to increase or decrease the firmness of the ice cream.
- When Ice Cream Mode is in operation, turn the control knob to increase or decrease the operation time in 1 minute increments. Maximum operation time can be set up to 70 minutes and 5 minutes at the minimum.
Cooling Only Mode
- When in Cooling Only Mode, turn the control knob to increase or decrease the operation time in 1 minute increments. Maximum operation time can be set up to 70 minutes and 5 minutes at the minimum.
NOTE: Default operation time is 10 minutes
Mixing Only Mode
- When in Mixing Only Mode, turn the control knob to increase or decrease the operation time in 1 minute increments. Maximum operation time can be set up to 70 minutes and 5 minutes at the minimum.
NOTE: Default operation time is 30 minutes
Yogurt Mode
- When in Yogurt mode, turn the control knob to increase or decrease the operation time in 1 hour increments. Maximum operation time can be set up to 24 hours and 4 hours at the minimum.
NOTE: Default operation time is 8 hours.
- POWER Button ⏻
After the appliance is installed and connected to the power supply, press the Power button to turn the machine on. The LCD will display "60:00" which is the factory preset 60 minutes operating time. When the unit is on and the Power button is pressed, the unit will enter Standby mode until the power cord is unplugged. NOTE: If the POWER Button is pressed at any point of the ice cream making operation, the unit will be turned off and will automatically reset/cancels the ice cream making process.
• CONSISTENCY LEVEL BUTTON
To customize the firmness of the ice cream, press the Consistency Level Button. Turn the control knob to select the desired consistency. Selection is showed in the display panel with the Consistency Level Indicator bars (soft, medium, and hard). Press the Start Button ▶ to begin operation.
NOTE: Timer starts at "00:00". This mode is not controlled by time. To return to Ice Cream Mode, press
• SPEED SELECTION BUTTON
After selecting Ice Cream mode or Mixing Only mode, the speed can be adjusted by pressing the Speed Selection Button. The mixing speed can be programmed from low, medium, and high speed. Selection is showed in the display panel with the Speed Indicator bars.
NOTE: Speed selection cannot be controlled by the control knob.
• START / PAUSE Button ▶
Press the START/PAUSE button to initiate operation. The LCD will display the operation icon corresponding to the operation mode chosen. The unit can be paused by pressing the START/PAUSE again. At pause, press START/PAUSE button and the ice cream maker will resume its unfinished operation.
NOTE: The unit may enter a three minute compressor lockout when operation of the unit has been resumed. This three minute time delay helps extend the life of the compressor. During the compressor lockout, the Mixing icon will be flashing while the Ice Cream icon is displayed. Once delay elapses, the compressor will engage, Ice Cream icon will be flashing, and the ice cream maker will start cooling again.
OPERATING INSTRUCTIONS
- Plug the unit into the power outlet. LCD screen will display "00" for standby.
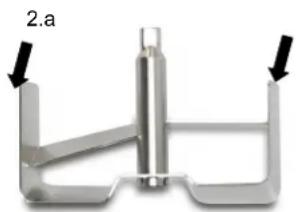
- Prepare ingredients (see pages 11 - 12 of the User Manual for recipes). Note: Please make sure that the pre-mixture does not exceed the top dasher of the churn blade to avoid overflowing. (See 2.a)
- Place the removable stainless steel mixing bowl into the base and make sure the bowl is properly aligned. The outside of the stainless steel mixing bowl should be completely dry before inserting it into the unit.
- For ice cream making, place churn blade in the removable stainless steel mixing bowl so that it rests in the center of the bowl. For yogurt making, the churn blade is not required for this operation.
natural_image
Metal mechanical component with two arrows pointing to features (no text or symbols)- Pour mixture into the removable stainless steel mixing bowl. When mixture is ready, position the transparent lid and lock into place by turning it counterclockwise.
- Press the POWER button to turn the unit on.
- Press the Menu/Mode button and choose Ice Cream, Cooling Only, Mixing Only or Yogurt Mode. The time will default to 60 minutes for Ice Cream mode and 8 hours for Yogurt mode. Timer can be adjusted by turning the Timer Control Knob
- Press the START/PAUSE button to begin. The timer will count down to 00:00 and the unit will beep three times to indicate the mixture is ready.
- Turn the unit off by pressing the POWER button. Remove the transparent lid by turning it clockwise to unlock. Lift the removable stainless steel mixing bowl out of the base with handle. Remove the churn blade from the bowl.
NOTE: If the unit is not powered off and removable mixing bowl is not removed from the unit after the operation time, it will go into an Extended Cooling Function.
EXTENDED COOLING FUNCTION
When the set operation time has elapsed, the operation stops and the appliance will beep 3 times. If the appliance is not turned off in ten minutes, it automatically enters into an Extended Cooling Function to keep the ice cream frozen. In this function, the compressor will come on in six-minute cycles for two hours. When done, the unit will beep 5 times to note that the Extended Cooling Function has completed. The unit will go into Standby mode afterwards.
NOTE: The mixing function is not activated during the Extended Cooling Function. If you would like to mix as well, press and hold the Menu button for 3 seconds to reset. You can also turn the unit off at any time during the Extended Cooling Function.
PAUSE TIME AND MIXING
Press the START/PAUSE button at any point of the ice cream making operation to pause the time and mixing. The ice cream maker will still keep cooling the mixture. Press the START/PAUSE button again to resume operation. NOTE:
- If the unit is paused and operation is not resumed in 10 minutes, the unit will go into Standby mode.
- The unit may enter a three minute compressor lockout when operation of the unit has been resumed. This three minute time delay helps extend the life of the compressor. Once delay elapses, the compressor will engage and the ice cream maker will start cooling again.
ADJUSTING OPERATIONS
- Increasing/Decreasing Operation Time during Operation
If changing of operation time is needed, press the Start/Pause button to pause unit. To adjust operation time, turn the control knob. Operation Time adjustment will be in 1 minute or 1 hour increments.
• Motor Protection Function
When the mixture becomes hard, the motor's protection device stops the motor from churning to prevent overheating or damage to the motor.
• Controlling the Volume of the Ingredients
To avoid overflowing, please ensure that the mixture does not exceed 60% of capacity of the removable mixing bowl as frozen mixture expands.
NOTE: The time it takes to make a batch of ice cream varies and depends on the amount and temperature of the ingredients used. For quicker results, use less ingredients and/or refrigerated ingredients.
STORAGE OF ICE CREAM
Remove the frozen mixture or finished ice cream into a clean and dry container using the plastic scoop. Do not use metal scoop as it can scratch the removable mixing bowl.
Fruit based ice creams, sorbets and sherbets are only truly luscious when they still have the just picked flavor that time so rapidly destroys. That is why no commercial fruit ice, sherbets or ice cream can ever be as good as freshly home-made. For fruit ices, sherbets or ice creams to have a long freezer life, the fruits must be cooked, thereby destroying their freshness. If your creations are consumed in a short time frame, you can use uncooked fruit purees for a much better flavor.
Ice cream mixtures can be as simple as pureed fruit, sugar and cream, Philadelphia-style, or based on more complicated cooked custards, French style. Both are delicious, though French versions are slightly richer. The recipes which follow are for both kinds. All use rich, heavy cream. If you prefer a lighter, lower-calorie mixture, substitute milk (whole or skim) or even yogurt for the cream in any of these recipe. Always sample the mixtures before freezing and adjust to your own taste.
Use these simple recipes as an inspiration for your own favorite ice creams. If you like a little crunch, add a cup of chopped nuts, chocolate chips or candy to a quart of mixture either before or after freezing, depending on whether you want the crunch to be frozen, too. You can also add chopped fruit, fresh or dried, shredded coconut, even marshmallows. It's better to add these soft things at the end so they do not get icy.
| Strawberry Ice Cream2 pints strawberries, washed and bulled 12 cup plus 2 tablespoons superfine sugar3 tablespoons fresh lemon juice 112 cups heavy creamPurée the strawberries in a food processor. Stir in the remaining ingredients. Pour the mixture into the removable mixing bowl of the ice cream maker and freeze. | Custard Ice Cream Base2 cups heavy cream1 cup whole milk 34 cup sugar 18 teaspoon fine sea salt6 large egg yolksIn a small pot, simmer heavy cream, milk, sugar and salt until sugar completely dissolves, about 5 minutes. Remove pot from heat. In a separate bowl, whisk yolks. Whisking constantly, slowly whisk about a third of the hot cream into the yolks, then whisk the yolk mixture back into the pot with the cream. Return pot to medium-low heat and gently cook until mixture is thick enough to coat the back of a spoon (about 170 degrees on an instant-read thermometer).Strain through a fine-mesh sieve into a bowl. Cool mixture to room temperature. Pour the mixture into the removable mixing bowl of the ice cream maker and freeze. |
| Peach Ice CreamTwo 16-ounce can peaches packed in heavy syrup, drained, liquid discarded. 34 cup simple syrup3 tablespoons fresh lemon juice1 cup heavy creamPuree the peaches in a food processor. Add the syrup, lemon juice and cream. Pour the mixture into the removable mixing bowl of the ice cream maker and freeze. | Coconut Ice CreamOne 15-ounce can sweeten cream of coconut.1 cup milk 112 cups heavy cream 12 cup tightly-packed sweetened coconut flakesPlace the coconut cream and milk in a food processor and blend thoroughly. Stir in the cream and coconut flakes. Pour the mixture into the removable mixing bowl of the ice cream maker and freeze. |
| Chocolate Ice Cream3 ounces semisweet chocolate1 ounce unsweetened chocolate1 recipe Custard Ice Cream Base, warmMelt the chocolate together in a saucepan over low heat, stirring occasionally until smooth. Gradually add some of the ice cream base to the chocolate, whisking it frequently to keep the chocolate smooth. Add the remaining ice cream base and cook over low heat until the mixture is well blended. Cool thoroughly. Pour the mixture into the removable mixing bowl of the ice cream maker and freeze. | Rich Vanilla Ice Cream3 cups heavy cream1 cup whole milk 34 cup sugar2 vanilla beans, split, or 2 tablespoons vanilla extract4 egg yolksFollow the recipe for the Custard Ice Cream Base, adding the vanilla beans to the saucepan with the cream, milk and sugar. Just before straining, scrape the seeds from the beans into the custard base. If using vanilla extract, add to the base after straining. Pour the mixture into the removable mixing bowl of the ice cream maker and freeze. |
| Fresh Strawberry Sorbet2 pints strawberries, washed and hulled1 cup plus 2 tablespoons simple syrup 14 cup fresh lemon juicePurée the strawberries in a food processor. You should have about 3 cups. Stir 1 cup of simple syrup and the lemon juice. Taste and add remaining syrup if necessary. Pour the mixture into the removable mixing bowl of the ice cream maker and freeze. | Watermelon Sorbet 12 watermelon, approximately1 cup simple syrup2 tablespoons fresh lemon juiceRemove the seeds and rind from enough watermelon to make 312 cups of purée in a food processor. Stir in the simple syrup and lemon juice. Pour the mixture into the removable mixing bowl of the ice cream maker and freeze. |
| Mango Sorbet4 ripe mangoes1 cups simple syrup 14 cup fresh lemon juicePeel and pit the mangoes. Purée the fresh in a food processor. You should have about 312 cups of purée. Stir in the simple syrup and lemon juice. Force the mixture through a fine sieve. Pour the mixture into the removable mixing bowl of the ice cream maker and freeze. | Fresh Pineapple Sorbet1 small ripe Hawaiian pineapple1 cups simple syrup2 tablespoons fresh lemon juicePeel, core and cube the pineapple. Place the cubes in a food processor and process until very smooth and frothy. You should have 212 cups. Stir in the simple syrup and lemon juice. Taste and add more syrup or juice if needed. Pour the mixture into the removable mixing bowl of the ice cream maker and freeze. |
| Strawberry Daiquiri2 pints strawberries, washed and bulled 12 cup superfine sugar 12 cup fresh lemon or lime juice1 1/3 cups rumPurée the strawberries in a food processor. Place the puree in the bowl of the machine with the remaining ingredients and freeze 25 to 30 minutes, depending on how firm you like your drinks.Serves 6. | Frozen Margarita 34 cup tequila 12 cup triple sec1 cup fresh lemon or lime juice 14 cup waterPower all the ingredients into the bowl of the machine and freeze 15 to 20 minutes, depending on how firm you like your drinks. While the mixtures is freezing, rub the rims of 6 glasses with a lemon wedge. Dip the rims in salt. Serve the drinks in the salted glasses. Serves 6. |
| Pina ColadaOne 20-ounce can crushed pineapple, drained1 cup coconut cream4 dashes bitters 14 teaspoon salt1 cup water1 cup rumPurée the pineapple in a food processor. You should have about 112 cups of puree. Place the puree in the bowl of the machine with the remaining ingredients and freeze 25 to 30 minutes depending on how firm you like your drinks. Serves 6. | Banana DaiquiriOne 20-ounce can crushed pineapple, drained1 cup coconut cream4 dashes bitters 14 teaspoon salt1 cup water1 cup rumPurée the pineapple in a food processor. You should have about 112 cups of puree. Place the puree in the bowl of the machine with the remaining ingredients and freeze 25 to 30 minutes depending on how firm you like your drink. Serves 6. |
Many common ice cream maker problems are easily resolved. Try the troubleshooting suggestions below to see if the problems can be resolved before having to contact the Whynter Service Department.
| Problem Possible | Causes Solutions | |
| Ice cream maker churning blade not working | Mixture is too hardPower off the | unit and wait for the mix-ture to be soften |
| Ice cream maker does not freeze | Room's ambient temperature is too highIce cream mixture temperature is too warmThe volume of the mixture is more than required measurement | Choose a well-ventilated area with temperatures above 60°F (16°C) and below 90°F (32°C)Use refrigerated mixture and make sure that your pre-mixture does not go over top dasher of the churn blade |
| Ice cream maker compressor does not run when operation of the unit has been resumed | The ice cream maker has entered a three minute compressor lockout | This three minute time delay helps ex-tend the life of the compressor. Once delay elapses, the compressor will en-gage and the ice cream maker will start cooling againContact Whynter Service Department |
| Ice cream is not firm enough | Ingredients were warm or at room temperature before placing in the bowlThe ice cream maker lid was opened and closed too many times during the freezing processThe freezing bowl has a thick coat-ing of ice on the wallsIncrease the firmness level | Use refrigerated mixture that does not go over top dasher of the churn bladeRefrain from opening the lid many timesAfter washing, dry completely prior to placing back in ice cream maker |
| Ice cream maker stops churning before ice cream is ready | Too much mix-in ingredients are added causing the churn blade to jamMix-in ingredients, such as choco-late chips or chopped nuts, added too soon | Wait until ice cream mixture is thick-ened or frozen before adding ingredi-ents |
| Ice cream too icy | Low-fat ice cream is being madeToo much water in the mixtureSugar in the mixture is not dis-solved | Use whole milk or buttermilk instead of nonfat milkPut the sugar on the fruit and let it melt in the fruit's juices instead of using syr-upMake sure sugar is well-dissolved |
| Removable mixing bowl is stuck | During shipping, due to pressure, the mixing bowl may have been suctioned into the freezing canister | To remove, firmly pull the bucket up and out |
Some user tips for your ice cream maker:
- Our freezing bowl is approved for food safety.
- DO NOT USE SHARP OBJECTS OR UTENSILS INSIDE THE MIXING BOWL! Sharp objects will scratch and damage the inside of the bowl. A rubber spatula or wooden spoon may be used when the appliance is in the off position.
• The temperature of the ingredients should be between 77irc F ( 25irc C) and 41irc F ( -5irc C). - Please note that our ice cream makers are a self-contained, compressor operated unit which no pre-freezing and salt required. All you need to do is to put the refrigerated mixture into the removable mixing bowl and the unit will freeze the mixture.
CAUTION: THE POWER CORD MUST BE UNPLUGGED BEFORE PROCEEDING TO AVOID ELECTRIC SHOCK
TO CLEAN AND SANITIZE BATCH BOWL, PADDLE AND LID
The batch bowl, mixing paddle, and lid must be cleaned and sanitized before initial use and after each use, unless unit is going to be used again within one hour. Failure to do so may allow residue of processed material to collect on the internal seals of the drive assembly, rendering them ineffective.
NOTE: In repetitive batch-processing applications, cleaning the batch bowl between batches will prolong the life of the drive assembly.
WASH
Use only low-foaming powdered detergents formulated for cleaning dishware and cooking utensils. These products can be purchased from restaurant and commercial food service suppliers. Follow the detergent manufacturer's instructions.
- Remove lid, batch bowl and paddle from unit.
- Hand-wash the batch bowl with detergent. Do not put batch bowl in the dishwasher.
- The lid and mixing paddle can be washed by hand or in a commercial dishwasher. Use the brush to clean inside the bottom hole of the mixing paddle before placing in the dishwasher.
- Pre-clean stubborn food deposits with brush and presoak in the detergent solution if necessary.
Any other servicing should be performed by an authorized service representative
RINSE
Use only wear to rinse.
SANITIZE
Use regular, unscented bleach diluted with water between 50irc F and 120irc F. The sanitizing dilutions are based on the hypochlorite concentration of the bleach. The dilutes for 2 commonly available bleach concentrations are:
- Hypochlorite: 5.25%–3 teaspoons bleach per gallon of water
-
Hypochlorite 8.25%–2 teaspoons bleach per gallon of water
-
Wet a soft cloth or sponge with a bleach dilution listed above.
- Wipe down interior and exterior of lid, bowl, and mixing paddle.
- Place bowl into freezing chamber, install paddle, and fill with sanitizing solution to above the mixing paddle. Cover with lid (to prevent splashing) and run on MIXING ONLY mode for 2 minutes. Empty bowl.
- Immerse lid in sanitizing solution and soak for 2 minutes.
AIR DRY
Do not rinse after sanitizing is completed. Drain sanitizing solution and allow parts to air-dry.
TO CLEAN AND SANITIZE HOUSING BASE AND FREEZING CHAMBER
The housing and freezing chamber must be cleaned and sanitized before first use, and whenever unit has come into contact with food. Remove the vent cover on the rear of the unit.
- To clean: Wipe down exterior housing and freezing chamber with wet cloth. Remove and clean under the vent cover if necessary.
- To sanitize; Wipe entire exterior housing and freezing chamber with a soft cloth or sponge that has been dampened with sanitizing solution* and wrung out to avoid any excess solution running into housing vents in base. DO NOT IMMERSE HOUSING IN WASHING SOLUTION, RINSE WATER OR SANITIZING SOLUTION.
- Allow to air-dry.
- Reinstall the vent cover on the rear of the unit.
*Use only sanitizing solutions recommended above.
ONE YEAR LIMITED WARRANTY
This Whynter Ice Cream Maker is warranted, to the original owner within the 48 continental states, for one year from the date of purchase against defects in material and workmanship under normal use and service. When making a warranty claim, please have the original bill or invoice of purchase with purchase date available. Should your Whynter Ice Cream Maker prove defective within one year from the date of purchase, return the defective part or unit, freight prepaid (within two months of purchase; after two months to one year, customer will be responsible for freight cost to Whynter's service department), along with an explanation of the claim to Whynter LLC. A return authorization number issued by Whynter is required for all warranty claims and returns. Please package the Whynter Ice Cream Maker carefully in its original packaging material to avoid damage in transit. The original box and packaging material should be retained, as Whynter is not responsible for the cost of replacement packaging. Under this warranty, Whynter will repair or replace any parts found defective at our discretion. This warranty is not transferable. After the expiration of the warranty, the cost of labor and parts will be the responsibility of the original owner of the unit.
THIS WARRANTY DOES NOT COVER:
- Acts of God, such as fire, flood, hurricanes, earthquakes and tornadoes.
- Improper power supply such as power surge, low voltage, defective household wiring or inadequate fuses. Use in commercial or industrial applications
- Damage, accidental or otherwise, to the Whynter Ice Cream Maker while in the possession of a consumer not caused by a defect in material or workmanship;
- Damage caused by consumer misuse, tampering, or failure to follow the care and special handling provisions in the instructions.
- Damage to the finish of the case, or other appearance parts caused by wear.
- Damage caused by repairs or alterations to the product by anyone other than authorized by the manufacturer.
- Removal, Replacement Packaging, Freight and Insurance cost for the warranty service.
DISCLAIMER OF IMPLIED WARRANTIES; LIMITATION OF REMEDIES CUSTOMER'S SOLE AND EXCLUSIVE REMEDY UNDER THIS LIMITED WARRANTY SHALL BE PRODUCT REPAIR OR REPLACEMENT AS PROVIDED HEREIN. CLAIMS BASED ON IMPLIED WARRANTIES, INCLUDING WARRANTIES OF MERCHANTABILITY OR FITNESS FOR A PARTICULAR PURPOSE, ARE LIMITED TO ONE YEAR OR THE SHORTEST PERIOD ALLOWED BY LAW, BUT NOT LESS THAN ONE YEAR. WHYNTER SHALL NOT BE LIABLE FOR CONSEQUENTIAL OR INCIDENTAL DAMAGES SUCH AS PROPERTY DAMAGE AND INCIDENTAL EXPENSES RESULTING FROM ANY BREACH OF THIS WRITTEN LIMITED WARRANTY OR ANY IMPLIED WARRANTY. SOME STATES AND PROVINCES DO NOT AL-LOW THE EXCLUSION OR LIMITATION OF INCIDENTAL OR CONSEQUENTIAL DAMAGES, OR LIMITATIONS ON THE DURATION OF IMPLIED WARRANTIES. SO THESE LIMITATIONS OR EXCLUSIONS MAY NOT APPLY TO YOU. THIS WRIT-TEN WARRANTY GIVES YOU SPECIFIC LEGAL RIGHTS. YOU MAY ALSO HAVE OTHER RIGHTS THAT VARY FROM STATE TO STATE.
Please retain the original proof of purchase in order to obtain warranty services. Warranty begins from the original date of purchase.
To obtain service or information, contact
Whynter LLC via email at support@whynter.com or call
866-WHYNTER.
Product contents and specifications may change without notice. Please visit our website for the most up to date information.
Copyright © 2022 Whynter LLC
WWW.WHYNTER.COM


- Whynter Stainless Steel 2.6 Quart Upright Ice Cream Maker with Yogurt Incubator and Stainless Steel Bowl & Churn Blade
- INSTRUCTION MANUAL
- Table of Contents
- APPLIANCE SAFETY
- CAUTION
- IMPORTANT SAFEGUIDES
- WARNING
- FOLLOW WARNING CALL OUTS BELOW ONLY WHEN APPLICABLE TO YOUR MODEL
- BEFORE USING YOUR APPLIANCE
- PREPARE RECIPE INGREDIENTS
- IMPORTANT SAFETY INSTRUCTIONS
- INSTALLATION OF YOUR APPLIANCE
- FREESTANDING INSTALLATION
- ELECTRICAL CONNECTION
- EXTENSION CORD
- CONTROLS
- - MENU/MODE Button
- • CONTROL KNOB
- Ice Cream Mode
- Cooling Only Mode
- Mixing Only Mode
- Yogurt Mode
- - POWER Button ⏻
- • CONSISTENCY LEVEL BUTTON
- • SPEED SELECTION BUTTON
- • START / PAUSE Button ▶
- OPERATING INSTRUCTIONS
- EXTENDED COOLING FUNCTION
- PAUSE TIME AND MIXING
- ADJUSTING OPERATIONS
- STORAGE OF ICE CREAM
- Some user tips for your ice cream maker:
- TO CLEAN AND SANITIZE BATCH BOWL, PADDLE AND LID
- WASH
- RINSE
- SANITIZE
- AIR DRY
- TO CLEAN AND SANITIZE HOUSING BASE AND FREEZING CHAMBER
- ONE YEAR LIMITED WARRANTY
- THIS WARRANTY DOES NOT COVER:
- Please retain the original proof of purchase in order to obtain warranty services. Warranty begins from the original date of purchase.
Brand : Whynter
Model : ICM-255SSY
Category : Sorbet maker