
DMP-UB200 - Blu-ray player PANASONIC - Free user manual and instructions
Find the device manual for free DMP-UB200 PANASONIC in PDF.


| Product Type | Ultra HD Blu-ray Disc Player |
| Model | DMP-UB200 |
| Brand | Panasonic |
| Dimensions (W x H x D) | 320 mm x 45 mm x 193 mm (12.6" x 1.8" x 7.6") |
| Weight | Approx. 1.3 kg (2.9 lbs) |
| Power Supply | AC 120 V, 60 Hz |
| Power Consumption (On) | Approx. 26 W |
| Power Consumption (Standby) | Approx. 0.2 W (Quick Start Off, Networked Standby Off) |
| Power Consumption (Quick Start On) | Approx. 7 W |
| Video Output | HDMI 2.0a, 4K/60p (4:4:4), HDR10, HLG |
| Audio Output Formats | Dolby Atmos, Dolby TrueHD, DTS:X, DTS-HD Master Audio, PCM |
| Disc Playback | Ultra HD Blu-ray, Blu-ray, DVD, CD, BD-RE/R, DVD-R/RW/R DL, +R/+RW/+R DL, CD-R/RW |
| File Playback (USB/Network) | MKV, MP4, MPEG2, JPEG, MPO, AAC, FLAC, WAV, WMA, ALAC, DSD (DFF/DSF) |
| Connectivity | HDMI Out (1), USB 2.0 (front), USB 3.0 (rear), LAN (Ethernet), Built-in Wi-Fi (802.11 a/b/g/n) |
| Smart Features | Netflix, Amazon Prime Video, VIERA Link, DLNA 1.5, Media Renderer, Firmware Update via Internet |
| Remote Control | Included (N2QAYB001167) with playback, TV, and Netflix buttons |
| Safety | Class 1 Laser, FCC compliant, UL listed |
| Maintenance | Clean with soft dry cloth; use lens cleaner for optical pickup |
| Warranty | 1 Year Parts, 90 Days Labor (U.S.) |
| Accessories Included | Remote control, 2 x AA batteries, AC power cord |
Frequently Asked Questions - DMP-UB200 PANASONIC
User questions about DMP-UB200 PANASONIC
0 question about this device. Answer the ones you know or ask your own.
Ask a new question about this device
Download the instructions for your Blu-ray player in PDF format for free! Find your manual DMP-UB200 - PANASONIC and take your electronic device back in hand. On this page are published all the documents necessary for the use of your device. DMP-UB200 by PANASONIC.
USER MANUAL DMP-UB200 PANASONIC


Firmware updates
Panasonic is constantly improving the unit's firmware to ensure that our customers are enjoying the latest technology.
Panasonic recommends updating your firmware as soon as you are notified.
For details, refer to "Firmware updates" (=> 14) or
http://panasonic.jp/support/global/cs/ (This site is in English only.)
Thank you for purchasing this product.
Please read these instructions carefully before using this product, and save this manual for future use.
If you have any questions, visit:
http://shop.panasonic.com/support
Register online at http://shop.panasonic.com/support (U.S. customers only)
IMPORTANT SAFETY INSTRUCTIONS
Read these operating instructions carefully before using the unit.
Follow the safety instructions on the unit and the applicable safety instructions listed below. Keep these operating instructions handy for future reference.
1 Read these instructions.
2 Keep these instructions.
3 Heed all warnings.
4 Follow all instructions.
5 Do not use this apparatus near water.
6 Clean only with dry cloth.
7 Do not block any ventilation openings. Install in accordance with the manufacturer's instructions.
8 Do not install near any heat sources such as radiators, heat registers, stoves, or other apparatus (including amplifiers) that produce heat.
9 Do not defeat the safety purpose of the polarized or grounding-type plug. A polarized plug has two blades with one wider than the other. A grounding-type plug has two blades and a third grounding prong. The wide blade or the third prong are provided for your safety. If the provided plug does not fit into your outlet, consult an electrician for replacement of the obsolete outlet.
10 Protect the power cord from being walked on or pinched particularly at plugs, convenience receptacles, and the point where they exit from the apparatus.
11 Only use attachments/accessories specified by the manufacturer.
12 Use only with the cart, stand, tripod, bracket, or table specified by the manufacturer, or sold with the apparatus. When a cart is used, use caution when moving the cart/apparatus combination to avoid injury from tip-over.
13 Unplug this apparatus during lightning storms or when unused for long periods of time.
14 Refer all servicing to qualified service personnel. Servicing is required when the apparatus has been damaged in any way, such as power-supply cord or plug is damaged, liquid has been spilled or objects have fallen into the apparatus, the apparatus has been exposed to rain or moisture, does not operate normally, or has been dropped.


CAUTION
RISK OF ELECTRIC SHOCK DO NOT OPEN

CAUTION: TO REDUCE THE RISK OF ELECTRIC
SHOCK, DO NOT REMOVE SCREWS.
NO USER-SERVICEABLE PARTS
INSIDE
REFER SERVICING TO QUALIFIED
SERVICE PERSONNEL.

The lightning flash with arrowhead symbol, within an
equilateral triangle, is intended to alert the user to the
presence of uninsulated "dangerous voltage" within
the product's enclosure that may be of sufficient
magnitude to constitute a risk of electric shock to persons.

The exclamation point within an equilateral triangle is
intended to alert the user to the presence of important
operating and maintenance (servicing) instructions in
the literature accompanying the appliance.
This device complies with Part 15 of the FCC Rules.
Operation is subject to the following two conditions:
(1) This device may not cause harmful interference, and
(2) this device must accept any interference received, including
interference that may cause undesired operation.
Contains FCC ID: H8N-WLU5260
The 5.47-5.725 GHz band is restricted to indoor operations only.
FCC CAUTION
Any changes or modifications not expressly approved by the party responsible for compliance could void the user's authority to operate this equipment.
This transmitter must not be co-located or operated in conjunction with any other antenna or transmitter.
This equipment complies with FCC radiation exposure limits set forth for an uncontrolled environment and meets the FCC radio frequency (RF) Exposure Guidelines in Supplement C to OET65.
This equipment has very low levels of RF energy that are deemed to comply without testing of specific absorption ratio (SAR).
However, it is desirable that it should be installed and operated keeping the radiator at least 20 cm (7 7/8 inches) or more away from a person's body (excluding extremities: hands, wrists, feet, and ankles).
FCC Note:
This equipment has been tested and found to comply with the limits for a Class B digital device, pursuant to Part 15 of the FCC Rules. These limits are designed to provide reasonable protection against harmful interference in a residential installation. This equipment generates, uses, and can radiate radio frequency energy and, if not installed and used in accordance with the instructions, may cause harmful interference to radio communications. However, there is no guarantee that interference will not occur in a particular installation. If this equipment does cause harmful interference to radio or television reception, which can be determined by turning the equipment off and on, the user is encouraged to try to correct the interference by one or more of the following measures:
Reorient or relocate the receiving antenna. Increase the separation between the equipment and receiver. Connect the equipment into an outlet on a circuit different from that to which the receiver is connected. Consult the dealer or an experienced radio/TV technician for help.
FCC Caution: To assure continued compliance, follow the attached installation instructions and use only shielded interface cables when connecting to peripheral devices.
Any changes or modifications not expressly approved by the party responsible for compliance could void the user's authority to operate this equipment.
This device complies with Part 15 of the FCC Rules. Operation is subject to the following two conditions:
(1) This device may not cause harmful interference, and (2) this device must accept any interference received, including interference that may cause undesired operation.
Responsible Party:
Panasonic Corporation of North America
Two Riverfront Plaza, Newark, NJ 07102-5490
Support Contact: http://shop.panasonic.com/support
Conforms to UL STD 60065.
Precautions
WARNING
Unit
To reduce the risk of fire, electric shock or product damage,
- Do not expose this unit to rain, moisture, dripping or splashing.
- Do not place objects filled with liquids, such as vases, on this unit.
- Use only the recommended accessories.
- Do not remove covers.
- Do not repair this unit by yourself. Refer servicing to qualified service personnel.
AC power supply cord
The power plug is the disconnecting device.
Install this unit so that the power plug can be unplugged from the socket outlet immediately.
CAUTION
Unit
- This unit utilizes a laser. Use of controls or adjustments or performance of procedures other than those specified herein may result in hazardous radiation exposure.
- Do not place sources of naked flames, such as lighted candles, on this unit.
- Some portions of this unit may become hot during use. When moving or cleaning this unit, disconnect the AC power supply cord and wait for 3 minutes or longer.
Placement
To reduce the risk of fire, electric shock or product damage, - Do not install or place this unit in a bookcase, built-in cabinet or in another confined space. Ensure this unit is well ventilated. - Do not obstruct this unit's ventilation openings with newspapers, tablecloths, curtains, and similar items. - Do not place the unit on amplifiers/receivers or equipment that may become hot. The heat can damage the unit.
Batteries
Mishandling of batteries can cause electrolyte leakage and may cause a fire.
- Danger of explosion if battery is incorrectly replaced. Replace only with the type recommended by the manufacturer.
- When disposing of the batteries, please contact your local authorities or dealer and ask for the correct method of disposal.
- Do not mix old and new batteries or different types at the same time.
- Do not heat or expose to flame.
- Do not leave the battery(ies) in a car exposed to direct sunlight for a long period of time with doors and windows closed.
- Do not take apart or short circuit.
- Do not recharge alkaline or manganese batteries.
- Do not use batteries if the covering has been peeled off.
Remove batteries if you do not intend to use the remote control for a long period of time. Store in a cool, dark place.
Restriction on use of unauthorized copied content
This unit adopts the following technology for copyright protection. Cinavia Notice
This product uses Cinavia technology to limit the use of unauthorized copies of some commercially-produced film and videos and their soundtracks. When a prohibited use of an unauthorized copy is detected, a message will be displayed and playback or copying will be interrupted.
More information about Cinavia technology is provided at the Cinavia Online Consumer Information Center at http://www.cinavia.com. To request additional information about Cinavia by mail, send a postcard with your mailing address to: Cinavia Consumer Information Center, P.O. Box 86851, San Diego, CA, 92138, USA.
Wireless LAN connection
The following limits are in place regarding the usage of this unit. You must be aware of these limits before using this unit. Panasonic will in no way be responsible for any incidental damage which may arise due to a failure to obey these limits, or to any condition of use or disuse of this unit.
- Data transmitted and received over radio waves may be intercepted and monitored.
- This unit contains delicate electronic components. Please use this unit in the manner in which it was intended and follow the following points:
- Do not expose this unit to high temperatures or direct sunlight.
- Do not bend, or subject this unit to strong impacts.
- Keep this unit away from moisture.
- Do not disassemble or alter this unit in any way.
To dispose or transfer this unit
The unit may keep the user settings information in the unit. If you discard this unit either by disposal or transfer, then follow the procedure to return all the settings to the factory presets to delete the user settings. (=> 29, "To return all settings to the factory preset.")
- The operation history may be recorded in the memory of this unit.
Table of contents
IMPORTANT SAFETY INSTRUCTIONS ..... 2
Precautions 3
Getting started
Accessories 5
Unit and media care 5
playable media. 6
Control reference guide ..... 8
Connecting to a TV 10
Connecting to an amplifier/receiver ..... 11
Connecting to the network ..... 12
Settings 13
Playback
HOME menu 15
Playback.... 15
Network Service (Enjoying NETFLIX, etc.) ..... 19
Home Network feature ..... 20
VIERA Link. 21
Option menu.... 22
Reference
Setup menu....24
Troubleshooting guide ..... 29
Specifications 34
Licenses 37
Limited Warranty....38
To enjoy Ultra HD Blu-ray Disc featured with High Dynamic Range (HDR)
If you see a message about High Dynamic Range (HDR) compatible issue while an Ultra HD Blu-ray Disc is played back, please check your TV settings as follows.
An example of the message: "This player is not connected to a High Dynamic Range (HDR) compatible TV."
1) If you are using a Panasonic TV compatible with 4K and High Dynamic Range (HDR) released in 2015 or 2016, please check your TV settings as follows.
- Switch the TV to the HDMI input.
- Press "MENU" button of your TV remote control
- Select "HDMI HDR setting" in "Setup"
- Select "On" in "HDMI HDR setting"
2) If you use a TV not from Panasonic, compatible with 4K and High Dynamic Range (HDR), please refer to the operating instructions of the TV.
3) When you play a High Dynamic Range (HDR) disc on a TV without High Dynamic Range (HDR) capability, the disc can be played back (in non-HDR quality) even if the message appears.
Accessories
Check the supplied accessories before using this unit.
1 Remote control
(N2QAYB001167)
2 Batteries for remote control
1 AC power supply cord
(K2CB2YY00092)

- Product numbers are provided in this Owner's Manual correct as of June 2017.
These may be subject to change.
- Do not use AC power supply cord with other equipment.
■ Using the remote control
Insert the batteries to the terminal so that it (+ and -) matches those in the remote control.

R6/LR6, AA
(Alkaline or manganese batteries)
Point it at the remote control signal sensor on this unit. (⇒ 9)
Unit and media care
Clean this unit with a soft, dry cloth.
Never use alcohol, paint thinner, or benzine to clean this unit.
Before using a chemically treated cloth, carefully read the instructions that came with the cloth.
This unit's lens
Use the lens cleaner (not supplied) to clean the unit's lens.
Clean discs
DO
DO NOT
Wipe with a damp cloth and then wipe dry with a dry cloth.
Disc handling precautions
- Handle discs by the edges to avoid inadvertent scratches or fingerprints on the disc.
- Do not attach labels or stickers to discs.
- Do not use disc cleaning sprays, benzine, thinner, static electricity prevention liquids, or any other solvent.
- Do not use the following discs:
– Discs with exposed adhesive from removed stickers or labels (rented discs, etc.). – Discs that are badly warped or cracked. – Irregularly shaped discs, such as heart shapes.
playable media
| Device | Media markings | Device types | Contents format |
| BD |  Blu-ray Blu-ray | Ultra HD Blu-ray*1*2 | Video |
 Blu-ray Disc Blu-ray Disc | BD-Video Video | ||
| BD-RE | Video, JPEG, MPO | ||
| BD-R | Video, MKV, JPEG, MPO | ||
| DVD |  VIDEO VIDEO | DVD-Video Video | |
 R 4.7 R 4.7 | DVD-R | Video, AVCHD, MKV, JPEG, MPO, AAC, ALAC, DSD (DFF, DSF), FLAC, MP3, WAV, WMA | |
 R DL R DL | DVD-R DL | ||
 RW RW | DVD-RW | Video, AVCHD | |
| — +R/+RW/+R DL | |||
| CD |  DIGITAL AUDIO DIGITAL AUDIO | Music CD Music [CD-DA] | |
| — | CD-R CD-RW | MKV, JPEG, MPO, AAC, ALAC, FLAC, MP3, Music [CD-DA], WAV, WMA | |
| USB | — | USB devices (up to 2 TB) | AVCHD, AVCHD 3D, MKV, MP4, MPEG2, JPEG, MPO, AAC, ALAC, DSD (DFF, DSF), FLAC, MP3, WAV, WMA |
- See pages 7 and 34 for more information on the types of content that can be played. *1 See "Enjoying Ultra HD Blu-ray" (⇒ 17) *2 Unless otherwise indicated, BD-Video content includes Ultra HD Blu-ray content in this Owner's Manual.
■ Types of discs that cannot be played by this unit
Any other disc that is not specifically supported or previously described.
- DVD-RAM
- Super Audio CD
- Photo CD
- DVD-Audio • Video CD and Super Video CD
- HD DVD
■ Region management information
The unit can play back BD-Video/DVD-Video discs of the following regions codes, including "ALL":
Example: BD-Video DVD-Video


- The unit cannot playback discs in PAL format.
Finalize
Any DVD-R/RW/R DL, +R/+RW/+R DL and CD-R/RW that are recorded by a recorder need to be finalized by the recorder to play on this unit. Please refer to the recorder's owner's manuals.
BD-Video
This unit supports high bit rate audio (Dolby® Digital Plus, Dolby® TrueHD, DTS-HD High Resolution Audio™ and DTS-HD Master Audio™) adopted in BD-Video.
3D
3D videos and 3D still pictures can be played back when this unit is connected to a 3D compatible TV using a High Speed HDMI Cable.
Music CD
- Operation and sound quality of CDs that do not comply with CD-DA specifications (copy control CDs, etc.) cannot be guaranteed to work.
- The digital audio content side of a DualDisc does not meet the technical specifications of the Compact Disc Digital Audio (CD-DA) format so playback may not be possible.
USB device
- Connect a USB device while the Home screen is displayed.
- This unit does not guarantee connection with all USB devices.
- This unit does not support USB device charging.
- FAT12, FAT16, FAT32, and NTFS file systems are supported.
- The USB port on the front of the unit supports USB 2.0 High Speed and the USB port on the rear of the unit supports USB 3.0 Super-Speed.
- The USB port on the rear of the unit supports an HDD formatted in FAT32 and NTFS. If the HDD is not recognized, the power to the HDD may not be supplied. Supply power from an external source.
- It is not possible to use two USB devices simultaneously. (=> 30)
- For playback of 4K videos stored on a USB device, use USB 3.0 port on rear of the unit and USB device conforming to USB 3.0.

- It may not be possible to play the above media in some cases due to the type of media, the condition of the recording, the recording method, and how the files were created.
- The producers of the disc can control how discs are played, so you may not always be able to control play as described in this Owner's Manual. Read the disc's instructions carefully.
Control reference guide
■ Remote control
When other Panasonic devices respond to the remote control of the unit, change the remote control code. (⇒ 28)

1 Turn the unit on and off 2 TV operation buttons You can operate the TV through the unit's remote control. Some buttons may not work depending on the TV. 3 Select title numbers, etc./Enter numbers or characters 4 Cancel Clear the currently selected character. (when entering a password for "Ratings" in the Setup menu, for example) 5 Basic playback control buttons (⇒ 15) 6 Show Pop-up menu (⇒ 16) 7 Show Top menu (⇒ 16) 8 Show Option menu (⇒ 22) 9 Colored buttons (red, green, yellow, blue) Used for various purposes depending on the screen 10 Transmit the remote control signal 11 Open or close the disc tray (⇒ 9) 12 Change soundtrack (⇒ 16) 13 Show "Video Settings" (→ 23) 14 Show the status messages (⇒ 16) 15 Show "Playback Information Window" (⇒ 16) 16 Show the Home screen of the Network Service (⇒ 19) 17 Show Closed Caption setup screen (⇒ 22, 26) 18 Show NETFLIX screen (⇒ 19) 19 Show HOME menu (→ 15) 20 [▲, ▼, ◀, ▶]: Move the highlight for selection [OK] : Confirm the selection (◀◀◀)(▶◀◀) : Frame-by-frame (⇒ 16) 21 Return to previous screen
■ Reprogramming the remote control
You can operate the TV using the unit's remote control.
1 Input the 2-digit code (⇒ 36) while pressing [☐] of TV operation button on the remote control.
e.g., 01: [0] ⇒ [1]
2 Test by turning on the television.

- If your television brand has more than one code listed, select the one that allows correct operation.
Front

1 Disc tray
2 USB port (DG-5 V 500 mA)
This port supports USB 2.0 High Speed.
3 Remote control signal sensor
Distance: Within approx. 7 m (23 feet)
Angle: Approx. 20° up and down, 30° left and right
4 POWER LED
When the unit is turned on, the LED flashes first, and then lights up.
If the LED keeps flashing, there may be an error. (=> 33)
5 Open or close the disc tray
6 Standby/on switch (I/O) (=> 13)
Press to switch the unit from on to standby mode or vice versa. In standby mode, the unit is still consuming a small amount of power.
CAUTION
Do not place objects in front of the unit. The disc tray may collide with objects when it is opened, and this may cause malfunction.

- When inserting a media item, ensure that it is facing the correct way, which is the right side facing up.
- If you connect a Panasonic product with a USB connection cable, the setup screen may be displayed on the connected equipment. For details, refer to the instructions for the connected equipment.
Rear

1 AC IN ( ) terminal (=> 10)
2 Cooling fan
3 HDMI AV OUT terminal (=> 10)
4 LAN port (=> 12)
5 USB port (HDD) (== DC 5 V 900 mA)
This port supports USB 3.0 Super-Speed.

Class II equipment (The construction of the product is double-insulated.)
Connecting to a TV
4K images can be played back when this unit is connected to a 4K compatible TV.
- Before making any connections, please disconnect all the units from AC power. (Connect the AC power supply cord after making all connections.)
- Use High Speed HDMI cables. Non-HDMI-compliant cables cannot be utilized.
- This unit consumes a small amount of AC power (=> 34) even when turned off in standby mode. For the purpose of energy conservation, the unit should be disconnected if you will not be using it for an extended period of time.
■ Enjoying 4K output
- To enjoy images in 4K/60p, you need an HDMI cable that supports 18 Gbps. When outputting 1080p or 24p (4K) signal, please use HDMI cables 5.0 meters (16.4 ft.) or less. It is recommended that you use Panasonic's HDMI cable.
- If you connect this unit to a 4K-compatible TV and perform “Easy Setting”, 4K/60p will be automatically selected. (⇒ 13, 28)
- To view Ultra HD Blu-ray content in 4K/HDR format, connect to the HDMI terminal of a device that supports HDCP2.2, 4K/60p (4:4:4), and HDR signals that meet Ultra HD Blu-ray standards.
Enjoying video and audio with a 4K-compatible TV
Connecting to an amplifier/receiver
Enjoying video with a 4K-compatible TV and audio with a 4K-compatible amplifier![graph LR A["AV OUT"] --> B["HDMI cable (18 Gbps)"] B --> C["HDMI IN"] C --> D["HDMI OUT (ARC)"] D --> E["HDMI cable (18 Gbps)"] E --> F["HDMI IN (ARC)"] F --> G["Computer"] H["Amplifier/receiver (4K-compatible)"] --> D](/content/2026/05/1062362/images/5c33e2e6acd60f9d15c924ebdb38e2099d962d1257cff552c0403698b548bddd.jpg)

- About ARC:
When using the TV or amplifier/receiver that does not have the indication of “(ARC)” (non-ARC-compatible) on the HDMI terminal, the amplifier/receiver and TV must also be connected using an optical digital cable or coaxial cable in order to enjoy the TV’s sound through the amplifier/receiver.
Connecting an amplifier to a 4K-compatible TV
3D or 4K images can be played back when this unit is connected to a 3D or 4K compatible TV.
• This connection only supports up to 5.1ch. - To connect a TV and amplifier with an HDMI cable, connecting terminals on both the TV and amplifier must be ARC-compatible. (⇒ above, "About ARC")
![graph LR A["AV OUT"] --> B["HDMI cable (18 Gbps)"] B --> C["HDMI IN"] B --> D["HDMI IN (ARC)"] C --> E["HDMI cable"] D --> E E --> F["HDMI OUT (ARC)"] F --> G["Amplifier/receiver"]](/content/2026/05/1062362/images/02a35cabf90692ba9d837827a84295867193eb08eb5e170a99c32b4ba4dfa9be.jpg)
Connecting to the network
The following services can be used when this unit is connected to broadband.
- Firmware can be updated (⇒ 14)
- You can enjoy BD-Live/Network Service (→ 17, 19)
- You can access other devices (Home Network) (→ 20)
- This unit supports Direct Access and can make a wireless connection to wireless devices without a router. You can use this function when enjoying the Home Network feature, etc. Internet access is not available while connected via Direct Access. (See page 20)
For details about the connection method, refer to the instructions supplied with the connected equipment.
Wireless LAN connection
This unit has built-in wireless LAN and can be connected to a wireless router.


- For additional information about this unit, refer to http://shop.panasonic.com/support
- The unit is not compatible with public wireless LAN services. • See page 3 for the precautions of wireless LAN connection.
LAN cable connection
![graph TD A["LAN Cable"] --> B["Broadband router, etc."] B --> C["Internet"]](/content/2026/05/1062362/images/8e57cfd92159701d39a78cdeb1a19e42747ee374120820d0730d8425b2734b8f.jpg)
- Use category 5 or above straight LAN cables (STP) when connecting to peripheral devices.
- Inserting any cable other than a LAN cable in the LAN port can damage the unit.
Settings
The following settings can be performed anytime in the Setup menu. (See pages 26, 28)
Easy Setting
After connecting your new player for the first time and pressing [⏻], the basic settings screen will appear.
Preparation
Turn on the TV and select the appropriate video input.
1 Press [⏻].
Setup screen appears.
2 Follow the on-screen instructions to continue with the settings.
(e.g., "Quick Start")
- Certain recent models of Panasonic TVs (VIERA) may automatically apply their language setting to this unit.
■ When connected to a 4K/60p-compatible TV
When connected to a 4K/60p-compatible TV, you can set the video output format.

Follow the on-screen instructions to set the format.

- To reconnect this unit to a 4K/60p-compatible TV after connecting this unit to a 2K-compatible TV and completing "Easy Setting", set "4K60p Output" to "4K/60p(4:4:4)" or "4K/60p(4:2:0)". (⇒ 24)
Easy Network Setting
After completing "Easy Setting", you can perform "Easy Network Setting".
Follow the on-screen instructions to establish your connection settings.
Select "Wired" or "Wireless" and press [OK].

■ About the wireless connection
To obtain your network name (SSID*1) and encryption key (password).
The default settings may be printed on the router. If the SSID and password have been changed, consult the person responsible for setting up your network.
e.g.

For more details, refer to the manual supplied with the wireless broadband router, or contact your Internet provider.
If your SSID is not displayed:
Search again by pressing the red button on the remote control.

Stealth SSIDs will not be displayed; in this case, enter manually in the following order.
1 To display the SSID input screen:
Press [HOME]
⇒ select "Setup" and press [OK] → select "Player Settings" and press [OK] ⇒ select "Network" and press [OK] → select "Network Settings" and press [OK] → select "Wireless Settings" and press [OK] → select "Manual setting" and press [OK]
2 Enter your SSID.
If the wireless router supports the PUSH button method *2:
You can connect to and configure the security settings of your wireless LAN device with ease by pressing the Link button on the router.
If your wireless network is encrypted:
Enter your encryption key (password).
- You can switch between capital and lower case letters by pressing the "Shift" key.


• Refer to the owner's manuals of the hub or router. - Do not use this unit to connect to any wireless network for which you do not have usage rights. Using these networks may be regarded as illegal access. - If you have trouble getting online on your PC after performing network settings on this unit, perform the network settings on your PC. - Please be aware that connecting to a network without encryption may result in the leaking of data such as personal or secret information.
1 An SSID (Service Set IDentification) is a name used by wireless LAN to identify a particular network. Transmission is possible if the SSID matches for both devices.
2 The PUSH button method is a connection method which allows you to set encryption for a wireless LAN connection with ease.
You can connect to a wireless LAN network by pressing a certain button on the wireless access point [Link button, WPS (Wi-Fi Protected Setup™) button, etc.].
Firmware updates
This unit is capable of checking the firmware automatically when connected to the Internet via a broadband connection. 3
When a new firmware version is available, the following message is displayed.

Select "Yes" to start downloading the firmware. When the firmware update starts after the downloading is finished, a black screen is displayed and the POWER LED flashes rapidly.
You cannot operate the unit until the update is complete. Don't remove the AC power supply cord during the update. Removing the AC power supply cord while the update is in progress may damage the unit.
After the firmware is installed, unit will restart and the following screen will be displayed.


- You can also download the latest firmware from the following website and store it to a USB device to update the firmware.
http://panasonic.jp/support/global/cs/
(This site is in English only.)
When the update is complete the POWER LED will stop rapid flashings and start flashing in a repeating pattern of three flashes. Turn off and on the unit. (⇒ 33)
- To show the firmware version on this unit. (⇒ 28, "Firmware Version Information")
- Downloading will require several minutes. It may take longer or may not work properly depending on the connection environment.
3 You must agree to the terms of use for the Internet function and the privacy policy. ( ⇒ 27, "Notice")
*4 "X.XX" represents the firmware version number.
HOME menu
Major functions of this unit can be operated from the HOME menu.
Preparation
Turn on the TV and select the appropriate video input.
1 Press [⏻] to turn on the unit.
It may take some time until the HOME menu is displayed.
2 Press [OK] or [◀, ▶] to select the item.
- Press [OK] or [▲, ▼] to select the item if necessary.

Videos/Music/Photos
| Disc | Play back the contents. (→ right)When multiple contents are recorded, select the types of contents or the title.See “Playable media” (→ 6) |
| USB |
| Network ContentsPlayback | (⇒ 20) |
| Media Renderer | (⇒ 20) |
Home Network
Network Service
Displays the Home screen of Network Service. (⇒ 19)
Setup
| Player Settings | (→ 24) |
| Wallpaper | Changes the background of HOME menu. |
| BD-Video Data Erase | (→ 17) |
To show the HOME menu, press [HOME].

- Items displayed may vary depending on the media.
Playback
1. Insert the media.
Playback starts depending on the media.
2. Select the item to play and press [OK].
Repeat this step if necessary.
![PANASONIC DMP-UB200 - Select the item to play and press [OK]. - 1](/content/2026/05/1062362/images/34d42f0cac160a8249619e1596b3bf22b2b6c88b14d34fb5cae078cba7f5922d.jpg)
- DISCS CONTINUE TO ROTATE WHILE MENUS ARE DISPLAYED. Press [■STOP] when you have finished playback to protect the unit's motor, your TV screen, and so on.
- When the following conditions are met, still pictures are played back in 4K regardless of the image quality.
- The unit is connected to a 4K compatible TV.
- "Resolution" is set to "Auto" or "4K" (see page 24).
- This unit cannot output 4K images when playing back in 3D.
- It is not possible to play back AVCHD and MPEG2 videos that have been dragged and dropped or copied and pasted to the media.
- To enjoy BD-Video that supports Dolby Atmos or DTS:X™ (see page 25).
Operations during playback
Some operations may not work depending on the media and contents.
Stop
Press [■STOP].
The stopping point is memorized.
Resume play function
Press [▶PLAY] to restart from this point.
- The point is cleared if the media is removed.
- On BD-Video discs including BD-J, the resume play function does not work.
Pause
Press [IPAUSE].
- Press [■■PAUSE] again or [▶ PLAY] to restart play.
Search/Slow motion
Search
While playing, press [SEARCH◀◀] or [SEARCH▶▶].
- Ultra HD Blu-ray, MKV, MP4 and MPEG2: Audio is not heard. (When "Voice Guidance Setting" is set to "On", audio is not heard regardless of the media.)
Slow motion
While paused, press [SEARCH◀◀] or [SEARCH▶▶].
- BD-Video and AVCHD: [SEARCH▶▶] only.
- MKV, MP4 and MPEG2: Not effective.
The speed increases up to 5 steps.
- Music, MP3, etc.: The speed is fixed to a single step.
- Press [▶PLAY] to revert to normal playback speed.
Skip
While playing or paused, press [◀◀] or [▶▶].
Skip to the title, chapter or track.
Frame-by-frame
While paused, press [◀] (◀▶) or [▶] (▶▶).
• Each press shows the next frame. - Press and hold to change in succession forward or backward. - Press [▶PLAY] to revert to normal playback speed. - BD-Video and AVCHD: Forward only. - MKV, MP4 and MPEG2: Not effective.
Changing soundtrack
Press [AUDIO].
You can change the audio channel number or soundtrack language, etc.
Show top menu/pop-up menu
Press [TOP MENU] or [POP-UP MENU].
Select the item and press [OK].
Show the status messages
While playing, press [PLAYBACK INFO.].
You can check the detailed video content* playback status.
| Video attribute information of video content*. | |
| Audio attribute information of video content*. | |
| HDMI | HDMI output information. |
Press [RETURN] to exit.
* BD-Video, DVD-Video, MKV, MP4, MPEG2 (except Network Contents)
While playing, press [STATUS].
The status messages give you information about what is currently being played. Each time you press [STATUS], the display information may change or disappear from the screen.
- Depending on media and contents, the display may change or not appear.
e.g., Ultra HD Blu-ray
![graph TD A["HDR (High Dynamic Range)"] --> B["T1 C1 0:05.14 HDR(PQ)"] B --> C["E"] B --> D["D"] D --> E["F"] style A fill:#f9f,stroke:#333 style B fill:#ccf,stroke:#333 style C fill:#cfc,stroke:#333 style D fill:#fcc,stroke:#333 style E fill:#ffc,stroke:#333](/content/2026/05/1062362/images/99d830456e4755851bddce76d099041c463686c3e7796ac320da75bc7effff05.jpg)
A Displayed when an HDR (High Dynamic Range) video signal is being output. - “HDR (High Dynamic Range: HLG to PQ Conversion)”: The format of the HDR video is converted from HLG to PQ - “Dynamic Range Conversion Output”: The video signal is converted to SDR (Standard Dynamic Range)
B T: Title, P: Program, C: Chapter, PL: Playlist © Elapsed time in the title. Method of HDR (High Dynamic Range) video. E: Current position. F: Total time.
e.g., JPEG
| Date | 11/12/2010 | No. | 1/26 |
| Size | 500 x 375 | ||
| Manufacturer | |||
| Equipment | |||
Enjoying Ultra HD Blu-ray. Enjoying 3D video and photos.
You can enjoy the playback of Ultra HD Blu-ray discs with this unit.
Preparation
- For 4K/HDR viewing, connect to a device and terminals that support HDCP2.2*1, 4K/60p (4:4:4) and HDR signals that meet Ultra HD Blu-ray standards. (⇒ 10)
Due to copyright restrictions, it may not be possible to play back certain discs unless this unit is connected to the Internet.

- When connected to a device or terminal that does not support HDCP2.2*1, this unit applies Dynamic Range Conversion*2 to HDR signals to output them in 2K resolution. In addition, depending on the disc, it may not be possible to perform playback correctly.
- When connected to a device or terminal that supports 4K/60p (4:2:0/8 bit) and lower, this unit plays back 60p content by applying Dynamic Range Conversion *2 to its HDR signals to output them.
- When connected to a device or terminal that does not support 4K resolution, this unit applies Dynamic Range Conversion*2 to HDR signals to output them in 2K resolution.
- When connected to a device or terminal that does not support HDR, this unit applies Dynamic Range Conversion*2 to HDR signals to output them. In addition, depending on the disc, it may not be possible to output content in 2K resolution or perform playback correctly.
*1 HDCP is a technology designed to prevent illegal copying. "2.2" represents a version.
*2 Dynamic Range Conversion is a function that converts HDR video signals into video signals suited to TVs that do not support HDR input.
Preparation
Connect this unit to a 3D compatible TV. (⇒ 10)
- Perform the necessary preparations for the TV.
- Play back following the instructions displayed on the screen.
- 3D Settings (⇒ 23, 26)

- Please refrain from viewing 3D images if you do not feel well or are experiencing visual fatigue. In the event that you experience dizziness, nausea, or other discomfort while viewing 3D images, discontinue use and rest your eyes.
- 3D video might not output the way it is set in "Resolution" and "24p Output" (⇒ 24).
- When playing back 3D photos from "Photos" screen, select from the "3D" list. (Still pictures in "2D" are played back in 2D.) If "2D" and "3D" indications are not displayed, press the red button on the remote control to switch the view of playback contents.
Enjoying BD-Live
With "BD-Live" discs, you can enjoy bonus contents that use Internet access.
For this BD-Live function, connection of a USB device is necessary along with Internet connection.
1 Perform network connection and settings. (⇒ 12, 13) 2 Connect a USB device with 1 GB or more free space.
- The USB device is used as the local storage.
3 Insert the disc.
■ Deleting data on the USB device
Select "BD-Video Data Erase" in the HOME menu (⇒ 15) and press [OK].

- The usable functions and the operating method may vary with each disc, please refer to the instructions on the disc and/or visit their website.
- "BD-Live Internet Access" may need to be changed for certain discs. (=> 27)
Slideshow
Play a slideshow of photos and adjust various settings during the playback.
1 Insert the media. 2 Select "View Photos". 3 Select an item and press the green button.
The following items can be set.
| Start Slideshow | Start the slideshow. You can display still pictures in the selected folder one by one at a constant interval. |
| Display Interval | Change the display interval. |
| Transition Effect | Select the effect when sliding pictures. |
| Repeat Play | Set whether to repeat the slideshow. |
| Soundtrack | Set whether to play background music.• FLAC and MP3, etc., on the USB device can be played back during the slideshow of JPEG on the USB device. |
| Soundtrack Folder | Select the folder from which the music files are played. |
| Shuffle BGM | Background music is played in random order. |

- Still pictures displayed as "X" cannot be displayed as thumbnail with this unit.
- You cannot play back AAC and ALAC as background music.
Network Service (Enjoying NETFLIX, etc.)
Network Service allows you to access some specific websites supported by Panasonic, and enjoy Internet contents such as photos, videos, etc. from Network Service home screen.
- Some services, such as NETFLIX require a registered account.
For details of your NETFLIX account, refer to NETFLIX.

* Images are for illustration purposes, contents may change without notice.
Preparation
• Network connection (=> 12) • Network setting (=> 13)
- You must agree to the terms of use for the Internet function and the privacy policy. (=> 27, "Notice")
1 Press [INTERNET].
- Netflix can be accessed directly by pressing [NETFLIX] button.
2 Select the item and press [OK].
To exit from Network Service, press [HOME].
![PANASONIC DMP-UB200 - Select the item and press [OK]. - 1](/content/2026/05/1062362/images/8cad0b64f7cb29e178ae7b937966c2bf99557e08b2e1beb820daa73dbe133b9c.jpg)
- In the following cases, settings are possible using the Setup menu items.
- When restricting the use of Network Service (→ 28, "Network Service Lock")
- When the audio is distorted (→ 27, "Audio Auto Gain Control")
- When wrong time is displayed (→ 27, "Time Zone", "DST")
- When using a slow Internet connection, the video may not be displayed correctly. A high speed Internet service with a speed of at least 6 Mbps is recommended.
- Be sure to update the firmware as soon as a firmware update notice is displayed on the screen. If the firmware is not updated, you may not be able to use Network Service function properly. (→ 14)
- Network Service Home Screen is subject to change without notice.
- The services through Network Service are operated by their respective service providers, and service may be discontinued either temporarily or permanently without notice. Therefore, Panasonic will make no warranty for the content or the continuity of the services.
- Some features of websites or content of the service may not be available.
- Some content may be inappropriate for viewers.
- Some content may only be available for specific countries and may be presented in specific languages.
Home Network feature
Before using the following features, be sure to configure the connected equipment on your Home Network.
Playing back contents on the Network Contents server
You can share photos, videos and music stored in the Network Contents server *1 [PC, smartphone, etc.] connected to your home network.
- About support format of Network Contents ( ⇒ 35)
![graph TD A["Player"] --> B["Server"] B --> C["Music Note Icon"] style A fill:#f9f,stroke:#333 style B fill:#ccf,stroke:#333 style C fill:#cfc,stroke:#333](/content/2026/05/1062362/images/7f93a796344a41df0003a8180cee4b1e0a62078603e8b020f08c4680619fd421.jpg)
1 Press [HOME]. 2 Select "Home Network" and press [OK]. 3 Select "Network Contents Playback" and press [OK].
- The list can be updated by pressing the green button on the remote control.
- The selected equipment can be deleted from the list by pressing the red button on the remote control.
- The connection method can be switched to Direct Access *2 by pressing the yellow button on the remote control.
4 Select the equipment and press [OK]. 5 Select the item to play and press [OK].
- You may be able to use convenient functions depending on the content by pressing [OPTION].
To exit from Home Network
Press [HOME].
Using the Digital Media Controller
You can use a smartphone or tablet as the Digital Media Controller (DMC) to playback contents from Network Contents server*1 on the Renderer (this unit).
Possible applications:
![graph TD A["Renderer"] --> B["Device"] B --> C["Laptop"] C --> D["Controller"] D --> E["Server + Controller"] E --> F["Server"] style A fill:#f9f,stroke:#333 style B fill:#ccf,stroke:#333 style C fill:#cfc,stroke:#333 style D fill:#fcc,stroke:#333 style E fill:#cff,stroke:#333 style F fill:#ffc,stro…](/content/2026/05/1062362/images/e944d688c3160d9e7a94de107ee7f44cb71b64718ebfb47d40b53cdcb7911129.jpg)
1 Press [HOME]. 2 Select "Home Network" and press [OK]. 3 Select "Media Renderer" and press [OK]. 4 Select "Home Network" or "Direct Access"*2 and press [OK], then follow the indications on the screen. 5 Operate the DMC compatible devices.
To exit from Media Renderer screen, press [HOME].

- Direct Access *2 connection while using Home Network feature is only temporary, and the network connection method returns to the original setting when exiting.
- Depending on the device or connection environment, the data transfer rate may decrease.
- Depending on the contents and the connected equipment, playback may not be possible.
- Items displayed in gray on the display cannot be played back by this unit.
*1 DLNA compatible server, etc. *2 Direct Access is a function which allows you to wirelessly and directly connect wireless LAN-equipped devices to each other without a wireless router in between. You can connect devices such as those that support Wi-Fi Direct®. *3 DMC compatible software should be installed.
VIERA Link
What is VIERA Link?
VIERA Link is a convenient function which will link the operations of this unit and a Panasonic TV (VIERA) or other device under "VIERA Link".
You can use this function by connecting the equipment with an HDMI cable. See the owner's manuals for connected equipment for operational details.
Automatic input switching Power on link
When the following operations are performed, the input channel of the TV will be automatically switched and the screen of this unit will be displayed.
If this unit is on and the TV is off, the TV automatically turns on.
- When play starts on the unit
- When you display a menu, such as the HOME menu or Setup menu
Power off link
When you set the TV to standby mode, this unit is also automatically set to standby mode.
Playing music continuously even after turning off the TV
When the unit is connected to a Panasonic TV (VIERA) that supports VIERA Link and an amplifier/receiver supports VIERA Link.
① While playing music, press [OPTION]. ② Select "TV Power".
Easy control only with VIERA remote control
Only when TV supports "VIERA Link"
By using the TV remote control, you can perform various playback operations and settings.
See the owner's manuals of the TV for more details.

- If you set "VIERA Link" to "Off", set it to "On" (⇒ 28). (The default setting is "On".)
- The buttons and functions that you can use for this unit vary depending on the TV. For details, refer to the owner's manuals of the TV.
- The operation of this unit may be interrupted when you press certain buttons on the TV remote control.
- VIERA Link, based on the control functions provided by HDMI which is an industry standard known as HDMI CEC (Consumer Electronics Control), is a unique function that we have developed and added. As such, its operation with other manufacturers' equipment that supports HDMI CEC cannot be guaranteed.
- Please refer to individual manuals for other manufacturers' equipment supporting VIERA Link function.
Option menu
A variety of playback operations and settings can be performed from this menu.
Available options differ depending on the playing contents and the condition of the unit.
1 Press [OPTION].
e.g., BD-Video

- When playing music, select "Playback Settings" and press [OK].
2 Select an item and change the settings.
To exit the screen
Press [OPTION].
Regarding Language: (see page 36)
Operation Menu
■ Soundtrack (see page 16)
This setting can also be switched by pressing [AUDIO].
■ Audio channel
Select the audio channel number.
■ Subtitle
■ Subtitle Settings
Change the subtitle settings.
Angle
Select the number of the angle.
■ Repeat Play
Select the item that you want to repeat.
- You can repeat the playback of a chapter, playlist, the entire disc, etc., but the items displayed will differ depending on the type of the media.
- Select "Off" to cancel.
Shuffle
Select whether to play shuffle or not.
■ Start Slideshow
Start the slideshow.
Status
Show the status messages.
■ Rotate Right
Rotate Left
Rotate the still picture.
■ Wallpaper
Set the still picture to the wallpaper of HOME menu. (⇒ 15)
Video
The recording method of the original video appears.
■ Secondary Video
| Video | Select on/off for images. The recording method of original video appears. |
| Soundtrack | Select on/off for audio and the language. |
■ Playback Information Window (⇒ 16)
This setting is also displayed by pressing [PLAYBACK INFO.].
Control Panel
Display the Control Panel.
Playing back while using VIERA Link, etc.
e.g.,

Press [RETURN] to hide the Control Panel.
Top Menu
Display Top Menu.
■ Pop-up Menu
Display Pop-up Menu.
■ Menu
Display Menu.
■ Closed Caption (⇒ 26)
You can only set "Manual setting" and "CC Reset" in the Setup menu.
These settings are also displayed by pressing [CC].
■ Reception
The radio wave status during the playback of Network Contents is displayed. (Only when a wireless connection is used)
Video Settings
These settings are also displayed by pressing [VIDEO SETTING].

Switch "Set 1", "Set 2" or "Standard" by using [◀, ▶].
- You can register desired settings to "Set 1" and "Set 2". Settings for BD Video playback and settings for the playback of other types of media are registered separately. (The default settings for "Set 1"/"Set 2" are the same as the settings for "Standard".)
- You cannot change the "Standard" settings.
■ Display
Select a setting suitable for your screen.
■ Picture Type
Select the picture quality mode during play.
■ Sharpness Adjustment
Adjust the sharpness of images. The greater the value is, the sharper images will be.
Noise Reduction
Reduce unnecessary noise in videos. The greater the value is, the less noise will appear.
■ Luminance/Color Adjustment
Adjust the contrast, brightness, tone curve (white/black), color saturation and hue.
■ Bandwidth Limitation
Adjust the bandwidth limitations.
■ Dynamic Range Adjustment
Set the brightness of the entire screen when outputting HDR (High Dynamic Range) video to a connected HDR-compatible TV.
■ Dynamic Range Conversion Adjustment
When this unit is connected to a TV that does not support HDR (High Dynamic Range) input, HDR video is output converting to a SDR (Standard Dynamic Range) video signal. If you set a smaller value, their contrast will be reproduced more faithfully, but the entire screen will appear darker. To increase the brightness, set a larger value.
■ Progressive
Select the method of conversion for progressive output to suit the type of material being played.
- When the content is distorted, change the settings from "Auto" to "Video".
■ Reset to Default Video Settings
Return "Video Settings" of the selected tab ("Set 1" or "Set 2") to the factory preset.
Audio Settings
■ Sound Effects*
Select the sound effect.
- Night Surround :
Enjoy a movie with powerful sound even when the volume is kept low at night. The audio is set in such a way that it can be heard easily.
■ DSD Decode Sampling Frequency
Select the settings that suit your sound quality preferences.
■ DSD LPF Setting
Select the settings that suit your sound quality preferences.
■ Dialog Enhancer*
The volume of the center channel is raised to make dialog easier to hear.
* This function is effective only when "Digital Audio Output" is set to "PCM" ( ⇒ 25).
3D Settings
■ Signal Format
| Original Keep original picture format. | |
| Side by side | 3D picture format comprising of left and right screens. |
■ Pop-Out Level
3D position for the Option menu or message screen, etc. can be adjusted during 3D playback.
Setup menu
Change the unit's settings if necessary. The settings remain intact even if you switch the unit to standby.
1 Press [HOME]. 2 Select "Setup". 3 Select "Player Settings".

4 Select an item and change the settings.
To exit the screen
Press [HOME].
HDMI
■ Resolution
The items supported by the connected devices are indicated on the screen as “*”. When any item without “*” is selected, the images may be distorted.
- If "Auto" is selected, the best suited output resolution to the connected TV is automatically selected.
4K60p Output
This unit automatically chooses to output images in 4K*1 60p when connected to a 4K/60p compatible TV.
- This item is available only when "Resolution" is set to "Auto" and "4K".
- To connect to a TV that supports 4K/60p (4:4:4/8 bit) or 4K/60p (4:2:2/12 bit), select "4K/60p(4:4:4)". Images will not be output correctly with an HDMI cable that does not support 18 Gbps.
- To connect to a TV that supports 4K/60p (4:2:0/8 bit), select "4K/60p(4:2:0)".
24p Output
Content recorded at 24p *2 , such as BD-Video films, is output at 24p when played back.
- When this unit is connected to TV compatible with 4K/24p and "Resolution" is set to "Auto" or "4K", images will be output in 4K/24p.
- When this unit is connected to a TV compatible with 1080/24p and “Resolution” is set to “Auto”, “1080i” or “1080p”, images will be output in 1080/24p.
- If images output in 24p are distorted, change the setting to "Off".
■ Advanced Settings
Press [OK] to show the following settings:
Color Mode
This setting is for selecting color-space conversion of the image signal.
Deep Color Output
Set the output method to be used when this unit is connected to a TV that supports Deep Color.
HDR (High Dynamic Range) Output
Output images in HDR (High Dynamic Range) format depending on the content and connected device.
HLG / PQ Conversion
Set whether or not to convert HDR (High Dynamic Range) videos in HLG format to PQ format before outputting them when this unit is connected to a TV that supports only HDR (PQ) format.
- When "HDR (High Dynamic Range) Output" is set to "Off", this setting is disabled.
Contents Type Flag
Depending on the playback content, the TV will output adjusting to the optimal method when a TV that supports this function is connected.
1 A high resolution image/display technology of approximately 4000 (width) × 2000 (height) pixels. 2 A progressive image recorded at a rate of 24 frames per second (motion-picture film). Many BD-Video movie contents are recorded in 24 frames/second in accordance with the film materials.
Video
■ Still Mode (paused video)
Select the type of picture shown when you pause playback.
| Auto | Automatically selects the type of picture shown. |
| Field | Select if jittering occurs when “Auto” is selected. |
| Frame | Select if small text or fine patterns cannot be seen clearly when “Auto” is selected. |
Seamless Play
The chapter segments in playlists are played seamlessly.
- Select "On" when the picture freezes for a moment at the chapters segment in playlists.
Audio
■ Dynamic Range Compression
You can listen at low volumes but still hear dialog clearly.
(Dolby Digital, Dolby Digital Plus and Dolby TrueHD only)
- "Auto" is effective only when playing Dolby TrueHD.
■ Digital Audio Output
Press [OK] to show the following settings:
Dolby D/Dolby D +/Dolby TrueHD
DTS/DTS-HD
Select the audio signal to output.
- Select "PCM", when the connected equipment cannot decode the respective audio format. This unit decodes the audio format and transmits to the connected equipment.
- If you do not make proper settings, the audio may be static or noisy.
- If you set "Voice Guidance Setting" to "On", these settings will be fixed to "PCM".
BD-Video Secondary Audio
Select whether or not to mix the primary and secondary audio (including the button click sound).
If "Off" is selected, the unit outputs the primary audio only.

- To enjoy BD-Video that supports Dolby Atmos or DTS:X™, connect this unit to an AV amplifier or similar device that supports it with an HDMI cable, and select the following settings: – Dolby D/Dolby D +/Dolby TrueHD: "Bitstream"
- DTS/DTS-HD: "Bitstream"
- BD-Video Secondary Audio: "Off" Dolby Atmos is a trademark of Dolby Laboratories.
Downmix
Select the downmix system of multi-channel to 2-channel sound.
- Select "Surround encoded" when the connected equipment supports the virtual surround function.
- The downmix effect is not available when "Digital Audio Output" is set to "Bitstream".
- The audio will be output in "Stereo" in the following cases:
- AVCHD playback
- Playback of secondary audio (including the button click sound).
■ Audio Delay
Synchronization between picture and sound is corrected by adjusting the delay time of the audio output.
■ Voice Guidance Setting
Voice Guidance reads aloud various on-screen information, such as menu items, explanatory text, and currently-selected items. (It is also possible to display the "Voice Guidance Setting" screen by pressing and holding the [HOME] button for at least 5 seconds while the HOME menu is displayed.)
• Information is read aloud in PCM audio format. - Audio with sampling frequencies above 48 kHz are down-sampled to 48 kHz or lower. - When "On" is set, this unit operates in the manner described below. - “Dolby D/Dolby D +/Dolby TrueHD” and “DTS/DTS-HD” in “Digital Audio Output” are fixed to “PCM”. ( ⇒ left) - Audio is muted during searching ([SEARCH◀◀] or [SEARCH▶▶]).
3D
3D BD-Video Playback
Select the playback method of 3D compatible video software.
3D AVCHD Output
Select the output method of 3D AVCHD videos.
3D Playback Precautions
Set to display or hide the 3D viewing warning screen when playing back the 3D compatible video software.
Language
Audio Language
Choose the language for audio.
- If "Original" is selected, the original language of each disc will be selected.
- When the selected language is not recorded on the disc, or depending on how the navigation is created on the disc, it may playback in a different language than the selected language.
- Enter a code (⇒ 36) when you select "Other * * * *".
Subtitle Language
Choose the language for the subtitle.
(1) 2017年1月1日 - When "Auto" is selected, a subtitle for the language selected in the "Audio Language" is displayed only when the language other than the language selected in the "Audio Language" is played back. - When the selected language is not recorded on the disc, or depending on how the navigation is created on the disc, it may playback in a different language than the selected language. - Enter a code (⇒ 36) when you select "Other * * * *".
Menu Language
Choose the language for the disc menus.
- Enter a code (⇒ 36) when you select "Other * * * *".
Subtitle Text
Select a desired item according to the language used for MKV subtitles text.
- This item is displayed only after playing back a file.
■ On-screen Language
Choose the language for menus and on-screen messages.
■ Closed Caption
Closed captioning services depend on the content, and the unit can display closed captions for both digital and analog types.
Press [OK] to show the following settings:
➢ Closed Caption Display
Set whether or not to display closed captions.
➢ Closed Caption Type
Select the closed caption type that matches the one of the content to be played back.
Analog CC
Select the channel of analog closed captions.
Digital CC
Select the channel of digital closed captions.
Manual setting
Set the display style of closed captions.
CC Reset
Restore the default "Closed Caption" settings.
Network
■ Easy Network Setting (⇒ 13)
■ Network Settings
Perform network-related settings individually. Press [OK] to show the following settings:
LAN Connection Mode
Select the LAN connection method.
- When not using wireless LAN (when turning it off), select "Wired".
Wireless Settings
This allows the wireless router and connection settings to be set up. Current connection settings and connection state can be checked.
The wireless router connection wizard will be displayed.
Select a connection method to wireless access point.
Search for wireless network (⇒ 13)
PUSH button method (⇒ 14)
PIN code method
This method allows you to set encryption for a wireless LAN connection with ease.
You can connect to a wireless LAN network by entering a PIN code generated by this unit into the wireless access point you want to connect to.
Manual setting
If a search using "Search for wireless network" does not find the wireless access point you want to connect to, or if you cannot connect to a wireless LAN network with other methods, enter an SSID manually to establish a wireless LAN connection.
IP Address/DNS Settings
This is for checking the state of the network connection and setting the IP address and DNS-related.
Press [OK] to show the respective setting.
Proxy Server Settings
This is for checking the state of connection with the Proxy server and performing settings.
Press [OK] to show the respective setting.
▶ Network Service Settings ( ⇒ 19)
Press [OK] to show the following settings:
Audio Auto Gain Control
Volume that is different depending on the contents is adjusted automatically to the standard volume while using the Network Service.
- Depending on contents, this function effect will not work.
- Select "Off" when the audio is distorted.
Time Zone
Set the unit's time to match your location.
- Some Network Service contents require the time zone to be set. Set time zone if necessary.
DST
Select "On" when using Daylight Saving time.
Notice
Displays the terms of service for the cloud services.
Network Drive Connection
This unit can access a hard disk shared folder on a network and play back videos, still pictures, and music.
▶ Remote Device Settings (⇒ 20)
Press [OK] to show the following settings:
Setting Unit Name
Set the name of this unit to be displayed on the connected equipment.
Registration Type
| Auto | Allow connections to all the equipment accessing this unit. |
| Manual | Set the permission for individual equipment connections accessing this unit. |
Remote Device List
Registering/deregistering of the displayed equipment can be performed when "Manual" in "Registration Type" is selected.
- You can register up to 16 devices.
Networked Standby
Even when “Quick Start” is set to “Off”, by using a remote device (smartphone or tablet), you can wake the unit from the off state and start certain Internet content services.
- To activate operation from the remote device, select "On". But power consumption in standby mode will increase. ( ⇒ 34)
- To use this function, you will need a remote device that can run a function that wakes another device from Networked Standby and apps designed for various services of "Network Service". Refer to the instructions for the respective apps for details.
- Only the devices permitted by the "Remote Device List" can be operated.
▶ BD-Live Internet Access ( ⇒ 17)
You can restrict Internet access when BD-Live functions are used.
- If "Allow (Limited)" is selected, Internet access is permitted only for BD-Live contents which have content owner certificates.
Ratings
The following items use the same password. Don't forget your password.
■ DVD-Video Ratings
Set a ratings level to limit DVD-Video play.
■ BD-Video Ratings
Set an age limit of BD-Video (including Ultra HD Blu-ray) play.
■ Network Service Lock
You can restrict the usage of Network Service.
System
Easy Setting
You can execute basic settings.
■ Display Settings
Press [OK] to show the following settings:
Screen Saver Function
This is to prevent image retention on the screen.
- When this is set to "On": If a list of playback content is displayed and there is no operation for 5 minutes or more, the screen switches to HOME menu automatically.
- While playing and pausing, etc., this function is not available.
Status Messages
Choose whether to show status messages automatically.
VIERA Link
Set to use "VIERA Link" function when connected via HDMI cable to a device that supports "VIERA Link".
- Select "Off" when you do not want to use "VIERA Link".
Quick Start
Speed of start-up from standby mode is increased.
- When set to "On", the internal control unit will be powered. The idle power consumption will increase compared to when set to "Off".
■ Remote Control Code
Change the remote control code if other Panasonic products react to this remote control.
■ Firmware Update (⇒ 14)
Press [OK] to show the following settings:
▶ Automatic Update Check
When this equipment remains connected to the Internet, it will check for the latest firmware version when it is turned on and you can update it if necessary.
Update Now
You can update the firmware manually if a firmware update is available.
■ System Information
Press [OK] to show the following settings:
License
Information about the software used by this unit is displayed.
Firmware Version Information
Display firmware version of this unit and wireless LAN module.
This returns all values in the Setup menu and the Option menu to the default settings, except for some settings of network, ratings, remote control code, on-screen language, etc.
Troubleshooting guide
Before requesting service, please perform the following checks.
Do you have the latest firmware installed?
Panasonic is constantly improving the unit's firmware to ensure that our customers are enjoying the latest technology. (⇒ 14)

Make the following checks and visit our website for more information.
http://shop.panasonic.com/support
Enter the model number.

Or visit our website to find a service center.
You can find a service center near you easily on our website.
Other support information:
"Limited Warranty" (⇒ 38)
The following do not indicate a problem with this unit:
- Regular disc rotating sounds. – Image disturbance during search. – Image disturbance when replacing 3D discs.
■ Unit does not respond to remote control or unit's buttons.
Press and hold [⏻/l] on the main unit for 3 seconds.
- If still unable to turn the unit off, disconnect the AC power supply cord, wait 1 minute, then reconnect the AC power supply cord.
■ Cannot eject disc.
① While the unit is on, press and hold [OK], the yellow button, and the blue button on the remote control at the same time for more than 5 seconds. - POWER LED starts to flash, and "00 RET" is displayed on the screen. ② Press [▶] (right) repeatedly on the remote control until "06 FTO" is displayed on the screen. ③ Press [OK].
General operation
To return to the factory default.
Select "Yes" in "Restore Default Settings" in the Setup menu. (→ 28)
To return all settings to the factory preset.
Reset the unit as follows:
① While the unit is on
Press and hold [OK], the yellow button, and the blue button on the remote control at the same time for more than 5 seconds. - POWER LED starts to flash, and "00 RET" is displayed on the screen.
② Press [▶] (right) repeatedly on the remote control until "08 FIN" is displayed on the screen. ③ Press and hold [OK] for more than 5 seconds.
This unit is turned off when the input for the TV is switched.
This is a normal phenomenon when using VIERA Link. For details, please read the owner's manuals for the TV.
The remote control doesn't work properly.
Change the batteries in the remote control. (⇒ 5) The remote control and this unit are using different codes.
Turn on this unit by using [⏻/l] on the main unit, and check "Remote Control □", which is displayed on the screen when you press a button on the remote control.
Press and hold [OK] and the displayed number ("☐") for more than 5 seconds.
This unit is turned off automatically.
To save on electricity, this unit is turned off automatically depending on the media if there is no button operation for about 20 minutes when not playing back (such as when paused or displaying the menu, displaying still pictures, etc.).
You have forgotten your ratings password. You want to cancel the ratings level.
The ratings level returns to the factory defaults.
① While the unit is on, press and hold [OK], the yellow button, and the blue button on the remote control at the same time for more than 5 seconds. - The POWER LED starts to flash, and "00 RET" is displayed on the screen. ② Press [▶] (right) repeatedly on the remote control until "03 VL" is displayed on the screen. ③ Press [OK].
The TV screen turns black.
In the following cases, HDMI authentication takes place and a black screen is displayed: - When "24p Output" is set to "Auto". - When the display is switched between 2D and 3D images. - When you quit the 4K playback by displaying another screen, including the HOME menu.
This unit does not recognize the USB connection correctly.
➢ Disconnect and re-connect the USB cable. If it still does not recognize the connection, turn this unit off and on again. USB devices may not be recognized by this unit when connected using the following: - a USB hub - a USB extension cable. If you connect a USB HDD to this unit, use the USB cable that is supplied with the HDD. If the USB HDD is not recognized, the power to the USB HDD may not be supplied. Supply power from an external source. If you connect a second USB device while a screen other than the Home screen is displayed, it will not be detected. Display the Home screen and reconnect the USB device you want to use.
Images from this unit do not appear on the TV screen, or they are distorted.
An incorrect resolution is selected in "Resolution". Reset the setting as follows: The connected devices are changed. Reset the setting as follows: ① While the unit is on, press and hold [OK], the yellow button, and the blue button on the remote control at the same time for more than 5 seconds. - The POWER LED starts to flash. ② Press [8] and the blue button on the remote control at the same time for more than 5 seconds. Set the item again. (⇒ 24) - When Dolby Digital Plus, Dolby TrueHD, and DTS-HD® audio are not output properly, select "Yes" in "Restore Default Settings" (→ 28) and make proper settings. - "4K60p Output" will be set to "Off". Make the correct setting again. (⇒ 24) When "3D BD-Video Playback" in the Setup menu is set to "Auto", images may not be output depending on the connection method. After removing the disc from this unit, select "Set before play" in the Setup menu, and select "2D Playback" in the setup screen displayed when playing 3D discs. (⇒ 26) When outputting in 4K, images may be distorted depending on the HDMI cable. Use an HDMI cable that supports 18 Gbps.
Video is not output in 4K or high-definition.
➢ Confirm that "Resolution" in the Setup menu is set properly. (⇒ 24) ➢ Confirm the HDMI cable, related connections, and the compatibility of the TV video input. To output images in 4K, connect the HDMI cable to a 4K compatible terminal of the connected device. (⇒ 10) To enjoy images in 4K/60p, set "4K60p Output" to "4K/60p(4:4:4)" or "4K/60p(4:2:0)". (⇒ 24) If "4K60p Output" is set to "4K/60p(4:4:4)", check to see if the connected HDMI cable supports 18 Gbps. (⇒ 10, 24) If 4K images are not output from the connected 4K-compatible TV, set "4K60p Output" to "4K/60p(4:4:4)" or "4K/60p(4:2:0)". (⇒ 24)
Cannot output video in HDR quality even when connected to an HDR-compatible TV.
When connected to a device or terminal that does not support HDR, this unit applies Dynamic Range Conversion to HDR signals to output them. In addition, depending on the disc, it may not be possible to output content in 2K resolution or perform playback correctly. (⇒ 17) Video may not be output from your TV in HDR quality, depending on the content. Set "HDR (High Dynamic Range) Output" and "HLG / PQ Conversion" to "Auto". (→ 24)
3D video is not output.
➢ Connect to a 3D compatible device (e.g., TV and amplifier/receiver). When a non-3D compatible amplifier/receiver is connected between this unit and a TV, 3D video is not output. (⇒ 11) ➢ Confirm the settings on this unit and the TV for 3D. (⇒ 17)
3D video is not output correctly as 2D.
Select "Set before play" in the Setup menu, and select "2D Playback" in the setup screen displayed when playing 3D discs. (⇒ 26, "3D BD-Video Playback") ➢ Discs that have recorded titles with Side by side (2 screen structure) and that can be enjoyed in 3D are played back in accordance with the settings of the TV.
No subtitles.
When progressive output is on, closed captions/subtitles cannot be displayed.
The subtitles overlap closed captions recorded on discs.
➢ Turn off the subtitles or the closed captions. (⇒ 22, 26)
Closed captions are not displayed.
➢ Confirm that the source content supports CC. ➢ Confirm the “Closed Caption Display” is set to “On”. (⇒ 22, 26) ➢ Change the “Closed Caption Type” setting. (⇒ 22, 26) ➢ Confirm the “Analog CC” or “Digital CC” is set properly (⇒ 22, 26).
Cannot play back videos on the USB device smoothly.
Use the port on the rear side of this unit, which supports USB 3.0.
A black band is displayed around the edge of the screen.
The aspect ratio of the screen is abnormal.
Adjust the aspect setting on the TV.
There is a lot of image lag when playing video.
➢ Set “0” all items in the “Noise Reduction”. (⇒ 23) Set "Audio Delay". (⇒ 25)
Audio
Cannot hear the desired audio.
Check the connections and the “Digital Audio Output” settings. (See 11, 25)
There is no sound coming out.
Refer to “Connecting to an amplifier/receiver” (See 11) to check the audio output settings suited to the connections of your device.
Playback
Disc cannot be played.
The disc is dirty. (See 5) The disc is not finalized. (See 7) Depending on the Ultra HD Blu-ray disc, it may not be possible to perform playback unless this unit is connected to the Internet.
Still pictures (JPEG) do not play back normally.
The images that were edited on the PC, such as Progressive JPEG, etc., may not be played back.
I can't play back BD-Live.
Confirm that this unit is connected to the broadband Internet. (See 12) Confirm the "BD-Live Internet Access" settings. (See 27) Confirm a USB device is connected to the USB port. (See 9)
Network Messages on the screen
I can't connect to the network.
Confirm the network connection and settings. (See 12, 13, 26) There may be interference that prevents the unit from detecting your home network. Place the unit and the wireless router closer to each other. This unit may be able to detect your network name (See 14, "SSID").
Check the owner's manuals for each device and connect accordingly.
When using wireless LAN connection, video from the Network Contents server* is not played back or video frames are dropped during playback.
A higher transfer rate router such as 802.11n (2.4 GHz or 5 GHz) wireless router may solve the problem. If you use an 802.11n (2.4 GHz or 5 GHz) wireless router, it is necessary to set the encryption type to "AES". Simultaneous use with a microwave, cordless telephone, etc. at 2.4 GHz may result in connection interruptions or other problems. On the "Wireless Settings" screen (=> 26), the continuous lighting of at least 4 "Reception" indicators is the target for a stable connection. If 3 or fewer indicators are lit or the connection is being interrupted, change the position or angle of your wireless router and see if the connection state improves. If there is no improvement, connect to a wired network and perform the "Easy Network Setting" (=> 13) again.
* DLNA compatible server, etc.
Cannot read. Please check the disc.
You inserted an incompatible disc.
Cannot play this file.
You tried to play a non-compatible video.
No disc inserted.
The disc may be upside down.
This operation is not available.
Some operations are unsupported by the unit. (For example, reverse slow motion, etc.)
IP address is not set.
The "IP Address" in "IP Address/DNS Settings" is "---, ---, ---, ---". Set the "IP Address", "Subnet Mask", and "Default Gateway". (Select the automatic address acquisition if necessary.)
The current wireless network security setting is weak. It is recommended to change to a stronger security setting.
Set a stronger network security level referring to the wireless router owner's manuals.
POWER LED
When the POWER LED is flashing other than during power up or down of this unit, check the message on the TV screen. If a message is not displayed on the TV screen, determine the type of the error by checking the way the POWER LED is flashing.
Symbols indicate the following states:


(Flashes 6 times)
The remote control and this unit are using different codes. Turn on this unit by using [∅/I] on the main unit, and check "Remote Control □" which is displayed on the screen when you press a button on the remote control. Press and hold [OK] and the displayed number ("☐") for at least 5 seconds.

(Flashes 4 times)
The unit fails to operate properly. Press [⏻/l] on the main unit for 3 seconds to switch the unit to standby, then switch back on.

(Flashes)
The copyright protected disc cannot be played back. One of the devices connected to this unit (TV, amplifier, etc.) does not support copyright protection. ➢ Temperature of this unit is hot and the unit switches to standby for safety reasons. Wait for about 30 minutes. Install or place this unit with good ventilation. A firmware update is in progress.

(Flashes 3 times)
The disc in use cannot be played back since the copyright information is invalid. A firmware update using a USB device is complete.
Specifications
General
| Signal system NTSC | |
| Operating temperature range | +5 °C to +35 °C(+41 °F to +95 °F) |
| Operating humidity range | 10 % to 80 % RH(no condensation) |
| HDMI OUT(19 pin type A) | 1 pc.Output Audio format: PCM, Dolby Digital, Dolby Digital Plus, Dolby TrueHD, DTS®, DTS-HD High Resolution AudioTM , DTS-HD Master AudioTM |
| USB port (Type A) Front | : 1 pc.,DC 5 V, Max. 500 mA[High-Speed USB (USB 2.0)]Rear: 1 pc.,DC 5 V, Max. 900 mA[Super-Speed USB (USB 3.0)] |
| LAN (Ethernet) Port 1 p c. | 10BASE-T/100BASE-TX |
| Wireless LAN Standard | Compliance:IEEE802.11 a/b/g/n |
| Frequency Range:2.4 GHz/5 GHz band | |
| Security:Encryption type: TKIP/AES,Authentication type: PSK, WEP(64 bit/128 bit) | |
| LASER Specification | Class I LASER ProductWave length: 777-800 nm (CDs)/650-665 nm (DVDs)/400-410 nm (BDs)Laser power: No hazardous radiation is emitted with the safety protection |
| Power supply | AC 120 V, 60 Hz |
| Power consumption Approx. 26 W | |
| Power consumption in quick start standby mode | Approx. 7 W(Quick Start: On) |
| Power consumption in standby mode | Approx. 0.2 W(Quick Start: Off, Networked Standby: Off) |
| Dimensions(W×H×D)Including the projecting parts | 320 mm×45 mm×193 mm(Approx. 12 5/8"×1 13/16"×7 5/8") |
| Mass (Weight) | Approx. 1.3 kg (2.9 lbs) |
- Specifications are subject to change without notice.
File format
| File format Extension Reference | ||
| MKV(Compression methodsVideo: H.264/HEVCAudio: AAC, PCM,Vorbis, FLAC) | ".MKV",".mkv" | Resolution up to 3840x2160 30p,4096x2160 24p.The video file and subtitles text file are inside the same folder,and the file names are the same except for the file extensions.Some MKV files may not be played back correctly,depending on the video resolution, frame rate condition, subtitle format and so on.MOTION JPEG is not supported. |
| Subtitles text file".SRT",".srt",".SSA",".ssa",".ASS",".ass" | ||
| mp4(Compression methodsVideo: H.264/HEVCAudio: AAC) | ".MP4",".mp4",".MOV",".mov" | Resolution up to 3840x2160 30p,4096x2160 24p. (except MPEG2)Some mp4/MPEG files may not be played back correctly, depending on the video resolution, frame rate condition and so on.MOTION JPEG is not supported.Depending on the audio compression method,only images may be played back and it may not be possible to output audio. |
| MPEG(TS/PS)(Compression methodsVideo: MPEG2/H.264*1/HEVC*1Audio: AAC*1/Dolby Digital/LPCM*) | ".MPG",".mpg",".MPEG",".mpeg",".M2TS",".m2ts",".MTS",".mts",".TS",".ts" | |
| JPEG | ".JPG",".jpg" | MOTION JPEG and Progressive JPEG are not supported.You may not be able to play back the file if you have edited the folder structure or the file name on a PC or other device. |
| MPO | ".MPO",".mpo" | 3D still picture |
| MP3 | ".MP3",".mp3" | This unit supports ID3 tags,but only titles, artist names and album names can be displayed. |
| FLAC | ".FLAC",".flac" | This unit supports tags, but only titles, artist names and album names can be displayed. Maximum sampling rate: 192 kHz/24 bit |
| WAV | ".WAV",".wav" | Maximum sampling rate: 192 kHz/32 bit |
| AAC | ".M4A",".m4a" | Maximum sampling rate: 48 kHz/320 kbps |
| WMA | ".WMA", ".wma" | This unit supports tags, but only titles, artist names and album names can be displayed. Maximum sampling rate: 48 kHz/385 kbps |
| DSD (DFF, DSF) | ".DSF", ".dsf", ".DFF", ".dff" | 2.8 MHz (2 ch/5.1 ch), 5.6 MHz (2 ch only) |
| ALAC | ".M4A", ".m4a" | 96 kHz/32 bit (Max.7.1 ch), 176.4/192 kHz/32 bit (Max.5.1 ch) |
*1 TS only 2 PS only
- With certain recording states and folder structures, the play order may differ or playback may not be possible.
- A combined total of up to 10,000 files and folders can be displayed as playable data in each folder regardless of their format.
(Even when the picture playback menu is displayed, for example, if a folder in the menu contains playable videos and music files, they are also counted as playable data.)
Audio information
The audio output differs depending on the settings on the unit are connected to the amplifier/receiver. ( ⇒ 25, “Digital Audio Output”)
- The number of channels listed is the maximum possible number of output channels when connected to amplifier/receiver compatible with the respective audio format.
HDMI OUT
| “Digital Audio Output” | ||
| “Bitstream” “PCM” ^1 | ||
| Output channel | Outputs using original audio*2 | BD-Video: 7.1ch PCM*2*3 DVD-Video: 5.1ch PCM |
1 The maximum possible number of Dolby sound is 2ch PCM. 2 When “BD-Video Secondary Audio” is set to “On”, the audio will be output as Dolby Digital, DTS Digital Surround TM or 5.1ch PCM. However, when playing BD-Video without secondary audio or navigation sounds, the audio is output as the original format. 3 The audio output is amplified from 5.1ch or 6.1ch to 7.1ch depending on the DTS, Inc. specifications.
Supported format for Network Contents Playback
When this unit works as a Network Contents client, following contents are playable.
- File formats that are not supported by your Network Contents server* cannot be played. * DLNA compatible server, etc.
Video
| Container Video codec Audio codec | Example of file extension | ||
| MKV | H.264HEVC | AACPCM VorbisFLAC | .mkv |
| AVCHD H.264 Dolby Digital .mts | |||
| MP4 | H.264HEVC | AAC | .mp4, .mov |
| PS | MPEG2 | Dolby Digital Linear PCM | .mpg, .mpeg |
| TS | MPEG2H.264HEVC | AADolby Digital | .m2ts, .ts |
Photo
| Format | Example of file extension |
| JPEG | .jpg |
Audio
| Audio codec | Example of file extension |
| MP3 | .mp3 |
| FLAC | .flac |
| WAV | .wav |
| AAC | .m4a, .adts |
| WMA | .wma |
| ALAC | .m4a |
| DSD | .dsf, .dff |
| Linear PCM | — |
- Depending on the server, the contents other than stated above can be played back.
Language code list
| Language Code Language Code Language Code | |||||
| Abkhazian: | 6566 | Gujarati: | 7185 | Rhaeto-Romance: | |
| Afar: | 6565 | Hausa: | 7265 | 8277 | |
| Afrikaans: | 6570 | Hebrew: | 7387 | Romanian: | 8279 |
| Albanian: | 8381 | Hindi: | 7273 | Russian: | 8285 |
| Amharic: | 6577 | Hungarian: | 7285 | Samoan: | 8377 |
| Arabic: | 6582 | Icelandic: | 7383 | Sanskrit: | 8365 |
| Armenian: | 7289 | Indonesian: | 7378 | Scots Gaelic: | 7168 |
| Assamese: | 6583 | Interlingua: | 7365 | Serbian: | 8382 |
| Aymara: | 6589 | Irish: | 7165 | Serbo-Croatian: | 8372 |
| Azerbaijani: | 6590 | Italian: | 7384 | Shona: | 8378 |
| Bashkir: | 6665 | Japanese: | 7465 | Sindhi: | 8368 |
| Basque: | 6985 | Javanese: | 7487 | Singhalese: | 8373 |
| Bengali; Bangla: | Kannada: | 7578 | Slovak: | 8375 | |
| 6678 | Kashmiri: | 7583 | Slovenian: | 8376 | |
| Bhutani: | 6890 | Kazakh: | 7575 | Somali: | 8379 |
| Bihari: | 6672 | Kirghiz: | 7589 | Spanish: | 6983 |
| Breton: | 6682 | Korean: | 7579 | Sundanese: | 8385 |
| Bulgarian: | 6671 | Kurdish: | 7585 | Swahili: | 8387 |
| Burmese: | 7789 | Laotian: | 7679 | Swedish: | 8386 |
| Byelorussian: | 6669 | Latin: | 7665 | Tagalog: | 8476 |
| Cambodian: | 7577 | Latvian, Lettlish: | 7686 | Tajik: | 8471 |
| Catalan: | 6765 | Lingala: | 7678 | Tamil: | 8465 |
| Chinese: | 9072 | Lithuanian: | 7684 | Tatar: | 8484 |
| Corsican: | 6779 | Macedonian: | 7775 | Telugu: | 8469 |
| Croatian: | 7282 | Malagasy: | 7771 | Thai: | 8472 |
| Czech: | 6783 | Malay: | 7783 | Tibetan: | 6679 |
| Danish: | 6865 | Malayalam: | 7776 | Tigrinya: | 8473 |
| Dutch: | 7876 | Maltese: | 7784 | Tonga: | 8479 |
| English: | 6978 | Maori: | 7773 | Turkish: | 8482 |
| Esperanto: | 6979 | Marathi: | 7782 | Turkmen: | 8475 |
| Estonian: | 6984 | Moldavian: | 7779 | Twi: | 8487 |
| Faroese: | 7079 | Mongolian: | 7778 | Ukrainian: | 8575 |
| Fiji: | 7074 | Nauru: | 7865 | Urdu: | 8582 |
| Finnish: | 7073 | Nepali: | 7869 | Uzbek: | 8590 |
| French: | 7082 | Norwegian: | 7879 | Vietnamese: | 8673 |
| Frisian: | 7089 | Oriya: | 7982 | Volapük: | 8679 |
| Galician: | 7176 | Pashto, Pushto: | 8083 | Welsh: | 6789 |
| Georgian: | 7565 | Persian: | 7065 | Wolof: | 8779 |
| German: | 6869 | Polish: | 8076 | Xhosa: | 8872 |
| Greek: | 6976 | Portuguese: | 8084 | Yiddish: | 7473 |
| Greenlandic: | 7576 | Punjabi: | 8065 | Yoruba: | 8979 |
| Guarani: | 7178 | Quechua: | 8185 | Zulu: | 9085 |
Display languages list
| Display Language | Display Language | Display Language | |||
| ENG | English | JPN | Japanese | ARA | Arabic |
| FRA | French | CHI | Chinese | HIN | Hindi |
| DEU | German | KOR | Korean | PER | Persian |
| ITA | Italian | MAL | Malay | IND | Indonesian |
| ESP | Spanish | VIE | Vietnamese | MRI | Maori |
| NLD | Dutch | THA | Thai | BUL | Bulgarian |
| SVE | Swedish | POL | Polish | RUM | Romanian |
| NOR | Norwegian | CES | Czech | GRE | Greek |
| DAN | Danish | SLK | Slovak | TUR | Turkish |
| POR | Portuguese | HUN | Hungarian | * | Others |
| RUS | Russian | FIN | Finnish | ||
TV code list
| Brand TV Code | |
| Panasonic 01/02 | |
| LG | 10/11 |
| SAMSUNG 20/21/22 | |
| SONY 30 | |
| VIZIO 40/41 | |
Licenses
"AVCHD", "AVCHD 3D", "AVCHD Progressive" and "AVCHD 3D/Progressive" are trademarks of Panasonic Corporation and Sony Corporation.
Java is a registered trademark of Oracle and/or its affiliates.
Dolby, Dolby Audio, and the double-D symbol are trademarks of Dolby Laboratories.
For DTS patents, see http://patents.dts.com. Manufactured under license from DTS Licensing Limited. DTS, DTS-HD, the Symbol, & DTS and the Symbol together are registered trademarks, and DTS-HD Master Audio | Essential is a trademark of DTS, Inc. © DTS, Inc. All Rights Reserved.
The terms HDMI and HDMI High-Definition Multimedia Interface, and the HDMI Logo are trademarks or registered trademarks of HDMI Licensing, LLC in the United States and other countries.
This product is licensed under the AVC Patent Portfolio License for the personal use of a consumer or other uses in which it does not receive remuneration to (i) encode video in compliance with the AVC Standard ("AVC Video") and/or (ii) decode AVC Video that was encoded by a consumer engaged in a personal activity and/or was obtained from a video provider licensed to provide AVC Video. No license is granted or shall be implied for any other use. Additional information may be obtained from MPEG LA, L.L.C. See http://www.mpegla.com
This product is licensed under the VC-1 Patent Portfolio License for the personal and non-commercial use of a consumer to (i) encode video in compliance with the VC-1 Standard ("VC-1 Video") and/or (ii) decode VC-1 Video that was encoded by a consumer engaged in a personal and non-commercial activity and/or was obtained from a video provider licensed to provide VC-1 Video. No license is granted or shall be implied for any other use. Additional information may be obtained from MPEG LA, L.L.C. See http://www.mpegla.com
MPEG Layer-3 audio coding technology licensed from Fraunhofer IIS and Thomson.
“DVD Logo” is a trademark of DVD Format/Logo Licensing Corporation.
"Wi-Fi®" and "Wi-Fi Direct®" are registered trademarks of Wi-Fi Alliance®. "Wi-Fi Protected Setup™" and "WPA™" are trademarks of Wi-Fi Alliance®.
Windows is a trademark or a registered trademark of Microsoft Corporation in the United States and other countries.
Android is a trademark of Google Inc.
Copyright 2004-2014 Verance Corporation. Cinavia™ is a Verance Corporation trademark. Protected by U.S. Patent 7,369,677 and worldwide patents issued and pending under license from Verance Corporation. All rights reserved.
This product incorporates the following software:
(1) the software developed independently by or for Panasonic Corporation.
(2) the software owned by third party and licensed to Panasonic Corporation,
(3) the software licensed under the GNU General Public License, Version 2.0 (GPL V2.0),
(4) the software licensed under the GNU LESSER General Public License, Version 2.1 (LGPL V2.1), and/or
(5) open source software other than the software licensed under the GPL V2.0 and/or LGPL V2.1.
The software categorized as (3) - (5) are distributed in the hope that it will be useful, but WITHOUT ANY WARRANTY, without even the implied warranty of MERCHANTABILITY or FITNESS FOR A PARTICULAR PURPOSE. Please refer to the detailed terms and conditions thereof shown in the Player Settings menu.
At least three (3) years from delivery of this product, Panasonic will give to any third party who contacts us at the contact information provided below, for a charge no more than our cost of physically performing source code distribution, a complete machine-readable copy of the corresponding source code covered under GPL V2.0, LGPL V2.1 or the other licenses with the obligation to do so, as well as the respective copyright notice thereof.
Contact Information: oss-cd-request@gg.jp.panasonic.com
The source code and the copyright notice are also available for free in our website below. http://panasonic.net/avc/oss/
(1) MS/WMA
This product is protected by certain intellectual property rights of Microsoft Corporation and third parties. Use or distribution of such technology outside of this product is prohibited without a license from Microsoft or an authorized Microsoft subsidiary and third parties.
(2) MS/PlayReady/Final Product Labeling
This product contains technology subject to certain intellectual property rights of Microsoft. Use or distribution of this technology outside of this product is prohibited without the appropriate license(s) from Microsoft.
(3) MS/PlayReady/End User Notices
Content owners use Microsoft PlayReady™ content access technology to protect their intellectual property, including copyrighted content. This device uses PlayReady technology to access PlayReady-protected content and/or WMDRM-protected content. If the device fails to properly enforce restrictions on content usage, content owners may require Microsoft to revoke the device's ability to consume PlayReady-protected content. Revocation should not affect unprotected content or content protected by other content access technologies. Content owners may require you to upgrade PlayReady to access their content. If you decline an upgrade, you will not be able to access content that requires the upgrade.
(4) Vorbis, FLAC, WPA Supplicant
The software licenses are displayed when "License" in the Setup menu is selected. ( ⇒ 28)
Limited Warranty
Panasonic Products Limited Warranty
Limited Warranty Coverage (For USA Only)
If your product does not work properly because of a defect in materials or workmanship, Panasonic Corporation of North America (referred to as "the warrantor") will, for the length of the period indicated on the chart below, which starts with the date of original purchase ("warranty period"), at its option either (a) repair your product with new or refurbished parts, (b) replace it with a new or a refurbished equivalent value product, or (c) refund your purchase price. The decision to repair, replace or refund will be made by the warrantor.
| Product or Part Name Parts Labor | ||
| Blu-ray Disc Player 1 Year 90 Days | ||
| All included Accessories(Except Non-Rechargeable Batteries) | 90 Days Not Applicable | |
| Only Non-Rechargeable Batteries | 10 Days Not Applicable | |
During the “Labor” warranty period there will be no charge for labor. During the “Parts” warranty period, there will be no charge for parts. This Limited Warranty excludes both parts and labor for non-rechargeable batteries, antennas, and cosmetic parts (cabinet). This warranty only applies to products purchased and serviced in the United States. This warranty is extended only to the original purchaser of a new product which was not sold “as is”.
Mail-In Service--Online Repair Request
Online Repair Request
To submit a new repair request and for quick repair status visit our Web Site at http://shop.panasonic.com/support
When shipping the unit, carefully pack, include all supplied accessories listed in the Owner's Manual, and send it prepaid, adequately insured and packed well in a carton box. When shipping Lithium Ion batteries please visit our Web Site at http://shop.panasonic.com/support as Panasonic is committed to providing the most up to date information. Include a letter detailing the complaint, a return address and provide a daytime phone number where you can be reached. A valid registered receipt is required under the Limited Warranty.
IF REPAIR IS NEEDED DURING THE WARRANTY PERIOD, THE PURCHASER WILL BE REQUIRED TO FURNISH A SALES RECEIPT/PROOF OF PURCHASE INDICATING DATE OF PURCHASE, AMOUNT PAID AND PLACE OF PURCHASE. CUSTOMER WILL BE CHARGED FOR THE REPAIR OF ANY UNIT RECEIVED WITHOUT SUCH PROOF OF PURCHASE.
Limited Warranty Limits and Exclusions
This warranty ONLY COVERS failures due to defects in materials or workmanship, and DOES NOT COVER normal wear and tear or cosmetic damage. The warranty ALSO DOES NOT COVER damages which occurred in shipment, or failures which are caused by products not supplied by the warrantor, or failures which result from accidents, misuse, abuse, neglect, mishandling, misapplication, alteration, faulty installation, set-up adjustments, misadjustment of consumer controls, improper maintenance, power line surge, lightning damage, modification, introduction of sand, humidity or liquids, commercial use such as hotel, office, restaurant, or other business or rental use of the product, or service by anyone other than a Factory Service Center or other Authorized Servicer, or damage that is attributable to acts of God. THERE ARE NO EXPRESS WARRANTIES EXCEPT AS LISTED UNDER “LIMITED WARRANTY COVERAGE”. THE WARRANTOR IS NOT LIABLE FOR INCIDENTAL OR CONSEQUENTIAL DAMAGES RESULTING FROM THE USE OF THIS PRODUCT, OR ARISING OUT OF ANY BREACH OF THIS WARRANTY.
(As examples, this excludes damages for lost time, travel to and from the servicer, loss of or damage to media or images, data or other memory or recorded content. The items listed are not exclusive, but for illustration only.)
ALL EXPRESS AND IMPLIED WARRANTIES, INCLUDING THE WARRANTY OF MERCHANTABILITY, ARE LIMITED TO THE PERIOD OF THE LIMITED WARRANTY.
Some states do not allow the exclusion or limitation of incidental or consequential damages, or limitations on how long an implied warranty lasts, so the exclusions may not apply to you.
This warranty gives you specific legal rights and you may also have other rights which vary from state to state. If a problem with this product develops during or after the warranty period, you may contact your dealer or Service Center. If the problem is not handled to your satisfaction, then write to:
Consumer Affairs Department
Panasonic Corporation of North America
661 Independence Pkwy
Chesapeake, VA 23320
PARTS AND SERVICE, WHICH ARE NOT COVERED BY THIS LIMITED WARRANTY, ARE YOUR RESPONSIBILITY.
Shop
Accessories!
for all your Panasonic gear
Go to
http://shop.panasonic.com/support
Get everything you need to get the most out of your Panasonic products
Accessories & Parts for your Camera, Phone, A/V products, TV, Computers & Networking, Personal Care, Home Appliances, Headphones, Batteries, Backup Chargers & more...
Customer Services Directory
For Product Information, Operating Assistance, Parts, Owner's Manuals, Dealer and Service info go to http://shop.panasonic.com/support
For the hearing or speech impaired TTY: 1-877-833-8855
Changing audio .....16
Language .....26
BD-Live....17
© Closed Caption....22, 26
D DMC .....20
File format.....34
Firmware update .....14
HDR....4,17
LAN....12
Language
Audio 26
Code list .....36
Menu 26
On-screen.....26
Soundtrack .....22
Subtitle .....22, 26
M Media Renderer ..... 20
N Network
Connection ..... 12
Setting 13,26
Network Service .....19
P Pop-up menu .....16
POWER LED. . . . . . . . 9, 33
Quick Start 28
Repeat play 22
Restore Default
Settings .....28
Resume play function . . .15
S Subtitle 22, 26
Ultra HD Blu-ray ..... 17
USB device .....7
VIERA Link 21
W Wireless LAN ..... 12
24p 24
4K....13,24
USA Only: Disposal may be regulated in your community due to environmental considerations. For disposal or recycling information, please visit Panasonic website:
http://www.panasonic.com/environmental/
or call 1-888-769-0149.
![CAUTION - VISIBLE AND INVISIBLE LASER RADIATION WHEN OPEN, DO NOT STARE INTO BEAM. FDA 21CFR/CLASS 3 [Da]. CAUTION - CLASS 2 VISIBLE AND INVISIBLE LASER RADIATION WHEN OPEN, DO NOT STARE INTO THE BEAM. €058025-1/Class 2. ATTENTION - RAYONNEMENT LASER VISIBLE ET INVISIBLE, CLASSE 2, EN CAS D'OUVERTUR…](/content/2026/05/1062362/images/faaecb83c0533954d26ff2c58fdebd34c5294927c180892ae2c6dcde6c565ada.jpg)
(Inside of product)
The model number and serial number of this product can be found on either the back or the bottom of the unit. Please note them in the space provided below and keep for future reference.
MODEL NUMBER
SERIAL NUMBER
User memo:
DATE OF PURCHASE
DEALER NAME
DEALER ADDRESS
P - U B 2 0 0
TELEPHONE NUMBER
Panasonic Corporation of North America
Two Riverfront Plaza, Newark, NJ 07102-5490
http://shop.panasonic.com

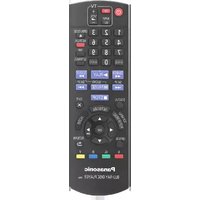
- FIRMWARE UPDATES
- IMPORTANT SAFETY INSTRUCTIONS
- CAUTION
- RISK OF ELECTRIC SHOCK DO NOT OPEN
- FCC NOTE
- PRECAUTIONS
- WARNING
- UNIT
- AC POWER SUPPLY CORD
- PLACEMENT
- BATTERIES
- RESTRICTION ON USE OF UNAUTHORIZED COPIED CONTENT
- WIRELESS LAN CONNECTION
- TO DISPOSE OR TRANSFER THIS UNIT
- TABLE OF CONTENTS
- GETTING STARTED
- PLAYBACK
- REFERENCE
- TO ENJOY ULTRA HD BLU-RAY DISC FEATURED WITH HIGH DYNAMIC RANGE (HDR)
- ACCESSORIES
- USING THE REMOTE CONTROL
- UNIT AND MEDIA CARE
- TYPES OF DISCS THAT CANNOT BE PLAYED BY THIS UNIT
- ANY OTHER DISC THAT IS NOT SPECIFICALLY SUPPORTED OR PREVIOUSLY DESCRIBED
- REGION MANAGEMENT INFORMATION
- FINALIZE
- BD-VIDEO
- D
- MUSIC CD
- USB DEVICE
- CONTROL REFERENCE GUIDE
- REMOTE CONTROL
- REPROGRAMMING THE REMOTE CONTROL
- FRONT
- REAR
- CONNECTING TO A TV
- ENJOYING 4K OUTPUT
- CONNECTING TO AN AMPLIFIER/RECEIVER
- CONNECTING AN AMPLIFIER TO A 4K-COMPATIBLE TV
- CONNECTING TO THE NETWORK
- LAN CABLE CONNECTION
- SETTINGS
- EASY SETTING
- PREPARATION
- PRESS [⏻]
- FOLLOW THE ON-SCREEN INSTRUCTIONS TO CONTINUE WITH THE SETTINGS
- WHEN CONNECTED TO A 4K/60P-COMPATIBLE TV
- EASY NETWORK SETTING
- ABOUT THE WIRELESS CONNECTION
- IF YOUR SSID IS NOT DISPLAYED
- IF THE WIRELESS ROUTER SUPPORTS THE PUSH BUTTON METHOD
- IF YOUR WIRELESS NETWORK IS ENCRYPTED
- HOME MENU
- PRESS [⏻] TO TURN ON THE UNIT
- PRESS [OK] OR [◀, ▶] TO SELECT THE ITEM
- NETWORK SERVICE
- INSERT THE MEDIA
- SELECT THE ITEM TO PLAY AND PRESS [OK]
- OPERATIONS DURING PLAYBACK
- STOP
- PRESS [■STOP]
- RESUME PLAY FUNCTION
- PAUSE
- PRESS [IPAUSE]
- SEARCH/SLOW MOTION
- SEARCH
- WHILE PLAYING, PRESS [SEARCH◀◀] OR [SEARCH▶▶]
- SLOW MOTION
- WHILE PAUSED, PRESS [SEARCH◀◀] OR [SEARCH▶▶]
- SKIP
- WHILE PLAYING OR PAUSED, PRESS [◀◀] OR [▶▶]
- FRAME-BY-FRAME
- WHILE PAUSED, PRESS [◀] (◀▶) OR [▶] (▶▶)
- CHANGING SOUNDTRACK
- PRESS [AUDIO]
- SHOW TOP MENU/POP-UP MENU
- PRESS [TOP MENU] OR [POP-UP MENU]
- SHOW THE STATUS MESSAGES
- WHILE PLAYING, PRESS [PLAYBACK INFO.]
- WHILE PLAYING, PRESS [STATUS]
- ENJOYING ULTRA HD BLU-RAY. ENJOYING 3D VIDEO AND PHOTOS
- ENJOYING BD-LIVE
- DELETING DATA ON THE USB DEVICE
- SLIDESHOW
- NETWORK SERVICE (ENJOYING NETFLIX, ETC.)
- PRESS [INTERNET]
- SELECT THE ITEM AND PRESS [OK]
- HOME NETWORK FEATURE
- PLAYING BACK CONTENTS ON THE NETWORK CONTENTS SERVER
- USING THE DIGITAL MEDIA CONTROLLER
- VIERA LINK
- AUTOMATIC INPUT SWITCHING POWER ON LINK
- POWER OFF LINK
- PLAYING MUSIC CONTINUOUSLY EVEN AFTER TURNING OFF THE TV
- EASY CONTROL ONLY WITH VIERA REMOTE CONTROL
- OPTION MENU
- PRESS [OPTION]
- SELECT AN ITEM AND CHANGE THE SETTINGS
- OPERATION MENU
- RECEPTION
- VIDEO SETTINGS
- DISPLAY
- PICTURE TYPE
- SHARPNESS ADJUSTMENT
- NOISE REDUCTION
- LUMINANCE/COLOR ADJUSTMENT
- BANDWIDTH LIMITATION
- DYNAMIC RANGE ADJUSTMENT
- DYNAMIC RANGE CONVERSION ADJUSTMENT
- PROGRESSIVE
- RESET TO DEFAULT VIDEO SETTINGS
- AUDIO SETTINGS
- SOUND EFFECTS
- DSD DECODE SAMPLING FREQUENCY
- DSD LPF SETTING
- DIALOG ENHANCER
- D SETTINGS
- SIGNAL FORMAT
- POP-OUT LEVEL
- SETUP MENU
- HDMI
- RESOLUTION
- K60P OUTPUT
- P OUTPUT
- ADVANCED SETTINGS
- COLOR MODE
- DEEP COLOR OUTPUT
- HDR (HIGH DYNAMIC RANGE) OUTPUT
- HLG / PQ CONVERSION
- CONTENTS TYPE FLAG
- VIDEO
- STILL MODE (PAUSED VIDEO)
- SEAMLESS PLAY
- AUDIO
- DYNAMIC RANGE COMPRESSION
- DIGITAL AUDIO OUTPUT
- DOLBY D/DOLBY D +/DOLBY TRUEHD
- DTS/DTS-HD
- BD-VIDEO SECONDARY AUDIO
- DOWNMIX
- AUDIO DELAY
- VOICE GUIDANCE SETTING
- D BD-VIDEO PLAYBACK
- D AVCHD OUTPUT
- D PLAYBACK PRECAUTIONS
- LANGUAGE
- AUDIO LANGUAGE
- SUBTITLE LANGUAGE
- MENU LANGUAGE
- SUBTITLE TEXT
- ON-SCREEN LANGUAGE
- CLOSED CAPTION
- ➢ CLOSED CAPTION DISPLAY
- ➢ CLOSED CAPTION TYPE
- ANALOG CC
- DIGITAL CC
- MANUAL SETTING
- CC RESET
- NETWORK
- EASY NETWORK SETTING (⇒ 13)
- NETWORK SETTINGS
- LAN CONNECTION MODE
- WIRELESS SETTINGS
- SEARCH FOR WIRELESS NETWORK (⇒ 13)
- PUSH BUTTON METHOD (⇒ 14)
- PIN CODE METHOD
- IP ADDRESS/DNS SETTINGS
- PROXY SERVER SETTINGS
- NETWORK SERVICE SETTINGS ( ⇒ 19)
- AUDIO AUTO GAIN CONTROL
- TIME ZONE
- DST
- NOTICE
- NETWORK DRIVE CONNECTION
- REMOTE DEVICE SETTINGS (⇒ 20)
- SETTING UNIT NAME
- REMOTE DEVICE LIST
- NETWORKED STANDBY
- BD-LIVE INTERNET ACCESS ( ⇒ 17)
- RATINGS
- DVD-VIDEO RATINGS
- BD-VIDEO RATINGS
- NETWORK SERVICE LOCK
- SYSTEM
- DISPLAY SETTINGS
- SCREEN SAVER FUNCTION
- STATUS MESSAGES
- QUICK START
- REMOTE CONTROL CODE
- FIRMWARE UPDATE (⇒ 14)
- AUTOMATIC UPDATE CHECK
- UPDATE NOW
- SYSTEM INFORMATION
- LICENSE
- FIRMWARE VERSION INFORMATION
- TROUBLESHOOTING GUIDE
- THE FOLLOWING DO NOT INDICATE A PROBLEM WITH THIS UNIT
- UNIT DOES NOT RESPOND TO REMOTE CONTROL OR UNIT'S BUTTONS
- CANNOT EJECT DISC
- GENERAL OPERATION
- TO RETURN TO THE FACTORY DEFAULT
- TO RETURN ALL SETTINGS TO THE FACTORY PRESET
- THIS UNIT IS TURNED OFF WHEN THE INPUT FOR THE TV IS SWITCHED
- THE REMOTE CONTROL DOESN'T WORK PROPERLY
- THIS UNIT IS TURNED OFF AUTOMATICALLY
- YOU HAVE FORGOTTEN YOUR RATINGS PASSWORD. YOU WANT TO CANCEL THE RATINGS LEVEL
- THE TV SCREEN TURNS BLACK
- THIS UNIT DOES NOT RECOGNIZE THE USB CONNECTION CORRECTLY
- IMAGES FROM THIS UNIT DO NOT APPEAR ON THE TV SCREEN, OR THEY ARE DISTORTED
- VIDEO IS NOT OUTPUT IN 4K OR HIGH-DEFINITION
- CANNOT OUTPUT VIDEO IN HDR QUALITY EVEN WHEN CONNECTED TO AN HDR-COMPATIBLE TV
- D VIDEO IS NOT OUTPUT
- D VIDEO IS NOT OUTPUT CORRECTLY AS 2D
- NO SUBTITLES
- THE SUBTITLES OVERLAP CLOSED CAPTIONS RECORDED ON DISCS
- CLOSED CAPTIONS ARE NOT DISPLAYED
- CANNOT PLAY BACK VIDEOS ON THE USB DEVICE SMOOTHLY
- A BLACK BAND IS DISPLAYED AROUND THE EDGE OF THE SCREEN
- THE ASPECT RATIO OF THE SCREEN IS ABNORMAL
- THERE IS A LOT OF IMAGE LAG WHEN PLAYING VIDEO
- CANNOT HEAR THE DESIRED AUDIO
- THERE IS NO SOUND COMING OUT
- DISC CANNOT BE PLAYED
- STILL PICTURES (JPEG) DO NOT PLAY BACK NORMALLY
- I CAN'T PLAY BACK BD-LIVE
- NETWORK MESSAGES ON THE SCREEN
- I CAN'T CONNECT TO THE NETWORK
- WHEN USING WIRELESS LAN CONNECTION, VIDEO FROM THE NETWORK CONTENTS SERVER* IS NOT PLAYED BACK OR VIDEO FRAMES ARE DROPPED DURING PLAYBACK
- CANNOT READ. PLEASE CHECK THE DISC
- CANNOT PLAY THIS FILE
- NO DISC INSERTED
- THIS OPERATION IS NOT AVAILABLE
- IP ADDRESS IS NOT SET
- THE CURRENT WIRELESS NETWORK SECURITY SETTING IS WEAK. IT IS RECOMMENDED TO CHANGE TO A STRONGER SECURITY SETTING
- POWER LED
- (FLASHES 6 TIMES)
- (FLASHES 4 TIMES)
- (FLASHES)
- (FLASHES 3 TIMES)
- SPECIFICATIONS
- AUDIO INFORMATION
- SUPPORTED FORMAT FOR NETWORK CONTENTS PLAYBACK
- LICENSES
- MS/WMA
- MS/PLAYREADY/FINAL PRODUCT LABELING
- MS/PLAYREADY/END USER NOTICES
- VORBIS, FLAC, WPA SUPPLICANT
- LIMITED WARRANTY
- PANASONIC PRODUCTS LIMITED WARRANTY
- LIMITED WARRANTY COVERAGE (FOR USA ONLY)
- MAIL-IN SERVICE--ONLINE REPAIR REQUEST
- ONLINE REPAIR REQUEST
- LIMITED WARRANTY LIMITS AND EXCLUSIONS
- ALL EXPRESS AND IMPLIED WARRANTIES, INCLUDING THE WARRANTY OF MERCHANTABILITY, ARE LIMITED TO THE PERIOD OF THE LIMITED WARRANTY
- SHOP
- CUSTOMER SERVICES DIRECTORY
Brand : PANASONIC
Model : DMP-UB200
Category : Blu-ray player