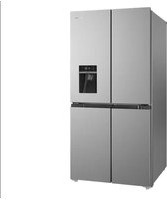
USER MANUAL WQE4960AA WESTINGHOUSE
natural_image
Front view of a modern stainless steel refrigerator with four doors (no visible text or symbols)

natural_image
Exterior view of a modern stainless steel double refrigerator with a small display case on top (no visible text or symbols)
WQE4900AA
WQE4900BA
WQE4960AA
WQE4960BA
Congratulations
Congratulations and thank you for choosing our refrigerator. We are sure you will find your new refrigerator a pleasure to use. Before you use the refrigerator, we recommend that you read through the entire user manual, which provides the description of the refrigerator and its functions.
To avoid the risks that are always present when you use an electric appliance, it is important that the refrigerator is installed correctly and that you read the safety instructions carefully to avoid misuse and hazards.
We recommend that you keep this instruction booklet for future reference and pass it on to any future owners.
After unpacking the refrigerator please check if it is not damaged. If in doubt, do not use the refrigerator and contact your local Electrolux Customer Care Centre.

environmental tip
Information on disposal for users
- Most of the packing materials are recyclable. Please dispose of those materials through your local recycling depot or by placing them in appropriate collection containers.
- If you wish to discard this refrigerator, please contact your local authorities and ask for the correct method of disposal.
- Local authorities will have the latest information regarding safe disposal of the product.
- Incorrect disposal may expose the user to injury from sharp objects, fl ammable gases or cause environmental damage.
- Refrigerant gases within the unit should only be discharged by qualified persons. A licence may be required by your local authorities to discharge or reclaim the refrigerant gases. Incorrect discharge of gases may expose the user to injury from fl ammable gases or cause environmental damage.
Contents
Important safety instructions 3
Installing your new refrigerator 4
Refrigerator operation 5
Refrigerator features 6
Using the control panel 7
Refrigerator features 8
Using the control panel 9
Features of your refrigerator 10
Cleaning your refrigerator 11
Energy consumption 11
Noises 12
Food storage guide 13
Troubleshooting 14
Conditions of use
This appliance is designed and intended to be used in household ONLY;
- staff kitchen areas in shops, offices and other working environments;
- farm houses and by clients in hotels, motels and other residential type environments;
- bed and breakfast type environments;
- catering and similar non-retail applications.

warning
Warning

Warning: Risk of fire / flammable materials
This appliance contains fl ammable R600a refrigerant. Avoid safety hazards by carefully installing, handling, servicing and disposing of this appliance.
- Ensure that the tubing of the refrigerant circuit is not damaged during transportation and installation.
- Leaking refrigerant may cause eye injuries or ignite.
- The room for installing appliance must be at least 1m3 per 8g of refrigerant. The amount of refrigerant in the appliance can be found on the rating plate inside the refrigerator appliance.
- If you are unsure of the refrigerant check the rating plate inside the refrigerator compartment.
- It is hazardous for anyone other than an Authorized Service Person to service this appliance.
- Keep ventilation openings in the appliance enclosure or in the built-in structure, clear of obstruction.
RoHS
Compliant
Being ensured permissible content limitation of some toxic chemicals (RoHS compliant)
Important safety instructions
Please read the user manual carefully and store in a handy place for later reference.
The symbols you will see in this booklet have these meanings:

warning
This symbol indicates information concerning your personal safety

caution
This symbol indicates information on how to avoid damaging the appliance

This symbol indicates tips and information about use of the appliance

environmental tip
This symbol indicates tips and information about economical and ecological use of the appliance
Meanings of symbols used in this manual are shown below:

This symbol indicates never to do this

This symbol indicates always do this

warning
- If pressurised aerosol containers bear the word 'fl ammable' and/or a small fl ame symbol, do not store them inside any refrigerator or freezer. If you do so, you may cause an explosion.
- This appliance is not intended for use by persons (including children) with reduced physical, sensory or mental capabilities, or lack of experience and knowledge, unless they have been given supervision or instruction concerning use of the appliance by a person responsible for their safety.
• Children should be supervised to ensure that they do not play with the appliance.
- When you dispose of your old refrigerators and freezers, remove any doors. Children can suff ocate if they get trapped inside.
- This appliance contains insulation formed with fl ammable blowing gases. Avoid safety hazards by carefully disposing of this appliance.


Warning: Risk of fire / flammable materials

warning
√ The appliance must be plugged into its own dedicated 220-240V, 50Hz AC electrical outlet.
√ Ensure that the electric outlet is properly earthed to ground. Consult a qualified electrician if you are unsure.
√ The plug must be accessible when the appliance is in position.
Do not use an extension cord or adapter plug.
If the power cord is damaged, it must be replaced by the manufacturer, its service agent or similarly qualified persons to avoid a hazard.
√ Unplug the appliance before cleaning and before changing the light bulb to avoid.
electric shock.
Never unplug the appliance by pulling on the power cord. Always grip the plug firmly, and pull straight out of the receptacle to prevent damaging the power cord.
√ Choose a location that is not too cold - the temperature should be above 10irc C.
√ Put the appliance in a dry place, avoiding areas of high moisture or humidity.
Don't put the appliance in frosty or unprotected areas, for example in a garage or on a verandah.
Don't put the appliance in direct sunlight.
Don't put the appliance near stoves, fires or heaters.
Do not use mechanical devices or other means to accelerate the defrosting process, other than those recommended by the manufacturer.
Do not damage the refrigerant circuit.
Do not use electrical appliances inside the food storage compartments of the appliance, unless they are of the type recommended by the manufacturer.
Do not store explosive substances such as aerosol cans with a flammable propellant in this appliance.
When correctly installed, your appliance should:
• have adequate clearance to the back and sides for air circulation (refer to page 4).
- be aligned to the surrounding cupboards.
• have doors that will self-close from a partially open position.

warning
- Have the stability foot in place (see diagram on page 4) to prevent the appliance falling forward when a door with heavy food load is opened.
Installing your new refrigerator
Clearance around your refrigerator
Your Multidoor Refrigerator can be installed between cupboards or fixtures but you must consider the following spaces around the cabinet:
The minimum distance allowed:
- Allow a minimum of 50mm clearance on both sides.
- Allow 50mm clearance at the back of the refrigerator.
- Allow 20mm clearance above the hinge covers.

- Allow a 349 or 427mm clearance on the hinge of the doors, if you place the refrigerator next to wall. This will make cleaning easier.

- Make sure that cupboards or fixtures do not stick out further than the refrigerator cabinet to avoid fridge doors hitting your cupboards.
Note: Refrigerator doors on all models are designed to sit proud of cabinetry (not flush).
Installing your refrigerator
The appliance should arrive with the stability foot wound fully up so it will not interfere with the operation of the rollers (see diagram in Step 3 below).

caution
The rollers are designed for forward or backward movement only. They are not castors. Moving the refrigerator sideways may damage your floor and the rollers.
- Roll the refrigerator into its final position.
-
When the refrigerator is placed on a level ground, the front of the refrigerator is higher than the back, and there is a certain height difference (about 2.5mm), so that the refrigerator can be tilted at a certain angle, so as to ensure that the door can be closed better.
-
When you have the appliance in its final position, side it needs to be stabilized Wind the stability foot down the to the floor until it just makes contact with the floor. Whenever you need to move the appliance, be sure to wind the foot back up so that the appliance can roll freely and be sure to reset it when reinstalling. (The wrench opening size 30mm)

natural_image
Mechanical assembly diagram showing a lever and base with directional arrows indicating motion (no text or symbols)
- Check the alignment of the refrigerator to the surrounding cupboards. The top of the refrigerator should be on the same level from side to side (see diagram below). If you need to adjust the level, use the adjustable rollers as discussed in Step 3.

- If the refrigerator rocks from one corner to the opposite rear corner, this means that the floor is uneven; you will need to put some packing under one of the rear rollers. You could use thin pieces of solid material, such as thin board, vinyl floor tiles or laminate. Place the packing so that it will sit under one of the rear rollers when the refrigerator is rolled into position.
- You may now need to fine-tune the installation by repeating Steps 3, 4 and 5.
- Whenever you need to move the refrigerator, be sure to wind the foot back up so that the refrigerator can roll freely.
- Clean your refrigerator thoroughly following the instructions on page 9 and wipe off any dust that was accumulated during shipping.
- Leave standing in stable upright position for 2-3 hours prior to turn "on".
- Plug the refrigerator into the power point. Don't use a double adaptor. If you need to roll the refrigerator out to get at the power point, remember to raise the stability foot before you do so.
- We recommend that you let your refrigerator run for two to three hours before you put any food in it. It will allow you to check that it is operating properly.
Congratulations! You have successfully installed your new refrigerator.

caution
Keep ventilation openings, in the appliance enclosure or in the built-in structure clear of obstruction.
Refrigerator Operation
The refrigerator transfers heat from food placed inside the appliance to the outside air.
This process makes the rear, the sides and the area adjacent to the doors, particularly at initial start up, feel warm to hot, this is normal.
There is a cooling coil located behind the rear wall of the cabinet. This coil cools and removes moisture from the air. A fan then circulates cold, dry air throughout the cabinet.
This air circulation means that food are refrigerated far more quickly than in refrigerators where the air remains relatively static.
Avoid placing food against air outlets as this will effect air circulation.
A light frosting may occasionally occur on the cold interior of the freezer when the door is opened frequently. This is normal and will disappear after a few days in most climates.
Make sure you fully close the freezer door after you load or remove food. If the door is left partly open, a heavy frost will coat the inside of the freezer. If a frost develops, remove it.
Ensure to properly close the door, so the frost will not reoccur.
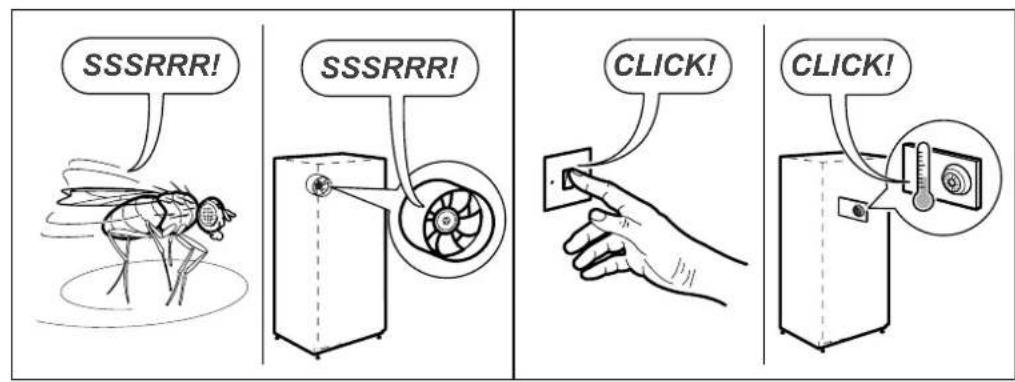
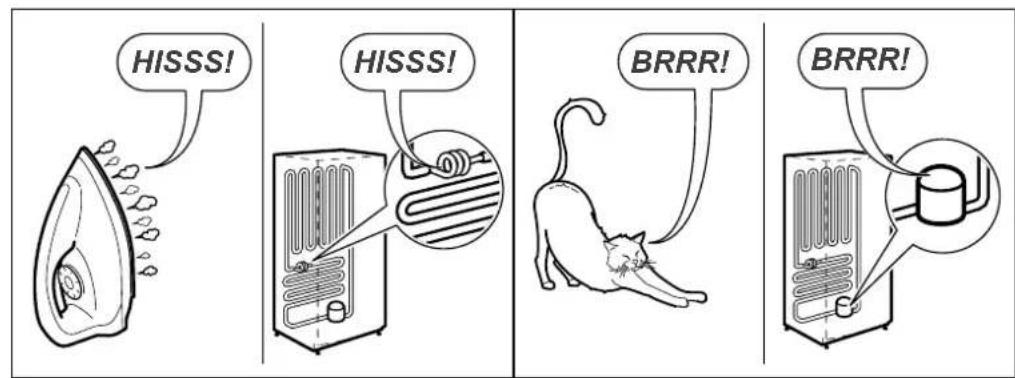
Your new energy efficient appliance uses a high-speed compressor and other energy efficient components that may produce different noises to your old appliance.
These sounds are normal and includes:
• compressor running noise.
• air movement noise from the small fan motor.
• occasional gurgling, similar to water boiling.
• a popping noise, heard during automatic defrosting.
• a clicking noise, just prior to the compressor starting up.
These noises are normal and will not cause the unit to alarm.
Temperature Control
The factory default settings;
Refrigerator = 5 ^ irc c Freezer = - 1 8 ^ irc c
If you want to change the temperature, follow the instructions in the section about the user interface for your model. Ensure that you make only small adjustments and wait 24 hours to see if it's correct to your liking.
Note: When you set a temperature, you set an average temperature for the whole refrigerator cabinet.
Checking the softness of ice cream is a good indication that your freezer is the right period. While checking the temperature of water kept in the refrigerator is a good way of checking the temperature of the food compartment.
Temperature inside each compartment may vary, depending on how much food you store and where you place it
High or low room temperature may also effect the actual temperature inside the refrigerator.

caution
This appliance can be used by children aged from 8 years and above and persons with reduced physical, sensory or mental capabilities or lack of experience and knowledge if they have been given supervision or instruction concerning use of the appliance in a safe way and understand the hazards involved. Children shall not play with the appliance. Cleaning and user maintenance shall not be made by children without supervision.
Refrigerator features
(WQE4900AA,WQE4900BA)

Control Panel
The control panel is located on the fridge door.

Note: Product illustrations demonstrate various features but may not be completely in line with current products.

Function setting of the LED display
Note: the display will turn off after 20 seconds of inactivity, while the display will wake up if the button is touched again.
Feature Selection - each press of the "MODE" button will cycle through the operating modes.
Holiday
- Holiday Mode - the refrigerator will run at 3°C while the freezer will operate at -18°C. Do not store fresh food when holiday mode is on.
QUICK FREEZE
- Quick Freeze mode - When the super freezer mode is selected, the compressor will operate continuously to freeze foods faster, and keep them fresh. The super freezer mode will automatically turn off either after 24 hours of operation, or when the freezer reaches -28ircC . The super freezer icon will turn off, and the freezer will continue to operate at the normal set temperature.
QUICK CHILL
- Quick Chill Icon - When the Quick Chill mode is selected, the fridge compartment reaches the set temperature in the shortest period, in order to keep the food as fresh as possible. Under this mode, the set temperature of the fridge compartment locks on 2°C. The program runs 150mins then exits automatically, the Quick Chill icon goes out, which represent the Quick Chill function is disable, the set temperature returns to the last one before the Quick Chill mode operates.
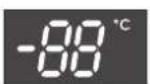
Set Temperature

Freezer compartment settings - the default temperature of the freezer is -18ircC . To change the temperature press the "FREEZER" button to cycle through the set temperatures.
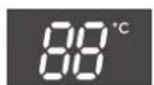
Set Temperature

Fridge compartment settings - the default temperature of the refrigerator is 5°C. To change the temperature press the "REFRIGERATOR" button to cycle through the set temperatures.
LOCK
((Door Alarm))
Lock button - Press the "LOCK hold 3sec" button to enable the lock mode. The lock icon will be visible. While the refrigerator is in this mode the other buttons on the control panel will not function, when the buttons are touched a chime will sound and the lock icon will flash. To exit lock mode, press and hold the lock button for 3 seconds until the icon is no longer displayed. Open door alarm - when the refrigerator or freezer door is left open for more than 1 minute the alarm will sound to alert that the door is open. Closing the door will disable the alarm. The alarm will continue every 30 seconds until the door is closed.
Refrigerator features
(WQE4960AA, WQE4960BA)

Control Panel
The control panel is located on the fridge door.

Note: Product illustrations demonstrate various features but may not be completely in line with current products.
Using the control panel

Function setting of the LED display
Note: the display will turn off after 20 seconds of inactivity, while the display will wake up if the button is touched again.
Feature Selection - each press of the "MODE" button will cycle through the operating modes.
Holiday
- Holiday Mode - the refrigerator will run at 3°C while the freezer will operate at -18°C. Do not store fresh food when holiday mode is on.
QUICK FREEZE
- Quick Freeze mode - When the super freezer mode is selected, the compressor will operate continuously to freeze foods faster, and keep them fresh. The super freezer mode will automatically turn off either after 24 hours of operation, or when the freezer reaches -28ircC . The super freezer icon will turn off, and the freezer will continue to operate at the normal set temperature.
QUICK CHILL
- Quick Chill mode - When the Quick Chill mode is selected, the fridge compartment reaches the set temperature in the shortest period, in order to keep the food as fresh as possible. Under this mode, the set temperature of the fridge compartment locks on 2°C. The program runs 150mins then exits automatically, the Quick Chill icon goes out, which represent the Quick Chill function is disable, the set temperature returns to the last one before the Quick Chill mode operates.
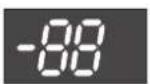
| Set Temperature |
| -18°C | -15°C |
| -19°C | -16°C |
| -20°C | -17°C |
| -21°C | |
| -22°C | |
| -23°C | |
Freezer compartment settings - the default temperature of the freezer is -18ircC . To change the temperature press the "FREEZER" button to cycle through the set temperatures.

| Set Temperature |
| 5°C | 8°C |
| 4°C | 7°C |
| 3°C | 6°C |
| 2°C | |
Fridge compartment settings - the default temperature of the refrigerator is 5°C. To change the temperature press the "REFRIGERATOR" button to cycle through the set temperatures.
LOCK
((Door Alarm))
Lock button - Press the "LOCK hold 3sec" button to enable the lock mode. The lock icon will be visible. While the refrigerator is in this mode the other buttons on the control panel will not function, when the buttons are touched a chime will sound and the lock icon will flash. To exit lock mode, press and hold the lock button for 3 seconds until the icon is no longer displayed. Open door alarm - when the refrigerator or freezer door is left open for more than 1 minute the alarm will sound to alert that the door is open. Closing the door will disable the alarm. The alarm will continue every 30 seconds until the door is closed.
Features of your refrigerator
This section tells you how to make the most of the many useful features and how to clean them.
Door storage bins
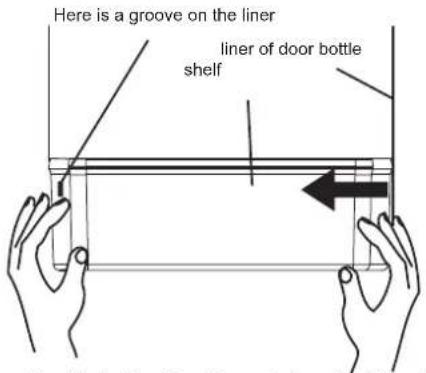
Disassembly: Hold both sides of the bottle shelf with both hands. Push it from the side without the groove and push it inward as the direction of the arrow. When pushing hard, please note that the raised on the edge of bottle shelf is separated from the groove of the liner. Then bottle shelf can be removed.
Installation : Hold both sides of the bottle shelf with both hands. Install the buckle of the groove side at first. Then push the other side inward slightly, the buckle can be fixed.
Crisper Bin
You can use the crisper bin to store vegetables, fruit or smallgoods. To remove, pull it forward then up and out.

natural_image
Illustration of a door with an open lid and directional arrows indicating flow or movement (no text or symbols)
Glass Shelves
When removing the glass shelf, please press the movable pin under the shelf with both hands and push inward at the same time. Then the glass shelf will be removed.

LED lighting
Your refrigerator is fitted with long life LED lighting. In the unlikely event the LED lights should fail, then the LED lights should be serviced by the manufacturer, its service agent or similarly qualified technician. Refer to the warranty page for contact details.
Instructions for child lock lever

Press the child's lock lever with your thumb as the direction as below ① and the water lever ② will be locked to prevent children from taking any water.
Press in the opposite direction to unlock and take water
Instructions for water tank assembly

- Hold both sides of the tank with hands and pull the tank assembly off the door slightly in the direction indicated as below.
Notes: This transparent silicone parts used to seal the water tank. When you clean the water tank, this part does not need to be disassembled. If it is removed, when installing the water tank, please seal the silicone well before installing the water tank.

1-1. Align the transparent silicone part with the hole in the door and place it in it.

1-2. After the transparent silicon is inserted into the hole, push it down until it touches the intercepting surface in the hole and cannot be pushed; to prevent water leakage

- Rotate counterclockwise to remove the water valve assembly from the water tank for cleaning.
-
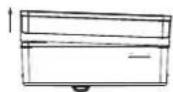
Pinch the flange of the water tank cover slightly upwards, and the water tank cover can be separated from the water tank. Remove the other side with the same method. The tank and its cover can be cleaned after disassembly.
-
Install the water valve by rotating it clockwise after cleaning. When installing the tank cover, install the one side at first (do not press it all the way), then install the other side. Press firmly on edges of the tank cover to fit the tank. Re-install the entire water tank assembly at 45irc to the door. Press the outer edge of the water tank slightly downwards to make it fit into the door.
Fill the tank with clean drinking water(\*)

Open the inlet cover of water tank①. Slowly fill the tank with pure drinking water up to the maximum fill line marked with "2L". Then close the inlet cover①. To prevent any spills, please use a narrow-spout container to charge water.
* Only drinking water or mineral water can be stored in the water tank, not suitable for any other beverages
Cleaning your refrigerator Energy consumption

warning
Before cleaning: Turn appliance off at the power point, then remove power cord from socket. This will make sure there is no chance of getting an electric shock.
Doors and exterior
You should only clean the doors with lukewarm soapy water and a soft cloth. Rinse with clean water and then wipe the surface with clean water and a soft clean cloth to remove soap residue.

caution
Do not use stainless steel cleaners, abrasive pads or other cleaners as they are likely to scratch the surface. Damage to this product after delivery is not covered by your warranty.
Interior
You should clean the appliance interior regularly. It will be easiest to clean when the food supply is low. Wash the interior with a soft cloth and use an unscented mild soap with lukewarm water. Thoroughly dry all surfaces and removable parts. Avoid getting water on appliance controls. If you have taken out any removable parts, replace them and switch the power on before re-stocking the appliance with food. Naturally, you should keep the interior of your appliance hygienic by promptly and thoroughly wiping up any food spills.
Door seals
Take care with Ensure to keep door seals clean. Sticky food and drink can cause seals to stick to the cabinet and tear when you open the door.
Wash seal with a mild detergent and warm water. Rinse thoroughly and dry.

warning
Never use hot water, solvents, commercial kitchen cleaners, aerosol cleaners, metal polishes, caustic or abrasive cleaners, or scourers to clean this appliance, as they will damage it. Many commercially available cleaning products and detergents contain solvents that will damage your refrigerator. When cleaning, use only a soft cloth with an unscented mild soap and lukewarm water.
The following guide will help you reduce the running cost of your new refrigerator. This will save you money and help conserve our valuable energy resources.
en. Do not block air vents. Doing so may cause the refrigerator to run longer and use more energy.
- Do not set your freezer temperature too low. After 24 hours, ice cream should be firm but able to be scooped out with a spoon without bending the handle. If ice cream is firmer than this (or too soft), adjust the freezer temperature controls (see 'Set Temperature', page 7).
- Ensure that the refrigerator doors seal properly as you close them.
- Before you open the refrigerator doors, decide what you want to put in or take out. This will minimize the time you have the doors open.
- It is best to have the refrigerator in a place that is out of direct sunlight and away from heating appliances of any kind. For example, do not place the refrigerator next to a cooker, stove or dishwasher.
- Allow hot foods to cool to room temperature before you put them in your freezer.
- Thaw frozen foods in the refrigerator section.
- If you keep the freezer compartment filled to capacity, your food mass will help maintain the freezer temperature when you open the door.
Turning off the refrigerator
If you are leaving for a short holiday, there is no need to turn off your refrigerator.
If you are going on a long holiday and want to turn the refrigerator off, follow the steps below.
- Take all the food out of the refrigerator and freezer compartments.
- Switch off the refrigerator and remove the electric cord from the power point.
- Clean the inside.
- Leave the doors open. This prevents bacteria from growing and causing smells in the refrigerator.
Power failure
If there is a power failure in your area, keep the door to the freezer closed. Most foods in your freezer will stay frozen for 24 hours.
NOISES
Appliance noise
Your new refrigerator may make sounds that your old one didn't make. Because the sounds are new to you, you might be concerned about them. Most of the new sounds are normal. Hard surfaces, like the floor, walls and cabinets, can make the sounds seem louder than they actually are. The following describes the kinds of sounds and what may be making them."


Food storage guide
| Category Product | Refrigerator Freezer Storage tips | | |
| Meat | Sausages and mince | 1-2 Days 2-3 Months Keep cold meat at the | back of the refrigerator where it is coldest. | |
| Chops and steak 3-4 | Days 4-6 Months | |
| Cold meats 3-5 Days | 4-6 Months | | Plastic can cause meat to sweat if stored in refrigerator for more than a day. |
| Roasts 3-5 Days 12 Months | | Roast can take up to 48 hours to defrost properly, transfer frozen roast to the refrigerator 2 days before use. |
| Poultry | Chicken 1-2 Days 2 Months | If poultry takes on a smell or colour |
| Roast Chicken | 3-5 Days | 12 Months | you are unsure about it is best to throw it out. |
| Eggs | 6 Weeks | Not Suitable | Whole eggs are not suitable for freezing, slightly beaten eggs may be frozen for four months. |
| Seafood | Whole fish and fillets | 2-3 Days | 2 Months | Store in an airtight container or foil. |
| Lobster and crabs | 1-2 Days 2 Months | | Never freeze prawns in salty water as this will dehydrate the flesh. |
| Prawns | 1-2 Days 2 Months | |
| Dairy | Milk | Until Expiry Date | Not Suitable | If dairy takes on a smell or colour and you are unsure about it, it is best to throw it out. |
| Yoghurt 7-10 Days | | Not Suitable |
| Hard Cheeses | 2 Weeks - 2 Months | 2 Months (Grated) |
| Soft Cheeses | 1-2 Weeks | Not Suitable | Depending on the variety hard cheese can last from 2 weeks to 2 months. |
| Butter | 8 Weeks 12 Months | |
| Fruit& Vegetables | Every fruit and vegetable has a different shelf life. Some stay fresh for a couple of days e.g beans, others can last for a couple of months e.g. onions. | 8-12 MonthsWhen freezing chop and blanch in small portions. | Keep vegetables in the crisper and away from the air vents to avoid freezing. |
| Don't wash fruit and vegetables before storing them in the refrigerator as this can make them susceptible to rotting. |
| Left overs | Homemade meals | 3-4 Days 2-6 Months | Store in sealed container. | Freeze meals in small portion sizes to limit wastage. |

IMPORTANT
Please note, use this information as a guide only, actual storage times will vary depending on how you use your refrigerator, climatic conditions and the freshness of the food.
Troubleshooting
If you think something may be wrong with your refrigerator, you can carry out some easy checks before calling for service. You may locate the problem, sparing yourself from inconvenience and saving time and money.
| Problem Solution | |
| When your appliance is not operating | Make sure that the power cord is plugged into the power outlet properly and that the outlet is switched 'ON'. |
| Try running another appliance from the power outlet. If no power is coming from the outlet you may have blown a fuse or tripped a circuit of your household power supply. |
| Try adjusting the temperature control to a slightly "colder" position. |
| It is normal for the freezer fan NOT to operate during the automatic defrost cycle, or for a short time after the appliance is switched on. |
| When there is refrigerator/freezer noise | Modern refrigerators/freezers with increased storage capacity use high speed compressors. These can provide a seemingly high level of sound which is quite normal. Normal operational sounds include:Occasional gurgling, similar to water boiling.Air flow noise (air circulates because of a small fan).A popping noise heard during automatic defrost. |
| Other strange sounds may mean that you need to check and take action. For example, noises may mean that:The cabinet is not level.The floor is uneven or weak.Bottles are badly placed and rattling.There are vibrations from an object on top of or behind or beside the refrigerator.The back of the refrigerator cabinet is touching the wall. |
| Remember it is quite normal for noise to seem louder when the refrigerator starts operating, or during quieter periods such as night time. |
| If there are odours inside the appliance | The interior may need cleaning.Some food produce odours.Some containers and wrapping can cause odours.Ask yourself if the odour started about the same time you started storing something unusual. |
| When the motor seems to run more than expected | Your new appliance provides you with large capacities in both the refrigerator section and the separate freezer. It is normal for the motor to operate frequently. However, to keep operation to a minimum, check the following:Are doors kept open too long or too often?Are controls set too cold? refer to "Using the control panel" for how to adjust.Have large amounts of warm food just recently been stored? Summer, festive seasons and holidays usually mean a lot more work for your appliance.If the day is hot or the room is very warm, the appliance will need to run more than normal.The appliance will run more than normal just after you install it or when it has been turned off for a long time. |
| If the temperature in the refrigerator is too cold | Refer to "Using the control panel" for how to adjust.Increase the temperature to avoid high energy consumption. |
| If heavy frosting occurs in the freezer | Make sure you fully close the freezer and fridge doors. If the doors are left partly open a heavy frost will coat the inside of the freezer. If a frost develops, remove it. Make sure properly close the doors at the frost will not reoccur. |
| If water drips on the floor | The defrost water tray, (located at the back of the cabinet), may not be properly positioned, or the drain tube may not be properly positioned to direct water into this tray. You may need to pull the refrigerator away from the wall to check the tray and tube. |
| Freezer Door opens after closing fridge door | It is normal for the freezer door to momentarily open and re-close when the food compartment door is closed. If the freezer door stays open, it indicates that the refrigerator cabinet needs to be tilted backwards a little further. If you call a service person to solve this problem, you will be charged for the cost of a service call, as this is not a warranty fault. |
| When temperature is hot/warm on the outside and rear side of the Fridge | In normal operation, the fridge transfers heat from inside to outside of the cabinet. It is normal for the side and rear of the fridge to feel warm/hot while operating. This will be more noticeable during start up and hot ambient conditions. |
When there's leakage at water dispenser
- Do not fill any beverage into water tank except for purified/mineral water
- Make sure dispenser valve is tight enough
- Clean water tank completely
If you have a problem, and the problem persists after you have made the checks mentioned above, contact your nearest Electrolux approved Service Centre or the dealer you bought the refrigerator from. Be ready to quote the model number, 9-digit PNC and 8-digit serial number, which is stated on the label inside the refrigerator compartment.
This document sets out the terms and conditions of the product warranties for Westinghouse Appliances. It is an important document. Please keep it with your proof of purchase documents in a safe place for future reference should there be a manufacturing defect in your Appliance. This warranty is in addition to other rights you may have under the Australian Consumer Law.
1. In this warranty:
(a) ‘ACL’ or ‘Australian Consumer Law’ means Schedule 2 to the Competition and Consumer Act 2010;
(b) 'Appliance' means any Electrolux product purchased by you and accompanied by this document;
(c) 'ASC' means Electrolux's authorised serviced centres;
(d) 'Westinghouse' is the brand controlled by Electrolux Home Products Pty Ltd of 163 O'Riordan Street, Mascot NSW 2020, ABN 51 004 762 341 in respect of Appliances purchased in Australia and Electrolux (NZ) Limited (collectively "Electrolux") of 3-5 Niall Burgess Road, Mount Wellington, in respect of Appliances purchased in New Zealand;
(e) 'Warranty Period' means the period specified in clause 3 of this warranty;
(f) 'you' means the purchaser of the Appliance not having purchased the Appliance for re-sale, and 'your' has a corresponding meaning.
- Application: This warranty only applies to new Appliances, purchased and used in Australia or New Zealand and is in addition to (and does not exclude, restrict, or modify in any way) other rights and remedies under a law to which the Appliances or services relate, including any non-excludable statutory guarantees in Australia and New Zealand.
3.WarrantyPeriod: Subject to these terms and conditions, this warranty continues for in Australia for a period of 24 months and in New Zealand for a period of 24 months, following the date of original purchase of the Appliance. Specific components are warranted against manufacturing defects in Australia and New Zealand for the periods listed below;
- Compressor – Further 3 years
-
External Condenser – Further 3 years
• Evaporator – Further 3 years
• Drier – Further 3 years
-
Repair or replace warranty: During the Warranty Period, Electrolux or its ASC will, at no extra charge if your Appliance is readily accessible for service, without special equipment and subject to these terms and conditions, repair or replace any parts which it considers to be defective. Electrolux may, in its absolute discretion, choose whether the remedy offered for a valid warranty claim is repair or replacement. Electrolux or its ASC may use refurbished parts to repair your Appliance. You agree that any replaced Appliances or parts become the property of Electrolux.
-
Travel and transportation costs: Subject to clause 7, Electrolux will bear the reasonable cost of transportation, travel and delivery of the Appliance to and from Electrolux or its ASC. Travel and transportation will be arranged by Electrolux as part of any valid warranty claim.
-
Proof of purchase is required before you can make a claim under this warranty.
-
Exclusions: You may not make a claim under this warranty unless the defect claimed is due to faulty or defective parts or workmanship. This warranty does not cover:
(a) light globes, batteries, filters or similar perishable parts;
(b) parts and Appliances not supplied by Electrolux;
(c) cosmetic damage which does not affect the operation of the Appliance;
(d) damage to the Appliance caused by:
(i) negligence or accident;
(ii) misuse or abuse, including failure to properly maintain or service;
(iii) improper, negligent or faulty servicing or repair works done by anyone other than an Electrolux authorised repairer or ASC;
(iv) normal wear and tear;
(v) power surges, electrical storm damage or incorrect power supply;
(vi) incomplete or improper installation;
(vii) incorrect, improper or inappropriate operation;
(viii) insect or vermin infestation;
(ix) failure to comply with any additional instructions supplied with the Appliance;
In addition, Electrolux is not liable under this warranty if:
(a) the Appliance has been, or Electrolux reasonably believes that the Appliance has been, used for purposes other than those for which the Appliance was intended, including where the Appliance has been used for any non-domestic purpose;
(b) the Appliance is modified without authority from Electrolux in writing;
(c) the Appliance's serial number or warranty seal has been removed or defaced.
(a) carefully check the operating instructions, user manual and the terms of this warranty;
(b) have the model and serial number of the Appliance available;
(c) have the proof of purchase (e.g. an invoice) available;
(d) telephone the numbers shown below.
- How to claim under this warranty: To enquire about claiming under this warranty, please follow these steps:
- Australia: For Appliances and services provided by Electrolux in Australia: Electrolux goods come with guarantees that cannot be excluded under the Australian Consumer Law. You are entitled to a replacement or refund for a major failure and for compensation for any other reasonably foreseeable loss or damage. You are also entitled to have the Appliance repaired or replaced if the Appliance fails to be of acceptable quality and the failure does not amount to a major failure. 'Acceptable quality' and 'major failure' have the same meaning as referred to in the ACL.
- New Zealand: For Appliances and services provided by Electrolux in New Zealand, the Appliances come with a guarantee by Electrolux pursuant to the provisions of the Consumer Guarantees Act, the Sale of Goods Act and the Fair Trading Act. Where the Appliance was purchased in New Zealand for commercial purposes the Consumer Guarantee Act does not apply.
- Confidentiality: You accept that if you make a warranty claim, Electrolux and its agents including ASC may exchange information in relation to you to enable Electrolux to meet its obligations under this warranty.
Important Notice
Before calling for service, please ensure that the steps listed in clause 8 above have been followed.
| AUSTRALIA | FOR SERVICEor to find the address of your nearestauthorised service centre in AustraliaPLEASE CALL 13 13 49For the cost of a local call | FOR SPARE PARTSor to find the address of your nearestspare parts centre in AustraliaPLEASE CALL 13 13 50For the cost of a local call |
| NEW ZEALAND | FOR SERVICEor to find the address of your nearestauthorised service centre in New ZealandPLEASE CALL 0800 10 66 10 | FOR SPARE PARTSor to find the address of your nearestspare parts centre in New ZealandPLEASE CALL 0800 10 66 20 |
CE
For more information on all Westinghouse appliances, or for dimension and installation information, call into your retailer, phone or email our customer care team or visit our website:
AUSTRALLA
phone: 1300 363 640
fax: 1800 350 067
email: customercare@electrolux.com.au
web: westinghouse.com.au
NEW ZEALAND
phone: 0800 436 245
fax: 0800 225 088
email: customercare@electrolux.com.nz
web: westinghouse.com.nz