
97595 - Floor polisher TORNADO - Free user manual and instructions
Find the device manual for free 97595 TORNADO in PDF.


| Product Type | Floor Polisher |
| Brand | Tornado |
| Model | 97595 |
| Dimensions (H x W x D) | 40 cm x 30 cm x 20 cm |
| Weight | 10 kg |
| Power Supply | 120V/60Hz |
| Power Consumption | 1200 W |
| Motor Type | Universal Motor |
| Speed Settings | Variable Speed 0–3000 RPM |
| Brush Diameter | 30 cm |
| Brush Type | Two Counter-rotating Brushes |
| Noise Level | 80 dB |
| Cord Length | 10 m |
| Features | Ergonomic Handle, Swivel Head, Built-in Buffer |
| Maintenance | Clean Brush After Each Use, Inspect Power Cord Regularly |
| Safety | Overload Protection, Thermal Cutoff |
| Spare Parts | Replaceable Brushes, Pads, Power Cord |
| Repairability | User-serviceable Brushes, Professional Service for Motor |
| General Info | For Use on Hardwood, Tile, and Laminate Floors |
Frequently Asked Questions - 97595 TORNADO
User questions about 97595 TORNADO
0 question about this device. Answer the ones you know or ask your own.
Ask a new question about this device
Download the instructions for your Floor polisher in PDF format for free! Find your manual 97595 - TORNADO and take your electronic device back in hand. On this page are published all the documents necessary for the use of your device. 97595 by TORNADO.
USER MANUAL 97595 TORNADO
Operations & Maintenance Manual For Commercial Use Only
natural_image
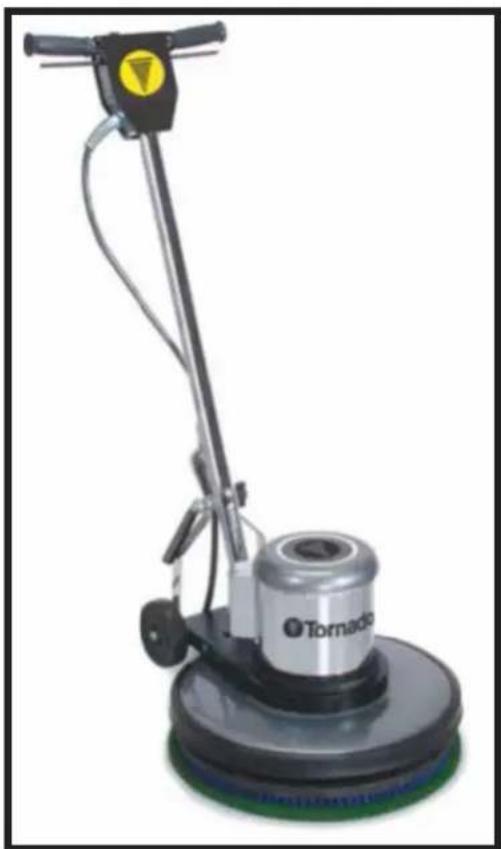
Tornado cleaning worker on a circular base (no visible text or symbols)M SERIES 17" & 20"
MODEL NO:
97590 17"
97595 20"
NOTES
For warranty information go to www.tornadovac.com
| MODEL NO. 97590 9 | 7595 | |
| VOLTS 115 115 |
GROUNDING INSTRUCTIONS
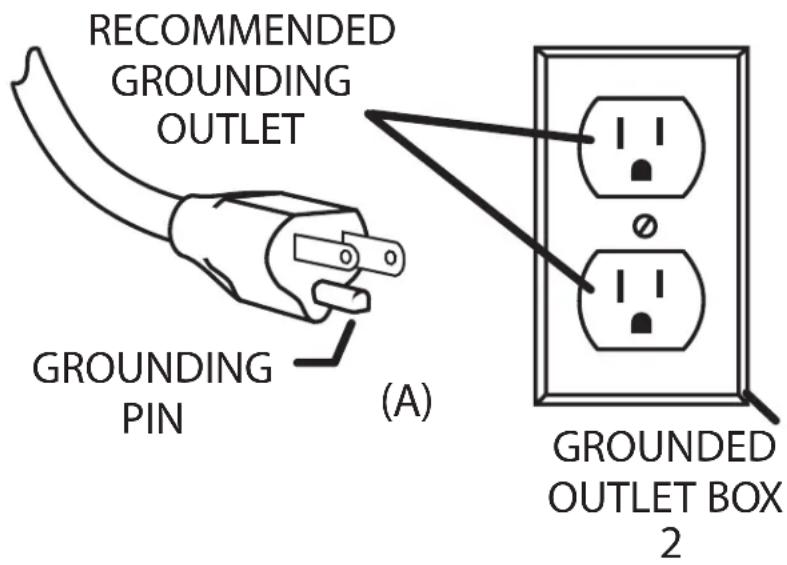
This appliance must be grounded. If it should malfunction or breakdown, grounding provides a path of least resistance for electric current to reduce the risk electric shock. This machine is equipped with a cord having an equipment -grounding conductor and grounding plug. The plug must be inserted into an appropriate outlet that is properly installed and grounded in accordance with all local codes and ordinances.
WARNING: Improper connection of the equipment-grounding conductor can result in a risk of electric shock. Check with a qualified electrician or service person if you are in doubt as to whether the outlet is properly grounded. Do not modify the plug provided with the appliance - if it will not fit the outlet, have a proper outlet installed by a qualified electrician.
This appliance is for use on a nominal 115-volt circuit, and has a grounding plug that looks like the plug illustrated in sketch A.
A
Your new Tornado unit is a high quality, precision-made product. All parts used in the manufacturing of this unit have passed rigid quality control standards prior to assembly. Please safeguard the original receipt / invoice. If you experience any problems with your unit during the warranty period, the original receipt / invoice will act as proof of purchase. Contact Tornado for any warranty inquiries.
IMPORTANT SAFETY INSTRUCTIONS
READ AND UNDERSTAND ALL INSTRUCTIONS BEFORE USING THIS UNIT
Read and understand this owner's manual and all labels on the unit before operating. Safety is a combination of common sense, staying alert and knowing how your unit works. Use this unit only as described in this manual. Use only manufacturer's recommended attachments. To reduce the risk of personal injury or damage to your unit use only Tornado recommended accessories.
WARNINGS
READ THIS OPERATOR'S MANUAL!
WARNING: You must have training in the operation of this machine before using it.
WARNING: Machines can burn flammable materials and vapors. Do not use this machine with or near fuels, grain dust, solvents, thinners or other flammable materials.
WARNING: Do not operate this machine unless it is completely assembled.
WARNING: Do not use this machine as a step or to move furniture.
WARNING: When disconnecting power cord from electrical outlet, grasp the plug. Pulling it out by the cord itself can damage cord insulation and internal connections to the plug. To prevent electric shock, always remove the electrical plug from the electrical outlet before doing any repairs or maintenance to this machine.
WARNING: To prevent injury, always remove the electrical plug from the electrical outlet before changing the polishing pad and before leaving the machine.
WARNING: To prevent injury, keep hands, feet, and loose clothing away from the rotating pad.
WARNING: Maintenance and repairs must be done by authorized personnel only.
WARNING: Keep all fasteners tight. Keep adjustments according to specification.
WARNING: Keep the electrical parts of the machine dry. For storage, keep the machine in a building.
WARNING: Always use a three-wire electrical system connected to the electrical ground. For maximum protection against electric shock, use a circuit that is protected buy a ground fault circuit interrupter. Consult with your electrical contractor.
WARNING: To prevent damage to the power cord, do not let the pad, pad driver or wheels touch the power cord when the machine is running. Always lift the power cord over the machine.
WARNING: Make sure all labels, decals, warning, cautions and instructions are fastened to the machine.
WARNING: To avoid fire, do not use unit with a flammable or combustible liquid to clean floor.
UNCRATING
Your Floor Machine was protectively packed to prevent damage in shipment. We suggest that upon removing the unit from its carton you carefully inspect it for any possible damage in transit. If damage is discovered, immediately notify the transportation company who delivered your machine. As a manufacturer, we are unable to act upon any claim for concealed damage: you must originate the claim.
IMPORTANT SAFEGUARDS
This machine is designed to be safe when used to perform the functions specified in this Operator's Manual. Should damage occur to electrical or mechanical parts, the machine should be repaired by the manufacturer or competent service center before using in order to avoid further damage to the machine or physical injury to the user. Your floor machine is equipped with a safety switch lockout device designed for your safety. Do not attempt to bypass or defeat the safety lockout device. Never use any device to lock the power switch in the ON position.
APPLICATIONS FOR 175 RPM FLOOR MACHINE
The 175 RPM Floor Machine will operate in a wide variety of applications and can be used for spray buffing, dry buffing, scrubbing and stripping applications. These heavy duty floor machines are specially recommended for long term aggressive scrubbing and stripping maintenance. They are specially recommended for the following application"
Scraping with an attachment tool to remove heavy industrial deposits and residue or to prepare a foundation for installation or carpet
Wire brushing or concrete floors
Sanding with very aggressive sandpaper or sand scree discs
Carpet restoration where shampooing & pile lifting require very stiff brush bristles. The 175 RPM Floor Machine is the most versatile speed in the floor care industry.
APPLICATIONS OF 175 RPM FLOOR MACHINE ON HARD FLOORS
Spray buffing with the red spray buff pad and spray buff chemical.
Dry buffing a buffable finish with a tan, beige, or white pad or brush.
Scrubbing with free or blue pad or scrubbing brush.
Stripping with a black pad and a stripping chemical.
APPLICATIONS OF 175 RPM FLOOR MACHINE ON CARPET
Bonnet cleaning with a yarn bonnet and carpet maintainer chemical.
Shampooing using a shower feed shampoo brush and solution tank mounted to the handle tube containing carpet shampoo.
WARNING
To prevent injury, always remove the electrical plug from the electrical outlet before changing the polishing pad and before leaving the machine.
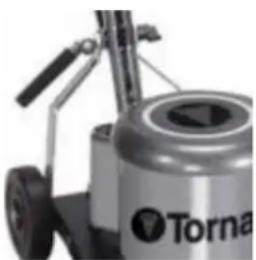
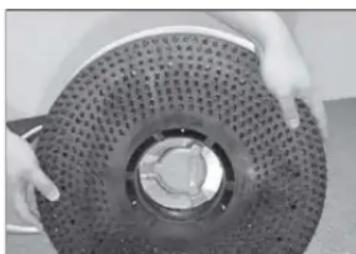
To attach the drive block or brush or other attachment, be sure the handle is “locked in the upright position (see figure #1). Lay the floor machine on its back with the handle lying on the floor, this exposes the driving plate on the underside of the floor machine. Holding the drive block, brush or attachment in both hands and straddling the motor with your back to the handle box. Bend over and fit the three slots to the clutch plate (built into the back of the brush) over the three lugs of the driving plate. Turn the drive block, brush, or other attachment counter-clockwise as far as it will go until it is seated in the ready-to-use position (see figure #2). CAUTION: This is the only proper way to install a drive block, brush, or other attachment. NEVER put a drive block, brush or attachment on the machine by placing it on the floor and moving the running machine over it, or by placing the machine over the block or attachment and then starting the motor.
Return the floor machine to the upright position and adjust the handle to an operating position. Recommended handle position is close the waist with arms extended down. Lock the cam release lever into position. NOTE: The hardened steel cam release lever does not require extreme tightening to effectively hold the handle in position. Over-tightening the cam release lever will shorten the functional life of the lever. To remove drive block, brush or attachment: Lay the floor machine on its back again and disengage clutch plate slot from driving plate lugs by turning it clockwise.
natural_image
Close-up of a Torna portable water dispenser with wheels and handle (no visible text or symbols)Figure #1
natural_image
Close-up of hands holding a perforated tire with a circular opening (no visible text or symbols)Figure #2
First, install the pad driver and pad, brush, or other attachment to be used. Plug the machine in as directed and lower the handle to the desired operating height and lock in place using the cam lever handle. Push the safety switch forward (see figure #3) and squeeze the switch triggers beneath the handle grips. This activates the motor and stars the block, brush or attachment in operation. Each time your release the triggers the safety switch will reset. You will need to follow the direction above to restart the machine. CAUTION: When leaving the machine unattended, disconnect the wall plug and return the handle to the “locked” upright position to prevent accidental starting.
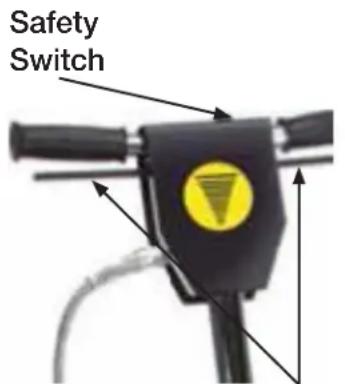
Figure #3 Switch Trigger
TO GUIDE YOUR FLOOR MACHINE
To the Right: raise the handle slightly. The higher the handle is lifted, the faster the machine will move to the right. To the Left: lower the handle until the machine moves to the left. The more the handle is lowered the faster the machine will move to the left.
TO INSTALL THE OPTIONAL SOLUTION TANK
Mount the solution tank to the front of the handle and attach with mounting brackets and knobs. Position the solution tank control handle horizontally and below the switch lever of the machine and adjacent to the right handle grip. Remove the plug from the motor housing and insert the (long) extension tube adaptor and secure at bottom of machine with the retainer. The solution tank should be used only with a shower feed drive block or bush.
TRANSPORTING THE MACHINE
Place the handle in the upright position. Lock the handle cam release lever. Tip the machine back and transport on the wheels.
MAINTENANCE
Once a month remove the motor cover and vacuum out any dust or debris which has accumulated on the motor. Replace the motor cover by setting it overt the holes in the housing and replace all of the screws. Check and maintain the tightness of all the fasteners.
WARNING: Do not over-tighten the switch housing screws.
Keep the machine clean especially at the handle tube and collar so the handle tube will move freely through the collar. Inspect the cord for cuts, gashes, or loose prongs; replace as needed. Disassembly of this motor voids the warranty. Improper disassembly and assembly of this motor can permanently damage the field or rotor.
TROUBLESHOOTING
| Problem Possible Cause | |
| Machine will not start | Switch is defective. Replace.Cord is damaged. Replace.Plug is broken or has a loose contact.Replace. |
| Machine will not reach operating speed | Over drawn circuit. Unplug anything other than the machine from the circuit or locate another circuit. |
| Motor runs but pad or brush does not turn | Coupling is broken. Replace. |
THIS PAGE INTENTIONALLY LEFT BLANK

TORNADO®
Warranty Registration Form
Please Print Clearly
| Company/Institution | |
| Contact Name | Title |
| Address | City/State/Zip Code |
| Phone | Fax |
| Date of Purchase | |
| Selling Dealer:(Required) | |
See white metal plate or sticker on unit for this information.
| MACHINE TYPE/MODEL NUMBER: MACHINE | SERIAL NUMBER: |
| 1. 1. | |
| 2. 2. | |
| 3. 3. | |
| 4. 4. |
Facility Description (please circle all that apply)
- School 6. Manufacturing 11. Airport 16. Other Govt.
- Retail Store 7. College/University
- Restaurant 8. Hospital
- Office Building 9. Nursing Home
-
Contract Cleaning 10. Religious Institution
-
Warehouse 17. Auto Service
- Apartment/Condo 18. Non-Profit
-
Supermarket 19. Other (specify)
-
U.S. Govt
How did you first learn about Tornado cleaning and maintenance equipment?
- Contacted by local dealer
- Previous experience with Tornado products
- Reputation/Recommendation
○ Advertising - Direct mail
Website:
○ Blog: ____
○ Other
You can complete this form online at
www.tornadovac.com/services/warranty-registration-form.aspx
This form may also be returned to :
Tornado Industries
3101 Wichita Court
Fort Worth, TX 76140
Fax: 817-551-0719
Damage or defect arising from abuse, neglect or other misuse is excluded from this warranty. Other items may or may not apply based on your specific machine. If any defect occurs, and service is attempted by non-Authorized Tornado Service Centers, the warranty will be void.
- GROUNDING INSTRUCTIONS
- IMPORTANT SAFETY INSTRUCTIONS
- READ AND UNDERSTAND ALL INSTRUCTIONS BEFORE USING THIS UNIT
- WARNINGS
- READ THIS OPERATOR'S MANUAL!
- UNCRATING
- IMPORTANT SAFEGUARDS
- APPLICATIONS FOR 175 RPM FLOOR MACHINE
- APPLICATIONS OF 175 RPM FLOOR MACHINE ON HARD FLOORS
- APPLICATIONS OF 175 RPM FLOOR MACHINE ON CARPET
- WARNING
- TO GUIDE YOUR FLOOR MACHINE
- TO INSTALL THE OPTIONAL SOLUTION TANK
- TRANSPORTING THE MACHINE
- MAINTENANCE
- THIS PAGE INTENTIONALLY LEFT BLANK
- TORNADO®
- Warranty Registration Form
- Facility Description (please circle all that apply)
- How did you first learn about Tornado cleaning and maintenance equipment?
- You can complete this form online at
Brand : TORNADO
Model : 97595
Category : Floor polisher